

Page 1

ASSEMBLY INSTRUCTIONS
Stationary Shelf
NOTE: Please count and inspect all pieces before disposing of any carton or packing materials.
COMPONENTS:
REF. # QTY. DESCRIPTION PART No.
1 1 STATIONARY SHELF CALL~~**
HARDWARE BAG (PART No. A6481) *for individual item, order that part number
REF. # QTY. DESCRIPTION PART No.
E1 4 SHELF BRACKET B4649**
E2 8 #8-32 X 38 SCREW X221*
E3 8 #10-32 X 1/2 SCREW X375*
E4 8 #8-32 KEPS NUT T107*
When ordering components, specific color and/or size information may be required.
Contact a Mayline Customer Service Representative. 1-800-822-8037
** Denotes Color Code
~~Denotes Size
E5 8 #10-32 CAGE NUT T118*
FOUR RAILS ARE REQUIRED TO MOUNT SHELF INTO CABINET
(1)
Page 2
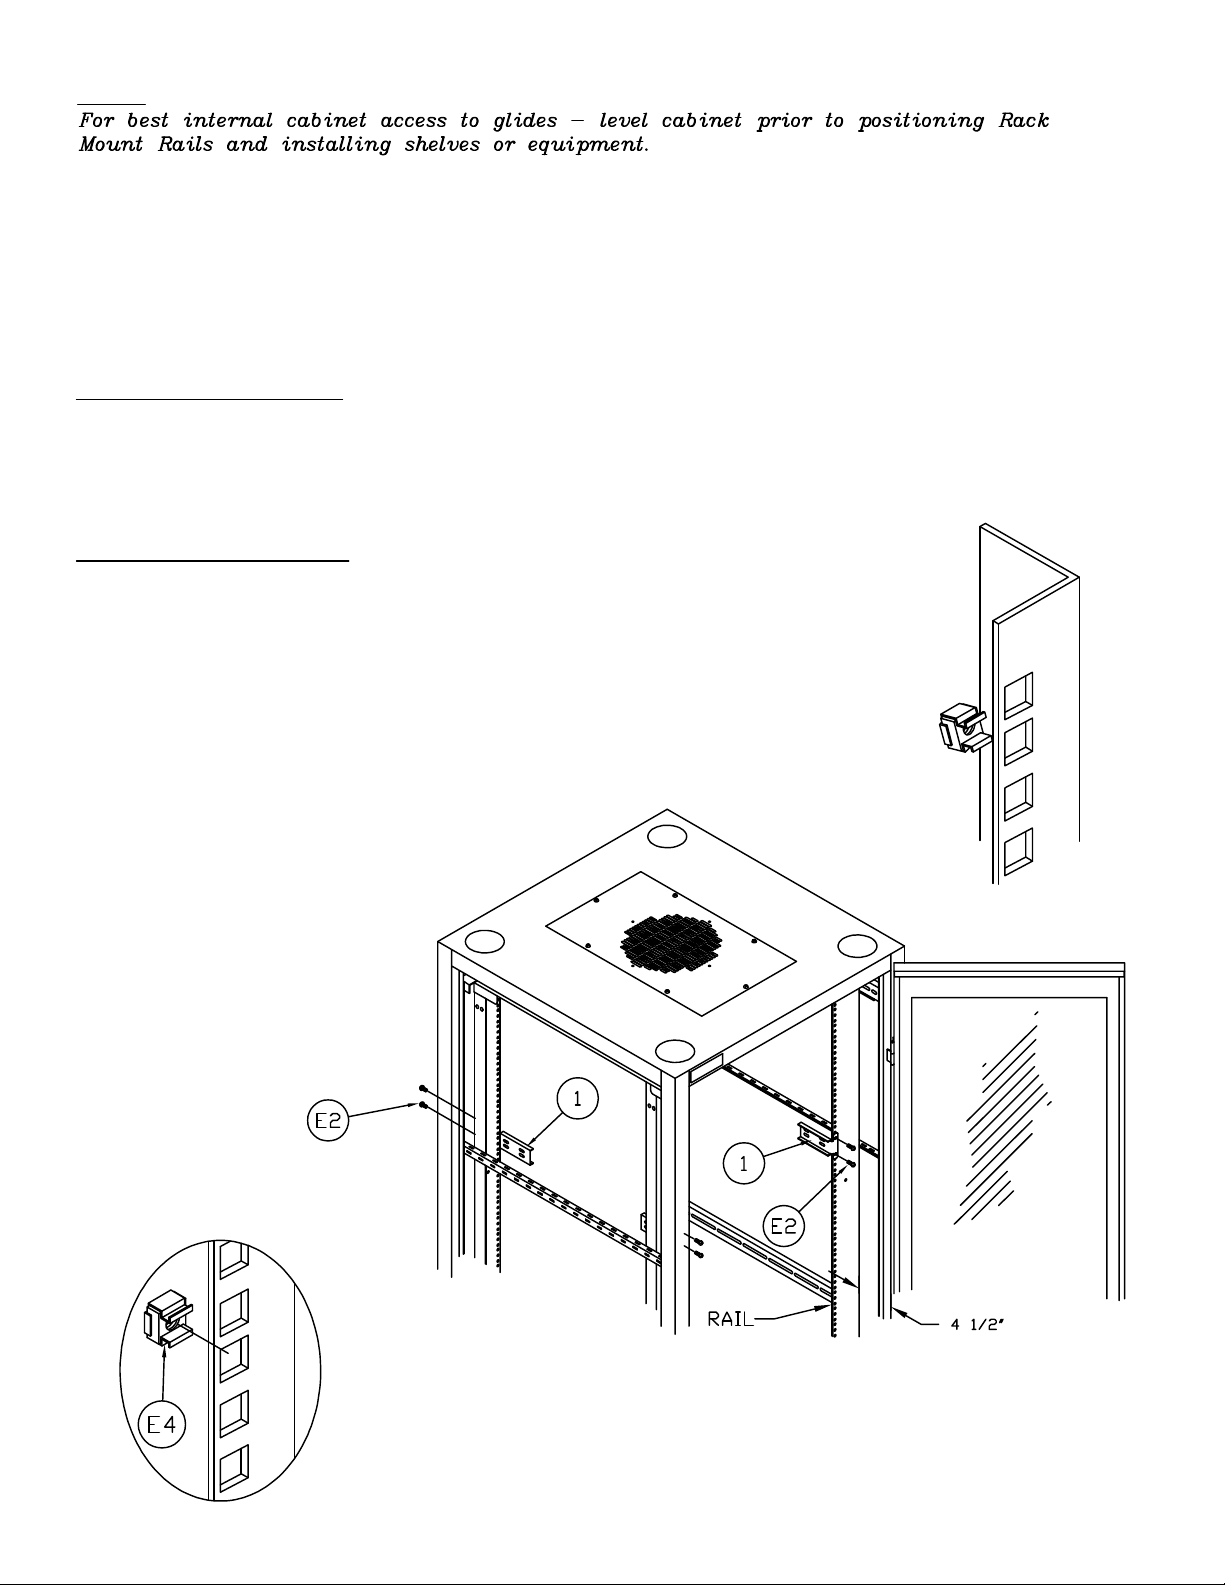
NOTE:
1. Attach Rails approximately 4 1/2 " inboard from outer cabinet frame.
2. Select the desired height where the shelf will be mounted in the cabinet.
3. Install Cage Nuts (E4) into selected holes, two per support.
TO INSTALL CAGE NUTS (E4):
A.) Place bottom of Cage Nut through square hole from back side of rail (see detail at right),
allowing the lower portion of Cage Nut to grip the rail.
B.) Compress the upper portion of the Cage Nut with your thumb and snap Cage Nut into
place.
TO REMOVE CAGE NUTS (E4):
Compress Cage Nut with pliers.
4. Attach Shelf Brackets (1) with
Fasteners (E2) to Rack Mount
Rails in Cabinet.
(2)
Page 3

5. Position Shelf Brackets as shown.
6. Secure in place with Screws (E1) and KEPS Nuts (E3), two per
support.
(3)
 Loading...