

Page 1
Kwik-File, LLC
Mailflow-To-Go VertiPocket Sorter
SRF3837
VertiPocket Sorter
Model SRF3837, 37 3/4"W x 12 3/4"D x 37"H
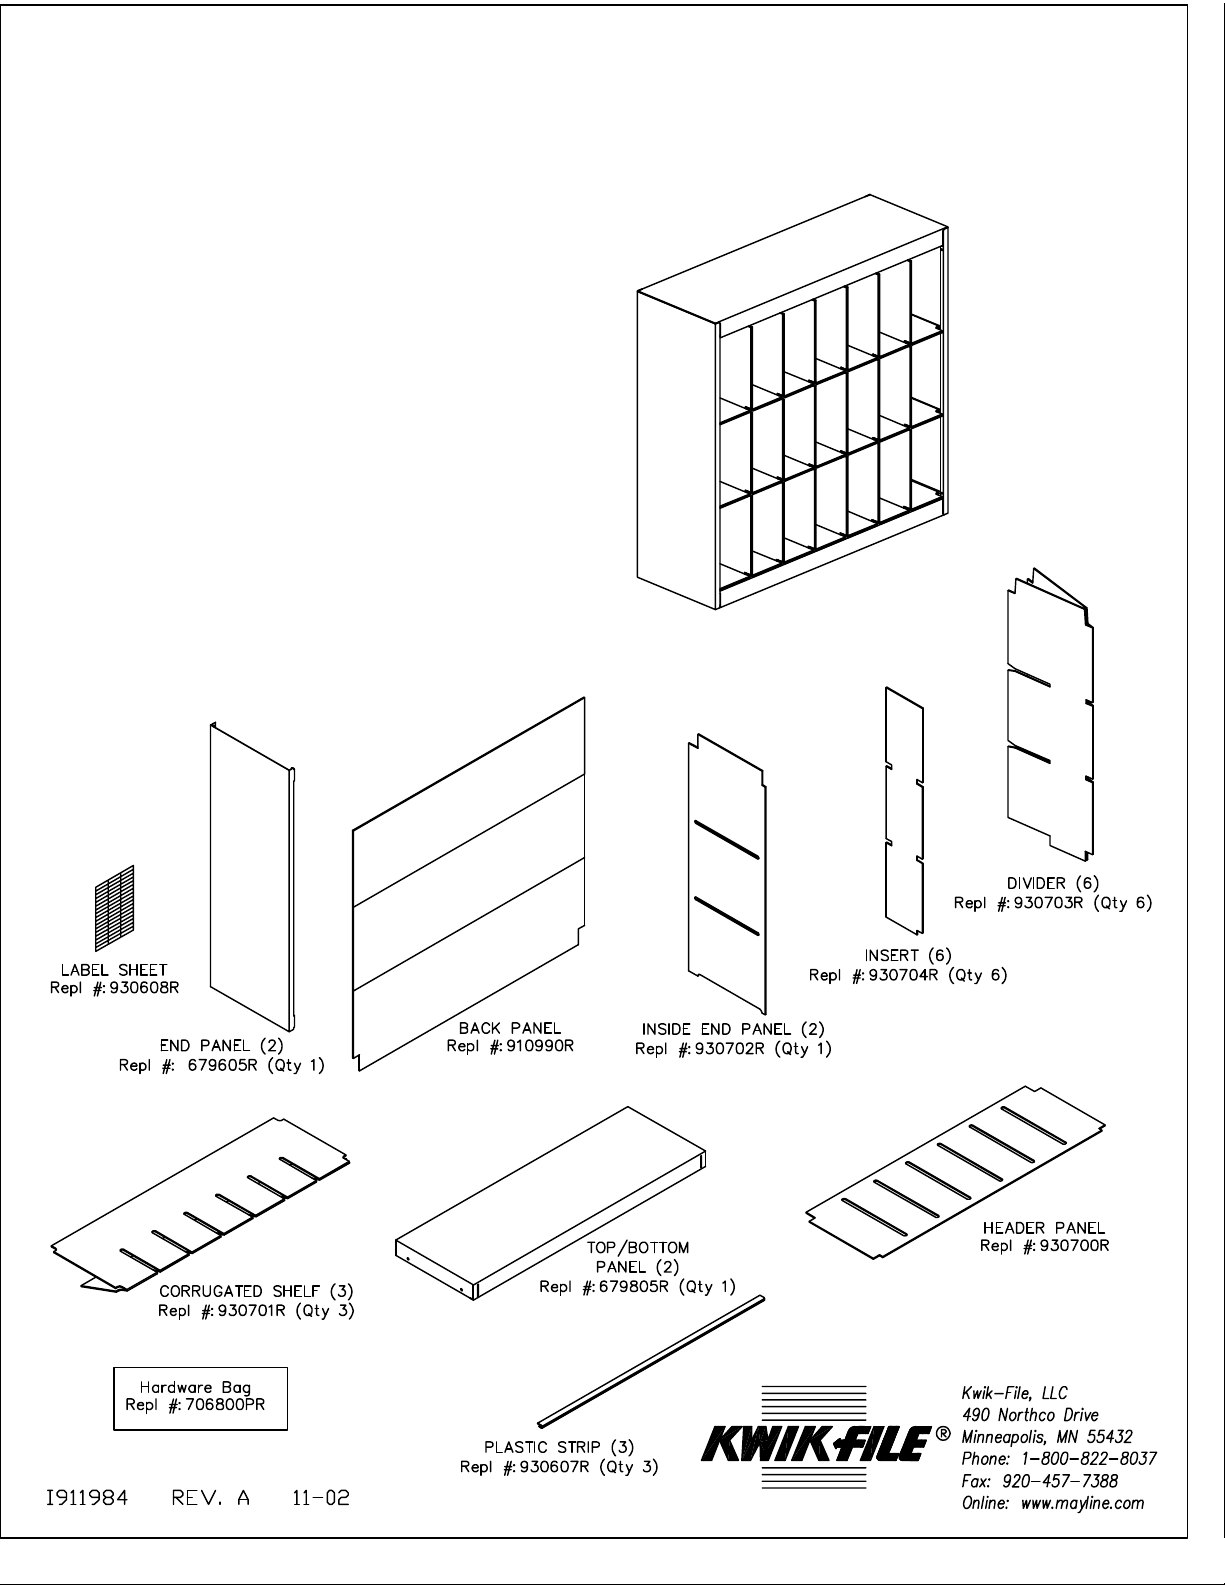
Parts list and drawings for SRF3837 Mailflow-To-Go VertiPocket Sorter.
Page 2
1. Tools required: Phillips screwdriver. Unpack
carton; then identify and count all parts.
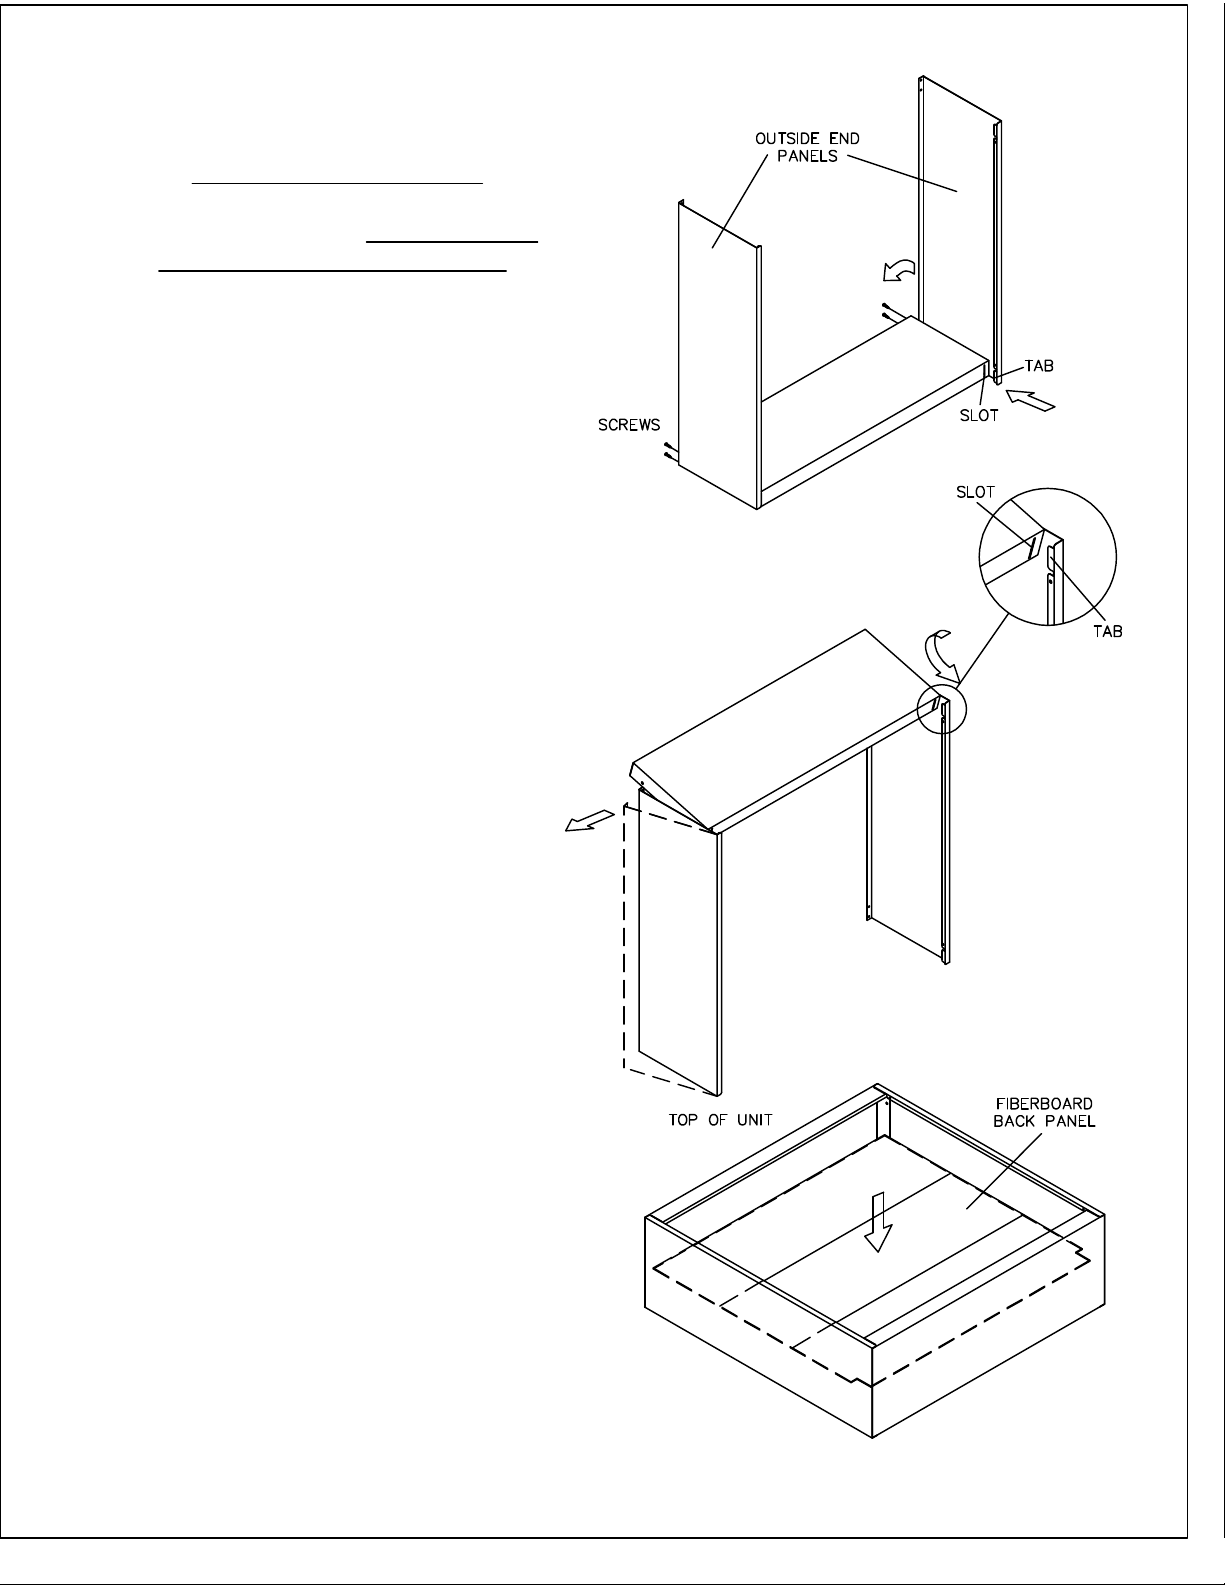
2. Place a 2" thick shelf with open side down on
the floor; front edge has slots at each end. Install
outside end panels: insert tab through slot in
front as shown, and turn back of end panel until it
fits behind back of shelf. Repeat with other side.
Insert 4 screws through outside end panel and
shelf at rear corners; fasten securely.
3. Install top 2" thick shelf by sliding onto tabs of
outside end panels. Pull out the back edges of
the outside end panels so the shelf can be
lowered into place; then return outside end
panels to their original position. Install 4 screws
through upper rear corners to complete assembly
4. Carefully place the unit on its back; insert
fiberboard back panel.
Page 3

5. Install corrugated inside header panel under
top of sorter with larger corner cutouts toward
back of unit. Then, install the corrugated inside
header panels with feet on bottom and large
corner cutout to top rear of sorter. Press inside
end panels firmly against outside end panels.
6. Install one corrugated shelf into the slots in the
inside end panels, with the short folded side of
the shelf on the bottom. Repeat with the
remaining shelves, ending with the last shelf
resting on bottom of sorter.
7. Place a corrugated insert ( with notch at the
bottom front) into a corrugated divider. Fold small
flaps at bottom of divider outwards. Now install
corrugated divider, making sure the folded flaps
fit under bottom shelf, and top of divider fits into
slots in headed panel. finally, press divider down
firmly until flush with shelves. Repeat with
remaining five dividers and inserts.
Page 4

8. Install plastic strips on front edge of each shelf,
with the short edge of the plastic strip under the
bottom, and the longer edge over the shelf top.
Roll each strip onto the shelf edge and firmly into
place. Repeat for all shelves.
9. The grooves in the front of each plastic strip
hold the paper labels provided. Separate each
label along the perforations; then insert in the
bottom groove, and push the label into place,
tucking the top of label into the top groove with
your fingernail. (Labels can be created using a
PC and printer or typewriter as desired, but
before separating.)
 Loading...