

Page 1
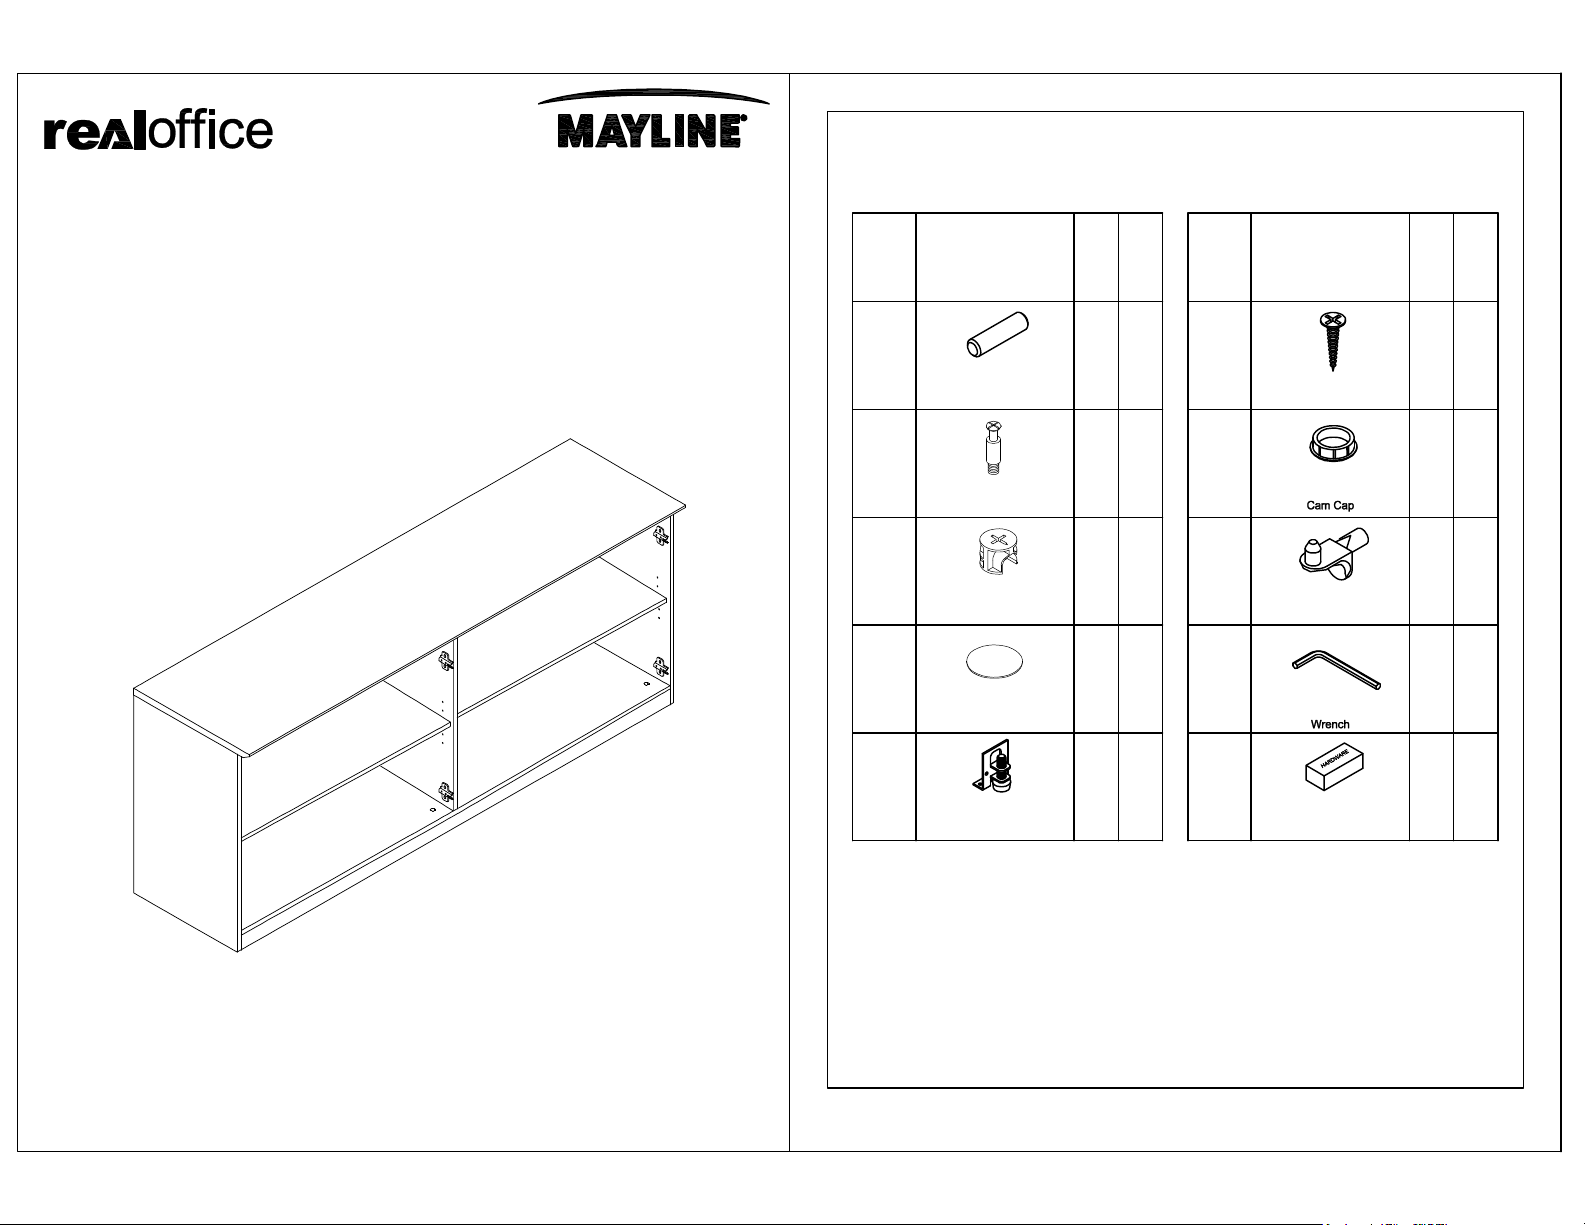
PARTS LIST
TM
Medina Series
Low Wall Cabinet
Model No. MVLCC
Name Part
HB
A
REALS004
Wood Dowel
HB
B 235
REALS003
Cam Post
HB
C
REALS001
Cam Lock
HB
D 235
REALS404**
Cam Sticker
HB
E
REALBY018
Leveler
Qty.
18
35
6
Spare
Qty
1
2
PartName
Qty.
HB
F
REALS417
4x14mm
HB
6G
REALS412**
HB
H
REALS009
Shelf Support
8
HB
H1 1
REALBY028
MVLCCHB
Spare
Qty
224
1
1
ASSEMBLY INSTRUCTIONS
CALL 1-800-822-8037 FOR ASSISTANCE
P/N MVLCC REV 1 01/14
www.mayline.com
Items with HB are in hardware box.
**Denotes Color Code
1
Page 2
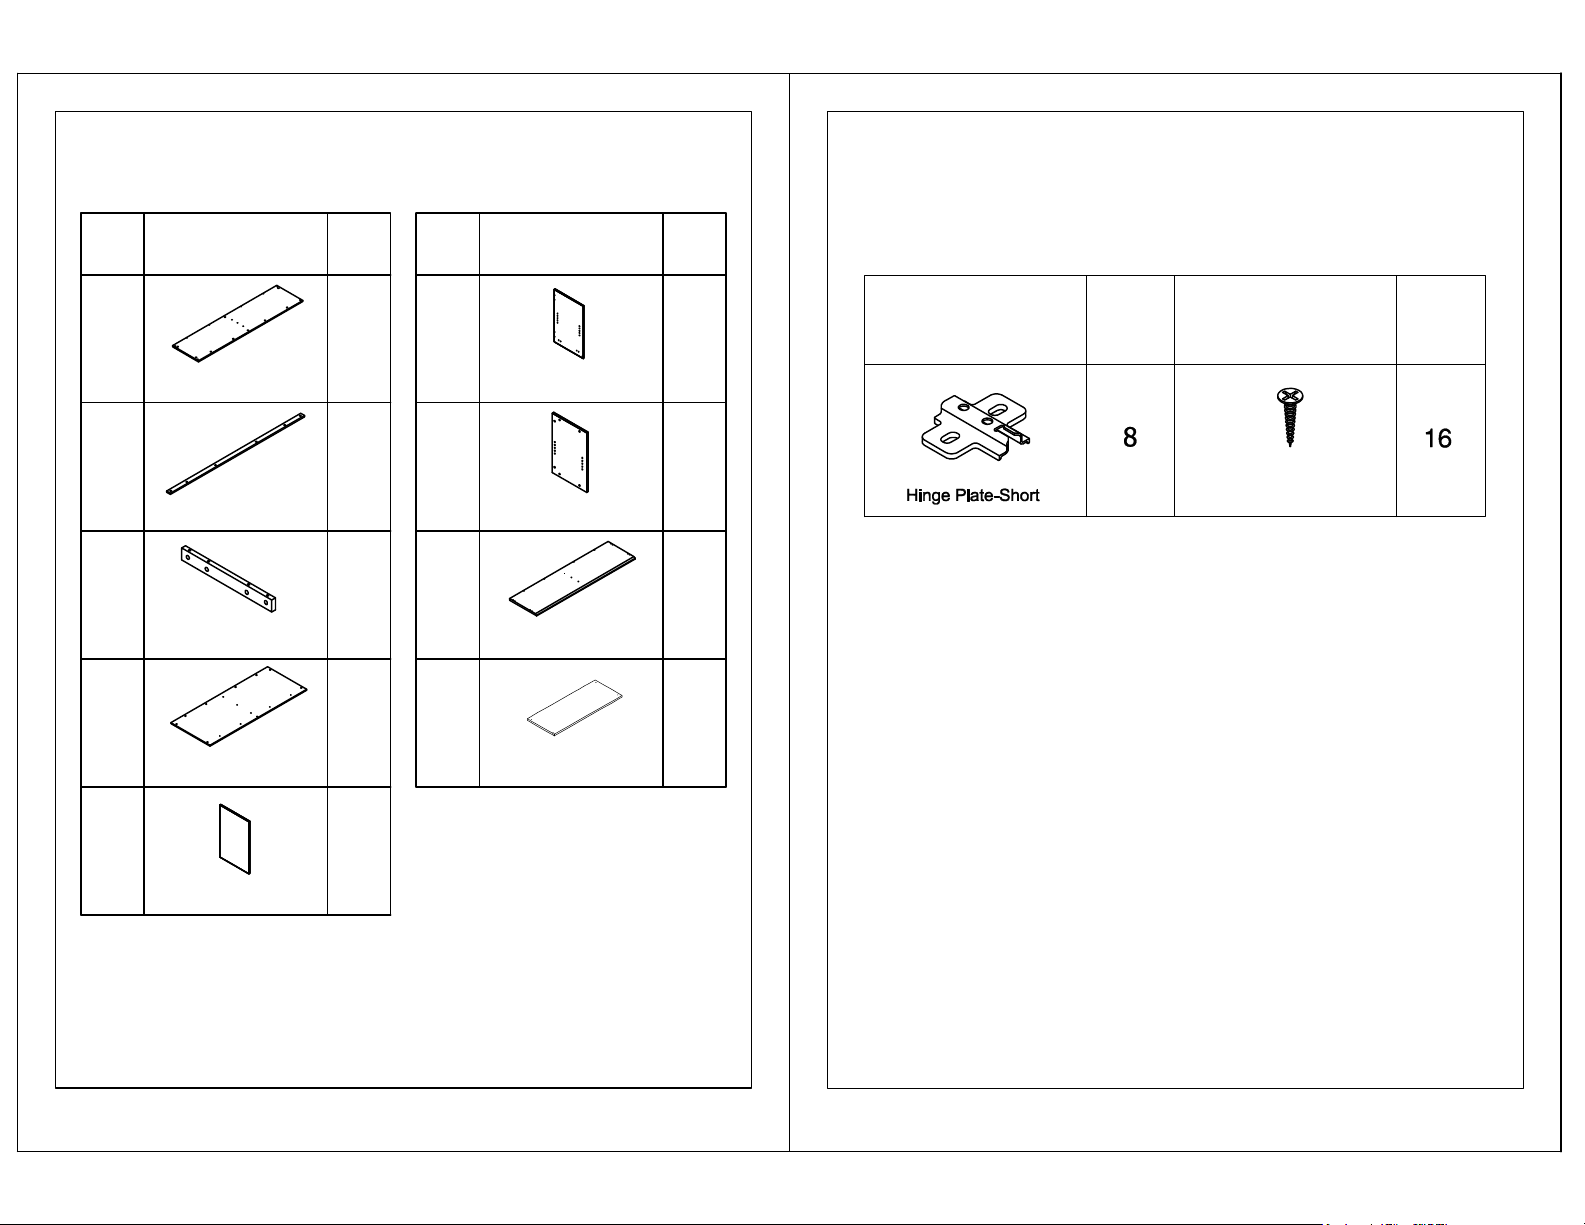
PARTS LIST
Pre-Installed Replacement
Name Part
I
MVLCCI**
Bottom Panel
J
MVLCCJ**
Toe Kick
K
MVLCCK**
Bottom Slat
L
MVLCCL**
Back Panel
Qty.
1
1
1
1
N
O
P
Q
PartName
MVLCCN**
Right Side Panel
MVLCCO**
Center Panel
MVLCCP**
Top
MVLCCQ**
Adjustable Shelf
Qty.
1
1
1
2
Part
Parts List
Included
Qty.
REALS417
Ø4X14mm White
Part
Included
Qty.
M
MVLCCM**
Left Side Panel
1
**Denotes Color Code
2
**Denotes Color Code
3
Page 3

IMPORTANT!
Review ALL instructions before beginning assembly .
These instructions are provided to avoid problems that
may occur from improper assembly or installation.
Mayline and/or its distributor are not responsible for
failure resulting from improper assembly or installation of
this product. Moreover, all warranties are void for failure
to follow these assembly instructions.
1
Install the Cam Post (B) into Toe Kick (J). Insert Cams (C) into Bottom slat (K).
Attach Toe Kick (J) to Bottom slat (K) by turning Cams (C).
2
Install the Cam Post (B) into Bottom panel (I). Insert Cams (C) into Koe kick (J) and
Bottom slat (K). Attach Bottom panel (I) to Toe Kick (J) and Bottom slat by turning
Cams (C).
C
J
A
I
3
Insert Wood Dowels (A) into center panel (O). Install the Cam Post (B) into Bottom
panel (I). Insert Cams (C) into center panel (O) Attach Bottom panel (I) to center
panel (O) by turning Cams (C).
D
K
K
C
J
O
D
B
NOTE: The arrow on the face of the
Cam (C) should point towards the
Cam Post (B) for proper alignment.
4
C
D
B
I
5
Page 4

4
Insert Wood Dowels (A) into Back panel (L). Install the Cam Post (B) into Back panel
(L). Insert Cams (C) into center panel (O) and Bottom panel (I). Attach Back panel
(L) to center panel (O)、 Bottom panel (I) and Bottom slat (K) by turning Cams (C).
6
Insert Wood Dowels (A) into Top panel (P). Install the Cam Post (B) into Top panel
(P). Insert Cams (C) into Back panel、 (L) Side panel (M & N) 、Center panel (O).
Attach Top panel (P) to Back panel (L)、 Side panel (M & N) 、Center panel (O) by
turning Cams (C).
J
C
O
K
D
I
5
Insert Wood Dowels (A) into Side panel (M & N). Install the Cam Post (B) into Side
panel (M & N). Insert Cams (C) into Back panel (L) Bottom panel (I) and Koe kick
(J). Attach Side panel (M & N) to Back panel (L)、 Bottom panel (I) and Koe kick (J)
by turning Cams (C).
A
N
D
C
L
O
I
M
J
B
P
P
L
N
B
O
D
I
M
J
J
7
Install Shelf Support Pins (H) into Side Panels (M & N) and Center panel, Install
Adjustable Shelves (Q) .
M
P
Q
O
I
Q
J
N
H
G
6
7
 Loading...