

Mayline MNPB, Medina Assembly Instructions
ASSEMBLY INSTRUCTIONS
CALL 1-800-822-8037 FOR ASSISTANCE
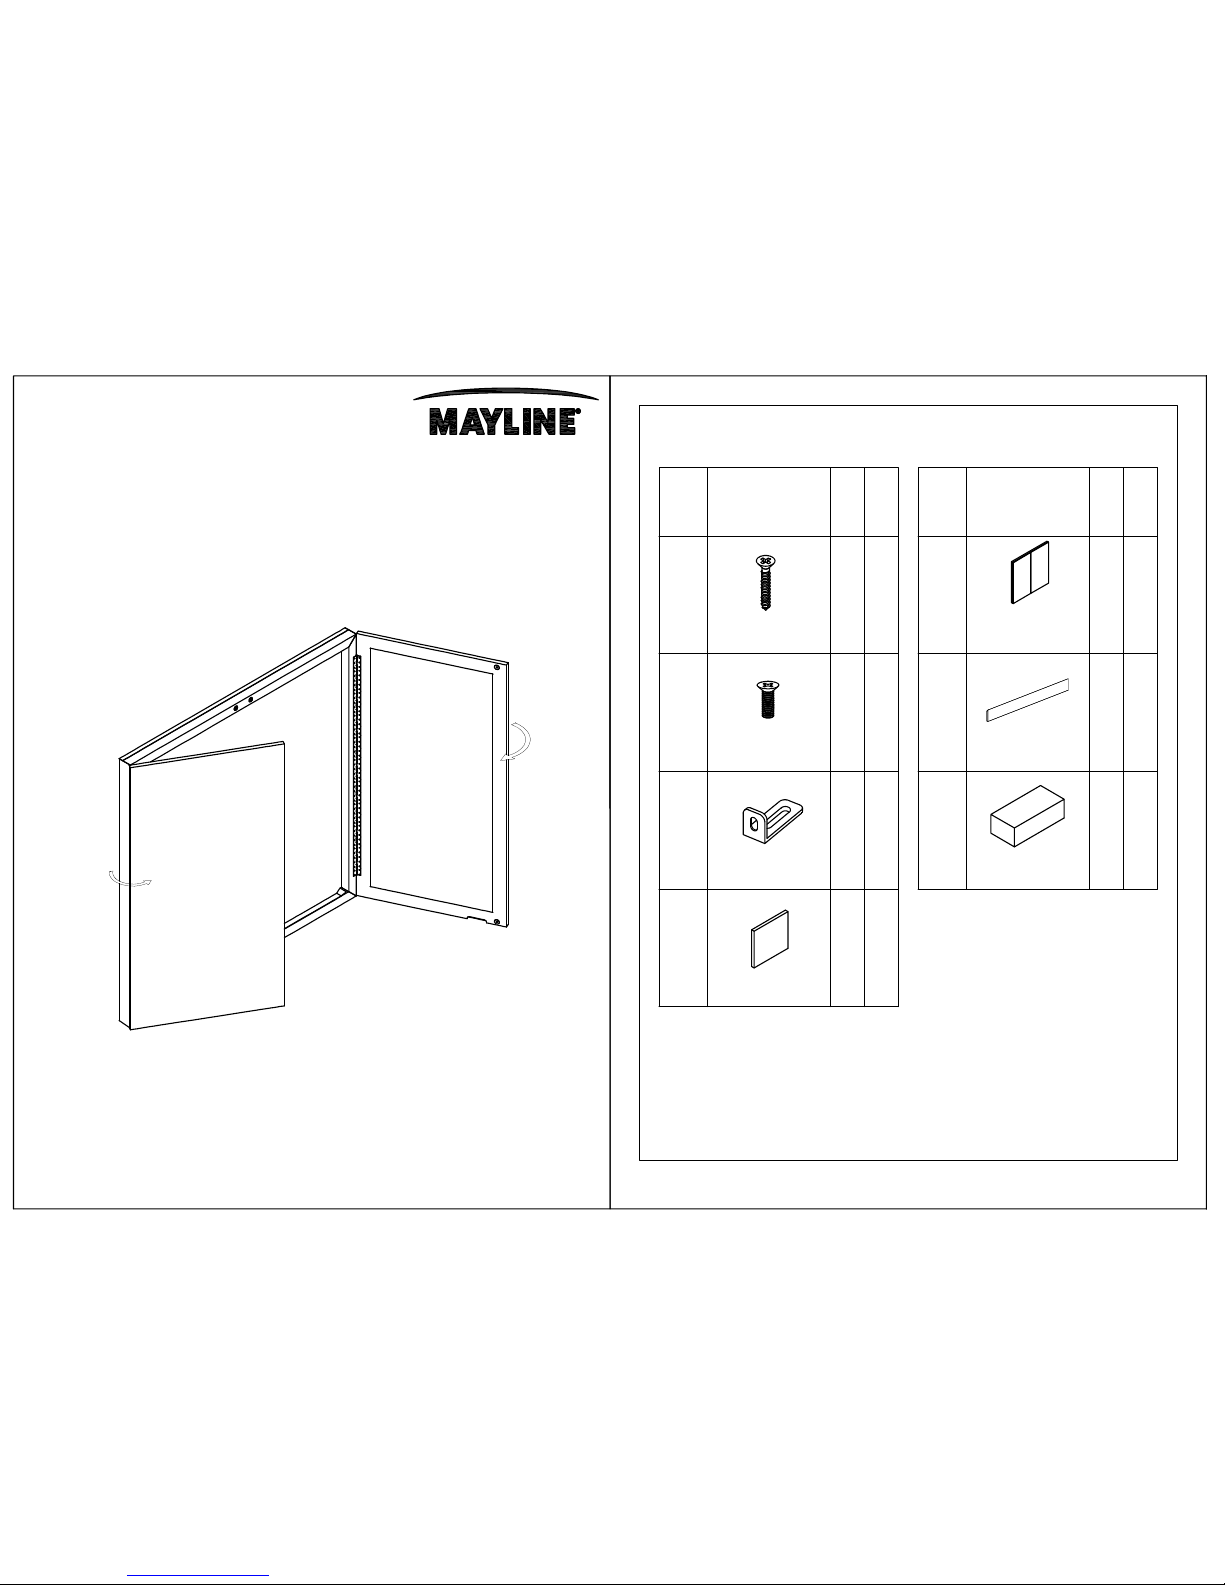
PARTS LIST
1
Name Part
Qty.
Spare
Qty
A
Presentation Board
Model No. MNPB
P/N MNPB REV 2 02/27/15
Presentation Board
CTMBB
Mounting Bracket
MNPB**
F
1
HB
4x50mm
B
1
HB
REALS205
M6x15mm
REALS043
E
Mntg Bracket
REALS093
Medina Series
TM
www.mayline.com
HB
C
1
Name Part
Qty.
Spare
Qty
CTMBHB
H
A
R
D
W
A
R
E
HB
D
6
Foam Spacer
REALS092
**Denotes Color Code
Items with HB are in hardware box.
1
2 3
IMPORTANT!
Review ALL instructions before beginning assembly. These
instructions are provided to avoid problems that may occur from
improper assembly or installation. Mayline and/or its distributor
are not responsible for failure resulting from improper assembly
or installation of this product. Moreover, all warranties are void
for failure to follow these assembly instructions.
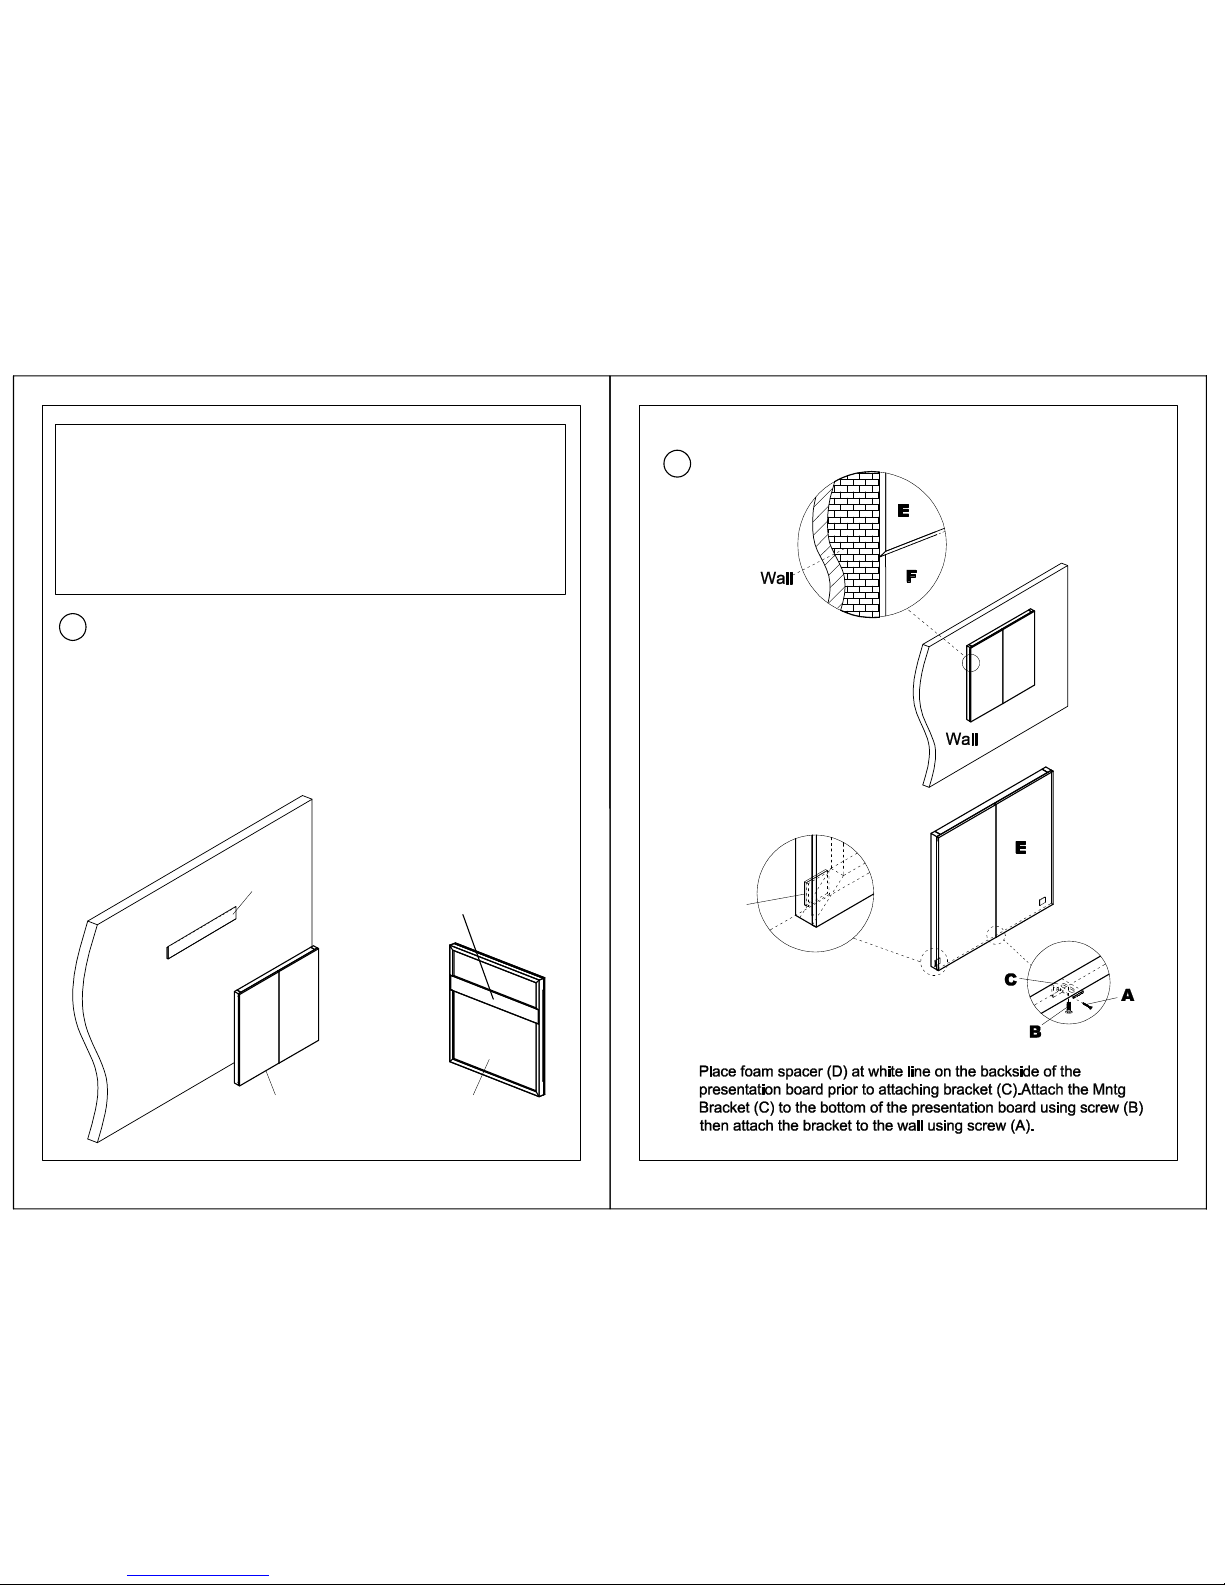
Wall
Front
Back
F
E
E
Eounting Board Installation - Due to the various wall construction methods, it is
up to a professional installer to secure the Mounting Bracket (F) to the wall
with the proper fasteners and/or anchors as required by the wall construction
at the desired mounting location. Mayline does not take responsibility for safe,
proper fastening.
To Hang Presentaion Board - Position Presentation Board so that the
pre-attached wall mounting bracket (See Below) is centered and above
Mounting Bracket (F) and lower Presentation Board until wall mounting
bracket and Mounting Bracket (F) lock together. (See Step 2)
Pre-attached wall
mounting bracket
2
D
 Loading...