

Page 1
LAMINATE CASEWORK ASSEMBLY INSTRUCTIONS
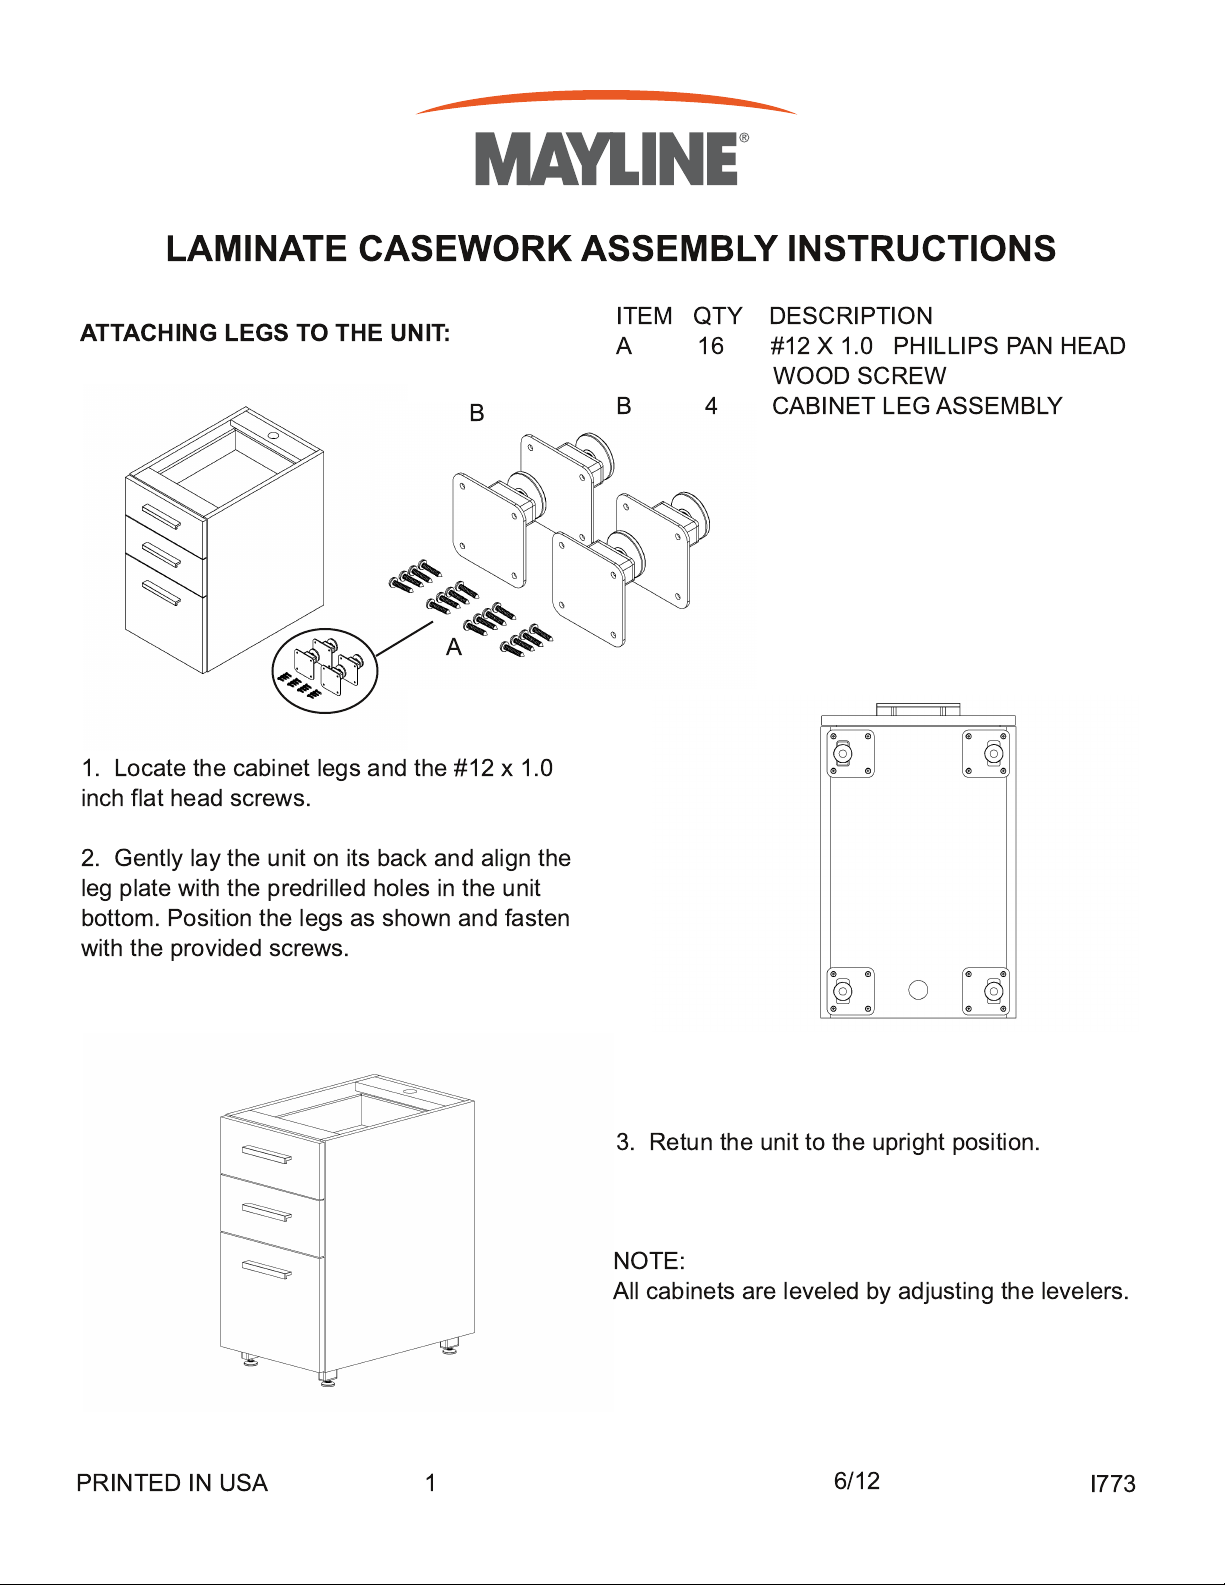
ATTACHING LEGS TO THE UNIT:
B
A
1 . Locate the cabinet legs and the #1 2 x 1 .0
inch flat head screws.
2. Gently lay the unit on its back and align the
leg plate with the predrilled holes in the unit
bottom. Position the legs as shown and fasten
with the provided screws.
ITEM QTY DESCRIPTION
A 1 6 #1 2 X 1 .0 PHILLIPS PAN HEAD
WOOD SCREW
B 4 CABINET LEG ASSEMBLY
PRINTED IN USA 1
3. Retun the unit to the upright position.
NOTE:
All cabinets are leveled by adjusting the levelers.
6/1 2
I773
Page 2
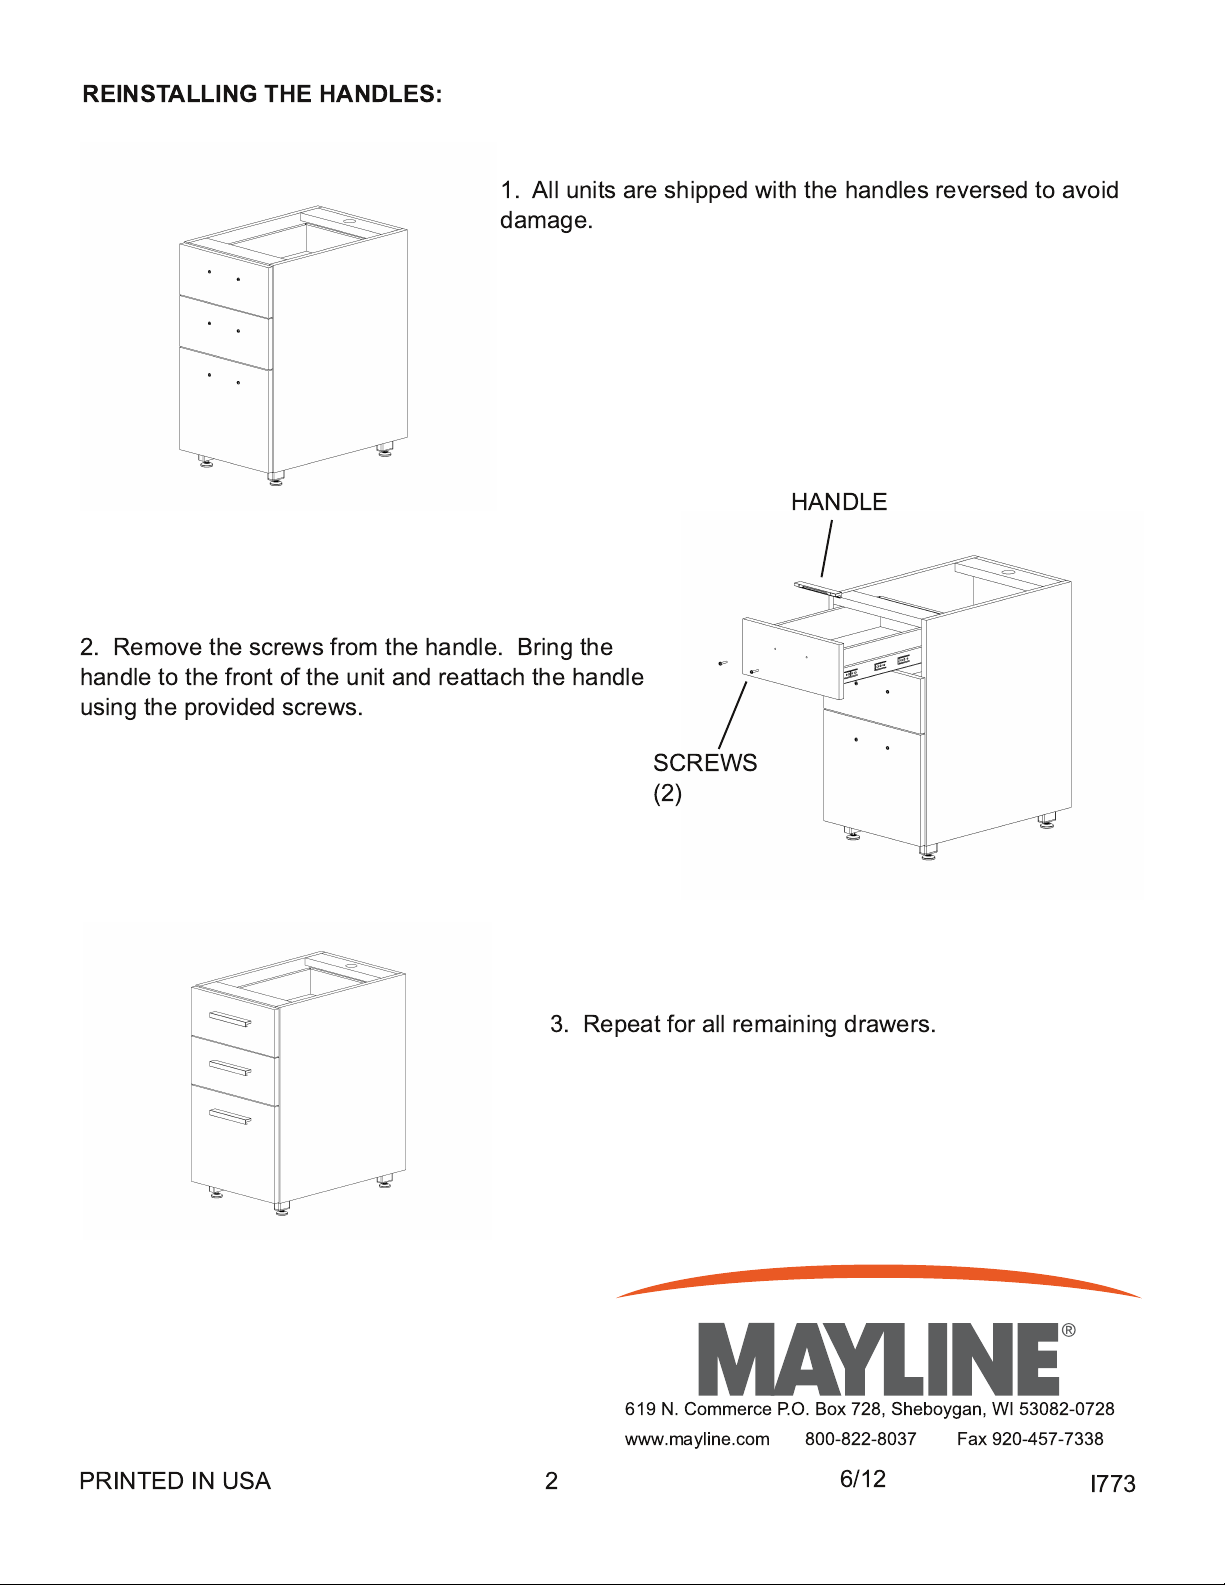
REINSTALLING THE HANDLES:
1 . All units are shipped with the handles reversed to avoid
damage.
2. Remove the screws from the handle. Bring the
handle to the front of the unit and reattach the handle
using the provided screws.
HANDLE
SCREWS
(2)
3. Repeat for all remaining drawers.
PRINTED IN USA 2
61 9 N. Commerce P.O. Box 728, Sheboygan, WI 53082-0728
www.mayline.com 800-822-8037 Fax 920-457-7338
6/1 2
I773
Page 3

INSTALLING ADJUSTABLE SHELVES:
1 . Place the shelf pins in the desired hole. Be
sure to place all four pins at the same level (4 pins
per shelf). For wide units 5 are provided (center
back for 5th pin).
SUPPORT SHELF PINS
(4 OR 5)
2. Slide the shelf securely onto the pin. Push on
the shelf to verify that it rests evenly on all four pins
(5 pins for wide units).
PRINTED IN USA 3
61 9 N. Commerce P.O. Box 728, Sheboygan, WI 53082-0728
www.mayline.com 800-822-8037 Fax 920-457-7338
6/1 2
I773
Page 4

INSTALLING SLIDING DOORS:
2. Set the door into the bottom track. Slide
back and forth to check function. Repeat for
second door using the front track.
1 . Place the top of the door in the top rear track
and push until the door bottoms out on the top
track. Rotate the door until the bottom of the door
is over the rear bottom track.
PRINTED IN USA 4
61 9 N. Commerce P.O. Box 728, Sheboygan, WI 53082-0728
www.mayline.com 800-822-8037 Fax 920-457-7338
6/1 2
I773
Page 5

INSTALLING A PED UNIT:
1 . Fully extend the drawer.
2. Locate the black tabs on the slide.
3. Push the tabs in opposite directions and firmly
pull on drawer to remove from cabinet.
4. Completely remove all drawers. Be sure to keep
drawers in proper order.
5. Place the top in the desired position over the ped.
6. Screw the top to the ped through the four pre-
drilled holes in the ped (2 in front rail, 2 in rear rail).
MOUNTING SCREWS
(4)
PRINTED IN USA 5
61 9 N. Commerce P.O. Box 728, Sheboygan, WI 53082-0728
www.mayline.com 800-822-8037 Fax 920-457-7338
6/1 2
I773
Page 6

7. Replace the drawers by aligning the
slides on each side and closing fully. Be
sure to put drawers back in the order
they were removed.
PRINTED IN USA 6
61 9 N. Commerce P.O. Box 728, Sheboygan, WI 53082-0728
www.mayline.com 800-822-8037 Fax 920-457-7338
6/1 2
I773
 Loading...