

Page 1
Kwik-File, LLC
File Harbor Cabinet
Wire Dividers
MWD
MS48: 42"shelf to fit 48" wide Cabinet
MS42: 36 3/4" shelf to fit 42" wide Cabinet
MS36: 30 3/4" shelf to fit 36" wide Cabinet
:
A package of 4 Wire Dividers to be suspended from:
NO Tools Required
1. Remove packaging material. NOTE: Check for concealed damage. Report any damage to
carrier.
2. Wire Dividers are used to separate 3-ring binders, books, etc., which rest on the shelves. The
Wire Dividers must be suspended from another shelf directly above the binders. If the binders will
be on the top shelf of the cabinet, another shelf for suspending the wire dividers must be placed
above them at the very top of the cabinet.
3. If storing binders, you will need 13 slots of vertical space for the binders and the shelf supporting
the binders, and one additional slot for the shelf above (from which the Wire Dividers hang).
4. Before attempting to install the Wire Dividers, first install both the shelf above and below the
binder storage area.
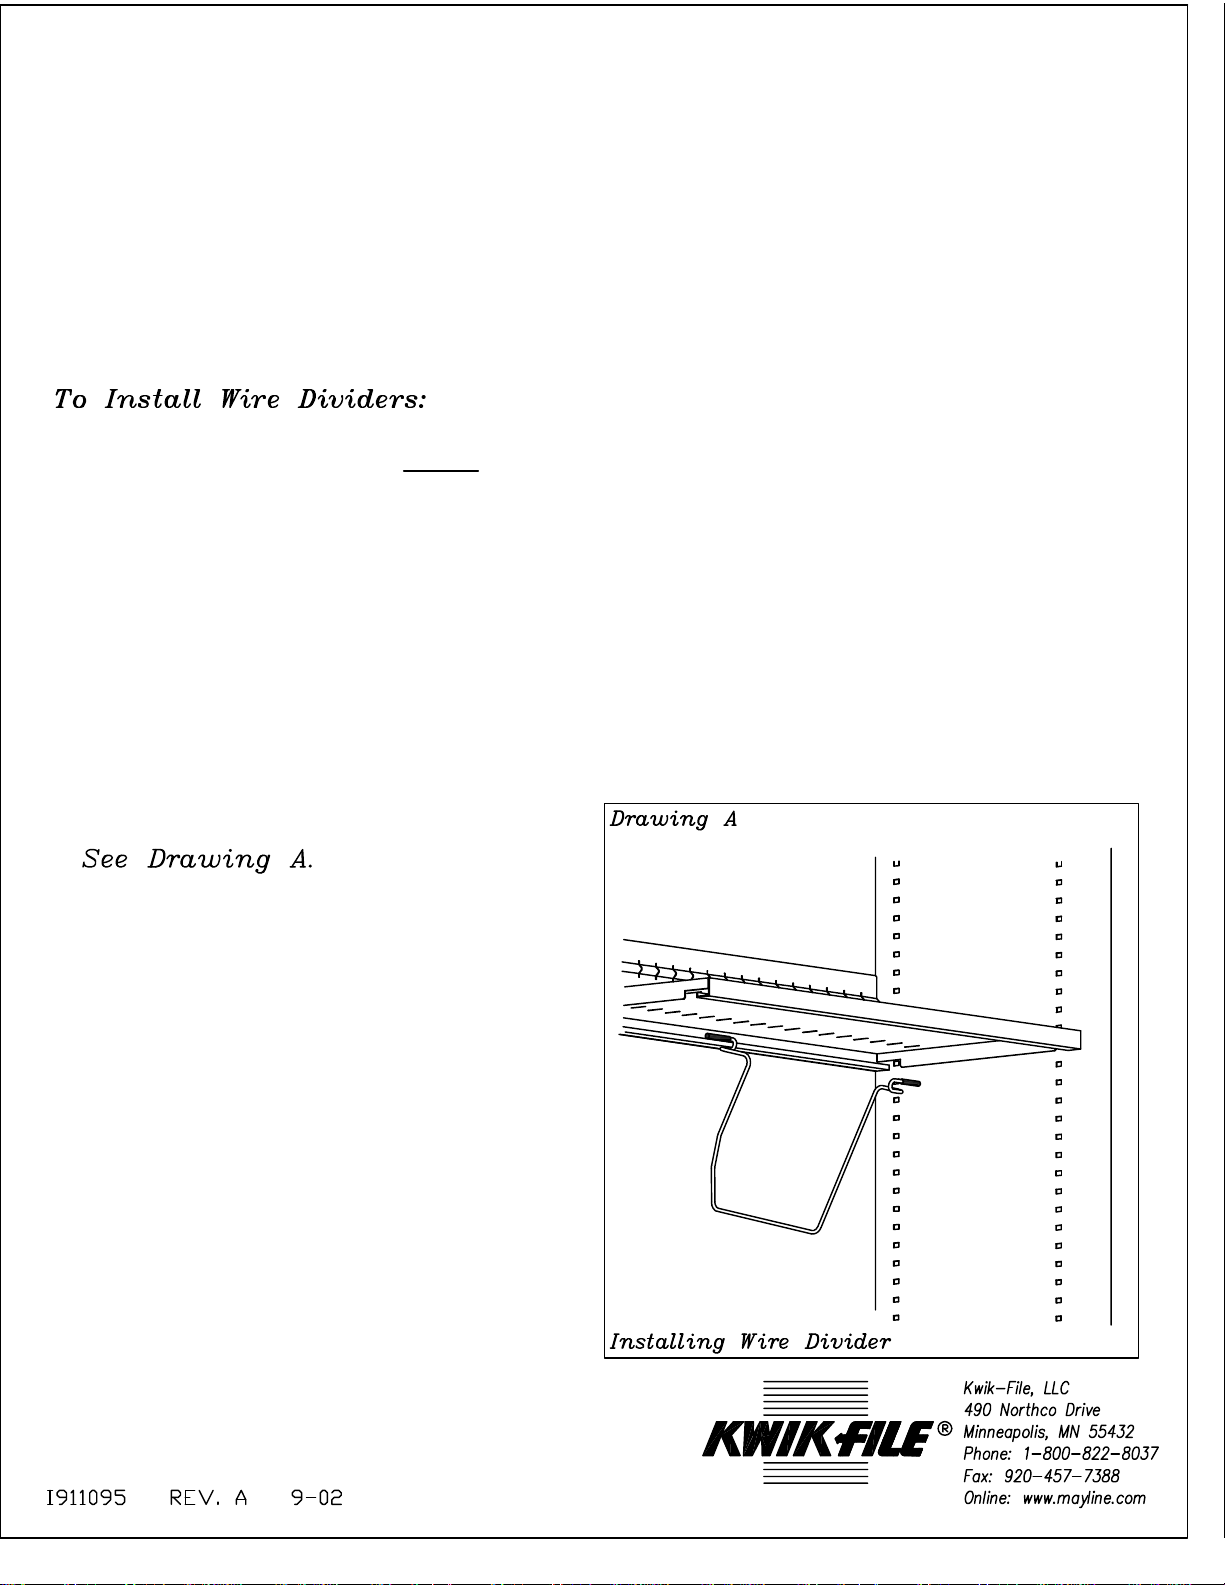
5. Squeeze the front and
back of the Wire Divider together slightly so that it
fits between the front and back lips of the shelf
above.
:
6. To position the Wire Divider exactly as desired,
slide it sideways, squeezing the front and back
together if necessary.
7. Once the Wire Divider is positioned properly,
spread it apart so that the rubber tipped ends are
forced all the way into the front and back lips of
the shelf above.
8. To re-position a Wire Divider, squeeze the
front and back ends together so that the rubber
tipped ends come out of the shelf lips, then move
it as desired.
Page 2

Kwik-File, LLC
File Harbor Cabinet
Hanger Bar
MHB48: 42" Hanger Bar for 48" wide Cabinet
MHB42: 36 3/4" Hanger Bar for 42" wide Cabinet
MHB36: 30 3/4" Hanger Bar for 36" wide Cabinet
NO Tools Required
1. Remove packaging material. NOTE: Check for concealed damage. Report any damage to carrier.
2. Remove the 4 shelf clips from the plastic bag taped to the bar.
3. See the attached Configuration Guide for the recommended spacing between the Hanger Bar and
other components. Make sure you know which media the hanger bar is intended to support (tape
seal, print-outs, etc.), and how much space the media will take below the hanger bar, and above the
next compontent. (As an example, 13 slots are required for both the Hanger Bar and a 10 1/2" tape
seal).
4. Put the shelf clips (small tips with flat ends are inserted
upwards - ) in the proper slots in the inside
end panels.
5. showing schematic of Hanger Bars.
6. Install the left support rail on the shelf clips.
:
7. With the right end of the Hanger Bar tipped upwards (to provide
clearance between the bar and the right inside
end panel of the cabinet), insert the left end of
the bar into the tabs on the left rail, with the
lower side of the bar facing the front of the
cabinet, as shown in Drawing B.
Back
8. With the right end of the bar still tipped
upwards, connect the right rail to the bar by
inserting the right rail tabs into the slots in the
right end of the bar.
9. Ease the right side of the Hanger Bar
assembly down onto the shelf clips so that it is
firmly in place.
Front
 Loading...