

Page 1

(1)
BETTER FOR YOUR BUSINESS
ASSEMBLY INSTRUCTIONS
TRANSACTION CONFERENCE TABLE
POWER KITS
NOTE: Please count and inspect all pieces before disposing of any carton or packing materials.
COMPONENTS:
Single Well Table Kit: TAECT1
Item # QTY. DESCRIPTION
1 2 DUAL SIDED POWER BLOCK
2 12 SIMPLEX (OUTLET)
3 2 MOUNTING BRACKET
4 1 24" INTERCONNECTING CABLE
5 - - - - - - - - - - 6 1 REMOVAL TOOL
Dual Well Table Kit: TAECT2
Item # QTY. DESCRIPTION
1 4 DUAL SIDED POWER BLOCK
2 24 SIMPLEX (OUTLET)
3 4 MOUNTING BRACKET
4 2 24" INTERCONNECTING CABLE
5 1 68" INTERCONNECTING CABLE
6 1 REMOVAL TOOL
ADDER Table Kit: TAECT3
Item # QTY. DESCRIPTION
1 2 DUAL SIDED POWER BLOCK
2 12 SIMPLEX (OUTLET)
3 2 MOUNTING BRACKET
4 1 24" INTERCONNECTING CABLE
5 1 68" INTERCONNECTING CABLE
6 1 REMOVAL TOOL
3 Utility circuits (1,2,4) share a #10 AWG super neutral and
share a ground.
3rd Circuit (IG) has dedicated, hot, neutral and ground
Page 2
(2)
Connector Panels
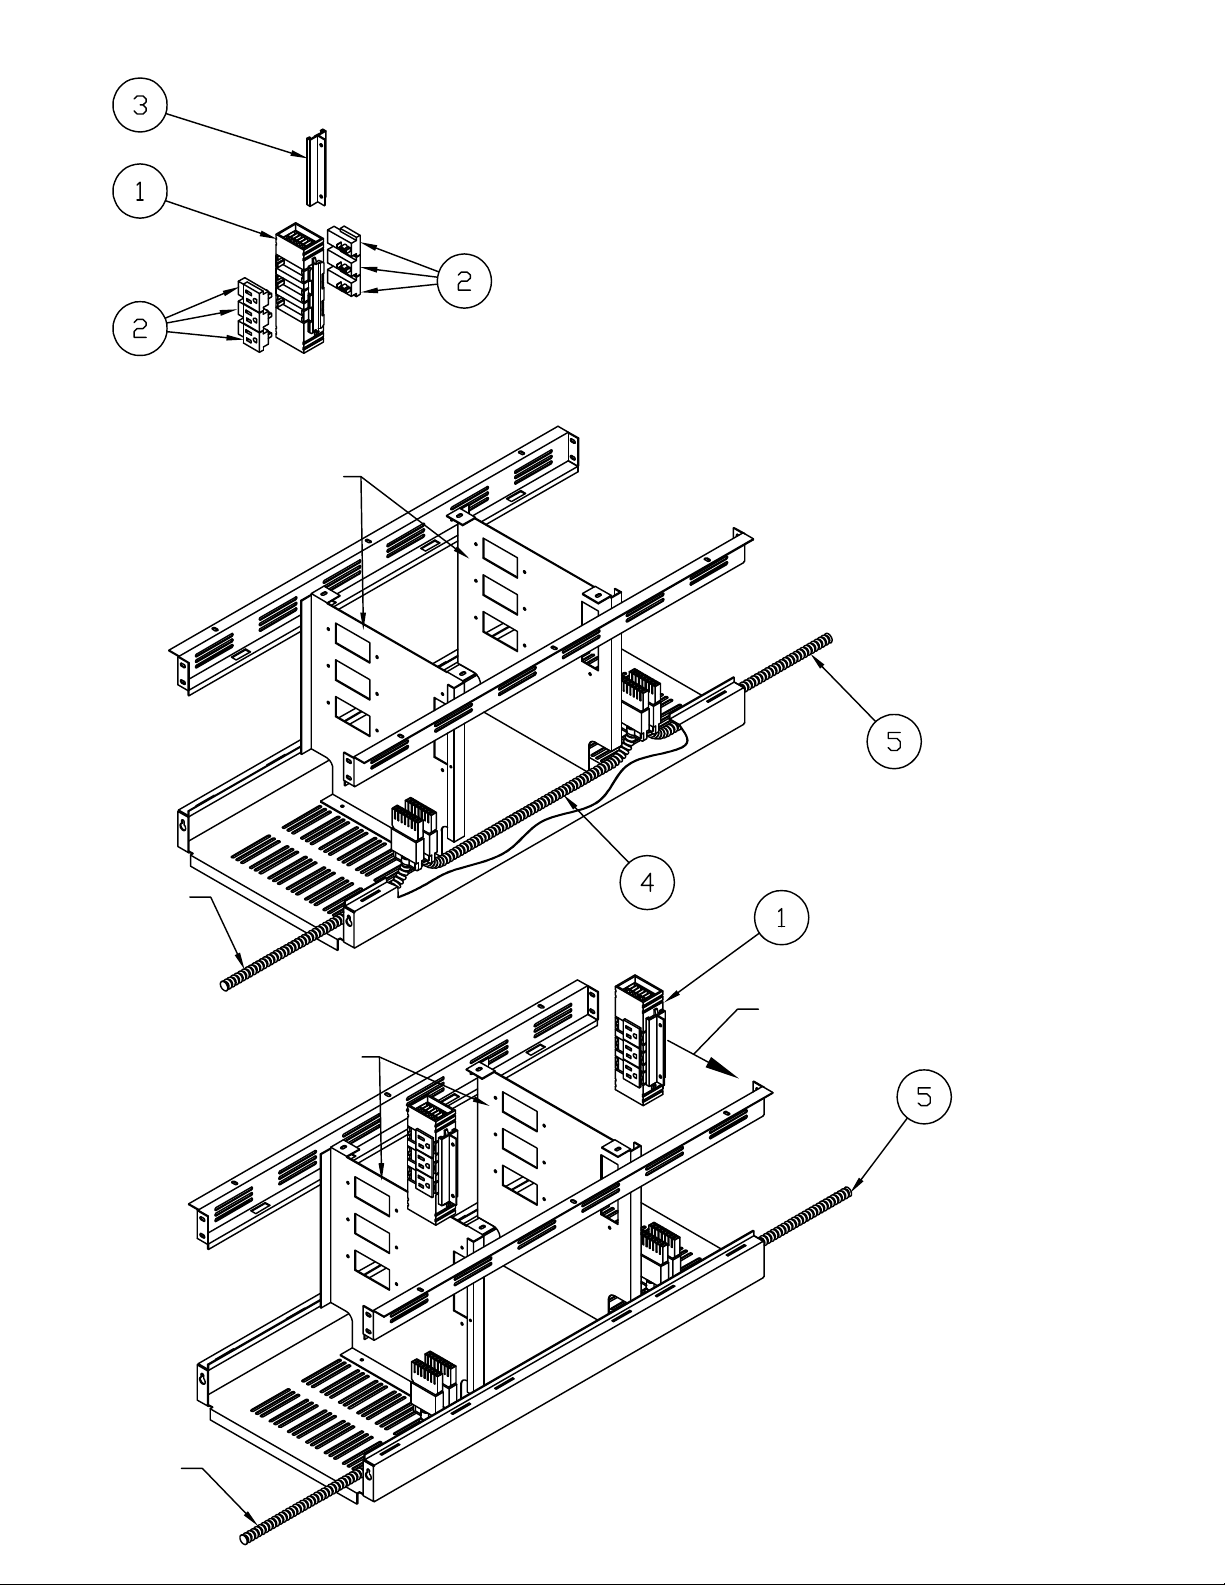
1. Snap Outlets (2) into Power Blocks (1).
2. Slide Mounting Bracket (3) into position on Power
Blocks (1).
3. Lay 26" Connection Cable (4) into position within
the trough assembly. Position plugs on either side
of Connector Panels.
Place Starter Cable (purchased separately) into
trough assembly.
Place 68" Connector Cable (5) into trough
assembly as required.
Starter cable
(purchased
separately)
Connector Panels
(As required)
Power Block
mounting bracket
holes
(As required)
Starter cable
4. Position Power Block assembly so that the
Mounting Bracket holes are toward mounting
flanges on the connector panels.
Plug Starter Cable, 26" Interconnecting Cable (4),
and 63" Interconnecting Cable (5) into assembled
Power Blocks (1).
Page 3

(3)
5. Fasten Power Blocks to Connector Panels using
screws supplied with Mounting Bracket (3).
Screws
 Loading...