

Page 1
C
CABINET/SHELF ASSEMBLY MODULAR WALL
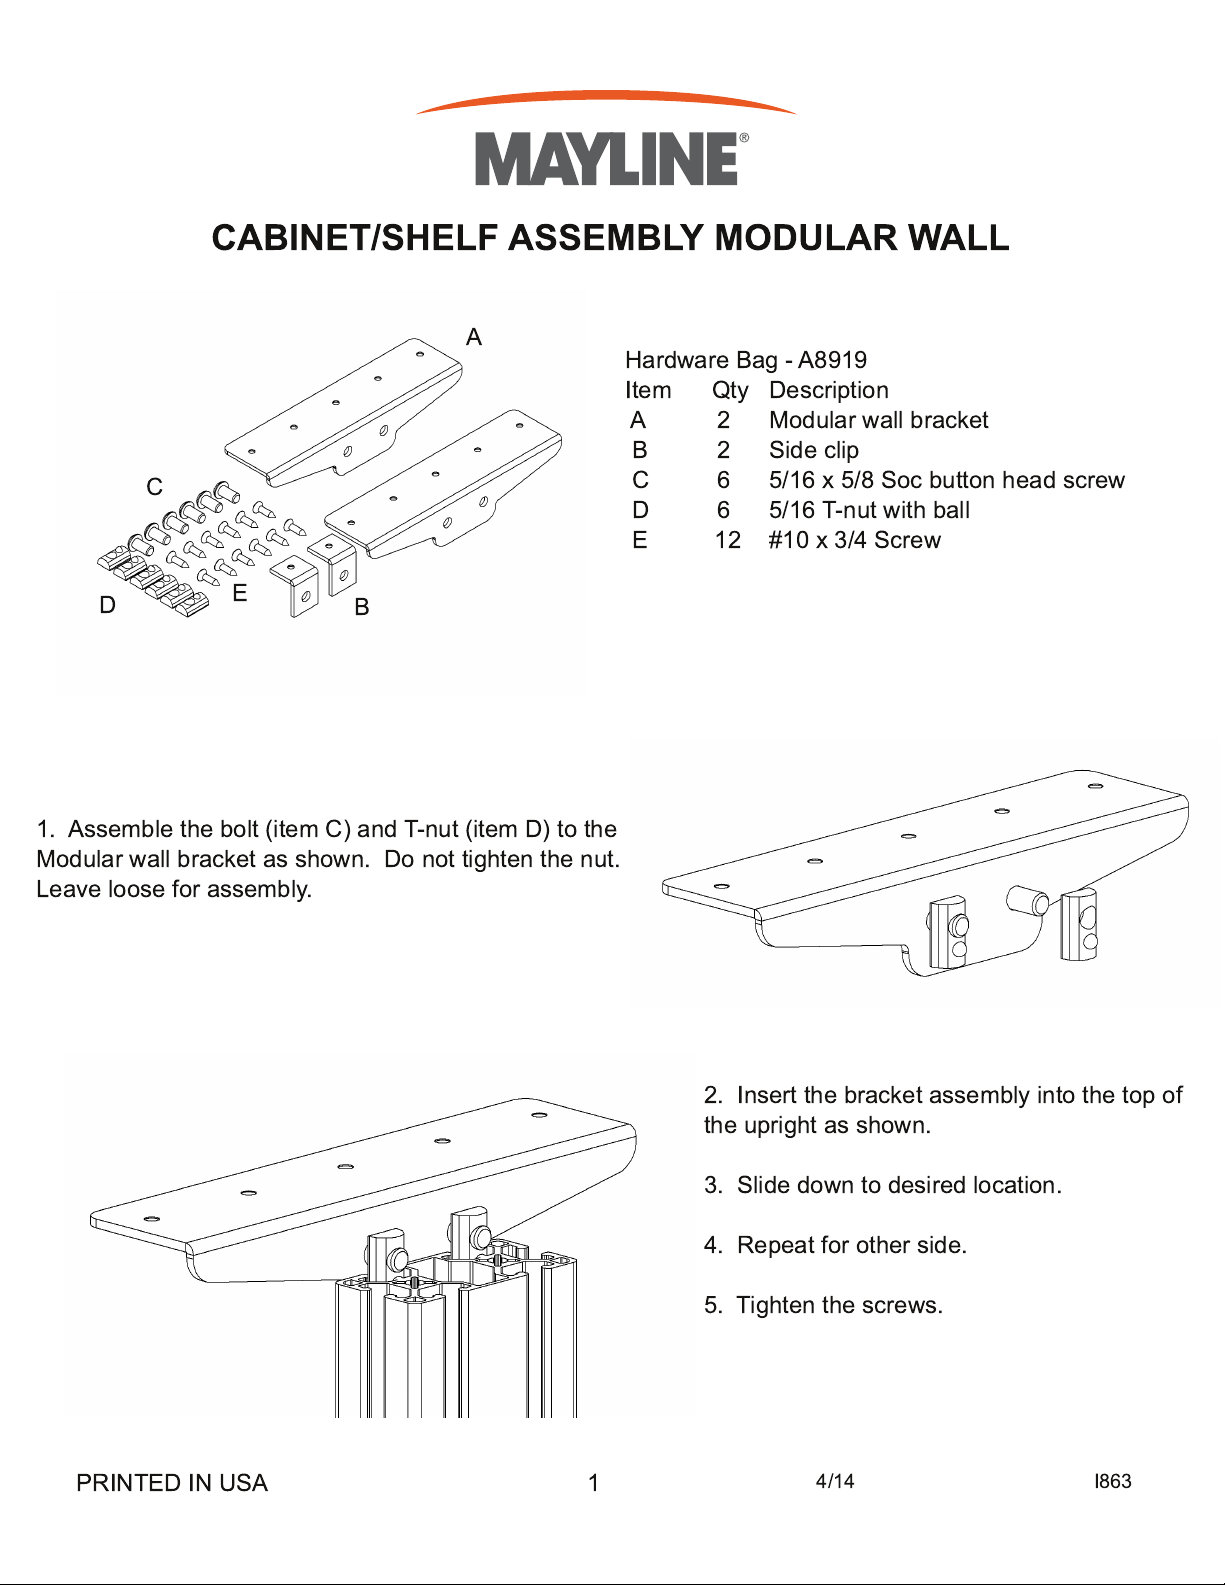
A
Hardware Bag - A891 9
Item Qty Description
A 2 Modular wall bracket
B 2 Side clip
C 6 5/1 6 x 5/8 Soc button head screw
D 6 5/1 6 T-nut with ball
E 12 #1 0 x 3/4 Screw
D
1 . Assemble the bolt (item C) and T-nut (item D) to the
Modular wall bracket as shown. Do not tighten the nut.
Leave loose for assembly.
E
B
2. Insert the bracket assembly into the top of
the upright as shown.
PRINTED IN USA 1
3. Slide down to desired location.
4. Repeat for other side.
5. Tighten the screws.
4/1 4
I863
Page 2
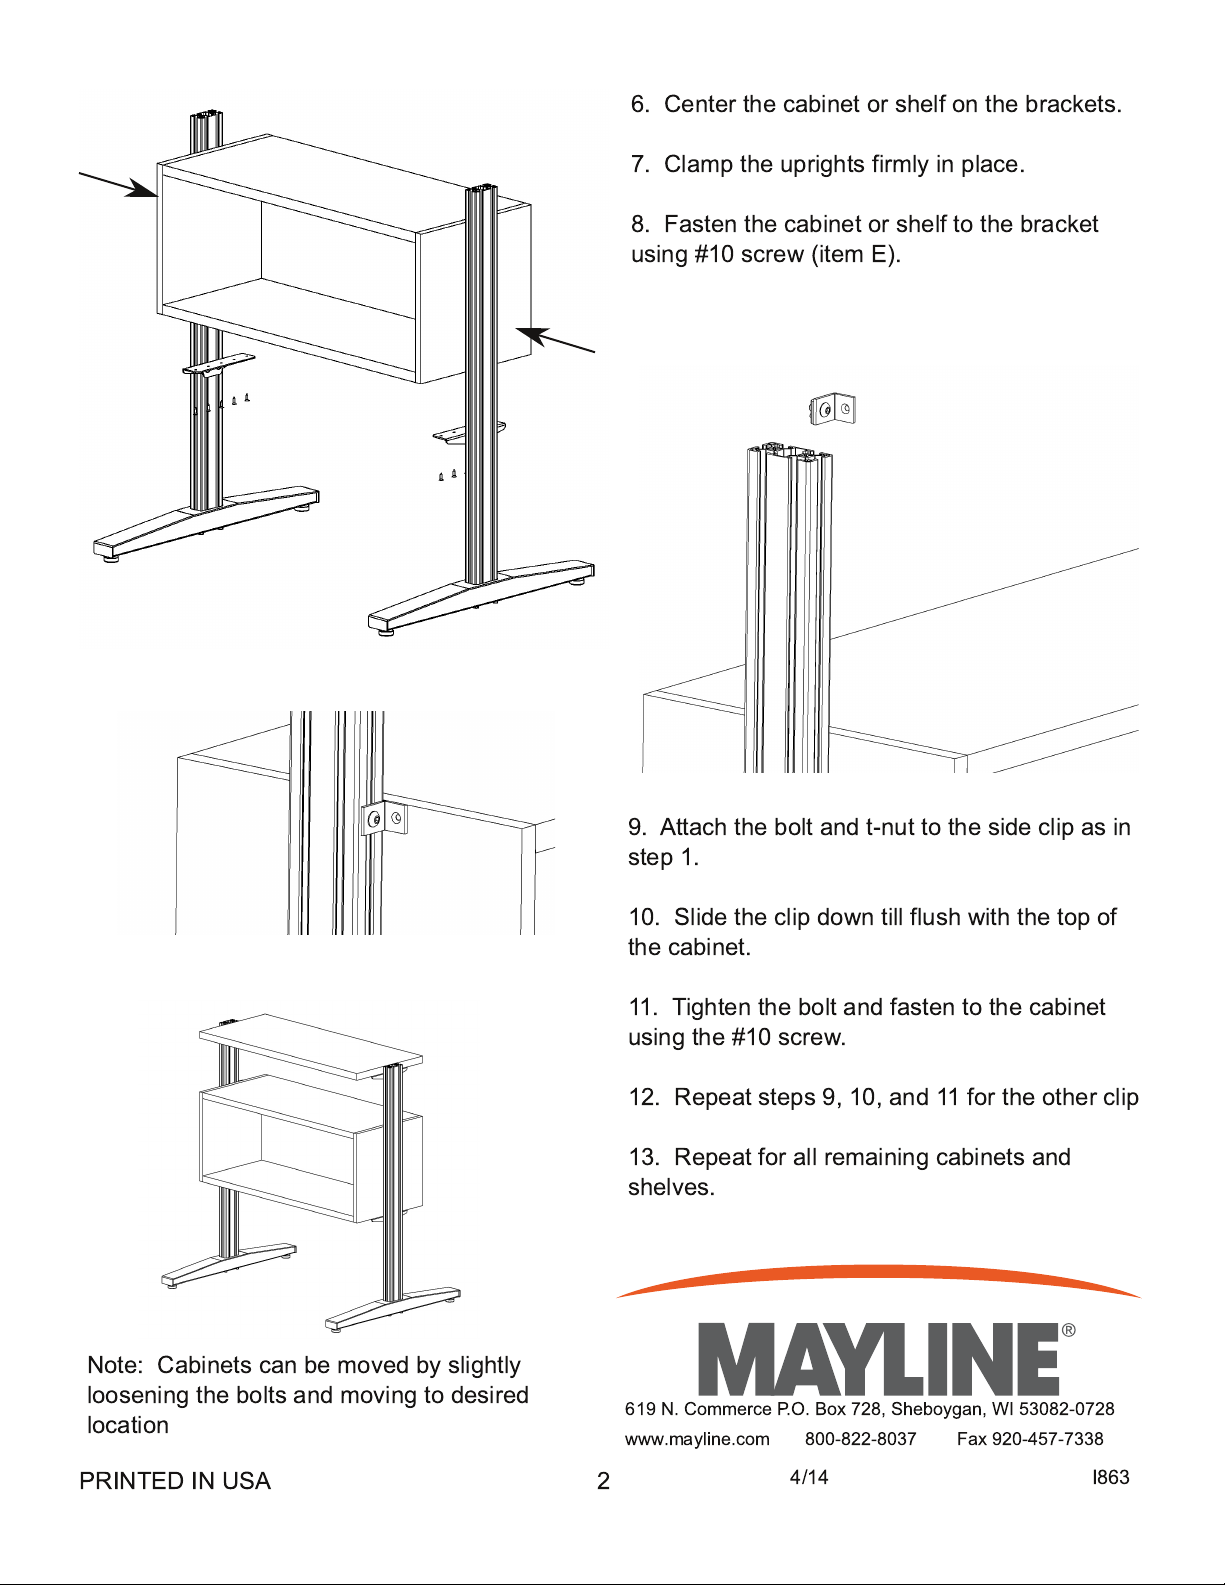
6. Center the cabinet or shelf on the brackets.
7. Clamp the uprights firmly in place.
8. Fasten the cabinet or shelf to the bracket
using #1 0 screw (item E).
Note: Cabinets can be moved by slightly
loosening the bolts and moving to desired
location
9. Attach the bolt and t-nut to the side clip as in
step 1 .
1 0. Slide the clip down till flush with the top of
the cabinet.
11 . Tighten the bolt and fasten to the cabinet
using the #1 0 screw.
1 2. Repeat steps 9, 1 0, and 11 for the other clip
1 3. Repeat for all remaining cabinets and
shelves.
61 9 N. Commerce P.O. Box 728, Sheboygan, WI 53082-0728
www.mayline.com 800-822-8037 Fax 920-457-7338
PRINTED IN USA 2
4/1 4
I863
 Loading...