

Page 1
Page 2
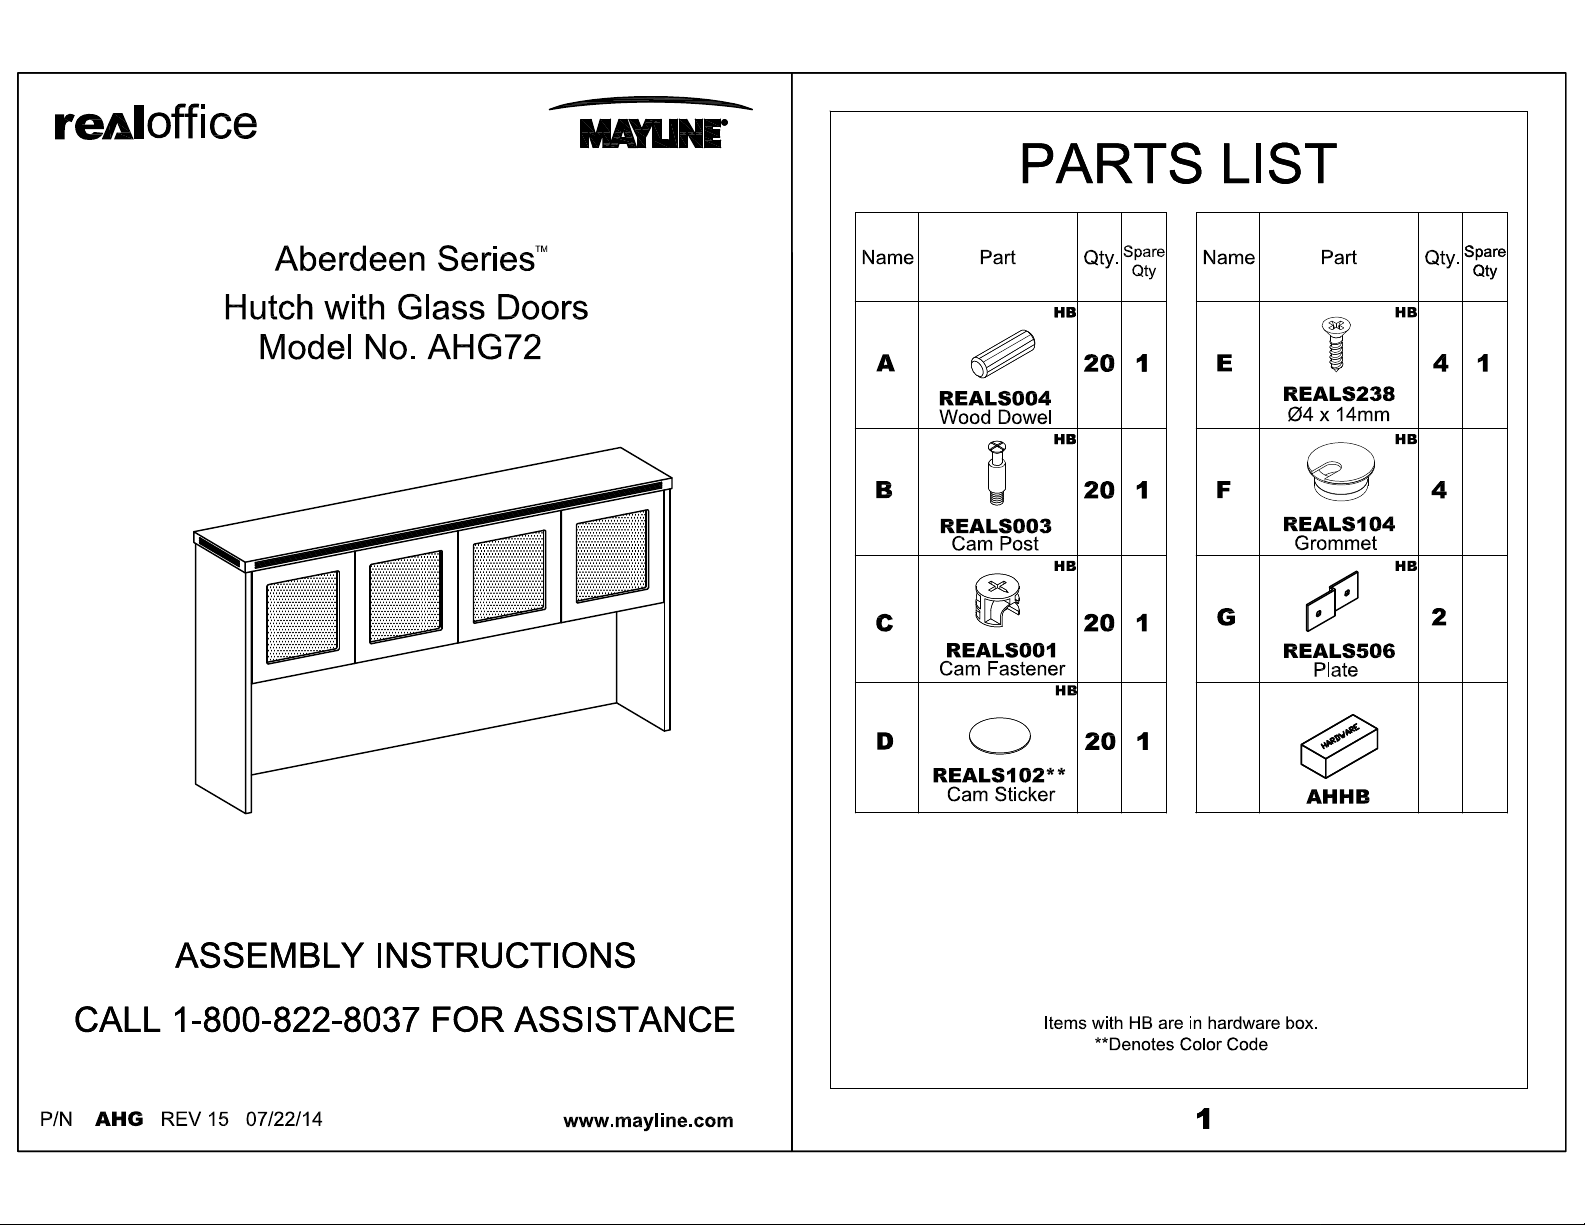
PARTS LIST
PARTS LIST
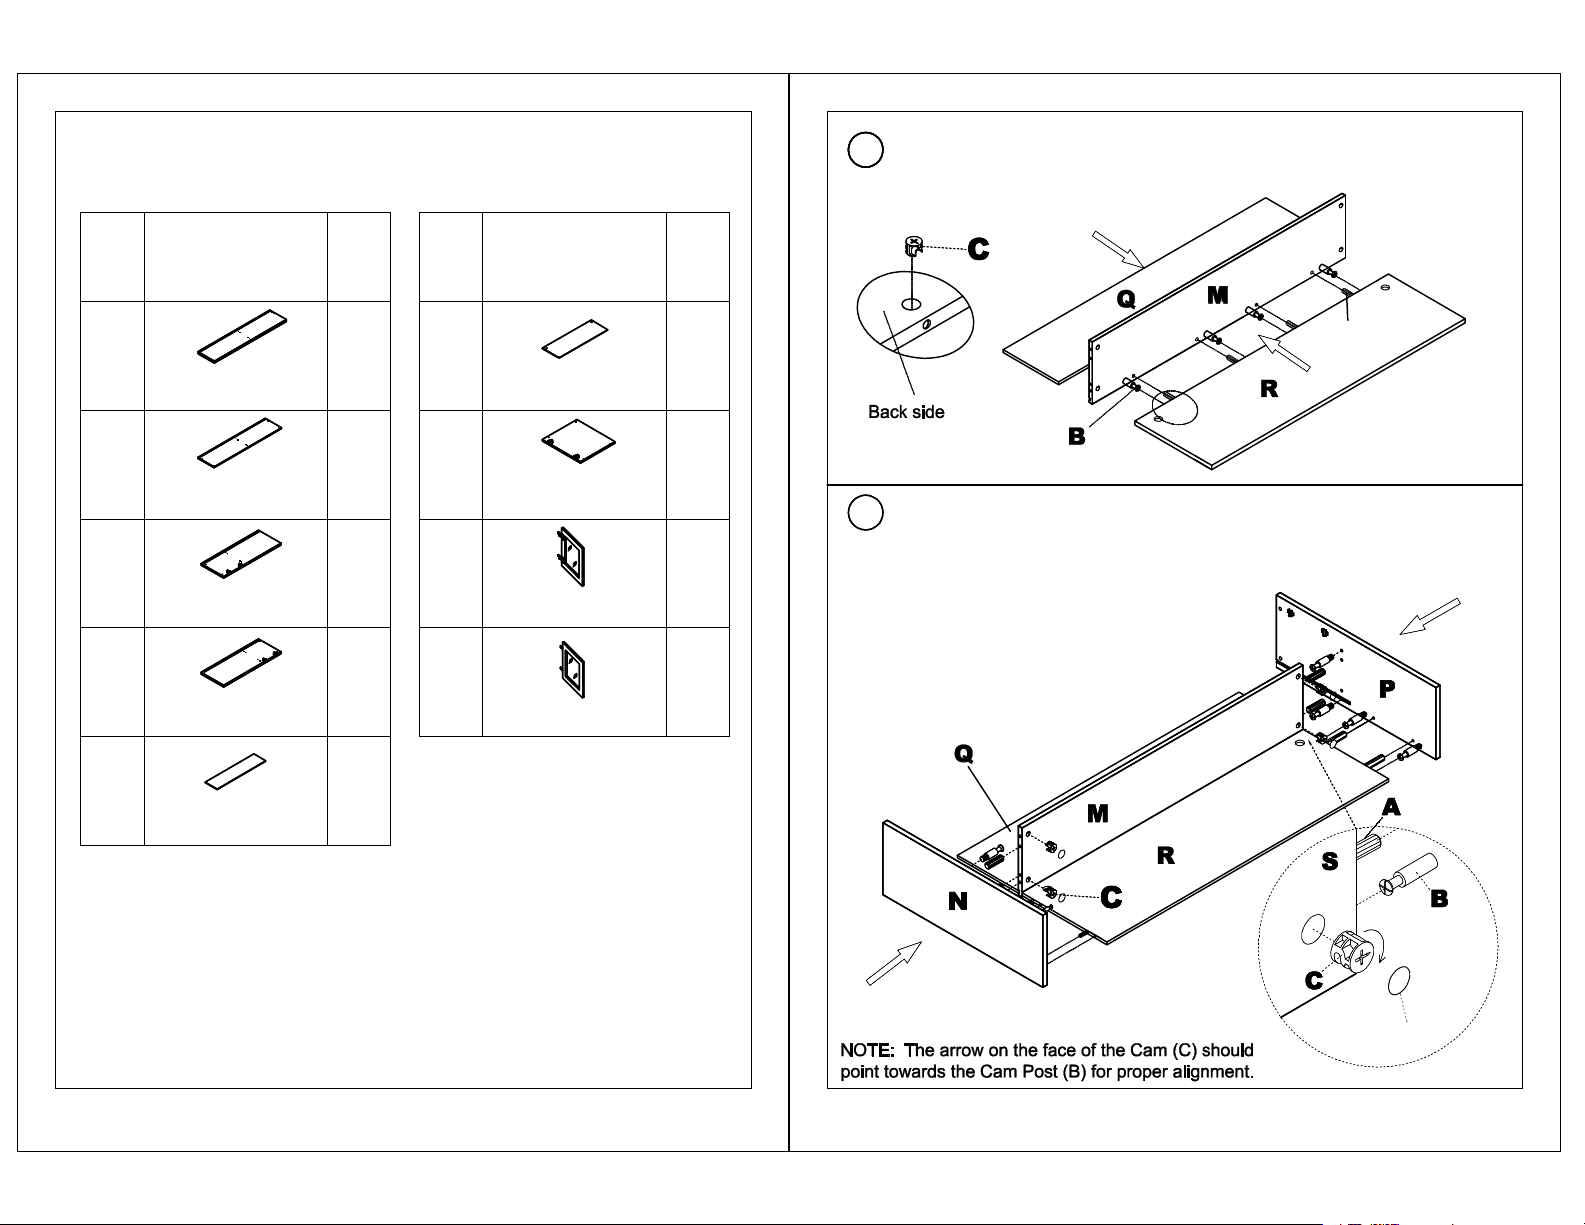
Install Cam Posts (B) into Shelf (M). Insert Wood Dowels (A) into top of
11
11
the Back Panel (R). Insert Cams (C) into the of the back side of Back Panel
(R). Slide Back Panels ( Q) into groove in Shelf (M).
L*
AH~~L**
M
AH~~M**
N
Left Side Panel
P
Right Side Panel
Q
AH~~Q**
Upper Back Panel
PartName
Top
Shelf
AHN**
AHP**
Qty.
1
1
1
1 2
R
S
T*
T*
U*
U*
PartName
AH~~R**
Lower Back Panel
AHS**
Center Divider
AHG~~T**
Right Side Door
AHG~~U**
Left Side Door
1
Qty.
1
1
2
A
Install Cam Posts (B) into threaded inserts in Side Panels (N, P). Insert
2
Wood Dowels (A) and Cams (C) into the end of the Shelf (M) and Back
Panel (R). Slide Side Panels (N, P) into position with Back Panels (R, Q)
inserting into the groove in the Side Panels (N, P). Fasten Side Panels (N,
P) and Shelf (M) by turning Cams (C).
*Available in Cherry (LCR) or Mocha (LDC) finish only.
**Denotes Color Code
~~Denotes Size (72, 66, 60)
2
D
3
Page 3

Stand unit in upright position. Install Cam Posts (B) into Shelf (M). Insert
3
Dowels (A) and Cam (C) into the Center Divider (S). Fasten Center Divider
(S) to Shelf (M) by turning Cams (C).
Install Cam Posts (B) into threaded inserts in the Top (L). Insert Wood
4
Dowels (A) and Cams (C) into top of the End Panels (N, P) and Center
Divider (S). Place Top (L) onto base and fasten by turning Cams (C). Place
Cam Stickers (D) onto Cams (C).
4
G
J
C
D
5
Page 4

Position hutch as desired.
5
Attach Plate (G) using Screws (E) to cabinet body and desk top.
6
Install Doors (U, T) into cabinet. Insert Grommets (F) into Shelf (M) and
7
Back Panel (R).
Adjust door alignment as necessary by using the adjustment screws on the
hinges. DO NOT use Power Driver to make these adjustments.
L
L
S
S
P
P
N
N
M
M
U
T
T
U
U
T
6
7
Page 5

Pre-Installed Replacement
Parts List
Part
REALS051
Hinge
REALS051P
Hinge Plate -
Outer Door
Included
Qty.
8
4
Part
REALS013P
Hinge Plate -
Inner Door
REALS016
Included
Qty.
4
32
8
9
 Loading...