

Page 1
Page 2
PARTS LIST
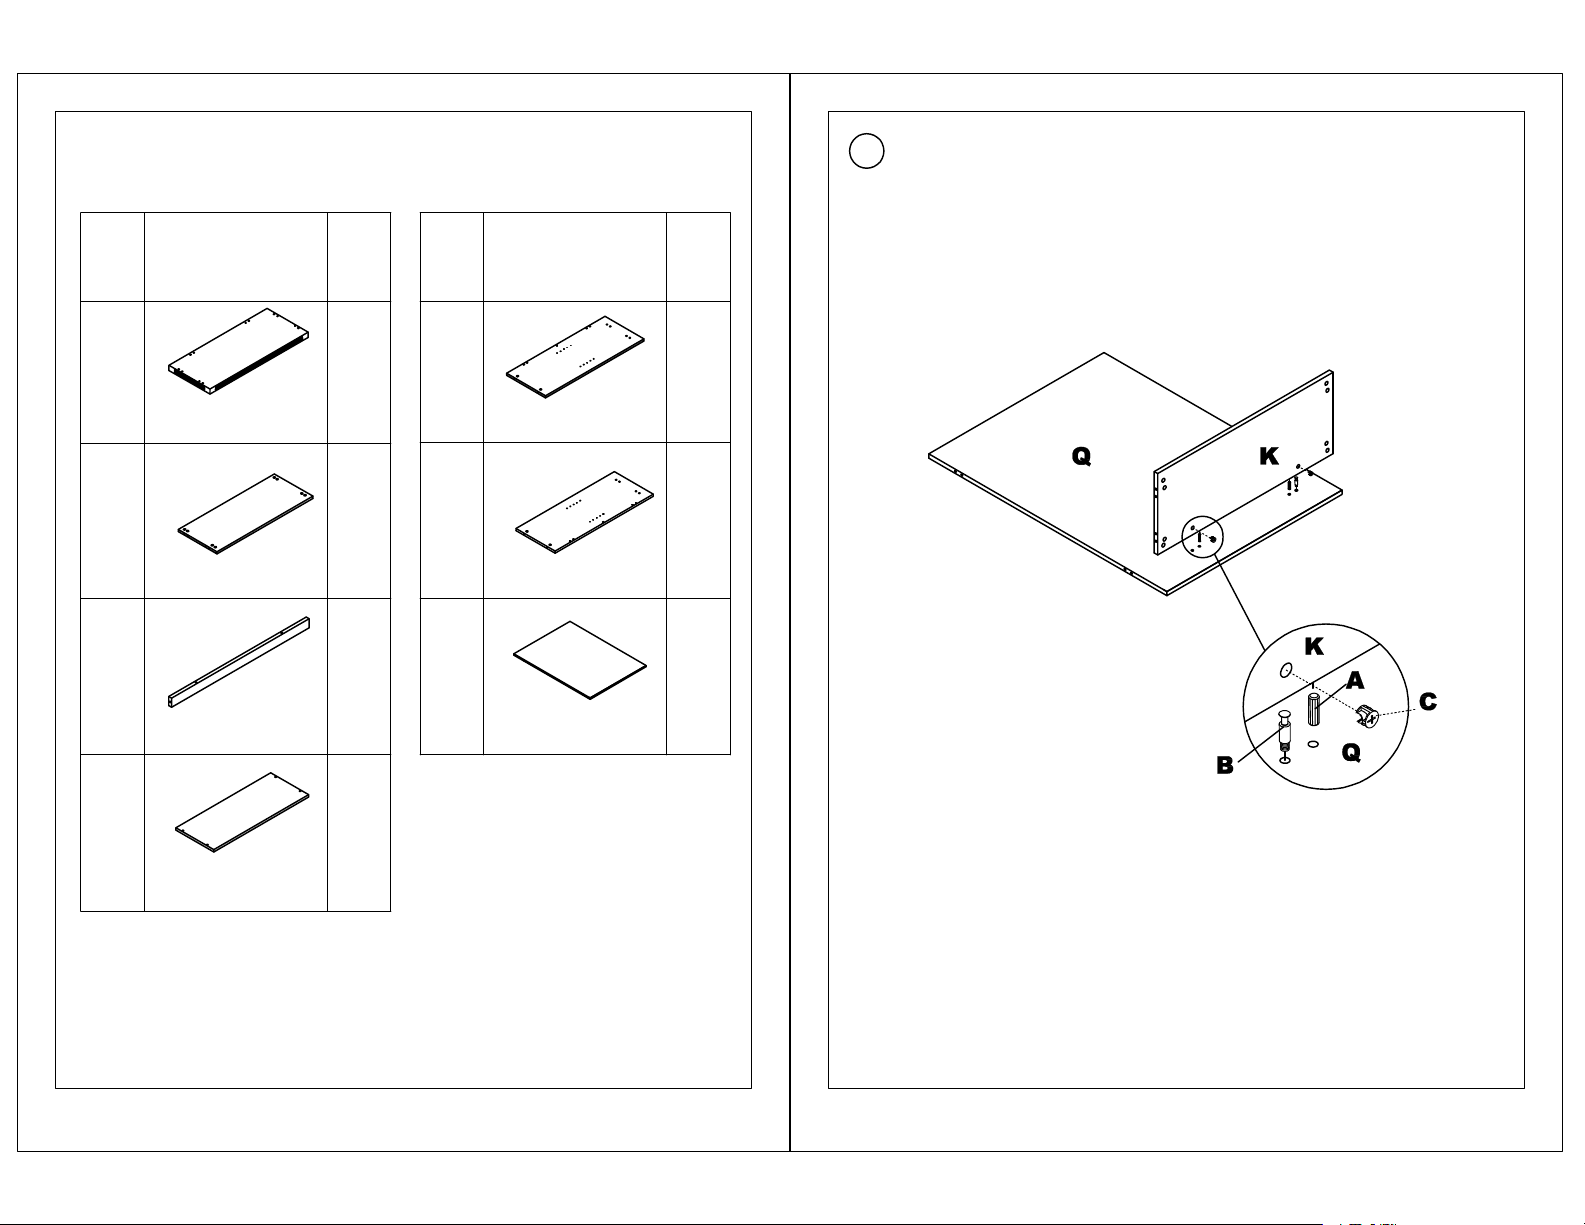
Insert Wood Dowels (A) into Bottom (K). Insert Cams (C) into Bottom
1
(K). Install Cam Posts (B) into threaded inserts in Back Panel (Q).
Attach Back Panel (Q) to Bottom (K) by turning Cams (C).
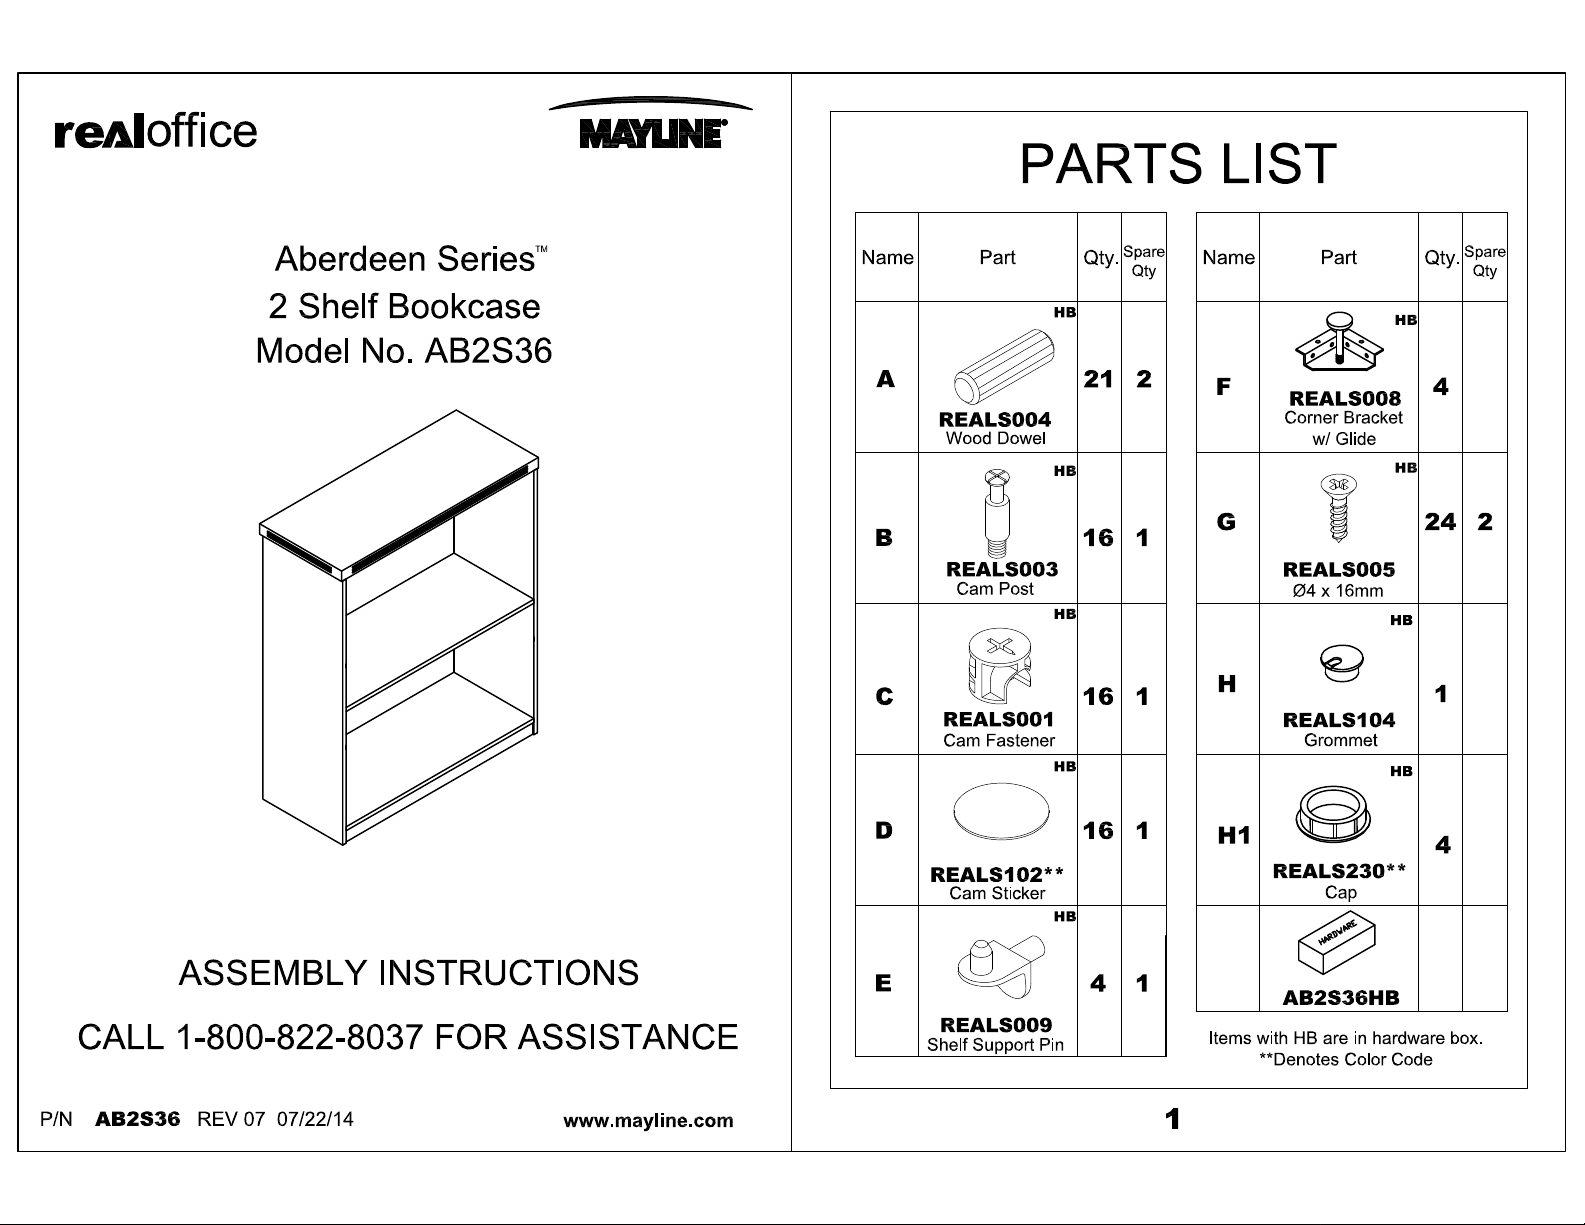
J
K
L
M
PartName
ABS36J**
Top
ABS36K**
Bottom
ABS36L**
Toe Kick
Qty.
1
1
1
1
N
P
Q
PartName
AB2SN**
Left Side Panel
AB2SP**
Right Side Panel
AB2S36Q**
Back Panel
Qty.
1
1
1
ABS36M**
Shelf
**Denotes Color Code
2 3
Page 3

Insert Wood Dowels (A) into Back Panel (Q), Bottom (K), and Toe Kick
2
(L). Insert Cams (C) into Back Panel (Q) and Bottom (K). Install Cam
Posts (B) into threaded inserts in Right Side Panel (P). Press Toe Kick
(L) to Bottom (K). Attach Right Side Panel (N) to Back Panel (Q) and
Bottom (K) by turning Cams (C).
3
Insert Wood Dowels (A) into Back Panel (Q), Bottom (K), and Toe Kick
(L). Insert Cams (C) into Back Panel (Q) and Bottom (K). Install Cam
Posts (B) into threaded inserts in Left Side Panel (N). Attach Left Side
Panel (N) to Back Panel Q) and Bottom (K) by turning Cams (C).
Q
P
K
L
NOTE: The arrow on the face of the Cam (C)
should point towards the Cam Post (B) for
proper alignment.
N
Q
P
L
C
4
5
Page 4

Insert Wood Dowels (A) into Back Panel (Q) and Side Panels (N & P).
4
Insert Cams (C) into Back Panel (Q) and Side Panels (N & P) . Install
Cam Posts (B) into threaded inserts in Top (J). Attach Top (J) to Back
Panel (Q) and Side Panels (N & P) by turning Cams (C).
Attach Corner Brackets with Glides (F) using Screws (G).
5
J
P
J
L
Q
P
N
N
Q
K
K
6
7
Page 5

Install Shelf Support Pins (E). Insert Grommet (H) into Back Panel (Q).
6
Apply Cam Stickers (D) over exposed Cams (C). Insert Caps (H1) into
adjustment holes for Levelers.
J
7
Install Shelf (M).
N
Q
K
P
H1
J
P
M
N
K
8
9
 Loading...