

Maxx air MaxxFan 5100, MaxxFan 5200 Instructions Manual
Step 1
Remove the old existing roof vent and remove all old roof sealant for a minimum of 2” entirely around the
roof opening.
Place the MaxxFan Roof Receiving Flange into the roof opening and trace a pencil line around it to verify
the clean seal area that will be required. Note that the Roof Receiving Flange must be centered in the roof
opening with the metal clips facing the sides of the vehicle (not facing the front or rear of the vehicle).
MaxxFan
TM
Installation Instructions
Model 5100 and 5200
MaxxAir – the leader in RV ventilation
From MaxxAir Vent Corporation
NOTE
The MaxxFan installs into a standard RV roof opening of 14 by 14 inches.
To determine if your roof opening is correctly sized simply remove the interior ceiling garnish trim
ring of your existing roof vent and measure the ceiling opening or verify the opening is large enough
by sliding the
MaxxFan interior Garnish trim ring into the opening.
Due to the rear exhaust louvers, the
MaxxFan requires a roof that is clear of obstructions such as air
conditioners, storage boxes, etc. for at least 8 inches to the rear of the existing standard roof vent
flange outside rear edge.
The
MaxxFan is designed for a minimum roof thickness of 1 1/8 inches to maximum of 6 1/2 inches.
If your roof thickness is less than 1 1/8 inches build additional thickness at the ceiling opening using
wood or other suitable material.
The
MaxxFan requires a 12 Volt 5 amp service. Confirm that the circuit you intend to use will accom-
modate the additional service load. Use the proper gauge stranded wire for electrical connection.
P/N 10-50201 - Rev.5/01/04
Patent Pending
Step 2
Apply factory recommended roof sealant to
the area traced with the pencil. Apply roof sealant
carefully so that no gaps are present that may
allow water to enter.
Step 3
Fasten the Roof Receiving Flange to the roof
with the screws provided.
Apply additional roof sealant over the screw
heads and around the edge of the roof flange.
Caution: Remove main vehicle
power before connecting
12 volt power to the
MaxxFan!
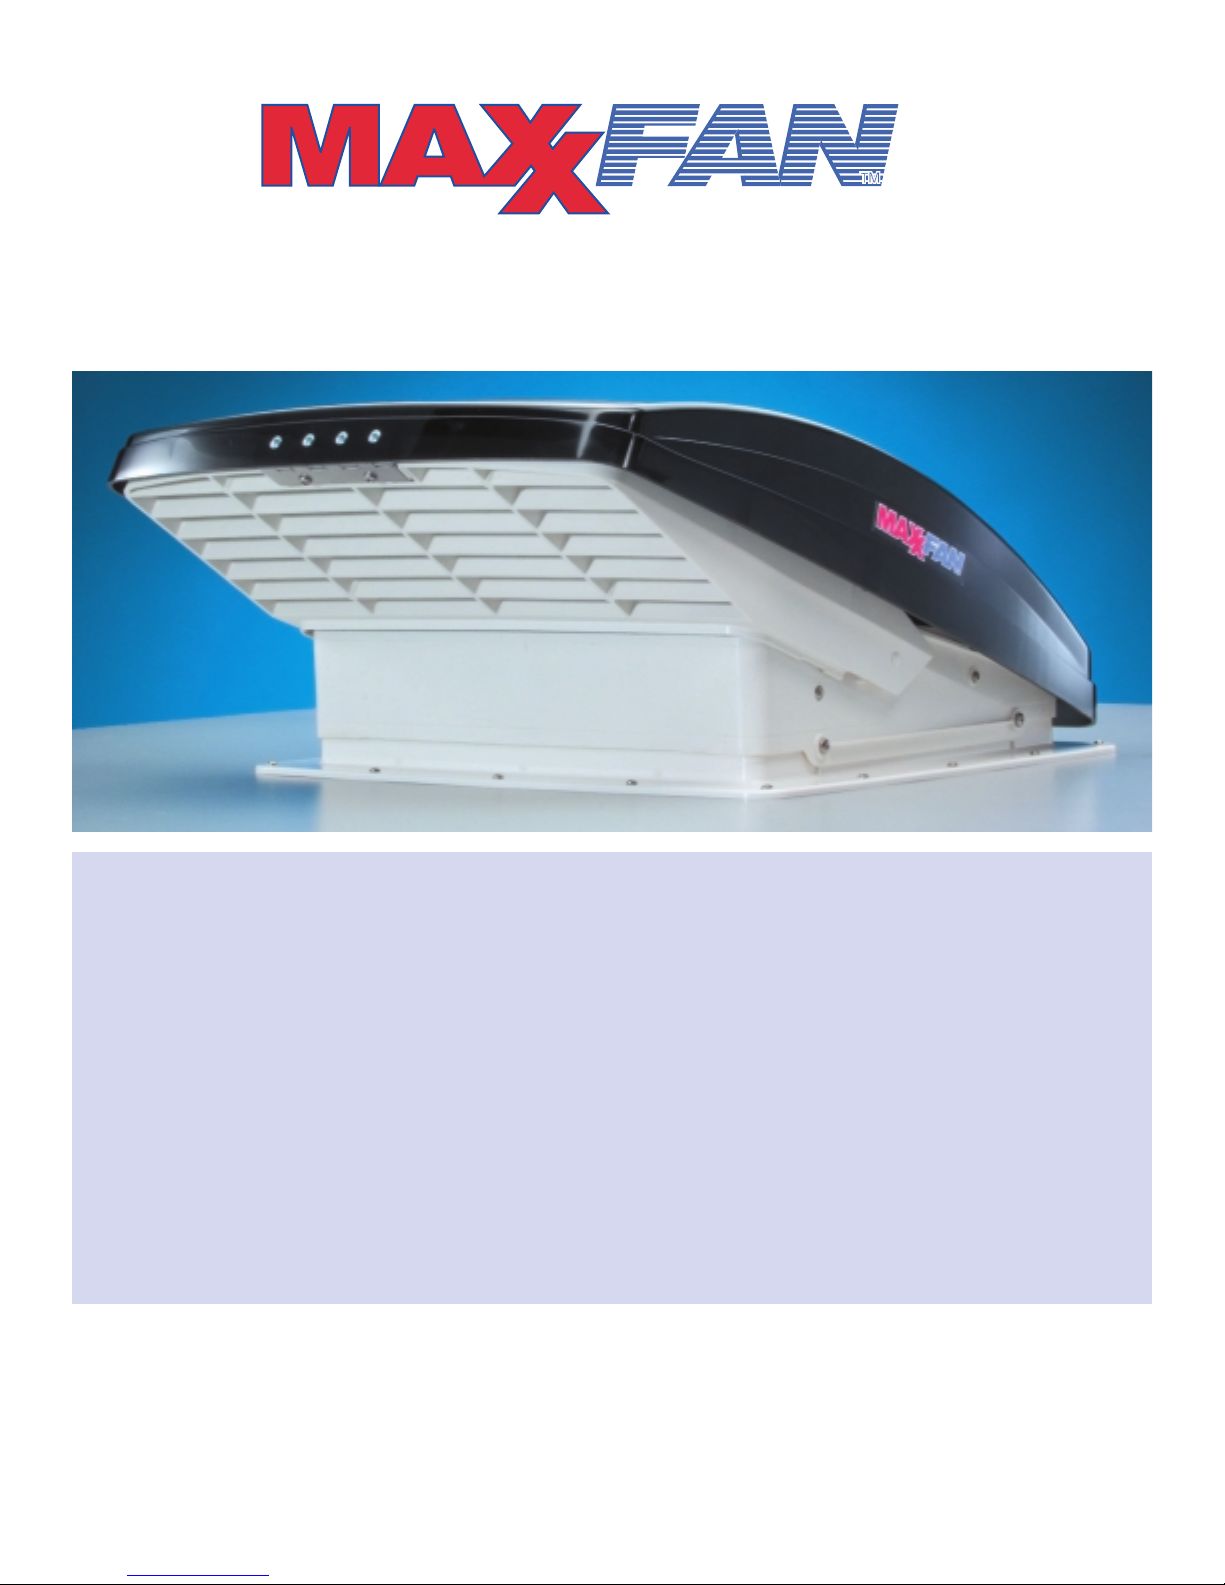
Step 4
Using the insulated electrical connectors
provided connect the vehicle 12 volt power to the
two
MaxxFan power wires located on the driver
side of the MaxxFan.
Note: The MaxxFan black wire identified with a
tag showing (+) must be connected to the
vehicle 12 volt (+) positive supply.
Disconnect main vehicle power
before proceeding!
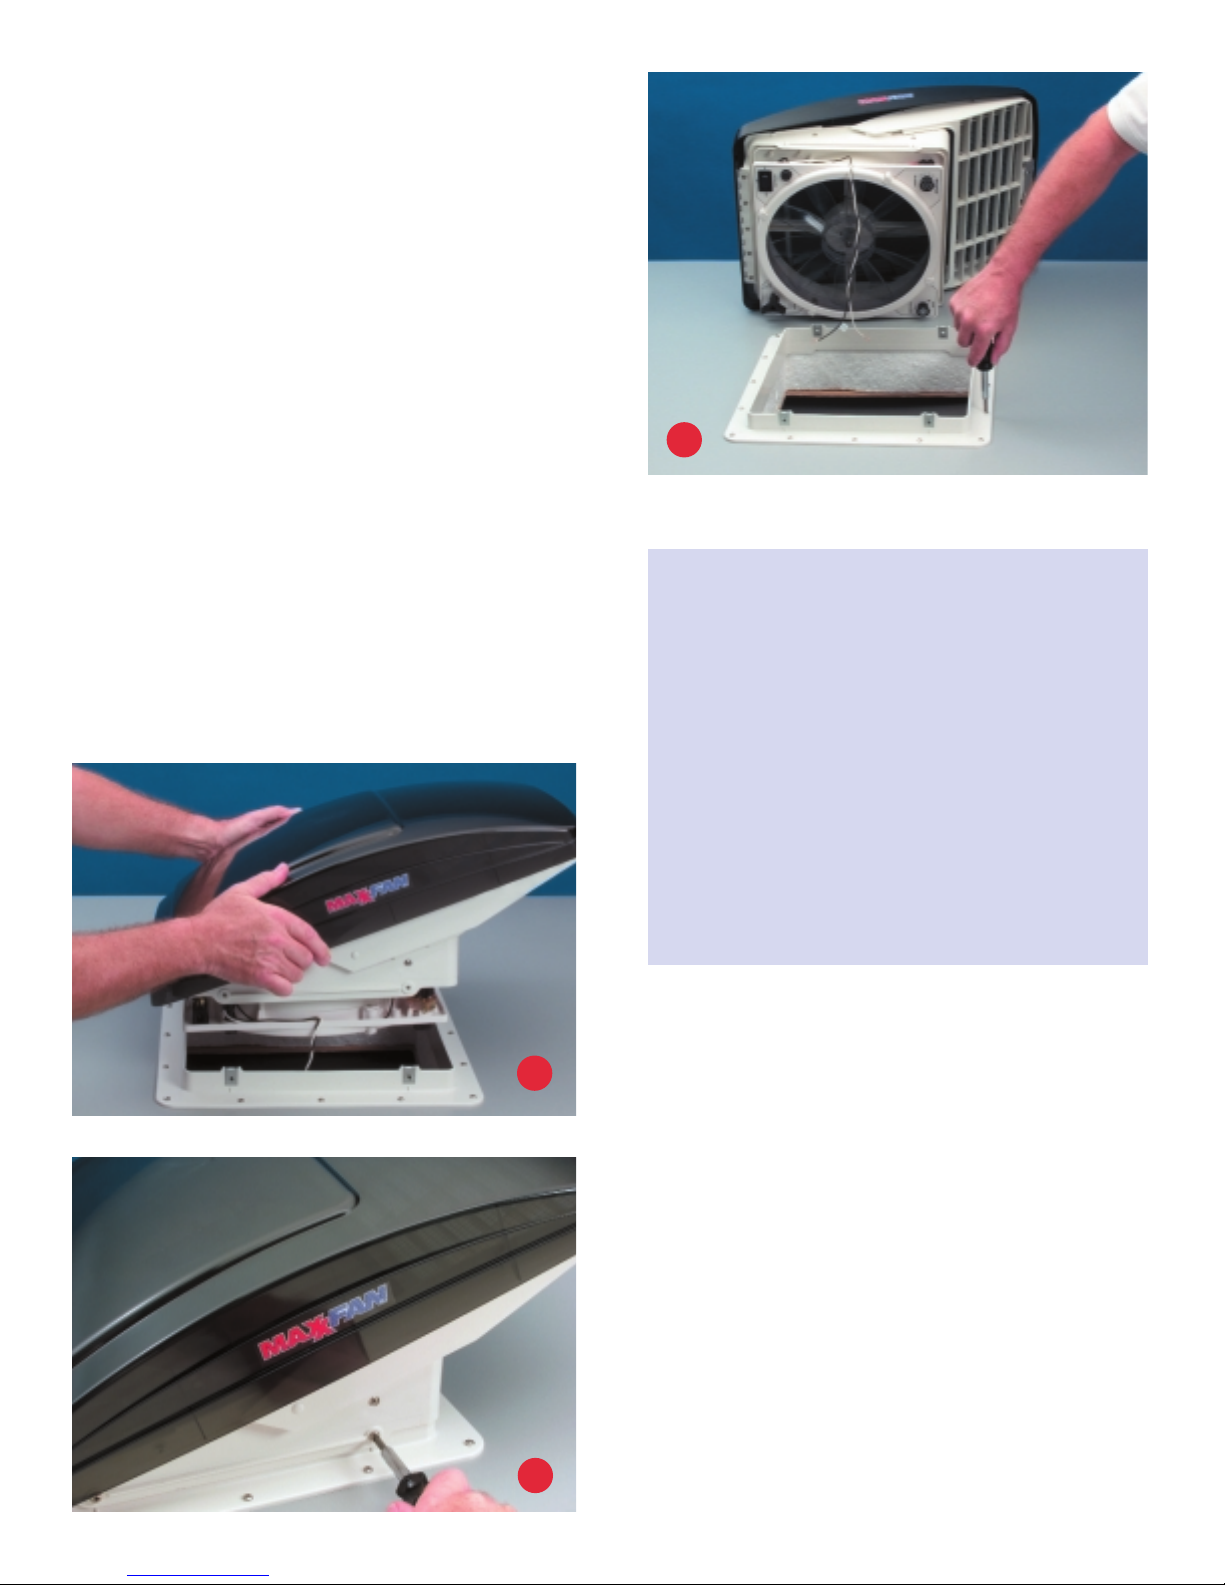
Step 5
With the MaxxFan open and the exhaust
louvers facing the rear of the vehicle lower the
MaxxFan onto the Roof Receiving Flange.
Make sure the power wire slide to the vehicle
interior and do not become entangled on the
Roof Receiving Flange upward edge.
Step 6
Verify the MaxxFan is fully seated down on the
Roof Receiving Flange and fasten the
MaxxFan
to the Roof Receiving Flange using the four 3/4
inch by #10 Stainless Steel screws provided.
This completes the roof top portion of
the installation.
NOTE
After making the 12 volt power connections you may re-apply vehicle power and
temporarily operate the
MaxxFan to verify
proper wire connection. Please note that the
MaxxFan motor only operates when the
MaxxFan is fully opened. Use the Vent Open
Knob and fully raise the
MaxxFan vent lid.
Verify that the fan operates in exhaust
when the exhaust switch is selected, if not
then reverse the 12 volt power leads to the
MaxxFan and verify correct operation.
3
6
5
 Loading...