

Page 1
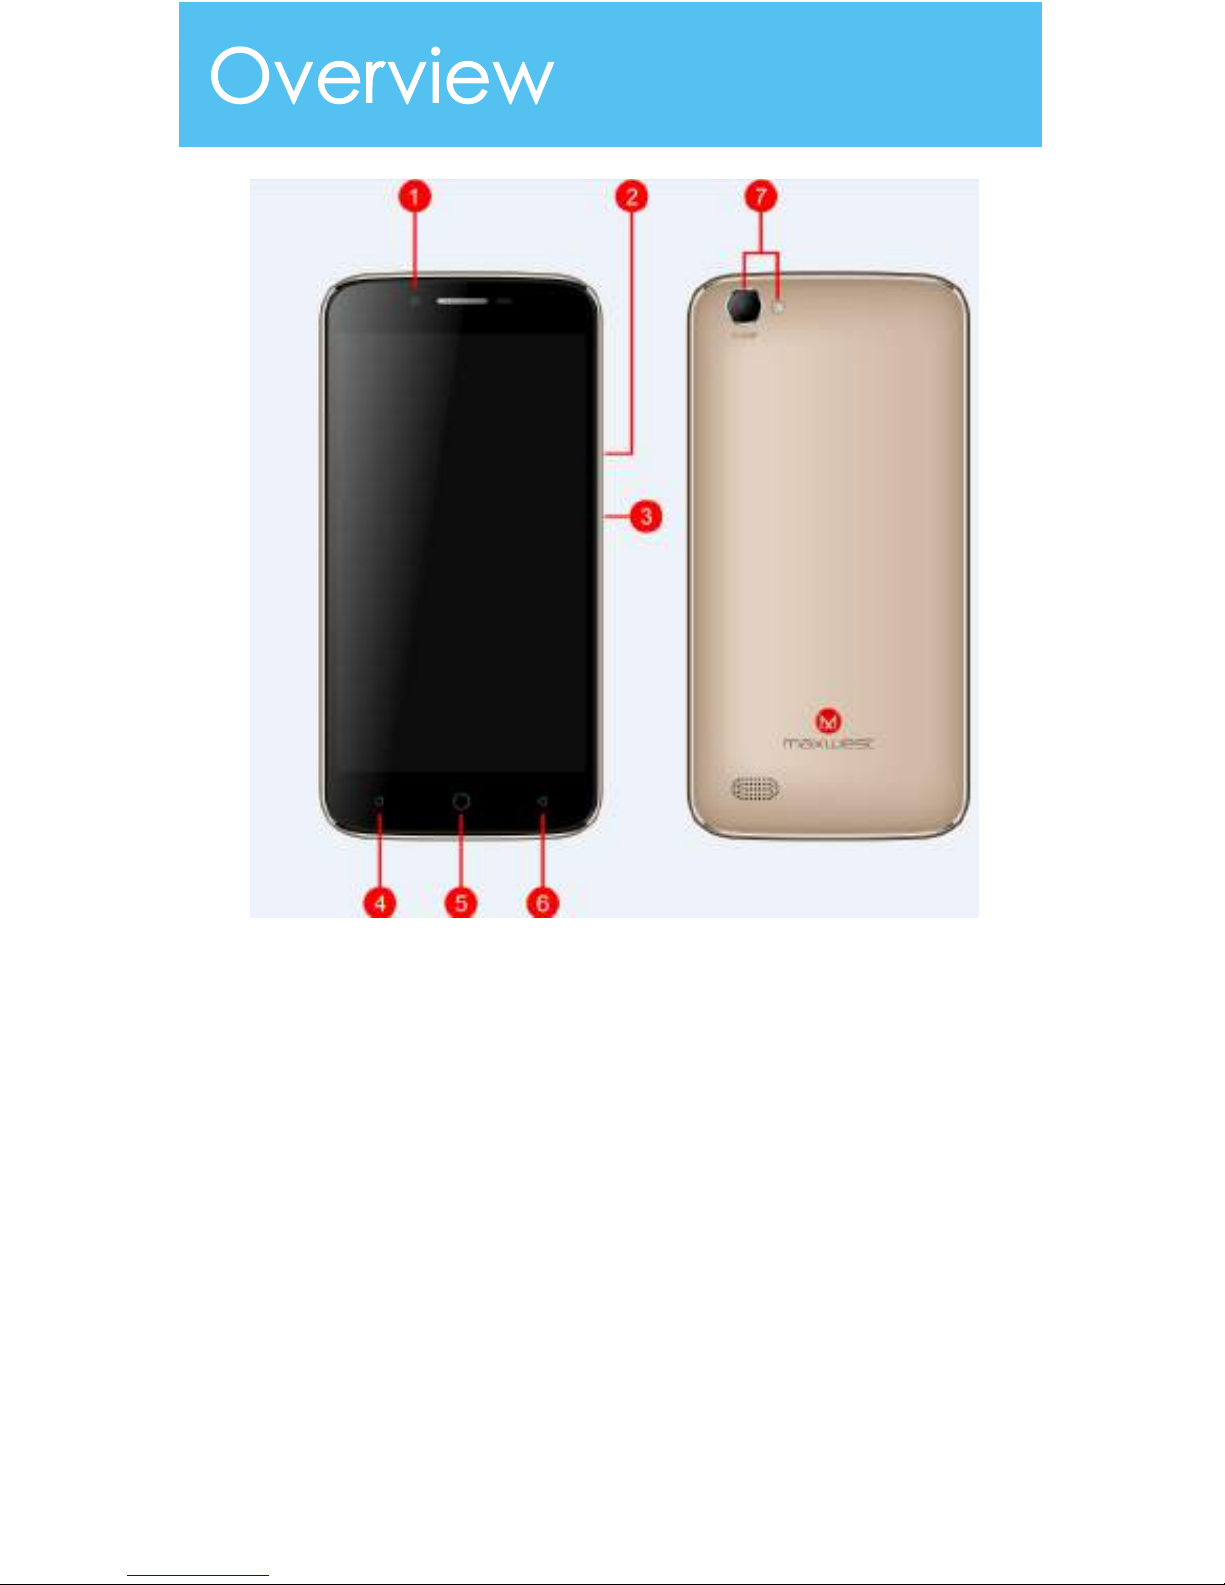
① Front Camera
② Volume Keys
③ Power Key
④ Menu
⑤ Home
⑥ Back
⑦ Flash and Rear Camera
Page 2

A SIM card contains your phone number and other necessary data. Your
device has dual SIM slots that both supports 4G(LTE) SIM cards.
1.Make sure the device is turned off. Hold the firmly and use eject tool to
loosen the SIM card tray.
2.Locate the SIM card slot and insert the proper SIM card into the proper
slot. For more information on SIM card installation,check out the included
SIM Card & Micro SD Card Installation Guide.
3.To turn on/off a SIM card go to Settings > SIM cards then slide the SIM
card sliders. To turn on/off a SIM card,s data connection, go to Settings >
Data usage, turn on the “Cellular data” option.
Power Key:
To power on/off it, press and hold power key for a few
seconds on top of your phone. When it is ON, press the power key once
to activate or deactivate the screen.
Home key:
Touch the key to return to the home screen. In idle screen,
touch and hold the key to view recently accessed features.
Options key:
In standby mode, touch the key to set wallpaper,
manage apps, access to system settings. Touch it to view menu options.
Back key :
Touch to go back to the previous menu.
Search key :
In standby mode, tap to open search page. In many
applications, it activates a search box to search within the application.
New batteries are shipped partially charged. Before using your device,
Page 3

New batteries are shipped partially charged. Before using your device,
install and charge the battery. Batteries perform best after several full
charge / discharge cycles.
Please charge the battery using the following methods:
1.Charge the phone by connecting it to a computer via the USB cable.
2.Connect the USB cable to the phone and the AC adapter. Plug the AC
adapter into an electrical outlet to start charging.
As the battery charges, an icon will appear in the status bar of the home
screen. When the battery is fully charged, a full battery icon appears on
screen.
Do not remove the battery while the device is charging.
Use only the AC adapter & USB cable provided with your
device.
For safely, the battery will stop charging if in danger of
overheating.
Page 4
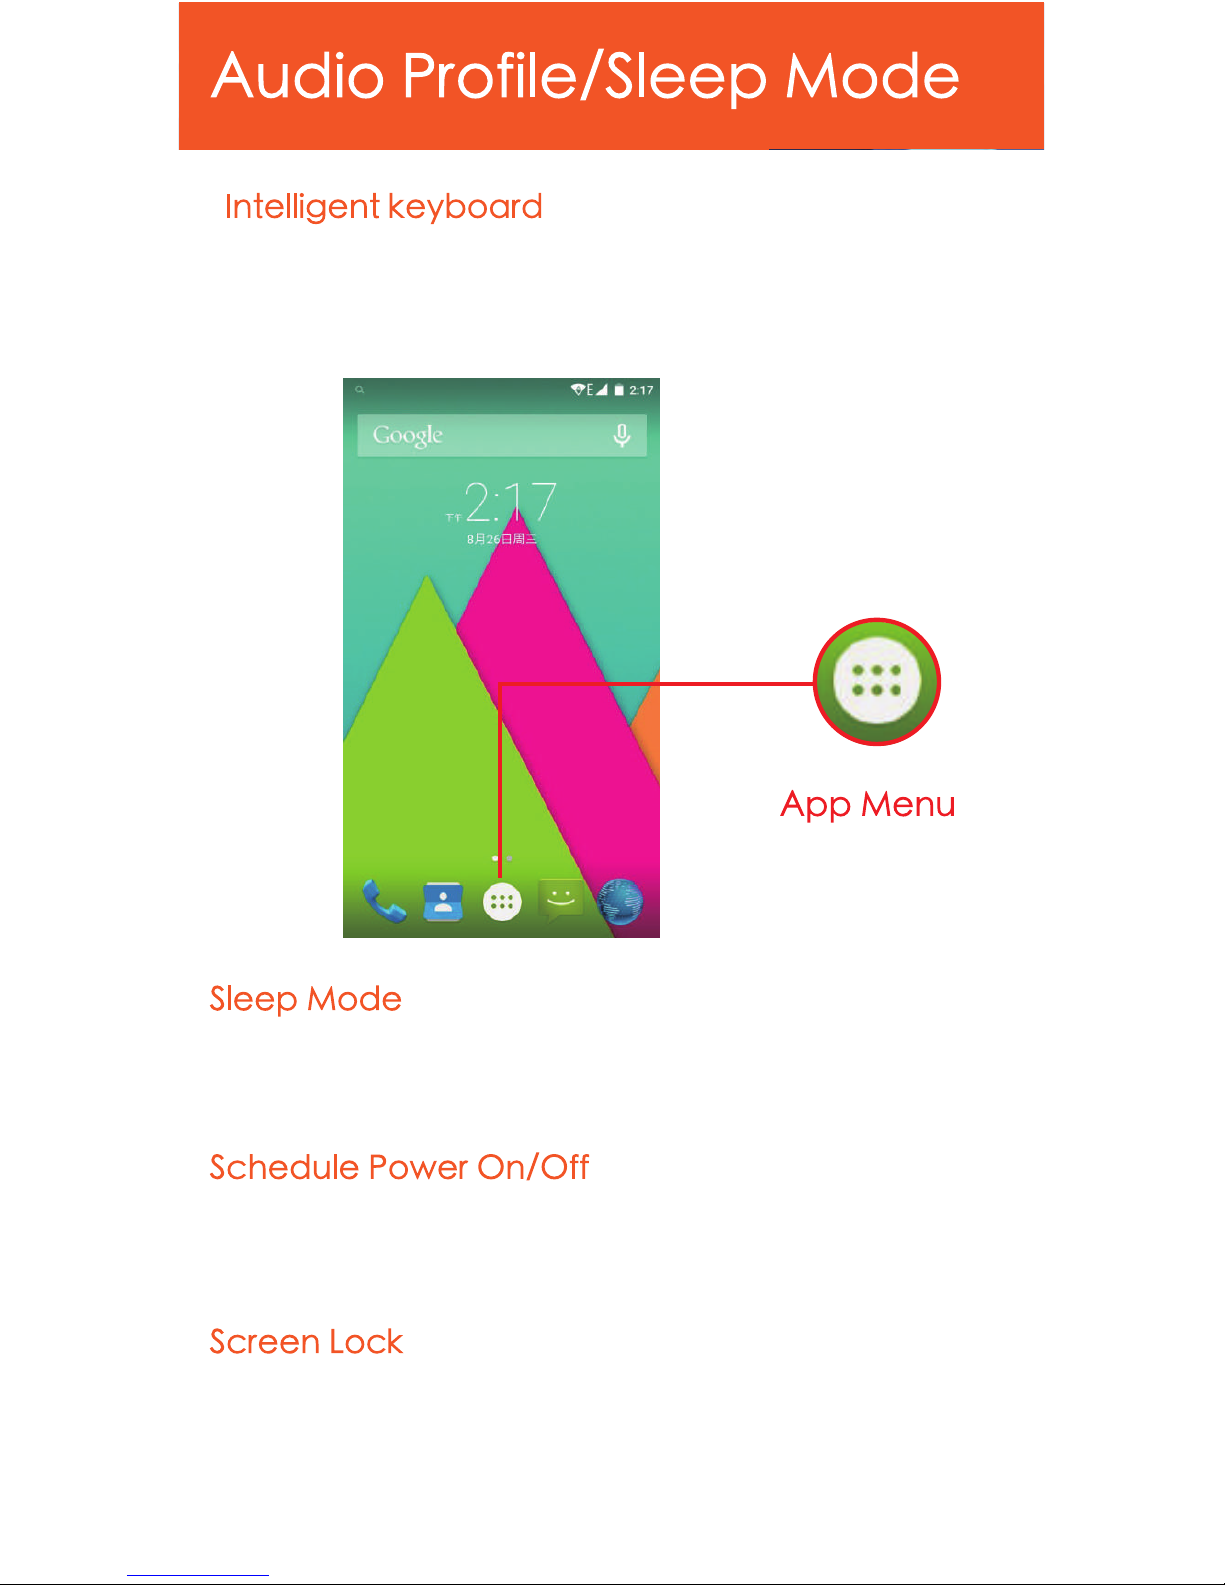
From the home screen, touch “APP Menu” & select “Settings” , Go to
“System profiles” and select the model that you want to. For your
Convenience, you may also select Silent Meeting, or Automobile options.
Turn on sleep mode to save your battery power.
1.On the home screen, touch “App Menu” & select “Settings”
2.Select “ Display” .
3.Select “Sleep” and choose a time interval from the list.
1.On the home screen, touch the “APP Menu” & select “Settings” .
2.Select “ Scheduled power on & off” .
3.Click on the time to change the time and day for the phone to turn
on/off automatically.
1 .On the home screen, touch the “APP Menu” & select “Settings” .
2.Select Security then select Screen lock .
3.Select the desired type of lock & follow the prompts to set up.
Page 5
Icons
IconsIcons
Icons Descriptions
DescriptionsDescriptions
Descriptions Icons
IconsIcons
Icons Descriptions
DescriptionsDescriptions
Descriptions
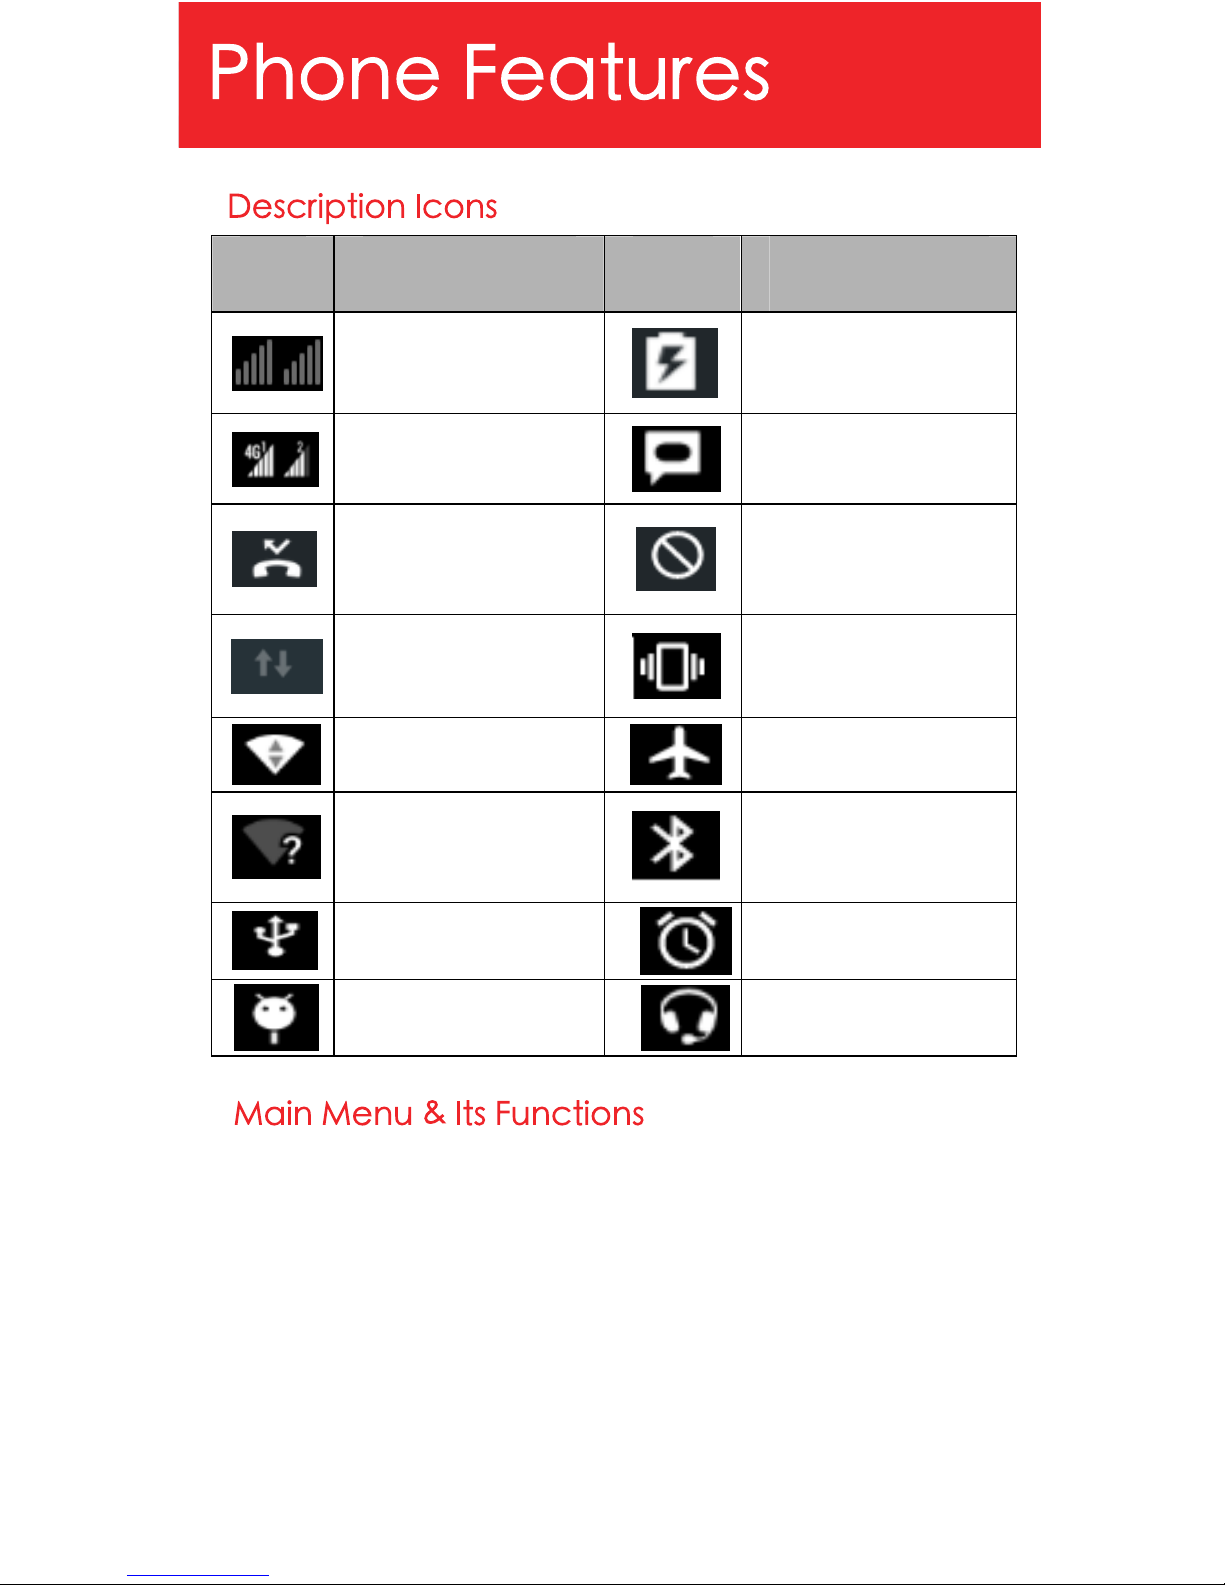
Signal searching
Battery charge.
Signal strecgth
New message
You have missed
calls
Silent mode
Data Conn off
Meeting mode
Wi-Fi network
Airplane mode.
New Wi-Fi network
detected
Bluetooth icon
USB connected
Alarm set
USB debugging
Earphone insert.
Select App Menu to enter the main menu---
Allow you to view a list of features available in your phone.
1、Browser
By default browser access to the Internet or use Chrome browser.
2、Calculator
Allows you to make tedious calculations quickly.
3、Calendar
View the calendar & add events.
4、Clock
Page 6

After entering Clock, touch to set Alarm; touch to
access to world cities; touch to access to Timer; touch to
access to Stopwatch.
5、Camera
Your product supports for taking photos and video recording. Before
taking a photo or video recording, you can set the following options:
Flash mode, Store location, Picture size, Picture quality, Countdown timer,
Storage Position, Continuous Shot, Face Detection, Select ISO, Exposure,
White balance, Timestamp, Focus mode, Anti Banding, Redeye
Reduction, Restore to Default Settings, etc. You can press the
Thumbnailpicture to view, edit, share the picture or video. Press ‘Menu’
for more options.
6、Contact
To see your list of Contacts. Access phonebook through this function.
7、 Downloads
In main menu, touch to enter, you can view the downloaded
files or applications.
8、FM Radio
In main menu, touch to enter FM Radio interface, then you can
listen to FM radio freely.
9、Gallery
Allow you to save & view photos & videos.
10、Play Store
Log in to your Gmail account to view all the applications & download
from thousands of applications available under the Google Market
called Play Store.
Note:
To use this app please connect to an internet connection.
11、Messaging
Allow you to view messages sent & received as a thread.
Page 7

Page 8

12、Music
View the list of songs available in your phone. View the artists, albums,
playlists & more.
13、Phone
Allow you to make quick outgoing calls.
14、File Manager
You could install the files in APK format & also view your files.
15、SIM Toolkit
This service is provided by the operator. It provides many types of
personalized message services.
16、Sound Recorder
Allows you to record sounds.
17、Videos
View from list of videos.
Page 9

1.Touch the phone icon.
2.Select SIM1 card or SIM2 card.
3.Click on a contact from your contact list to
make a call.
Gravity 5LTE automatically corrects and suggests words as you type.
Cut Copy and Paste.
Touch and hold text content to bring up the magnifying glass, and then
slide your finger to move the insertion points. Then choose to cut copy, or
paste. It is very easy to copy text from web pages, email, or text
messages.
Page 10

Gravity 5LTE supports Wi-Fi which allows you to co nnect with a Wireless
connection. This is useful for surfing internet on phone.
1、Enter "Settings" interface & Wi-Fi. Trun it on, and select the network you
want to connect.
2、Enter the password, select the connect.
Page 11

You may log-in to your e-mail accounts from the phone to access your
e-mails.
From the Home screen select “Email” .
Enter your email address, password and tap “Next” .
Select which type of email account you are setting up and complete
settings.(POP3 / IMAP / Microsoft Exchange Account)
You will need to enter your user name, password, and server information
depending on the type of email account or you can change the settings
by tapping “Manual setup” at the top right corner screen. Tap “Next”
and select “OK” to accept the activation notification.
1.Press MENU & select “Compose” .
2.Add recipients by typing a name or email address in the
“To” field. Matching contacts will appear. Select a recipient or continue
typing in the email address to send to multiple contacts.
3.Once finished typing the mail, select “Send”, “Save as draft”, or
“Discard” .
4.The reply tab contains “Reply”, “Reply all” and “Forward” options.
1.Go to Inbox to display messages.
2.Touch & hold the message you want to delete.
3.Select “Delete” .
Page 12

Connect the enclosed Micro USB to USB cable to your smart phone and
computer.
Once connected successfully, on your phone, slide the top menu down
and click on “USB connected”,then, press "Turn on USB storage" button.
A new storage named “Gravity 5LTE” will appear on your “My
Computer" . Click in it to review files in the smart phone and /or to transfer
documents between devices. When finished, press” Turn off USB storage”
button on phone to disconnect.
Note: Photos taken with the camera will be saved under the a DCIM"
folder. Screenshots captured will be saved under “Pictures” folder. Put
Music files in the “Music” folder for the files to be played properly.
Press Volume(-) and power button at the same time to capture"
Screenshot" . All captured screenshot will be saved under gallery.
Page 13

Any Changes or modifications not expressly approved by the party
responsible for compliance could void the user's authority to operate the
equipment .This device complies with part 15 of the FCC Rules. Operation
is subject to the following two conditions:
(1)This device may not cause harmful interference, and
(2)this device must accept any interference received, including
interference that may cause undesired operation.
Note: This equipment has been tested and found to comply with the limits
for a Class B digital device, pursuant to part 15 of the FCC Rules. These
limits are designed to provide reasonable protection against harmful
interference in a residential Installation. This equipment generates, uses
and can radiate radio frequency energy and, if not installed and used in
accordance with the instructions, may cause harmful interference to
radio communications .However, there Is no guarantee that Interference
will not occur in a particular installation. If this equipment does cause
harmful interference to radio or television reception, which can be
determined by turning the equipment off and on, the user is encouraged
to try to correct the interference by one or more of the following
measures:
—Reorient or relocate the receiving antenna.
—Increase the separation between the equipment and receiver.
—Connect the equipment into an outlet on a circuit different from that to
which the receiver is connected.
—Consult the dealer or an experienced radio/TV technician for help.
SAR tests are conducted using standard operating positions accepted by
the FCC with the phone transmitting at its highest certified power level in
all tested frequency bands, although the SAR is determined at the highest
certified power level, the actual SAR level of the phone while operating
can be well below the maximum value, in general, the closer you are to a
wireless base station antenna, the lower the power output.
Before a new model phone is a available for sale to the public, it must be
tested and certified to the FCC that it does not exceed the exposure limit
established by the FCC, Tests for each phone are performed in positions
and locations (e.g. at the ear and worn on the body)as required by the
FCC.
For body worn operation, this model phone has been tested and meets
the FCC RF exposure guidelines when used with an accessory designated
for this product or when used with an accessory that Contains no metal
and that positions the handset a minimum of 1.0 cm from the body.
Non-compliance with the above restrictions may result in violation of RF
exposure guidelines.
Page 14

 Loading...