

Maxwell Thomas MORNINGSIDE OVERBED TABLE Instructions Manual
Maxwell Thomas
®
MORNINGSIDE OVERBED TABLE
Assembly and Operating Instructions
Ensamblado de Mesa de Cama e Intrucciones de Uso
• Important Warnings
To avoid serious injury and/or death to a patient or resident, follow ALL
instructions and these guidelines:
• This product is designed ONLY as patient/resident convenience as a
surface for reading, eating or keeping small personal items, such as
glasses, within reach.
• The weight limit for this product is 50 lbs. (22 kg); the weight should be
evenly distributed over the top of the product’s table.
NOTE: The hinged tabletop extension has a weight capacity of 10 lbs.
• Overloading this product could result in the product breaking as well as
damage to property and/or serious injury.
• This product should NOT be used as a walker, to assist a person in sitting
down or standing up, to prevent or brace a person’s fall, or to transport
persons. Use ONLY as directed.
• This product is designed for indoor use ONLY within close proximity of skilled
caregivers. It is not designed to hold electrical items, such as televisions, and
should be kept away from open flames and excessive heat.
• Inspect the product for damage before each use. DO NOT use the
product if it appears to be damaged or unstable, and DO NOT alter the
product in any way.
• DO NOT overtighten the screws or use power tools when assembling
this product.
• The weight limit on the flip-up surface is 10 lbs.
Tools Needed
Herramientas Necesarias
9
⁄16"
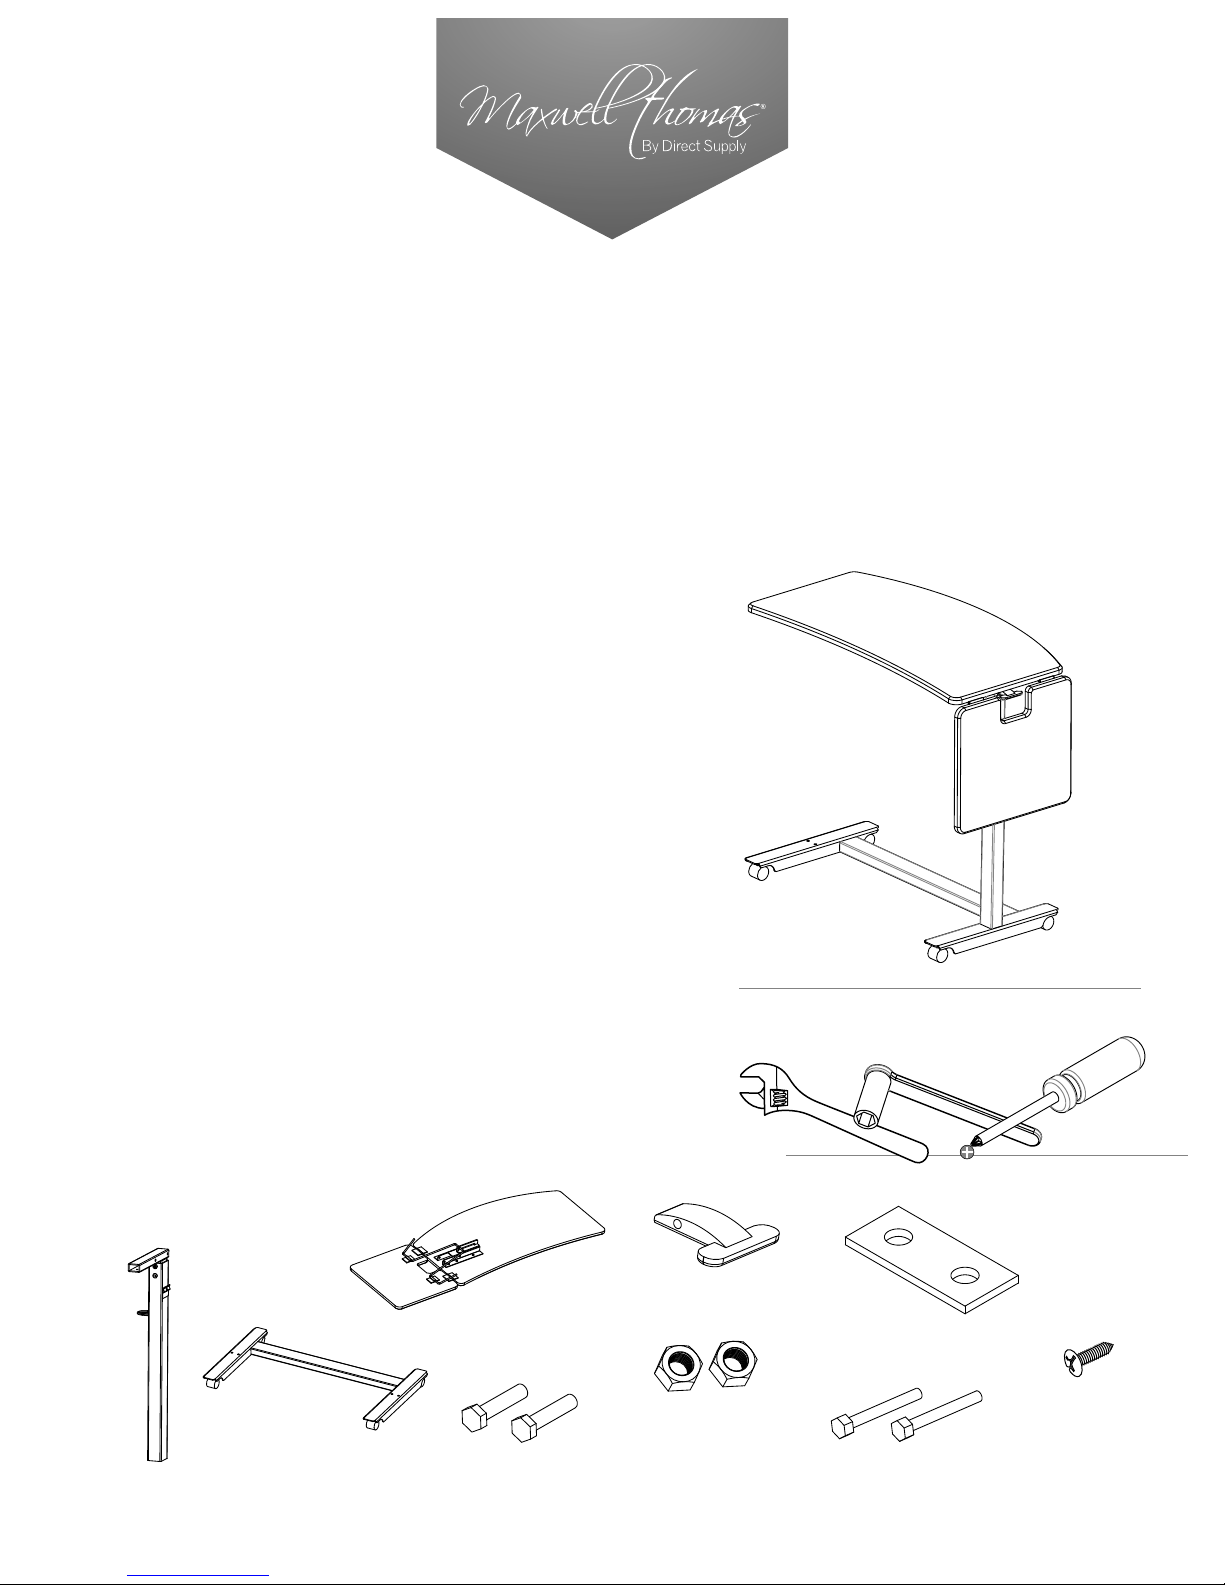
Components and Parts
Componentes y Piezas
Tabletop Assembly (1)
Caster Base
Assembly (1)
Column/Caster Base Bolts (2)
Column Assembly (1)
Height-Adjustment Paddle (1)
Column/Tabletop Nuts (2)
3
⁄8" - 16 x 1"
1-800-634-7328 DirectSupply.com
Column/Caster Base Washer
Column/Tabletop Bolts (2)
1
⁄4" - 20 x 2"
Column Screw (1)
Pan Head 1⁄4" - 20 x 3⁄8"

2
3
1
Place the overbed tabletop assembly so
the hinge mechanism is facing upward.
Be sure the top is protected to prevent
scratches during assembly.
4
Position the overbed table column so the ‘T’ is facing downward, and make
sure the height-adjustment paddle is in place. Insert the square tube of the
column into the tabletop bracket of the tabletop assembly.
NOTE: The bolt holding the height-adjustment paddle in place will need to be
removed when inserting the column bracket into the tabletop bracket – make
sure the paddle stays in the same place when removing this bolt to prevent
the spring mechanism pin from falling out.
Position the
overbed
table column
assembly
so the ‘T’
is facing
upward.
Insert the two tabletop bolts and tabletop nuts to secure
the column and tabletop assemblies.
Place the height-adjustment paddle into the
square tube, and insert one of the column/
tabletop bolts through the tube and handle to
temporarily hold it in place.
NOTE: The curved portion of the paddle must
be facing upward.
5
2
6
Connect the caster base
assembly to the column
assembly. Place the caster
base washer in the caster
base and insert the caster
base bolts. Tighten using a
9
⁄16" socket. Make sure the
concave side of the tabletop
is facing the open side of the
caster base.
7
Once the overbed table is fully assembled, carefully place
the overbed table on its casters. Remove the top screw
from the column and discard it. Install the column machine
screw into the upper hole of the outer column and tighten.
NOTE: The bottom screw MUST be left in place or it will
need to be repaired by the manufacturer.
 Loading...