

Page 1
USER’S & INSTALLATION
MANUAL
AIR CUR
TAIN
MAFH036-E2
MAFH048-E2
MAFH060-E2
THANKS FOR PURCHASING AIR CURTAIN, PLEASE READ IT CAREFULLY BEFORE USING
THANKS FOR PURCHASING AIR CURTAIN, PLEASE READ IT CAREFULLY BEFORE USING
Maxwell
Maxwell
Page 2
1、PRODUCT INTRODUCTION
As one of the new top-class products for modern decoration, air curtain is also matched with the airconditioner. It is installed at the entrances of supermarket, theater, meeting room, hotel, office room,
working shop and storeroom to prevent the dust, mosquito and nocuous air, and so on.
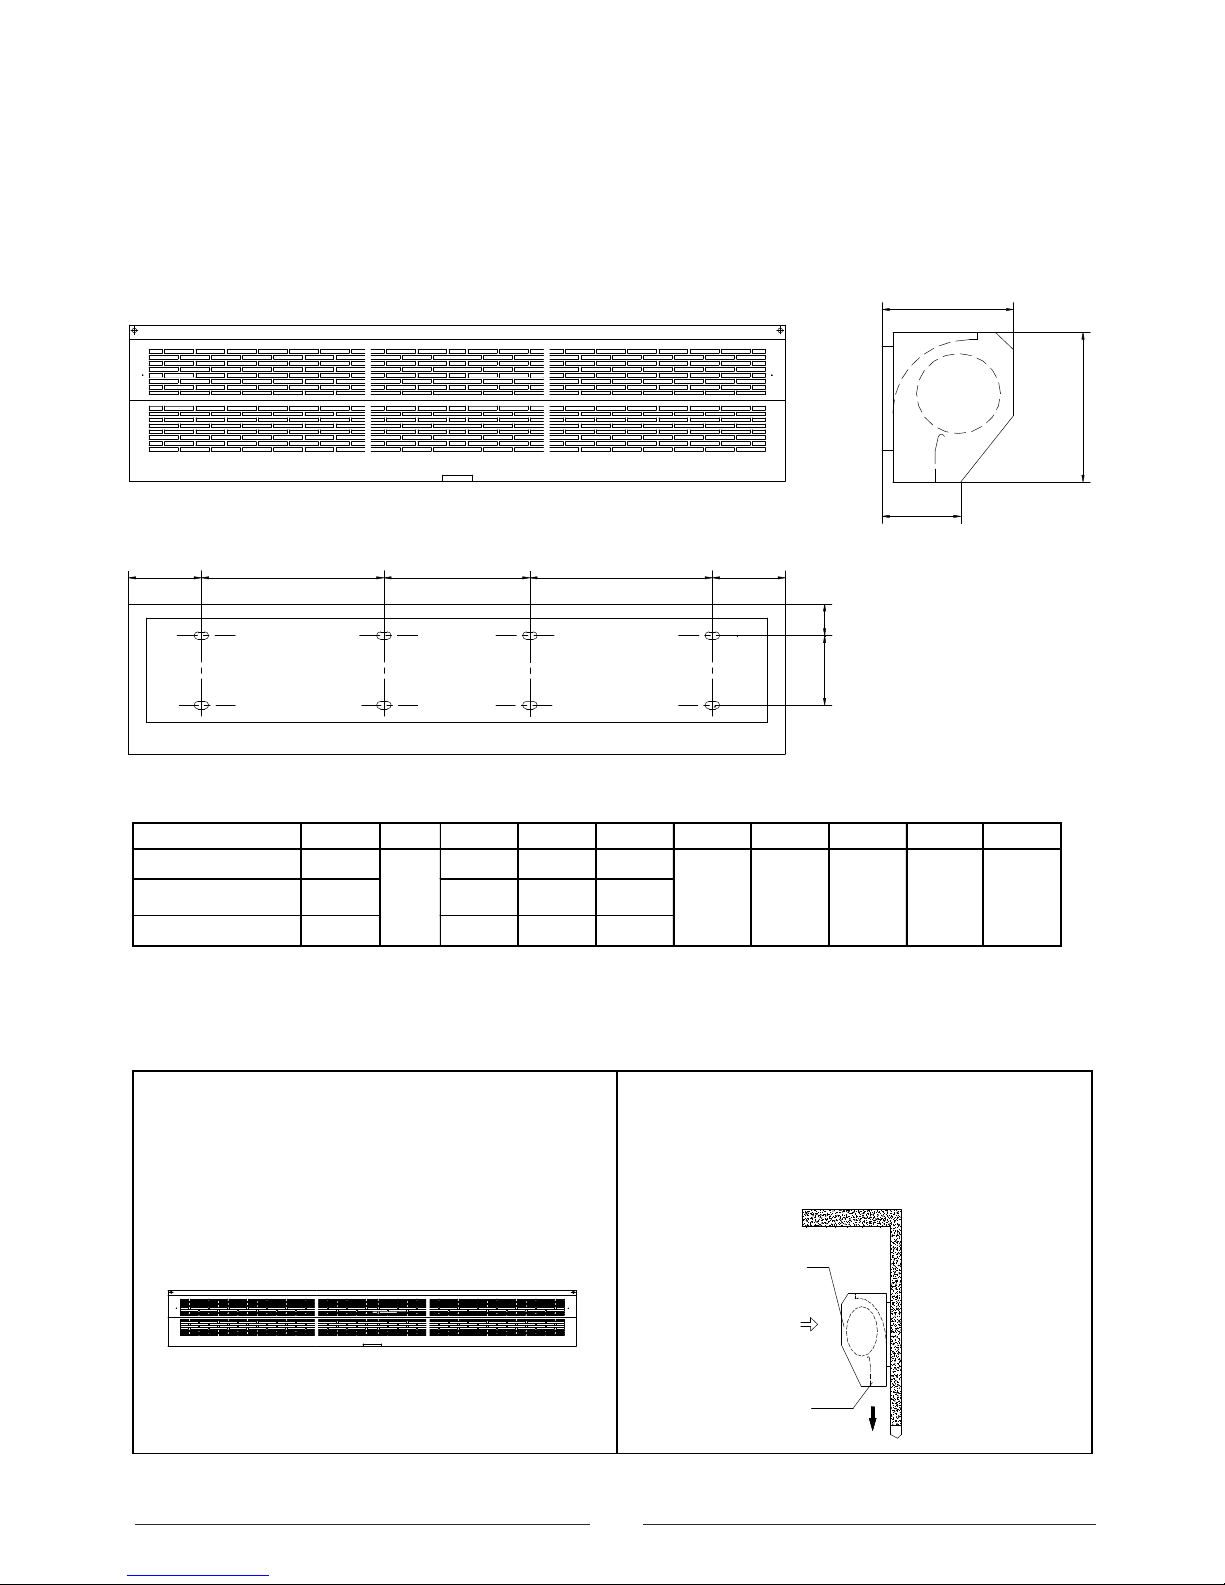
2、IDENTIFICATION & INSTALLATION DIMENSIONS
FRONT
J
G
B
F
I
SIZE
H
ECB
BACK
D
Units: in
MODEL A B C D E F G H I J
MAFH036-E2
35.4 1.2 11.4 22 --- 2 4 8.5 7.1 4.1
MAFH048-E2
47.2 16.9 10.6 16.9
MAFH060-E2
59 22.4 10.6 22.4
3、INSTALLATION CAUTION
Must follow the following asking when installing air curtain:
3.1Please install the unit in a sturdy place to
avoid the shaking and ensure its security (because it
maybe causes the wall becoming flexible or shaking
and noise.
ミミミ
ミミミ
ミミミミミミ
ミミミミミミ ミミミミミミ
ミミミミミミ
3.2 Please install the unit inside the room.
OUTDOOR
OUT
INDOOR
IN
2
Page 3
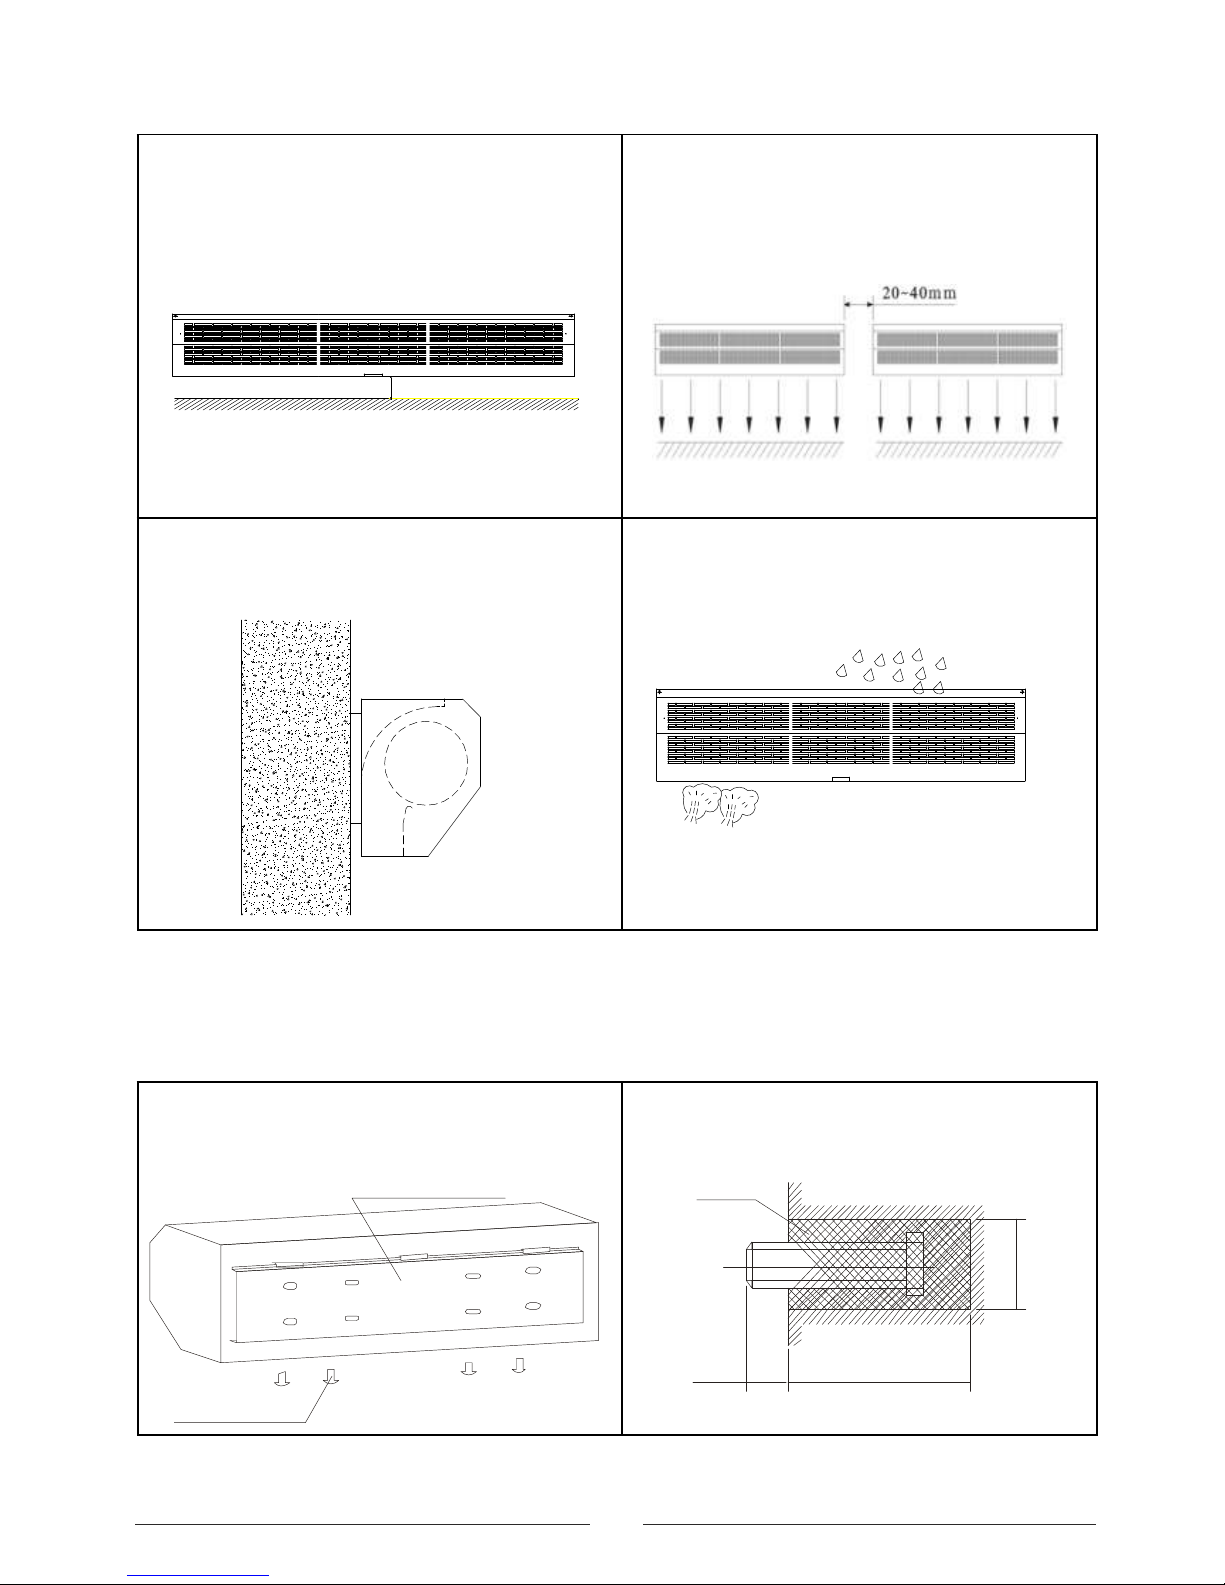
3.3 Don’t install the unit too low, no less than 2.3
meter from the ground.
2
.
3
m
3.4 When the entrance is wider than the unit, it is
recommended to install two or more units in
parallel. In this case, provide 20-40mm gaps
between the units.
3.5 Don’t allow gaps between the unit and the
wall. When hanging it from the ceiling, using the
enclosed ceiling braskets.
3.6 Don’t install the unit in a place where it is
splashed by water, exposed to excessive steam,
explosive gas or corrosive gas.
4、INSTALLATION
A、Installing on the concrete wall:
4.1.1 Removed the mounting plate
Unclamping the fixed screws on the back of
main body to removed the mounting plate.
MO UNTIN G PIATE
FIXING SCRE W
4.1.2 Fix the bolts in the proper position (Decide
the position with the mounting plate and pour
cement into the bolt holes.)
CONCRETE
13-15mm
70 mm
φ 40- 50mm
3
Page 4

4.1.3 When the cement has freeze, fit the mounting
plate (use the washer and nut according to the
following)
4.1.4 Install the main body
Set the main body onto the upper end of the
mounting plate and clamp it as shown.
B、Installing on the wooden wall
C、Hanging from the ceiling
4.3.1 Remove the mounting plate from main body
(Same as step 5.1.1)
MO UNTIN G PIATE
FIXING SCRE W
4.3.2 Fixing ceiling brackets as Fig.
C
D
C
NU T
SPRING WASHER
WA SHE R
4.2.1 Fix the mounting plate in the proper
positions with tapping screw.
MOODEN SCREW
MOUN TING PI ATE
4.2.2 Same as the step 4 of A
4
Page 5

4.3.3 Set the mounting plate on the ceiling
brackets and ensure safe & fixing (use the bolts
attached to the ceiling brackets as Fig. Using the
ceiling brackets to hang from the ceiling, the
position of mounting plate can be adjusted in the
limit of 100mm.
4.3.4 Do the same as step A to install the main
body.
D、For above ceiling
4.4.1Fix the air curtain as in the procedure for
installing on the concrete wall.
4.4.2 Then pipe as right Fig. Instructs.
HEATED MODEL’S INSTALLION IS SAME AS FM SERIES.
HEATED MODEL TECHNICAL PARAMETER
SINGLE PHASE
MODEL Diam
Of
Wheel
(in)
Volt.
/Freq.
(V
~/Hz)
Motor
power
(W
)
Heater
power
(KW)
Temp.(K)
Max.air
speed
(ft/
s)
Air volume
(cfm)
Net weight
(LBS)
MAFH036-E2 4.5
220/60
160 6 25/35 24.6
459 32
MAFH048-E2 200 8 25/35
565 38.6
MAFH060-E2
230 10 25/45
883 46.3
LINE SIZE
POWER
ITEM
SINGLE PHASE
(220V~,MAIN LINE:L、N)
HEATER
POWER (KW
)
3 4 5 6 8 10 14
MAIN
LINE(mm
2
)
2.5 4.0 6.0 10
EARTH
LINE(mm
2
)
2.5 4.0 6.0 10
5
Page 6

NOTE: forbid overload to operation for a long time!
BLUE(BROWN/RED)
ORANGE
YELLOW
MOTOR
(YELLOW)
BLACK
WHITE
c
RECEIVER
IC
A1
KM
RED
A2
RECEIVER
I/O
BROWN
BLUE
GREY
WHITE
GREEN
HEATER
HEATER
5
REDRED
4
RED
LN
K1
PN
L1
(BROWN)
BLACK
WHITE
GREEN
BROWN
BROWN
BLUE
BLUE
AN N
220VAC
PN
L2
HEATER
RED
MOTOR
(BROWN)
YELLOW
C
YELLOW
OPERATION
1 、Turn on the power switch
2、 A) In the rang of 6m&60 angle in front of Air Curtain, press the C of Emitter to star the COOLING
speed, then press the H to star the HEATING speed; Turning on the Cooling speed, press the OFF of
Emitter to turn off Air Curtain; Turning on the Heating speed, turn off the Air Curtain after taking off 3
minutes by press OFF. )
B
Press the ON/OFF of Receiver to change the COOLING/HEATING &turn off the Air Curtain
3、 According to using to adjust the grate to obtain the best effect.
A B
5、CAUTIONS
a)、Use the unit at the rate voltage and frequency indication on the nameplate.
b)、Disconnect power source before unit operation.
c)、Routing maintenance must be done every year.
d)、Never use petrol,benzese,thinner or any other such chemical for clearing the unit.
e)、Don’t allow water or anything enter the motor.
f) 、 When power supply comes from socket, the plug must accord with IEC335-1.When the power
cord is connected with charging line directly,all polarity switch that the contact gap is 3mm at least
must be installed in the charging line.
6
Page 7

Maxwell
Maxwell
Rockwell
Made by
Tel: (305)594-4972 Fax (305) 675-2212
www.rockwellus.com sales@rockwellus.com
2190 NW 89 Place, Doral, FL 33172 USA
 Loading...