

Maxview MXL012-55, MXL012-65, MXL012-75 Service Manual
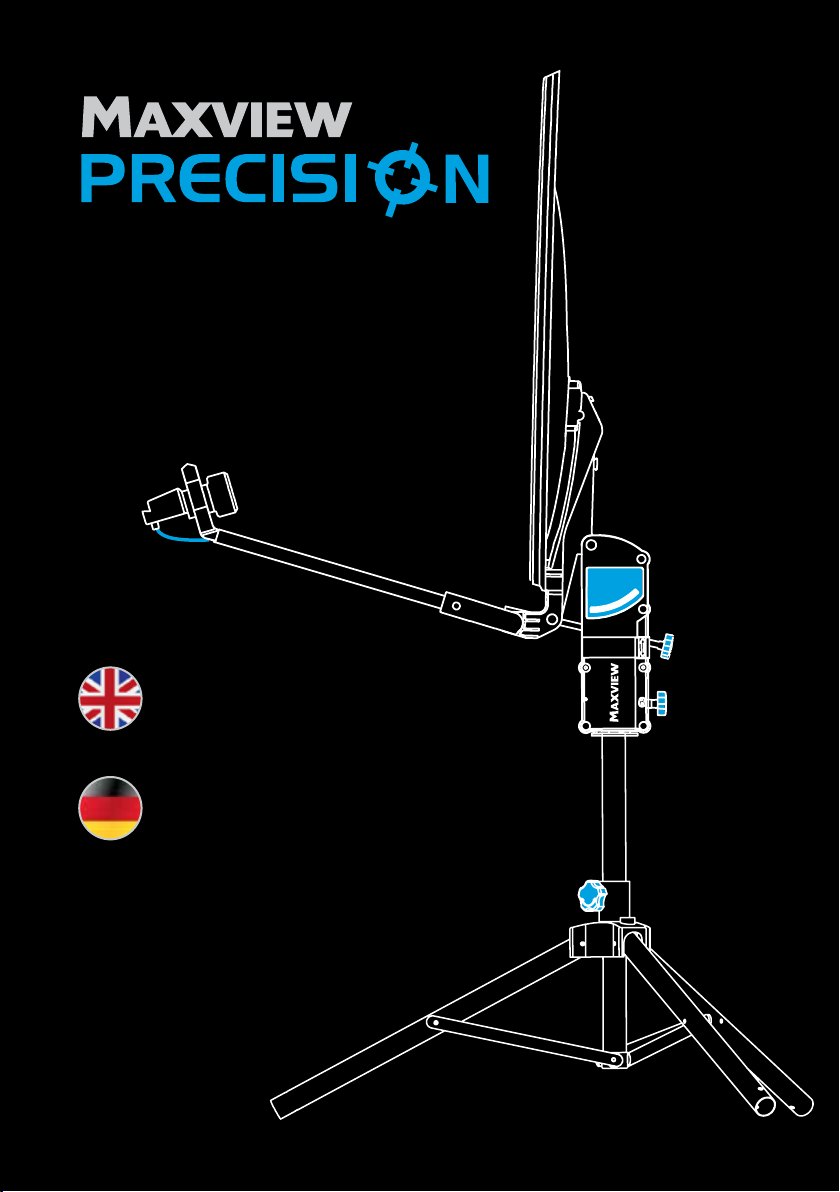
SIMPLICITY AT IT’S BEST
SET UP &
USER MANUAL
MODELS...
MXL012/55
MXL012/65
MXL012/75
AUFBAU- &
BEDIENUNGSANLEITUNG
REGISTERED COMMUNITY
DESIGN NO.2207746.
PATENT PENDING

SIMPLICITY AT IT’S BEST
THANK YOU!
For purchasing this product, we trust that
you will get many years of enjoyment with
this product.
Should you have any difficulty using your
Precision Portable Satellite System please
contact our friendly Customer Helpline on
+44 (0)1553 811000.
Please retain these instructions for future
reference.
CONTENTS
4-5 Get To Know Your Precision
6-10 Detailed Set Up Guide
11 Line Of Sight information
12 Using Your Integrated Sat Finder
14 Connecting Your Precision
14 Guidelines for SKY Reception
15 Glossary Of Terms
16 Satellite Azimuth Guide
16 Adjusting LNB Skew
17 Skew Map
18-19 Elevation Map & Quick Set Up Guide
20 Fault Finding
22 Satellite Footprint Maps
22 Dish stowage
23 Care & Maintenance
23 Safety
23 Guarantee
24 Maxview Contact Details
VIELEN DANK!
Vielen Dank und herzlichen Glückwunsch, dass
Sie sich für die Maxview Precision
Portable- Sat-Anlage entschieden haben.
Sollten sich bei der Inbetriebnahme
Schwierigkeiten ergeben kontaktieren Sie bitte
unseren Kundendienst unter
+49 (0) 8145 9969980.
Bitte bewahren Sie diese Anleitung gut auf.
INHALTSVERZEICHNIS
4-5 Lernen Sie Ihre Precision kennen
6-10 Aufbauanleitung
11 Freie Sicht zum Satelliten
13 Verwendung des integrierten Sat-Finder
14 Anschlussschema
15 Fachbegriffe
16 Einrichten der Antenne auf den
richtigen Azimuthwinkel
16 Einstellen des Skew-Winkel
17 Skew-Winkel-Karte
18-19 Elevationseinstellung - Aufbauanleitung
21 Fehlerbehebung
22 Ausleuchtzone
22 Abbau und Verpackung
23 Pflege und Wartung
23 Sicherheit
23 Garantie
24 Kontakt
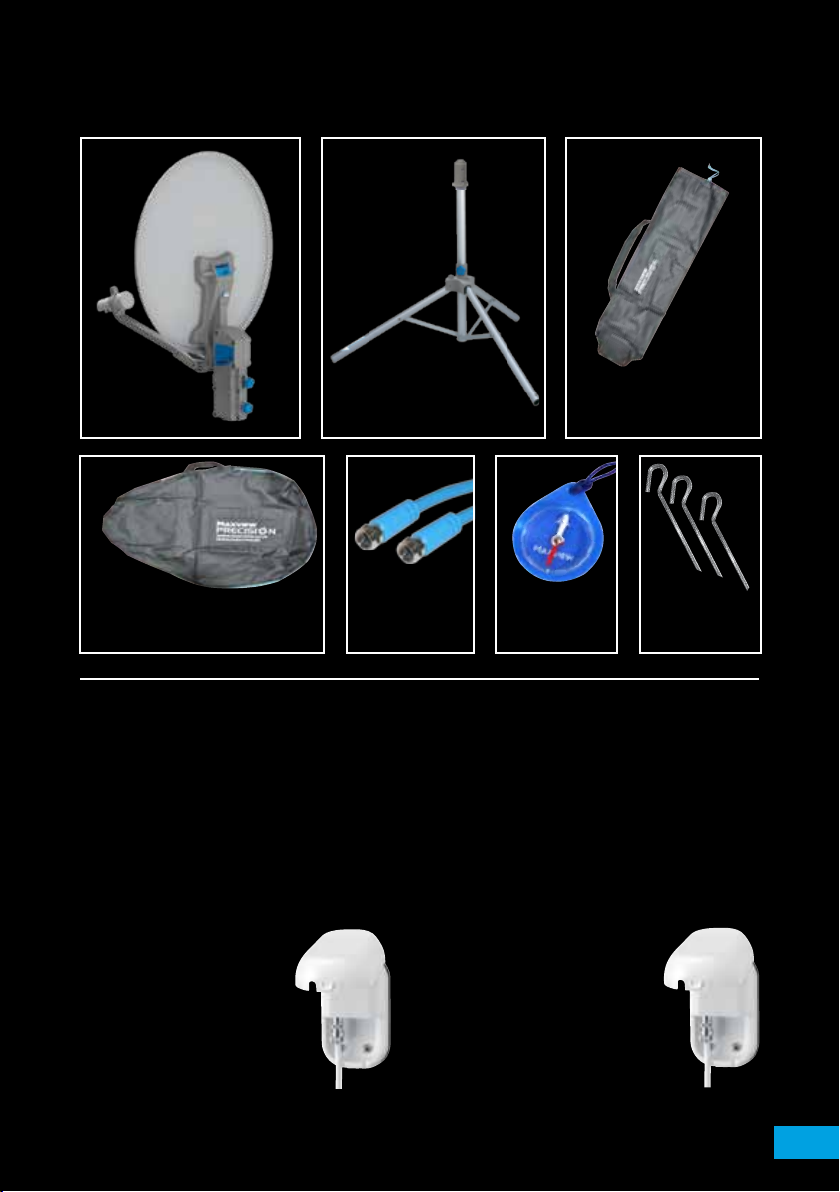
KIT CONTENTS
LIEFERUMFANG
Dish Unit
Sat-Spiegel
Dish Unit Holdall
Transporttasche für Sat-Spiegel
Tripod Stand
Sat-Stativ
10m
Flexible Cable
flexibles Kabel
OTHER EQUIPMENT YOU
WILL NEED TO GET
STARTED
> TV (digital or HD models)
> *Satellite Receiver OR TV with built in
satellite tuner
Optional extras:
*Weatherproof Socket.
Provides a waterproof and
neat cable entry into your
vehicle.
Tripod Holdall
Transporttasche für Stativ
Compass
Kompass
Ground Pegs
Heringe
ANDERE GERÄTE DIE
SIE BENÖTIGEN UM ZU
STARTEN
> 12/24/230 V Fernseher
> *Satelliten Receiver oder Fernseher mit
eingebautem Satelliten Receiver
Optionale Extras:
*Außensteckdose.
bietet eine wasserdichte und
ordentliche Kabeleinführung in
das Fahrzeug.
*Available separately from
Maxview visit www.maxview.co.uk
or visit your local leisure stockist.
* Separat erhältlich von Maxview.
Besuchen Sie www.maxview.de.
3

GET TO KNOW
YOUR PRECISION KIT
LERNEN SIE IHR PRECISION
SAT-ANTENNE KENNEN
A. Quick Set UpGuide
Helps you get up and running quickly and
easily.
B. Magnetic Arm Lock
To secure the LNB arm in a closed position.
C. Integrated Sat Finder
To help you align your satellite dish to the
satellite.
D. Folding LNB Arm
For compact storage of the system.
E. Coaxial Cable Ports
Easy access ports to attach your coaxial
cable.
F. Elevation Indicator
Easy to view elevation angle read out.
G. Elevation Adjustment Knob
Turn to adjust elevation angle.
H. Tripod - Dish Unit Interface
Also contains Azimuth rotation stops.
This allows scanning in satellite zone only.
I. Azimuth Lock
To lock off system in correct position once
satellite has been located.
J. Tripod Lock
Used to secure the tripod in assembled
position.
K. Level indicator
A level tripod will allow for quicker set up
and a more accurate elevation reading.
L. South Leg
To point south using compass during set up.
A. Kurzanleitung
Zur schnellen und einfachen Inbetriebnahme.
B. Magnetische LNB-Arm-Befestigung
Zum sichern des LNB-Arms beim Transport
C. Integrierter Sat-Finder
Zur Unterstützung der Ausrichtung der Maxview
Precision Sat-Antenne.
D. Klappbarer LNB-Arm
Für einfaches und leichtes verstauen.
E. Anschlüsse für Koax-Kabel
Einfacher Zugang zum anschließen des
Koax-Kabels
F. Elevations Indikator
Einfaches ablesen des Elevationswinkels
G. Elevations Arretierung
Einfache Arretierung des Elevationswinkels
H. Vormontierte Spiegeleinheit
Begrenzter Schwenkbereich zur leichteren
Ausrichtung.
I. Azimuth Arretierung
Zur Arretierung der Sat-Antenne, wenn Sie den
gewünschten Satelliten gefunden haben.
J. Stativ Feststeller
Zur Arretierung des Statives, wenn das Stativ in
der gewünschten Position steht.
K. Wasserwaage
Unterstützt den schnellen Aufbau, Sie können
ablesen ob das Stativ gerade steht.
L. “Süd-Bein“ Markierung
Um das „Süd-Bein“ richtig Auszurichten
benützen Sie den beiliegenden Kompass.

C
A
B
E
G
I
J
D
F
H
K
L
5
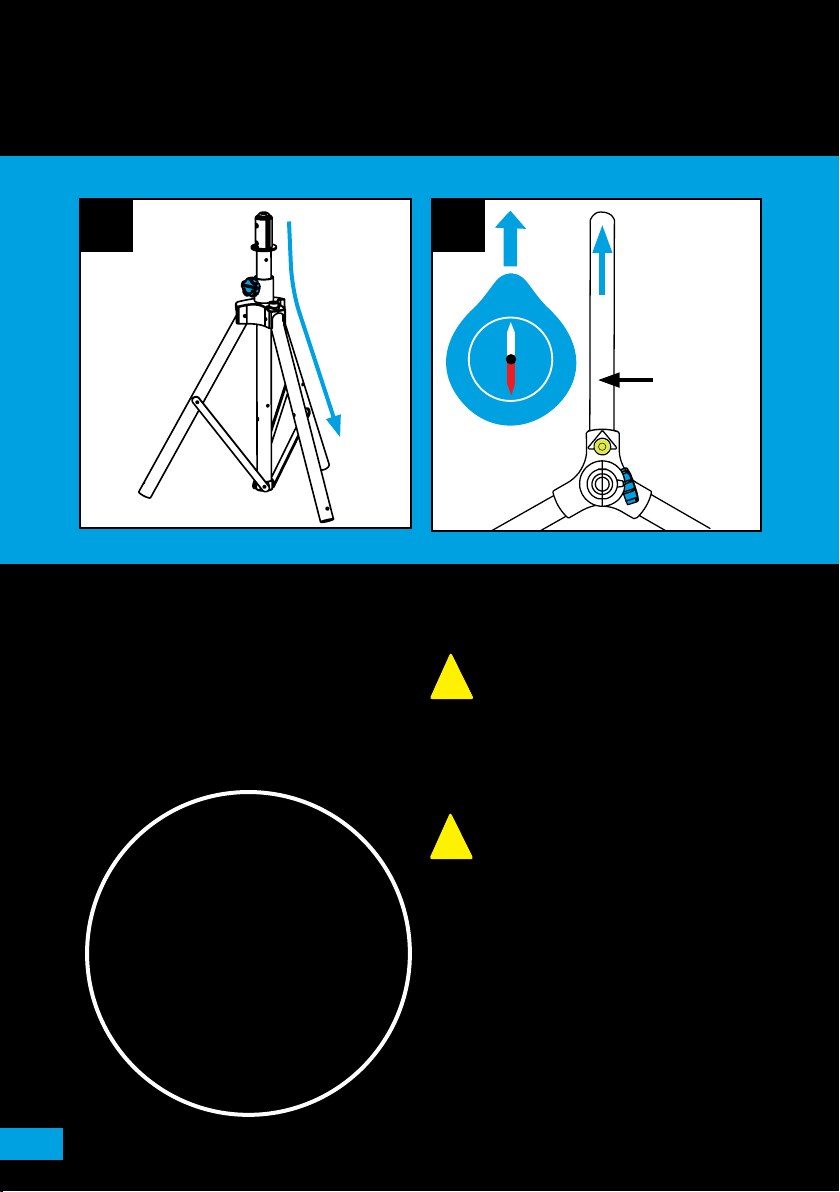
SET UP GUIDE
AUFBAUANLEITUNG
1. 2.
S
W
E
N
South Leg
Süd-Bein
1. Erect tripod by pushing firmly down to open
legs. Secure in open position by turning
knob.
1. Öffnen Sie das Sat-Stativ indem Sie die
Beine nach unten ziehen. Sichern Sie das
Stativ in der geöffneten Position mit Hilfe
des Feststellers.
FOR QUICK
SET UP GUIDE
SEE BACK OF DISH!
FÜR DIE SCHNELLE
MONTAGE SIEHE
ANLEITUNG AUF DER
SPIEGELRÜCKSEITE
2. Use compass to align the tripod’s south leg
with South on the compass.
Ensure no line of sight obstructions in
South area. e.g. tall buildings or trees,
!
reference page 11.
2. Benützen Sie den Kompass um das
“Süd-Bein“ optimal nach Süden auszurichten.
Vergewissern Sie sich, dass keine Hindernisse
die Sicht zum Satelliten versperren.
z.B. hohe Gebäude oder
!
Bäume (Seite 11).
3.
4.
South
Süden
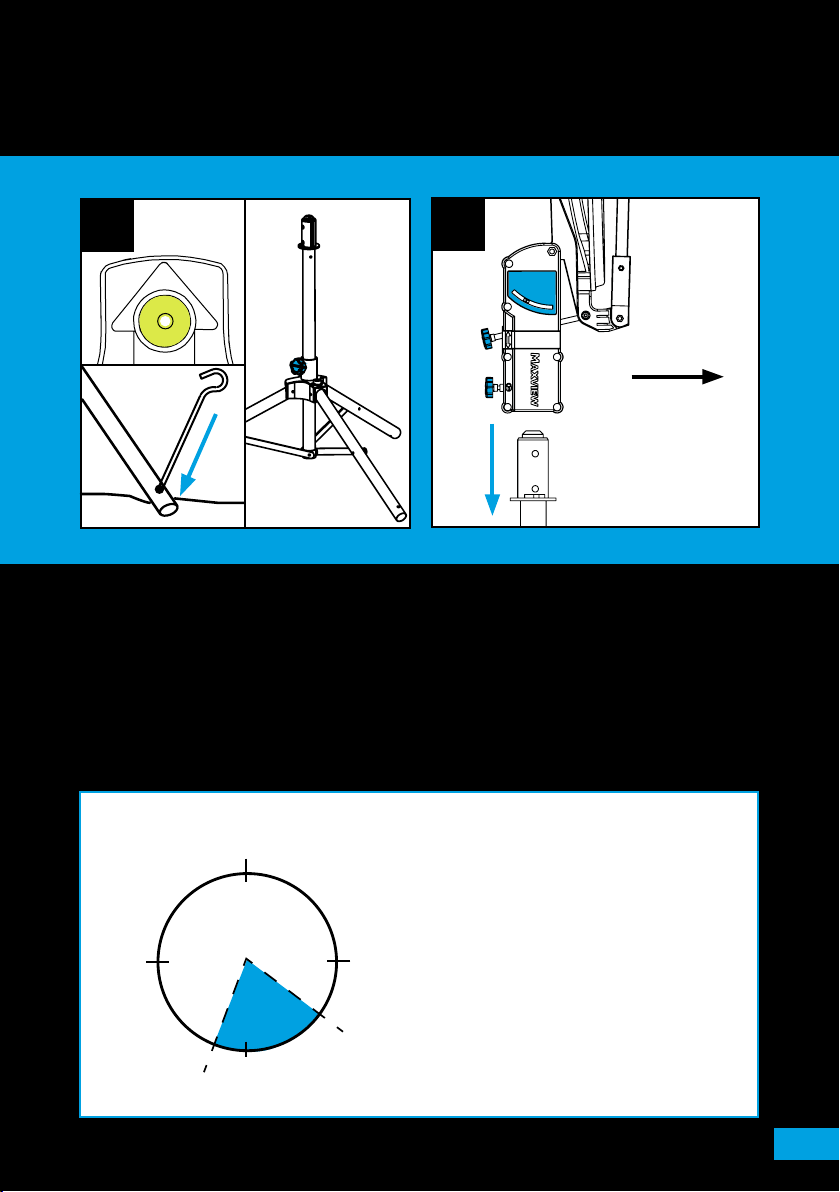
3. Level the tripod (use the level indicator as an
approximate guide only - not critical).
Use the pegs provided to secure tripod to the
ground.
3. Stellen Sie das Stativ gerade hin (Benutzen
Sie dafür die integrierte Wasserwaage als
Richtwert). Um das Stativ zu sichern verwenden
Sie die im Lieferumfang enthaltenen Heringe.
NORTH
NORDEN
Limited
Satellite Zone (Z).
WEST
Limitierter Drehbereich (Z).
WESTEN
(Z)
EAST
OSTEN
SOUTH
SÜDEN
4. Mount dish unit onto tripod with the LNB
arm facing towards the south leg.
(Reference Image 2).
4. Installieren Sie die Spiegeleinheit auf das
Sat-Stativ. Der LNB-Arm muss in Richtung des
“Süd-Beins“ zeigen.
NOTE/MERKE
All TV satellites used in Europe are located
within the zone highlighted in blue.
Your precision tripod has been limited to
this zone to reduce scanning ensuring
satellite location is quick and easy.
Alle TV Satelliten die in Europa Verwendung
finden befinden sich in der blauen Zone.
Das Precision-Stativ hat einen limitierten
Schwenkbereich, so dass Sie den Sat-Spiegel
nur im Segment der blauen Zone bewegen
können. Somit finden Sie Ihren gewünschten
Satelliten schnell und einfach.
7
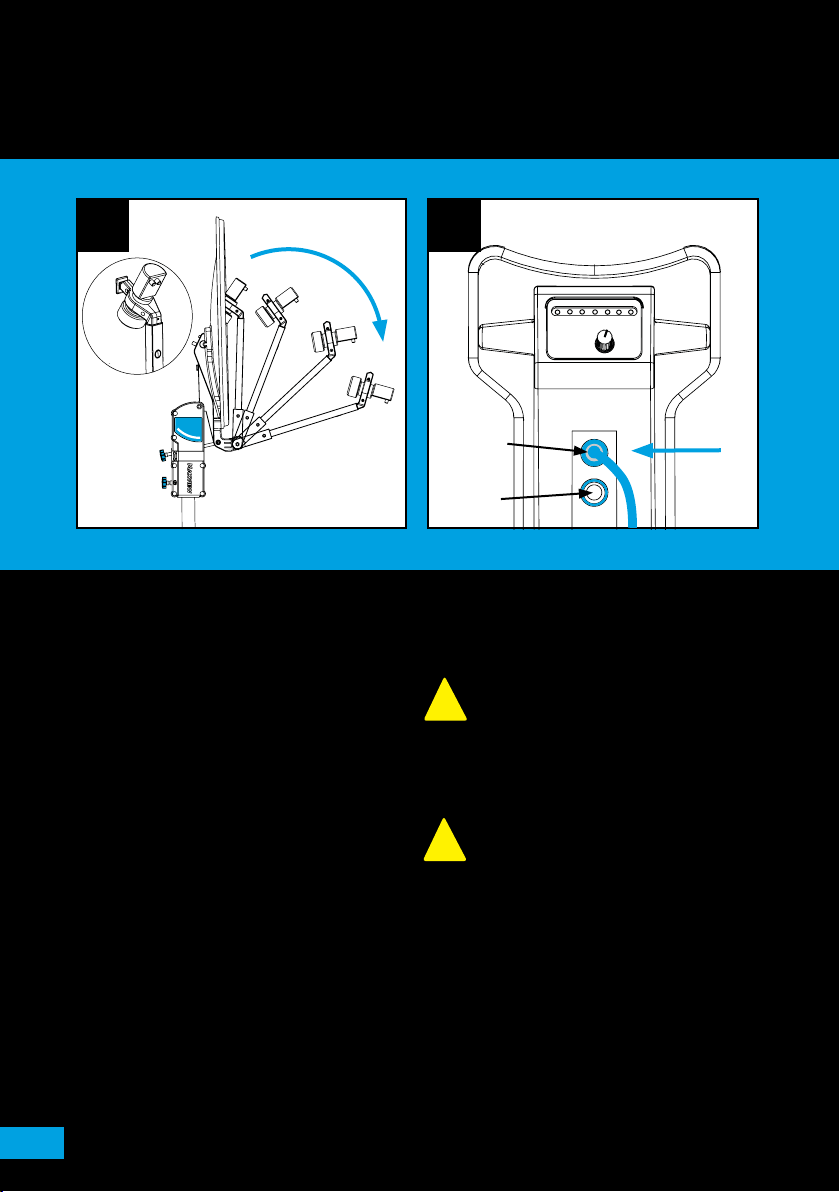
5. 6.
Single port.
SingleAnschluss.
Twin port.
TWINAnschluss.
5. Pull down LNB arm from magnetic lock.
5. Ziehen Sie den LNB-Arm von der
magnetischen LNB-Befestigung nach unten.
6. Plug in the 10m flexible cable to the coaxial
cable port. See page 14 for receiver end
connections.
The sat finder is wired
!
to the single port.
6. Verbinden Sie das flexible 10m Koax-Kabel mit
dem F-Anschluss an Ihrer Precision Sat-Antenne.
(Siehe S. 14 für Receiver und Verbindungen).
Das Koax-Kabel muss an dem Eingang
!
(Single-Anschluss) angeschlossen werden.
 Loading...