

MaxTronic Orion 410ST User Manual
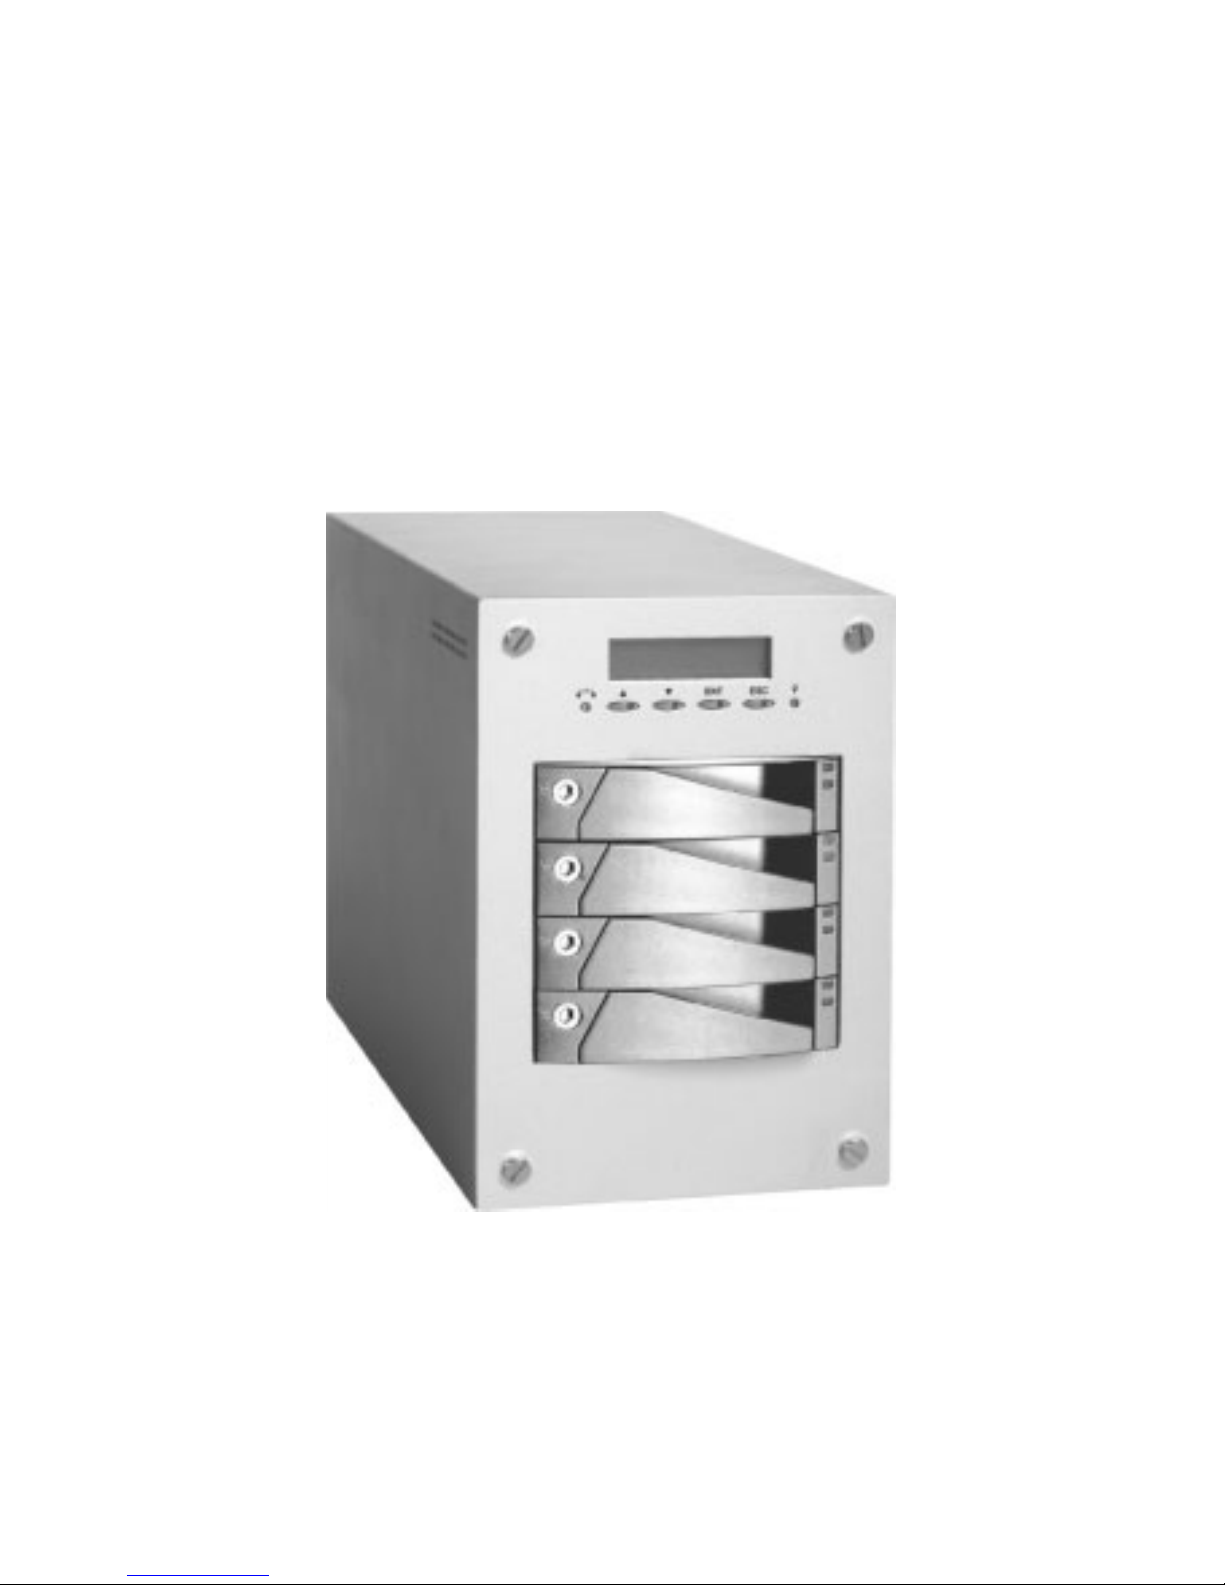
MaxTronic Orion 410ST
RAID Enabled NAS System
User Manual


Maxtronic Orion 410ST User Guide
Table of Contents
Preface
About this Manual ......................................................................................................i
Copyright Notice .........................................................................................................i
Conventions .................................................................................................................i
Safety Instructions .....................................................................................................ii
Limited Warranty ....................................................................................................iv
EMC Certificate ........................................................................................................iv
1 Introducing Orion 410ST
Product Features .......................................................................................................1
Package List ...............................................................................................................1
Components of the Orion 410ST ..............................................................................2
Front View ............................................................................................................... 2
Back View................................................................................................................2
Important Notice ...................................................................................................... 3
2 Getting Started
Hardware Installation ............................................................................................... 5
Power Connection....................................................................................................5
Network Connection................................................................................................ 6
Hard Disk Drive Installation....................................................................................7
Using the Front Control Panel ...............................................................................10
Control buttons ......................................................................................................10
LED indicators.......................................................................................................11
3 Orion 410ST System Setup
System Boot-up ........................................................................................................13
System Setup ............................................................................................................13
System Login ......................................................................................................... 14
Main Menu............................................................................................................. 14
Resetting the Administrator Password................................................................... 21
Resetting to Factory Default Settings .................................................................... 21
4 Configuring the User Interface
Using User Interface ................................................................................................23
System Status.........................................................................................................24
Quick Configuration ..............................................................................................27

Maxtronic Orion 410ST User Guide
5 Administrator Tools
Administrator Login ............................................................................................... 37
Instant Configuration ............................................................................................. 38
System Setup Screen ............................................................................................... 38
Event Notification ................................................................................................. 38
SNMP .................................................................................................................... 39
Factory Defaults .................................................................................................... 41
UPS........................................................................................................................ 41
Updating Firmware ............................................................................................... 42
Network Setup Settings .......................................................................................... 42
For Windows ......................................................................................................... 43
For Unix ................................................................................................................ 45
For Apple............................................................................................................... 47
FTP ........................................................................................................................ 50
Storage Setup Settings ............................................................................................ 51
Volume Setup........................................................................................................ 53
Share Setup............................................................................................................ 55
N-Sync Setup......................................................................................................... 56
User Privilege Settings ............................................................................................ 62
Groups ................................................................................................................... 62
Users...................................................................................................................... 64
Quotas.................................................................................................................... 68
Privilege Setup ...................................................................................................... 69
File Manager ......................................................................................................... 71
Backup-sync ............................................................................................................. 73
Jobs........................................................................................................................ 74
Logs....................................................................................................................... 77
Backing Up Jobs.................................................................................................... 78
Diagnostic Mode ...................................................................................................... 79
Starting Diagnostic Mode...................................................................................... 79
Downloading Diagnostic Mode Logs ................................................................... 81
Logging Out/Shutting Down ................................................................................. 82
Logout ................................................................................................................... 82
User Level Access .................................................................................................... 83
Password Setup ..................................................................................................... 83
File Manager ......................................................................................................... 84
Backup - sync ........................................................................................................ 84
Logout ................................................................................................................... 84
Appendix ................................................................................................... 85
Orion 410ST FTP Setting Guide ........................................................................... 85

Maxtronic Orion 410ST User Guide
IP sharing unit setup (Broadband Router)0 ........................................................... 85
IP sharing unit (Broadband Router)
D-link DI704up0....................................................................................................85
Enabling passive mode for the FTP tool0.............................................................. 90

Maxtronic Orion 410ST User Guide

i
Preface
About this Manual
This manual is designed to make the Orion 410ST NAS System as easy to use as possible.
Information contained in this document has been checked for accuracy, but no guarantee is
given that the contents are correct. Information and specifications are subject to change without notice.
Copyright Notice
Copy right reserved. Do not duplicate.
© Copyright MAY,2006 MaxTronic International Co., Ltd
Manual Revision 1.0.
All rights reserved. This Orion 410ST NAS System and related documentation are protected
by copyright and are distributed under licenses restricting their use, copying, and distribution.
No part of this documentation may be reproduced in any form, by any means without prior
written authorization of the company and its licensors, if any.
Conventions
Caution
This symbol is used to remind users to pay attention to important descriptions
regarding usage and maintenance (repair) or additional important information
related to this Orion 410ST NAS System.
Note
This symbol is used to provide users with useful information that can make
procedures such as configuration easier to accomplish.

ii
Maxtronic Orion 410ST User Guide
Safety Instructions
Safety Instructions
Before starting, take a few minutes to read this manual. Read all of
these instructions and save this manual for later reference.
Protect the Orion 410ST NAS System from extremely high or low
temperatures. Let the NAS system warm (or cool) to room temperature before using it.
Protect the Orion 410ST NAS System from being bumped or
dropped. Do not place the Orion 410PT on an unstable cart, stand, or
table. It may fall, causing serious damage to the product.
Keep the Orion 410ST NAS System away from magnetic forces.
Do not use the Orion 410ST NAS System near water.
Keep the Orion 410ST NAS System away from dust, sand, or dirt.
Gaps and openings in the cabinet are provided for ventilation. Never
block or cover these openings, because the Orion 410ST NAS System may overheat and become unreliable in operation. Don’t place
the Orion 410ST NAS System on a bed, sofa, rug, or other similar
surface.
Do not place the Orion 410ST NAS System near or over a radiator or
other heat source.
Refer to the rating plate for the correct voltage and ensure that the
appliance voltage corresponds to the supply voltage.
V

Maxtronic Orion 410ST User Guide
iii
Safety Instructions
The appliance must be grounded. The Orion 410ST NAS System is
equipped with a 3-wire grounded type of power cord. This power
cord will only fit into a grounded type of power outlet.
If an extension cord or a power center is used with the Orion 410ST
NAS System, make sure that the total current consumption of all
products plugged into the wall outlet does not exceed the ampere
rating.
Do not place the Orion 410ST NAS System where the cord will be
walked on.
Never push any object into the Orion 410ST NAS System through
cabinet gaps and openings, since it may touch dangerous voltage
points and cause a risk of fire or electric shock.
Unplug the power cord from the wall outlet before cleaning. Keep the
Orion 410ST NAS System dry. Do not use liquid cleaners, aerosol
cleaners, or a wet cloth. Use a damp cloth for cleaning.
Except as specifically explained in this User Manual, do not attempt
to service the Orion 410ST NAS System by yourself. Opening or
removing the covers may expose you to dangerous voltages.
Unplug this product from the wall outlet and refer servicing to qualified service personnel under the following conditions.
• If the Orion 410ST NAS System has been exposed to water or
any liquid.
• If the Orion 410ST NAS System has been dropped or the cabinet
damaged.
Users should not remove the cover of the Orion 410ST NAS System.
Disconnect all power supply cords before servicing, and only authorized personnel should perform servicing tasks.

iv
Maxtronic Orion 410ST User Guide
Limited Warranty
Limited Warranty
MaxTronic International Co., Ltd. guarantees all Orion 410ST NAS Systems are precisely
tested before they leave the factory and able to function normally under general conditions. In
case of any system malfunction under normal usage during the warranty period, MaxTronic
international Co., Ltd. and its local representatives will be responsible for the repair without
charging.
MaxTronic International Co., Ltd. is not responsible for any damage or loss of data, deemed
to be caused by its products. It is highly recommended that users conduct the necessary
backup practices.
EMC Certificate
This product has passed FCC ClassB inspection. Appropriate certifications have also been
approved. E.g. CE, UL, CB, C-Tick and BSMI.
Placement Notes
• The NAS system LCD panel can be damaged by exposure to direct
sunlight. Limit exposure to subdued or indirect sunlight only.
• The NAS system should be used only in clean environments that are
free from airborne contaminants such as dust, dirt, and smoke. Excessive moisture or oil particles in the air can also hinder NAS system
performance.
• To reduce the possibility of data errors caused by electromagnetic
interference, locate the NAS system at least five feet away from electrical appliances and equipment that generate magnetic fields.
Power Supply Safety Notes
• To avoid electric shocks, do not use an extended power cord or an
outlet that does not match the NAS system plug or leaves the plug
exposed.
• The NAS system has a 3-wire grounded plug. The third pin connects
to ground; do not remove it.
• If the power cord or plug is damaged or worn, unplug it immediately
and contact a qualified service technician for maintenance.
• To avoid fire or electric shocks, do not overload electric power outlets.
1
1 Introducing Orion 410ST
The Orion 410ST NAS System of MaxTronic International Co., Ltd. is a RAID-enabled NAS
(Network Attached Storage) system. The Orion 410ST NAS System is able to conduct continual self-tests, beyond unsymmetrical fault tolerance, and comes with data validation functions
provided by RAID 0, RAID 1, RAID 3, and RAID 5. The availability of cooling fans and hotswap features make the Orion 410ST with RAID function is more reliable and easier to use.
Product Features
• Automatic detection of overheating, DC voltage 3.3V, 5V, and 12V
• Automatic formatting, data synchronization and recovery
• Firmware upgradeable
• User-friendly configuration interface
• OS-independent networking storage system
• Hard disk drive error LED indicator
• Supports hard disk drive hot-swapping
• Supports one RJ45 ethernet port (10/100/1000)
• Supports UPS devices via USB interface
• System status and OS configuration display on front LCD screen
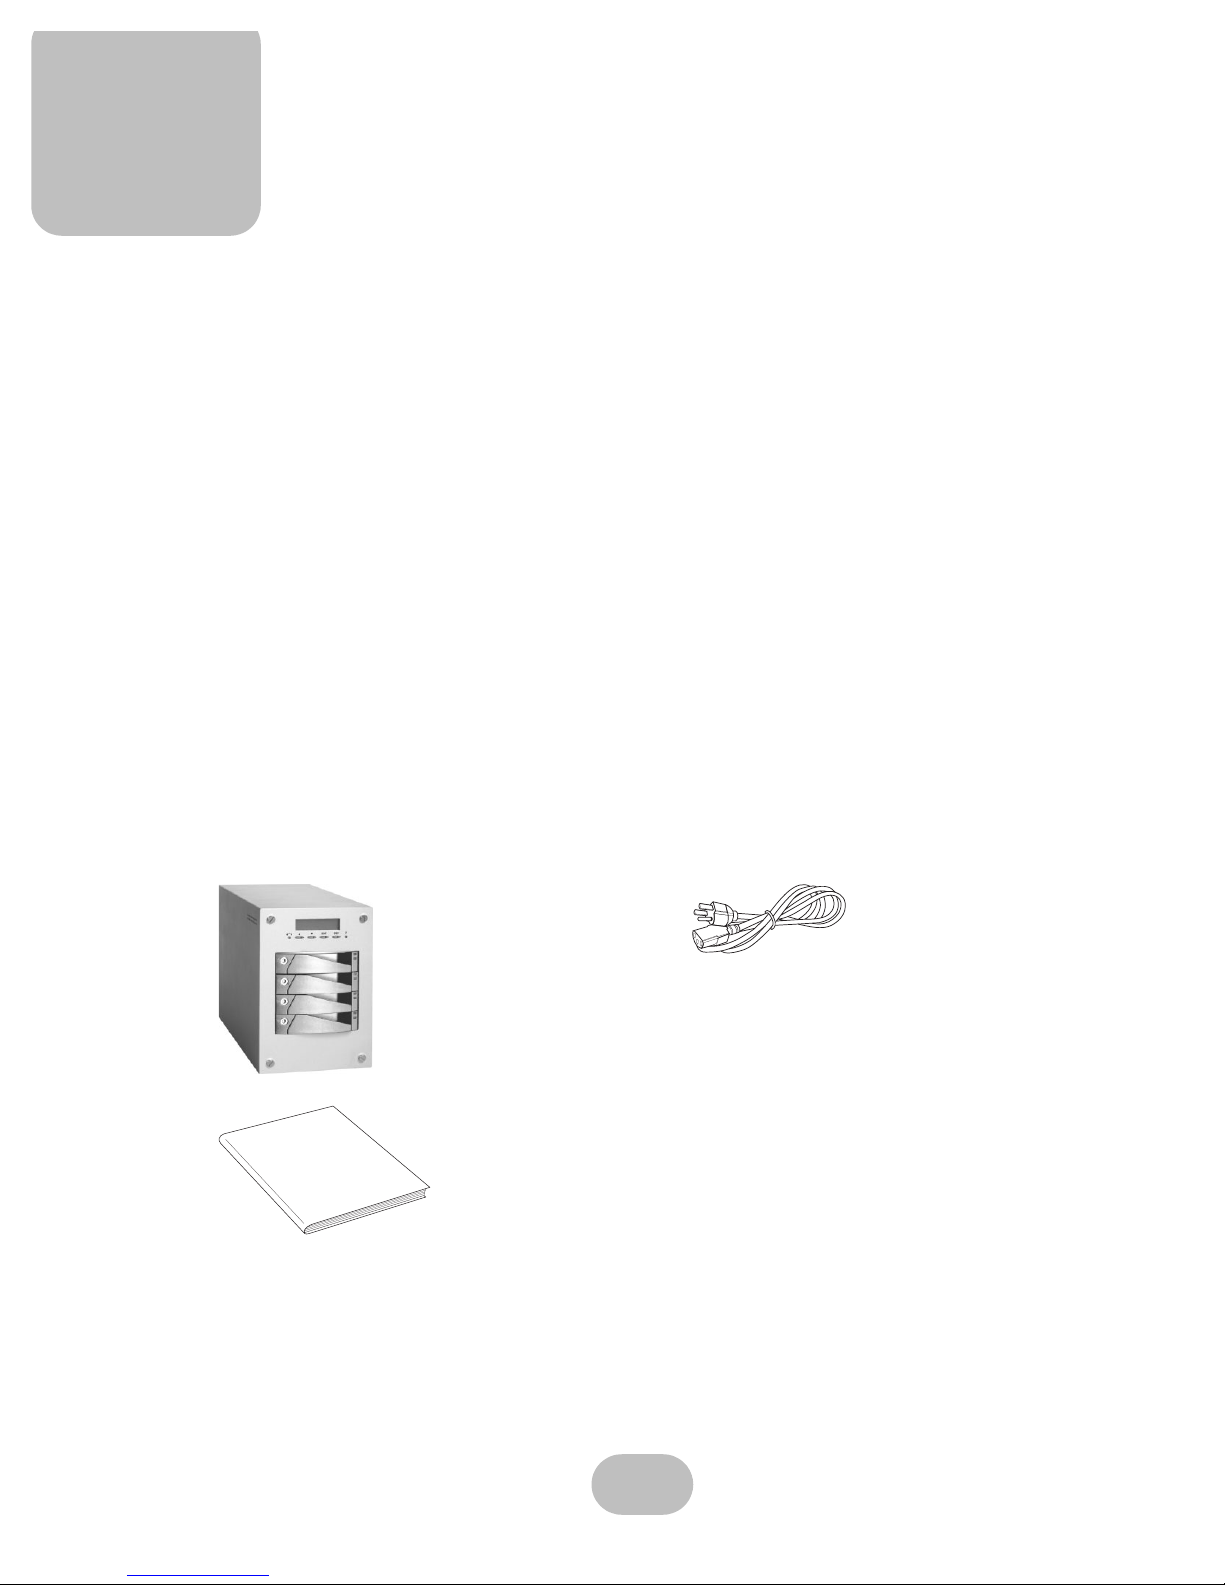
Package List
If any of them is missing or damaged, please contact with your local dealer.
User Manual
RJ45 Cable (2M)
Power Cord
Orion 410ST NAS System
Accessory Bag
User Manual
2
Maxtronic Orion 410ST User Guide
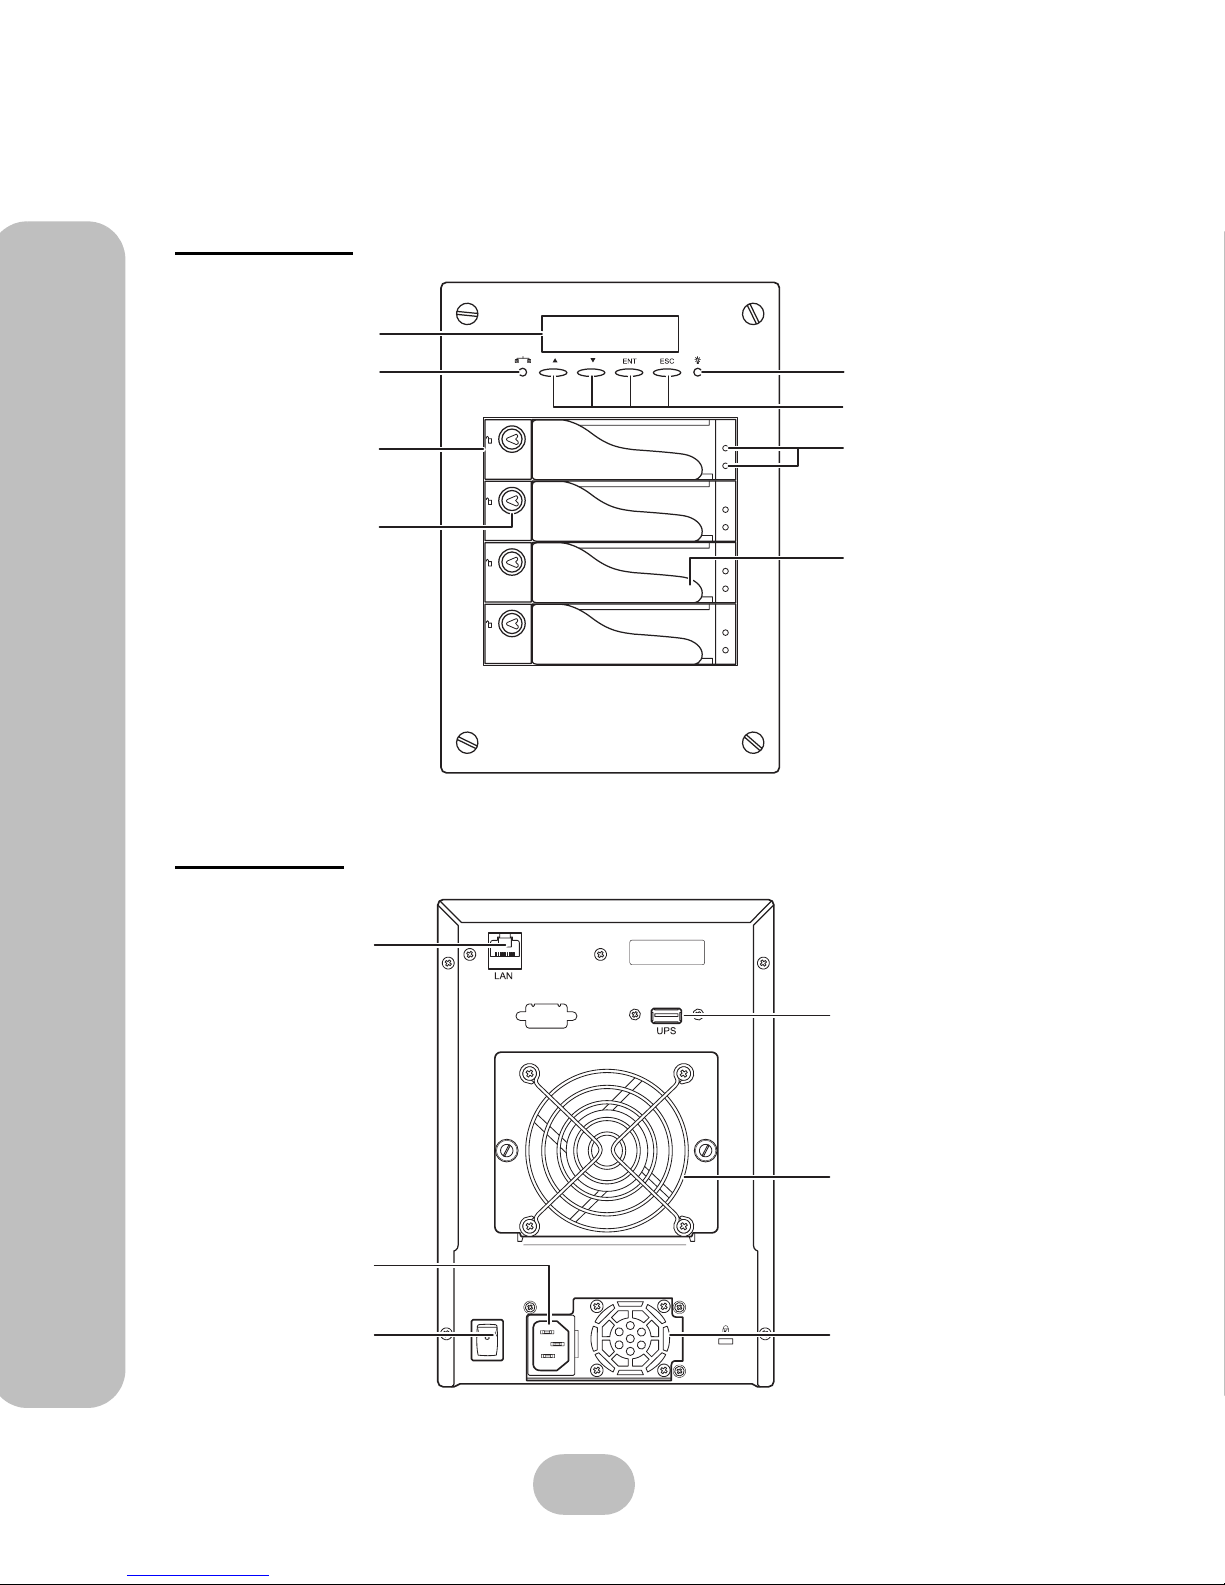
Components of the Orion 410ST
Components of the Orion 410ST
Front View
Back View
UPS Connector
System Fan
Power Supply
LAN Connector
Three-pin power
connector
Power Switch
Power
LED indicator
Control buttons
HDD
LED indicators
HDD caddy
LCD screen
Network LED indicator
HDD caddy (x4)
HDD caddy Lock (x4)

Maxtronic Orion 410ST User Guide
3
Components of the Orion 410ST
Important Notice
Follow the procedures below carefully to initialize your Orion 410ST NAS
System:
1. Connect the power cord and LAN cable.
2. Remove the HDD caddy(s) from the system.
3. Power on the system.
4. Hot plug the HDD caddy(s) into the system. Please make sure the
‘HDDx added OK’ displays on the LCD screen then continue the next
drive installation till the whole process is done.
5. Start configuration through the front control panel or the
browser interface.
Refer to the “Hard Disk Drive Installation” on page 7 section in Chap-
ter 3 for detailed information.

5
2 Getting Started
Hardware Installation
The basic hardware setup includes:
• Orion 410ST NAS System
• 4 hot-swappable caddies
• 1 power cord
• 1 network cable
• 1 set of keys
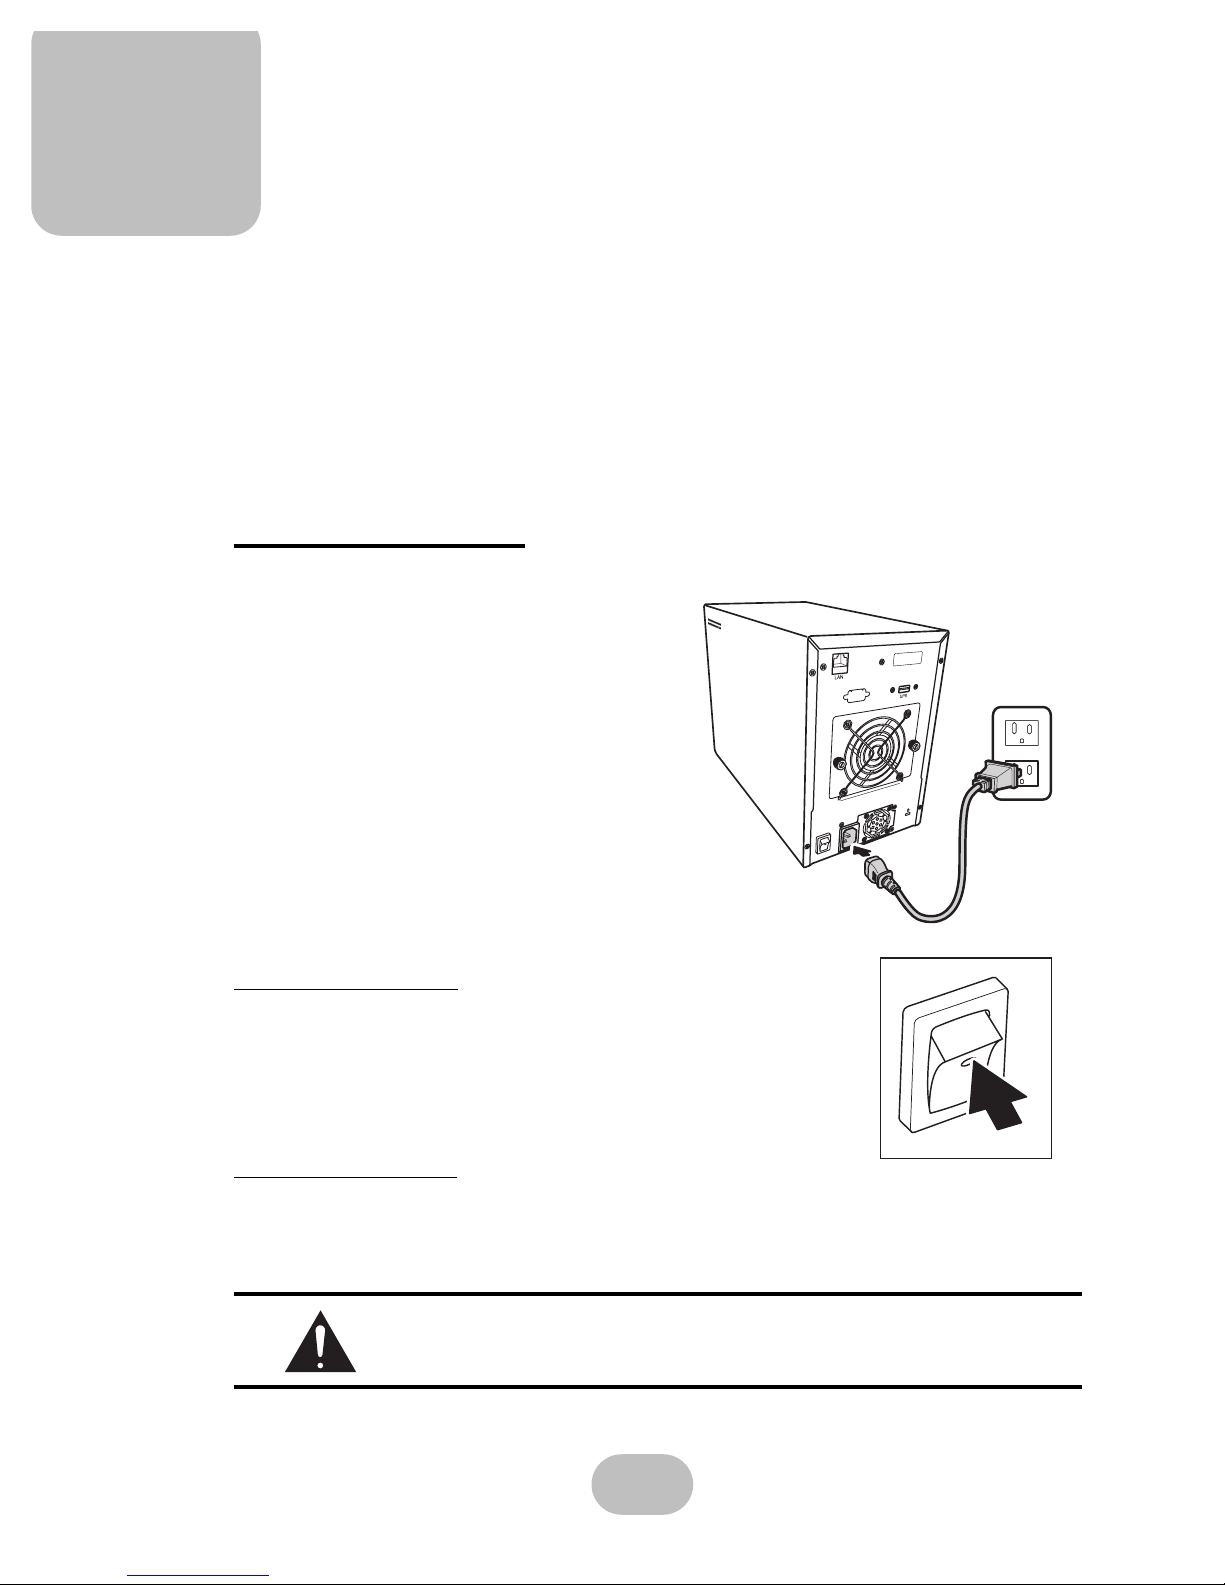
Power Connection
Use the power cord provided in the package for
proper power supply.
1. Connect the receptacle into the power connector on the rear side of the Orion 410ST.
2. Connect the three-pin power plug into a
power outlet.
Turn on the Power
Press the power switch at the rear side of the Orion 410ST.
Turn off the power
To shutdown the system properly, please use the “Shutdown” function in the administrator
tools via web browser.
Please refer to “Logging Out/Shutting Down” on page 82 for detailed information.
Do not turn off the power directly from the power source while the system
is still running or may encounter unexpected error.

6
Maxtronic Orion 410ST User Guide
Hardware Installation
Network Connection
Use the provided LAN cable to connect to network. Before the network is connected, the Network LED indicator will be lit orange.
1. Insert one end of the LAN cable into the router.
2. Insert the other end of the LAN cable into the
LAN connector on the rear side of the
Orion 410ST.
When network connection is set, the Network LED indicator located on the front control
panel starts flashing.
Please refer to the ‘LED indicators’ under “Using the Front Control Panel”
on page 10 for detailed information.
Maxtronic Orion 410ST User Guide
7
Hardware Installation
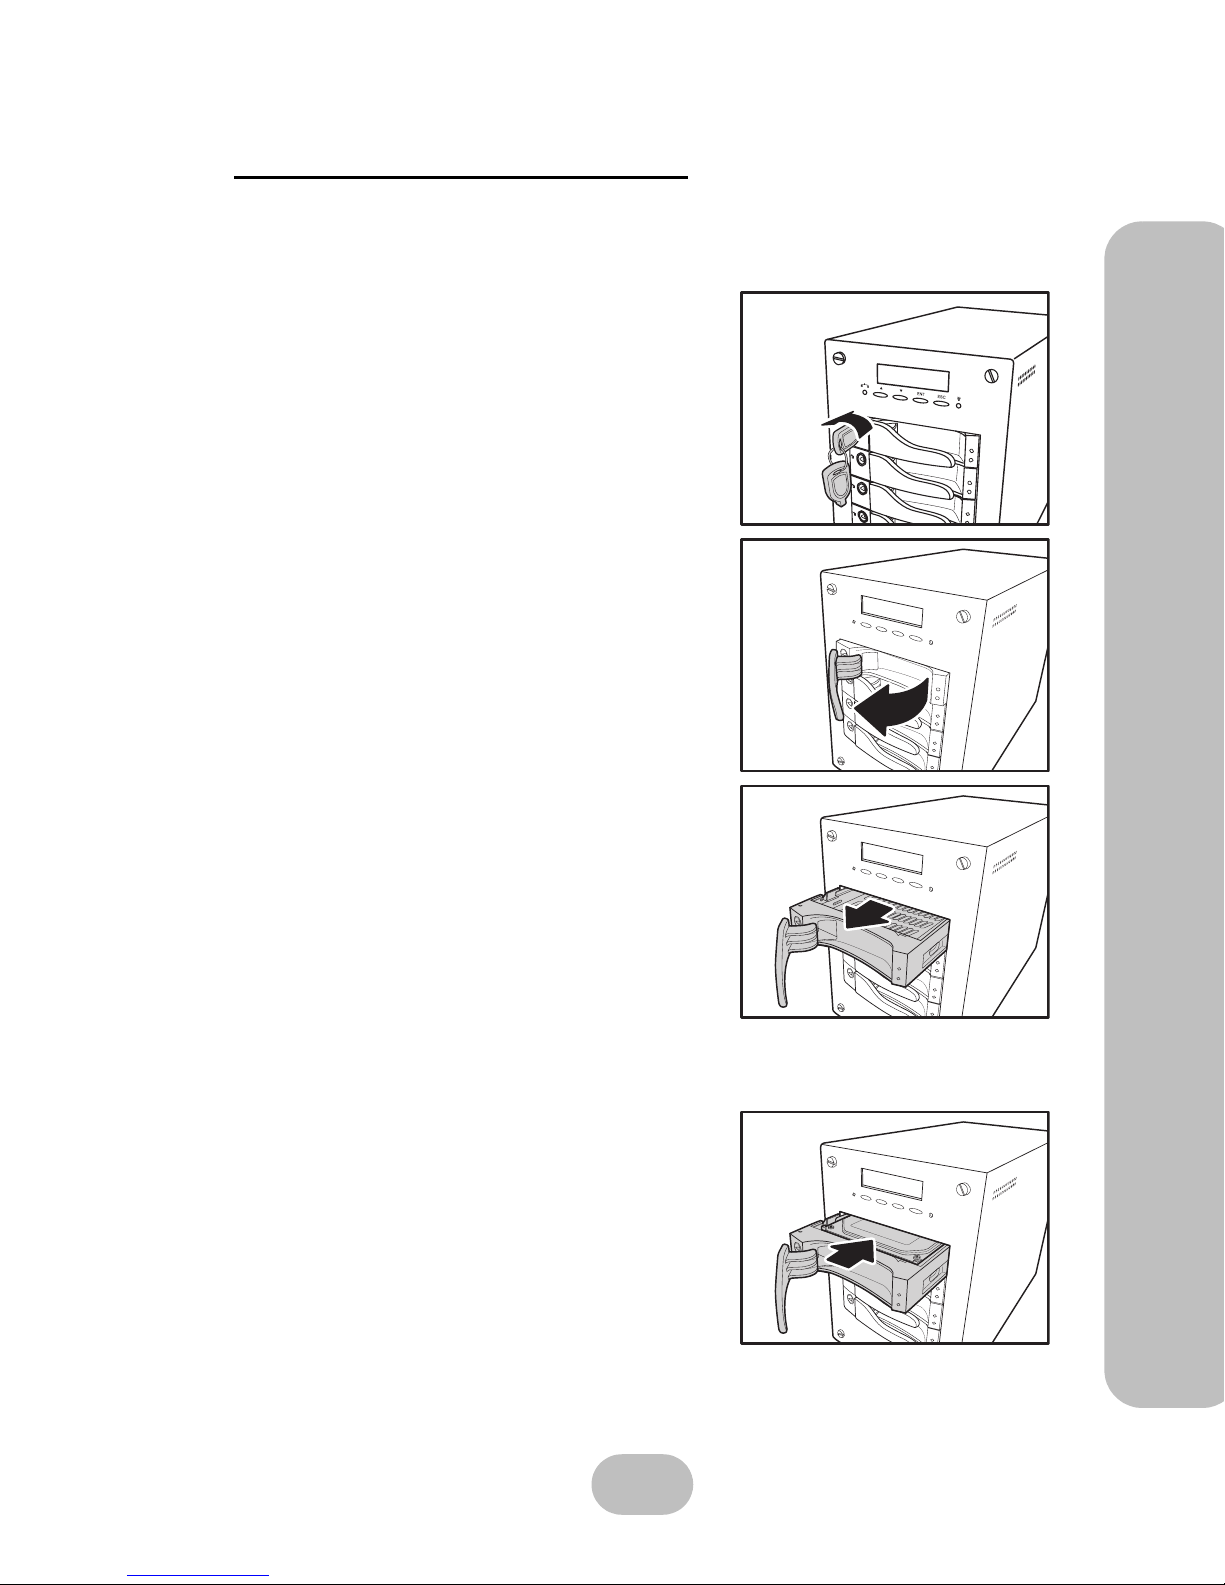
Hard Disk Drive Installation
When installing the HDDs for the first time, please follow the procedures below carefully to
initialize the Orion 410ST NAS System:
1. Connect the power cord and LAN cable.
2. Unlock the HDD caddy with the key provided.
3. Pull out the handle of the HDD caddy.
4. Pull out the HDD caddy and remove from the
tray (four caddies).
5. Power on the system, and the Orion 410ST NAS System will perform startup self-configurations.
6. Wait until the self-configuration is complete,
and the system information shows on the
LCD screen, hot plug the HDD caddies with
disks into the tray.
8
Maxtronic Orion 410ST User Guide
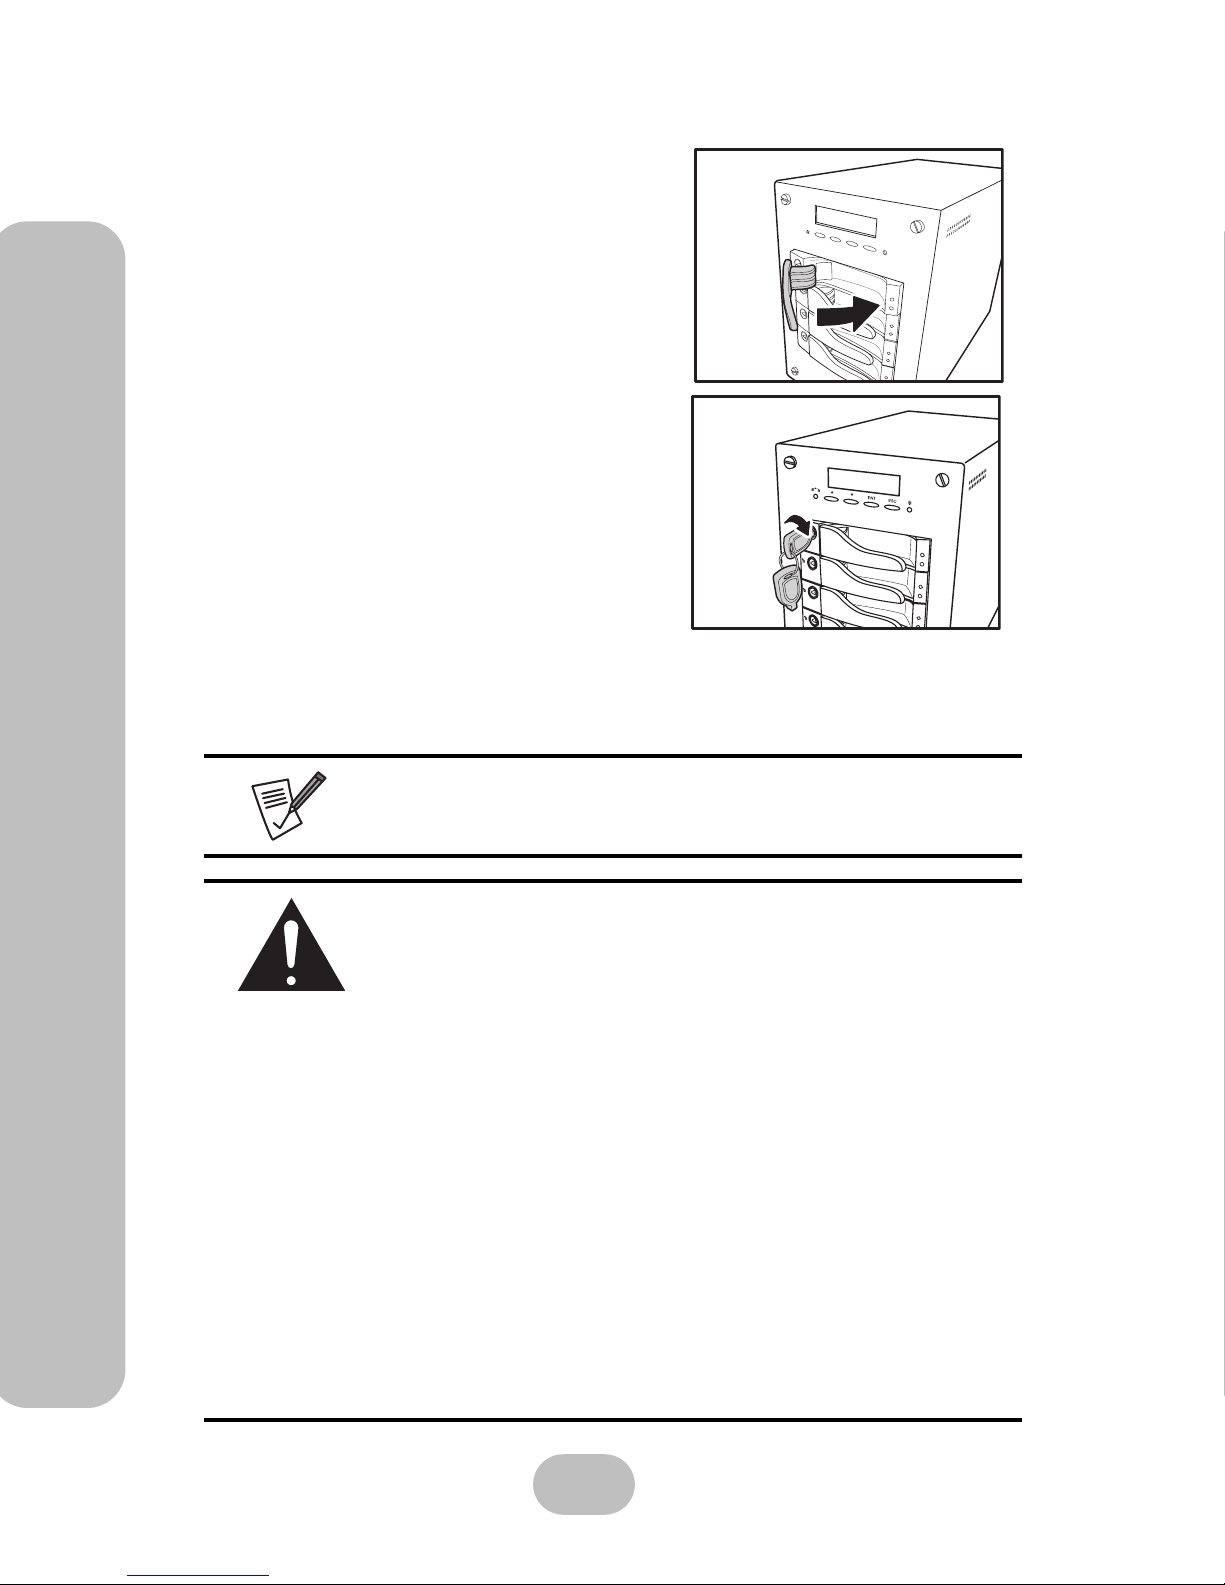
Hardware Installation
7. Push back the handle of the HDD caddy.
8. Lock the HDD caddy with the key. Keep the key
safe for future use.
9. Start configuration either with the front control panel or the
browser interface.
The original caddy order need not be the same when re-inserting the
caddies back into the Orion 410ST.
Do not install the HDD(s) into the Orion 410ST NAS System
while it’s powered off under any conditions.
The following are exceptions:
1. The HDD(s) have been initialized by the same Orion 410ST
and have been performing daily routine tasks.
2. Performing “Disk Roaming” procedure to reduce system down
time.
To perform “Disk Roaming“:
a. Power off the old NAS system.
b. Execute Factory Default on the new NAS system and then
power it off.
c. Remove the HDD(s) from the old NAS system.
d. Insert the HDD(s) into the new NAS system. Please be sure
the model and firmware of the new system are the same as
the old one.
e. Power on the new NAS system and Disk roaming is com-
plete.
Hot plugging previously initialized HDD(S) will overwrite existing user
configurations, RAID settings, and any data in the drive.

Maxtronic Orion 410ST User Guide
9
Hardware Installation
Disk and Caddy Assembly
To install new HDD(s) into the Orion 410ST is easy, for it supports hot-wrap, and it is unnecessary to shutdown the system when removing a HDD or replacing one drive.
Step for assembling:
1. Place the HDD in the caddy and fix it firmly with screws into proper position.Be sure
after HDD installed into the tray with completely inserting to system can connect to
back plane smoothly.
10
Maxtronic Orion 410ST User Guide
Using the Front Control Panel
Using the Front Control Panel
By using the front control panel of the Orion 410ST, the user can easily configure basic system settings.
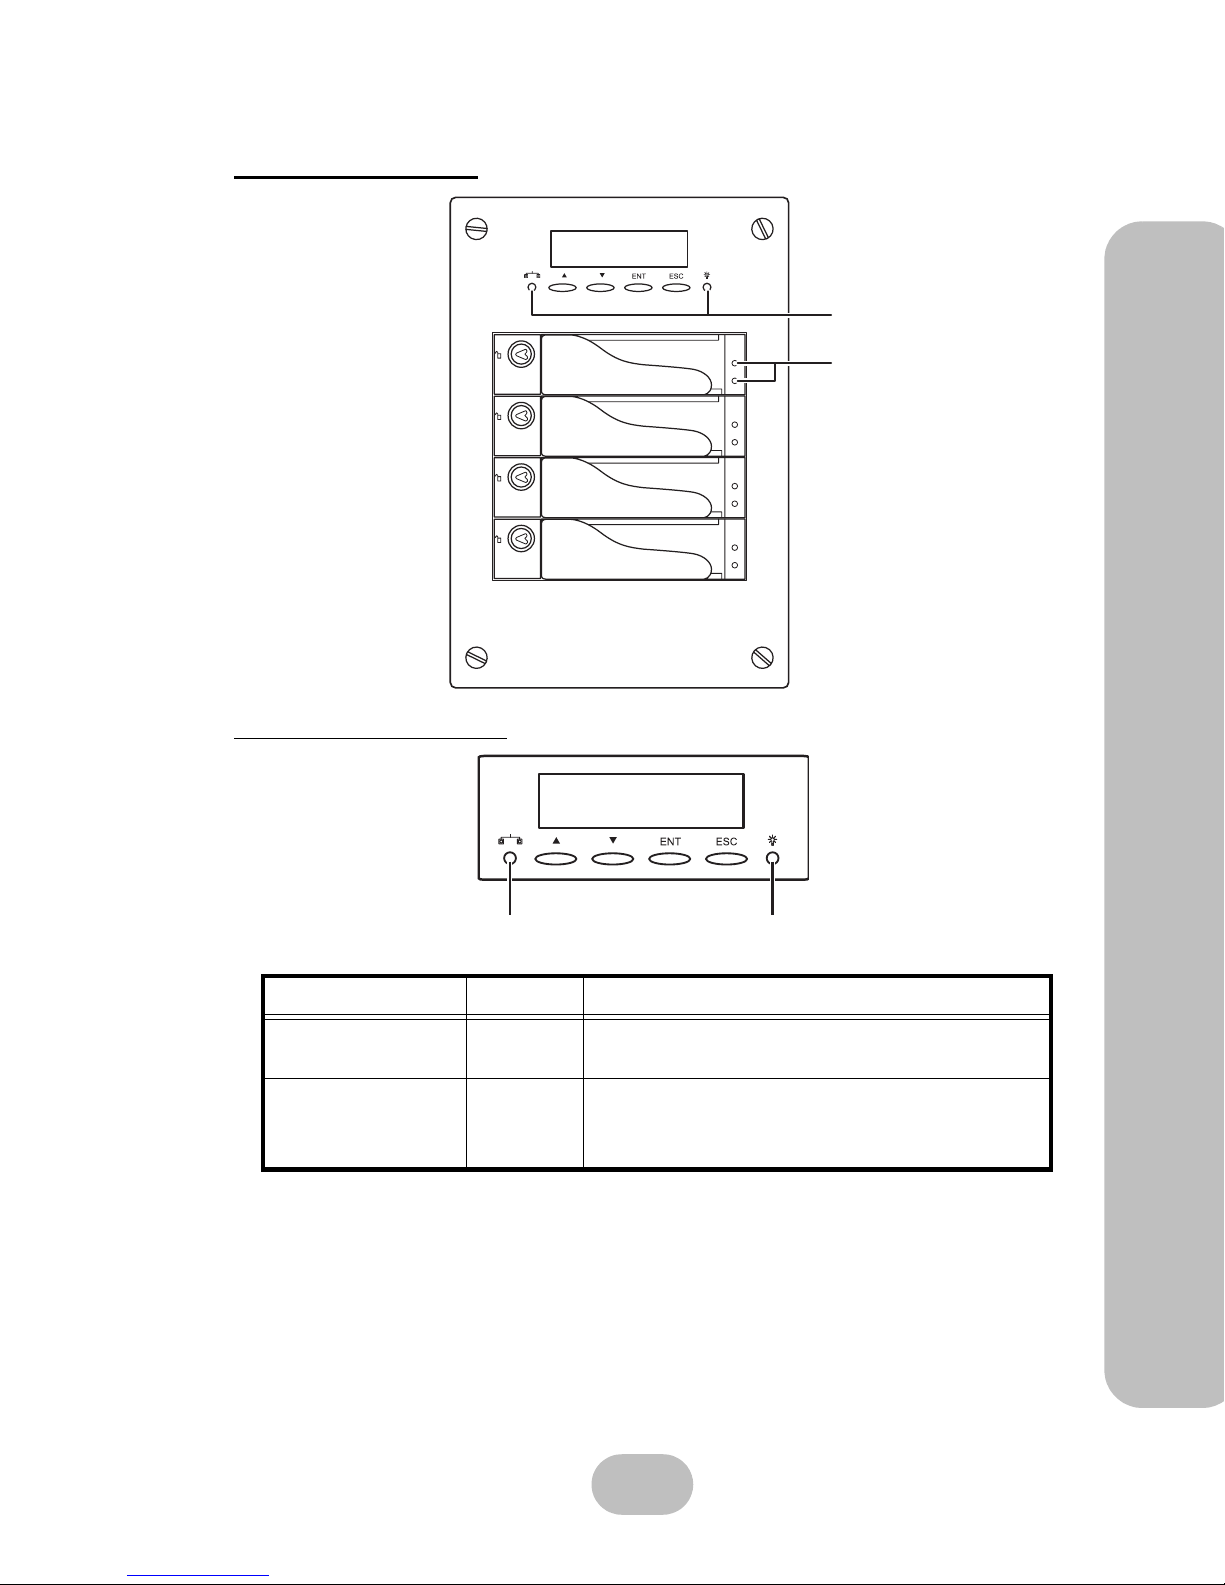
Elements contained in front control panel:
• 4 control buttons
• 2 LED indicators besides control buttons
• 2 LED indicators on each caddy, 8 in total
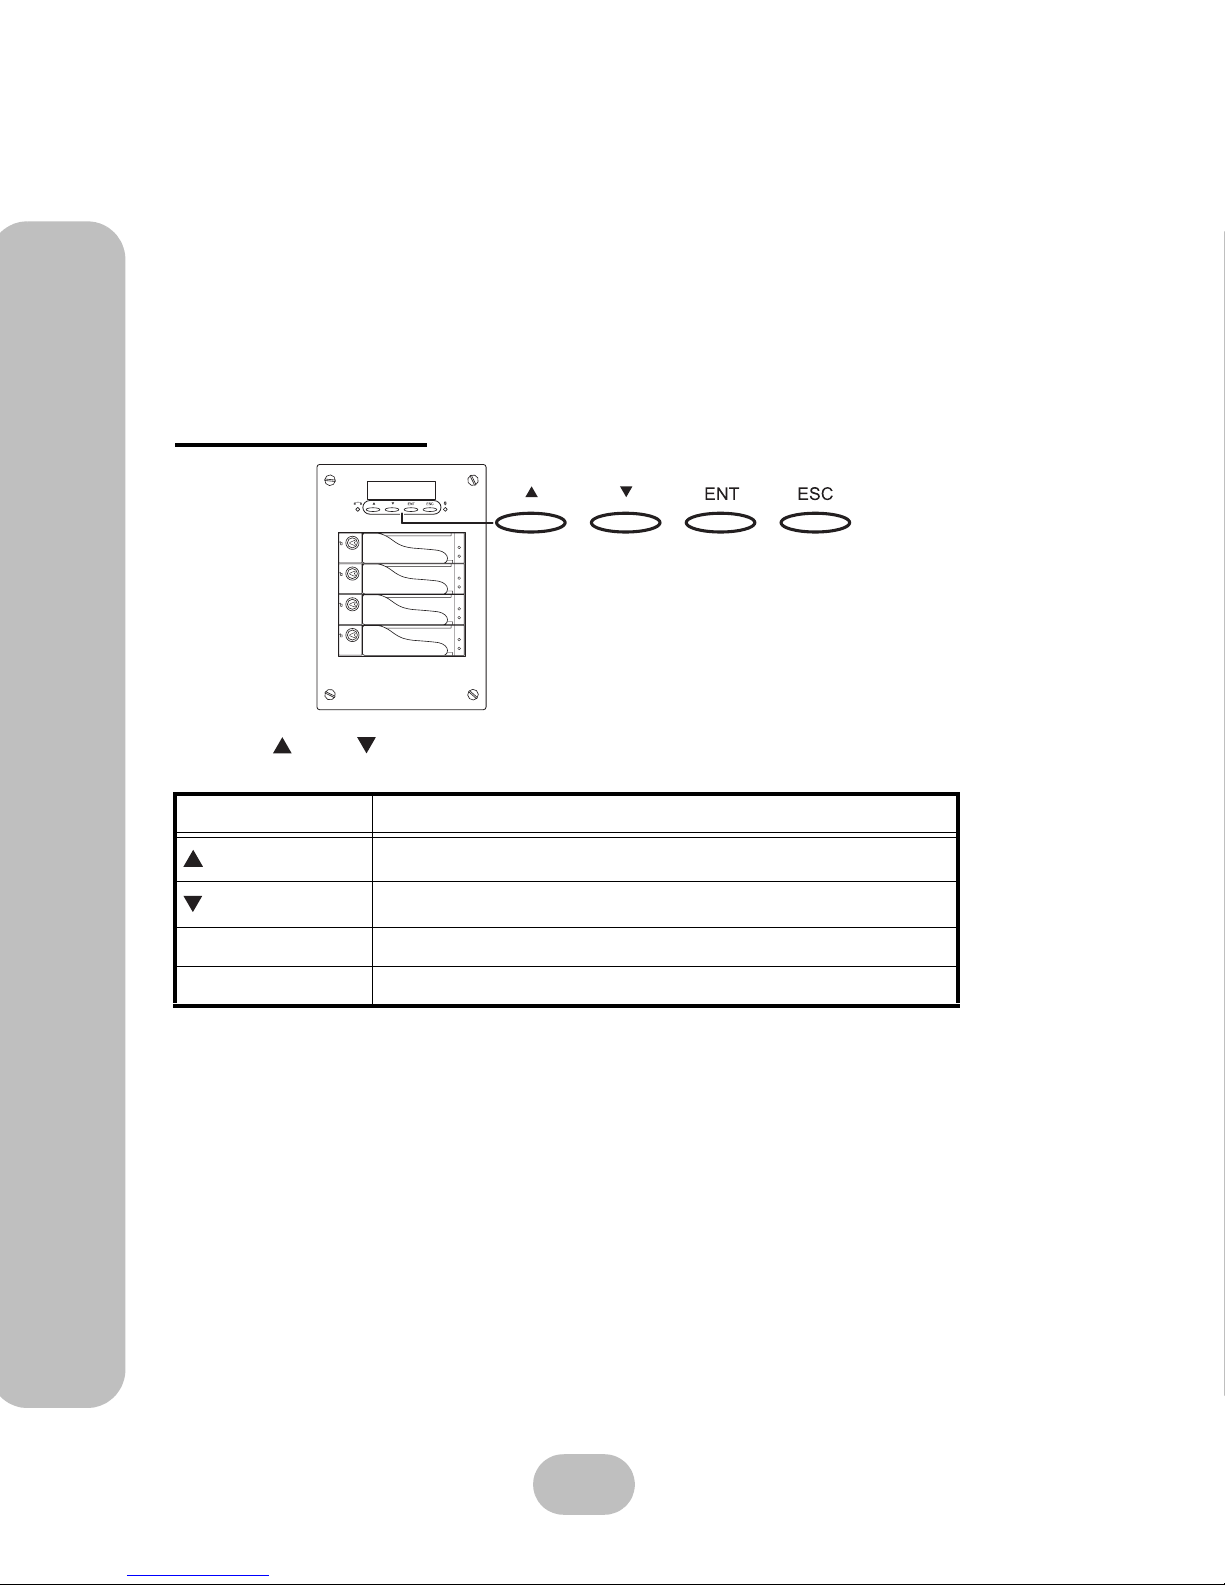
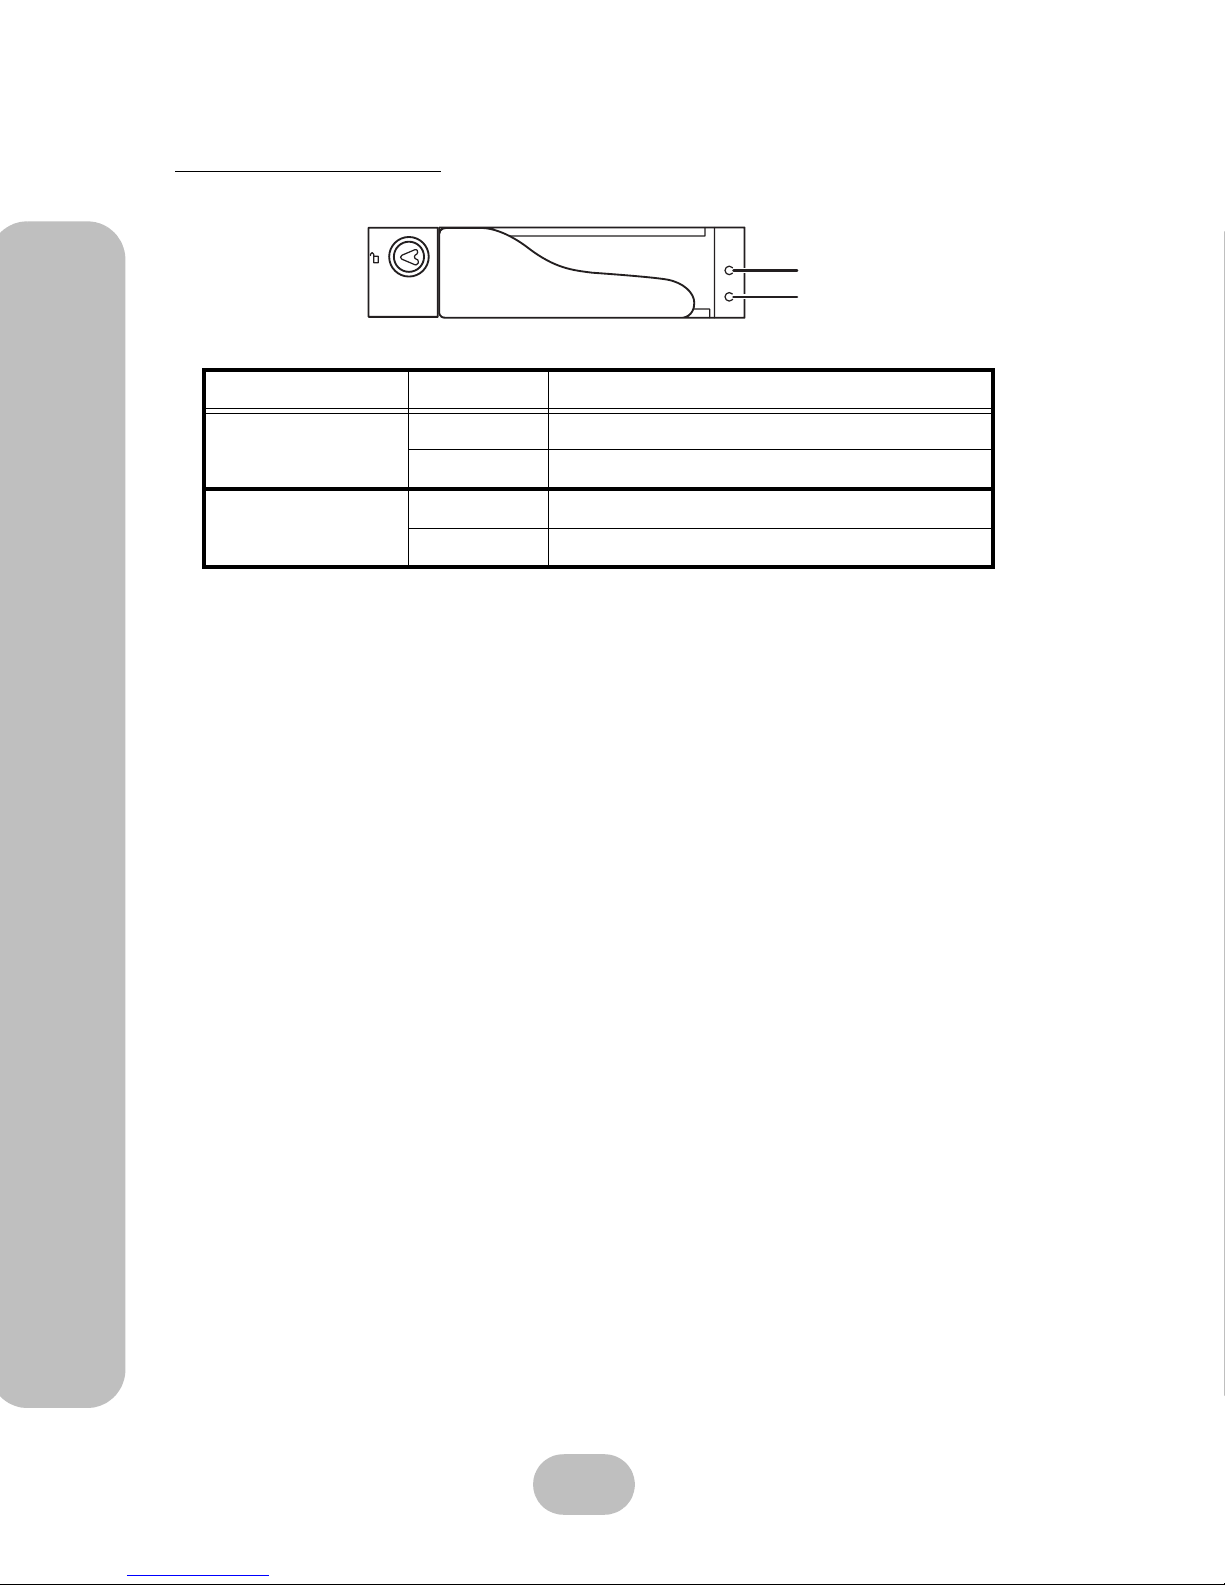
Control buttons
Use the up , down , ENT (enter), and ESC (escape) buttons to configure settings and view
menus in different layer.
Button Description
Up
Move to next item of setting menu
Down
Move to previous item of setting menu
ENT (Enter) Enter the selected menu and confirm the selection
ESC (Escape) Escape and return to the previous layer of menu
Control buttons at front panel
Maxtronic Orion 410ST User Guide
11
Using the Front Control Panel
LED indicators
System LED indicators
LED Color Description
Power Green
Shows the Orion 410ST is powered on and is
operating normally.
Network Status Orange
If the indicator is flashing, the Orion 410ST is connected to the Network.
If the indicator is off, please check all connections.
System LED indicators
Caddy LED indicators
Power
Network status
12
Maxtronic Orion 410ST User Guide
Using the Front Control Panel
Caddy LED indicators
2 LED indicators on each HDD caddy show the HDD status.
LED Indicators Color Description
Upper LED
Green Indicates normal operation of the HDD
Red Indicates HDD malfunction
Lower LED
Blue Indicates the HDD is being accessed
Off Indicates the HDD is idle
Upper LED
Lower LED
13
3 Orion 410ST System Setup
This chapter introduces how to use the front control panel to configure basic hardware setup.
System Boot-up
Every time the Orion 410ST is booted, the system will automatically performs self configuration. This includes checking system memory size, HDD detecting, Network connections, and
other system applications. This is to ensure normal system operation.
After the self-configuration is complete, various system parameters will continually show on
the front control panel LCD screen while the Orion 410ST is operated normally.
Each parameter is displayed for about 2 seconds on the LCD screen, including:
• Product model name
• System name (can be changed later)
• Time/Date
• Ethernet IP address
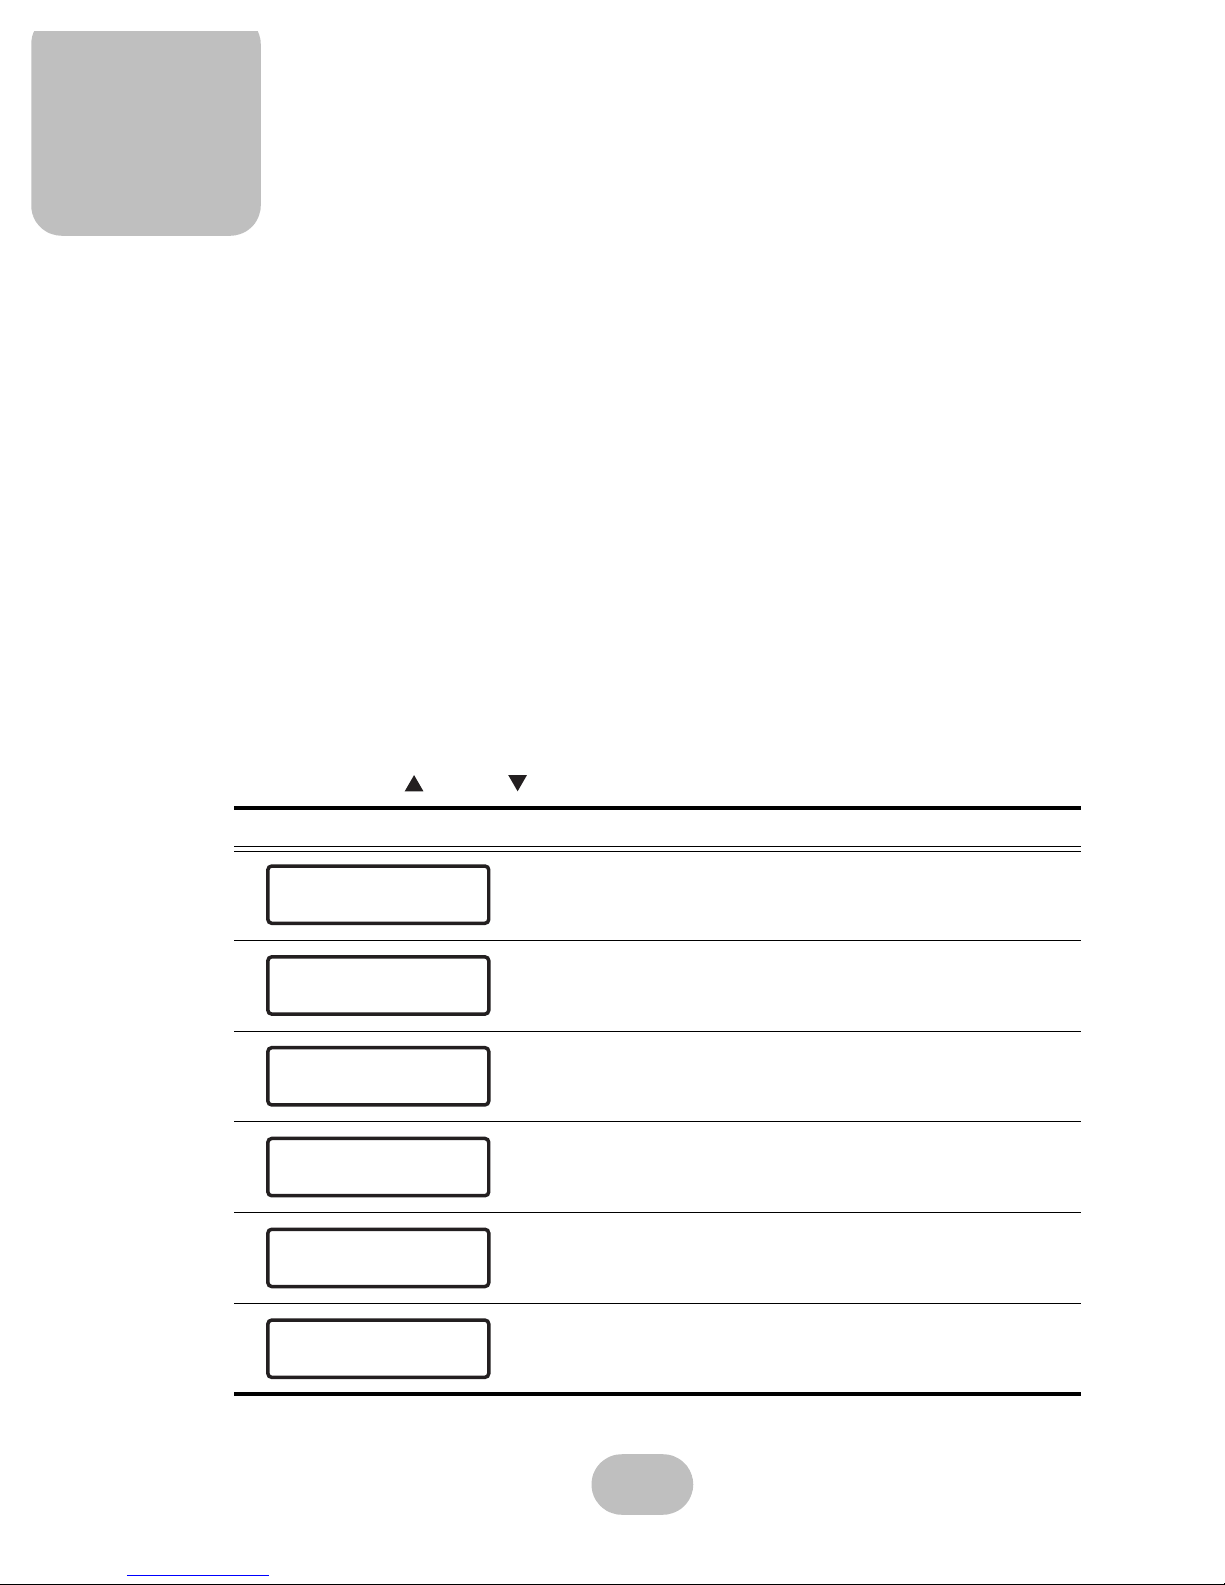
System Setup
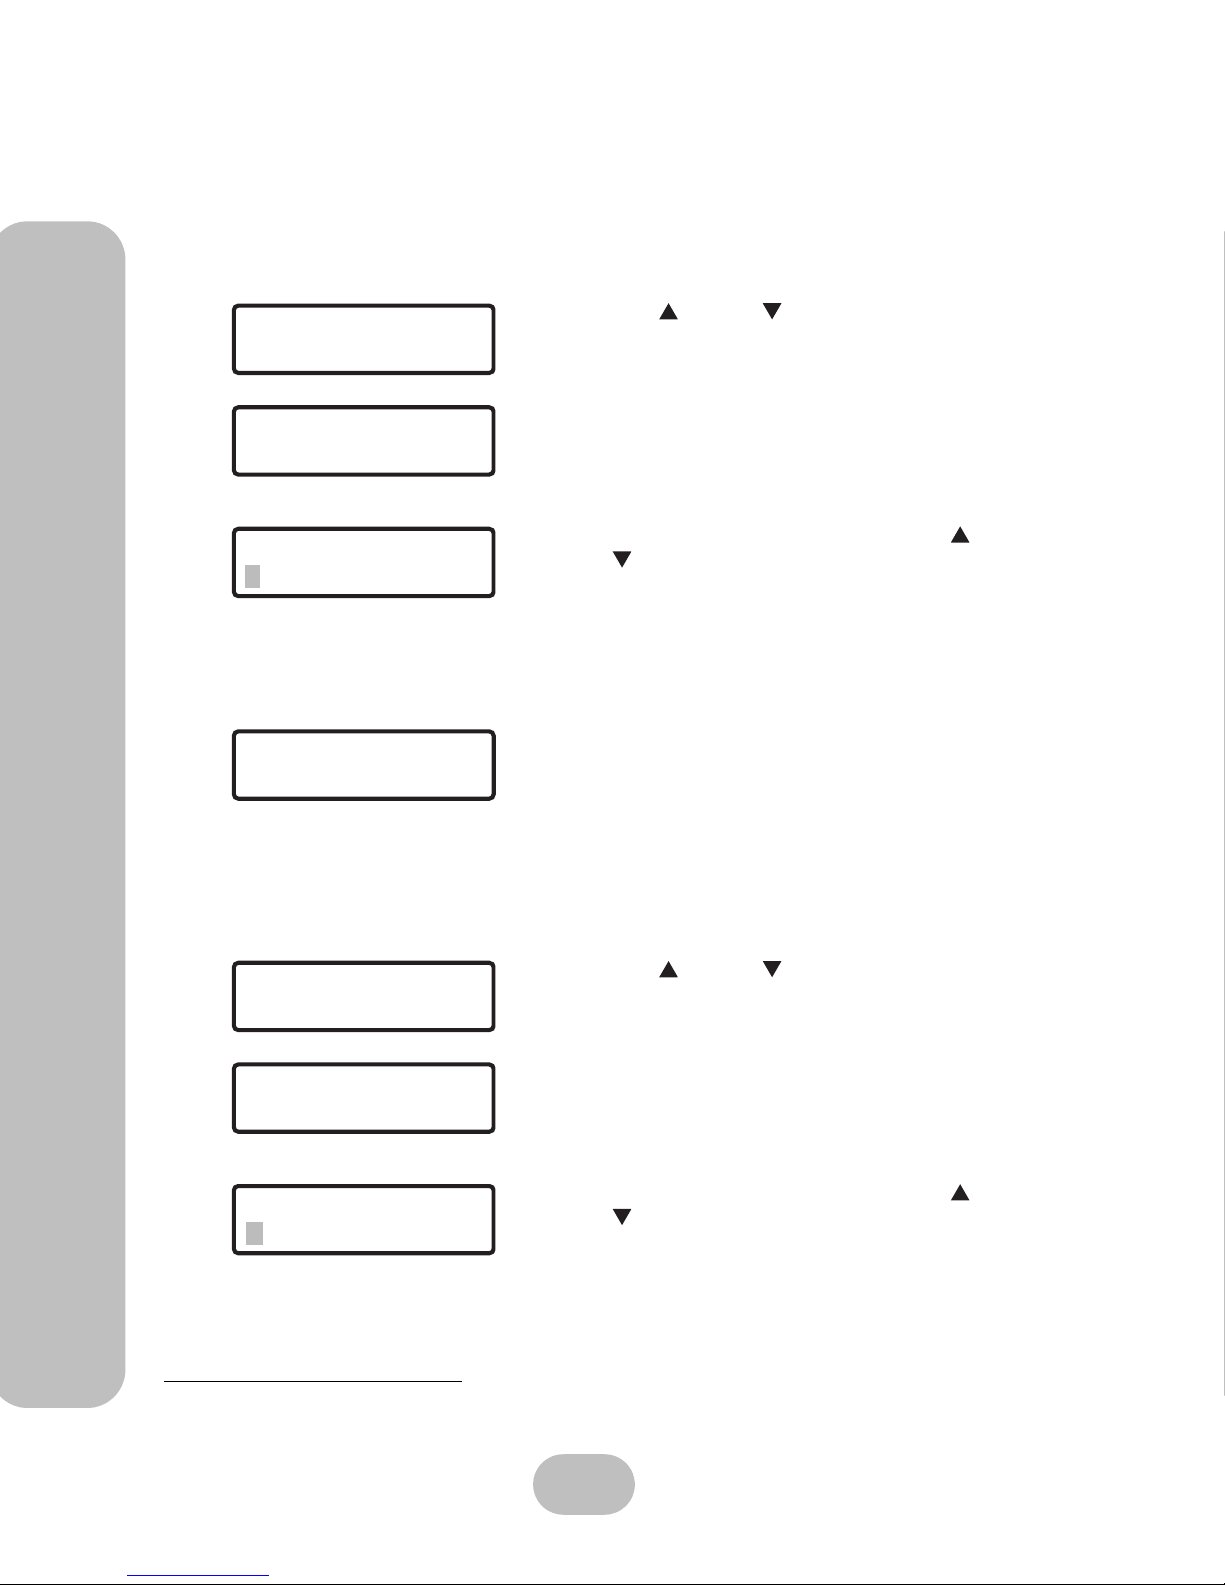
By pressing the up or down button, users can configure system information.
LCD screen display Description
Product model name
Ethernet IP address
System memory size information
CPU and processor frequency information
Use this function to reset the default administrator password
Use this function to reset to factory default settings
Orion 410ST
Ethernet CHO
10.0.10.103
System mem Size
256 MB
VIA Geode
500MHz
Passwd Reset
For Admin Passwd
Factory Default
Restore Settings
14
Maxtronic Orion 410ST User Guide
System Setup
System Login
Press the ENT button on the front control panel and enter password to access system settings.
Main Menu
After the administrator password is entered, the main menu screen will be displayed on the
front control panel LCD screen. Three system setup items are under the main menu:
•Network
•System
•Misc
1 Network Menus
11 Channel 0
Press ENT to proceed.
111 CH0 Status
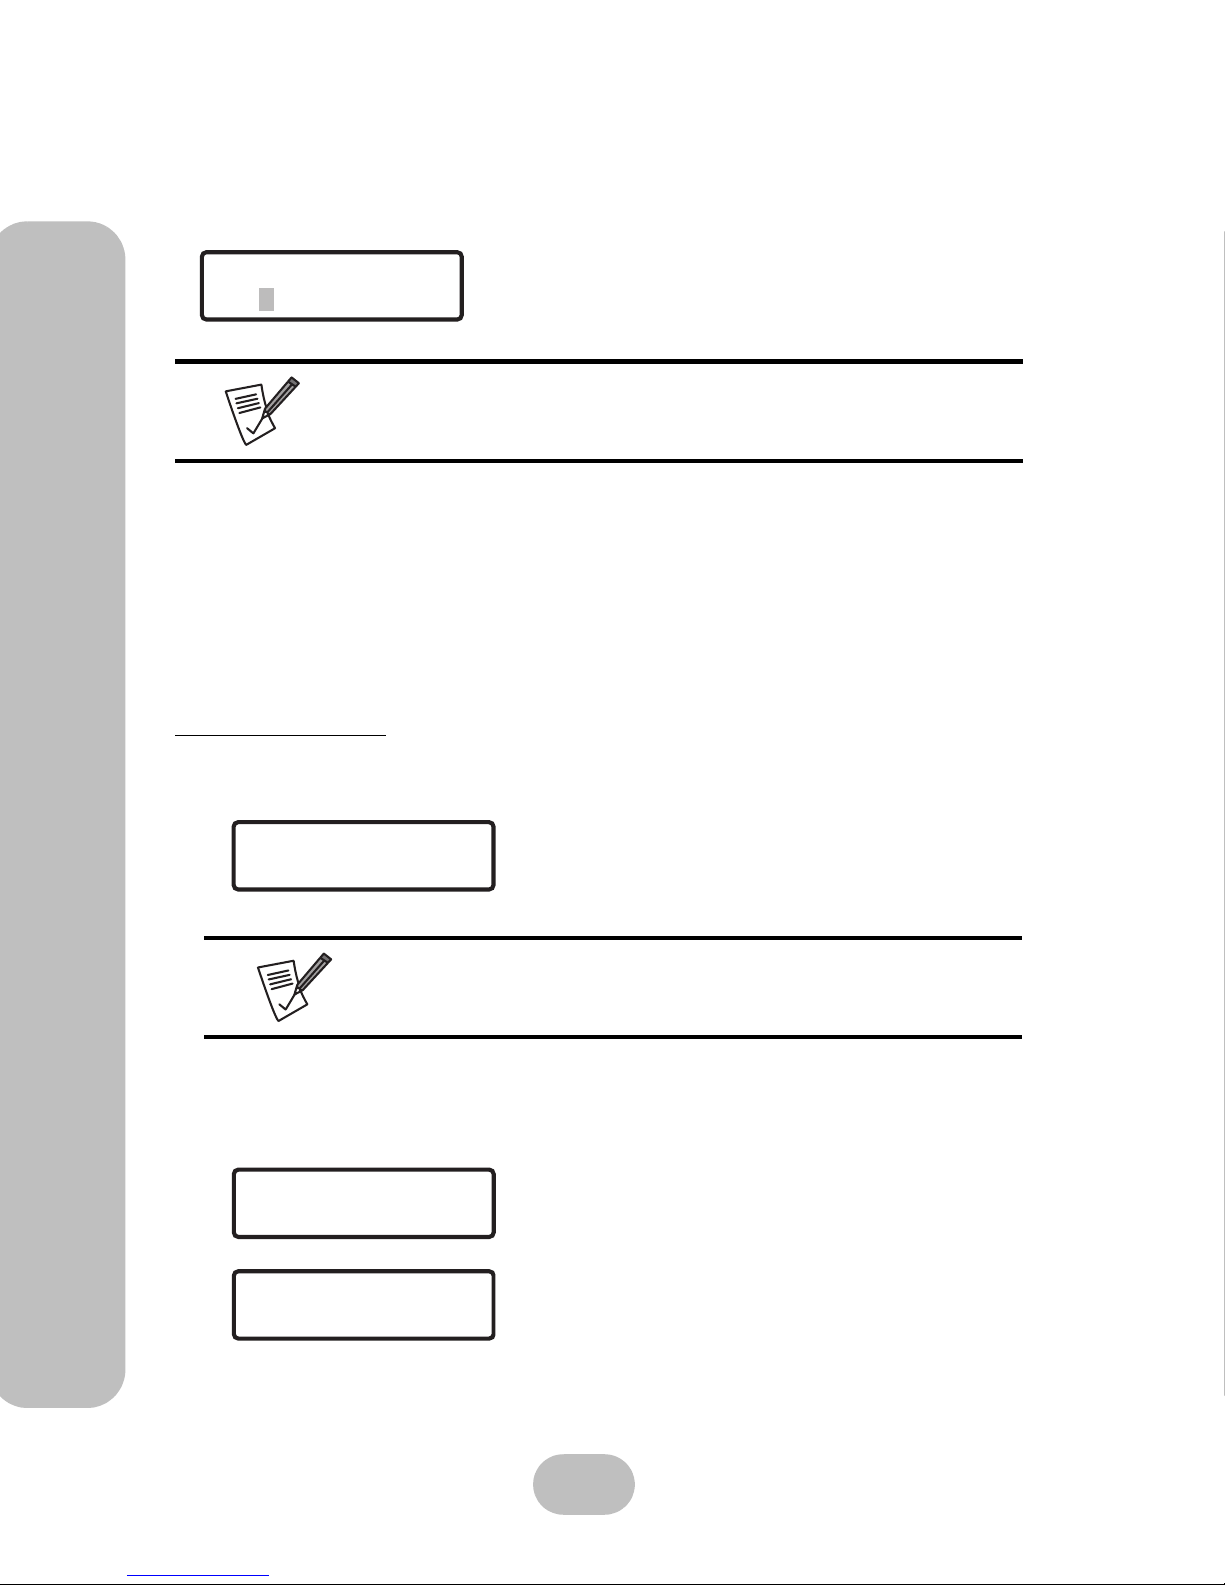
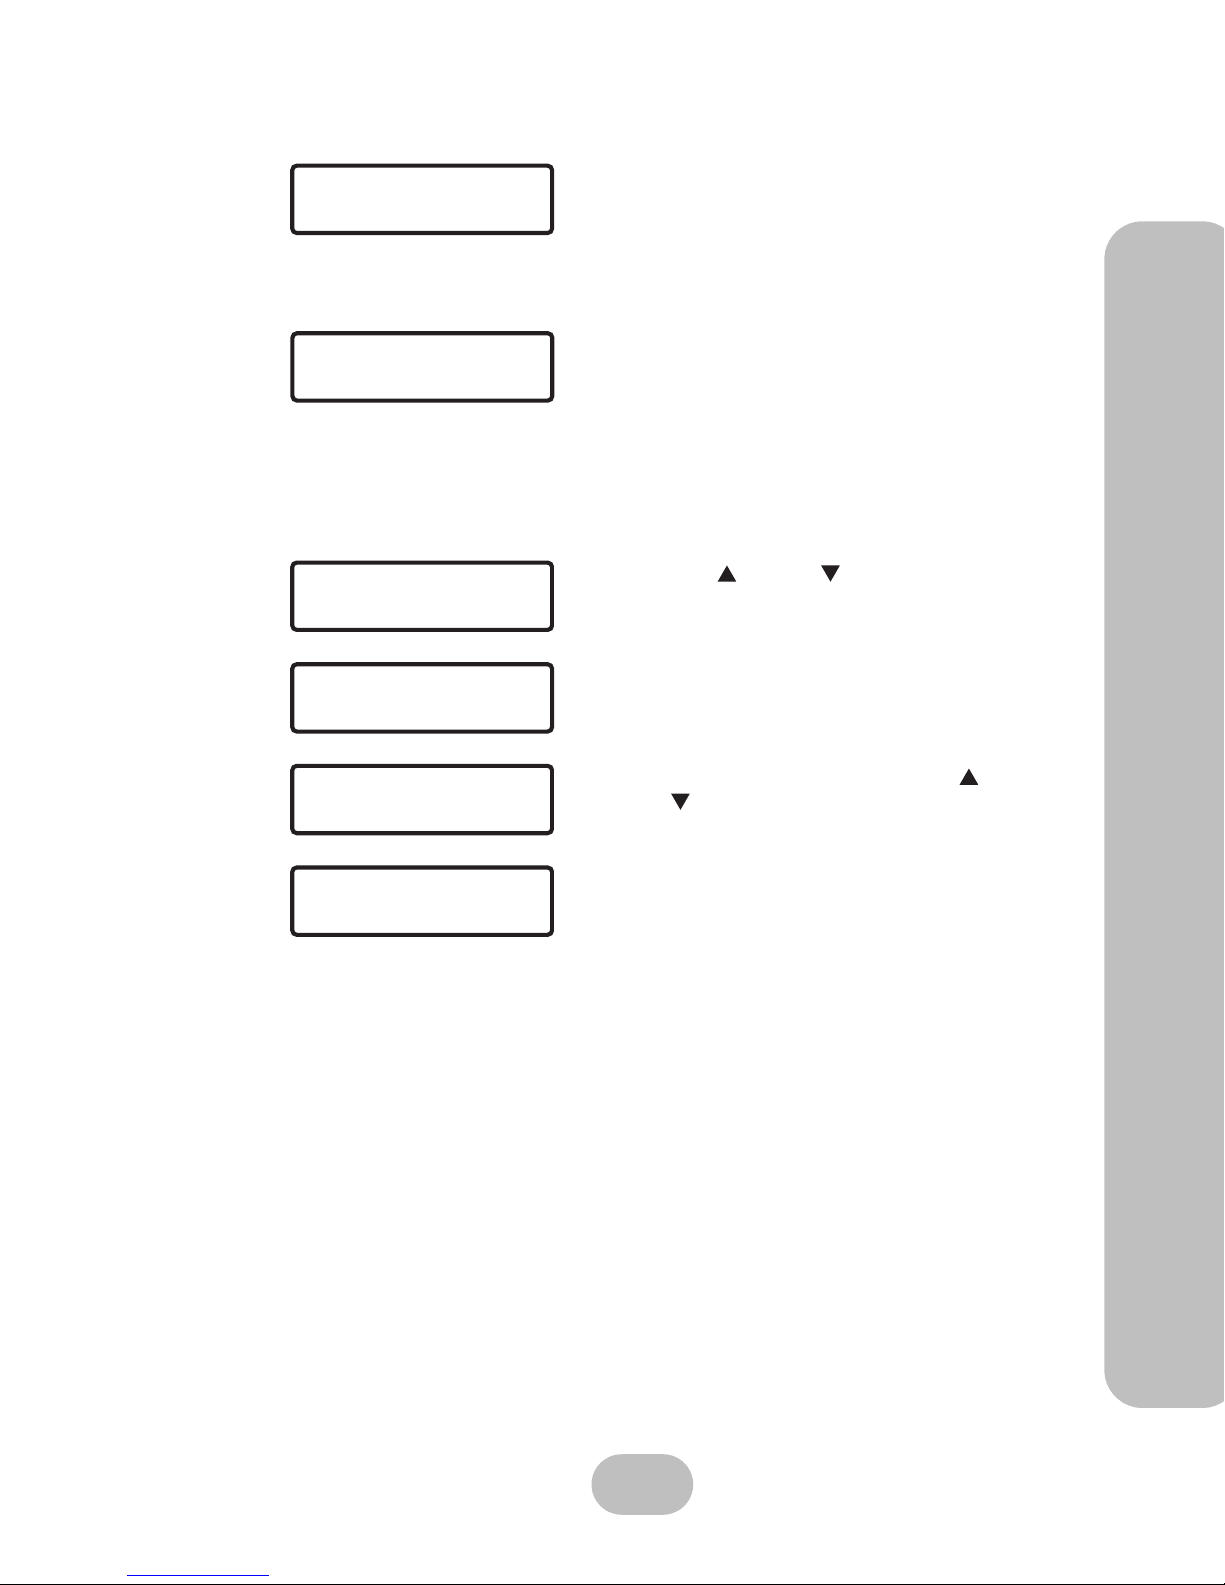
1. Press ENT button to enter ‘00000000’ (8 zeros).
2. Press ESC button to confirm and enter the main menu.
• The default administrator password is ‘00000000’ (8 zeros).
• To change the administrator password, please refer to “Misc” on page 20.
The administrator can change network settings under
this menu.
Since the Orion 410ST provides only one LAN connector, only ‘Channel 0’
will be shown.
1. Press ENT to view detailed CH0 status informa-
tion.
2. If the LAN cable is connected, an
‘ON CONNECTED’ message will be displayed.
Enter Passwd
000
1Network
11Channel 0
11Channel 0
111CH0 Status
ON CONNECTED
111CH0 Status
Maxtronic Orion 410ST User Guide
15
System Setup
112 IP Address
Most system configuration settings can be accessed via the system administrator tools in
the user interface, which is browser based. To access these tools, users must have the correct IP address, which is displayed on the front LCD screen.
On first startup, the Orion 410ST initiates DHCP/BOOTP to select all available IP address
in network. If manual input of an IP address is needed, acquire the IP address from the
Internet service provider. Use the control buttons located on front control panel to set the
IP address manually.
Steps to set IP address manually:
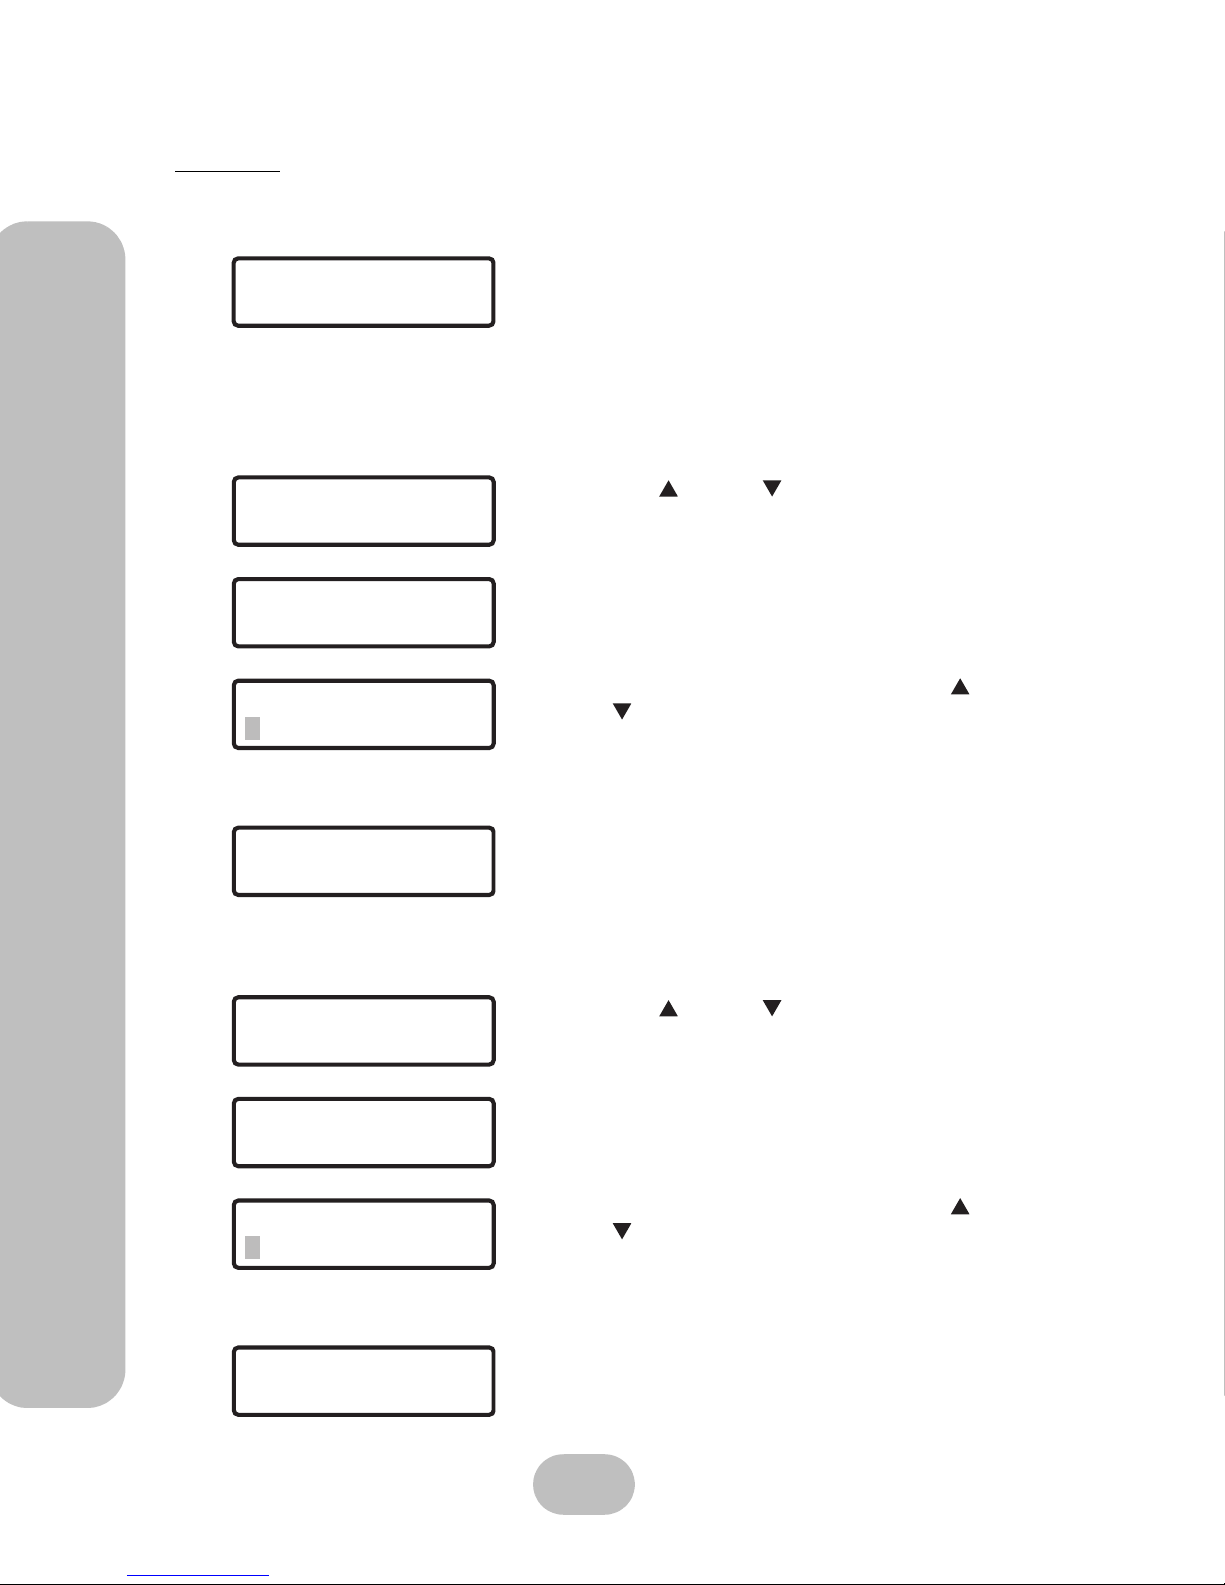
3. If the LAN cable is disconnected, an
‘ON DISCONNECTED’ message will be displayed
• Please check if the LAN cable is correctly con-
nected.
Ethernet status can not be updated automatically. Press ENT to check
‘Channel 0 status’ again to make sure the connection to network has
been successful.
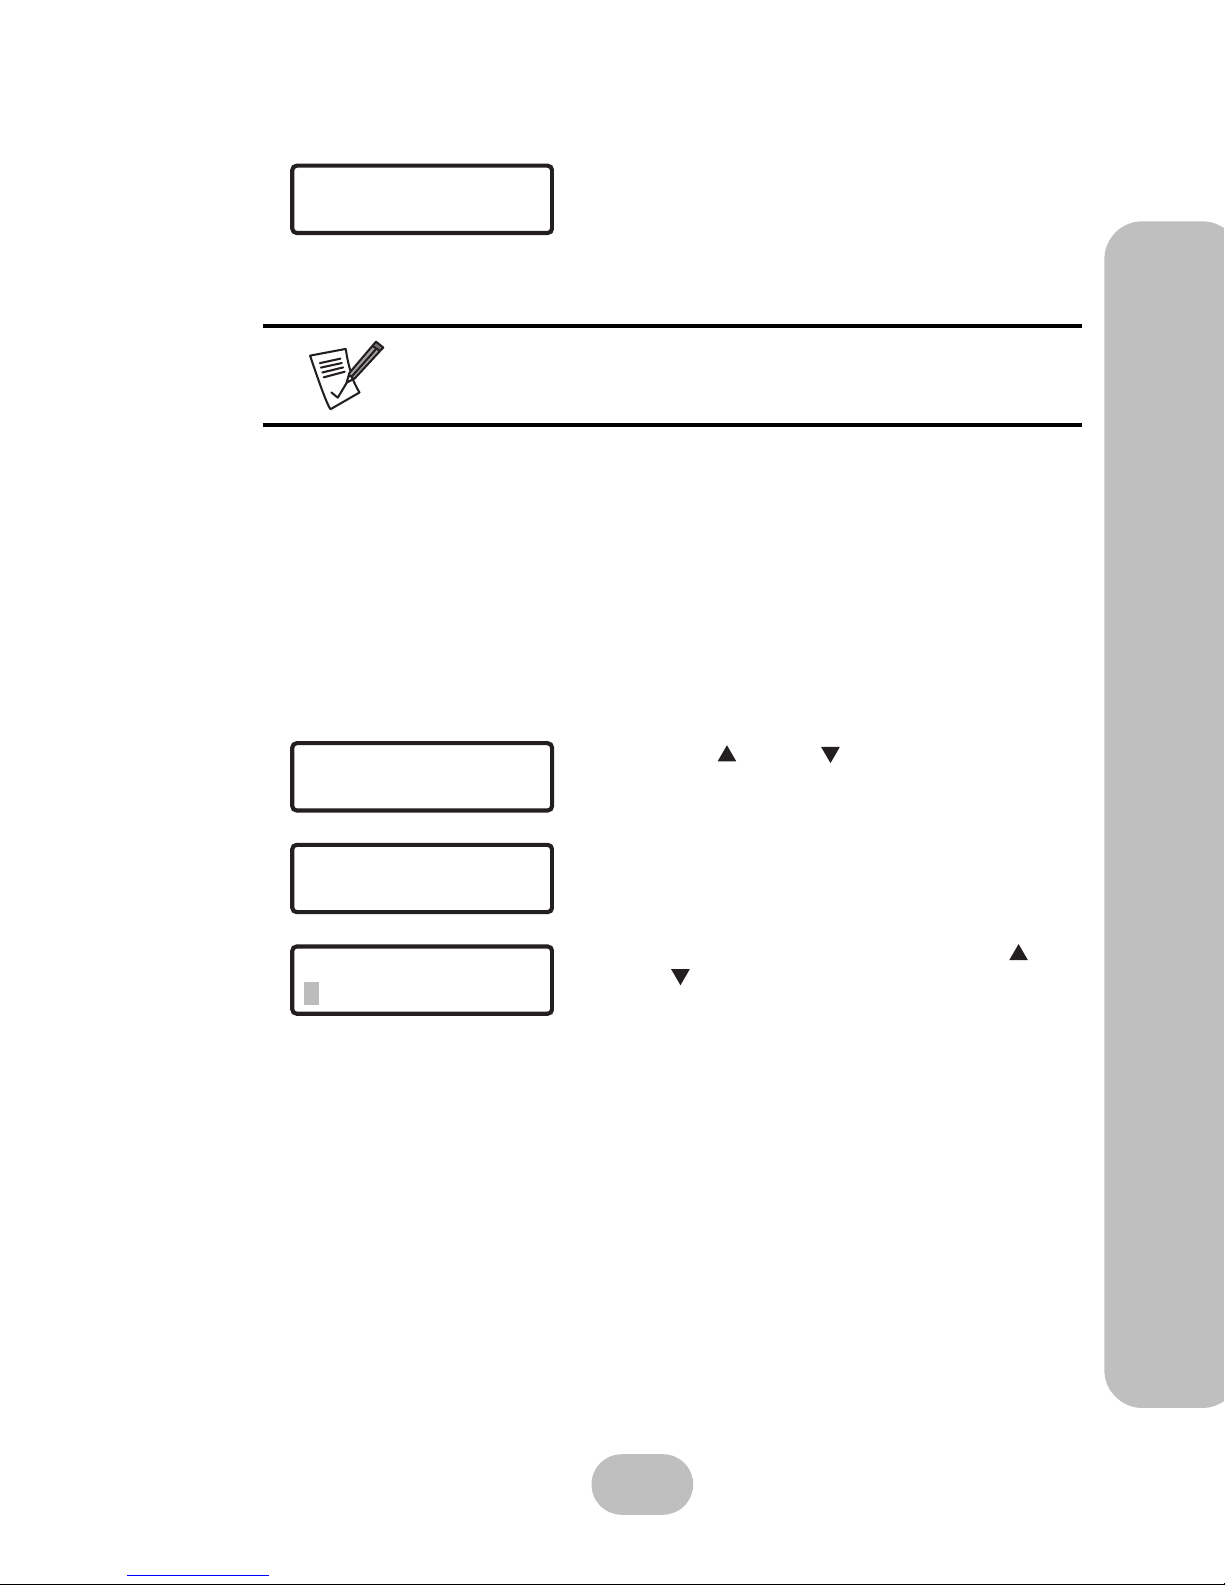
1. Use the up or down button under the 11
Channel 0 submenu to enter the ‘112CH0 IP
ADDR’ and press ENT to confirm.
2. Press ENT again to enter the ‘Set CH0 IP’ screen.
The current IP address will be displayed.
3. To set the IP address, press ENT again.
4. A flashing gray square appears. Use the up and
down buttons to adjust the value of each digit.
Before entering the next digit, press ENT to confirm the input.
5. After the IP address setup is complete, press ENT
to confirm.
6. The system will automatically reboot after the new
IP address is set.
ON DISCONNECTED
111CH0 Status
11Channel 0
112CH0 IP ADDR
Set CH0 IP
000.000.000.000
Set CH0 IP
000.000.000.000
16
Maxtronic Orion 410ST User Guide
System Setup
113 Netmask
After the system IP address is set, the administrator also needs to set a sub-network mask
IP address.
1
Setting the sub-network mask IP address:
114 Gateway
Use the gateway address provided by the network service provider to configure the gateway.:
1.
1. Use the up or down button under the 11
Channel 0 submenu to enter the ‘113CH0 Net-
mask’ and press ENT to confirm.
2. Press ENT again to enter the ‘Set CH0 Netmask’
screen. The present netmask IP address will be
displayed.
3. To set a netmask IP address, press ENT again.
4. A flashing gray square appears. Use the up and
down buttons to adjust the value of each digit.
Before entering the next digit, press ENT to confirm the input.
5. After the netmask IP address setup is complete,
press ENT to confirm.
6. Press ESC to exit the netmask IP setup screen.
The new sub-netmask IP address is displayed.
1. Use the up or down button under the 11
Channel 0 submenu to enter the ‘114Gateway’
and press ENT to confirm.
2. Press ENT again to enter the ‘Set CH0 Getway’
screen. The current gateway address will be displayedn.
3. To set a gateway address, press ENT again.
4. A flashing gray square appears. Use the up and
down buttons to adjust the value of each digit.
Before entering the next digit, press ENT to confirm the input.
5. After the gateway address setup is complete, press
ENT to confirm.
6. Press ESC to exit the gateway setup screen.
11Channel 0
113CH0 Netmask
113CH0 Netmask
000.000.000.000
Set CH0 Netmask
000.000.000.000
113CH0 Netmask
255.255.0.0
114CH0 Gateway
11Channel0
Set CH0 Gateway
000.000.000.000
Set CH0 Gateway
000.000.000.000
Maxtronic Orion 410ST User Guide
17
System Setup
115 HW ADDR
116 DHCP Status
If the LAN supports DHCP server, the Orion 410ST will detect the configuration. The
default status is ‘ON’. To disable DHCP, please following the steps below:
The new gateway address is displayed.
This is provided by the manufacture, and can’t be
changed.
1. Use the up or down button under the 11
Channel 0 submenu to enter the ‘116DHCP Status’ and press ENT to confirm.
2. The DHCP status will be displayed.
3. To set the DHCP status, press ENT again.
4. A query message appears. Use the up and
down buttons to move the arrow to ‘NO’, and
press ENT to confirm the selection.
DHCP now is turned off.
114CH0 Gateway
10.0.0.254
115CH0 HW ADDR
0.6.12.0.20.6
11Channel 0
116DHCP Status
116DHCP Status
ON
116DHCP Status
ON<- OFF
116DHCP Status
OFF
18
Maxtronic Orion 410ST User Guide
System Setup
2 System
21 Clock
Press ENT to proceed.
211 Date
212 Time
Users can change time and date settings under this
menu
1. Use the up or down button under the
21Clock submenu to enter the ‘211Date’ and
press ENT to confirm.
2. Current date information will be displayed.
3. To change the date, press ENT again.
4. A flashing gray square appears. Use the up and
down buttons to adjust the value of each digit.
Before entering the next digit, press ENT to confirm the input.
5. Press ESC to exit the date setup screen.
The new date is displayed.
1. Use the up or down button under the
21Clock submenu to enter the ‘212Time’ and
press ENT to confirm.
2. Current time information will be displayed.
3. To change the time, press ENT again.
4. A flashing gray square appears. Use the up and
down buttons to adjust the value of each digit.
Before entering the next digit, press ENT to confirm the input.
5. Press ESC to exit the time setup screen.
The new time is displayed.
2System
21Clock
21Clock
211Date
211Date
11/22/05
211Date
11/22/05
211Date
12/03/05
21Clock
212Time
212Time
02:41:42
212Time
02:41:42
211Date
12/03/05
Maxtronic Orion 410ST User Guide
19
System Setup
213 Time Zone
22 Shutdown
221 Reboot System
222 Halt System
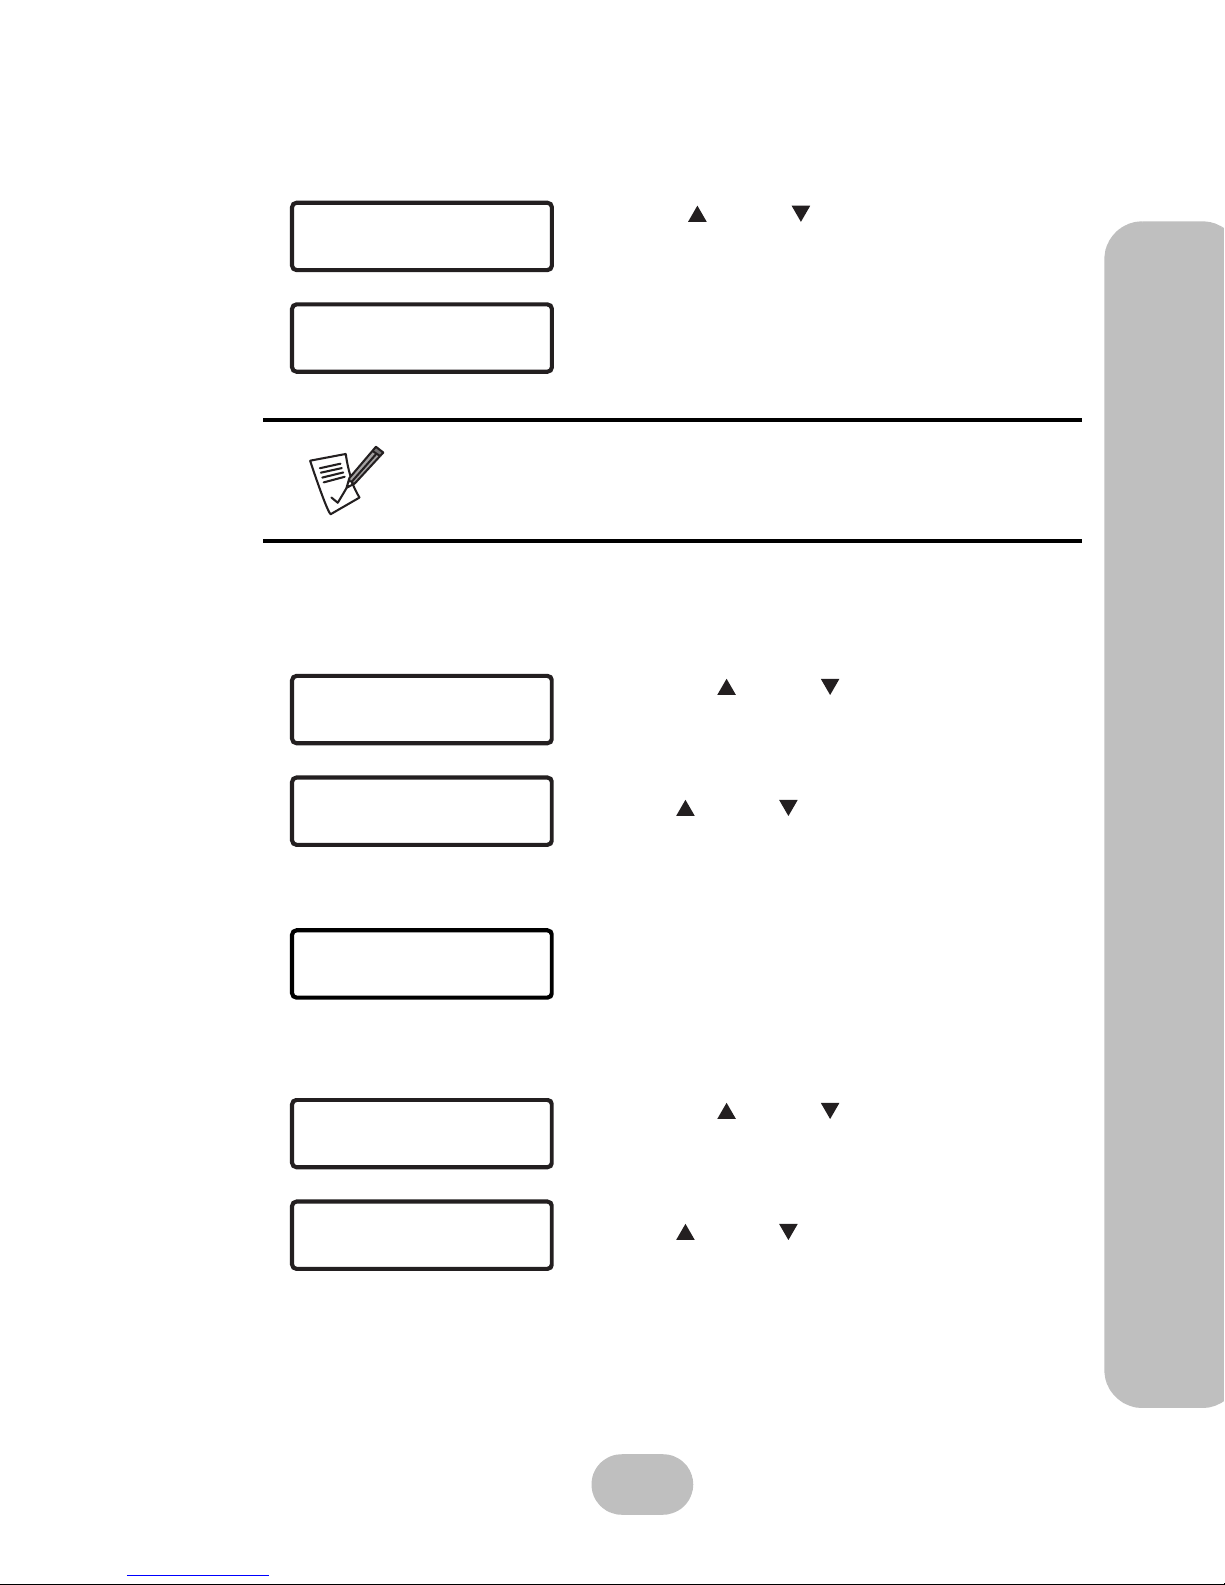
Use the up or down buttons in the 21Clock submenu to enter ‘213Timezone’ and press ENT to confirm.
Current timezone will be displayed.
• The timezone will be automatically detected when you start up the
Orion 410ST for the first time.
• If timezone needs to be changed, please do it through the user interface via the browser.
1. Use the up or down button under the
22Shutdown submenu to enter the ‘221Reboot
System’ and press ENT to confirm.
2. A query message shows on the LCD screen. Use
the up or down button to select ‘Yes’ or ‘No’.
• Yes : Reboot the system
• No: Exit the query screen and go back to the
‘221Reboot System’ submenu.
3. If ‘Yes’ is selected, the Orion 410ST will start
rebooting automatically.
1. Use the up or down button under the
22Shutdown submenu to enter ‘222Halt System’
and press ENT to confirm.
2. A query message shows on the LCD screen. Use
the up or down button to select ‘Yes’ or ‘No’.
• Yes : Halt the system (Shutdown)
• No: Exit the query screen and go back to the
‘222Halt System’ submenu.
21Clock
213Timezone
213Timezone
CST
221Reboot System
22Shutdown
Reboot?
Yes No<-
Rebooting...
Orion 410ST
222Halt System
22Shutdown
Halt?
Yes No<-
20
Maxtronic Orion 410ST User Guide
System Setup
3 Misc
This is used to set miscellaneous options. The main function of this menu is to change administrator password.
Steps to change the administrator password:
3. If ‘Yes’ is selected, ‘Halt System’ will appear on
the LCD screen, and the Orion 410ST will shutdown automatically.
Use this function to shutdown the Orion 410ST NAS System properly.
1. Press ENT to access the ‘31Setup Passwd’ submenu
under the ‘3Misc’ menu.
2. The current administrator password shows on the
LCD screen. Press ENT again to change the password.
3. A flashing gray square appears. Use the up or
down button to adjust the value of each digit.
Before entering the next digit, press ENT to confirm
the input.
4. After you have entered the new password, the system
will ask you to confirm this password.
5. Enter the exact value of each digit to confirm the
password.
• When you first use the Orion 410ST, you should change the default
password immediately, to ensure security.
• The changed administrator password should be stored in a safe location for future reference.
• The upper limitation of the administrator password is 14 digits.
• After the administrator password has changed, the Orion 410ST will
reboot. If the administrator needs to change any further system settings, please use the new administrator password to login to the system.
Halt System
Orion 410ST
31Setup Passwd
3Misc
31Setup Passwd
00000000
31Setup Passwd
31Setup Passwd
Confirm Passwd
Confirm Passwd
 Loading...