

Page 1

D3 Station
USER MANUAL
External Hard Drive
D3 Station
Page 2
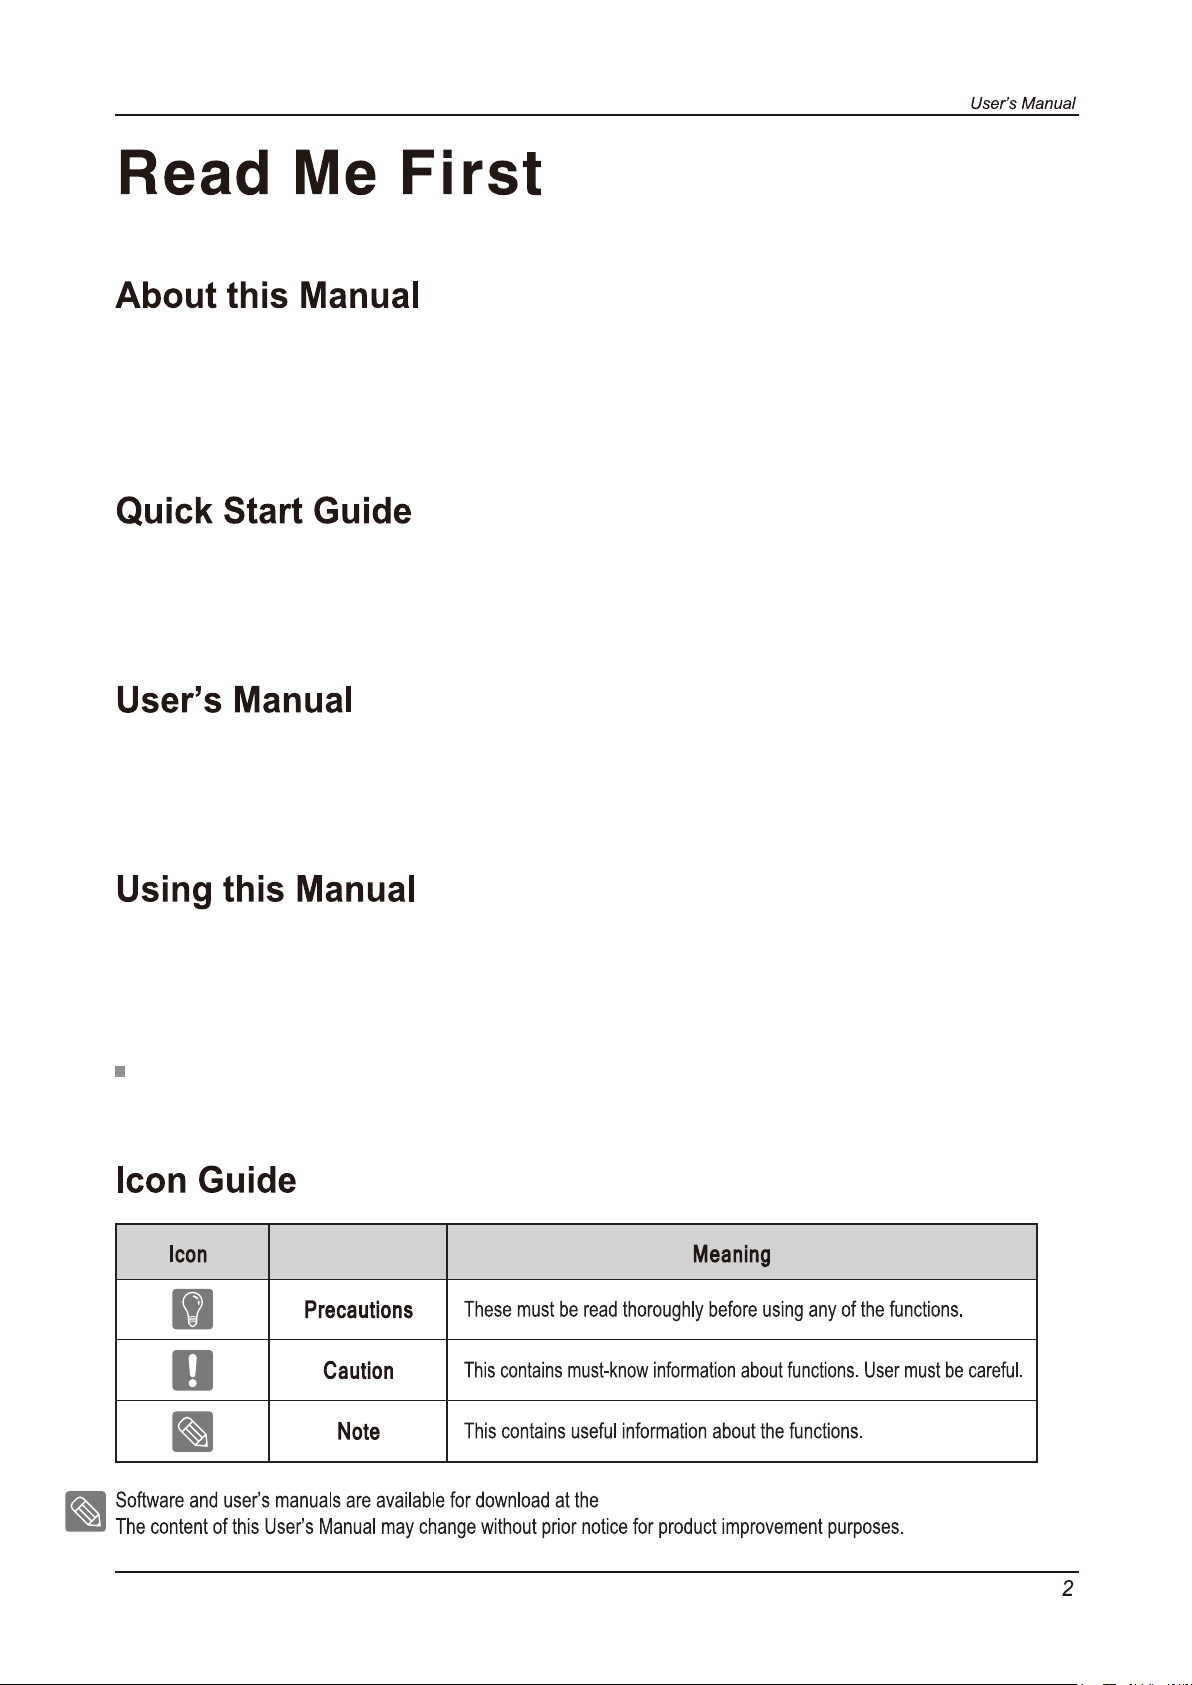
Your product comes with a quick start guide and a user’s manual.
Following the instructions and precautions of this manual will ensure easier and more enjoyable use of your D3 Station
External Hard Drive.
A start guide is provided with the purchase of D3 Station External Hard Drive.
The quick start guide explains product components and provides simple instructions on how to install the product.
The User’s Manual contains detailed information about features and instructions on using your D3 Station
External Hard Drive.
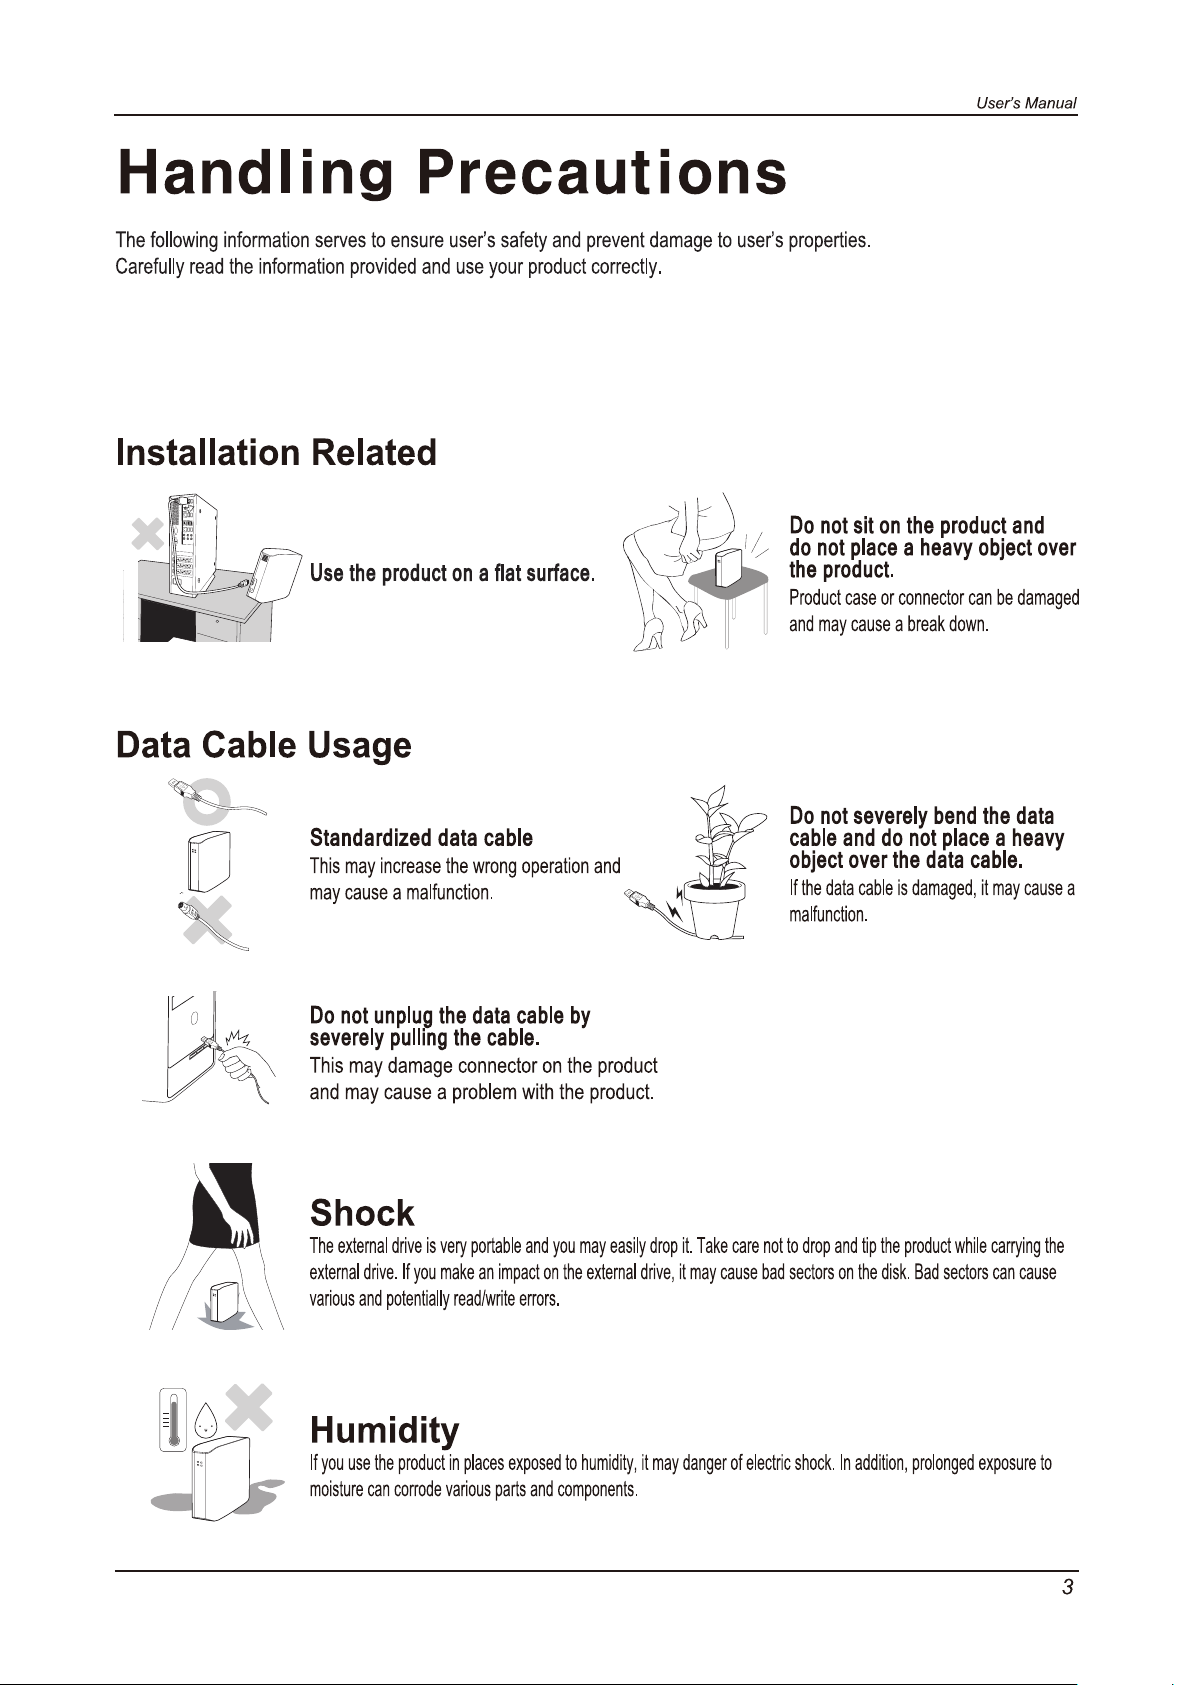
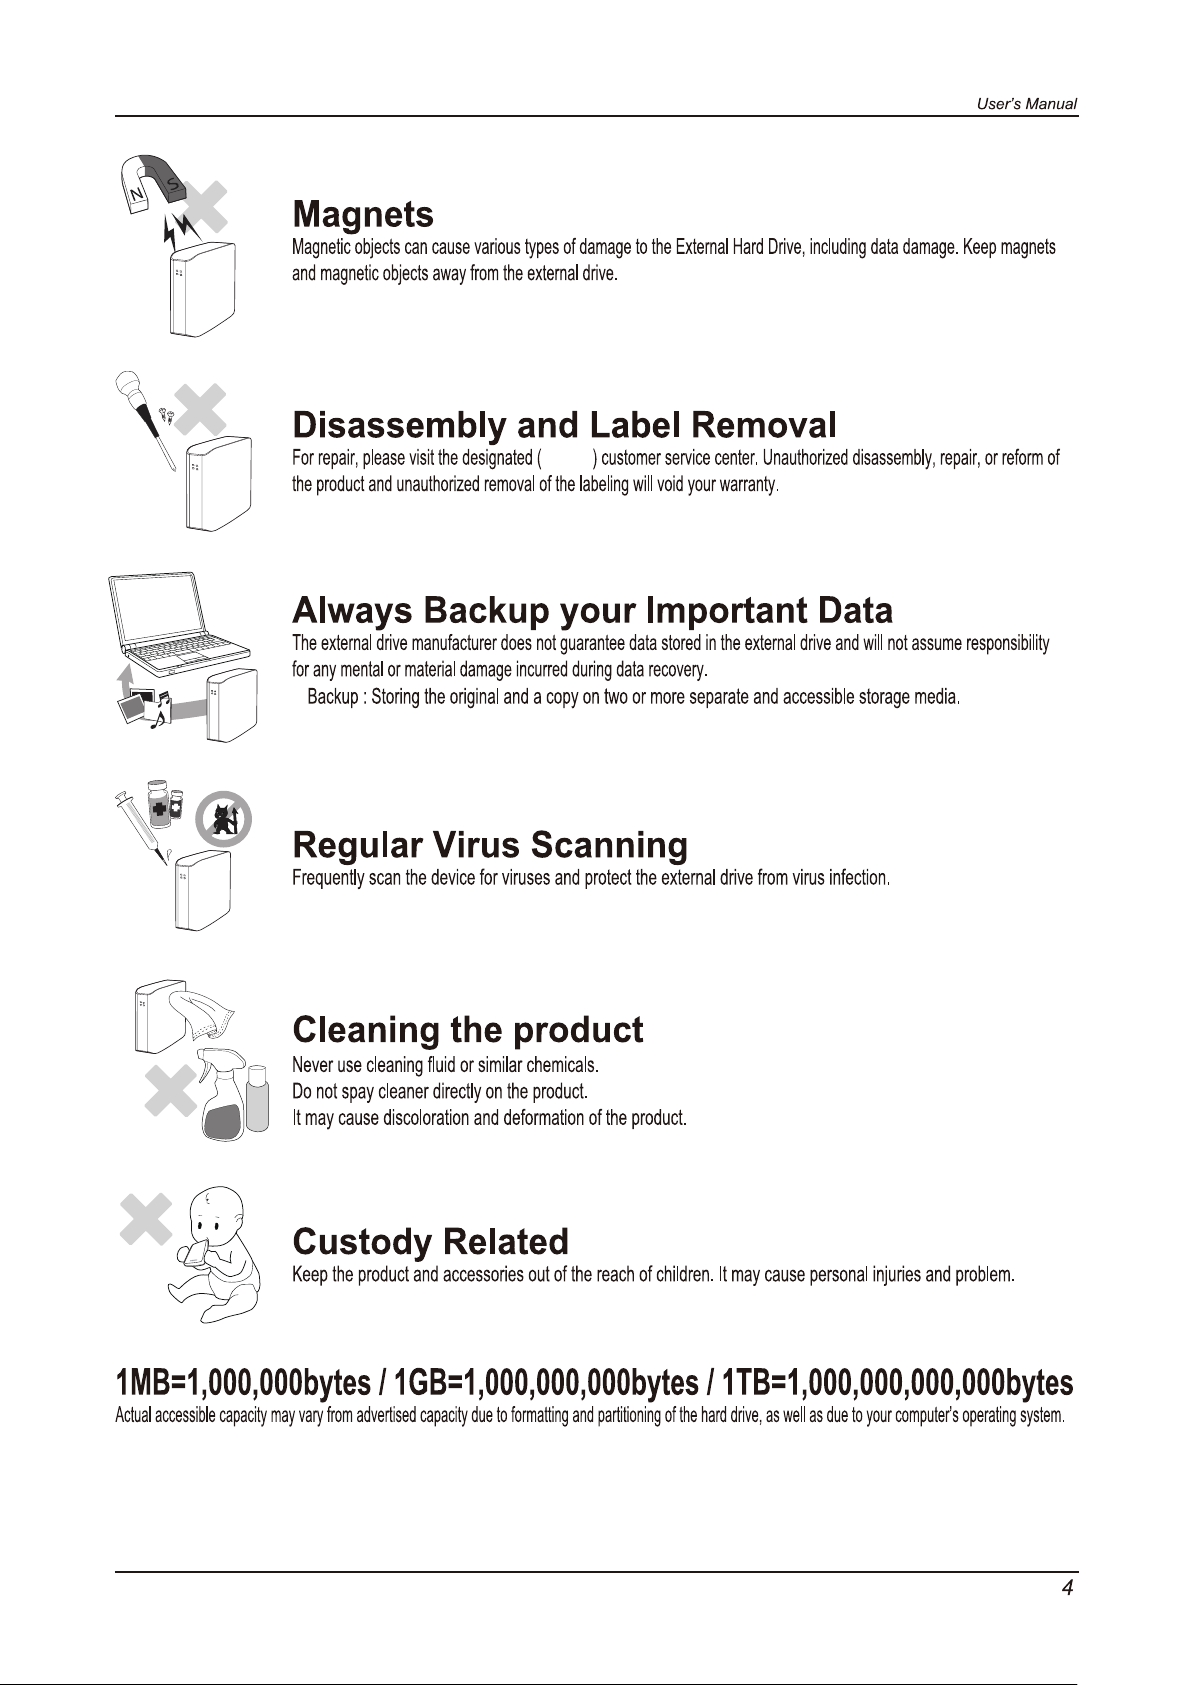
Carefully read and understand the “Handling Precautions” section before using the product.
Failure to follow all the instructions as outlined in the Handling Precautions section could result in damage to
you or to your D3 Station External Hard Drive.
Refer to the Troubleshooting section first if you experience a problem with the product.
Maxtor Hard Drive website
(http://maxtor.seagate.com).
D3 Station External Hard Drive
Page 3
D3 Station External Hard Drive
Page 4
maxtor
•
This device is not intended for use in the direct field of view at visual display workplaces.
To avoid incommoding reflections at visual display workplaces this device must not be placed in the direct field of view.
D3 Station External Hard Drive
Page 5
Read Me First
Handling Precautions
2
About this Manual
2
Quick Installation Guide
2
User’s Manual
2
Using this Manual
2
Icon Guide
3
Installation Related
3
Data Cable Usage
3
Shock
3
Humidity
4
Magnets
4
Disassembly and Label Removal
4
Always Backup your Important Data
4
Regular Virus Scanning
4
Cleaning the product
4
Custody Related
Introduction
Specifications
Connecting your D3 Station
Using your D3 Station
D3 Station Software
Troubleshooting
6 Introduction
7 D3 Station
8
Installation
9
Windows
10
Macintosh
11
Copying / Moving Files
11
Removable Disk Method
13
Safely Removing your D3 Station
13
For Windows
14
For Macintosh
15
Drive Manager Software
15
Drive Manager Installation
17
Using Drive Manager
19 FAQ
D3 Station External Hard Drive
Appendix
20
Partitioning and Changing File System Type
20
Reformat to FAT32
20
Reformat to NTFS32
20
Reformat in Macintosh
Product Certifications
21
21
FCC
Page 6
The D3 Station External Hard Drive is a high-performance external hard drive that supports USB 2.0 and
USB 3.0. Unlike conventional desktop disk drives, The D3 Station External Hard Drive makes it possible for
you to instantaneously add greater storage capacity to your system without having to take the computer apart.
This means that your D3 Station External Hard Drive comes fully partitioned and formatted for your use and
you can instantly access to the drive by simply plugging it into your computer through a USB port.
The D3 Station comes with Drive Manager which is a Windows-based integrated-management software that allows
the convenient use of External Hard Drives.
Drive Manager supports various functions including auto backup, file / folder security, drive diagnostic, partition setup.
D3 Station 2TB : HX-D201TDB/GM
D3 Station 3TB : HX-D301TDB/GM
D3 Station 4TB : HX-D401TDB/GM
D3 Station 5TB : HX-D501TDB/GM
D3 Station External Hard Drive
Page 7
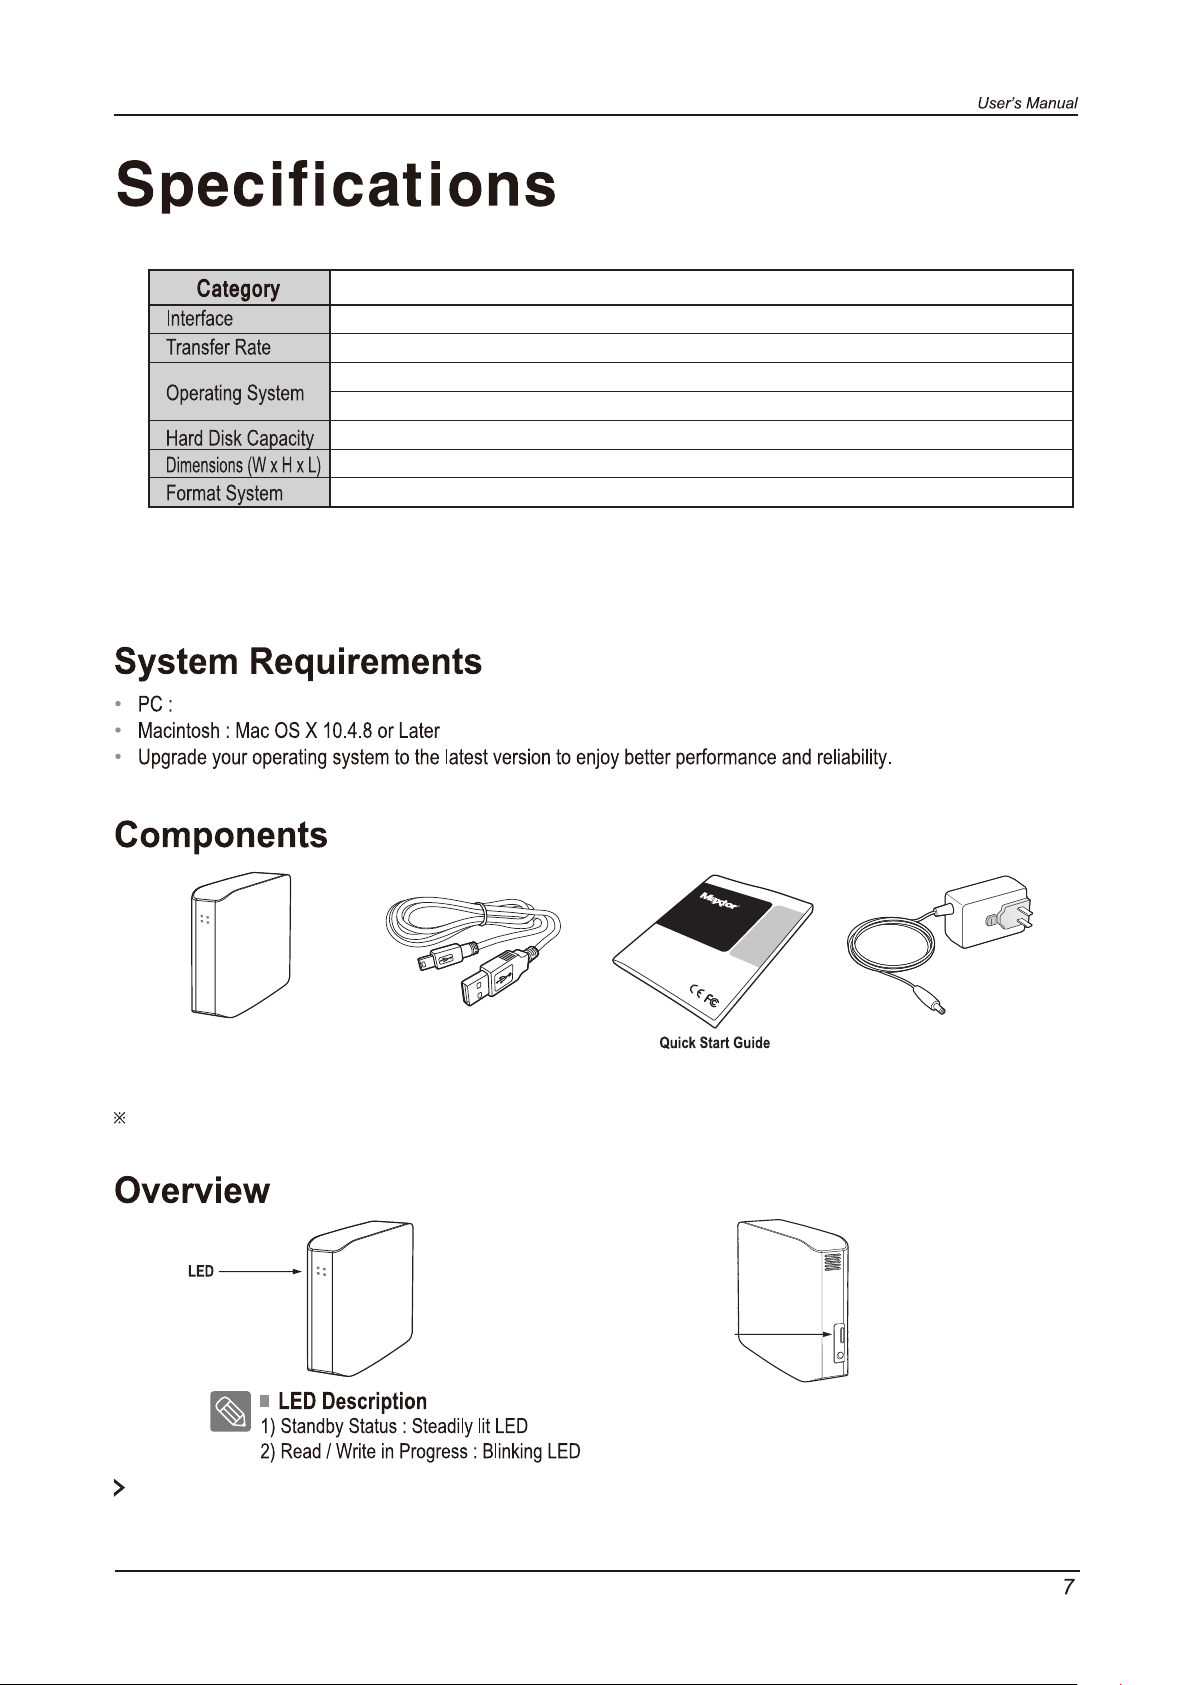
Windows Vista / 7 / 8 / 10
(D3 Station)
D3 Station
Super Speed USB 3.0
5 Gbps Max.
Windows Vista / 7 / 8 / 10
Mac OS X 10.4.8 or Later
2TB / 3TB / 4TB / 5TB
(180.6mm x 129.2mm x 47mm)
NTFS
D3 Station
USER MANUAL
External Hard Drive
When you purchase a D3 Station External Hard Drive, make sure that all components have been included in your
Power AdapterD3 Station USB 3.0-Cable
product package.
USB Port
To use the Hard Drive at its Maximum speed, you need a PC or a Host Card that supports USB3.0 interface
D3 Station External Hard Drive
Page 8

User’s Manual
Connecting your D3 Station
Installation
Verify that the computer meets the minimum system requirements as outlined in System Requirements. Insert the
USB cable to the desktop/laptop computer as shown in Figures 3 and 4:
Figure 3.
•
Connecting to a Desktop Computer
Figure 4.
•
To use the Hard Drive at its maximum speed, you need a PC or a Host Card that supports USB 3.0 interface.
D3 Station External Hard Drive
Connecting to a Laptop Computer
8
Page 9

When you connect D3 Station External Hard Drive to the computer a small icon will appear in the system tray
at the lower right corner of the screen.
Maxtor
You are now ready to use the Maxtor D3 Station External Hard Drive.
Maxtor drive
D3 Station External Hard Drive
9
Page 10

Connect your D3 Station External Hard Drive to the computer. Your Macintosh operating system will then
generate a Maxtor drive icon.
After clicking the Maxtor icon, the following folder will appear.
You are now ready to use the Maxtor D3 Station External Hard Drive.
(Software included with your D3 Station External Hard Drive does not support the Mac operating environment.)
Maxtor
(http://maxtor.seagate.com)
D3 Station External Hard Drive
Maxtor
10
Page 11

Using your D3 Station
Now that you have successfully installed your new D3 Station External Hard Drive, you can copy or move files or whole
folders from your new D3 Station to your computer and vice-versa.
Copy and paste files from the computer to the D3 Station External Hard Drive (Removable Disk Method).
D3 Station External Hard Drive.
From the Windows Explorer, you will see various drive letters; A, C, your C drive is your local Hard Drive.
D3 Station will most likely be the E drive however, it could be any drive letter. For the purposes of this manual,
we will assume that D3 Station is the E drive. As well, for practice copying folders and files, we will copy the
Temp folder onto D3 Station.
D3 Station External Hard Drive
11
Page 12

Now, we will copy the Temp folder from the Local C drive, to the Maxtor E drive. From the left pane in the
Windows Explorer : Right Click Maxtor E Click Paste
D3 Station
Maxtor
Detaching the USB cable while file transfer is in progress can damage your computer and/or D3 Station External
Hard Drive. If you need to disconnect the USB cable, wait for the transfer process to complete first and
then disconnect using the “Safely Remove Hardware” option.
D3 Station External Hard Drive
12
Page 13

Safely Removing your D3 Station
Click “Safely Remove Hardware.”
Click “Eject Seagate D3 Station” device.
Use the Safely Remove button of Drive Manager to safely remove your external hard drive.
This prompt will list all of the Mass Storage Devices like your Local Hard
Drive and your D3 Station Hard Drive.
D3 Station External Hard Drive
13
Page 14

Maxtor
Maxtor
Do not Disconnect D3 Station External Hard Drive's USB cable from the computer while file transfer is
in progress. Interrupting the file transfer could lead to data corruption and/or damage to your D3 Station.
D3 Station External Hard Drive
14
Page 15

D3 Station Software
Drive Manager Software
Drive Manager is bundled software for Windows provided for the convenient use of your External Hard Drive.
Drive Manager comprises AutoBackup (a personal backup solution), SecretZone™(a personal data protection solution),
and External Hard Drive management tools.
Drive Manager must be installed on a computer that is connected to your D3 Station to operate.
For further details, refer to the user manual provided with your D3 Station.
Drive Manager Installation
Maxtor
Maxtor
D3 Station External Hard Drive
15
Page 16

D3 Station External Hard Drive
16
Page 17

“Finish”.
D3 Station External Hard Drive
17
Page 18

Maxtor
Maxtor
D3 Station External Hard Drive
18
Page 19

Check the USB cable connection.
•
Check the LED light on the External Hard Drive.
•
Check the power supply to D3 Station External Hard Drive.
•
Ticking noise is an indication of insufficient power.
If the drive is not being recognized, try plugging it into a different USB port.
•
Q1. File transfer takes too long.
A1.
- USB 3.0
To use the Hard Driver at its Maximum speed, you need a PC or a Host Card that supports
USB 3.0 interface and USB 3.0 Cable.
Q2. The actual storage capacity of D3 Station External Hard Drive is different than the capacity
shown on the packaging.
Type of file system used for the drive, partitioning arrangement, type of operating system, and various other factors can
A2.
affect the actual storage capacity displayed by your computer.
(1MB=1,000,000bytes and 1GB=1,000,000,000bytes and 1TB=1,000,000,000,000bytes.)
Q3. I connected my D3 Station External Hard Drive, and the computer seems to recognize it, but the
drive won’t show up under Windows Explorer.
A3. D3 Station External Hard Drive is by default formatted to NTFS and will work normally when you connect it
to your computer. However, if the partition has been erased or the file system has been changed to a one that’s not
recognized by Windows, the drive will not appear under Windows Explorer. Try formatting the drive to FAT32 or NTFS.
(Caution : Formatting will erase all data stored in the drive.)
Q4. I am using Windows and cannot format the drive to FAT32.
A4. Windows operating systems that followed Windows NT have limited FAT32 formatting to 32GB.
Therefore, if you wish to format your D3 Station External Hard Drive to FAT32, you will need to download a format
utility from our website.
(Caution : Formatting will erase all data stored in the drive. We recommend that you back up your data before proceeding.)
Q5. My computer will not boot up properly.
A5. If you boot up your system with a D3 Station External Hard Drive connected to the computer, it’s possible that
your system’s BIOS is attempting to boot from the External Hard Drive.
Change the BIOS booting sequence or disconnect the External Hard Drive from the system and then try booting again.
Q6. I am using a Mac, and I can’t copy files.
A6. If the drive has been formatted to NTFS, data stored in the drive can only be read by Mac systems.
To use the drive on Mac OS X operating systems, use NTFS for Mac Driver or reformat your drive.
NTFS for Mac Driver : Refer to page 10
Reformat : Refer to page 20
D3 Station External Hard Drive
19
Page 20

D3 Station
•
•
•
http://maxtor.seagate.com
15
- Connect the D3 Station External Hard Drive to the computer.
- Click “Start” from the lower left corner of your screen.
- Right-click “My Computer” and then select “Manage.”
- From the “Computer Management” tool, select “Disk Management.”
- Right-click the drive you wish to format and then select “Delete Partition.”
- Once drive partition has been deleted, right-click the drive you wish to format and then select “New Partition” as shown
in the diagram below.
- From Create Partition Wizard, select “Primary Partition” and then enter the desired size of the partition.
- From the “File System” menu, select “NTFS” and format.
D3 Station External Hard Drive
20
Page 21

EAC
IMPORTANT NOTE: FCC Caution Statement
Any changes or modifications not expressly approved by the party responsible for compliance could void the user's authority to
operate this equipment.
Regulatory Compliance
IMPORTANT NOTE: FCC Compliance statement
This equipment has been tested and found to comply with the limits for a Class B digital device, pursuant to Part 15 of the FCC
Rules. These limits are designed to provide reasonable protection against harmful interference in a residential installation.
This equipment generates, uses and can radiate radio frequency energy and, if not installed and used in accordance with the
instructions, may cause harmful interference to radio communications. However, there is no guarantee that interference will not
occur in a particular installation. If this equipment does cause harmful interference to radio or television reception, which can be
determined by turning the equipment off and on, the user is encouraged to try to correct the interference by one of the following
measures:
• Reorient or relocate the receiving antenna.
• Increase the separation between the equipment and receiver.
• Connect the equipment into an outlet on a circuit different from that to which the receiver is connected.
• Consult the dealer or an experienced radio/TV technician for help.
IMPORTANT NOTE: FCC Operation Guide
This device complies with Part 15 of the FCC Rules. Operation is subject to the following two conditions:
(1) This device may not cause harmful interference, and (2) this device must accept any interference received, including
interference that may cause undesired operation.
IMPORTANT NOTE: FCC Shielded cable statement
This unit was tested with shielded cables on the peripheral devices. Shielded cables must be used with the unit to
insure compliance.
TUV
The maximum ambient temperature permitted by the manufacturer (Tma):45 C.
This device is not intended for use in the direct field of view at visual display workplaces. To avoid incommoding reflections at visual
display workplaces this device must not be placed in the direct field of view.
D3 Station External Hard Drive
21
Page 22

© 2016 Seagate Technology LLC. All rights reserved. Seagate, Seagate Technology, the Spiral logo, Maxtor and
Maxtor Logo are trademarks or registered trademarks of Seagate Technology LLC or one of its affiliated companies
in the United States and/or other countries. All other trademarks or registered trademarks are the property of their
respective owners. When referring to drive capacity, one gigabyte, or GB, equals one billion bytes and one
terabyte, or TB, equals one thousand billion bytes. Your computer’s operating system may use a different standard
of measurement and report a lower capacity. In addition, some of the listed capacity is used for formatting and
other functions and will not be available for data storage. Quantitative usage examples for various applications are
for illustrative purposes. Actual quantities will vary based on various factors, including file size, file format, features,
and application software. The export or re-export of hardware or software containing encryption may be regulated
by the U.S. Department of Commerce, Bureau of Industry and Security (for more information, visit
www.bis.doc.gov) and controlled for import and use outside of the U.S. Actual data rates may vary depending on
operating environment and other factors. Seagate reserves the right to change, without notice, product offerings or
specifications.
Seagate Singapore International Headquarters Pte. Ltd., Koolhovenlaan 1, 1119 NB Schiphol-Rijk, The Netherlands
D3 Station External Hard Drive User's Manual (01-16)
 Loading...