

Maxtor HDD, 20255400 Installation Manual

ATA HARD DRIVE
Installation Guide
P/N: 20255400

FCC Declaration of Conformance
This device complies with part 15 of the FCC Rules. Operation is subject to the following two conditions: (1) this device may not cause
harmful interference, and (2) this device must accept any interference received including interference that may cause undesired operation.

Contents
Warranty Registration Information
. . . . . . . . . . . . . . . . . . . . . . . . . . . . . . . . . . . i
1 Getting Started
. . . . . . . . . . . . . . . . . . . . . . . . . . . . . . . . . . . . . . . . . . . . . . . . . . . . . . . 1
Handling the Hard Drive
. . . . . . . . . . . . . . . . . . . . . . . . . . . . . . . . . . . . . . . . . . . . . . . . . . . . . . 1
Important Notice for Drives Larger than 137 GB
. . . . . . . . . . . . . . . . . . . . . . . . . . . . . . . . . . . . 2
Installing the Drive with an Ultra ATA PCI Card
. . . . . . . . . . . . . . . . . . . . . . . . . . . . . . . . . . . . . 2
Back Up Your Data
. . . . . . . . . . . . . . . . . . . . . . . . . . . . . . . . . . . . . . . . . . . . . . . . . . . . . . . . . . 2
Installing the Drive in a Macintosh
. . . . . . . . . . . . . . . . . . . . . . . . . . . . . . . . . . . . . . . . . . . . . . 3
2 Installing the Hard Drive
. . . . . . . . . . . . . . . . . . . . . . . . . . . . . . . . . . . . . . . . . . . . 5
Removing the System Cover
. . . . . . . . . . . . . . . . . . . . . . . . . . . . . . . . . . . . . . . . . . . . . . . . . . 5
Setting the Jumper
. . . . . . . . . . . . . . . . . . . . . . . . . . . . . . . . . . . . . . . . . . . . . . . . . . . . . . . . . . 6
Mounting the Hard Drive
. . . . . . . . . . . . . . . . . . . . . . . . . . . . . . . . . . . . . . . . . . . . . . . . . . . . . . 8
Attaching the Cables
. . . . . . . . . . . . . . . . . . . . . . . . . . . . . . . . . . . . . . . . . . . . . . . . . . . . . . . . 10
Configuring the System BIOS
. . . . . . . . . . . . . . . . . . . . . . . . . . . . . . . . . . . . . . . . . . . . . . . . . 13
3 Formatting the Hard Drive
. . . . . . . . . . . . . . . . . . . . . . . . . . . . . . . . . . . . . . . . . 15
Installing a New Boot Drive (Windows 98, Me)
. . . . . . . . . . . . . . . . . . . . . . . . . . . . . . . . . . . . 16
Installing a New Boot Drive (Windows 2000, XP)
. . . . . . . . . . . . . . . . . . . . . . . . . . . . . . . . . . 18
Installing an Additional Storage Drive or Replacement Boot Drive
. . . . . . . . . . . . . . . . . . . . . 20
Using a Drive Larger than 137 GB
. . . . . . . . . . . . . . . . . . . . . . . . . . . . . . . . . . . . . . . . . . . . . . 22
4 Getting Help
. . . . . . . . . . . . . . . . . . . . . . . . . . . . . . . . . . . . . . . . . . . . . . . . . . . . . . . . . . 25
Contacting Maxtor
. . . . . . . . . . . . . . . . . . . . . . . . . . . . . . . . . . . . . . . . . . . . . . . . . . . . . . . . . 26

i Warranty Registration Information
Warranty Registration Information
Before installing the hard drive, please write down the 8 character serial number and the 14 digit part number
information. If you ever need to contact Maxtor Support, you must provide this information about your hard
drive prior to assistance.
Several hard drive models are illustrated below to help you identify where these numbers are located. Use the
drawing that looks like your hard drive, then locate the part and serial numbers from your hard drive and write
these numbers in the space provided.
Part Number (P/N): Serial Number (S/N):
Part Number
Serial Number
Part Number
Serial Number
Part Number
Serial Number
Getting Started 1
1
Getting Started
Thank you for selecting a Maxtor hard drive storage product. This
installation guide will lead you through the installation of your hard drive.
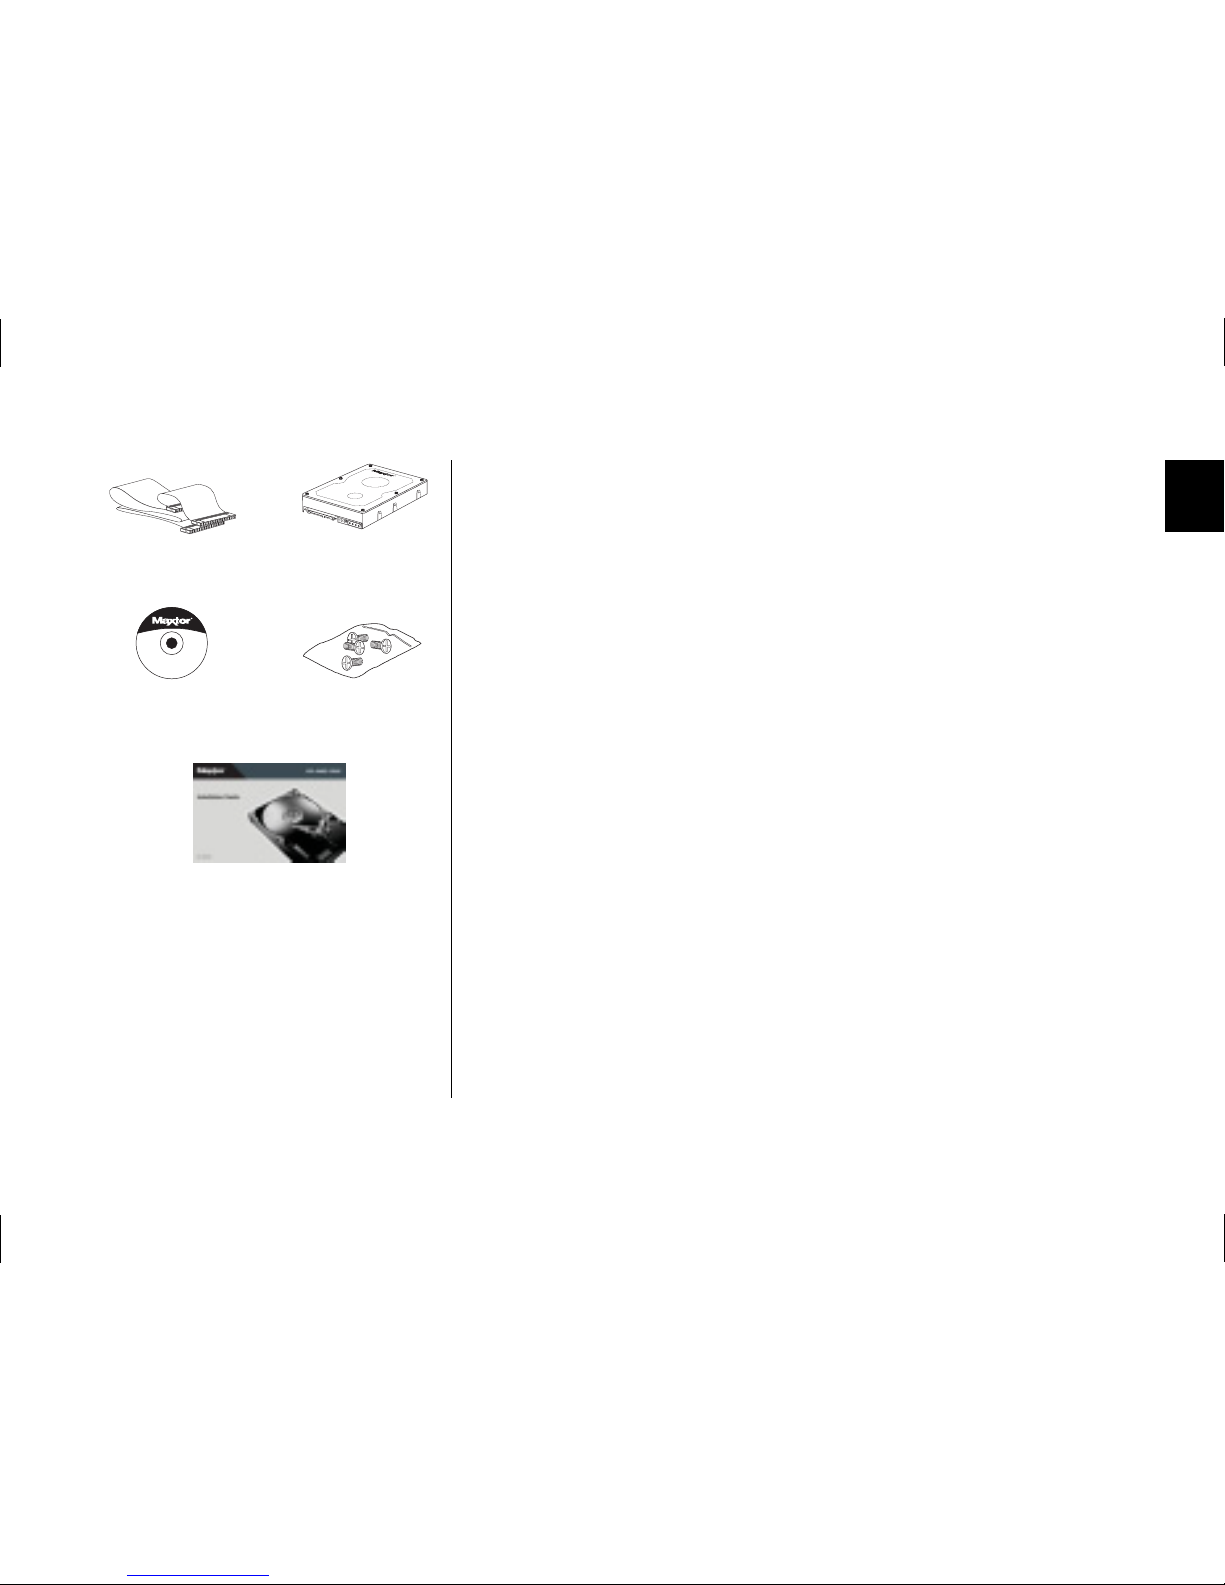
The Maxtor Hard Drive Kit includes the components shown in Figure 1.
Your computer may need some or all of these parts to complete the
installation. You will also need the tools shown in Figure 2 on page 2
including a full version of your operating system to install the hard drive
in your computer.
Handling the Hard Drive
Your hard drive should be handled with care during unpacking and
installation. Damage to hard drives is typically caused by rough
handling, shock, vibration, or electrostatic discharge (ESD). Be aware of
the following precautions when unpacking and handling your hard drive:
• Save the packing materials in case you need to return your hard drive.
• Allow the hard drive to reach room temperature before opening
the anti-static bag.
• Handle the hard drive by its sides. Do not touch the circuit board
electronics on the bottom of the hard drive.
• Do not connect or disconnect any hard drive cables when the
system is powered on.
• Do not drop, jar, or bump the hard drive.
Maxtor ATA
Hard Drive
Mounting Screws
Figure 1
Included in this Kit
Ultra ATA
Interface Cable
This Installation
Guide
MaxBlast® CD
MaxBlast
®

2 Getting Started
1
Important Notice for Drives Larger than 137 GB
Some systems do not properly support the full capacity of an internal drive
larger than 137 GB. To ensure proper installation, read “Using a Drive
Larger than 137 GB” on page 22 before setting up the drive.
Installing the Drive with an Ultra ATA PCI Card
If you are installing this hard drive with an Ultra ATA-compatible PCI
adapter card (such as the Maxtor Ultra ATA/133 PCI Card or Maxtor
SATA/150 PCI Card), use the ATA card documentation to install the
card before installing the hard drive. Some older systems require the
use of an ATA card to fully recognize higher capacity hard drives.
Back Up Your Data
Protect your data by backing up existing hard drives before installing
your new Maxtor hard drive.
System User Manual
Operating System
CD and Boot Disk
Philips Screwdriver
Small Needle-Nose Pliers
Figure 2
Required Tools

Getting Started 3
1
Installing the Drive in a Macintosh
If you are installing a drive larger than 137 GB in most Mac
models, you must connect the drive to a Mac-compatible
Ultra ATA/133 PCI card to access the full capacity of the
drive. See “Using a Drive Larger than 137 GB” on page 22 for
more information.
If you have a system older than the Power Mac G4, Maxtor
recommends that you attach your drive to a Mac-compatible ATA PCI
card (not included) instead of the on-board ATA controller. If you
choose to connect the drive to the Mac's built-in ATA port, you
should use the ATA cable provided with the Mac rather than the one
included with this kit.
For detailed information on mounting an internal drive in your
Macintosh, go to www.apple.com/support.
If you have a Power Mac G4 (Mirrored Drive Doors) system, the
jumpers on additional hard drives attached to the built-in ATA ports
must be set to cable select, not to master or slave.
You can format (initialize) and partition the drive using the Apple Drive
Setup Utility (for Mac OS 8.6 or higher) or the Apple Disk Utility (for
Mac OS X). Note that on all beige Power Mac G3 systems (Desktop,
Minitower, All-In-One) and some iMac models (333MHz G3 and
slower), Mac OS X can only be installed on a partition that is within the
first 8 GB of the drive.

4 Getting Started
1
intentionally blank page
Installing the Hard Drive 5
2
Installing the Hard Drive
This chapter describes how to physically install the hard drive in your
computer. The installation steps are as follows:
• Remove the system cover.
• Set the jumper.
• Mount the hard drive in your computer.
• Attach the cables.
• Configure the BIOS (Windows-based systems only).
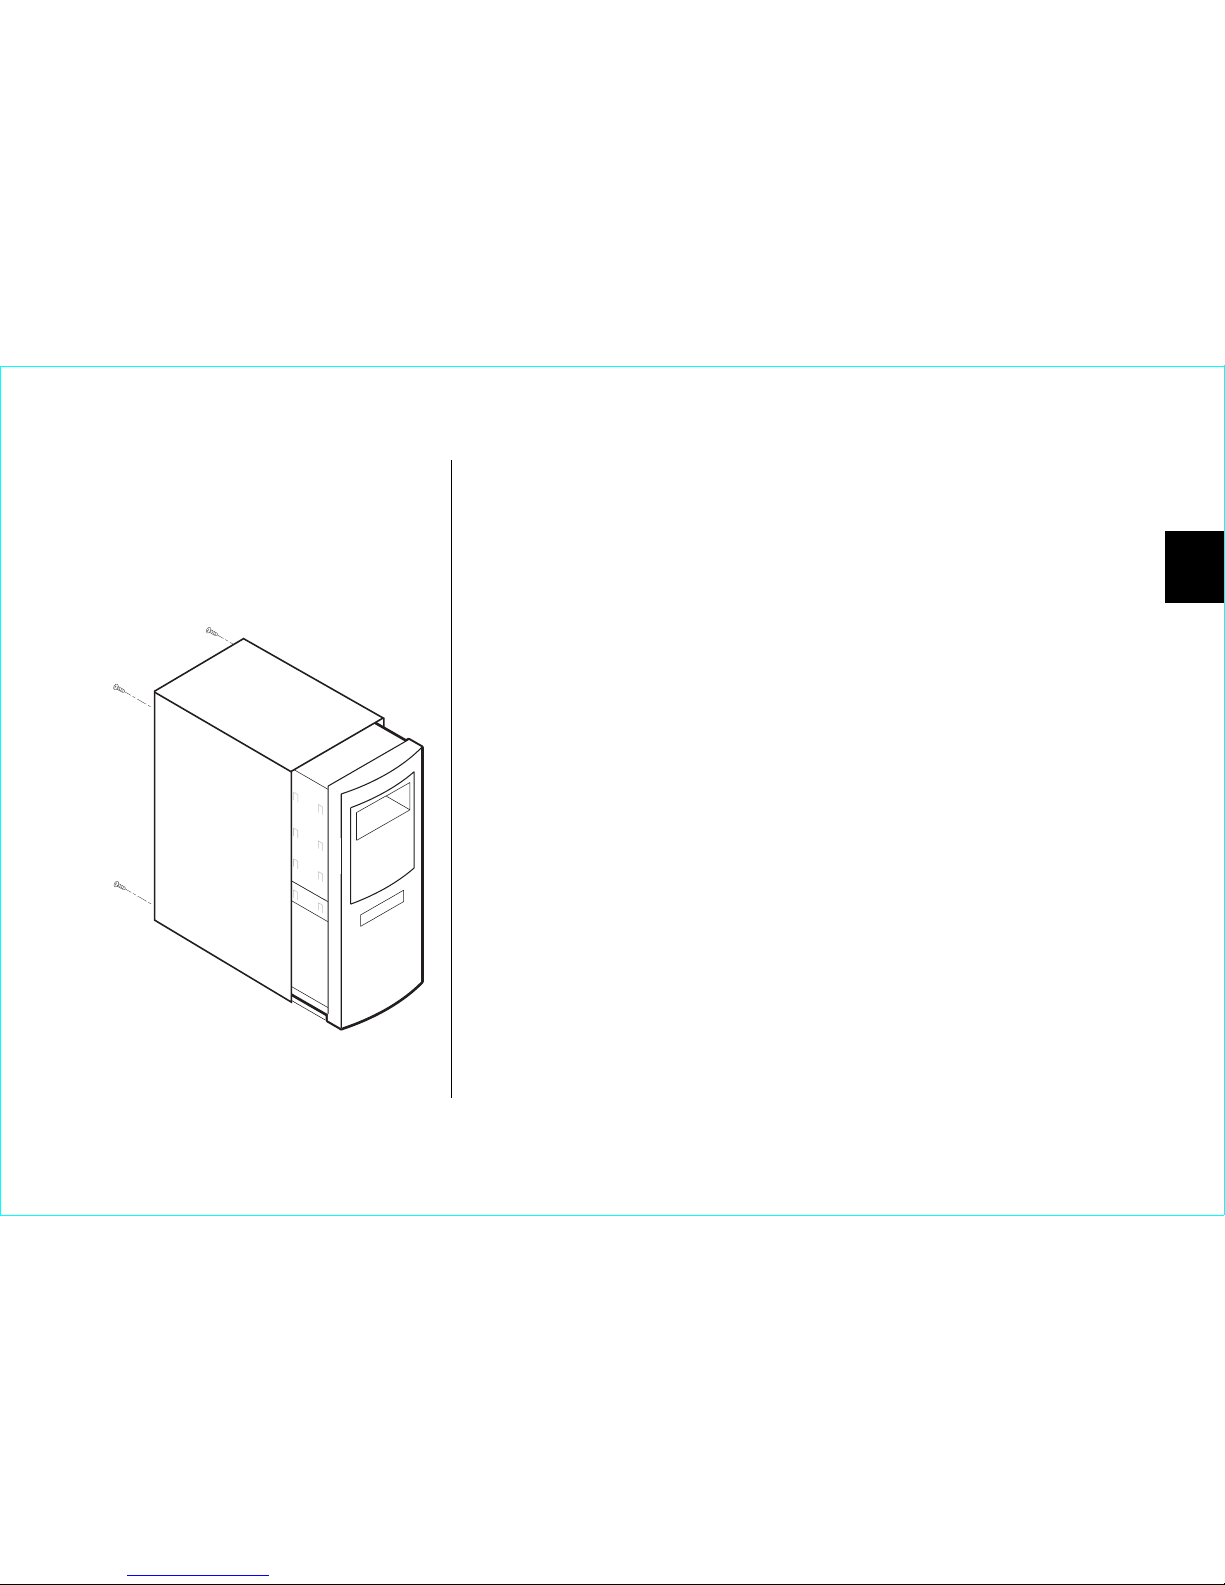
Removing the System Cover
1. Turn your computer off.
2.
Unplug your system from the electrical outlet.
3.
Remove the cover from your system case. Refer to your system
user manual for instructions on removing the cover, or obtain the
services of a qualified installation technician.
4.
Attach a grounding strap or touch a metal portion of your
computer case. This will ground you to minimize the risk of
exposing the hard drive to electrostatic discharge.
Figure 3
Removing the System Cover
2
6Installing the Hard Drive
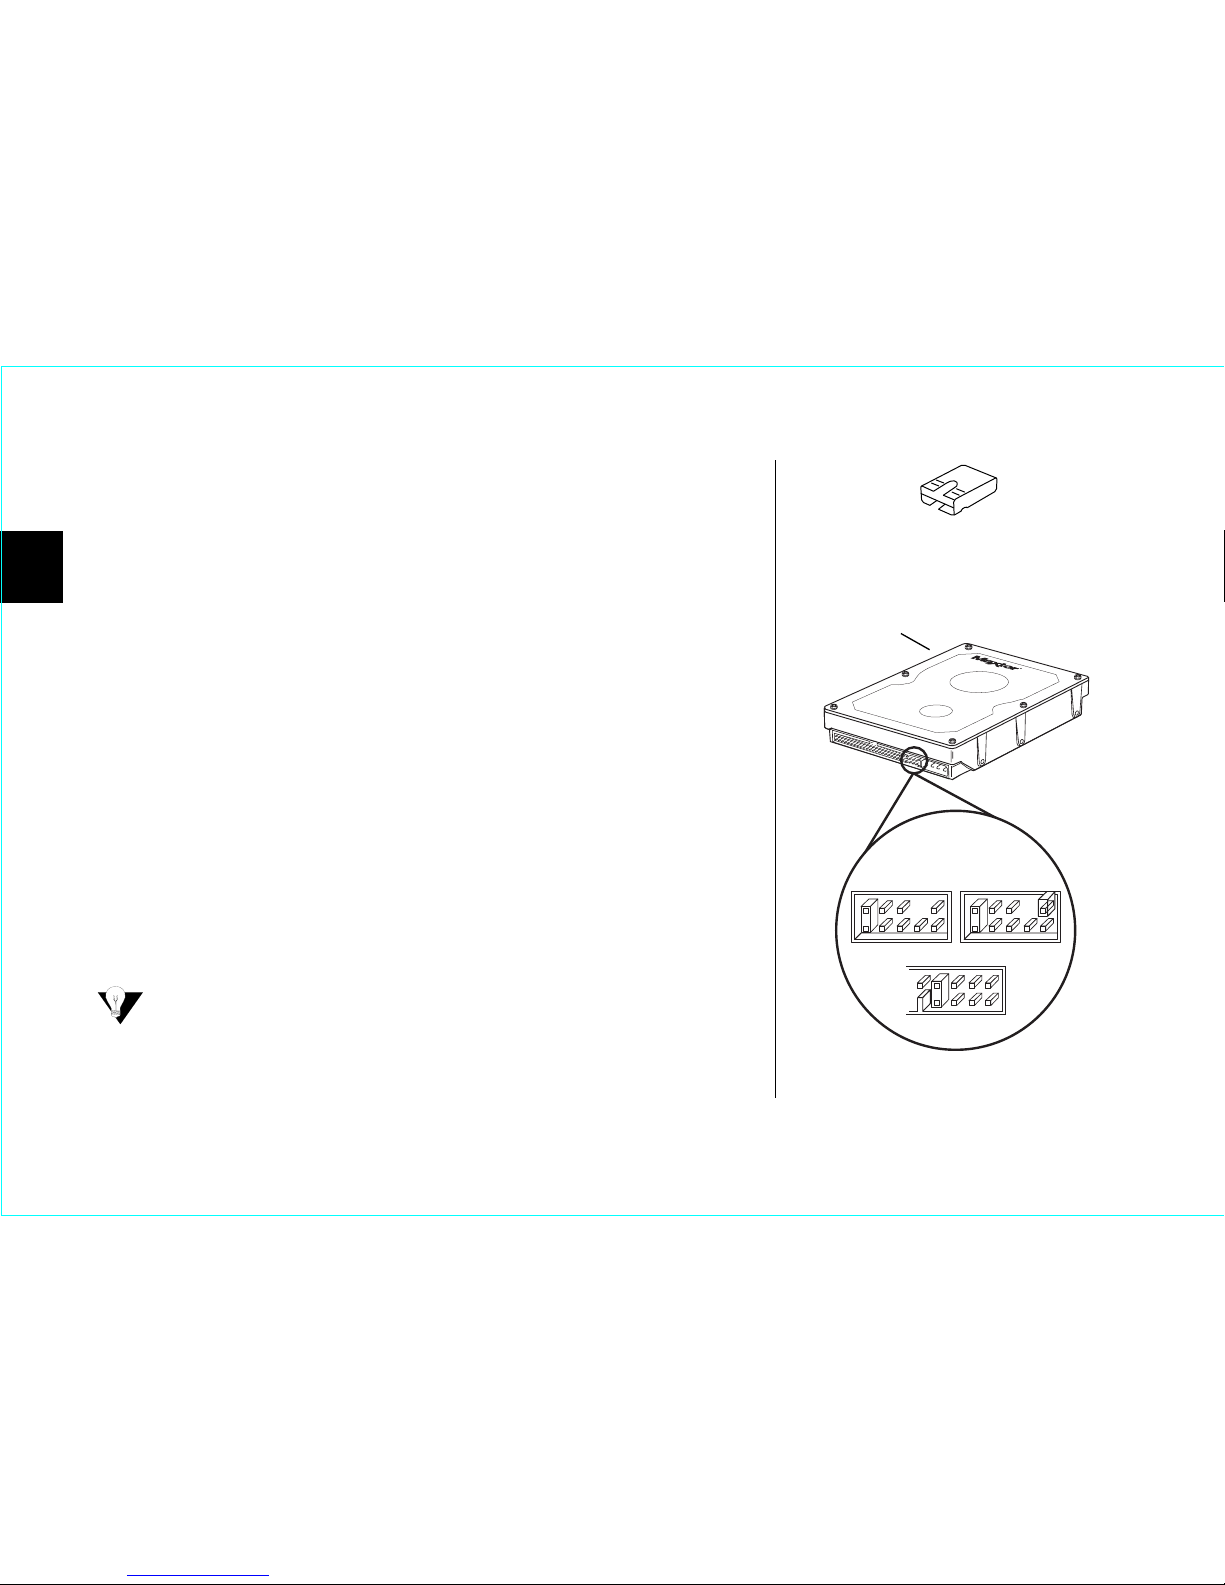
Setting the Jumper
Most Maxtor hard drives come preconfigured with a jumper (Figure 4) in
the cable select or master position. Maxtor recommends using the cable
select jumper position in most situations for ease of configuration.
1.
After removing the drive from its anti-static bag, match the jumper
block on the rear of the drive to one of the jumper block styles
shown in Figure 6. If you are unable to match your drive jumper
block to one of the styles shown, refer to the jumper settings diagram on the drive label.
2.
Configure the drive as cable select (CS) by using pliers to move the
jumper into the appropriate position on the jumper block.
To properly configure cable select, all devices on the same ATA cable
must use the cable select jumper setting and be connected with a 40pin Ultra ATA cable like the one included. Before installing a new hard
drive on an ATA cable with an existing device, confirm that the existing
device is configured as cable select. Jumper settings may be printed
on the device; however, you may need to consult the device
documentation or contact the manufacturer.
Older systems that do not support Ultra ATA/66 or are dated prior
to November 1998 may not be able to use the cable select jumper
option. If you are uncertain whether your system can use the cable
select option, consult your system manual, contact the system
manufacturer, or use the master/slave jumper settings instead.
Figure 4
A Jumper
Determine the jumper style and settings
using Figure 6 on page 7 or the diagram on
the drive label.
Style A1 Style A2
Style B
Figure 5
Common Jumper Blocks
 Loading...