

Page 1
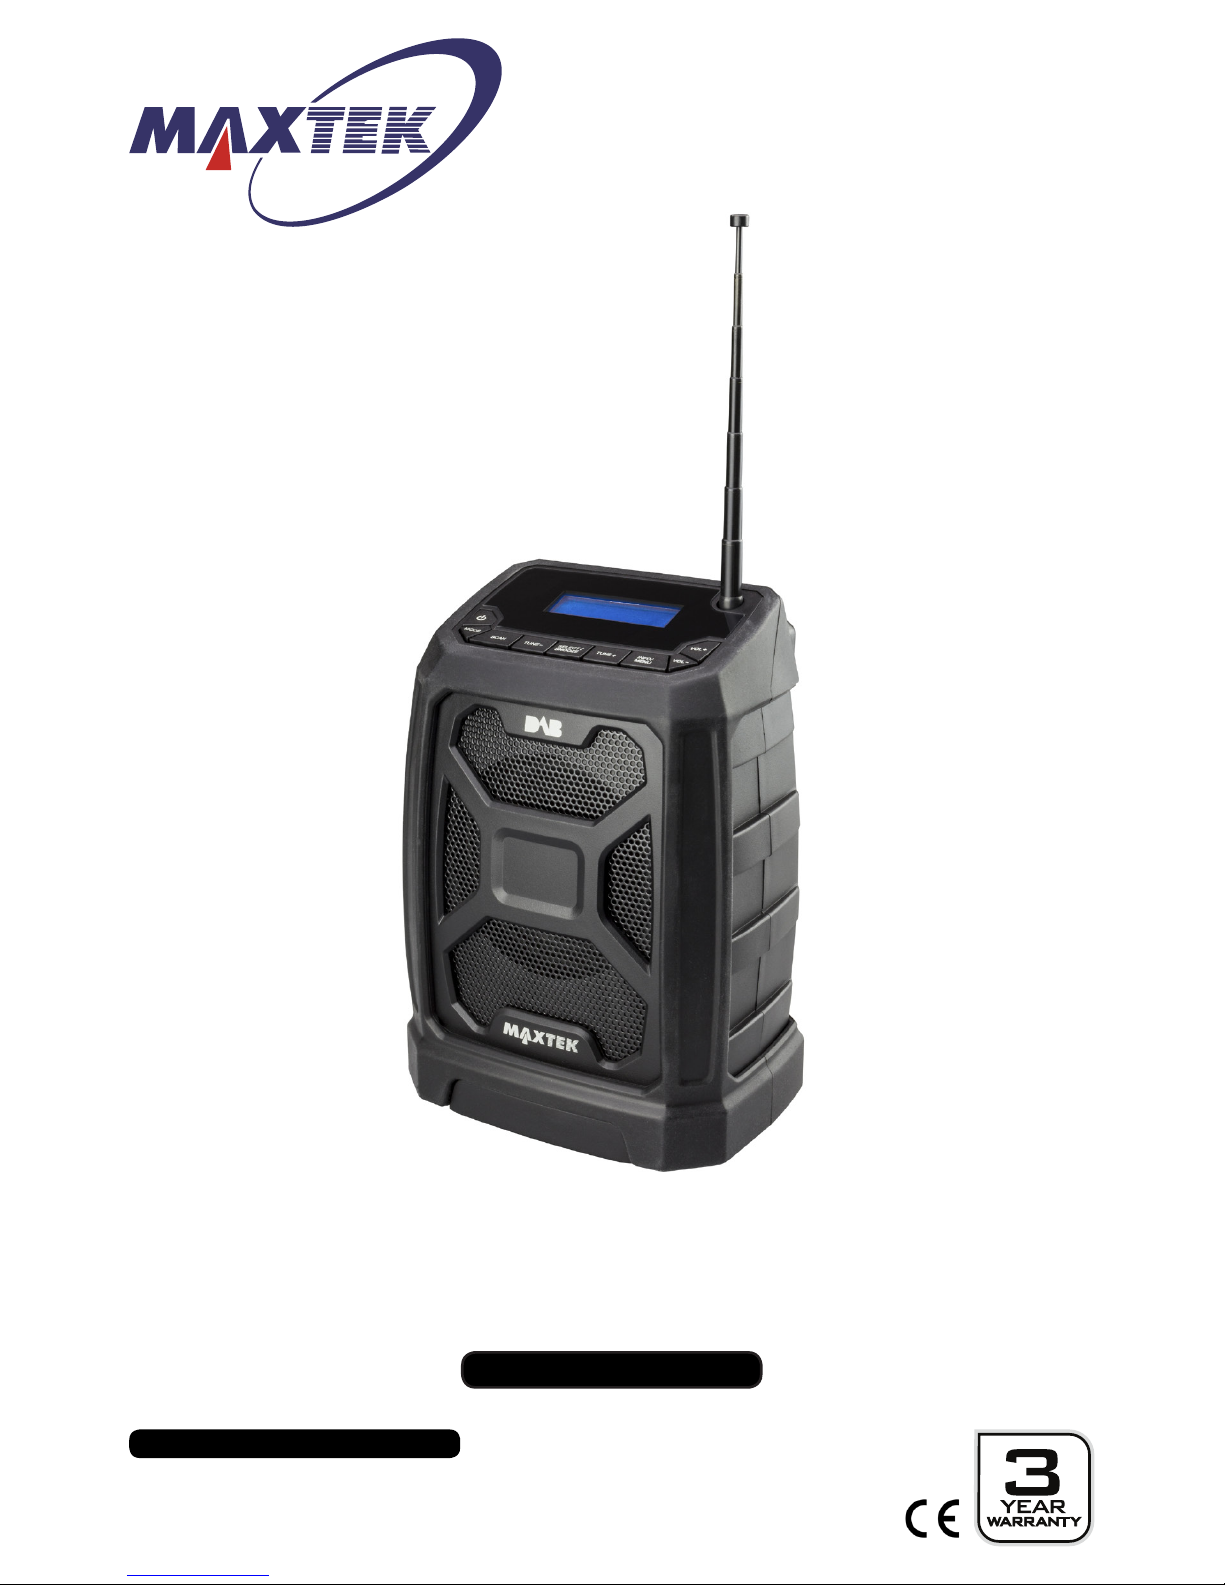
USER GUIDE
DAB & FM Radio
With AUX Port
MODEL NUMBER: 74772
After Sales Support
UK/N.IRELAND HELPLINE NO:
REP.IRELAND HELPLINE N
O
:
WEBSITE:
EMAIL:
01270 508538
1800 995 036
www.quesh.co.uk
Page 2

After Sales Support
UK/N.IRELAND HELPLINE NO:
REP.IRELAND HELPLINE N
O
:
WEBSITE:
EMAIL:
01270 508538
1800 995 036
www.quesh.co.uk
Contents
1.
2.
3.
4.
5.
6.
7-11.
12-15.
Welcome Section
Information & Safety Instructions
Contents & Features
Controls & Layout
Setup
• Out Of The Box
Control Method
• Using The Buttons
On/Off/Standby
• Turning On
• Turning Off
• Standby
DAB
• DAB Mode
• Tuning In A Station
• DAB Scan
• DAB Info
• DAB Menu
• Preset Recall
• Preset Store
• Full Scan
• Manual Tune
• DRC
• Prune
FM
• FM Mode
• Auto Scan
• Manual Tune
• FM Info
• FM Menu
• Preset Recall
• Preset Store
• Scan Settings
• Audio Settings
16.
17-25.
26.
AUX
• AUX Mode
• AUX Info
• AUX Menu
System
• System Menu
• Sleep
• Setting The Alarm
• Turning The Alarm On/Off
• Equaliser
• Time
• Time - Set Time/Date
• Time - Auto Update
• Time - Set 12/14 Hour
• Time - Set Date format
• Backlight
• Backlight - Timeout
• Backlight - On Level
• Backlight - Dim Level
• Language
• Factory Reset
• SW Version
Specications
Page 3

Welcome Section
Congratulations!
You have made an excellent choice with the purchase of this quality
MAXTEK
®
product.
By doing so you now have the assurance and peace of mind which
comes from purchasing a product that has been manufactured to
the highest standards of performance and safety, supported by the
high quality standards of Quesh Ltd.
We want you to be completely satised with your purchase, so this
MAXTEK® product is backed by a comprehensive manufacturer’s
3 year warranty and outstanding after sales service through our
dedicated helpline.
We hope you enjoy using this product for many years to come.
If you require technical support or in the unlikely event that your
purchase is faulty, please telephone our helpline for immediate
assistance. Faulty product claims made within the 3 year warranty
period will be repaired or replaced free of charge provided that you
have a satisfactory proof of purchase (keep your receipt safe).
This does not affect your statutory rights. However be aware that the
warranty will become null and void if the product is found to have
been deliberately damaged, misused and/or disassembled.
1
After Sales Support
UK/N.IRELAND HELPLINE NO:
REP.IRELAND HELPLINE N
O
:
WEBSITE:
EMAIL:
01270 508538
1800 995 036
www.quesh.co.uk
Page 4
Information &
Safety Instructions
This radio is powered by 4 x ‘AA’ size alkaline batteries (not included).
Do not dispose of batteries in your household waste.
Please contact your local authority for details on safe disposal.
• Never throw batteries into a re or expose to excessive heat sources.
• If batteries are swallowed, please seek immediate medical attention.
• Always ensure correct +/- battery polarity when installing batteries.
• Do not recharge non-rechargeable batteries.
Equipment, which is marked with the WEEE logo
(as shown on the left), should not be thrown away with your household waste.
Contact your local authority waste disposal department, as they will be able to
provide details of the recycling options available in your area.
Electrical and electronic equipment (WEEE) contains materials, parts and
substances, which can be dangerous to the environment and harmful to
human health if the waste of electrical and electronic equipment (WEEE) is not
disposed of correctly.
Equipment, which is marked with the WEEE logo
(as shown on the left), should not be thrown away with your household waste.
Contact your local authority waste disposal department, as they will be able to
provide details of the recycling options available in your area.
After Sales Support
UK/N.IRELAND HELPLINE NO:
REP.IRELAND HELPLINE N
O
:
WEBSITE:
EMAIL:
01270 508538
1800 995 036
www.quesh.co.uk
2
Adaptor Care
To get the best out of your adaptor please observe the following:
• Always remove the adaptor by holding the body of the plug or by holding the
connector’s body and not the wire.
• Do not wrap the cable around the body of the adaptor. This can cause harm to
the cable. Instead bunch the cable up as it was presented in the package.
• Always secure any loose trailing cable to avoid accidents.
• Always try batteries to conrm any possible power issues with the adaptor.
Page 5

Contents & Features
3
After Sales Support
UK/N.IRELAND HELPLINE NO:
REP.IRELAND HELPLINE N
O
:
WEBSITE:
EMAIL:
01270 508538
1800 995 036
www.quesh.co.uk
Contents
1 x DAB / FM & AUX Radio
1 x 5V Mains Adaptor
Features
• DAB receiver (174MHz - 240MHz)
• FM receiver (87.5MHz - 108.00MHz)
• Stores 10 FM presets
• Stores 10 DAB presets
• Powered by 4 x AA alkaline batteries (not included)
• 5v mains adapter (included)
• Auto adjusting clock
• Blue LCD backlight display
• Mono sound (1 x 5W speaker)
• Telescopic aerial
• 3.5mm AUX port (Line-In)
• Sleep Function
• Dual Alarms
• Dimable Display
DAB in Ireland
To check coverage and available services in Ireland please got to:
http://www.digitalradio.ie/can-i-get-dab/
Page 6
4
After Sales Support
UK/N.IRELAND HELPLINE NO:
REP.IRELAND HELPLINE N
O
:
WEBSITE:
EMAIL:
01270 508538
1800 995 036
www.quesh.co.uk
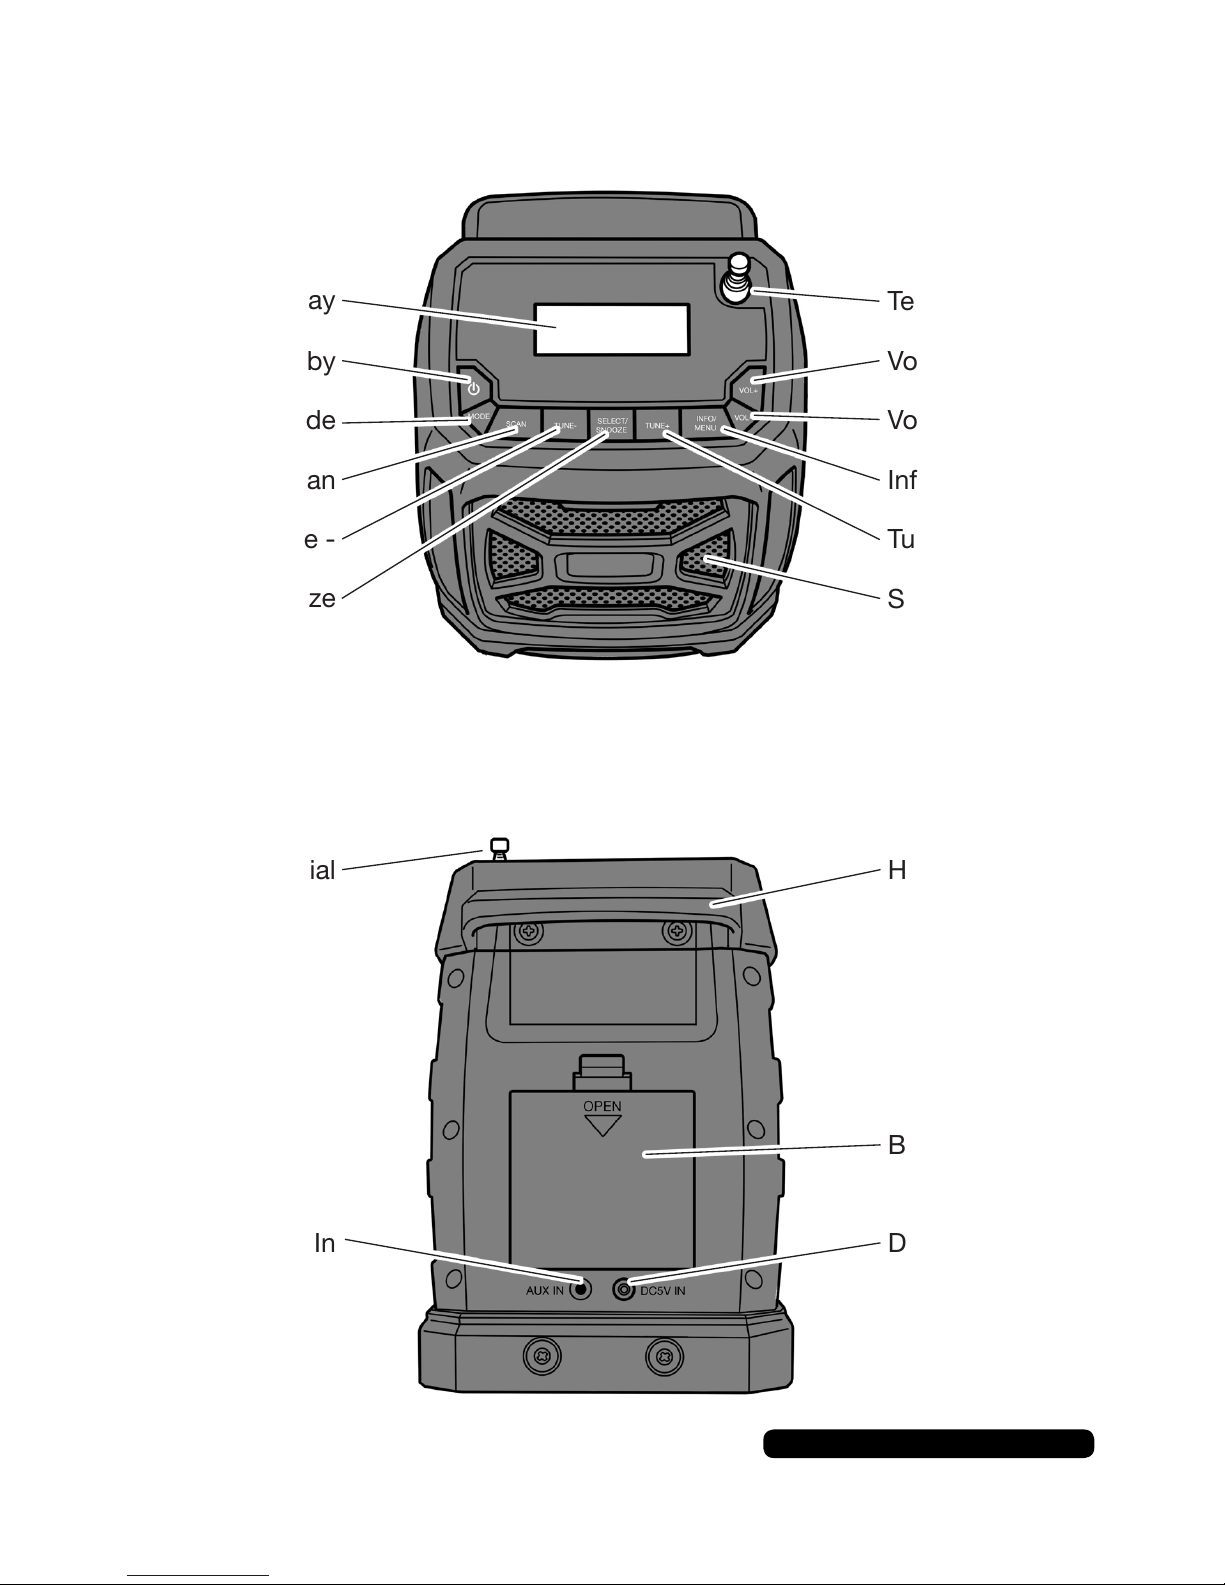
Controls & Layout
On/Off/Standby
Mode
Scan
Tune -
Select/Snooze
Vol +
Vol -
Info/Menu
Tune +
Speaker
LCD Display
Telescopic Aerial
Telescopic Aerial
AUX In
Battery Bay
DC 5V In
Handle
Page 7
5
After Sales Support
UK/N.IRELAND HELPLINE NO:
REP.IRELAND HELPLINE N
O
:
WEBSITE:
EMAIL:
01270 508538
1800 995 036
www.quesh.co.uk
Setup
Out Of The Box
Once you have removed the radio from the packaging, connect the
5V/1A mains adaptor (supplied) to a suitable mains outlet.
To use the radio with batteries, install 4 x ‘AA’ batteries into the
battery bay at the back of the radio. Fully extend the telescopic aerial
and press the button for 2 seconds to turn the radio on.
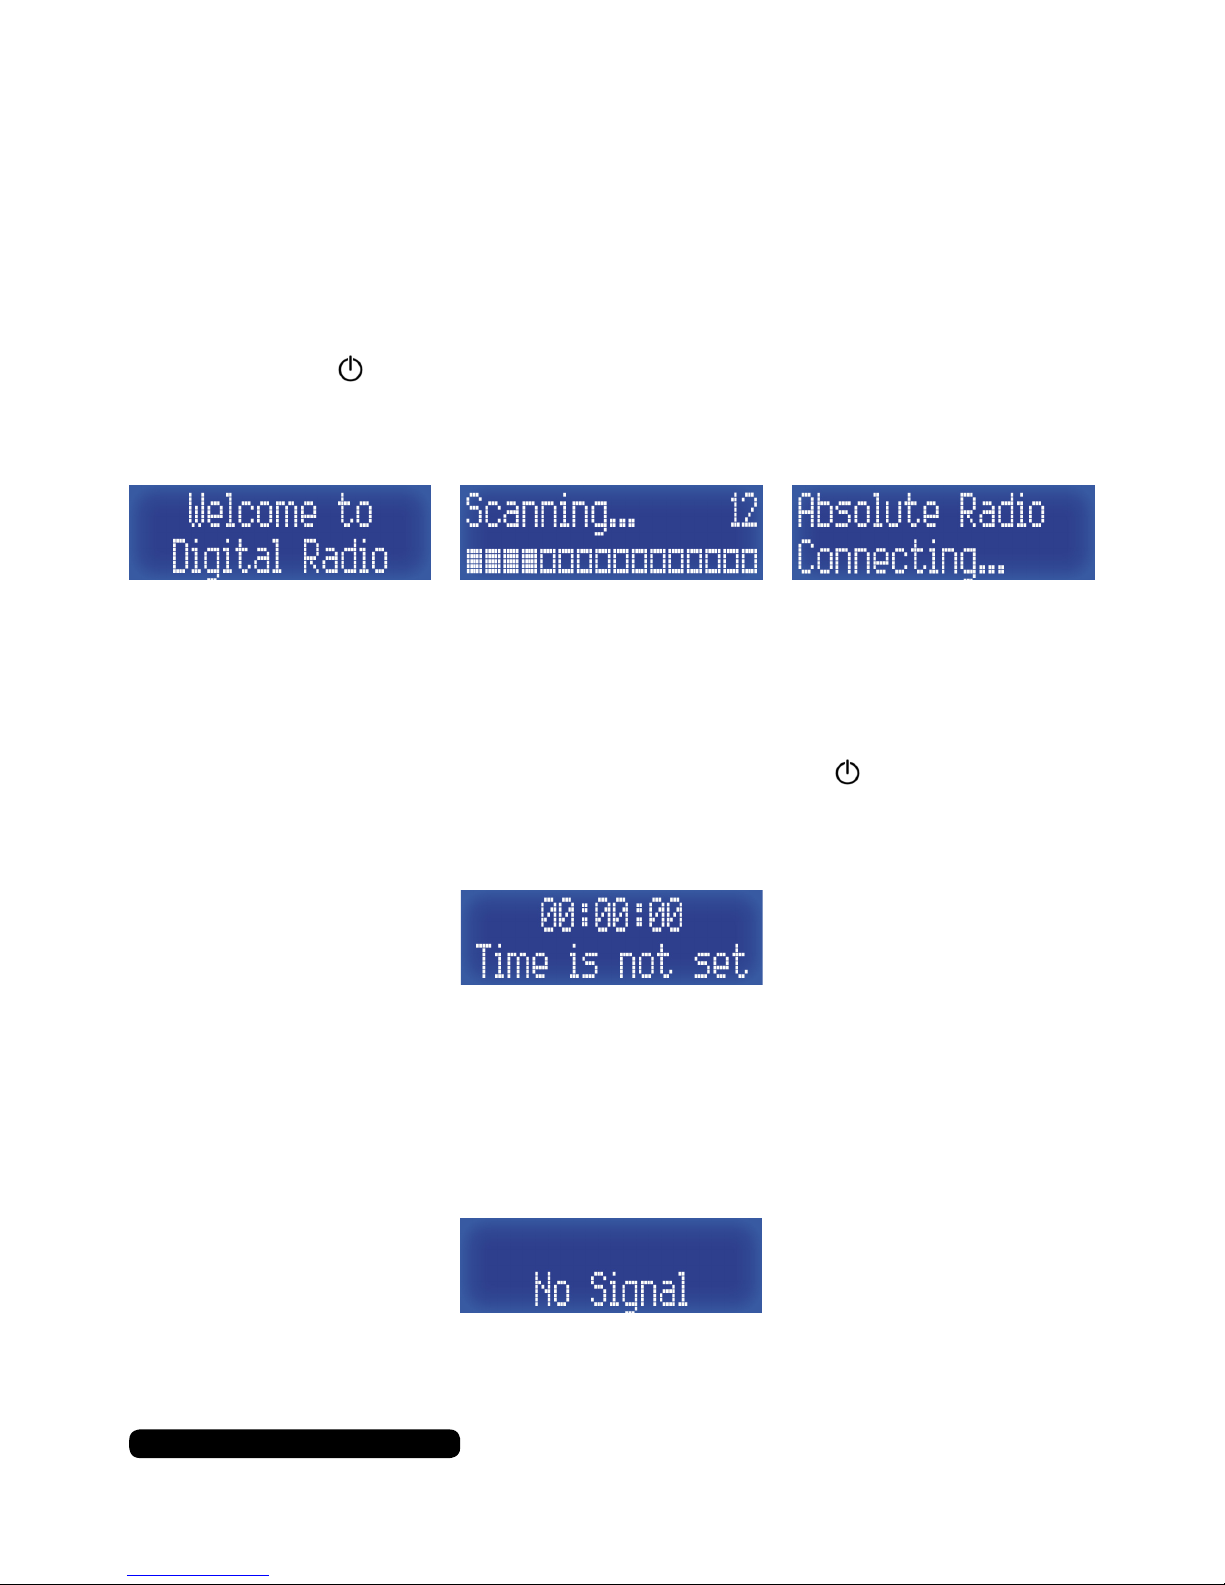
A welcome splash will show followed by the radio rst scan for the
available DAB stations in your area.
After the rst scan has been completed the radio will automatically
tune in to the rst alphabetically listed DAB radio station. The date
and time will be automatically set by the DAB signal received.
If you see the message ‘Time is not set’, give the button a quick
press to bring the radio out of standby mode. This should start the
DAB process and set the date and time.
If the display shows ‘No Signal’ then the radio is not receiving a DAB
signal. This can be down to the service available in your area, the
radio being too close to large electrical devices (microwaves, etc) or
digital interferance cause by large buildings, trees and/or hills.
In this instance please use the radio in FM mode.
You can set the date and time manually, see page 20.
Page 8
6
After Sales Support
UK/N.IRELAND HELPLINE NO:
REP.IRELAND HELPLINE N
O
:
WEBSITE:
EMAIL:
01270 508538
1800 995 036
www.quesh.co.uk
Control Method
Using The Buttons
All the buttons that are used with processes are a quick press only
unless stated to press and hold a button. A prolonged press may
interfere with the desired operation of the radio when not required.
On/Off/Standby
Turning On
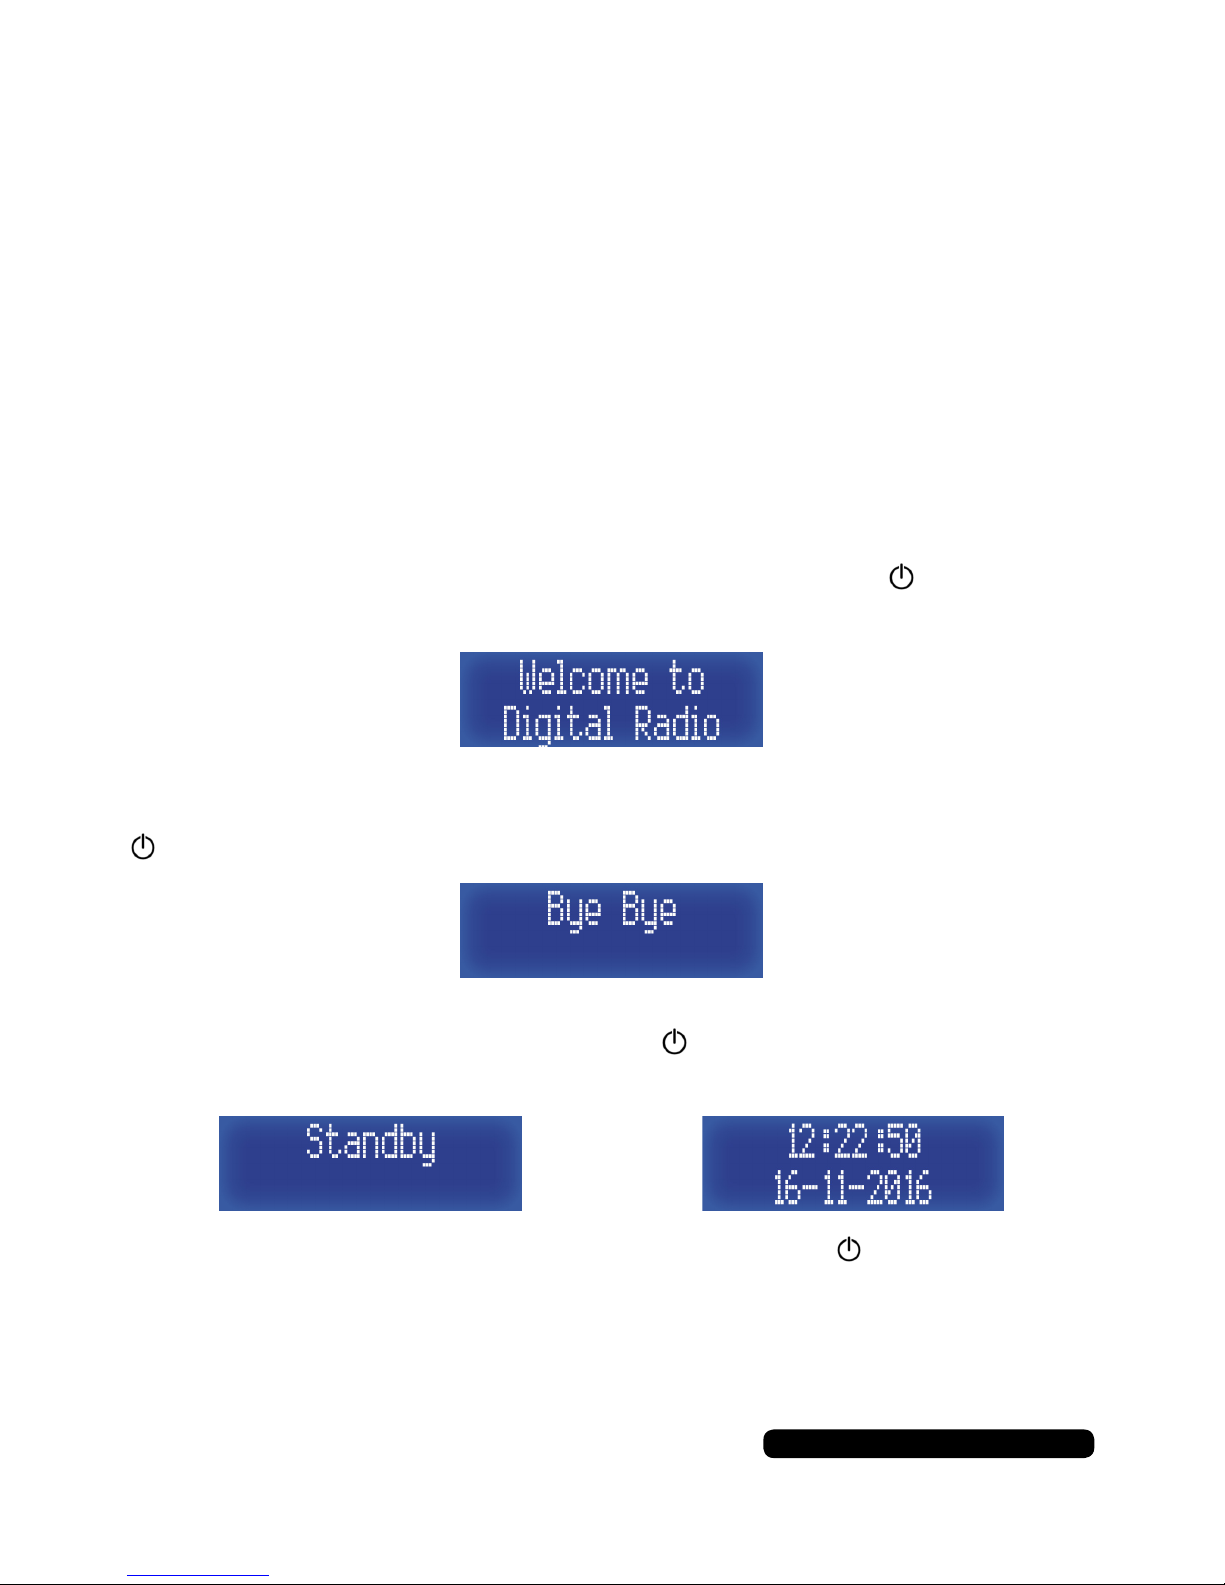
If the display is blank and not lit, press and hold the button for 2
seconds to turn the radio on. You will see the welcome splash.
Turning Off
When the display is lit and showing information, press and hold the
button until the ‘Bye Bye’ splash is seen. The display will turn off.
Standby
When the radio is playing press the button to put the radio into
standby mode. The date and time will show on the display.
To bring the radio out of standby mode press the button.
The radio will tune into the last station listened to.
Page 9
7
After Sales Support
UK/N.IRELAND HELPLINE NO:
REP.IRELAND HELPLINE N
O
:
WEBSITE:
EMAIL:
01270 508538
1800 995 036
www.quesh.co.uk
DAB
Tuning In A Station
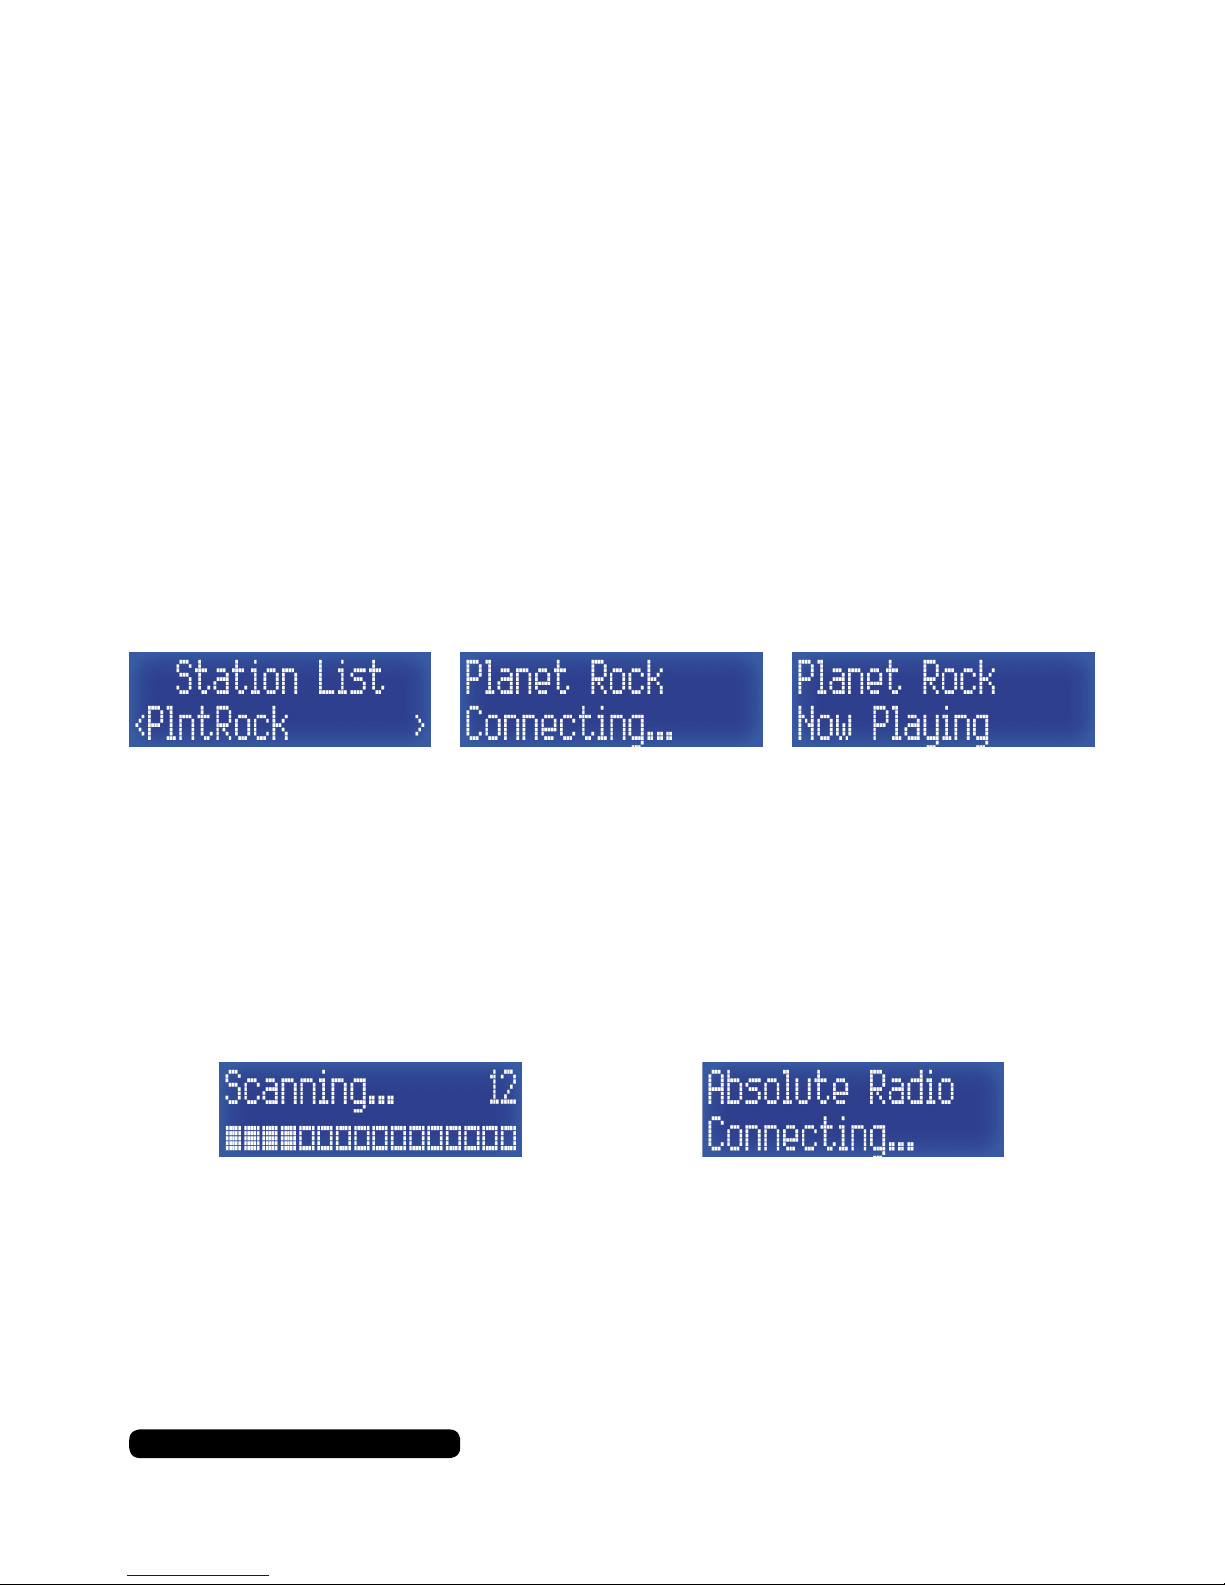
All the available stations are saved by the radio in alphabetical order.
To select a station press the ‘Tune+’ or ‘Tune-’ buttons repeatedly to
cycle through the station list until you get to a station you would like
to listen to, then press the ‘Select/Snooze’ to connect the radio to it.
DAB Scan
If you move your radio to a new location or you are suffering with
poor reception or bad interference, it is advisable to re-scan the
station list. To do this press the ‘Scan’ button. The radio will refresh
the station list and correct any tuning issues.
The number to the right of the scanning splash indicates the amount
of stations found and stored. The squares indicate the progress of
the scan. Once the scan is completed the radio will connect to the
rst alphabetically listed station.
DAB Mode
The radio, when turned on, is usually in DAB mode. If is not,
repeatedly press the ‘Mode’ button until DAB shows on the display.
Page 10

8
After Sales Support
UK/N.IRELAND HELPLINE NO:
REP.IRELAND HELPLINE N
O
:
WEBSITE:
EMAIL:
01270 508538
1800 995 036
www.quesh.co.uk
DAB
DAB Info
Pressing the ‘Info/Menu’ button repeatedly will cycle through and
display the following radio information:
• Now Playing
• Signal Strength
• Music genre
• National/Local designation
• MHz Frequency
• Signal Errors
• Kbps data transfer rate
• Power Type
• Time
• Date
DAB Menu
Press and hold the ‘Info/Menu’ button for 2 seconds to enter the
DAB menu. The rst option will be ‘Preset Recall’.
Using the ‘Tune+’ or ‘Tune-’ buttons, you can cycle through the
menu options available.
Preset Recall > Preset Store > Full Scan > Manual Tune > DRC > Prune > System*
(System* - see page 17)
Use the ‘Select/Snooze’ button to select your option.
Press the ‘Info/Menu’ button to exit the menu.
Page 11
9
After Sales Support
UK/N.IRELAND HELPLINE NO:
REP.IRELAND HELPLINE N
O
:
WEBSITE:
EMAIL:
01270 508538
1800 995 036
www.quesh.co.uk
DAB
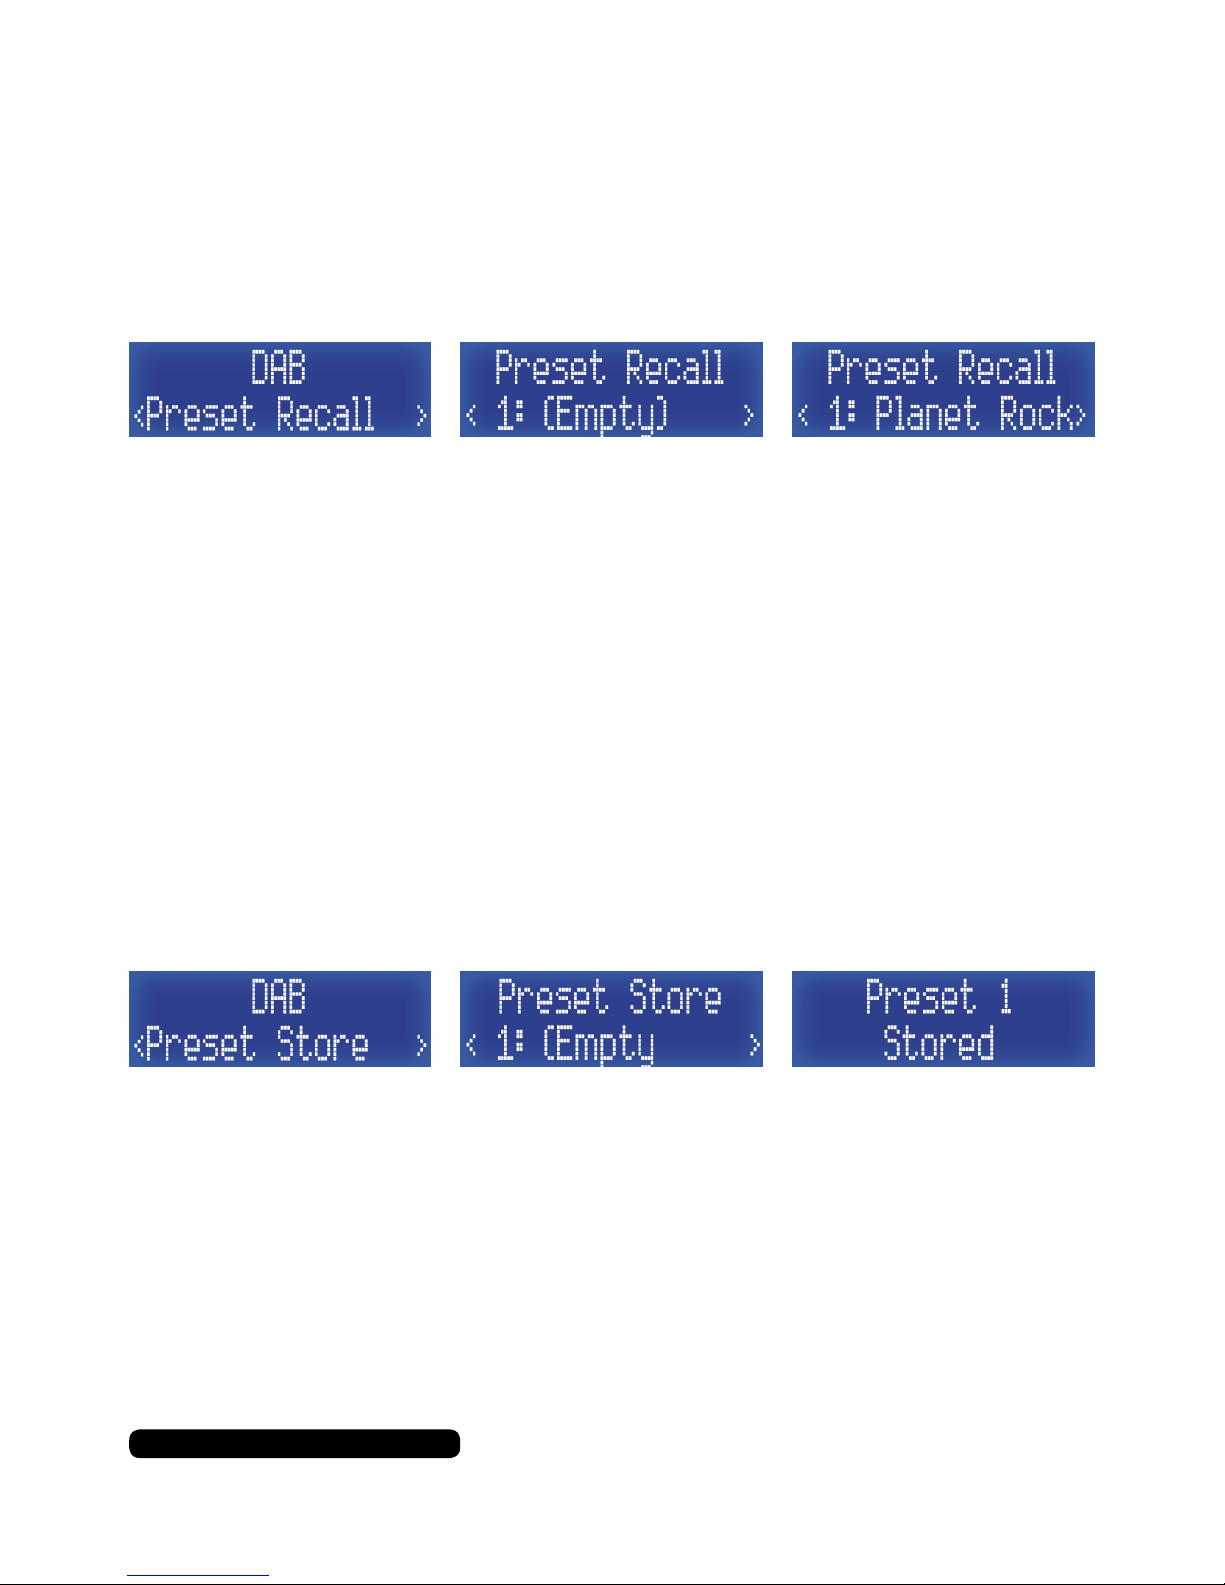
Preset Recall
Press the ‘Info/Menu’ button for 2 seconds to enter the DAB menu.
The rst option will be ‘Preset Recall’, press the ‘Select/Snooze’
button to access the saved presets.
Use the ‘Tune+’ or ‘Tune-’ buttons to cycle through the saved
presets and then the ‘Select/Snooze’ button to connect the radio.
There are 10 preset slots available. If there is no station saved in a
preset slot it will show up as ‘(Empty)’.
Preset Store
To save a preset, connect the radio to the required station so it is
playing (Tune In A Station - Page 7).
Press the ‘Info/Menu’ button for 2 seconds to enter the DAB menu.
The rst option will be ‘Preset Recall’, press the ‘Tune+’ to cycle
through the menu to ‘Preset Store’, then press the ‘Select/Snooze’
button to access the preset store.
Use the ‘Tune+’ or ‘Tune-’ buttons to cycle through the presets and
then press the ‘Select/Snooze’ button to save the preset in the
selected slot. There are 10 preset slots available. The display splash
‘Preset # Stored’ will show if the save is successful.
If there is no station saved in a preset slot it will show up as ‘(Empty)’.
You can save a new station by saving over the one listed in the slot.
Page 12
10
After Sales Support
UK/N.IRELAND HELPLINE NO:
REP.IRELAND HELPLINE N
O
:
WEBSITE:
EMAIL:
01270 508538
1800 995 036
www.quesh.co.uk
DAB
Full Scan
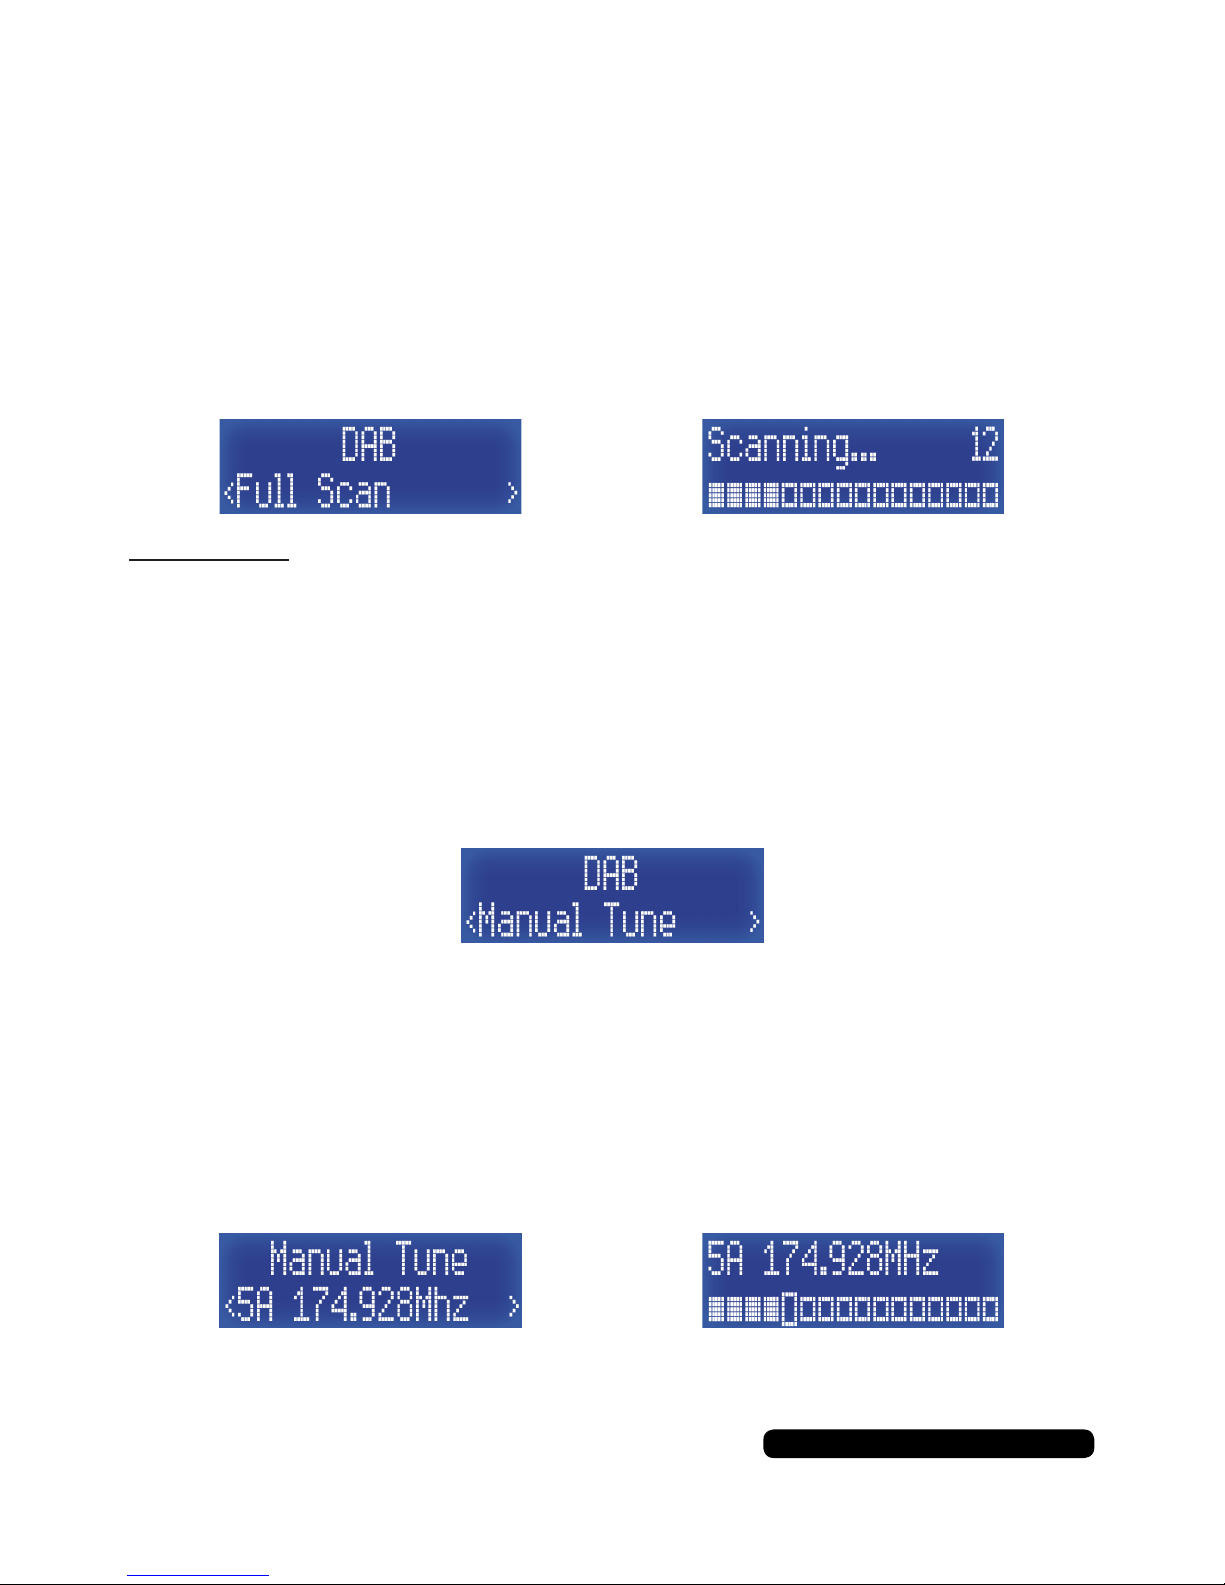
To manually tune the DAB frequency of the radio, Press the
‘Info/Menu’ button for 2 seconds to enter the DAB menu. The rst
option will be ‘Preset Recall’, press the ‘Tune+’ to cycle through the
menu to ‘Full Scan’, then press the ‘Select/Snooze’
button to start the scan.
Please Note:
The scan button also does the same function as this option.
Manual Tune
Press the ‘Info/Menu’ button for 2 seconds to enter the DAB menu.
The rst option will be ‘Preset Recall’, press the ‘Tune+’ to cycle
through the menu to ‘Manual Tune’, then press the ‘Select/Snooze’
button to access the manual tune options.
Press the ‘Tune+’ or ‘Tune-’ buttons to ne tune the radio followed by
the ‘Select/Snooze’ button to tune the frequency in. This can help to
clear poor signal. View the signal strength of the channel by pressing
the ‘Select/Snooze’ button and the same button again to return to
the tuning screen. You can save the frequency as a preset as
directed on page 9, Preset Store.
Press the ‘Info/Menu’ button to return to the radio.
Page 13
11
After Sales Support
UK/N.IRELAND HELPLINE NO:
REP.IRELAND HELPLINE N
O
:
WEBSITE:
EMAIL:
01270 508538
1800 995 036
www.quesh.co.uk
DAB
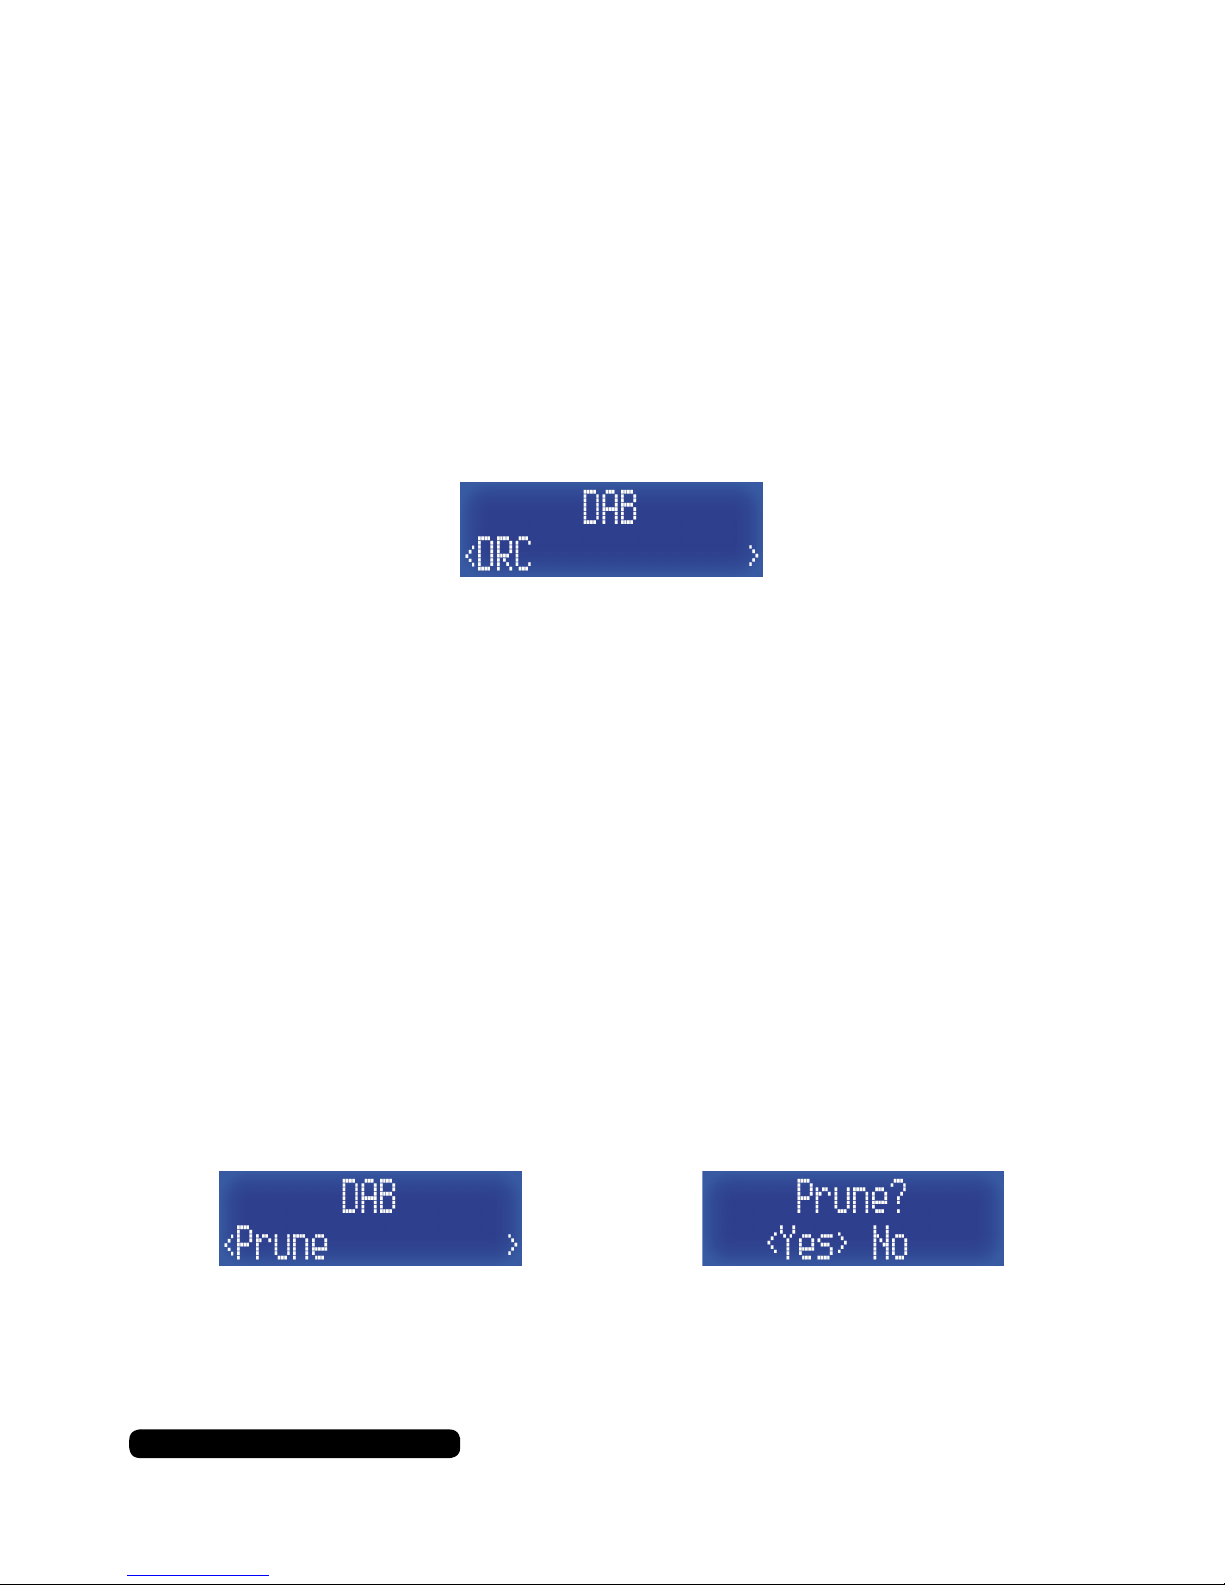
DRC
DRC or Dynamic Range Compression is a feature that some DAB
stations use to even out the audio levels between quiet and loud
segments of a broadcast.
Press the ‘Info/Menu’ button for 2 seconds to enter the DAB menu.
The rst option will be ‘Preset Recall’, press the ‘Tune+’ to cycle
through the menu to ‘DRC’, then press the ‘Select/Snooze’
button to select the feature.
Choose between Off, High and Low options by pressing ‘Tune+’ to
cycle through the options and ‘Select/Snooze’ to conrm your
chosen option. The asterisk in the top right indicates the current
selected option in use. Press the ‘Info/Menu’ button to return to the
radio.
Prune
You can remove any station from the station list that is marked with
a ‘?’ in front of the name listing.
To delete a station, connect the radio to the required ‘?’ listed station
so it is active (Tune In A Station - Page 7).
Press the ‘Info/Menu’ button for 2 seconds to enter the DAB menu.
The rst option will be ‘Preset Recall’, press the ‘Tune+’ to cycle
through the menu to ‘Prune’, then press the ‘Select/Snooze’
button to select the feature.
Use the ‘Tune+’ button to change between the options and press the
‘Select/Snooze’ button to conrm the action.
Press the ‘Info/Menu’ button to return to the radio.
Page 14
12
After Sales Support
UK/N.IRELAND HELPLINE NO:
REP.IRELAND HELPLINE N
O
:
WEBSITE:
EMAIL:
01270 508538
1800 995 036
www.quesh.co.uk
FM
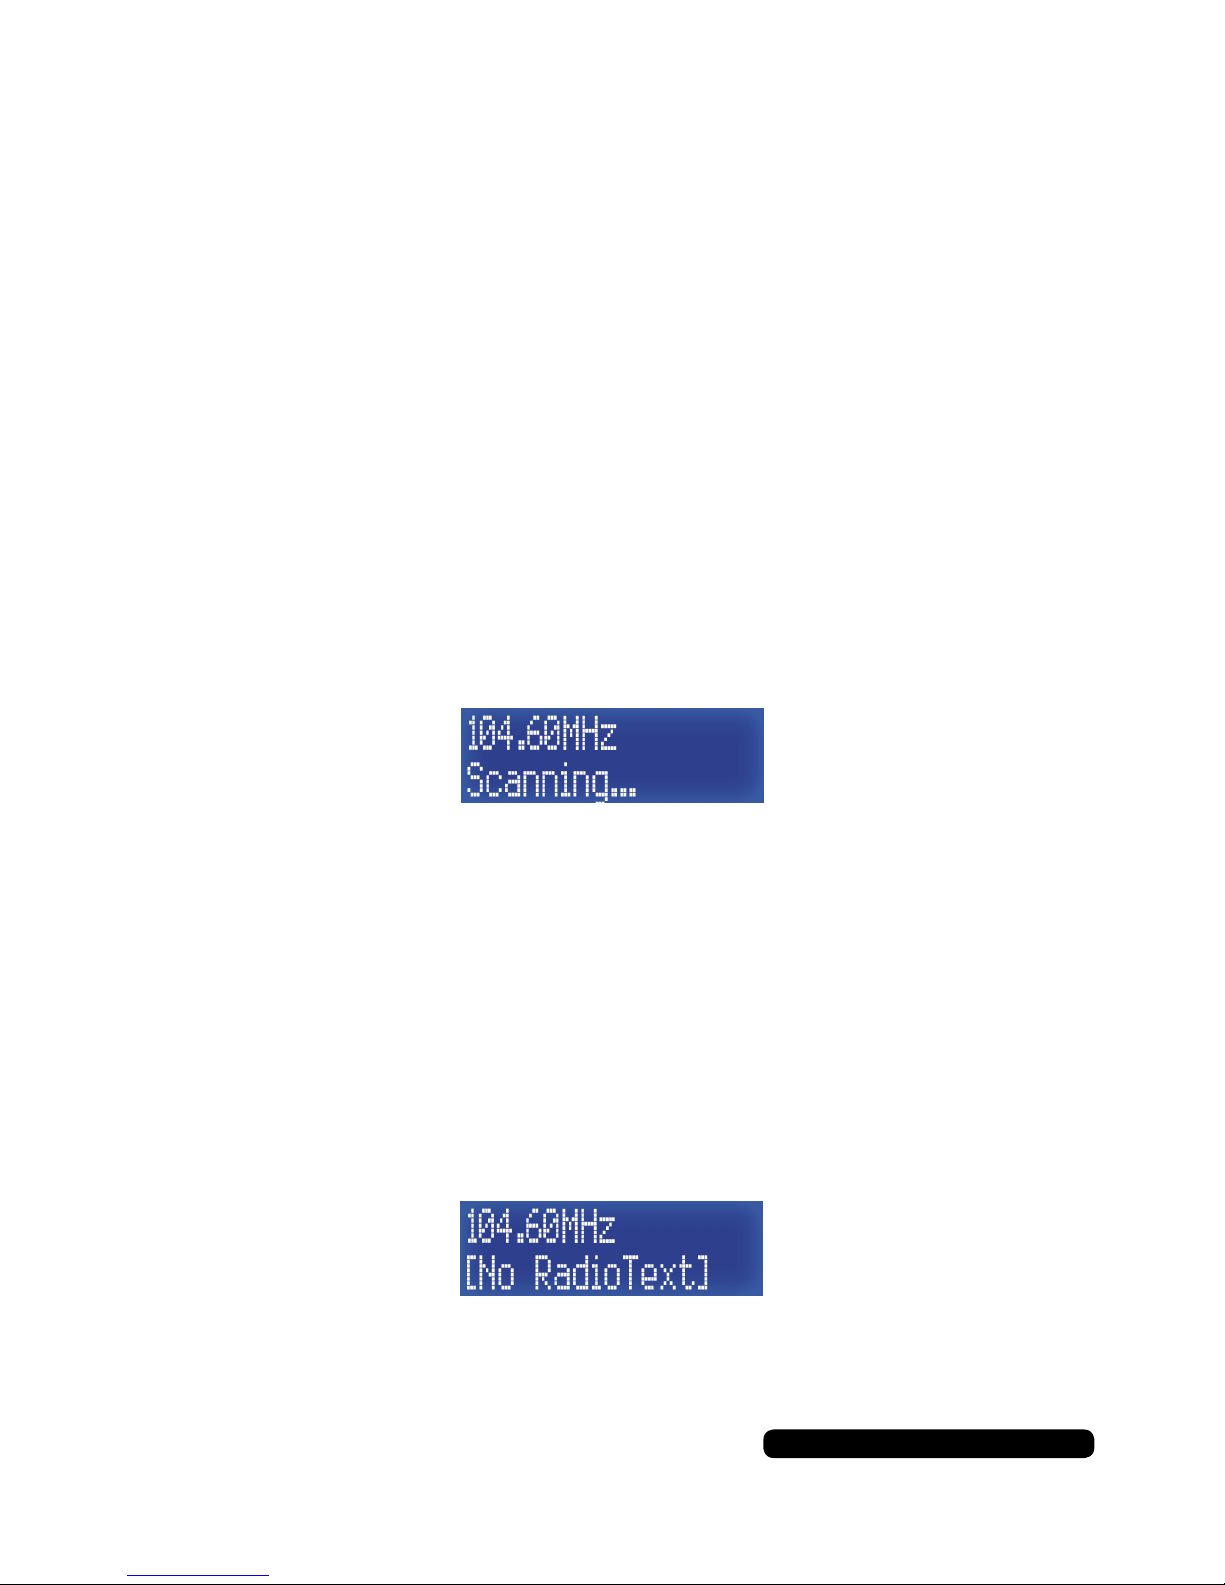
Auto Scan
Press the ‘Tune+’ or ‘Tune-’ button for 2 seconds to start the FM
auto scan in either direction along the frequency range.
The scan will stop at the next strongest signal it picks up. If the scan
continues without stopping you will need to manually tune the radio.
You can save the channel as a preset following directions on page
13, Preset Store
FM Mode
The radio, when turned on, is usually in DAB mode. To enter the FM
mode, repeatedly press the ‘Mode’ button until FM shows on the
display.
Manual Tune
Press the ‘Tune+’ or ‘Tune-’ button repeatedly to cycle through the FM
frequency range. The FM frequency tuning progresses in 0.05MHz
increments.
You can save the channel as a preset following directions on page
13, Preset Store.
Page 15

13
After Sales Support
UK/N.IRELAND HELPLINE NO:
REP.IRELAND HELPLINE N
O
:
WEBSITE:
EMAIL:
01270 508538
1800 995 036
www.quesh.co.uk
FM
FM Info
Pressing the ‘Info/Menu’ button repeatedly will cycle through and
display the following radio information:
• Radio Text
• PTY (Program Type)
• Name
• Mono/Stereo
• Power Type
• Time
• Date
FM Menu
Press and hold the ‘Info/Menu’ button for 2 seconds to enter the
DAB menu. The rst option will be ‘Preset Recall’.
Using the ‘Tune+’ or ‘Tune-’ buttons, you can cycle through the
menu options available.
Preset Recall > Preset Store > Scan Settings > Audio Settings > System*
(System* - see page 17)
Use the ‘Select/Snooze’ button to select your option.
Press the ‘Info/Menu’ button to exit the menu.
Page 16
14
After Sales Support
UK/N.IRELAND HELPLINE NO:
REP.IRELAND HELPLINE N
O
:
WEBSITE:
EMAIL:
01270 508538
1800 995 036
www.quesh.co.uk
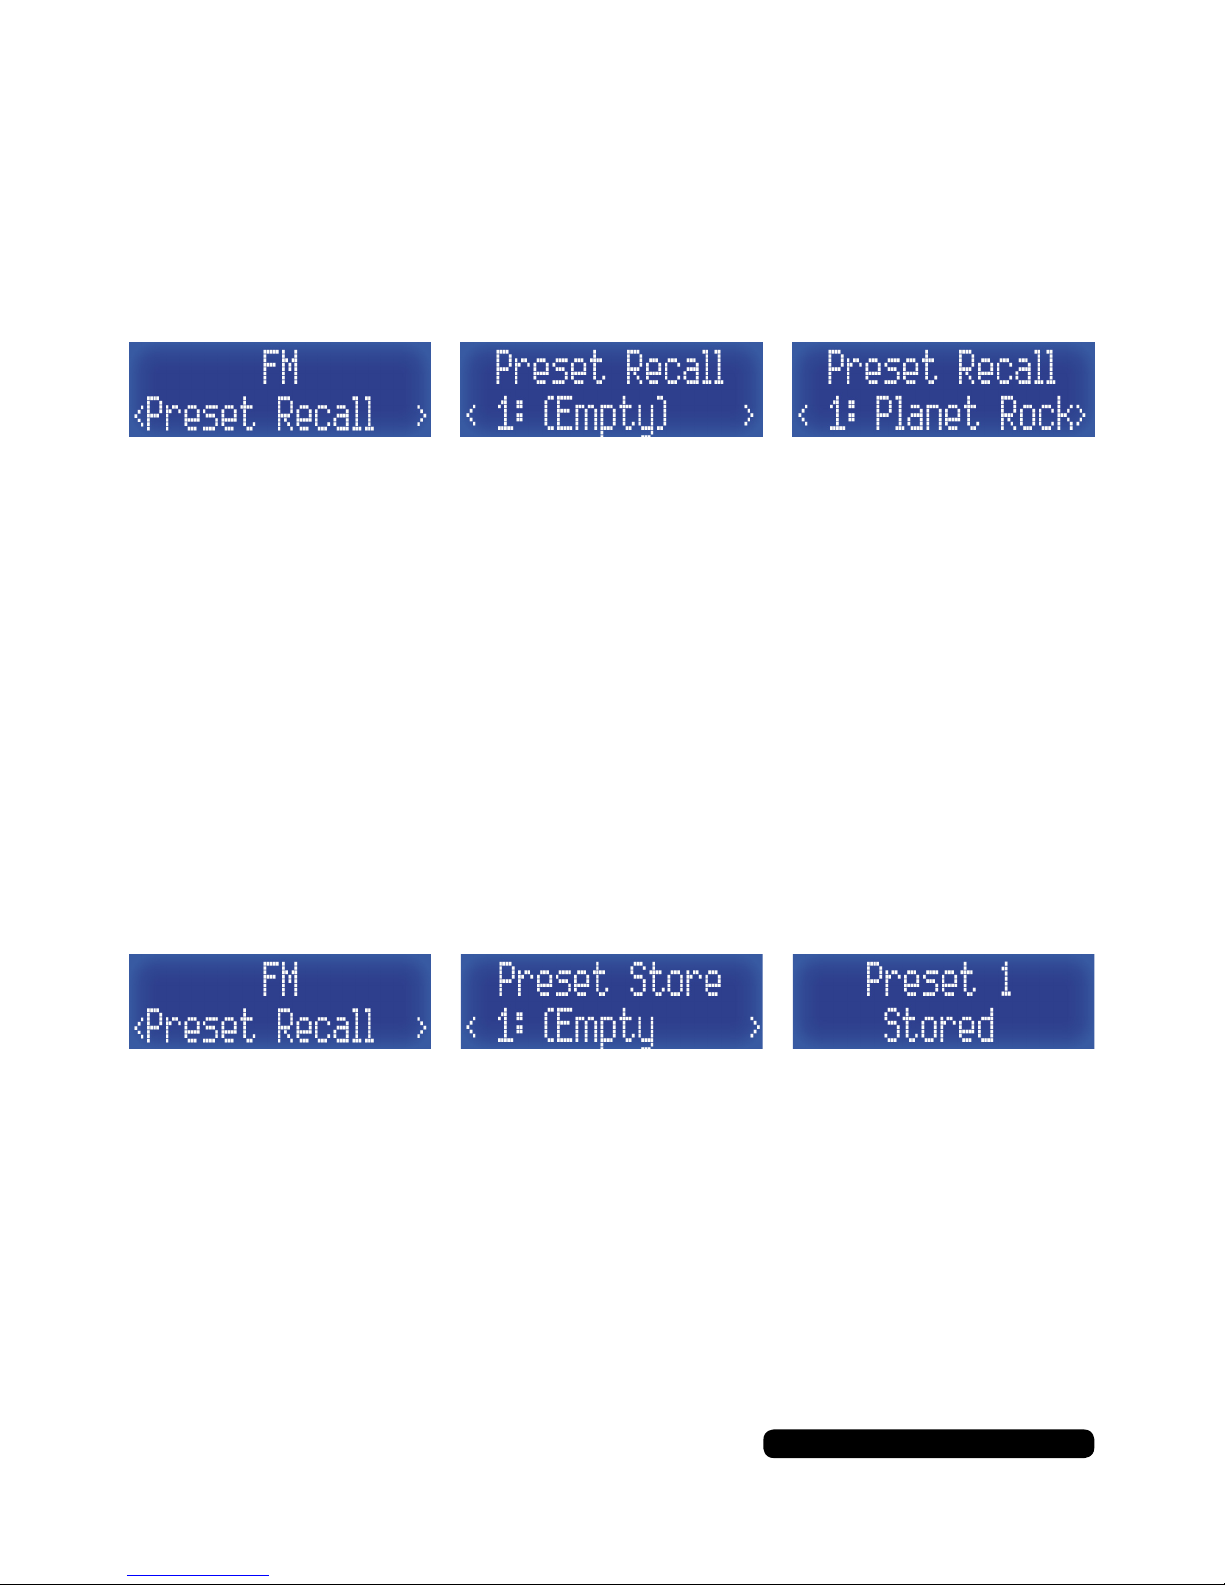
Preset Recall
Press the ‘Info/Menu’ button for 2 seconds to enter the FM menu.
The rst option will be ‘Preset Recall’, press the ‘Select/Snooze’
button to access the saved presets.
Use the ‘Tune+’ or ‘Tune-’ buttons to cycle through the saved
presets and then the ‘Select/Snooze’ button to connect the radio.
There are 10 preset slots available. If there is no station saved in a
preset slot it will show up as ‘(Empty)’.
FM
Preset Store
To save a preset, connect the radio to the required station so it is
playing (Auto Scan/Manual Tune - Page 12).
Press the ‘Info/Menu’ button for 2 seconds to enter the FM menu.
The rst option will be ‘Preset Recall’, press the ‘Tune+’ to cycle
through the menu to ‘Preset Store’, then press the ‘Select/Snooze’
button to access the preset store.
Use the ‘Tune+’ or ‘Tune-’ buttons to cycle through the presets and
then press the ‘Select/Snooze’ button to save the preset in the
selected slot. There are 10 preset slots available. The display splash
‘Preset # Stored’ will show if the save is successful.
If there is no station saved in a preset slot it will show up as ‘(Empty)’.
You can save a new station by saving over the one listed in the slot.
Page 17
15
After Sales Support
UK/N.IRELAND HELPLINE NO:
REP.IRELAND HELPLINE N
O
:
WEBSITE:
EMAIL:
01270 508538
1800 995 036
www.quesh.co.uk
FM
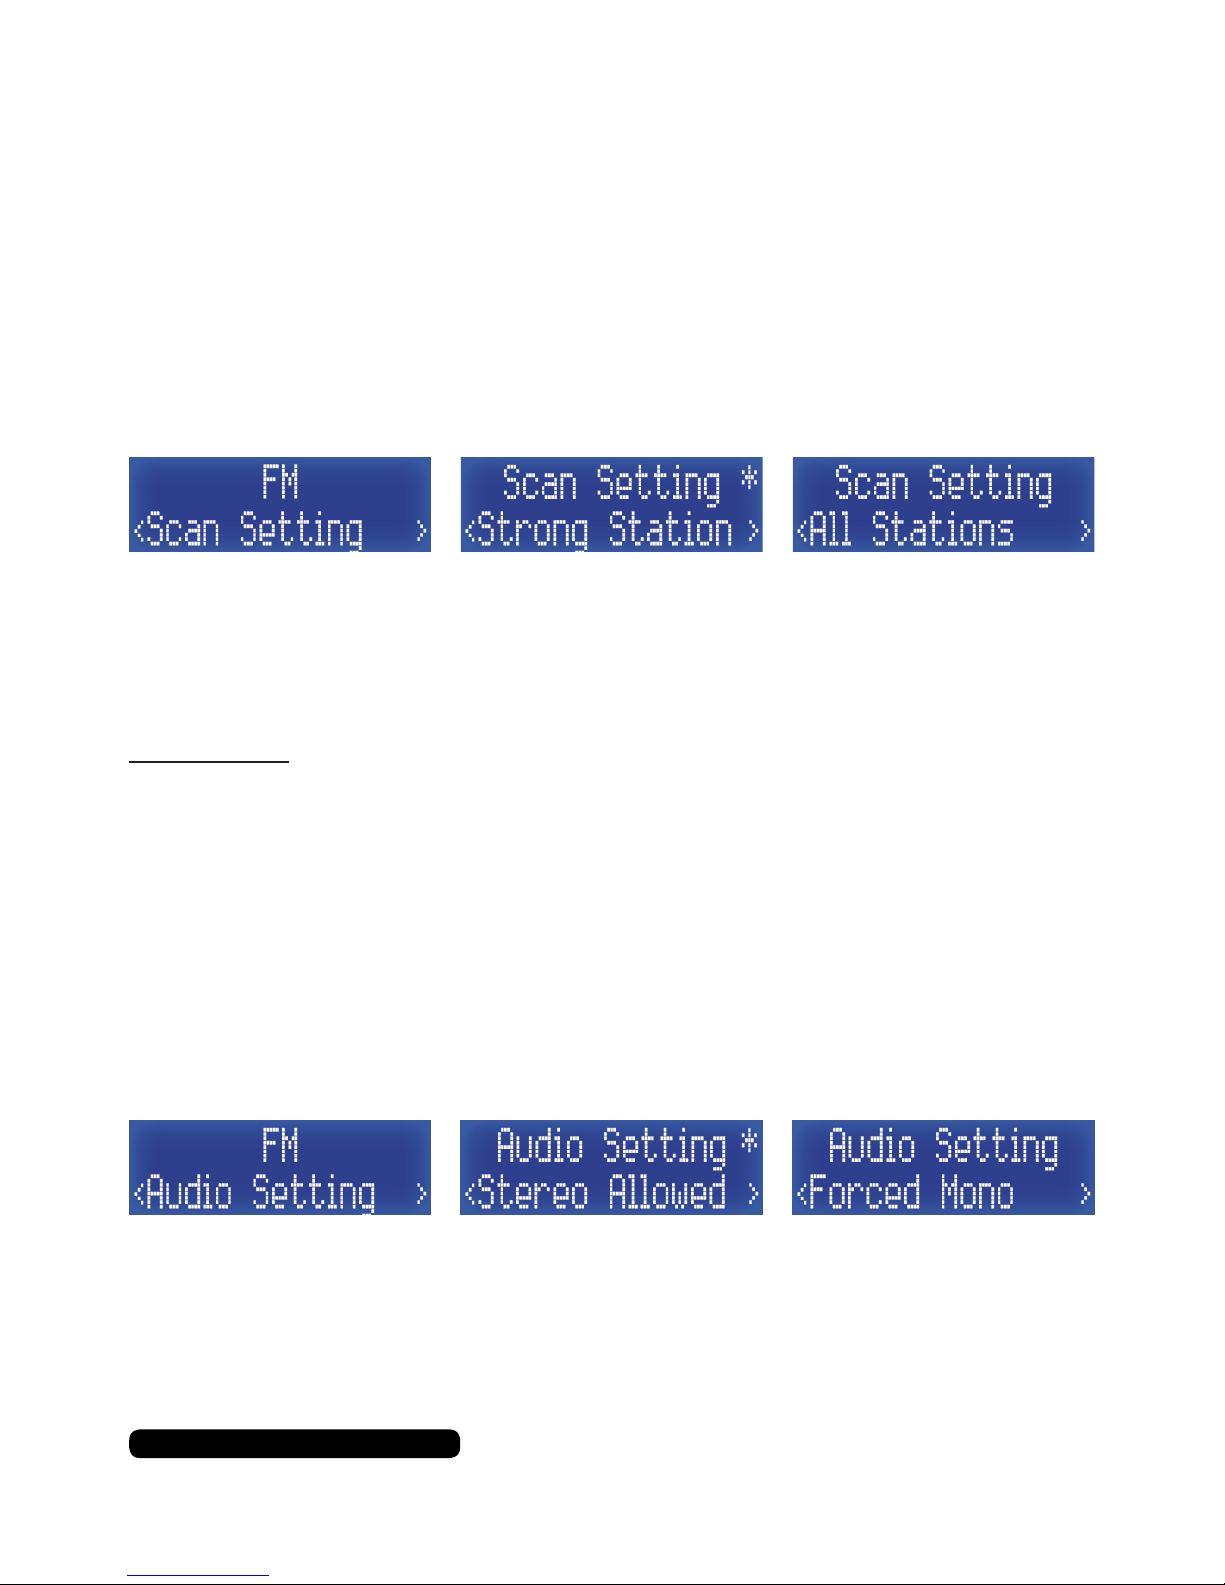
Scan Settings
Scan settings will allow you to change how the radio auto scans. As
default the scan setting is set to strong stations.
Press the ‘Info/Menu’ button for 2 seconds to enter the FM menu.
The rst option will be ‘Preset Recall’, press the ‘Tune+’ to cycle
through the menu to ‘Scan Setting’, then press the ‘Select/Snooze’
button to access this feature.
Use the ‘Tune+’ or ‘Tune-’ buttons to cycle through the two options
and then press the ‘Select/Snooze’ button to conrm. An asterisk in
the top right will indicated the current selected option.
Please Note:
For the best auto scan results, please change this option to ‘All Stations’.
Audio Settings
Audio settings will allow you to change whether the radio will play
stereo where available or keep the output on mono for all stations.
Press the ‘Info/Menu’ button for 2 seconds to enter the FM menu.
The rst option will be ‘Preset Recall’, press the ‘Tune+’ to cycle
through the menu to ‘Audio Setting’, then press the ‘Select/Snooze’
button to access this feature.
Use the ‘Tune+’ or ‘Tune-’ buttons to cycle through the two options
and then press the ‘Select/Snooze’ button to conrm. An asterisk in
the top right will indicated the current selected option.
Page 18
16
After Sales Support
UK/N.IRELAND HELPLINE NO:
REP.IRELAND HELPLINE N
O
:
WEBSITE:
EMAIL:
01270 508538
1800 995 036
www.quesh.co.uk
AUX
Aux Mode
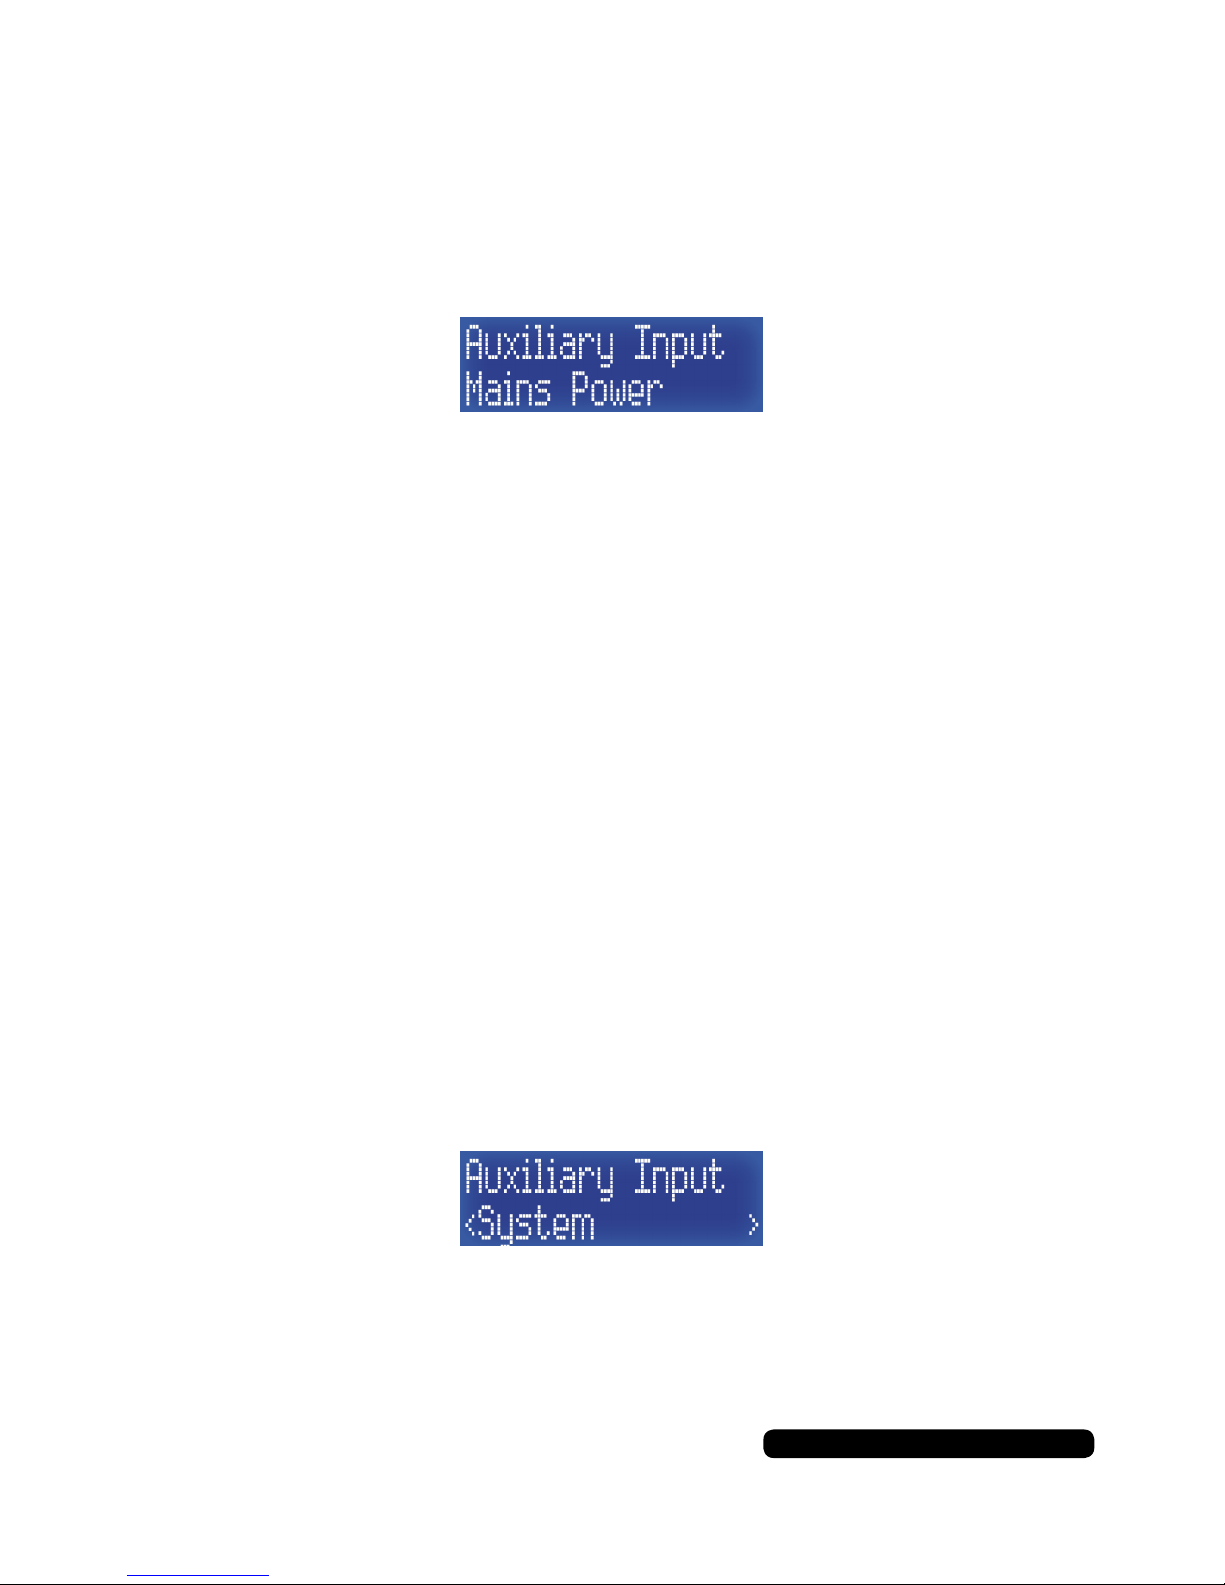
The radio, when turned on, is usually in DAB mode. To enter AUX
mode, repeatedly press the ‘Mode’ button until ‘Auxiliary Input’
shows on the display.
The radio will act like an amp in this mode. Any device with an audio
output connected to the 3.5mm AUX port on the back of the radio
will play though the speaker.
Make sure the output of the connected device is turned to maximum
volume for best results.
AUX Info
Pressing the ‘Info/Menu’ button repeatedly will cycle through and
display the following radio information:
• Power Type
• Time
• Date
AUX Menu
Press and hold the ‘Info/Menu’ button for 2 seconds to enter the
DAB menu. The only option will be ‘System’.
Use the ‘Select/Snooze’ button to enter the system menu.
Press the ‘Info/Menu’ button to exit the menu.
Page 19
17
After Sales Support
UK/N.IRELAND HELPLINE NO:
REP.IRELAND HELPLINE N
O
:
WEBSITE:
EMAIL:
01270 508538
1800 995 036
www.quesh.co.uk
System
System Menu
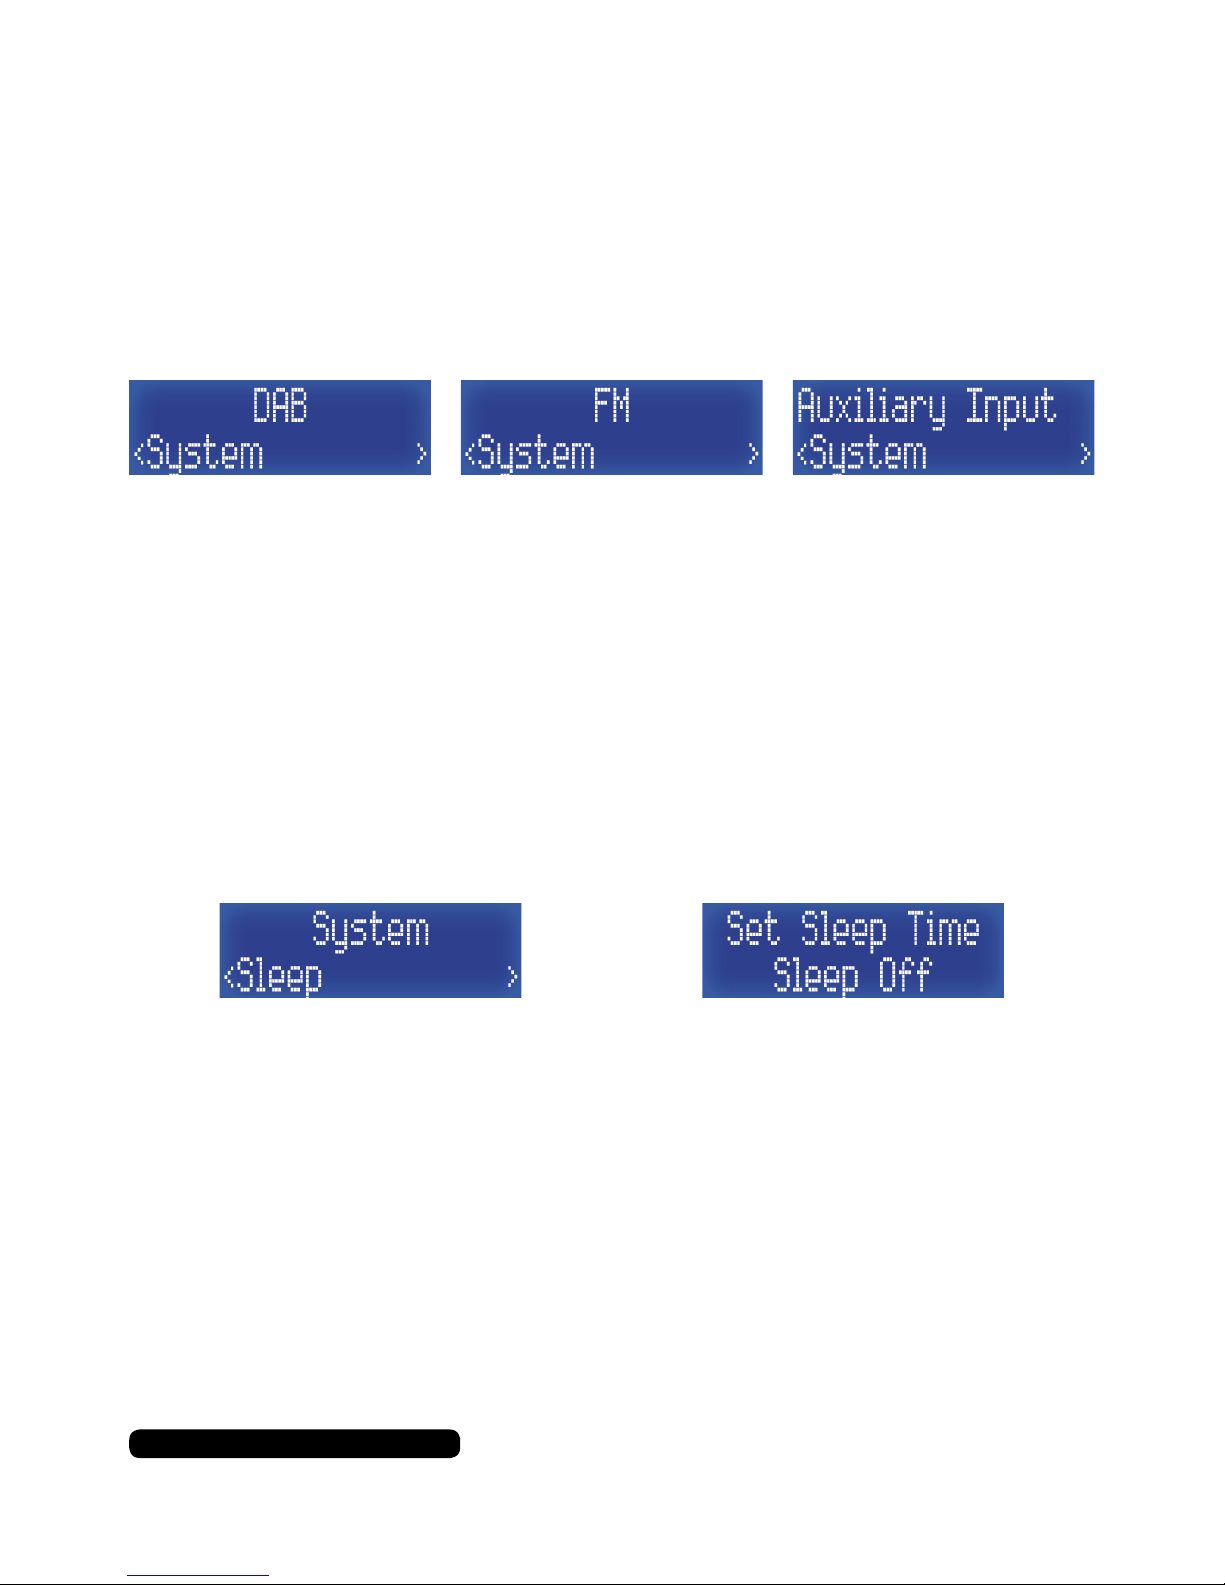
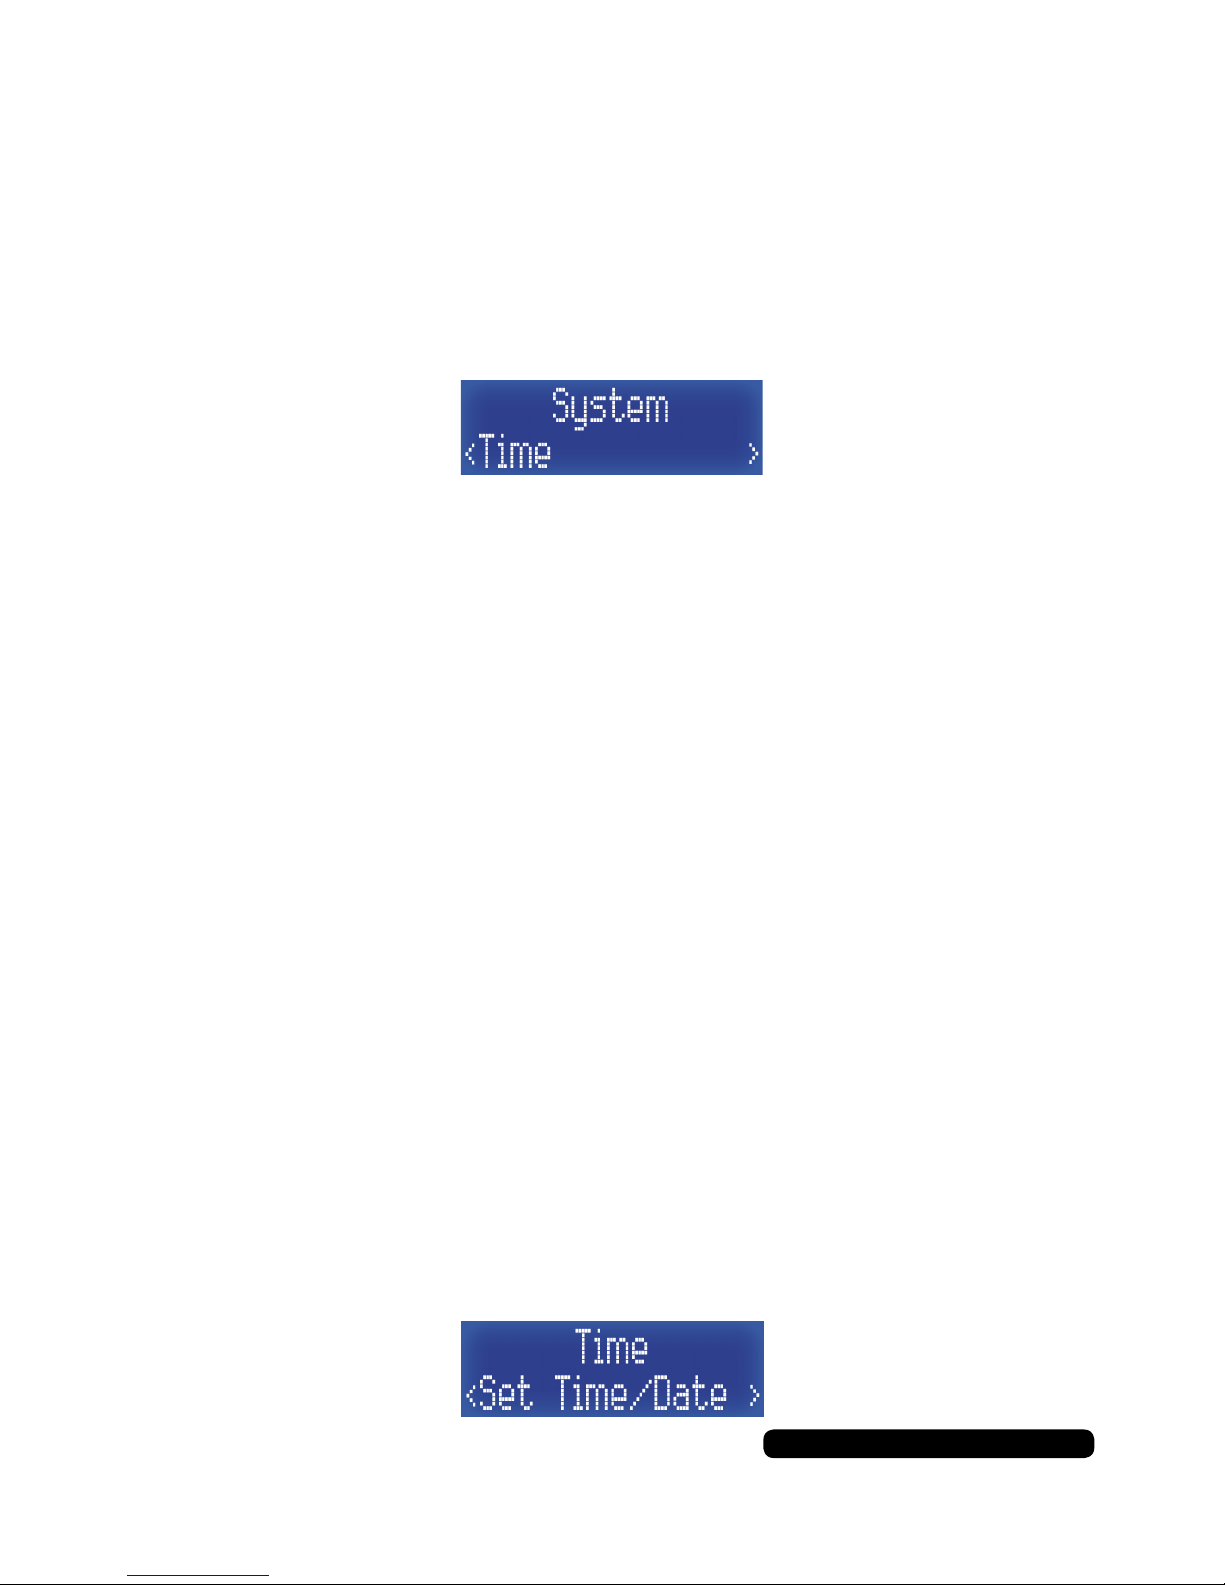
It is possible to access the system menu through all three modes.
Press and hold the ‘Info/menu’ button for 2 seconds, then press the
‘Tune-’ to cycle the menu to ‘System’ and press ‘Select/Snooze’
button to access it.
Using the ‘Tune+’ or ‘Tune-’ buttons, you can cycle through the
system menu options available.
Sleep > Alarm > EQ > Time > Backlight > Language > Factory Reset > SW Version
Sleep
You can set the radio to turn itself to standby mode after a
preselected amount of time. Once in the system menu list, press the
‘Tune+’ button repeatedly until you get to ‘Sleep’ and then press the
‘Select/Snooze’ to set this feature.
Press the ‘Tune+’ button to cycle through the available options and
press ‘Select/Snooze’ to select one.
The options are:
Sleep off > 15 > 30 > 45 > 60 > 90 (minutes)
Press the ‘Info/Menu’ button to return to the radio.
Once the timer has expired, the sleep timer remains off and will
need resetting again next time you want to use this feature.
Page 20
18
After Sales Support
UK/N.IRELAND HELPLINE NO:
REP.IRELAND HELPLINE N
O
:
WEBSITE:
EMAIL:
01270 508538
1800 995 036
www.quesh.co.uk
System
Setting The Alarm
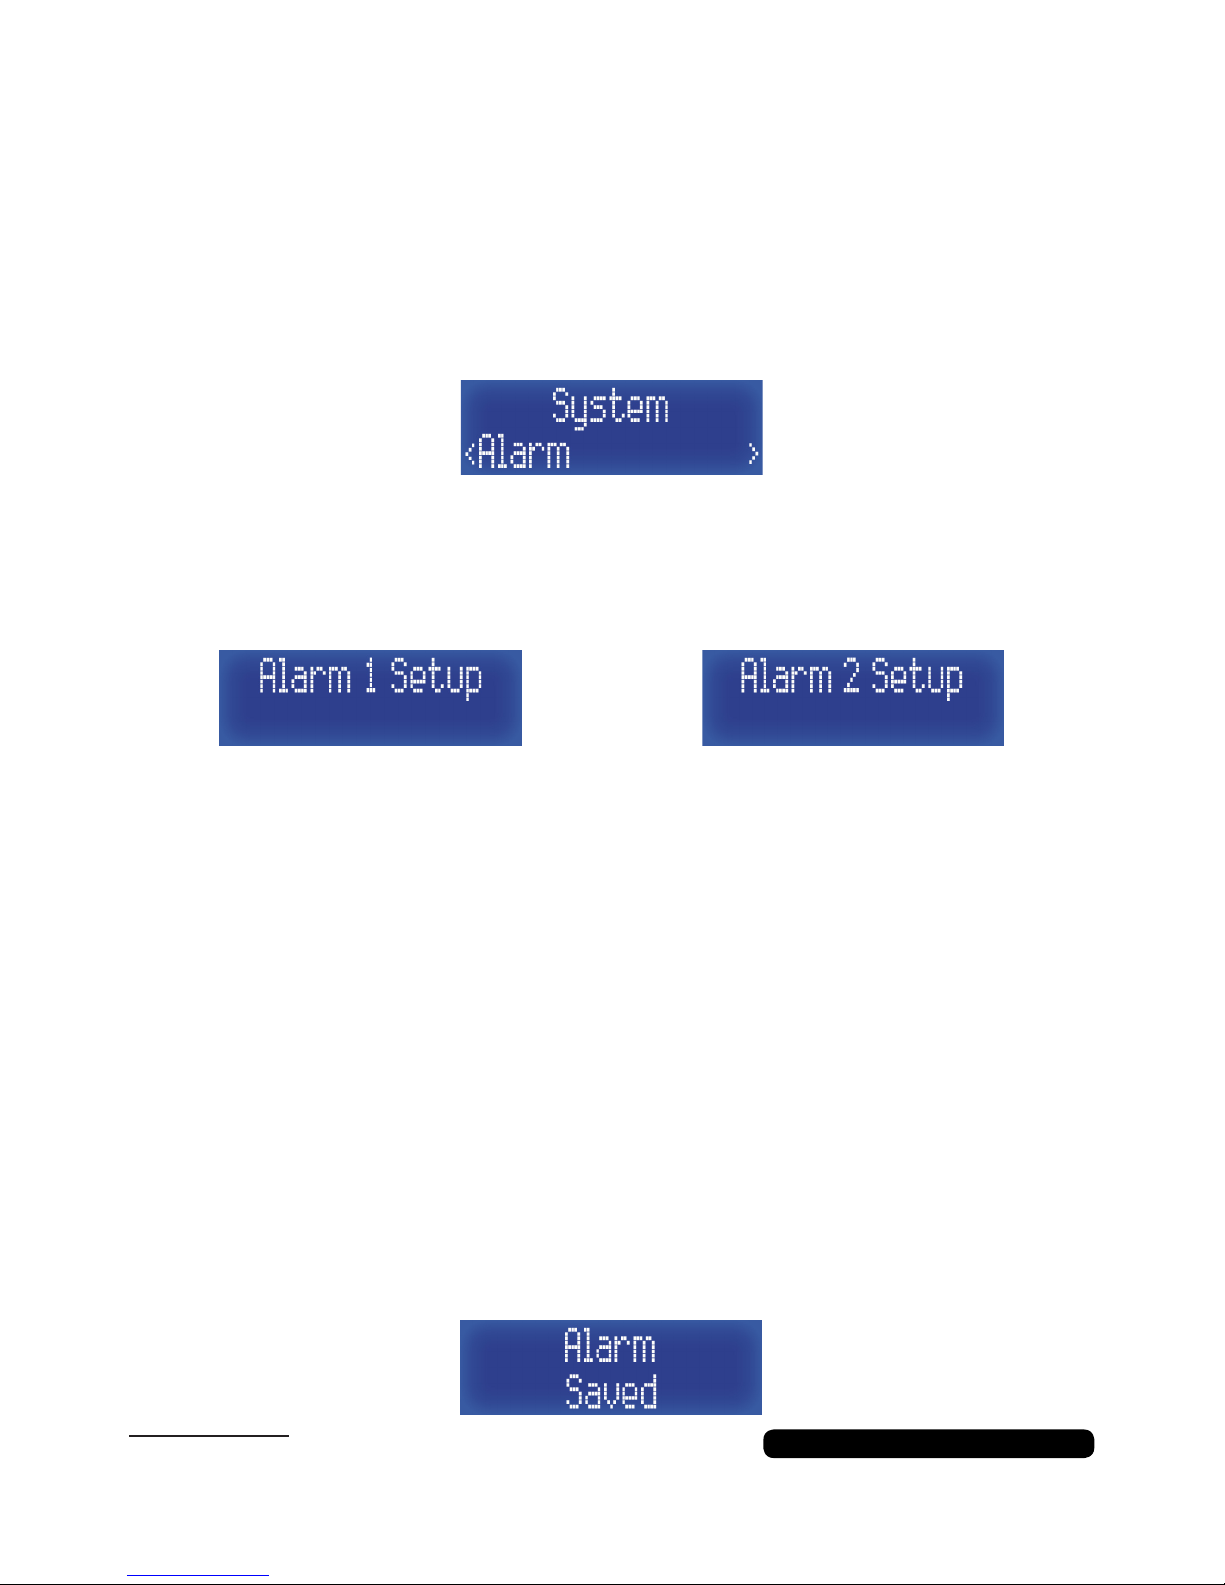
There are 2 alarms that can be set on this radio.
Once in the system menu list, press the ‘Tune+’ button repeatedly
until you get to ‘Alarm’ and then press the ‘Select/Snooze’ to set this
feature.
When you are in the alarm feature, press the ‘Tune+’ button
repeatedly to change between alarm 1 and 2, then press the
‘Select/Snooze’ to set the selected alarm.
Time:
Duration:
Alert:
*If ‘DAB’ or ‘FM’ selected:
Repeat:
*If ‘Once’ selected:
Volume:
Alarm:
Hour > Minutes
15 > 30 > 45 > 60 > 90 (Minutes)
Buzz > *DAB > *FM
Last Listened > Preset (1-10)
Daily > *Once > Weekday > Weekend
Day > Month > Year
Select Volume Level
On > Off
The process is controlled by using the ‘Tune+’ and ‘Tune-’ to cycle
through the available options/values and use the ‘Select/Snooze’
button to conrm the option/value selected.
Process ow:
The ‘alarm saved’ screen will show to conrm the alarm details
have been saved. However this does not mean the alarm is active.
Please Note:
The lowest alarm volume is 4
Page 21
19
After Sales Support
UK/N.IRELAND HELPLINE NO:
REP.IRELAND HELPLINE N
O
:
WEBSITE:
EMAIL:
01270 508538
1800 995 036
www.quesh.co.uk
System
Turning The Alarm On/Off
The alarm can only be set or disabled with the last option when
setting the alarm (See page 18, Setting The Alarm).
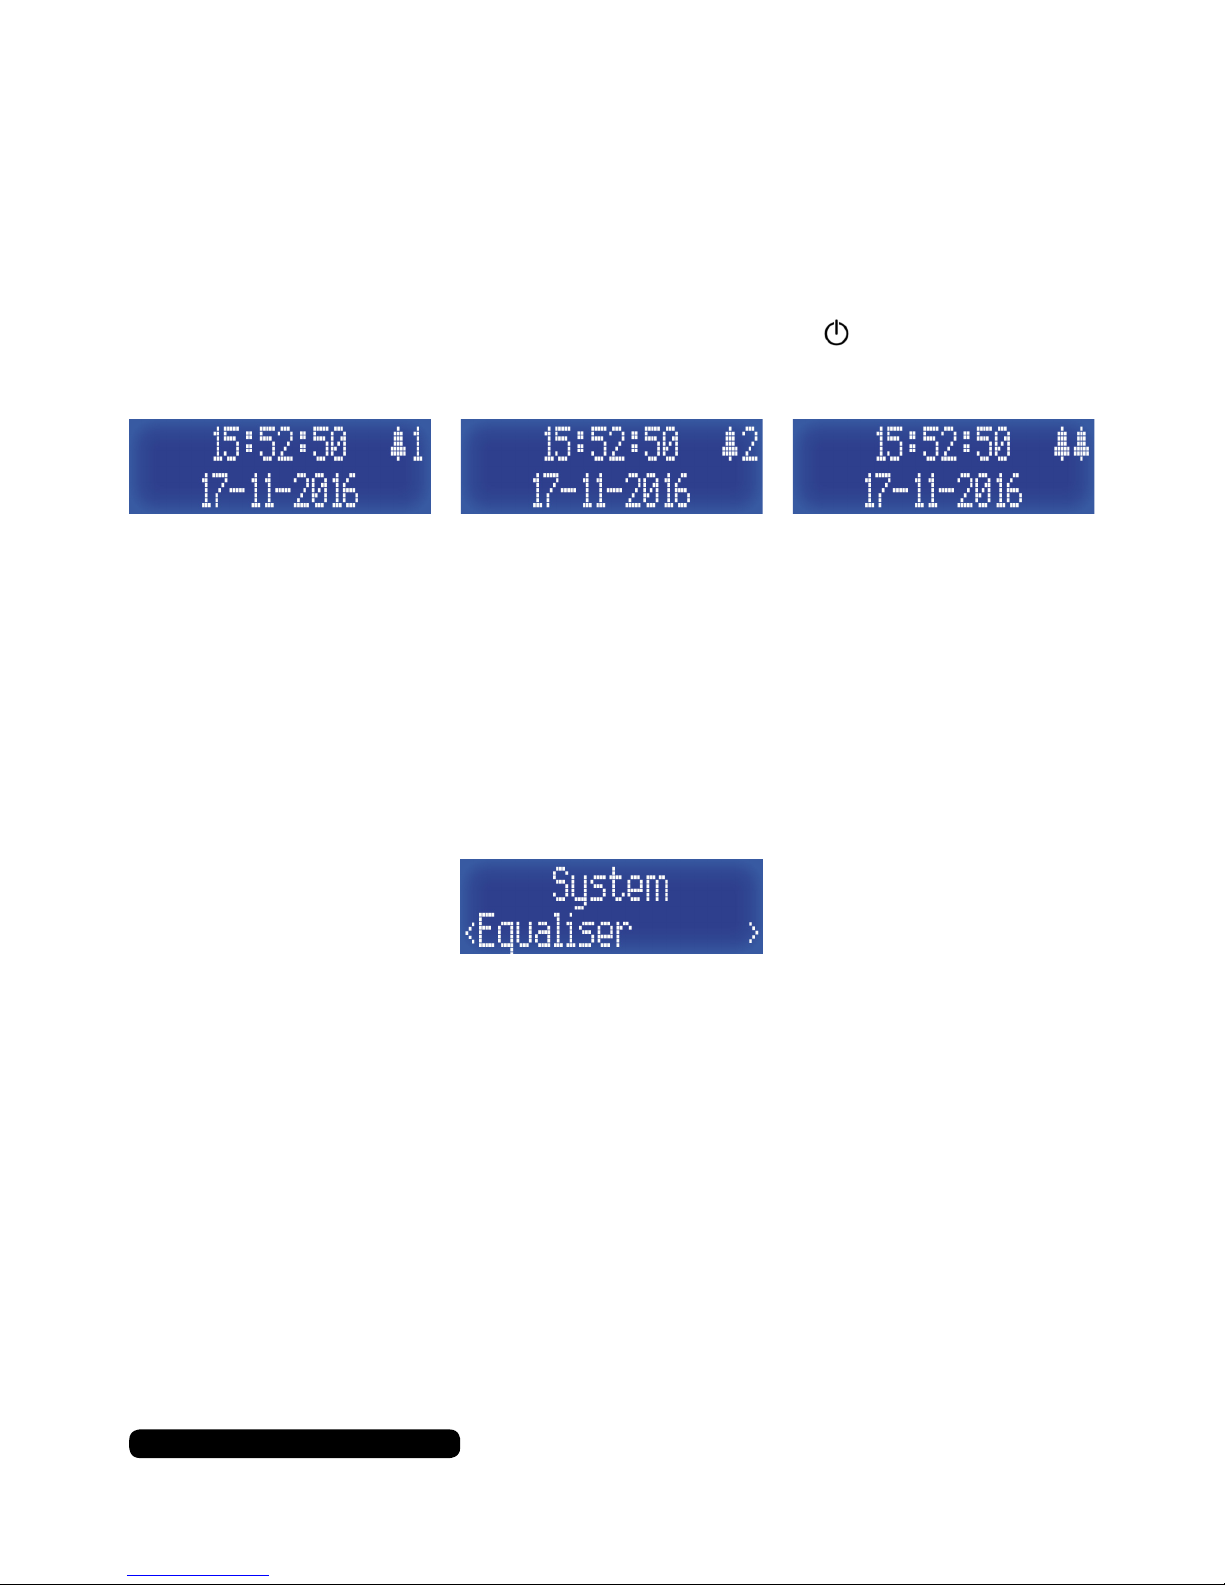
To check which alarm(s) have been set press the button to put the
radio into standby mode and check the display.
The bell icon and number indicate alarm 1 or 2 is active and the
double bell icon indicates that both alarms are active.
Equaliser
Set output tone of the radio with this feature.
Once in the system menu list, press the ‘Tune+’ button repeatedly
until you get to ‘Equaliser’ and then press the ‘Select/Snooze’ to set
this feature.
The process is controlled by using the ‘Tune+’ and ‘Tune-’ to cycle
through the available options/values and use the ‘Select/Snooze’
button to conrm the option/value selected.
Normal > Classic > Jazz > Pop > Rock > Speech > My EQ*
*You can customise the EQ by using the sub menu under ‘My EQ’
Here you can change the following:
Loudness Y/N
Treble +/-7
Bass +/-7
Page 22
20
After Sales Support
UK/N.IRELAND HELPLINE NO:
REP.IRELAND HELPLINE N
O
:
WEBSITE:
EMAIL:
01270 508538
1800 995 036
www.quesh.co.uk
System
Time
From here you can set the date and time manually, update it from
different sources, change the time format and the date format.
Once in the system menu list, press the ‘Tune+’ button repeatedly
until you get to ‘Time’ and then press the ‘Select/Snooze’ to set this
feature.
In this sub menu you can choose from the following:
• Set Time/Date
• Auto Update
• Set 12/24 Hour
• Set Date Format
Once in the Time sub menu list, press the ‘Tune+’ or ‘Tune-’ to cycle
through the available options and then press the ‘Select/Snooze’ to
set the selected option.
Time - Set Time/Date
Manually set the date and time with this option.
The process is controlled by using the ‘Tune+’ and ‘Tune-’ to cycle
through the available options/values and use the ‘Select/Snooze’
button to conrm the option/value selected.
Process ow:
Time:
Date:
Hour > Minutes
Day > Month > Year
The date format will change depending on the current selected
date format.
Page 23
21
After Sales Support
UK/N.IRELAND HELPLINE NO:
REP.IRELAND HELPLINE N
O
:
WEBSITE:
EMAIL:
01270 508538
1800 995 036
www.quesh.co.uk
System
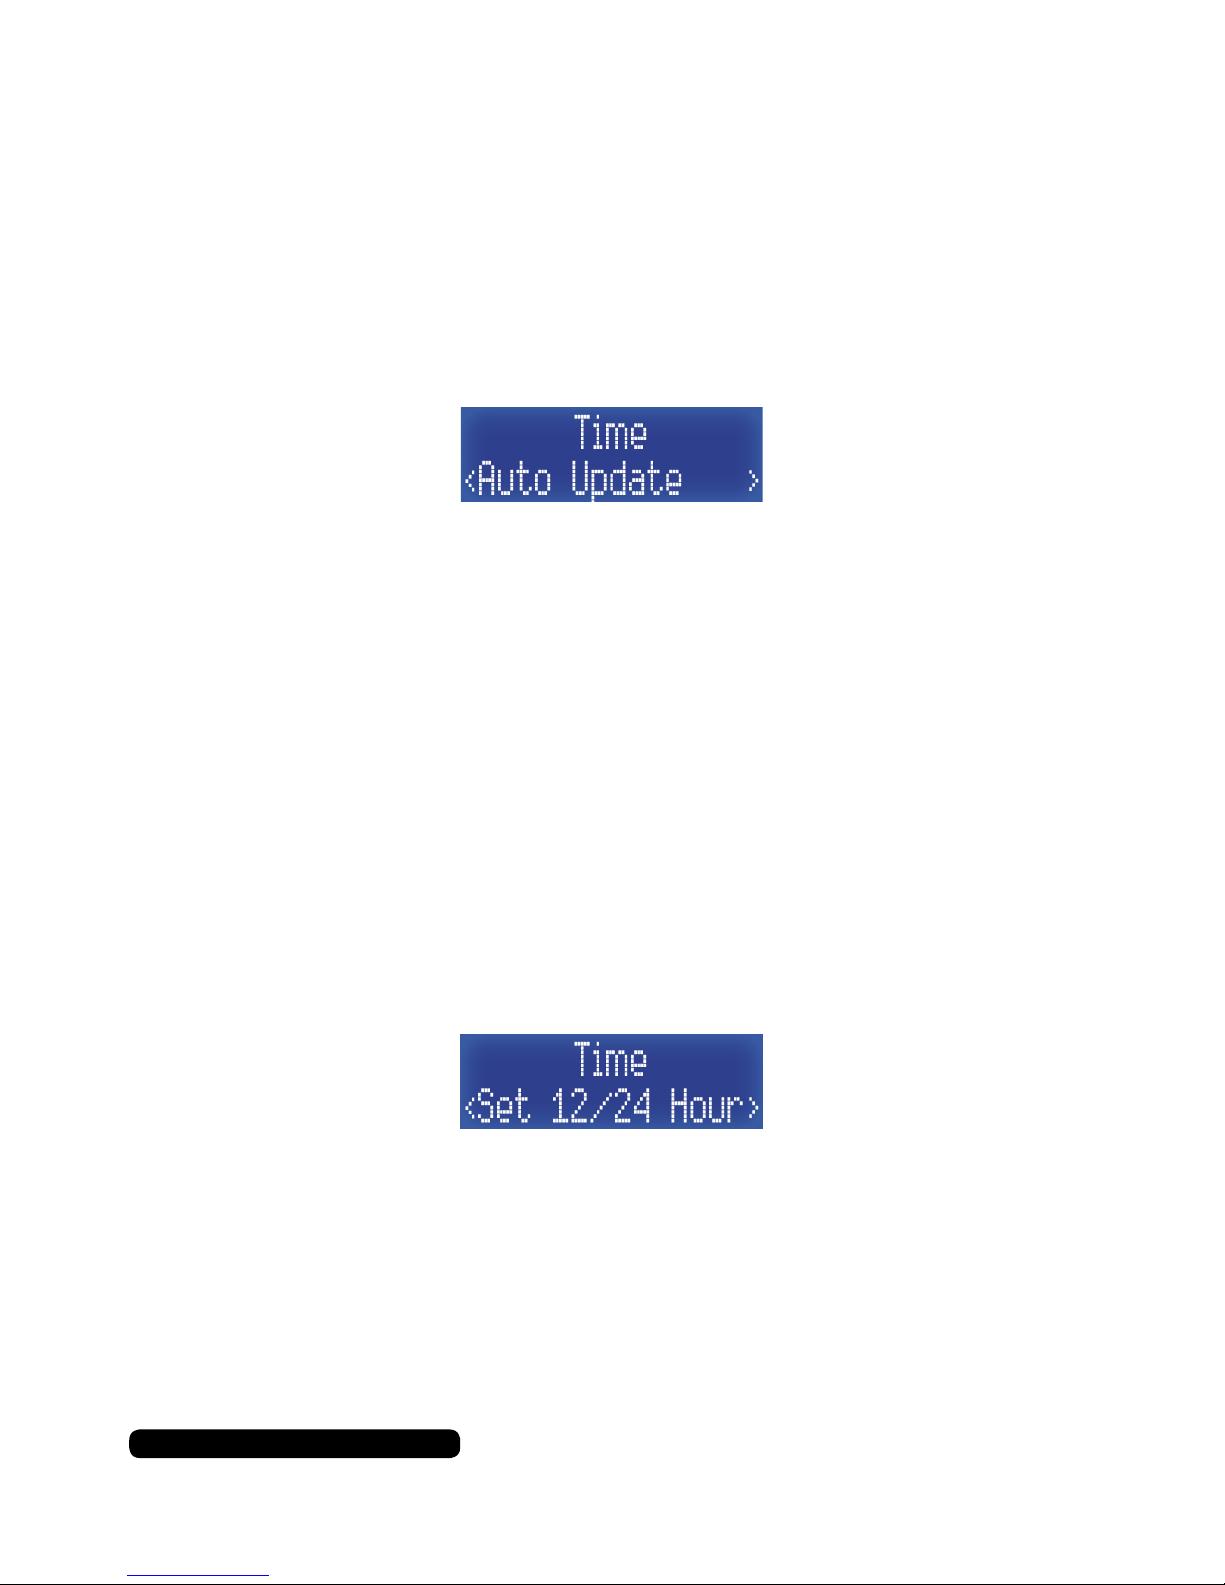
Time - Auto Update
With this option you can auto update the time and date information
from a DAB or FM signal.
Once in the Time sub menu list, press the ‘Tune+’ button repeatedly
until you get to ‘Auto Update’ and then press the ‘Select/Snooze’ to
set this feature.
Select the update source by using the ‘Tune+’ and ‘Tune-’ to cycle
through the available options and use the ‘Select/Snooze’ button to
conrm. Your source options are:
Update Any > Update From DAB > Update From FM > No Update
Press ‘Info/Menu’ a few times to exit this menu option to the radio.
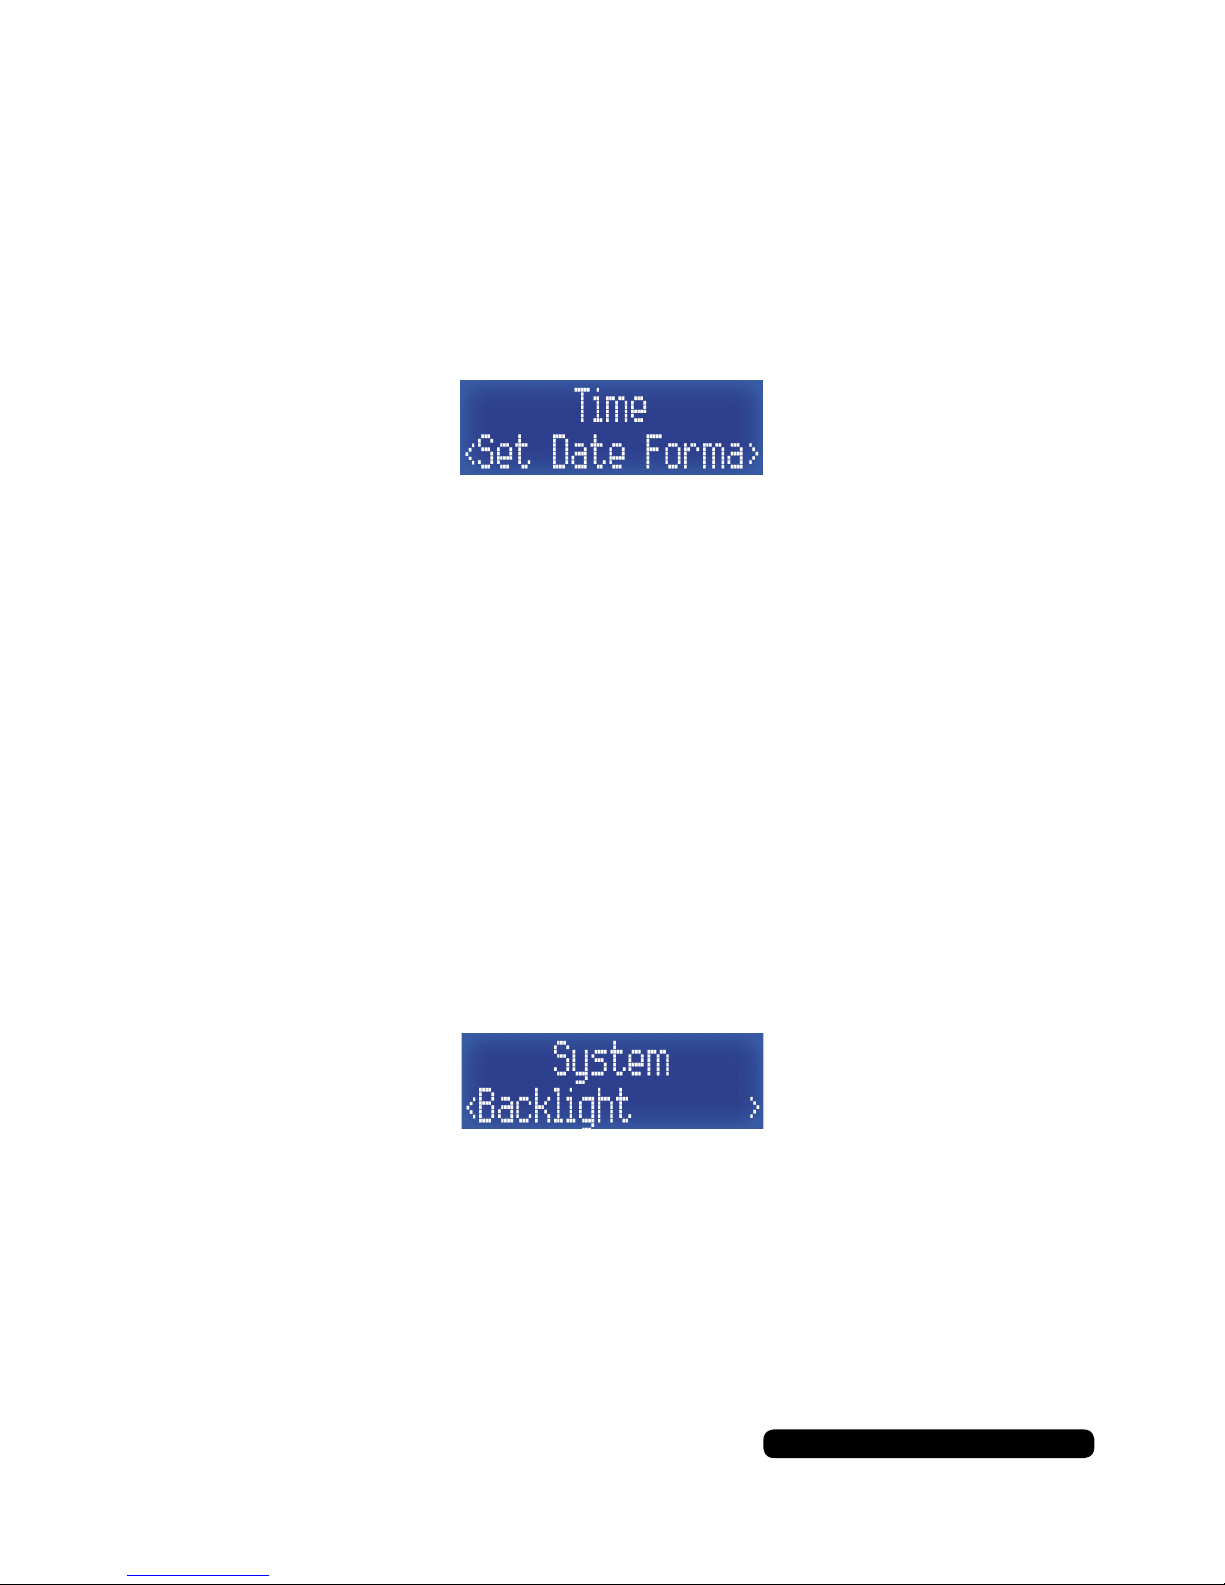
Time - Set 12/24 Hour
Change the presented format of the time with this option.
Once in the Time sub menu list, press the ‘Tune+’ button repeatedly
until you get to ‘Set 12/24 Hour’ and then press the ‘Select/Snooze’
to set this feature.
Select the update source by using the ‘Tune+’ and ‘Tune-’ to cycle
through the available options and use the ‘Select/Snooze’ button to
conrm. Your time format options are:
Set 12 Hour > Set 24 Hour
Press ‘Info/Menu’ a few times to exit this menu option to the radio.
Page 24
22
After Sales Support
UK/N.IRELAND HELPLINE NO:
REP.IRELAND HELPLINE N
O
:
WEBSITE:
EMAIL:
01270 508538
1800 995 036
www.quesh.co.uk
System
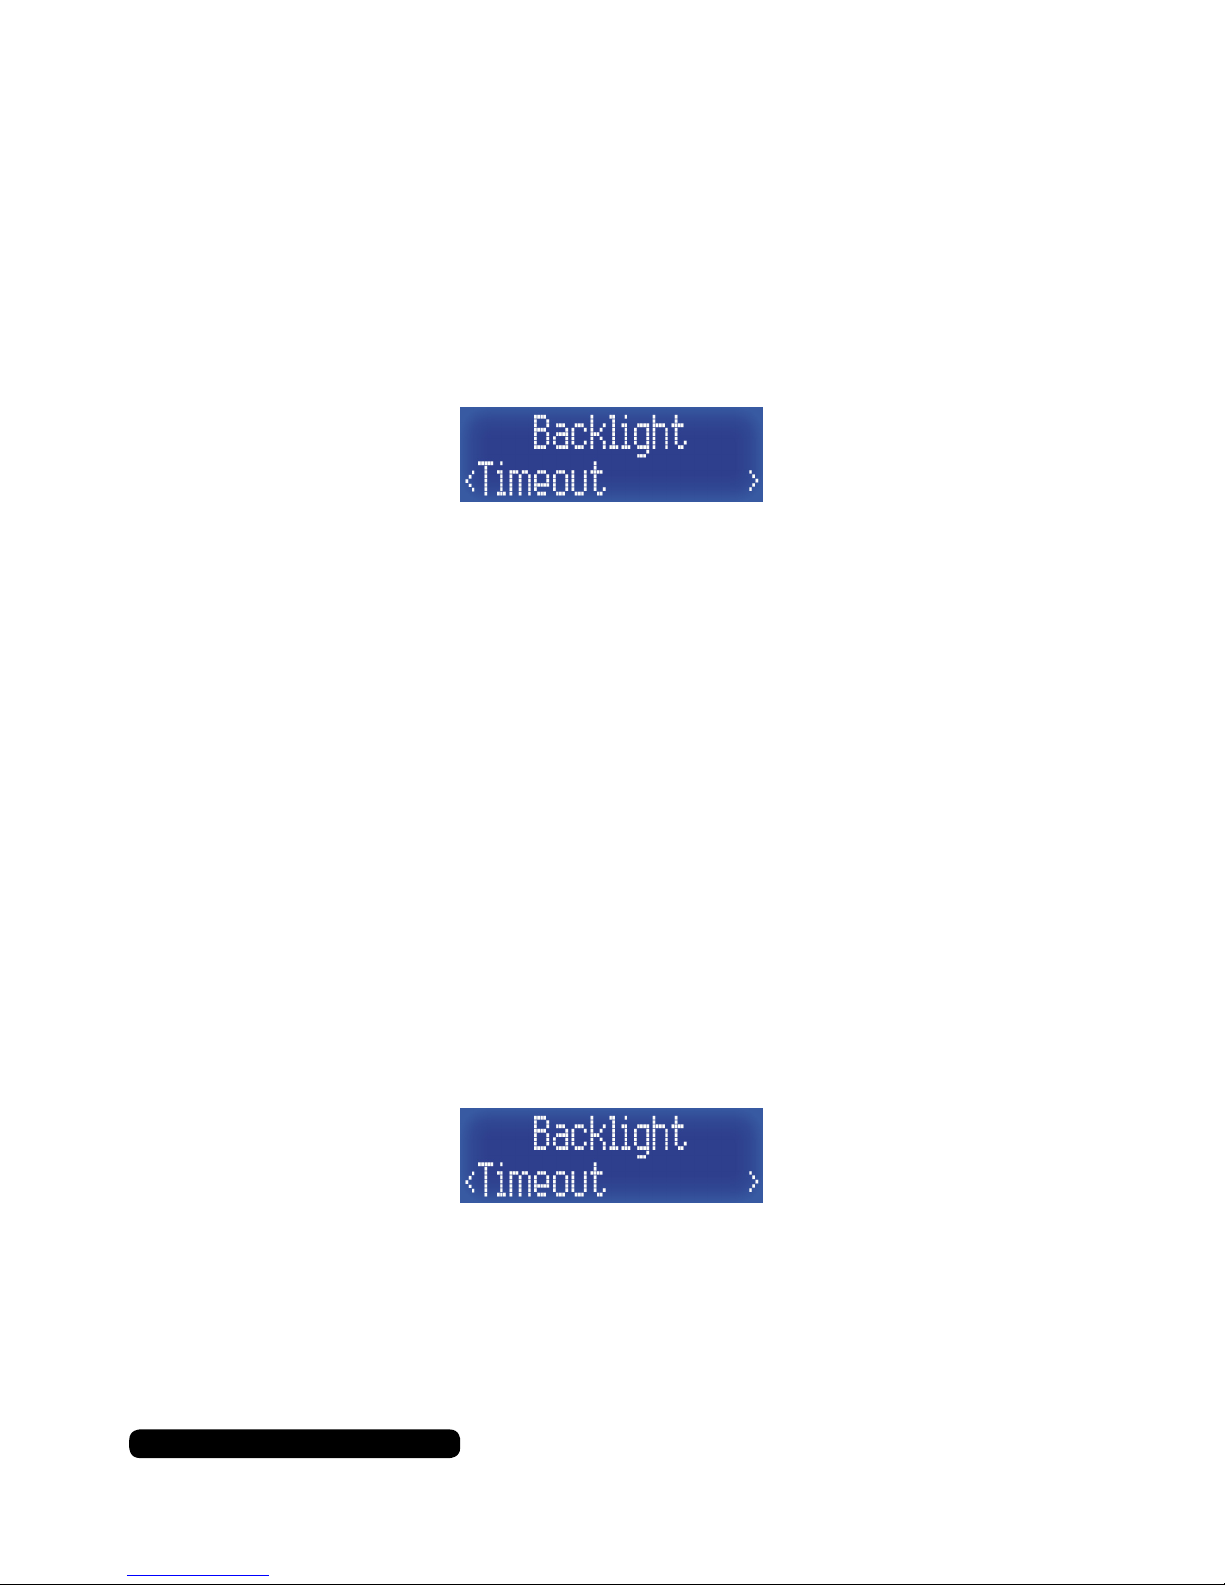
Time - Set Date Format
With this option you can change the displayed format of the date.
Once in the Time sub menu list, press the ‘Tune+’ button repeatedly
until you get to ‘Set Date Format’ and then press the ‘Select/Snooze’
to set this feature.
Select the update source by using the ‘Tune+’ and ‘Tune-’ to cycle
through the available options and use the ‘Select/Snooze’ button to
conrm. Your time format options are:
DD MM YYYY > MM DD YYYY
Press ‘Info/Menu’ a few times to exit this menu option to the radio.
Backlight
The active and standby backlight for the radio can be adjusted with
this menu option.
Once in the system menu list, press the ‘Tune+’ button repeatedly
until you get to ‘Backlight’ and then press the ‘Select/Snooze’ to set
this feature.
In this sub menu you can choose from the following:
• Time Out
• On Level
• Dim Level
Page 25
23
After Sales Support
UK/N.IRELAND HELPLINE NO:
REP.IRELAND HELPLINE N
O
:
WEBSITE:
EMAIL:
01270 508538
1800 995 036
www.quesh.co.uk
System
Backlight - Timeout
This option will allow you to set the length of time in seconds before
the screen dims.
Once in the Backlight sub menu list, press the ‘Tune+’ button
repeatedly until you get to ‘Timeout’ and then press the
‘Select/Snooze’ to set this feature.
Select the update source by using the ‘Tune+’ and ‘Tune-’ to cycle
through the available options and use the ‘Select/Snooze’ button to
conrm. Your timeout options are:
(seconds) 10 > 20 > 30 > 45 > 60 > 90 > 120 > 180 > On
The asterisk in the top right indicates the current setting.
Press ‘Info/Menu’ a few times to exit this menu option to the radio.
Backlight - On Level
On level is the brightness of the display when the radio is being
interacted with i.e. button presses.
Once in the Backlight sub menu list, press the ‘Tune+’ button
repeatedly until you get to ‘Timeout’ and then press the
‘Select/Snooze’ to set this feature.
In this sub menu you can choose from the following:
High > Med > Low
The asterisk in the top right indicates the current setting.
Press ‘Info/Menu’ a few times to exit this menu option to the radio.
Page 26
24
After Sales Support
UK/N.IRELAND HELPLINE NO:
REP.IRELAND HELPLINE N
O
:
WEBSITE:
EMAIL:
01270 508538
1800 995 036
www.quesh.co.uk
System
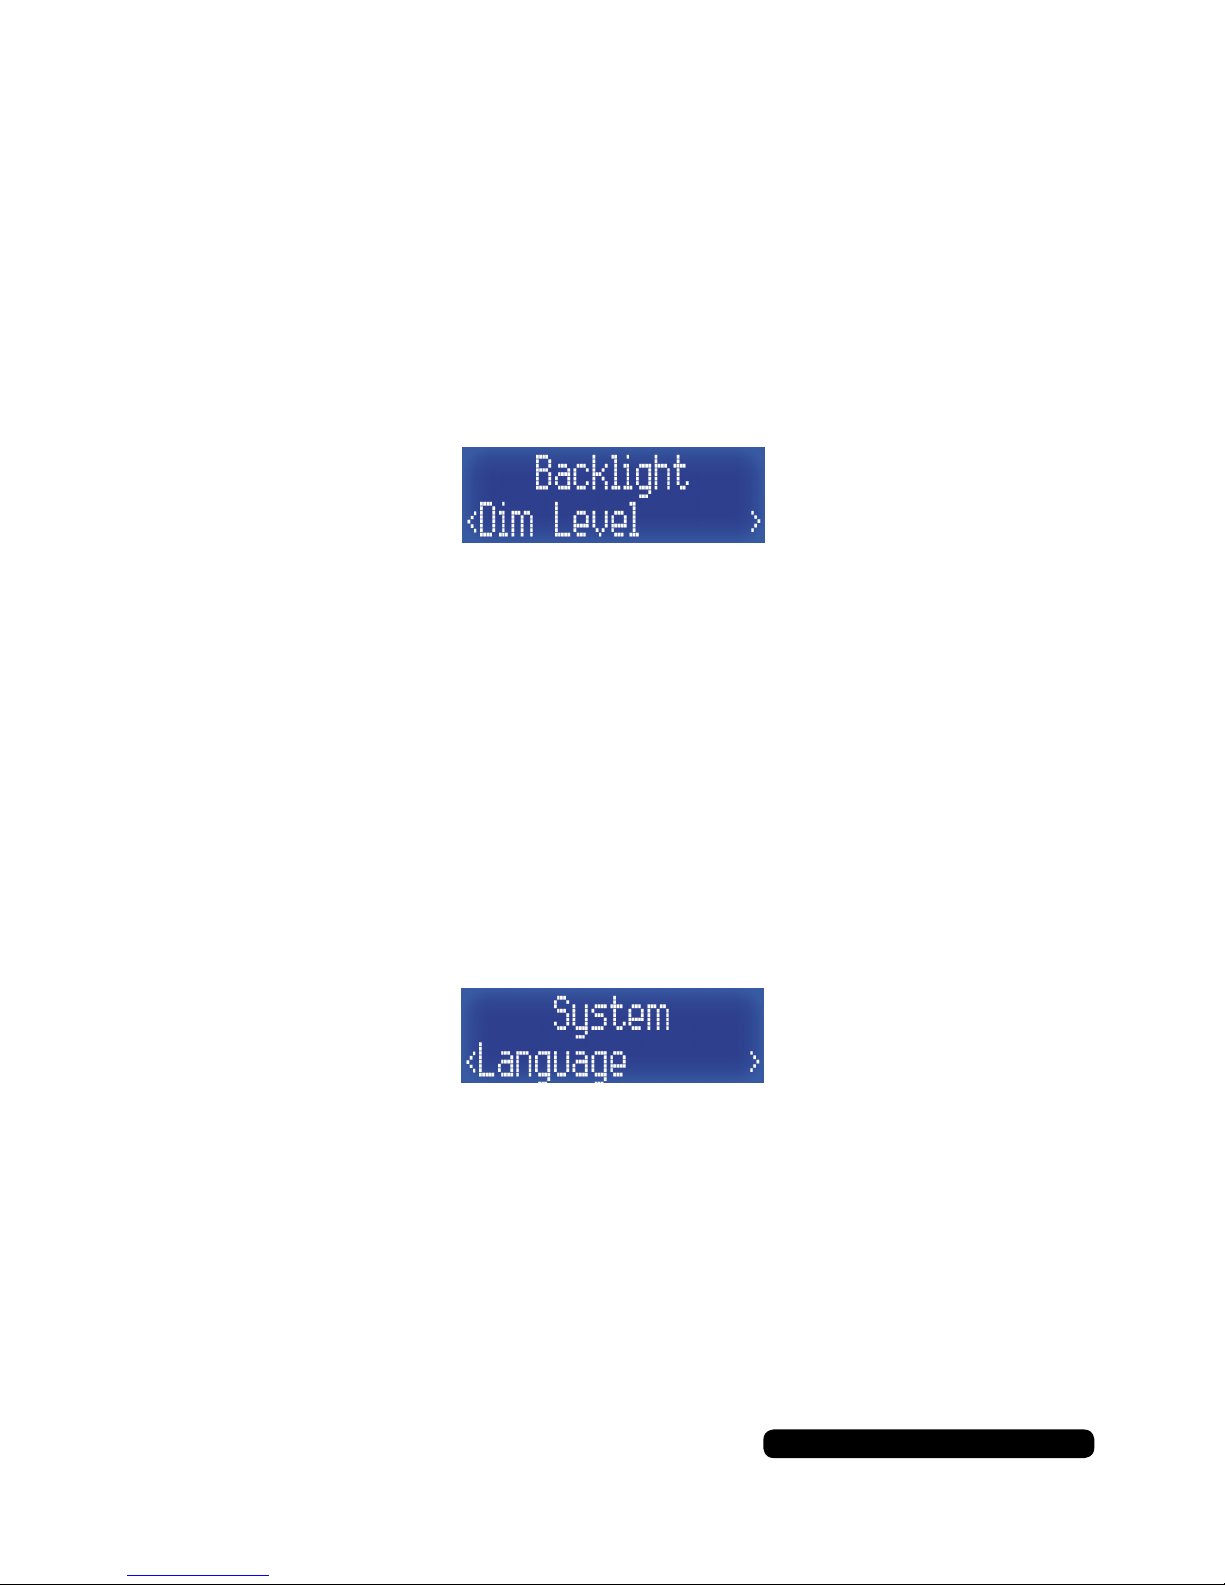
Backlight - Dim Level
Dim level is the brightness of the display when the radio has timed
out i.e. no buttons pressed (unless ‘On’ has been selected in the
timeout options).
Once in the Backlight sub menu list, press the ‘Tune+’ button
repeatedly until you get to ‘Dim Level’ and then press the
‘Select/Snooze’ to set this feature.
In this sub menu you can choose from the following:
High > Med > Low
The asterisk in the top right indicates the current setting.
Press ‘Info/Menu’ a few times to exit this menu option to the radio.
Language
It is possible to change the menu language for the menu systems.
Once in the system menu list, press the ‘Tune+’ button repeatedly
until you get to ‘Language’ and then press the ‘Select/Snooze’ to set
this feature.
Select the update source by using the ‘Tune+’ and ‘Tune-’ to cycle
through the available options and use the ‘Select/Snooze’ button to
conrm. Your Language options are:
English > French > German > Italian
The asterisk in the top right indicates the current setting.
Press ‘Info/Menu’ a few times to exit this menu option to the radio.
Page 27
25
After Sales Support
UK/N.IRELAND HELPLINE NO:
REP.IRELAND HELPLINE N
O
:
WEBSITE:
EMAIL:
01270 508538
1800 995 036
www.quesh.co.uk
System
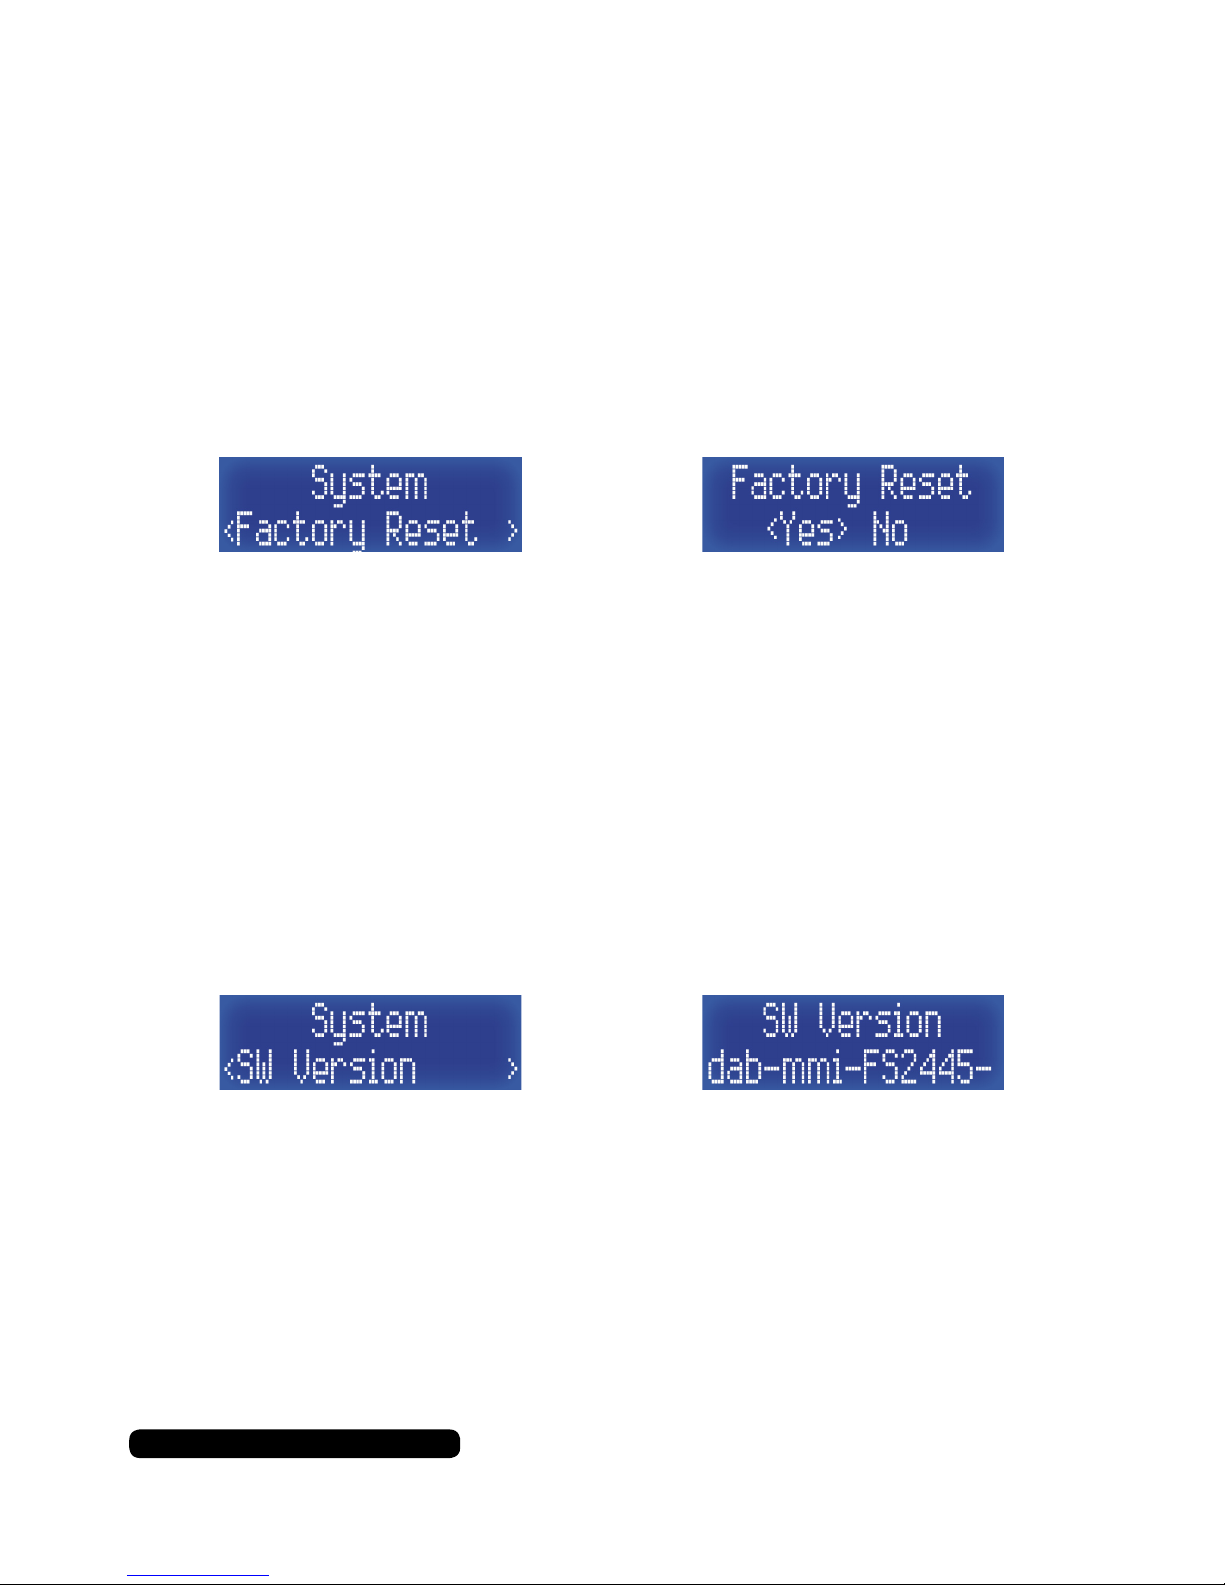
Factory Reset
From here you can restore the radio with a soft factory reset. This
function will delete all presets and the station list for DAB as well as
restore all default setting to the radio.
Once in the system menu list, press the ‘Tune+’ button repeatedly
until you get to ‘Factory Reset’ and then press the ‘Select/Snooze’
to set this feature.
Select the update source by using the ‘Tune+’ and ‘Tune-’ to cycle
through the available options and use the ‘Select/Snooze’ button to
conrm.
SW Version
This option displays the radio’s rmware version installed on the
chipset.
Once in the system menu list, press the ‘Tune+’ button repeatedly
until you get to ‘SW Version’ and then press the ‘Select/Snooze’ to
display this feature.
Press ‘Info/Menu’ a few times to exit this menu option to the radio.
Page 28

Quesh Ltd hereby declares that this radio is in compliance
with the essential requirements and other relevant
provisions of Directive 1999/5/EC.
26
After Sales Support
UK/N.IRELAND HELPLINE NO:
REP.IRELAND HELPLINE N
O
:
WEBSITE:
EMAIL:
01270 508538
1800 995 036
www.quesh.co.uk
Specifications
General
L x W x D: 128mm x 85mm x 180mm (approx)
Weight: 750g
Adaptor: 5V/1A
Battery Size: 4 x AA (Not included)
Usage Time: Approx. 7 hours (at maximum volume)
Language: English, French, German, Italian
Radio
Solution: Frontier
DAB Preset Slots: 10
FM Preset Slots: 10
FM Frequency Range: 87.5MHz - 109MHz
DAB Frequency Range: 174Mhz - 240MHz
Aerial Type: Telescopic
Speaker
Speaker Size: 70mm
Speaker Channels: Mono
Speaker Watt: 5W
Max Speaker Output: 80 dB
Impedance Load: 4 Ohm
Ports
3.5mm Aux in port
Page 29

27
After Sales Support
UK/N.IRELAND HELPLINE NO:
REP.IRELAND HELPLINE N
O
:
WEBSITE:
EMAIL:
01270 508538
1800 995 036
www.quesh.co.uk
INTENTIONALLY LEFT BLANK
Page 30

After Sales Support
UK/N.IRELAND HELPLINE NO:
REP.IRELAND HELPLINE N
O
:
WEBSITE:
EMAIL:
01270 508538
1800 995 036
www.quesh.co.uk
Warranty
This product is warranted to be free from defects in workmanship and parts for a period of 36 months
from the date of purchase. Defects that occur within this warranty period, under normal use and care,
will be repaired, replaced or refunded at our discretion, solely at our option with no charge for parts and
labour. The benets conferred by this warranty are in addition to all rights and remedies in respect of
the product the consumer has under existing U.K. laws.
Proof of Purchase
This warranty is valid for the original purchase and is not transferable.
Please keep your purchase receipt as proof of purchase and as proof of the date of when the purchase
was made. The receipt must be presented with the warranty card when making a claim under this
warranty.
Service during the Warranty Period
Please ensure the product is properly packaged so as to ensure that no damage occurs in transit. Also
make sure that you have included a detailed explanation of the problem.
Extent of the Warranty
This warranty is limited to defects in workmanship or parts. All defective products or parts will be
repaired or replaced. This warranty does not extend to accessories.
Normal Wear and Tear
This warranty does not cover normal wear and tear of the product or parts.
Exclusions
This warranty does not cover the following:
• Any defect caused by accident, misuse, abuse, improper installation or operation, lack or reasonable
care, unauthorised modication, loss of parts, tampering or attempted repair by a person not
authorised by the distributor.
• Any product that has been damaged by lightning strike either directly or indirectly, or on a main’s
or vehicle outlet power surge or liquid ingress.
• Any product that has not been installed, operated or maintained in accordance with the
manufacturer’s operating instructions provided with the product.
• Any product that has been used for purposes other than domestic use.
• The product if it is located outside of the U.K. and Ireland
• Any damage caused by improper power input or improper cable connection.
Your statutory rights are not affected.
Warranty Certificate
Page 31
After Sales Support
UK/N.IRELAND HELPLINE NO:
REP.IRELAND HELPLINE N
O
:
WEBSITE:
EMAIL:
01270 508538
1800 995 036
www.quesh.co.uk
Warranty Card
Mini DAB & FM Radio with AUX Port
Please keep your purchase receipt together with your warranty card
Fault Description:
Name:
Address:
Date of purchase:
Location of purchase:
We recommend that you attach a photocopy of your receipt, showing the date of purchase, to this
warranty card and keep it for your reference. In the event of a product fault, please call the After Sales
Support team. Please ensure that you have the product details (as shown on this card) to hand so that
the support team are able to respond as quickly and efciently as possible.
Model Number: 74772
Warranty Service Address
QUESH LTD,
B7, FIRST BUSINESS PARK
FIRST AVENUE, CREWE, CHESHIRE.
CW1 6BG
Page 32

 Loading...