

Page 1
Quick Start
Contents Overview
DATA IN P+ DATA OUT
POWER
Make sure the antenna is facing up.
5/32-inch hex tool
XPress™
MaxStream®
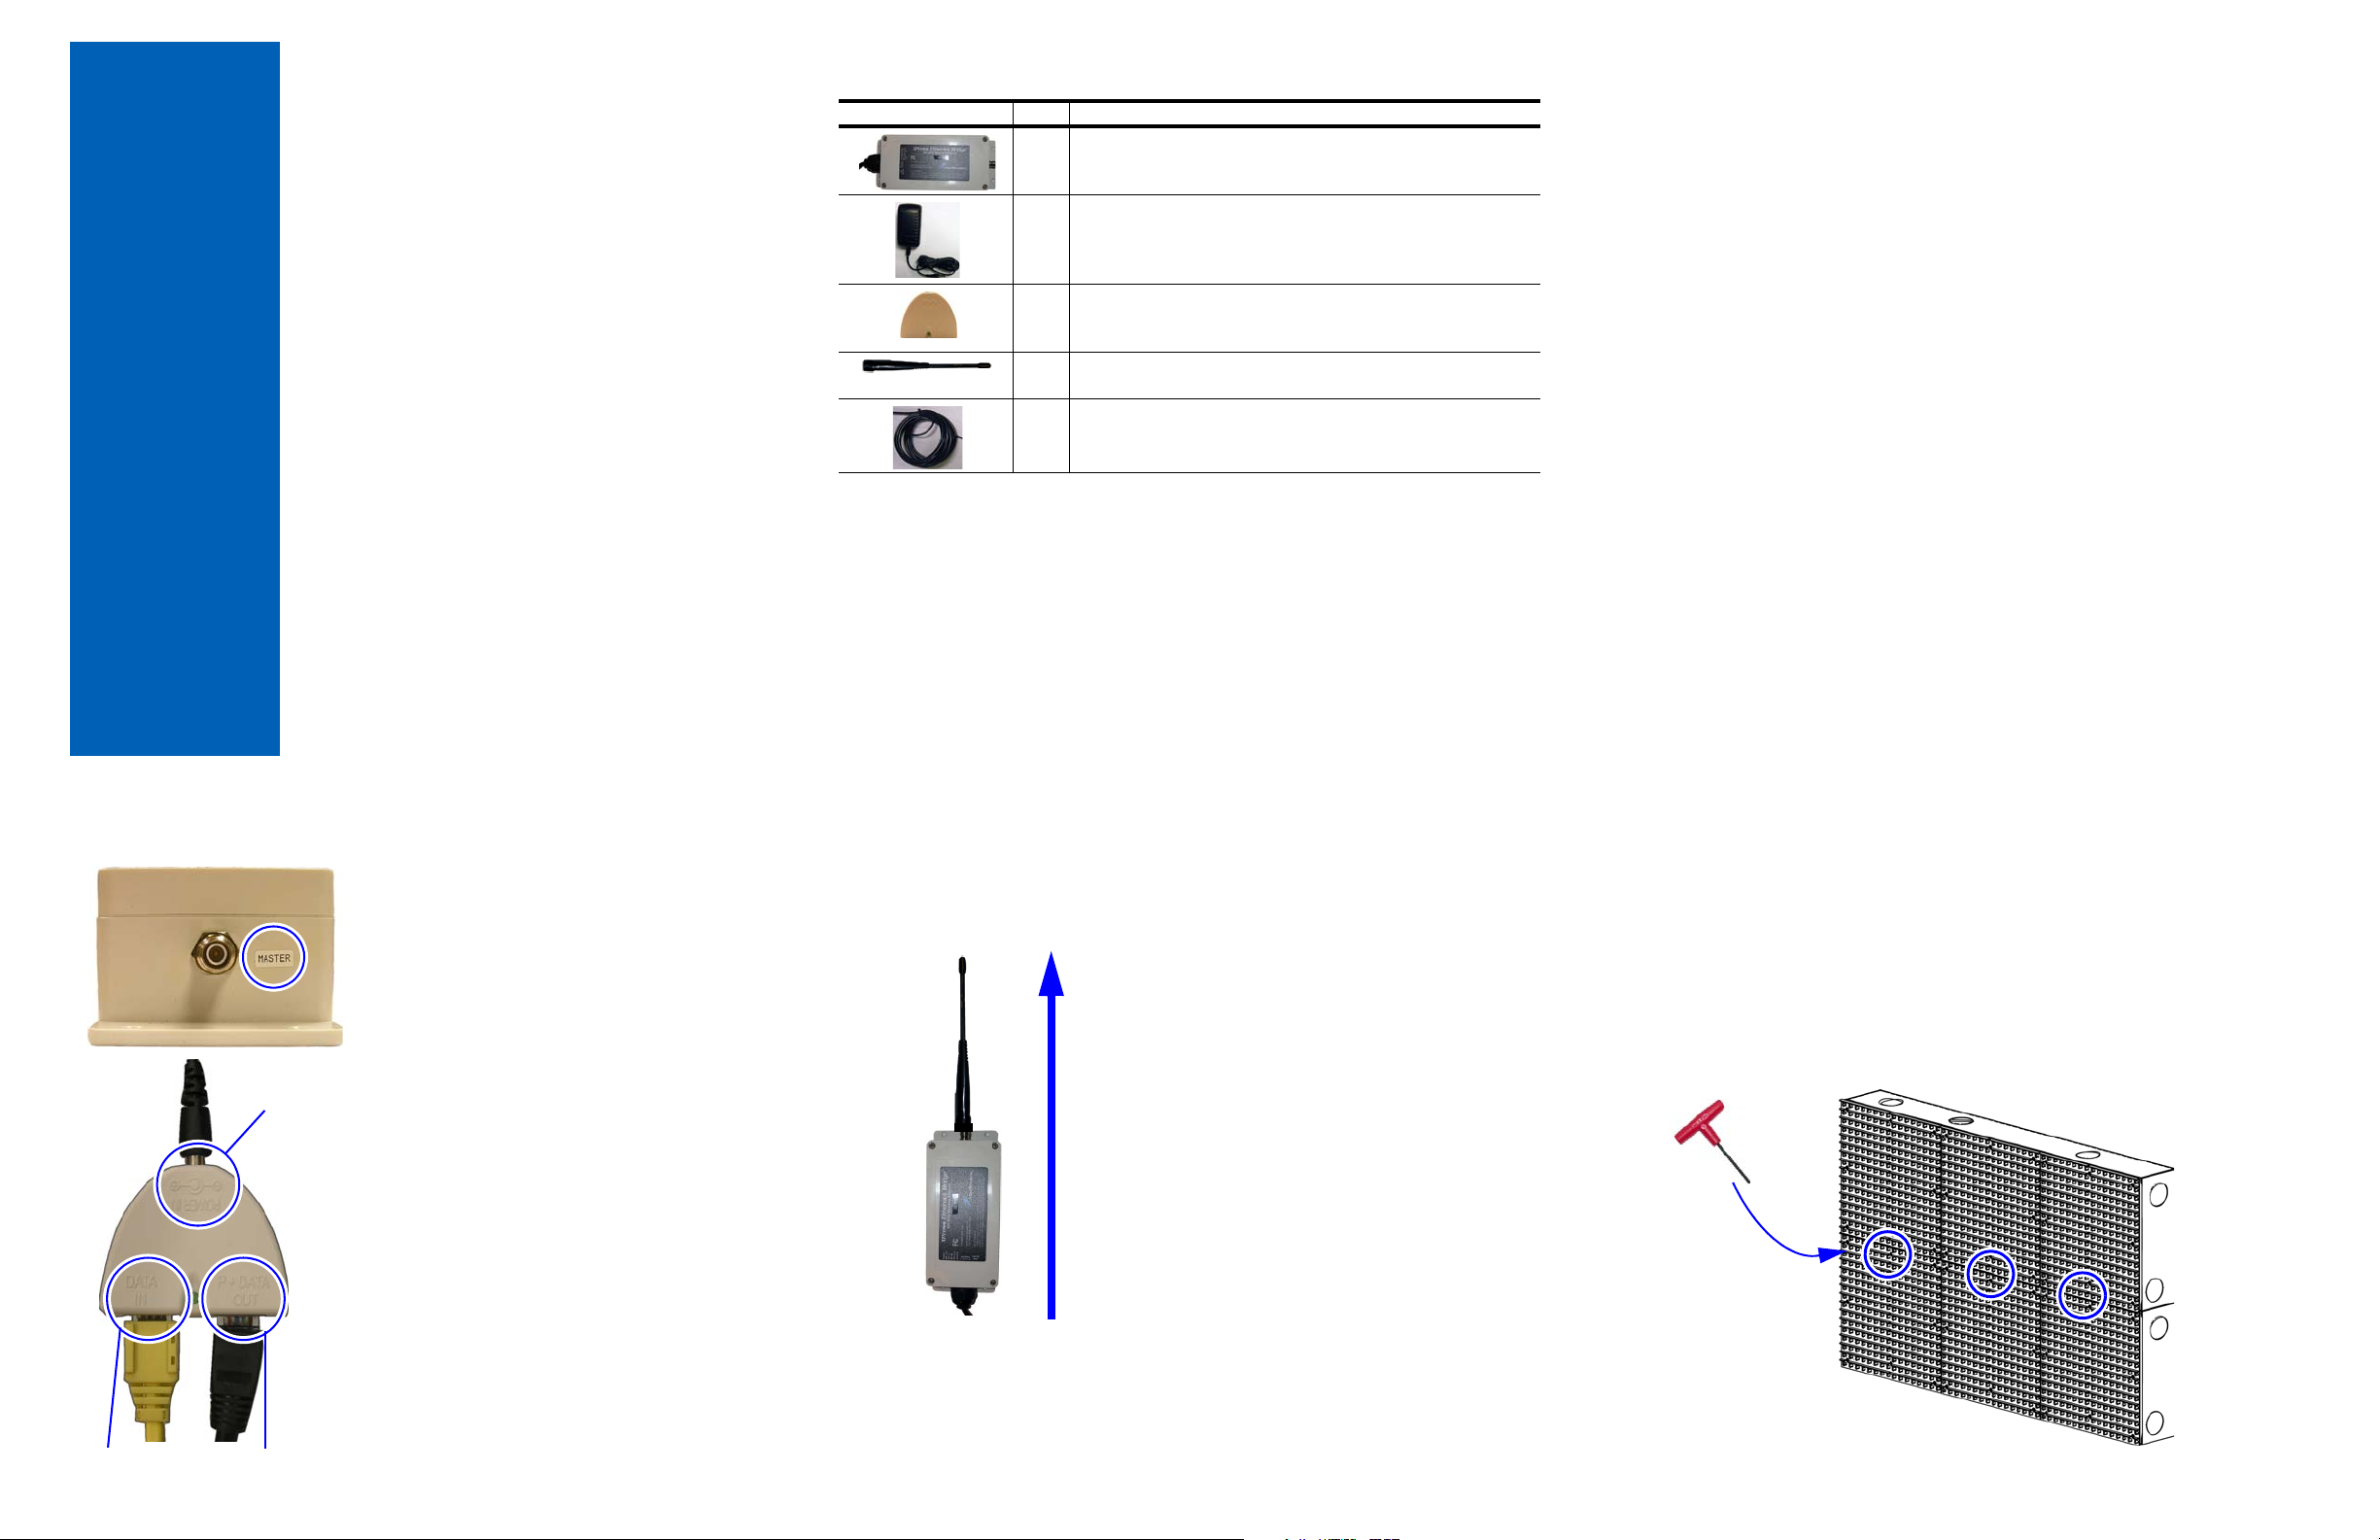
Picture Qty Description
XPress Ethernet Bridge RF Modem
2
The modem labeled MASTER will be connected to your computer,
the other modem will be connected to the sign.
6 VDC/80-240VAC power adapters
2
One power adapter is used with the modem connected to your
computer (or network). The other power adapter is not used.
PoE (Power over Ethernet) adapters
2
One PoE adapter is used to connect your computer, the modem
connected to your computer, and power. The other PoE is not used.
Half-wave, 2.5 dBi, dipole antennas w/RPTNC connector
2
Both antennas are used.
CAT5e outdoor cables, 30 feet
2
Cable usage depends on the requirements at your location.
These instructions explain how to connect the MaxStream XPress
Ethernet Bridge mode4ms to a computer or network and to the an
Excite 23mm Series A sign. This includes the following five steps:
1 - Connect the MASTER modem
2 - Mount the other modem near the sign
3 - Connect the modem to the sign
4 - Install Ooh!Media
5 - Send a test message
Connecting the
Ethernet Bridge
1) Connect the MASTER modem 2) Mount the other modem near the sign
Select a location near the sign to mount the remaining Ethernet
Bridge modem.
Use the modem labeled MASTER.
• The antenna on each modem
must come straight out of the
connection, do not bend.
• When you position each modem,
position it so that the antenna is
pointing straight up.
Connect the following to the PoE
adapter:
A. Connect the crossover cable from
your computer (or Ethernet cable
from the network) into the
DATA IN.
B. Connect the Ethernet bridge
modem labeled MASTER into the
P+ DATA OUT port.
3) Connect the modem to the sign
WARNING!
A. Disconnect all power from the sign at the power source.
B. At the sign, open the case door labeled Controller (bottom
left-most case)
• Using a 5/32-inch hex tool, turn screw counter-clockwise.
• Slowly pull the door toward you to open.
Hazardous voltage. Contact with high voltage may cause death or
serious injury. Always disconnect power to unit prior to servicing.
NOTICE: Only connect the Ethernet bridge
modem to the P+ DATA OUT port.
Connecting other devices to this port
may damage the equipment!
C. Connect the power adapter and
October 31, 2007 © 2007 Adaptive Micro Systems LLC. All rights reserved PN 1199611301 rev. D
plug in to an outlet
Page 2
3) Connect the modem to the sign,
Ethernet connection
Route the cable through this hole
Select Native.
Time in seconds
continued
C. Route the Ethernet cable from your network through the hole in
the back of the controller case of the sign.
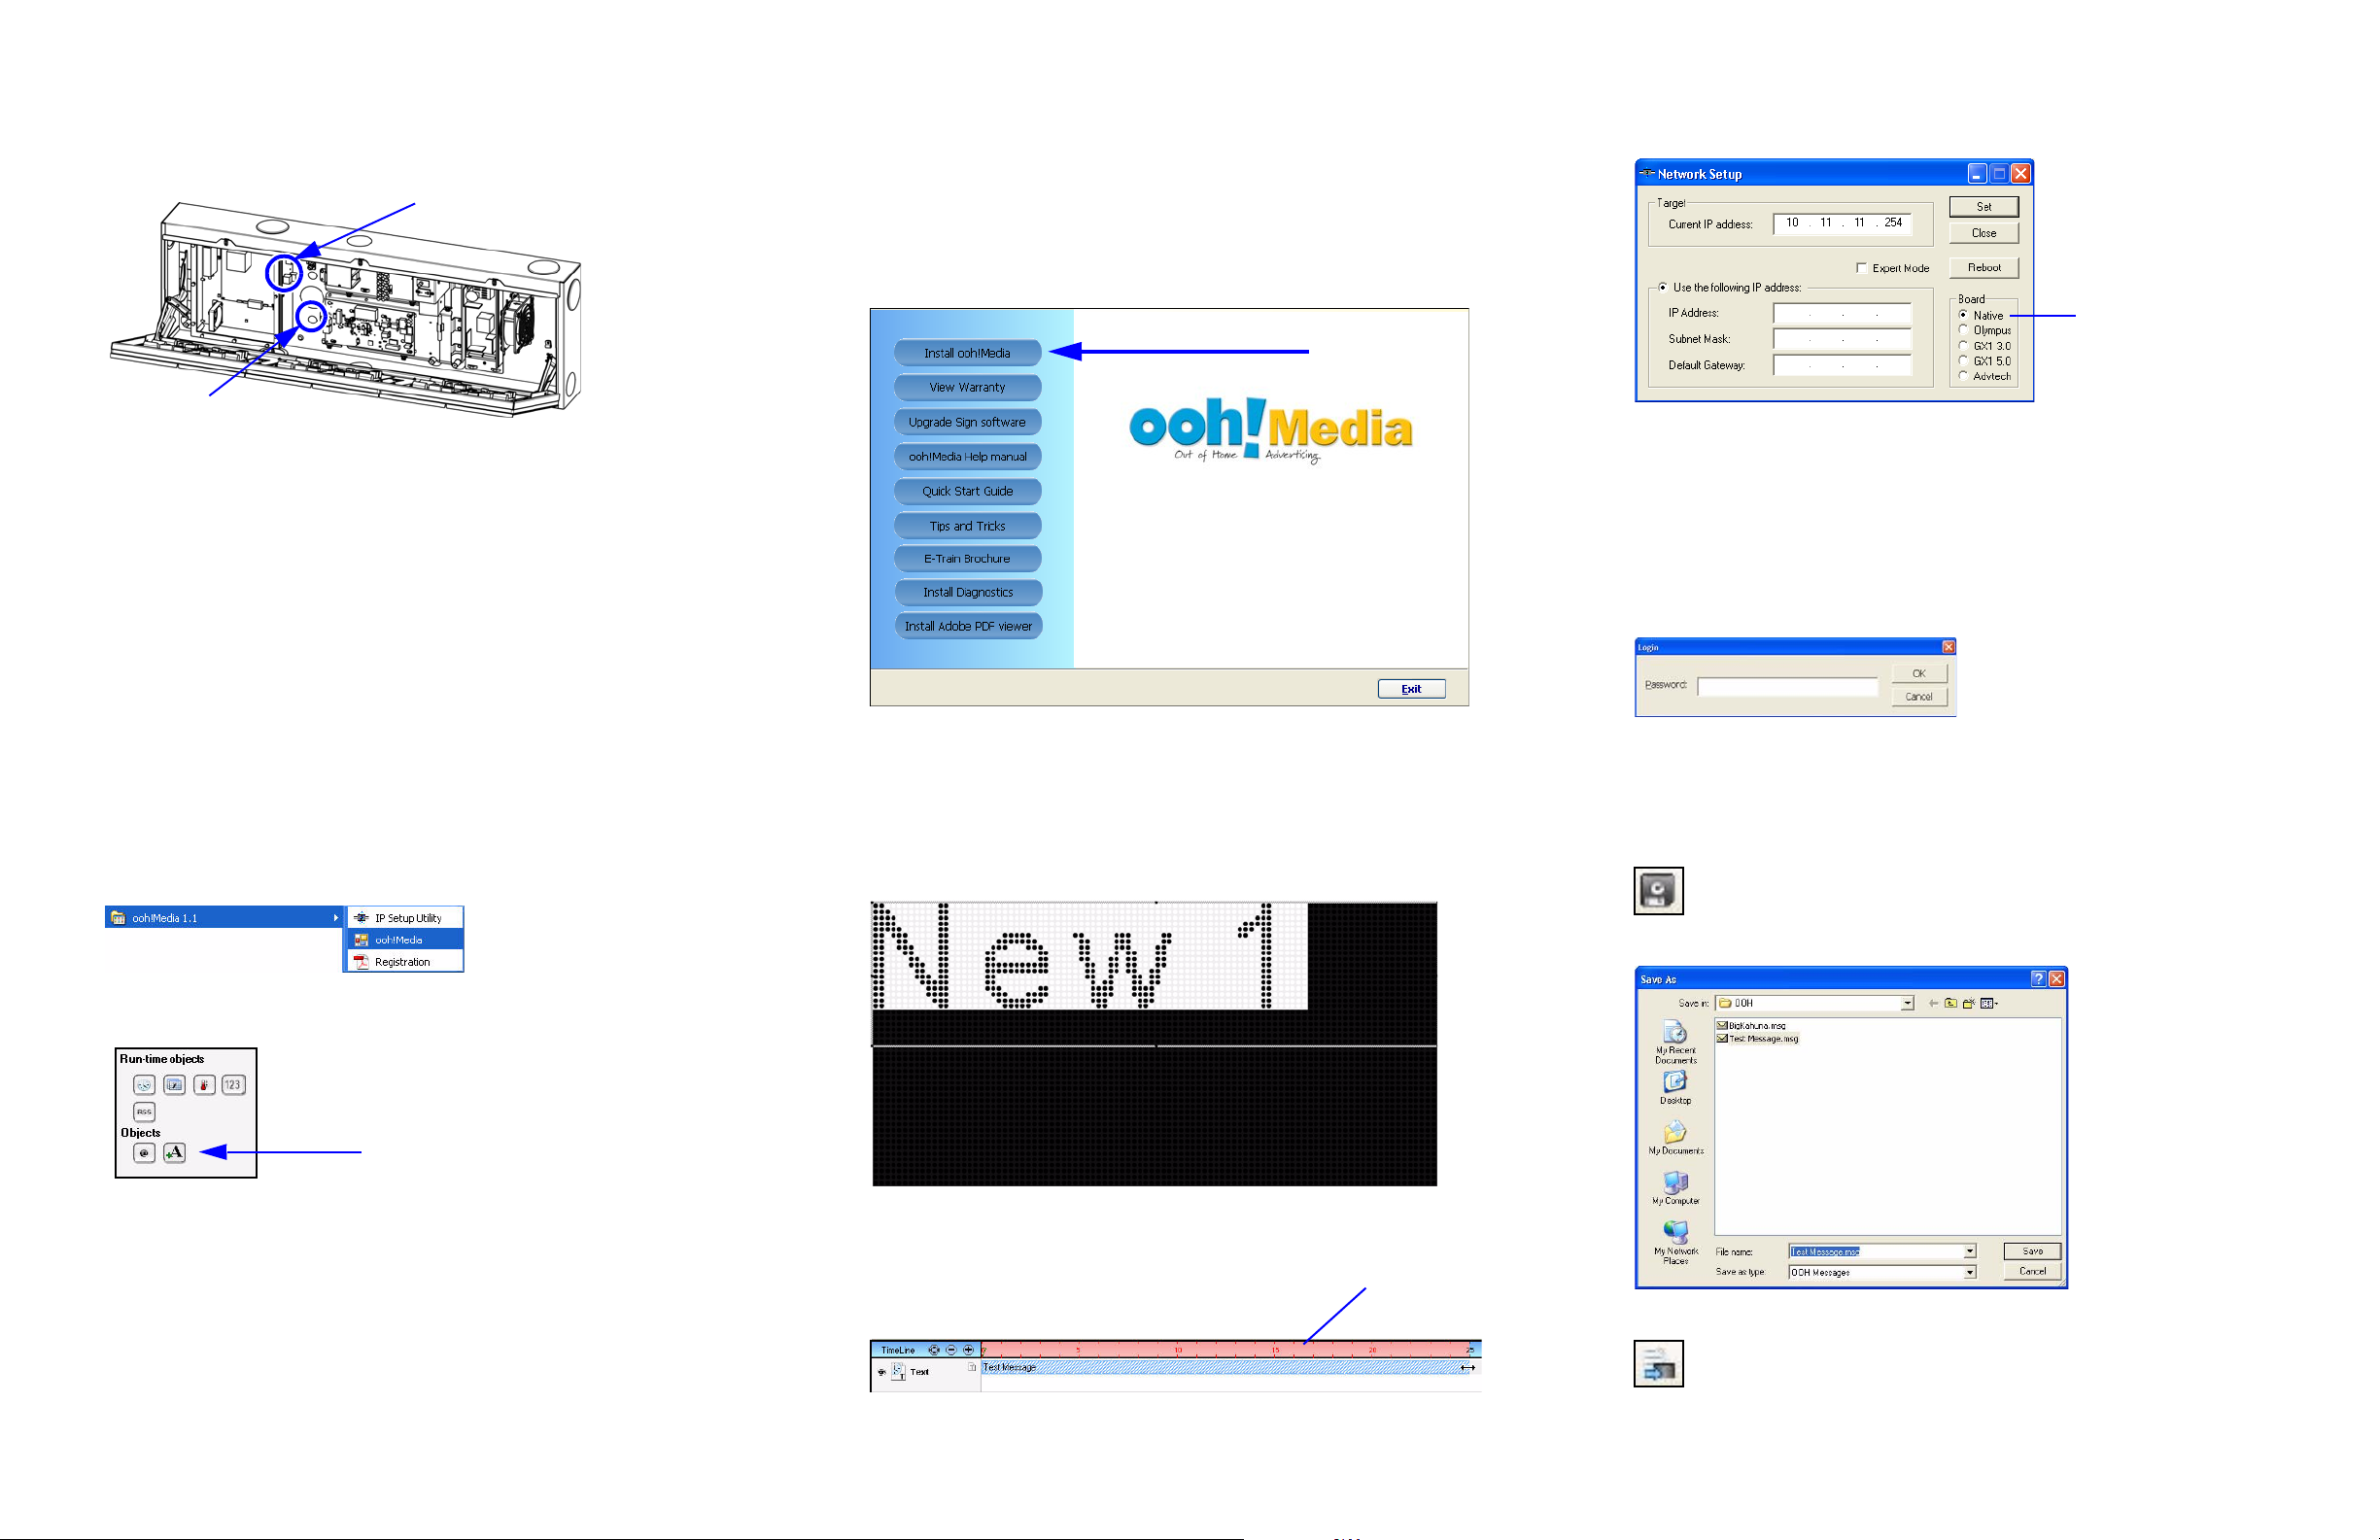
4) Install Ooh!Media
A. Insert the Ooh!Media CD into the CD-ROM drive.
If the installation does not start automatically, do the following:
•Select Start > Run.
•Type D:/amplayer (use the correct letter for your CD drive if not
D) and click OK.
B. On the first screen, click the Install Ooh!Media button and follow
the instructions.
C. In the Network Setup window, set the IP address information. You
will need most of this from your network administrator.
For a direct connection:
• Connect one end of the Ethernet crossover cable to the connection
labeled Ethernet in the sign’s controller case.
• Connect the other end to the Ethernet port on your computer or
laptop.
D. Close the case door.
E. Apply power to the sign.
5) Send a test message
A. Start Ooh!Media.
Click Start > All Programs > Ooh!Media > Ooh!Media.
C. Highlight the text inside the message and type an appropriate test
message.
Only check the Expert Mode box to set advanced options such as
the primary DNS. Only do this if instructed by your network
administrator, Internet service provider, or Adaptive Micro
Systems.
D. Click Set.
E. If the Login prompt appears, enter your password, click OK and
then click Close in the Network Setup window.
E. Click the disk icon to save the message.
F. Name the message and click Save.
B. In the lower portion of the Ooh!Media window under Run-time
Objects, click the insert new text button.
A new text message box appears in Ooh!Media.
D. Extend the length of the message by stretching it in the Timeline
(see figure below).
October 31, 2007 © 2007 Adaptive Micro Systems LLC. All rights reserved PN 1199611301 rev. D
Extend the message long enough for you to go to the sign and
look at it.
G. Click the send message icon to send the message to the sign.
H. Verify the message appears on the sign.
 Loading...