

Page 1
batt
ery-powered
D
UAL-HEAD
LED SECURITY SPOTLIGHT
A
SSEMBLY & OPERATING INSTRUCTIONS
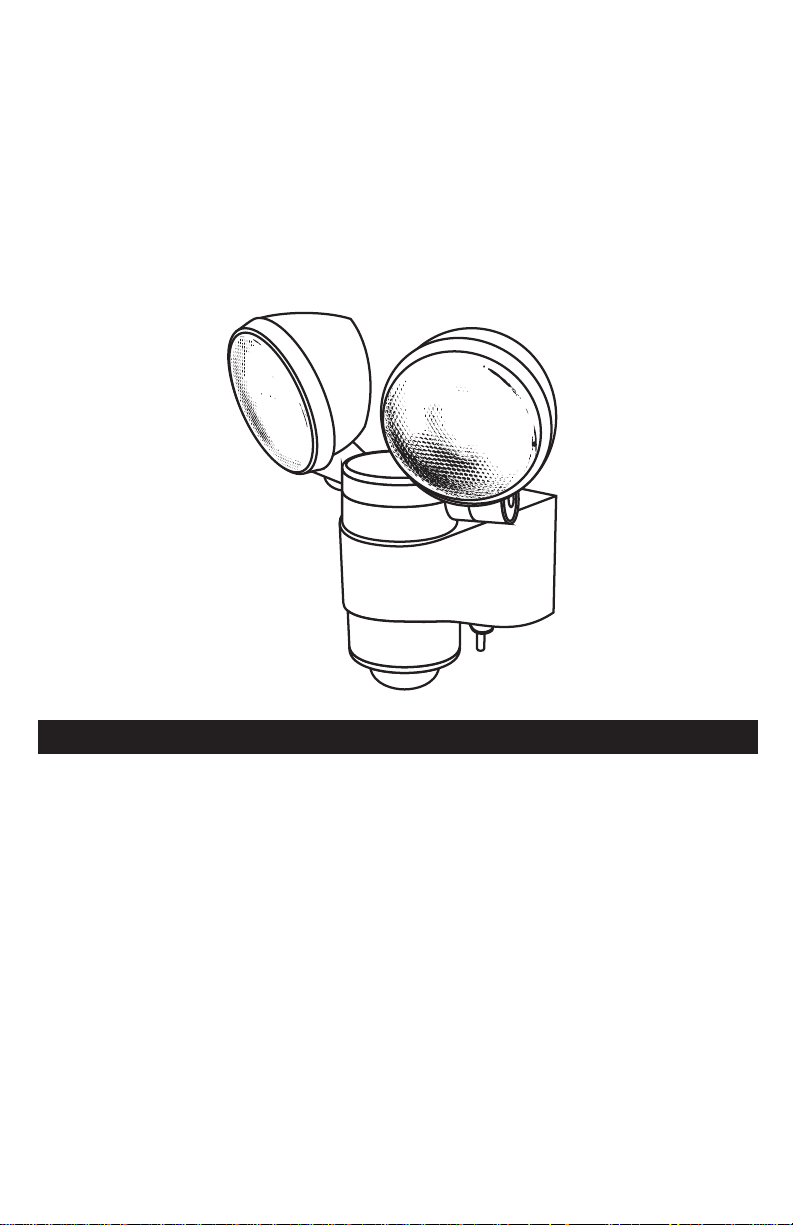
ABOUT YOUR DUAL HEAD LED SECURITY SPOTLIGHT
The Dual Head LED Security Spotlight is perfect for porches, doorways, or around the exterior of your home
or business. The 8 super bright LEDs in the Dual Head LED Security Spotlight have an estimated life of
30,000 hours so they should never need changing.
This Dual Head LED Security Spotlight has an adjustable TIME dial that allows light duration of up to
30 seconds. New C cell batteries should last roughly a year with normal usage.
The Dual Head LED Security Spotlight has a built-in motion sensor, which automatically turns on the light
when movement of a heat source (such as people, animals, or cars) is detected in the area. The light
remains on while motion continues to be detected in the area.
The Dual Head LED Security Spotlight has a LUX setting which can be adjusted to control the functioning of
the built-in photosensor so that the light only turns on at night.
The Dual Head LED Security Spotlight requires 3 C cell batteries (not included). The batteries typically
last up to 1 year under normal use. The shorter the time period used, the longer the batteries will last. The
spotlight may function irregularly or not at all at temperatures near or below freezing (20˚
functionality of alkaline batteries. Normal operation will return when the temperature rises.
F/-6
due to the
˚ C
)
Page 2
INCLUDED PARTS:
Carefully remove and identify all the parts from their protective packaging and lay them out in front of you.
Rotate this section
Adjustment dials are located on the backside of the motion sensor as shown in the pictures below. Grab
the black plastic area of the motion sensor and rotate it until you see the adjustment dials. The dials are
located on the black plastic part of the motion sensor on the side opposite of the front, denoted by an
arrow and the word FRONT on the motion sensor.
INSTALLING/REPLACING THE BATTERIES:
When the batteries run out of power, you can replace the batteries with 3 new C-Cell batteries. Follow the
steps below when replacing the battery.
1. Switch the Dual Head LED Security Spotlight to OFF.
2. Remove the Dual Head LED Security Spotlight from its mounted back.
a.
Remove the thumbscrew from the bottom of the back of the Dual Head LED Security Spotlight.
b.
Gently press on the button on the top of the back of the Dual Head LED Security Spotlight and
pull the light away from the mounting bracket.
3.
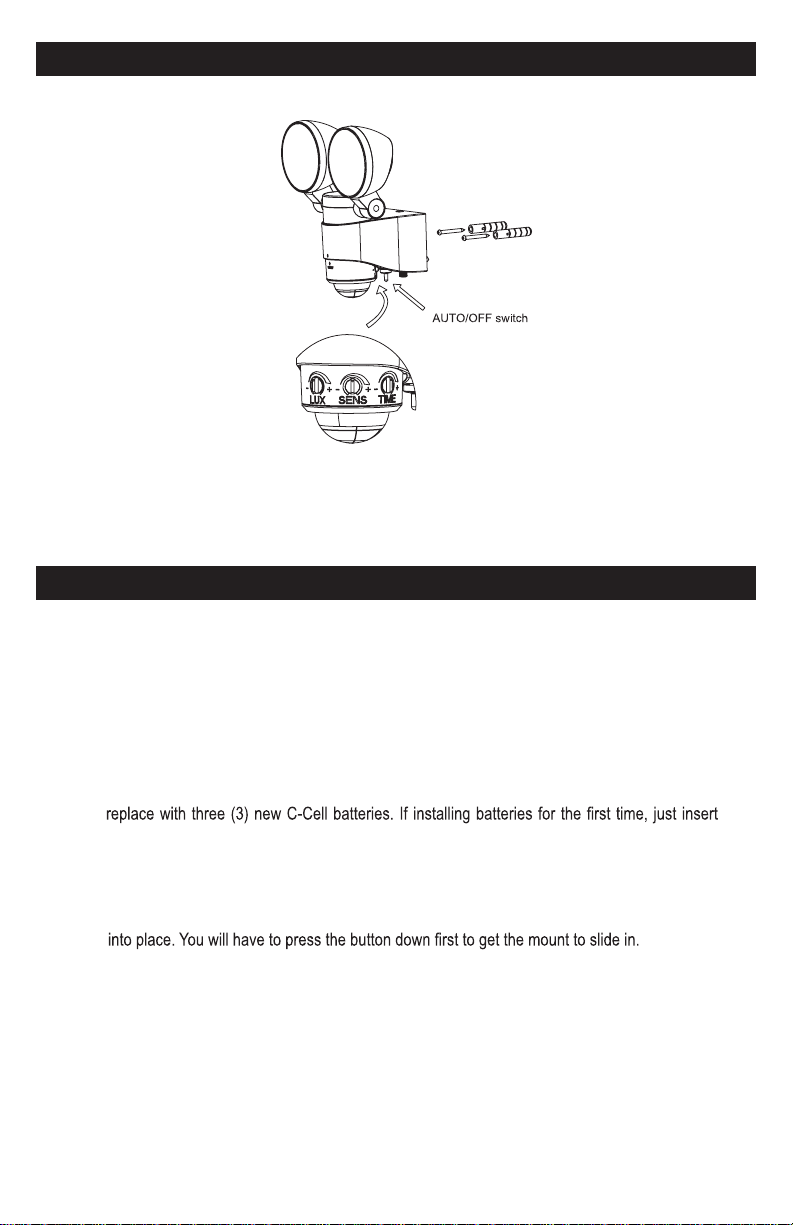
If replacing old batteries, carefully remove the old batteries from the battery tray and
three (3) new C-Cell batteries into the battery tray. Ensure that the new batteries are inserted in
the correct +/- polarity orientation as indicated in the battery compartment.
WARNING: BATTERIES
4. Press the Dual Head LED Security Spotlight back into the mounted back until the top button clicks
5. Replace the thumb screw in the bottom of the back of the Dual Head LED Security Spotlight.
6. Switch the Dual Head LED Security Spotlight back to AUTO
NOTE: DO NOT DISPOSE OF BATTERIES IN GENERAL HOUSEHOLD TRASH OR INTO A
FIRE SINCE THE BATTERIES MAY EXPLODE. CONSULT YOUR LOCAL REGULATIONS FOR
CORRECT DISPOSAL OF BATTERIES. DO NOT TAKE APART THE BATTERIES SINCE THEY
CONTAIN CORROSIVE CHEMICALS.
2
INSTALLED INCORRECTLY COULD POTENTIALLY DAMAGE THE UNIT.
Page 3
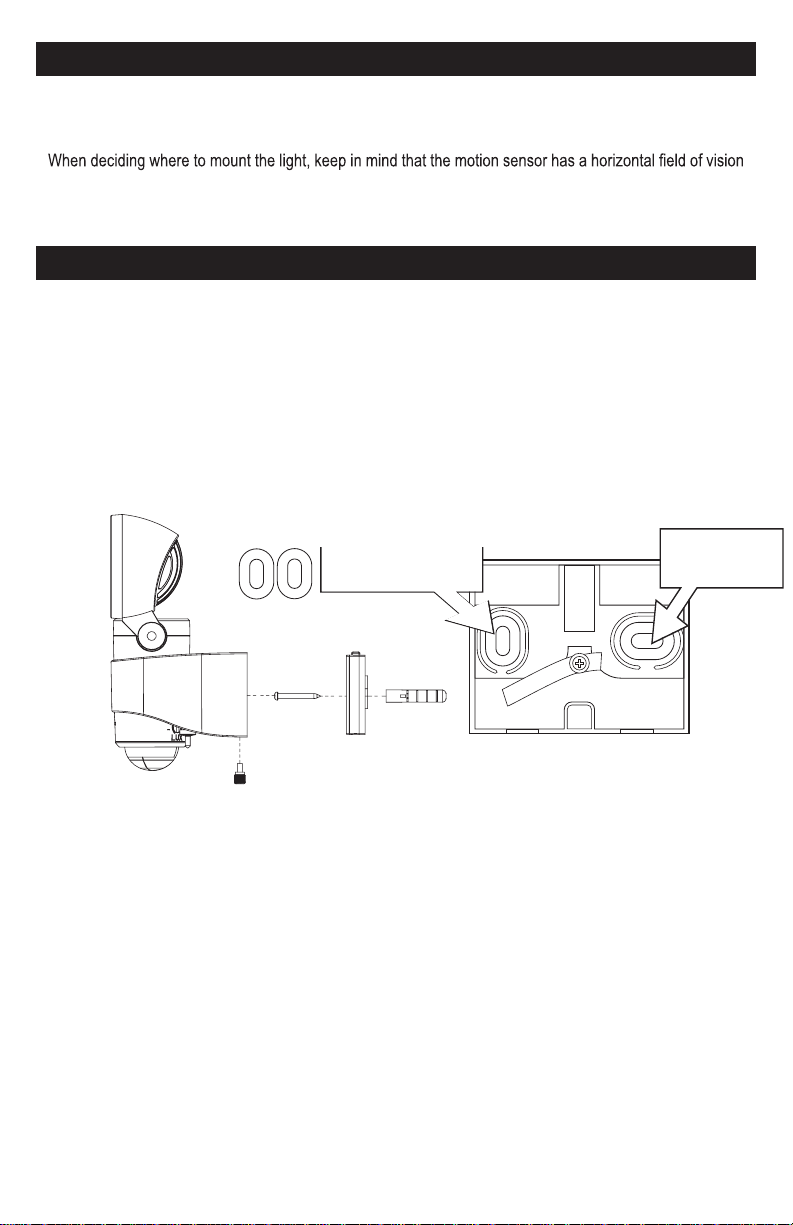
CHOOSING A LOCATION FOR YOUR DUAL HEAD LED SECURITY SPOTLIGHT:
Put one gasket in and one
screw through this hole.
Put other gasket in
and one screw
through this hole.
Rubber
gasket (x2)
This Dual Head LED Security Spotlight provides safety and security around your home. It is ideal for lighting
up areas where electricity is not available such as porches, driveways, carports outside, garages and
entrance areas.
of 130º at a distance of up to 26 feet when the surrounding temperature is 75°F. The outside temperature
will impact the detection distance. As temperatures get colder the motion sensor will become more sensitive
and the range of the motion sensor will increase.
HOW TO INSTALL YOUR DUAL HEAD LED SECURITY SPOTLIGHT:
TOOLS REQUIRED FOR INSTALL:
If mounting to wood or a softer surface, you only need a Phillips-head screwdriver If mounting to concrete,
brick, or a harder surface, a drill should be used to create mounting holes first.
Use the included mounting bracket and (2) screws with rubber washers to mount the Dual Head LED
Security Spotlight securely to a wall.
TO INSTALL THE MOUNTING BRACKET:
1.
Remove the mounting bracket from the back of the light by unscrewing the (one)
thumb screw and pushing the button at the top of the base of the back of the light.
2. Hold the mounting bracket up to the wall where you want to mount it.
3. If you need to drill, use the holes in the mounting bracket to identify where to drill on the
mounting surface. Once identified, remove mounting bracket and drill holes in the mounting
surface.
4. Once you have drilled the holes or if no drilling is needed, hold the mounting bracket back up
to the mounting surface. Drive the screws completely in, securing the mounting bracket to
the mounting surface. Make sure the rubber washers are under the heads of the screws.
5. Tighten both screws and slide the light over the mounting bracket until the button on
top clicks into place. Then replace the thumb screw in the bottom of the light and
mounting bracket.
3
Page 4
OPERATING YOUR DUAL HEAD LED SECURITY SPOTLIGHT
After installing new batteries in your Dual Head LED Security Spotlight, move the switch on the main body
to the AUTO position. When you do this, the light should activate immediately, regardless of lighting
conditions or motion. This is a test activation to show there is power flowing from the batteries to the light.
It should last roughly 30 seconds. After this test activation, the light will function based on the dial settings
mentioned below. Your Dual Head LED Security Spotlight is now ready for use.
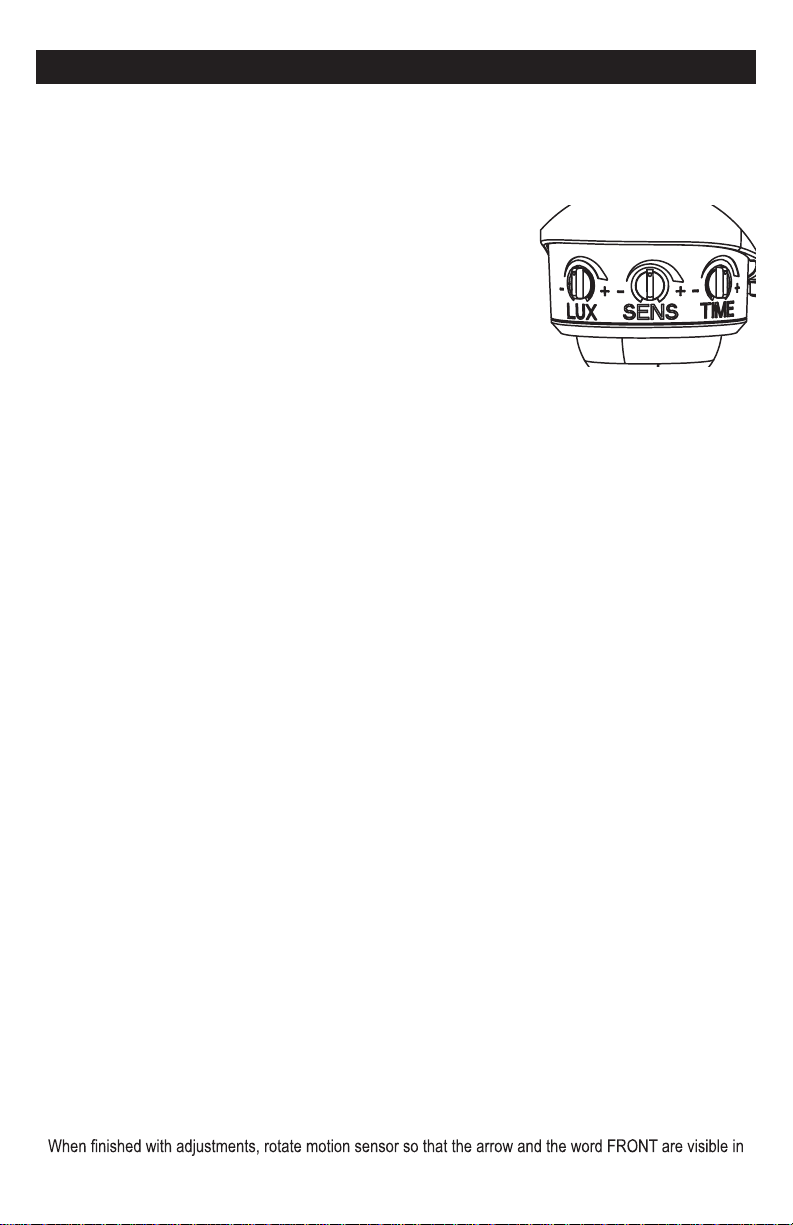
On the back of the motion sensor, there are 3 adjustment dials: TIME,
SENS, and LUX
The Dual Head LED Security Spotlight has been factory preset as follows:
TIME - Set at 15 seconds.
SENS – Set at a 10 - 15 foot range (when the surrounding temperature
is 75 F).
LUX - Set for your Security Light to activate at dusk when motion is
detected.
If the above settings are not suitable for your application, then these may be adjusted by spinning the motion
sensor around so you have access to the dials on the backside.
TIME PERIOD ADJUSTMENT
The time period control dial sets the duration that the Dual Head LED Security Spotlight will remain illuminated
after the last detected motion. The time period has an adjustable range of 10 seconds to 30 seconds.
To decrease the time period, move the dial toward the ( – ) symbol.
To increase the time period, move the dial toward the ( + ) symbol.
Test the time period by triggering the motion sensor and measure the time period the light stays on. Adjust
the TIME control until the desired illumination duration is reached.
A shorter TIME setting will conserve battery life. For best results, use the shortest TIME setting for your
location as possible.
MOTION SENSOR RANGE ADJUSTMENT
The motion sensor on Dual Head LED Security Spotlight is temperature-sensitive. The cooler the
temperature, the more sensitive the motion sensor will become. Use the SENS dial to adjust the sensitivity
of the motion sensor to compensate for environmental temperature changes. The motion sensor is most
sensitive when the SENS dial is turned fully clockwise (+).
To decrease sensitivity, move the dial toward the ( – ) symbol.
To increase sensitivit
T
o test the motion sensitivity, aim the sensor head toward the desired area. Set the TIME dial to minimum
( – ) position and the LUX dial to maximum (+). Walk slowly around the area of detection, changing your
walking pace until the Dual Head LED Security Spotlight comes on. If light does not come on, you may need
to adjust the direction of the sensor unit. Make adjustments as needed until the desired level of sensitivity is
reached. Re-adjust the TIME and SENS dials when complete.
LIGHT LEVEL ADJUSTMENT
The LUX dial controls the natural light level that triggers the Dual Head LED Security Spotlight and prevents
it from operating during daylight hours. Your Dual Head LED Security Spotlight comes preset for activation
at dusk.
To adjust for activation before dusk, move the dial toward maximum (+).
To adjust for activation after dusk, move the dial toward minimum (-).
RETURN ADJUSTMENT DIALS TO THE BACKSIDE
y, move the dial toward the ( + ) symbol.
front. Adjustment dials should be on the backside of the motion sensor during every day use.
4
Page 5

TROUBLESHOOTING:
PROBLEM POSSIBLE SOLUTIONS
• Ensure that the power button on the main body is in the AUTO position.
• Ensure that the Dual Head LED Security Spotlight has been positioned so
the motion sensor faces oncoming movement.
Dual Head LED
Security Spotlight will
not switch on when
there is movement in
the detection area.
• Ensure that the batteries have enough charge.
• Check to see that the LUX control has not been set too far towards the
minimum (-). Setting the LUX control too far towards minimum (-) will cause
the Dual Head LED Security Spotlight to turn on only in complete darkness.
• Check to see that the motion sensor is not near night time light sources such
as street lights.
Light switches on
during the day
Light switches on for
no apparent reason
on and off.
Light is not as bright
as normal
• The LUX control may be set too far towards the maximum (+) position.
• Reposition the Dual Head LED Security Spotlight so the motion sensor faces
a different direction.
•
This may be unavoidable; however the sensor could be redirected to a spot
where this is less likely to occur.
•
or white walls, you may need to redirect or possibly reposition the motion
sensor.
• Test the motion sensor by covering it completely with cardboard and waiting
several minutes to make sure it does not detect motion. If the Dual Head
LED Security Spotlight still switches on, please contact us for further
assistance.
• Battery charge may be low. See “Replacing the Batteries” on Pg 2
• Move the LUX control more towards the minimum (-) position..
• Battery charge may be low. See “Replacing the Batteries” on Pg 2
5
Page 6

MAINTENANCE TIPS:
The
LED lights in your Dual Head LED Security Spotlight will last up to 30,000 hours and should never need
replacement.
New batteries will last approximately 1 year with average use. The batteries can be accessed after removing
the mounting bracket. The batteries needed are 3 C-Cell batteries.
To keep your Dual Head LED Security Spotlight looking new, keep the lens free of dust and deposits by
wiping occasionally with a dry cloth or with warm soapy water.
COLD WEA
In
temperatures below 20ºF, performance of alkaline batteries may be reduced. Normal performance will
return when the temperature rises.
SAFETY
Do not immerse the Dual Head LED Security Spotligh
ORAGE
ST
If
you wish to store your light indoors for more than two or three days, turn the power switch to the OFF
position and remove the batteries to prevent damage to the batteries. Battery capacity may be reduced or
damaged during prolonged storage.
THER FUNCTIONALITY
TIPS
t in water or other liquid.
REPLACING THE
BATTERIES:
ONE YEAR LIMITED WARRANTY
We warrant to the original consumer/purchaser that this product shall be free of defects in material and
normal use and circumstances for a period of one (1) year from the date of original purchase for use.
SPECIFICATIONS
Power Source: Battery
Lumens: 320
Light Color: 6500K (Cool White or Daylight color)
Function: Motion-Activated
Light Duration: 10 - 30 seconds
Detection Angle: 130°
Max Detection: 26 feet (~8 meters)
Weatherproof Rating: IP44
Power Storage: 3 C-Cell batteries (not included)
workmanship under
MADE IN CHINA
Please save these instructions for future reference.
6
Page 7

PROJECTEUR DE SÉCURITÉ
À DEUX LUMIÈRES
À FONCTIONNEMENT À PILES
INSTRUCTIONS D’INSTALLATION ET D’UTILISATION
A PROPOS DE VOTRE PROJECTEUR DE SÉCURITÉ À DEUX LUMIÈRES
À FONCTIONNEMENT À PILES
Le projecteur de sécurité à deux lumières à fonctionnement à piles est parfait pour les porches, les entrées
et l’extérieur de votre maison ou lieu de travail. Les 8 LEDs hyper-brillantes situées dans les deux lumières
ont une durée de vie estimée à 30.000 heures. Elles ne devraient donc pas avoir besoin d’être changées.
Ce projecteur de sécurité possède un bouton TIME qui permet de régler la durée de la lumière jusqu’à 30
secondes. Les nouvelles pilles devraient durer environ un an en utilisation normale.
Le projecteur de sécurité dispose d’un détecteur de mouvement intégré qui déclenche la lumière lorsque le
mouvement d’une source de chaleur (comme les personnes, les animaux ou les voitures) est détecté dans
la zone. La lumière reste allumée tant que le mouvement est détecté dans la zone.
Le projecteur de sécurité à panneau solaire dispose d’un réglage LUX qui permet d’ajuster le
fonctionnement du capteur de lumière pour que la lumière ne s’allume que la nuit.
3 piles C-cell (non incluses) sont requises pour faire fonctionner ce produit. Ces piles devraient durer
environ 1 an en utilisation normale avant de devoir être remplacées. En baissant la durée de la lumière,
vous augmentez la durée de vie des piles. Le projecteur de sécurité pourrait mal ou même pas du tout
fonctionner à des températures proches et en dessous de -6° C / 20° F, à cause des caractéristiques des
piles alcaline. Lorsque la température remontera, l’utilisation redeviendra normale.
Page 8

PIÈCES INCLUSES
Retirez avec précaution toutes les pièces de leur emballage de protection et disposez-les en face de
vous.
Interrupteur ON/OFF
Les boutons de réglages sont situés en dessous du détecteur de mouvement comme indiqué sur le
dessin ci-dessus. Retournez le détecteur de mouvement pour y avoir accès. La partie inférieure est située
à l’opposé de la partie supérieure clairement indiqué par la marque « FRONT » sur le détecteur de
mouvement.
INSTALLER / REMPLACER LES PILES
Lorsque les capacités de chargement des piles diminuent, vous pouvez les remplacer par 3 nouvelles
piles C-cell. Suivez les instructions ci-dessous lorsque vous remplacez les piles.
1. Mettez le projecteur de sécurité sur la position OFF
2. Enlevez le projecteur de son support de fixation.
3. Retirez la vis à oreilles du dessous du projecteur de sécurité
a. Appuyez doucement sur le bouton situé en dessous du projecteur de sécurité et retirez la lumière
du support de fixation/
b. Si vous retirez les anciennes batteries, retirez-les délicatement du compartiment à batteries et
remplacez-les par trois (3) nouvelles piles C-cell. Vérifiez que les nouvelles piles sont insérées
dans la position +/- correcte comme indiquée sur le compartiment.
ATTENTION : LES PILES INSTALLEES DANS LE MAUVAIS SENS POURRAIENT ENDOMMAGER
L’APPAREIL.
4. Remettez le projecteur de sécurité dans son support de fixation jusqu’à ce que le bouton situé
au-dessus se remette dans sa position initiale. Vous devrez appuyer sur le bouton situé en-dessous en
premier pour remonter l’appareil.
5. Remettez la vis à oreilles en dessous du projecteur de sécurité.
6. Remettez le projecteur de sécurité sur la position AUTO.
NOTE: NE JETEZ PAS LES PILES DANS LES POUBELLES DE MAISON OU DANS UN FEU CAR LES
PILES POURRAIENT EXPLOSER. CONSULTE LES LOIS ET REGLEMENTS LOCAUX POUR SAVOIR
OU JETER VOS PILES. N’OUVREZ PAS LES PILES CAR ELLES CONTIENNENT DES PRODUITS
CHIMIQUES CORROSIFS.
8
Page 9

CHOISIR UN ENDROIT POUR VOTRE PROJECTEUR DE SÉCURITÉ :
Junta de
Goma (x2)
Ce projecteur de sécurité est idéal pour illuminer des zones où il n’y a pas d’électricité – par exemple les
devantures des maisons et les entrées de garages – pour la sécurité autour de votre maison.
Lorsque vous placez votre lumière, gardez en tête que le détecteur de mouvement qui active la lumière
dispose d’un champ de vision de 130° à l’horizontal à une distance de 26 pieds lorsque la température
ambiante est de 75° F. La température extérieure impacte donc la distance de détection. En cas de
température plus basse, le détecteur de mouvement est plus sensible et sa portée augmente.
COMMENT INSTALLER VOTRE LUMIÈRE DE SÉCURITÉ
OUTILS NÉCESSAIRES À L’INSTALLATION
Vous aurez besoin une perceuse et d’un tournevis à tête Philips.
Utilisez les deux (2) vis fournies pour installer le projecteur de sécurité sur un mur.
POUR INSTALLER LE SUPPORT DE FIXATION
1. Retirez le support de montage du dessous de la lumière en dévissant la (1) vis à oreilles
et en appuyant sur le bouton situé sur la base de la lumière.
Faites attention de ne pas endommager le support de montage car il sert également de
dossier à la lumière et du compartiment à piles.
Percez un
trou ici
Percez un
trou ici
2. Alignez le support de montage sur le mur et notez avec un stylo les endroits des deux
trous à percer. Retirez ensuite le support du mur.
3. Creusez des trous pour les vis si nécessaire. Des chevilles devraient être utilisées pour le
ciment, la brique ou d’autres surfaces similaires.
4. Alignez le support de montage sur le mur et installez les deux vis avec un tournevis.
5. Pressez le projecteur de sécurité sur le support de fixation jusqu’à ce que le bouton situé
au-dessus se remette en plqace. Vous devrez appuyer sur le bouton situé en-dessous en
premier pour remonter l’appareil.
6. Remettez la vis à oreilles située sur la base de l’appareil.
9
Page 10

UTILISER VOTRE LUMIÈRE DE SÉCURITÉ
Après avoir installé les nouvelles piles de votre projecteur de sécurité, passez l’interrupteur sur la position
AUTO. Votre dispositif est maintenant prêt à fonctionner.
En-dessous du détecteur de mouvement, vous trouverez 3 réglages : TIME, SENS et LUX.
La configuration d’usine de la lumière est la suivante :
TIME – préconfiguré à 15 secondes.
SENS – préconfiguré à une distance de 10 – 15 pieds (lorsque la
température ambiante est de 75° F)
LUX – préconfiguré pour votre lumière de sécurité à s’activer au crépus-
cule lorsqu’un mouvement est détecté
Si ces configurations ne conviennent pas à votre utilisation, vous pouvez
les modifier en ajustant les réglages situés en-dessous du détecteur de mouvement.
AJUSTEMENT DU RÉGLAGE TIME
Le réglage TIME permet de définir le temps durant lequel votre projecteur de sécurité restera allumé
après la dernière détection de mouvement. Ce réglage peut être modifié entre 10 et 30 secondes.
Pour réduire le temps, déplacez le réglage vers le symbole ( - ).
Pour augmenter le temps, déplacez le réglage vers le symbole ( + ).
Contrôlez le temps en déclenchant le détecteur de mouvement. Ajustez le réglage TIME jusqu’à ce que
la durée d’illumination vous convienne.
Une durée plus courte économisera les piles. Pour de meilleurs résultats, utilisez la durée la plus courte
possible pour votre zone d’utilisation.
AJUSTEMENT DU RÉGLAGE LUX
Le détecteur de mouvement de ce projecteur de sécurité est sensible à la température. Plus celle-ci est
froide, plus le capteur sera sensible. Utilisez le réglage SENS pour ajuster la sensibilité du détecteur de
mouvement et rectifier l’impact de la température. Le détecteur de mouvement est plus sensible lorsque
le réglage SENS est tourné dans le sens des aiguilles d’une montre ( + ).
Pour réduire la sensibilité, déplacez le réglage vers le symbole ( - ).
Pour augmenter la sensibilité, déplacez le réglage vers le symbole ( + ).
Pour vérifier la sensibilité du capteur, pointez le vers la direction désirée. Déplacez le réglage TIME au
minimum ( - ) et LUX au maximum ( + ). Déplacez-vous lentement vers la direction de détection jusqu’à
ce que la lumière s’allume. Si celle-ci ne s’allume pas, changez l’angle du capteur. Ajustez l’angle du
capteur jusqu’à ce que le degré de sensibilité souhaité soit atteint. Ensuite, réajustez les réglages TIME
et SENS.
AJUSTEMENT DU RÉGLAGE LUX
Le réglage LUX contrôle le niveau de lumière naturelle qui déclenche le projecteur de sécurité et donc
empêche la lumière de s’allumer pendant la journée. Votre lumière de sécurité est préconfigurée pour
s’activer au crépuscule.
Pour une activation avant le crépuscule, déplacez le réglage vers le maximum ( + ).
Pour une activation après le crépuscule, déplacez le réglage vers le minimum ( - ).
RETOURNEMENT DES RÉGLAGES
Lorsque vous aurez terminé vos réglages, retournez le détecteur de mouvement pour que la flèche et le
mot FRONT soient visibles au-dessus. Les réglages doivent être sur la partie inférieure du détecteur de
mouvement lors de l’utilisation quotidienne.
10
Page 11

DÉPANNAGE
PROBLÈME SOLUTIONS POSSIBLES
• Vérifiez que l’interrupteur d’alimentation est réglé sur la position AUTO.
• Vérifiez que le capteur a été placé en face de la zone de mouvements.
Le projecteur de
sécurité ne s’allume
pas lorsqu’il y a un
mouvement dans la
zone.
• Vérifiez que les piles ont été assez chargées.
• Vérifiez que le réglage LUX n’est pas positionné trop loin vers du minimum
( - ). Ajuster le réglage LUX trop près du minimum ( - ) entraine le
fonctionnement de la lumière de sécurité uniquement dans la pénombre
totale.
• Vérifiez que le capteur de mouvement n’est pas installé proche de sources
de lumière la nuit, comme les lumières de rues.
La lumière s’allume
durant la journée.
La lumière s’allume
pour aucune raison
apparente.
La lumière clignote
rapidement.
La lumière n’est pas
aussi vive qu’à la
normale.
• Le réglage LUX est peut-être positionné trop près de la position maximum (
+ ).
• Repositionnez le détecteur pour qu’il soit en face de la zone de mouvements.
• Les arbres, les voitures, les animaux de compagnie et les oiseaux sont
peut-être dans la zone de détection. Ce problème peut être contourné en
plaçant le détecteur à une hauteur plus importante où ces éléments sont
moins susceptibles de se manifester.
• S’il y a des objets réfléchissants dans la zone de détection comme des
fenêtres, de l’eau ou des murs blancs, repositionnez le détecteur de
mouvement.
•
Testez le détecteur de mouvement en le couvrant complètement avec du
carton pendant plusieurs minutes pour vérifier qu’il ne détecte aucun
mouvement. Si la lumière s’allume toujours, veuillez contacter pourde
l’aide.
• Les piles sont peut-être déchargées. Référez-vous au paragraphe «
remplacer les piles » à la page 2.
• Déplacez le réglage LUX vers la position minimum ( - ).
• Les piles sont peut-être déchargées. Référez-vous au paragraphe «
remplacer les piles » à la page 2.
11
Page 12

CONSEILS D’ENTRETI
Les LEDs de votre projecteur durent jusqu’à 30.000 heures et ne devraient pas nécessiter de remplacement.
Les nouvelles piles durent approximativement 1 an en utilisation moyenne. Les piles sont accessibles en
enlevant le support de fixation. Ces piles (3) sont de type 3C-Cell.
Pour maintenir votre lumière de sécurité en état de marche, gardez la lentille et le panneau solaire à l’abri
de la poussière et des dépôts en les essuyant occasionnellement avec un chiffon sec ou de l’eau chaude
savonneuse.
EN
UTILISATION À DES
En cas de températures en dessous
température remonte, l’utilisation redevient normale.
TEMPÉRATURES BASSES
de 20°F, la performance des piles Ni-MH peut être réduite. Lorsque la
CONSEILS DE SÉCURITÉ
Ne pas immerger le projecteur de sécurité dans l’eau ou d’autres liquides.
STOCKAG
Si vous souhaitez stocker vos lumières à l’intérieur pendant plus de deux ou trois jours, réglez l’interrupteur
de courant sur OFF et enlevez
de stockage prolongé.
E
les piles pour éviter de les abimer. La capacité des piles peut baisser en cas
FABRIQUÉ EN CHINE
Conserver ces instructions pour utilis
12
ation future.
 Loading...