

Page 1
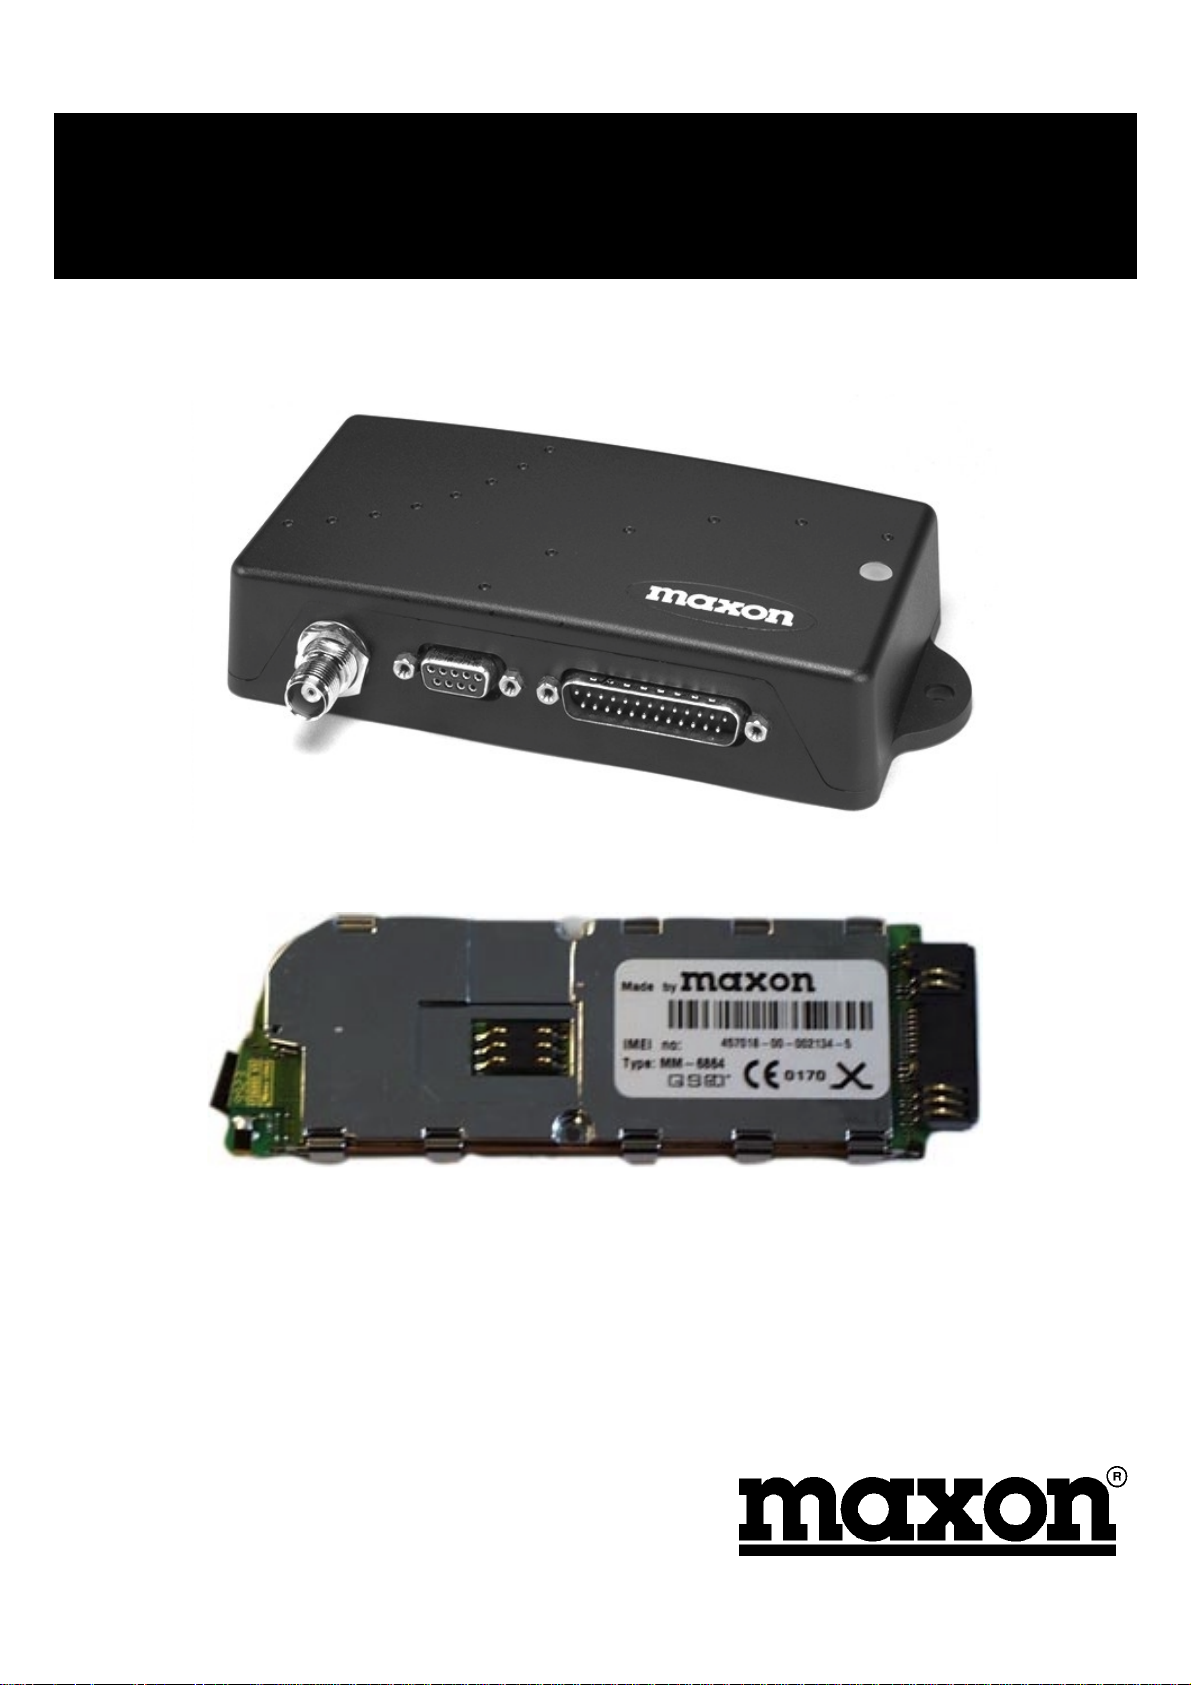
MM-6854 / MM-6864
GSM Dual-Band Data Modem
MM-6854
MM-6864
Application Notes
Page 2

Published by Maxon Europe Ltd
Maxon House
Maxted Close
Hemel Hempstead
Herts HP2 7EG
United Kingdom
Tel: +44 (0)1442 267777
Fax: +44 (0)1442 215515
e-mail datasales@maxon.co.uk
Internet: www.maxon.co.uk
Any queries regarding information in this manual, please contact the Technical Services Group Leader at the above address.
Information provided in this document is believed correct at time of printing but is subject to change without notic e.
Maxon will not accept liability for any loss, damage or costs howsoever caused as a result of the information provided.
Page 3

MM6854/64 Dual Band GSM Data Modem
WARNINGS
Internal components containing beryllium oxide are used in the equipment. Dust from this material is a
health hazard if inhaled or allowed to come into contact with the skin. Great care must be taken when
handling these components. They must not be broken or subjected to excessive heat.
Never operate the modem without the correct Maxon antenna, or a suitable artificial load, connected.
Never modify a modem, or accessory, except as instructed by Maxon in a formal communication as this may
invalidate any warrant y, guarant ee or type appro va l.
Do not operate this equipment in environments containing explosive materials or vapour. This includes
Petrol service stations.
This equipment should only be operated while stationary or with a hands-free accessory, provided that doing
so does not interfere with driving saf et y.
This equipment should not be operated on an aircraft as it is forbidden by law. It should not be operated in
the vicinity of medical equ ipment.
Issue 1.0 ME 820047
03/00 Page i
Page 4

MM6854/64 Dual Band GSM Data Modem
ME 820047 Issue 1.0
Page ii 03/00
Page 5

MM6854/64 Dual Band GSM Data Modem
TABLE OF CONTENTS
1 INTRODUCTION 1
1.1 Overview 1
1.2 How this document is organised 1
1.3 What are the MM6854/64 1
1.4 Recommended Procedures 1
1.5 Contact Information 1
1.6 Summary 2
2 SPECIFICATIONS 3
2.1 Basic Specifications 3
2.2 Summary 4
3 SYSTEM APPLICATIONS 5
3.1.1 GSM / GPS Application 6
4 OPERATION 7
4.1 Introduction 7
4.2 Network Connection 7
4.2.1 Inserting the SIM card 7
4.3 Turning on the modem 8
4.4 V.24 Interface 8
4.5 Set up the appropriate software 8
4.6 Confirming Operation 9
4.7 Summary 9
5 AT COMMANDS 11
5.1.1 +++<CR> - Escape command 12
5.1.2 A – Re-execute last command 12
5.1.3 ATA – Manually answer an incoming call 13
5.1.4 ATD – Dial a telephone number 13
5.1.5 ATDL 13
5.1.6 ATE – Command Echo 14
5.1.7 ATH – Hang up 14
5.1.8 ATIn - Identification 14
5.1.9 ATO0 – Return to transparent mode (switch from command mode to data mode). 15
5.1.10 ATQ - Result code suppression 15
5.1.11 ATS0=n – Auto-answer mode 15
5.1.12 ATS1? – Number of rings 15
5.1.13 ATS2- Escape character 16
5.1.14 ATS3 – Command line termination character 16
5.1.15 ATS4 – Line Feed character 16
5.1.16 ATS5 – Backspace character 16
5.1.17 ATS6 – Pause before blind dialling 16
5.1.18 ATS7 – Wait time for carrier 17
5.1.19 ATS8 – Wait time before dialling 17
5.1.20 ATS10 – Wait time before disconnection 17
5.1.21 ATS12 – Escape code guard time 17
5.1.22 ATV – Results code format 17
5.1.23 ATX – Defines CONNECT results code format 18
5.1.24 ATZ – Load user profile 18
5.1.25 AT&C – Data carrier detect options 18
5.1.26 AT&D – Data Terminal Ready options 18
5.1.27 AT&F – Restore default configuration 19
5.1.28 AT&V – Display current configuration 19
5.1.29 AT&W – Save current configuration 19
5.1.30 AT+CBSTs,m,p – Select bearer service type 20
Issue 1.0 ME 820047
03/00 Page iii
Page 6

MM6854/64 Dual Band GSM Data Modem
5.1.31 AT+CEER – Displays why last call was disc onn ec ted 20
5.1.32 AT+CMGD – Delete messages 20
5.1.33 AT+CMGF – Message format 21
5.1.34 AT+CMGL – List messages 21
5.1.35 AT+CMGR – Read messages 22
5.1.36 AT+CMGS – Send messages 22
5.1.37 AT+CMGW – Write messages to memory 23
5.1.38 AT+CMSS – Send messages from storage 23
5.1.39 AT+CNMI – New Message 24
5.1.40 AT+CPIN – Enter PIN and query blocks 25
5.1.41 AT+CR – Cellar result code for outgoing calls 25
5.1.42 AT+CRC – Cellar result code 25
5.1.43 AT+CRLP – Radio Link Protocol parameters 26
5.1.44 AT+CSCA – Service centre address 26
5.1.45 AT+CSDH – Show test mode parameters 26
5.1.46 AT+CSMP – Set text mode parameters 27
5.1.47 AT+DR – Data compression report 27
5.1.48 AT+DS – Data compression mode 28
5.1.49 AT+FCLASS – Select, read or test service class 28
5.1.50 AT+FMI – Report manufacturer ID 28
5.1.51 AT+FMM – Report module ID 29
5.1.52 AT+FMR – Report revision 29
5.1.53 AT+FRH – Receive HDLC data with carrier 29
5.1.54 AT + FRM – Receive data with carrier 29
5.1.55 AT+FTH – Transmit HDLC data with carrier 30
5.1.56 AT+FTM – Transmit data with carrier 30
5.1.57 AT+GMI – Request manufacturer ID 30
5.1.58 AT+GMM – Request model ID 30
5.1.59 AT+GMR – Request revision ID 31
5.1.60 AT+ICF – Character framing 31
5.1.61 AT+IFC – Local flow control 32
5.1.62 AT+ILRR – Display local report rate 32
5.1.63 AT+IPR – Set terminal equipment data rate 32
5.1.64 CME ERROR<n> 33
5.1.65 CMS ERROR<n> 33
5.1.66 S Register Summary 34
5.2 Summary 35
6 DEBUGGING & INDICATOR LIGHTS 37
6.1 Summary 37
7 INSTALLATION 39
7.1 Introduction 39
7.2 Antennas 39
7.3 Power Sources 39
7.4 Fusing 39
7.5 Cabling 40
7.6 Fixing 40
7.7 Connections 41
7.7.1 9 pin D-type (RS-232 Interface) 41
7.7.2 25 pin D-type 41
7.8 Summary 41
8 APPENDICES 43
8.1 Setting up Windows Modem interface 43
8.1.1 Open up the Control Panel 43
8.1.2 Double click on the modem icon 43
8.1.3 Highlight the don’t detect my modem box 44
8.1.4 Select the standard 19200 modem 44
8.1.5 Select the appropriate COM port 45
ME 820047 Issue 1.0
Page iv 03/00
Page 7

MM6854/64 Dual Band GSM Data Modem
8.1.6 Set the location information 45
8.1.7 Finish Installation 46
8.1.8 Select Properties 46
8.1.9 Select Connection 47
8.1.10 Set Data Bits, Parity and Stop bits 47
8.1.11 Select Flow Control and Software (XON/XOFF) 48
8.1.12 RS-232 48
8.2 Setting up Hyper Terminal 49
8.2.1 Select Hyper Terminal from Programs Menu 49
8.2.2 Select Hyper Terminal 50
8.2.3 Select Properties 50
8.2.4 Set Port 51
8.2.5 Port Settings 51
8.2.6 Properties 52
8.2.7 ASCII settings 52
8.3 Setting up Win Fax Pro 53
8.3.1 Communication Setup 53
8.3.2 Win Fax Pro Setup 53
8.4 Accessories 55
9GLOSSARY 57
LIST OF FIGURES
Figure 3-1 - Applications....................................................................................................................................5
Figure 3-2 - GSM / GPS Application.................................................................................................................. 6
Figure 4-1 - Location of SIM card ...................................................................................................................... 7
Figure 4-2 - Securing of SIM card...................................................................................................................... 8
Figure 7-1 - Fixing centres for MM-6854 modem ............................................................................................ 40
LIST OF TABLES
Table 7-1 - 9 pin D-type socket connections ................................................................................................... 41
Table 7-2 - 25 pin D-type plug connections.....................................................................................................41
Issue 1.0 ME 820047
03/00 Page v
Page 8

MM6854/64 Dual Band GSM Data Modem
ME 820047 Issue 1.0
Page vi 03/00
Page 9

MM6854/64 Dual Band GSM Data Modem
1 INTRODUCTION
1.1 Overview
This document provides Application information for the MM-6854/64 GSM Dual-Band Data Modem
and refers to software version 1.07 onwards.
This first section provides a brief overview of the products. Further sections go into more detail on the
various functions that are available and how they can be applied.
1.2 How this document is organised
Section 1 – Brief overview of the modems.
Section 2 – Basic Specifications
Section 3 – Typical Applications
Section 4 – Operation
Section 5 – AT Commands
Section 6 – Debugging and Indicator Lights
Section 7 – Installation – Covers the main points of installation.
Section 8 – Appendices - Provides information on the configuration of PCs.
Section 9 – Glossary
1.3 What are the MM6854/64
The MM-6854/64 are GSM Dual-Band Data Modems, they differ by the following:
MM-6854 Boxed modem, featuring internal back-up battery, requiring only the connection of
power and RS-232 serial data.
MM-6864 Basic PCB OEM GSM modem. For integration into a customer’s equipment.
1.4 Recommended Procedures
1. Radio Link Protocol should be used.
2. Observe flow control.
3. Data is not acknowledged, therefore ensure that the application does this.
1.5 Contact Information
Should you have any queries regarding this manual, or the information within it, please contact:
The Technical Support Group
Maxon Europe Limited.
Maxon House, Maxted Close
Hemel Hempstead
Hertfordshire HP2 7EG
United Kingdom
Telephone: +44 (0) 1442 267777 Fax: +44 (0) 1442 215515
Technical Support Direct Telephone Line: +44 (0) 1442 298988
Technical Support Direct Fax Line: +44 (0) 1442 242363
Internet: www.maxon.co.uk
Issue 1.0 ME 820047
03/00 Page 1
Page 10

MM6854/64 Dual Band GSM Data Modem
1.6 Summary
This section has provided a basic introduction to the products.
ME 820047 Issue 1.0
Page 2 03/00
Page 11

MM6854/64 Dual Band GSM Data Modem
2 SPECIFICATIONS
2.1 Basic Specifications
Performance
Specifications
Frequency Range 890 to 960MHz
RF Output Power Class 4 (2W) for 900MHz
Receiver Sensitivity -102dBm at 900MHz, -100dBm at 1800MHz
Modulation Type Modified GMSK
Intermediate Frequency 282MHz
Transmit Attack Time <25mS
RS-232 Interface V24 9 pin D-type
Data Communication Transparent
91/263/EEC
ETS 300 342-1
ETSI GSM 0707/05 AT commands plus Extended
SMS GSM rec. 7.05 including PDU mode
GSM 04.21 transparent data
GSM 04.22 non-transparent data
1710 to 1880MHz
Class 2 (1W) for 1800MHz
(<2% bit error rate)
Baud rate 300 – 57600 baud, no autobauding. Set to 19200
as default.
Parity: None, Space, Odd, Even or Mark
Character Format: 7 or 8
Stop bits: 1 or 2
Level: To CCITT Recommendation V.28
Non-error corrected link according to GSM 04.21
User rates:
2400 bps V.22 bis / V.26 ter / V.110
4800 bps V.32 / V.110
9600 bps V.32 / V.110
14400 bps V.32 / V.110 GPRS1
Non-Transparent
Error connected link according to GSM 04.22 (V.42)
User rates:
9600 bps V.32 / V.110
14400 bps V.32 / V.110 GPRS1
Note: When using V.110, the correspondent has to be an
ISDN adapter. Data compression according to V.42 bis.
Transparent Fax
Group 3, Class 1 support only.
User rates;
2400 bps
4800 bps
7200 bps
9600 bps
SMS
GSM rec. 7.05, including PDU mode
SIM card Interface
Issue 1.0 ME 820047
03/00 Page 3
Small size SIM, 3 or 5V
Page 12

MM6854/64 Dual Band GSM Data Modem
General Specifications
Temperature Range
Operating
Charging
Power Consumption Standby 25mW
Current Consumption 12V 333mA – fit 800mA A/S fuse
Supply Voltage +9V minimum to +28V DC maximum
Dimensions 172mm long x 82mm wide x 30mm high
Weigh 260 grams
Note
: Maxon Europe reserves the right to alter these specifications without prior notification as part of
our continuous improvement policy.
2.2 Summary
This section has outlined the basic specifications of the MM6854/64.
(Performance without degradation unless stated)
-20 to +60
0 to +40
Charging / On-air 4W max.
24V 166mA – fit 500mA A/S fuse
C
°°°°
C
°°°°
ME 820047 Issue 1.0
Page 4 03/00
Page 13

MM6854/64 Dual Band GSM Data Modem
3 SYSTEM APPLICATIONS
Fleet Management Construction Transportation
Anti-Theft Utilities Emergency Services
Refrigerated Trucks Taxis Delivery Vans
Courier Companies Vending Machines Surveillance
Figure 3-1 - Applications
Issue 1.0 ME 820047
03/00 Page 5
Page 14

MM6854/64 Dual Band GSM Data Modem
3.1.1 GSM / GPS Application
One example of an application is sending data and GPS information via the GSM Network.
GPS Antenna GSM Antenna
Terminal
GSM Modem
Control
Unit
Mobile Equipme nt
Computer
GSM Modem
Host Application
Figure 3-2 - GSM / GPS Application
GSM Antenna
ME 820047 Issue 1.0
Page 6 03/00
Page 15
MM6854/64 Dual Band GSM Data Modem
4 OPERATION
4.1 Introduction
This section covers the simple operation of the modems. It provides the relevant information for the
user to get the modem up and running.
A +9V to +28VDC power supply will be required, together with a Windows 95 PC, installed with Hyper
Terminal, or similar package, a CA8360 power cable, a CA8401 antenna and a CA8361 PC serial
cable.
4.2 Network Connection
It is necessary to obtain a SIM from your chosen Network Provider. This SIM must be suitable for
Data service.
All information needed to connect you to the network and to initiate billing for your calls is stored in the
gold-plated area of the SIM card, along with the names, numbers and messages you have entered
into the phone book, or received.
To prevent either, the loss of information or corruption of information, avoid touching the gold area and
do not place the SIM near electrical or magnetic fields.
A damaged SIM will not allow you to access the GSM network.
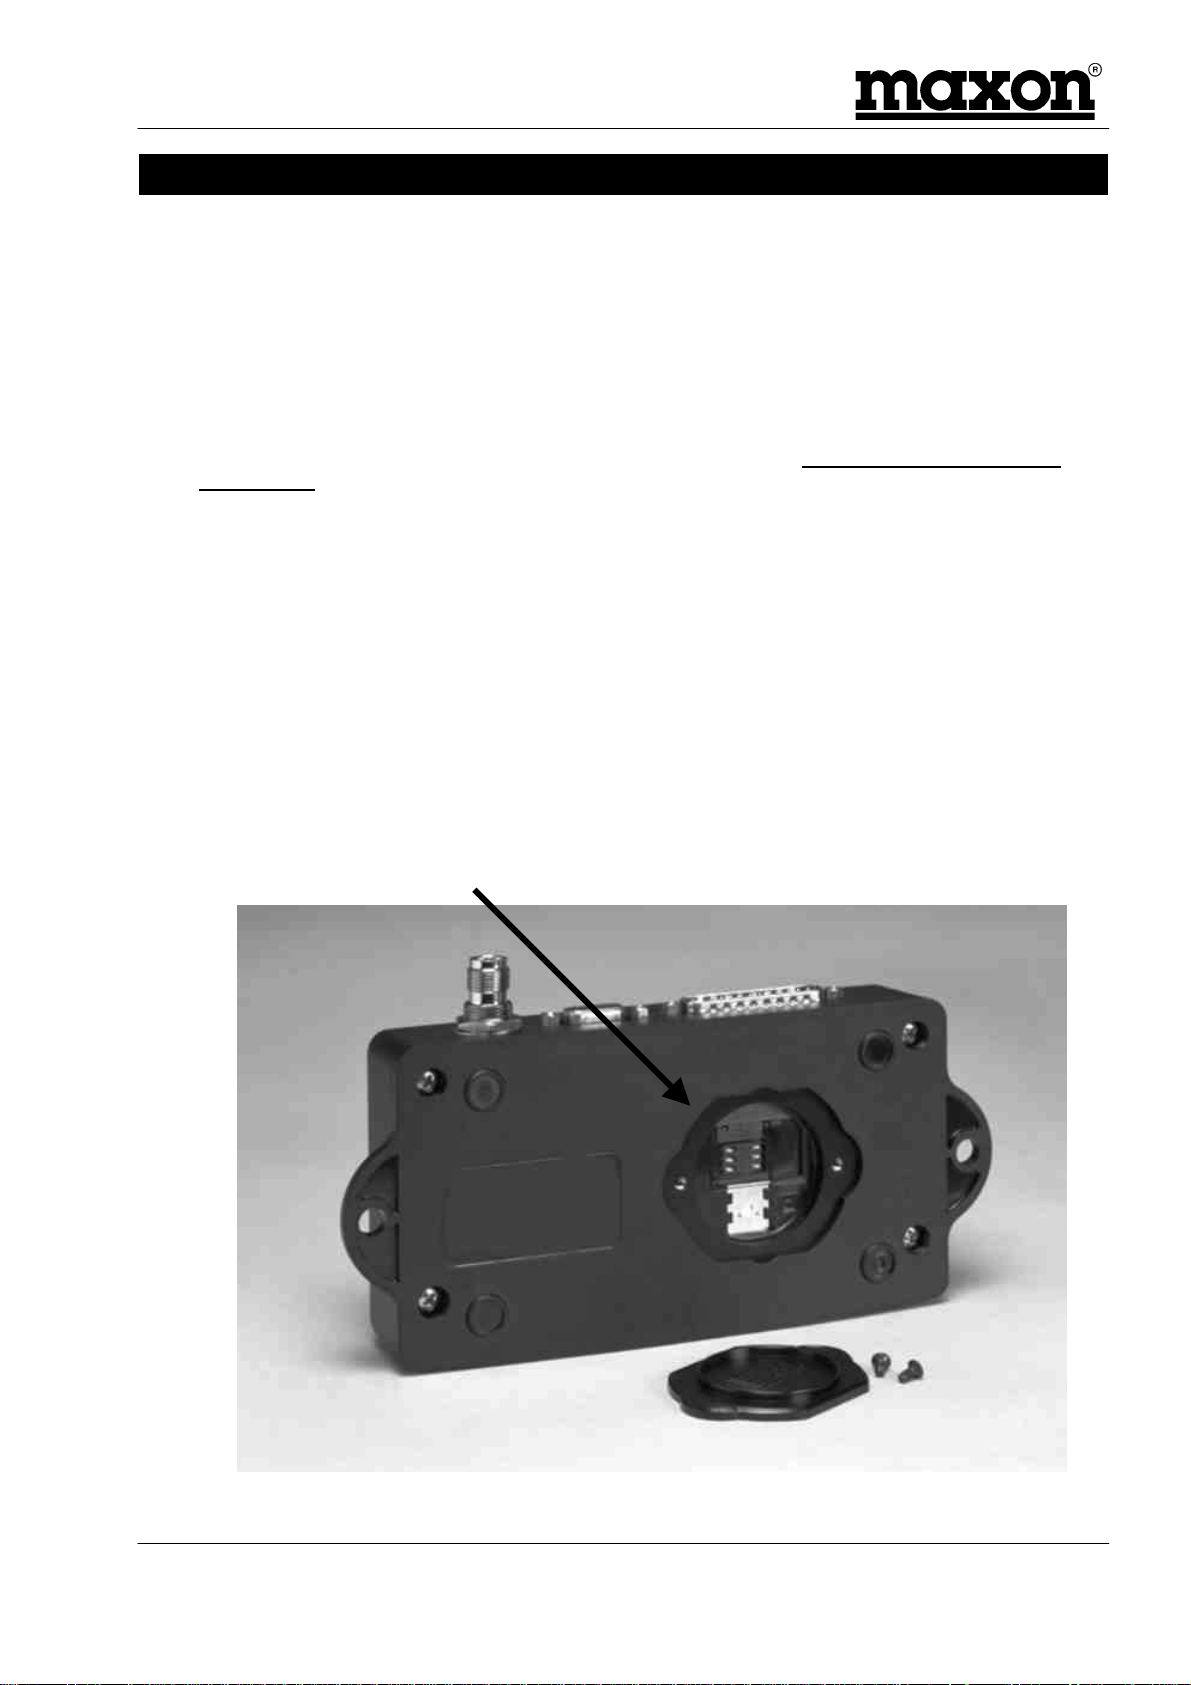
4.2.1 Inserting the SIM card
The SIM card will probably be supplied in a cardholder and will need to be carefully pressed free,
before fitting.
The modem must not be powered. If the 25 way D-type connector is removed, this ensures that this is
the case. The modem should be turned upside down and the two small countersunk screws removed
to expose the SIM card area.
Figure 4-1 - Location of SIM card
Issue 1.0 ME 820047
03/00 Page 7
Page 16

MM6854/64 Dual Band GSM Data Modem
Care should be taken to ensure that the card is correctly fitted and is held in place. This is
accomplished by fitting the card (with the gold area facing downwards) underneath the two lugs and
sliding the metal holder over the top of the card to secure it.
then
SIM card
inserted here
Metal
Holder
The lid can now be attached and held in place with the two screws.
Figure 4-2 - Securing of SIM card
4.3 Turning on the modem
To turn on the modem, connect power between pin 16 (+9V to +28VDC) and pin 17 (GND) of the D25
connector. Alternatively, fit accessory cable CA8360 and connect power between the red and black
leads. Connect a suitable antenna; the Maxon CA8401 is ideal.
Note
: It is important that the antenna ground is not connected to the modem ground. This will not
happen where through glass antennas are used. Antennas, which are through chassis mounting and
connect to the vehicle chassis should not be used. Failure to observe this may result in damage to the
unit and will invalidate the warranty.
Pin 15 of the D25 connector has to be pulled LOW in order to turn on the modem. Alternatively, fit
accessory cable CA8360 and connect the green lead to GND.
Provided that the SIM card is unlocked, the modem will make an automatic search for your home
network or another suitable network operator in your location. The modem will initially flash RED as it
establishes a network connection (within seconds) and then flash GREEN.
Note
: To prevent unauthorised use, the SIM can be protected by a PIN code (See Section 5.1.40).
Each time the modem is switched on the PIN code must be entered. If you enter the wrong code,
three times in succession, your SIM will be barred from the network and the modem will require a PUK
code.
4.4 V.24 Interface
The modem is set to communicate with a baud rate, which is set as default to 19200 baud. The
modem does not support autobaud and therefore it is important that any equipment, which
communicates with the modem, is set to 19200 baud.
4.5 Set up the appropriate software
Information is provided in Section 8.2 for setting up Hyper Terminal and TAPI devices for use with the
modems.
ME 820047 Issue 1.0
Page 8 03/00
Page 17

MM6854/64 Dual Band GSM Data Modem
4.6 Confirming Operation
On Hyper Terminal, type ATD <Telephone number you want to ring> and press Carriage Return.
The telephone will ring. The answer tone will be similar to the one, which you would receive, with a
fax machine.
4.7 Summary
This section has covered the basic operation of the modem.
Issue 1.0 ME 820047
03/00 Page 9
Page 18

MM6854/64 Dual Band GSM Data Modem
ME 820047 Issue 1.0
Page 10 03/00
Page 19

MM6854/64 Dual Band GSM Data Modem
5 AT COMMANDS
Command Function Paragraph
+++ Switch from data mode to command mode 5.1.1 Page 12
A/ Re-execute the last command 5.1.2 Page 12
ATA Manual answer an incoming call 5.1.3 Page 13
ATD Dial a telephone number 5.1.4 Page 13
ATDL Redial the last telephone number 5.1.5 Page 13
ATE Command echo 5.1.6 Page 14
ATH Hang up 5.1.7 Page 14
ATIn Identification 5.1.8 Page 14
ATO0 Switch from command mode to data mode 5.1.9 Page 15
ATQ Result code suppression 5.1.10 Page 15
ATS0=n Auto answer mode 5.1.11 Page 15
ATS1? Number of rings 5.1.12 Page 15
ATS2 Escape character 5.1.13 Page 16
ATS3 Command line termination character 5.1.14 Page 16
ATS4 Line Feed character 5.1.15 Page 16
ATS5 Backspace character 5.1.16 Page 16
ATS6 Set paus e bef ore bli nd dia ll ing 5.1.17 Page 16
ATS7 Wait time for carrier 5.1.18 Page 17
ATS8 Wait time before dialling 5.1.19 Page 17
ATS10 Wait time before disconnection 5.1.20 Page 17
ATS12 Escape code guard time 5.1.21 Page 17
ATV Result code format 5.1.22 Page 17
ATX Defines CONNECT result code format 5.1.23 Page 18
ATZ Load user profile 5.1.24 Page 18
AT&C Data Carrier Detect Options 5.1.25 Page 18
AT&D Data Terminal Ready Options 5.1.26 Page 18
AT&F Restore default configuration 5.1.27 Page 19
AT&V Display current configuration 5.1.28 Page 19
AT&W Save current configuration 5.1.29 Page 19
AT+CBSTs,m,p Select bearer service type 5.1.30 Page 20
AT+CEER Displays why last call was disconnect e d 5.1.31 Page 20
AT+CMGD Delete messages 5.1.32 Page 20
AT+CMGF Message format 5.1.33 Page 21
AT+CMGL List messages 5.1.34 Page 21
AT+CMGR Read message 5.1.35 Page 22
AT+CMGS Send messages 5.1.36 Page 22
AT+CMGW Write messages to memory 5.1.37 Page 23
AT+CMSS Send messages from storage 5.1.38 Page 23
AT+CNMI New Message 5.1.39 Page 24
AT+CPIN Enter PIN and query blocks 5.1.40 Page 25
AT+CR Cellar result code for outgoing calls 5.1.41 Page 25
AT+CRC Cellar result code 5.1.42 Page 25
AT+CRLP Radio Link Protocol parameters 5.1.43 Page 26
AT+CSCA Service centre address 5.1.44 Page 26
AT+CSDH Show test mode parameters 5.1.45 Page 26
AT+CSMP Set text mode parameters 5.1.46 Page 27
Issue 1.0 ME 820047
03/00 Page 11
Page 20

MM6854/64 Dual Band GSM Data Modem
Command Function Paragraph
AT+DR Data compression report 5.1.47 Page 27
AT+DS Data compression mode 5.1.48 Page 28
AT+FCLASS Select, read or test service class 5.1.49 Page 28
AT+FMI Report Manufacturer ID 5.1.50 Page 28
AT+FMM Report module ID 5.1.51 Page 29
AT+FMR Report revision 5.1.52 Page 29
AT+FRH Receive HDLC data with carrier 5.1.53 Page 29
AT+FRM Receive data with carrier 5.1.54 Page 29
AT+FTH Transmit HDLC data with carrier 5.1.55 Page 30
AT+FTM Transmit data with carrier 5.1.56 Page 30
AT+GMI Request manufacture ID 5.1.57 Page 30
AT+GMM Request model ID 5.1.58 Page 30
AT+GMR Request revision ID 5.1.59 Page 31
AT+ICF Character framing 5.1.60 Page 31
AT+IFC Local flow control 5.1.61 Page 32
AT+ILRR Display local report rate 5.1.62 Page 32
AT+IPR Set terminal equipment data rate 5.1.63 Page 32
Error Result Codes
Command Paragraph
+CME ERROR 5.1.6 4 Page 33
+CMS ERROR 5.1.6 5 Page 33
S register summary 5.1.66 Page 34
5.1.1 +++<CR> - Escape command
By sending the escape sequence +++<CR>, the modem will return to AT command mode. Then you
can send the ATH command for automatic termination of the connection:
Enter
+++<CR>
Response
OK
Notes: None
Result codes: None
5.1.2 A – Re-execute last command
The A/command lets you re-execute the last command entry. This command is not preceded by AT
and does not have to end with <CR>:
Enter
ATD12345678<CR>
A/
Response
BUSY
ATD12345678 (Re-executes the last AT command
Notes: None
Result codes: None
ME 820047 Issue 1.0
Page 12 03/00
Page 21

MM6854/64 Dual Band GSM Data Modem
5.1.3 ATA – Manually answer an incoming call
The modem does not automatically answer an incoming call (Default setting). The ATA command
causes the modem to go off-hook when the modem rings:
Enter
ATA
Response
The modem will answer the incoming call
Notes: None
Result codes: None
5.1.4 ATD – Dial a telephone number
This command will dial the number entered after the ATD command:
Enter
ATD12345678<CR>
Response
The modem dials the telephone number 12345678
Connect 14400 (Selected speed)
Notes:
As soon as the modem detects the carrier from the GSM base
station, it returns the CONNECT result code. Data transmission
can now begin.
The following characters are valid in a dial string: The digits
from “0” to “9”, and “+” for making International calls. The +
must be at the beginning of the number.
Result codes:
ERROR
NO CARRIER
CONNECT<selected speed>
Mobile equipment result code
5.1.5 ATDL
This command will dial the last number, which the modem dialled:
Enter
ATDL<CR>
Response
12345678 where 12345678 was the last number dialled.
Connect 14400 (Selected speed)
Notes: None
Result codes:
ERROR
NO CARRIER
CONNECT<selected speed>
Mobile equipment result code
Issue 1.0 ME 820047
03/00 Page 13
Page 22

MM6854/64 Dual Band GSM Data Modem
5.1.6 ATE – Command Echo
This command is used to enable and disable echo.
Enter
ATE0
ATE1
Response
Disable echo.
Enable echo.
Notes: None
Result codes:
OK
ERROR
5.1.7 ATH – Hang up
This command is used for asynchronous transmission only. If the user returns from data mode to
command mode after sending an escape sequence (+++) or after disabling the DTR signal with
AT&D1 option, the modem can be forced to disconnect by sending the ATH command.
Enter
ATH
Response
Notes: None
Result codes:
OK
ERROR
5.1.8 ATIn - Identification
This command provides information about the product identification.
Enter
ATIn
ATI0
ATI1
ATI2
ATI3
ATI4
ATI5 to I11
ATI12
ATI13
ATI14
ATI15
ATI17
Response
Mode
Product Code
Pre-computed checksum
Returns OK
Returns OK
OEM String
Returns OK
ROM Checksum
RC Version number
Shows firmware version
Shows selected country
GSM option
Notes: None
Result codes:
OK
ERROR
ME 820047 Issue 1.0
Page 14 03/00
Page 23

MM6854/64 Dual Band GSM Data Modem
5.1.9 ATO0 – Return to transparent mode (switch from command mode to data
mode).
If you wish to interrupt the data flow only briefly, you can use the ATO0 command to return your
modem to the transparent mode, i.e. the data flows once again.
Enter
ATO0
Response
Notes: None
Result codes:
OK
ERROR
5.1.10 ATQ - Result code suppression
This command is used to enable and disable the result code.
Enter
ATQ0
ATQ1
Response
Enable result code
Disable result code
Notes: None
Result codes:
OK
ERROR
5.1.11 ATS0=n – Auto-answer mode
Enter
ATS0=0
ATS0=1
….etc.
ATS0=5
ATA
Response
No auto-answer, incoming calls are ignored (Default value).
The modem will answer incoming calls after the first ring.
The modem will answer incoming calls after the fifth ring.
The modem will answer the incoming call.
Notes:
value of the ATS0=n string.
The S0 register can be read out by the ATS0? command, the
modem will then display the current value.
Result codes:
OK
ERROR
The ATA command can still be used regardless of the
5.1.12 ATS1? – Number of rings
Displays the number of rings, which the modem has detected. This register is cleared when no rings
occur for 8 seconds, or when the value becomes equal to S0.
Issue 1.0 ME 820047
03/00 Page 15
Page 24

MM6854/64 Dual Band GSM Data Modem
5.1.13 ATS2- Escape character
Typing ATS2? will display the decimal value of the ASCII character used as the escape character.
The default value (43) corresponds to an ASCII <+>. The value 127 disables the escape process.
Enter
ATS2=127
ATS2=43
Response
Disables the escape process.
Sets + as the escape character (default).
Notes: None
Result codes: None
5.1.14 ATS3 – Command line termination character
Typing ATS3? will display the decimal value of the ASCII character used as the carriage return
character. The default value (13) corresponds to an ASCII <CR>. Affects asynchronous operation
only.
Enter
ATS3=13
Response
Sets CR as the command line termination character (default).
Notes:
when entering commands .
Result codes: None
Setting any other value than 13 may cause problems
5.1.15 ATS4 – Line Feed character
Typing ATS4? will display the decimal value of the ASCII character used as the line feed character.
The default value (10) corresponds to an ASCII <LF>. Affects asynchronous operation only.
Enter
ATS4=10
Response
Sets LF as the line feed character (default).
Notes:
Result codes: None
None.
5.1.16 ATS5 – Backspace character
Typing ATS5? will display the decimal value of the ?ASCII character used as the backspace
character. The default value (8) corresponds to an ASCII <backspace>. Affects asynchronous
operation only.
Enter
ATS5=8
Response
Sets backspace as the backspace character (default).
Notes:
Result codes: None
None.
5.1.17 ATS6 – Pause before blind dialling
The value of this register is ignored.
ME 820047 Issue 1.0
Page 16 03/00
Page 25

MM6854/64 Dual Band GSM Data Modem
5.1.18 ATS7 – Wait time for carrier
After dialling, this register sets the time that the modem must wait before hanging up if it fails to detect
the remote carrier. Time is in seconds.
Enter
ATS7=60
Response
Sets the wait for carrier time to 60 seconds (default).
Notes:
Result codes: None
None.
5.1.19 ATS8 – Wait time before dialling
Sets the number of seconds to wait when the comma dial modifier is encountered in the dial string.
Enter
ATS8=2
Response
Sets the wait time before dialling to 2 seconds (default).
Notes:
Result codes: None
None.
5.1.20 ATS10 – Wait time before disconnection
Set the number of tenths of seconds to wait before disconnecting after the modem has indicated the
absence of the received line signal.
Enter
ATS10=15
Response
Sets the wait time before disconnection to 15 seconds (default).
Notes:
Result codes: None
None.
5.1.21 ATS12 – Escape code guard time
Defines the maximum silence time, in fiftieths of a second, accepted between two characters in an
escape sequence.
Enter
ATS12=10
Response
Sets the escape code guard time to 0.2 seconds (default).
Notes:
Result codes: None
None.
5.1.22 ATV – Results code format
This command is used to select short or long result codes.
Enter
ATV0
ATV1
Response
Sets short result codes.
Sets long result codes.
Notes:
Result codes:
OK
ERROR
None.
Issue 1.0 ME 820047
03/00 Page 17
Page 26

MM6854/64 Dual Band GSM Data Modem
5.1.23 ATX – Defines CONNECT results code format
This command is used to define the result code for CONNECT.
Enter
ATX0
ATX1
Response
Modem returns only the CONNECT code as soon as a
satisfactory connection has been set up.
Modem returns only the CONNECT<SPEED> code as soon as a
satisfactory connection has been set up.
Notes:
Result codes: None
ATX2, 3 & 4 perform the same function as ATX1.
5.1.24 ATZ – Load user profile
This command will load a user-defined profile.
Enter
ATZ0
Response
User profile 0 is loaded.
Notes:
Result codes:
OK
ERROR
None.
5.1.25 AT&C – Data carrier detect options
This command affects the DCD line connected to the serial port.
Enter
AT&C0
AT&C1
Response
Sets the GSM module DCD control line to ON regardless of the
data carrier status of the distant station.
DCD specifies the data carrier status of the distant station.
DCD on indicates that a connection exists.
Notes:
Result codes:
OK
ERROR
None.
5.1.26 AT&D – Data Terminal Ready options
This command affects the DTR line connected to the serial port.
Enter
AT&D1
AT&D2
Response
The modem changes to the command mode when the DTR line
switches from ON to OFF.
The modem sets up a connection to the distant station, switches
to command mode and deactivates auto-answer mode when the
DTR line switches from ON to OFF. Auto-answer can be reactivated by resetting DTR to ON.
Notes:
Result codes:
OK
ERROR
None.
ME 820047 Issue 1.0
Page 18 03/00
Page 27

MM6854/64 Dual Band GSM Data Modem
5.1.27 AT&F – Restore default configuration
This will force the modem to load the default configuration.
Enter Response
Notes:
Result codes:
OK
ERROR
5.1.28 AT&V – Display current configuration
The modem will display the current configuration.
Enter Response
Notes:
Result codes:
OK
ERROR
5.1.29 AT&W – Save current configuration
This command will allow you to save the current configuration.
None.
None.
Enter Response
Notes:
Result codes:
OK
ERROR
None.
Issue 1.0 ME 820047
03/00 Page 19
Page 28

MM6854/64 Dual Band GSM Data Modem
5.1.30 AT+CBSTs,m,p – Select bearer service type
Selects the bearer service to be used when dat a calls are orig ina ted.
S
0
1
2
3
4
5
6
7
65
66
68
70
71
M
0
P
0
1
Enter
AT+CBST?
AT+CBST=?
Speed
Not supported
300bps / V.21
1200bps / V.21
1200/75bps / V.21
2400bps / V.22 bis
2400bps / V.26 ter
4800bps / V.32
9600bps / V.32
300bps / V.110
300bps / V.110
2400bps / V.110
4800bps / V.110
9600bps / V.110
Mode
Asynchronous
Protocol
Transparent
Non-transparent
Response
The modem will reply with the selected speed, mode and
protocol.
The modem will reply with the supported speeds, modes and
protocols.
Result codes
OK
ERROR
5.1.31 AT+CEER – Displays why last call was disconnected
This command lets you query the reason why the last call was disconnected.
Enter Response
Notes:
Result codes:
OK
ERROR
None.
5.1.32 AT+CMGD – Delete messages
This command is used to delete a received stored SMS message.
Enter
AT+CMGD=<index>
Response
Delete SMS entry correspon d ing to <index > wh er e <index> is
the location in memory.
Notes:
Result codes:
OK
ERROR
Message service failure result codes.
None.
ME 820047 Issue 1.0
Page 20 03/00
Page 29

MM6854/64 Dual Band GSM Data Modem
5.1.33 AT+CMGF – Message format
This command allows you to define the input and output format of the short message.
Enter
AT+CMGF=0
AT+CMGF=1
AT+CMGF=?
Response
Set to PDU mode, a complete SMS message including all
header information is passed as a binary string.
Set to text mode, all commands and responses are in ASCII
characters.
Displays all supported values.
Notes:
Result codes:
OK
ERROR
Message service failure result codes.
None.
5.1.34 AT+CMGL – List messages
This command is used to list the SMS messages stored in the modem.
Enter
AT+CMGL=<STAT>
Where <STAT>
In text mode:
“REC UNREAD”
“REC READ”
“STO UNSENT”
“STO SEND”
“ALL”
In PDU mode:
0
1
2
3
4
Response
Receive unread messages.
Stored read messages.
Stored unsent messages.
Stored sent messages.
All messages
Received unread messages
Stored read messages
Stored unsent messages
Stored sent messages
All messages
AT+CMGL::<index>,
<stat>,<da>,<CR>,<LF>,<dat
a>
Where <data>
<da>
<index>
AT+CMGL=?
Issue 1.0 ME 820047
03/00 Page 21
TP user data GSM 03.40
Destination Address type value according to GSM 03.40.
Location in memory.
Displays the supported values.
Notes:
Result codes:
OK
ERROR
Message service failure result codes.
None.
Page 30

MM6854/64 Dual Band GSM Data Modem
5.1.35 AT+CMGR – Read messages
This command is used to read SMS messages.
Enter
AT+CMGR=<index>,<data>
Where
<index>
<data>
Response
Integer indicating the location of the SMS to be read.
TP user data GSM 03.40
Notes:
Result codes:
OK
ERROR
Message service failure result codes.
5.1.36 AT+CMGS – Send messages
This command is used to send SMS messages.
Enter
In text mode:
AT+CMGS=”Receiver
number”<CR><text to be
sent>CtrlZ
In PDU mode:
AT+CMGS=<length><CR><p
du>CtrlZ/esc
Where
<length>
<pdu>
AT+CMGS<mr>
Where <mr>
Response
OK
Number of characters in text mode, or length of binary string in
PDU mode.
Binary string coded according to GSM 03.38
Message reference according to GSM 03.40.
Notes:
Result codes:
OK
ERROR
Message service failure result codes.
None.
Esc quits without sending.
ME 820047 Issue 1.0
Page 22 03/00
Page 31

MM6854/64 Dual Band GSM Data Modem
5.1.37 AT+CMGW – Write messages to memory
This command is used to store a SMS message into the memory.
Enter
In text mode:
AT+CMGW=<oa/da><CR><t
ext to be stored>CtrlZ/esc
In PDU mode:
AT+CMGW=<length><CR><
pdu is given>CtrlZ/esc
Where
<da>
<length>
Response
TP – Destination Address. Address value field in string format
GSM 03.40.
Number of characters in text mode, or length of binary string in
PDU mode.
Notes:
Result codes:
OK
ERROR
Message service failure result codes.
Esc quits without sending.
5.1.38 AT+CMSS – Send messages from storage
This command is used to send a stored SMS message.
Enter
AT+CMSS=<index>[,<da>,<t
oda>]
Where
<da>
<index>
<mr>
<toda>
Response
Sends message stored in location corresponding to <index>.
OK
TP – Destination Address. Address value field in string format
GSM 03.40.
Location in memory
Message reference according to GSM 03.40.
Integer format of <da>.
Notes:
Result codes:
OK
ERROR
Message service failure result codes.
Issue 1.0 ME 820047
03/00 Page 23
Page 32

MM6854/64 Dual Band GSM Data Modem
5.1.39 AT+CNMI – New Message
This command allows you to determine how the modem shall notify the user when a SMS message is
received from the network operator.
Enter
AT+CNMI=<mode>,<mt>,<b
m>,<ds><bfr>
AT+CNMI?
AT+CNMI=?
Where <mode>
<mt>
Response
Set message indication mode.
Display current values
+CNMI<mode>,<mt>,<bm>,<ds>,<bfr>
Display list of supported values .
+CNMI<mode>,<mt>,<bm>,<ds>,<bfr>
Buffer unsolicited result code modem. If buffer is full, the oldest
indications may be discarded and replaced with the new
received indication.
Discard indication and reject new received messages unsolicited
result codes when serial port is in use. Otherwise forward them
directly to the user.
Buffer unsolicited result codes in the modem when the serial link
is in use and deliver them when the serial link is unused.
Forward unsolicited result codes directly to the user. Serial link
specific in-band used to embed result codes as data when the
modem is in on-line mode.
Disable SMS-deliver ind ic ati on.
If SMS-deliver is stored in modem, indication of memory location
routed to the user using +CMTI<mem>,<index> indication that
new message has been received.
SMS deliveries are routed directly to the user.
Class 3 SMS deliveries are routed directly to the user.
<bm>
<bfr>
No CBM, Cell Broadcast Message, is routed to the user.
If CBM, Cell Broadcast Message, is stored in modem, indication
of memory location is routed to the user using the
+CBMI<mem>,<index>.
SMS status disabled.
SMS status report enabled.
The results codes buffered in the modem are sent to the user
when mode 1…3 is entered.
The result code is cleared when mode 1…3 is entered.
Notes:
Result codes:
OK
ERROR
Message service failure result codes.
+CMTI<mem>,<index> indication that new messages has been
received.
+CBMI indication of new cell broadc ast
ME 820047 Issue 1.0
Page 24 03/00
Page 33

MM6854/64 Dual Band GSM Data Modem
5.1.40 AT+CPIN – Enter PIN and query blocks
This command is used to validate the PIN code, or to validate the PUK code.
Enter
AT+CPIN?
AT+CPIN=<puk>,<new_pin>
AT+CPIN=<pin>
Response
Displays the current status of the PIN code.
If PUK code is required. New_pin will be the new pin code for
the SIM card.
Enter the PIN code for the SIM card.
Notes:
Result codes:
OK
ERROR
+CPIN READY
+CPIN SIM PIN “Pin code required”
+CPIN SIM PUK “PUK code required”
+CPIN SIM PIN2 “Pin 2 code required”
Mobile equipment result code
5.1.41 AT+CR – Cellar result code for outgoing calls
AT+CR=?
5.1.42 AT+CRC – Cellar result code
This command controls whether or not the extended format of incoming call indication is used. When
enabled the modem will then send an extended string instead of the usual RING.
AT+CRC can have the value 0 or 1. If set to 0 the cellar result code will be disabled, and 1 will enable
the result code.
Enter
AT+CRC=?
Response
Displays the mode selected:
+CRING:ASYNC For asynchronous transparent
+CRING:REL ASYNC For asynchronous non-transparent
+CRING:SYNC For synchronous transparent
+CRING:REL SYNC For synchronous non-transparent
+CRING:VOICE For normal speech
+CRING:FAX For fax calls
Notes:
Result codes:
OK
ERROR
Issue 1.0 ME 820047
03/00 Page 25
Page 34

MM6854/64 Dual Band GSM Data Modem
5.1.43 AT+CRLP – Radio Link Protocol parameters
This command lets you change parameters for the radio link protocol, used only for NON-transparent
data transmission.
Enter
AT+CRLP=<up-window
size>,<down window
size>,<acknowledgement
timer>,<retransmissions
attempts>,<reset
allowed>,<re-sequencing
time>
AT+CRLP?
AT+CRLP=?
Response
Displays the current settings.
Displays the supported settings.
Notes:
Result codes:
OK
ERROR
None
5.1.44 AT+CSCA – Service centre address
This command shall be used to indicate to which service centre the message has to be sent.
The modem has no default value for this address. If a SMS is sent without having indicated the
service address, an error will be generated.
Enter
Response
AT+CSCA=”<sca>”
Where <sca>
AT+CSCA?
GSM 04.11 RP SC address address-values field string format.
Displays the current value.
Notes:
Result codes:
OK
ERROR
Message service failure result codes
None
5.1.45 AT+CSDH – Show test mode parameters
This command is used to determine if a detailed header information is shown in text mode result
codes.
Enter
AT+CSDH=0
AT+CSDH=1
AT+CSDH?
AT+CSDH=?
Response
Disable header information.
Enable header information
Displays the current value.
Displays the supported values
Notes:
Result codes:
OK
ERROR
Message service failure result codes
None
ME 820047 Issue 1.0
Page 26 03/00
Page 35

MM6854/64 Dual Band GSM Data Modem
5.1.46 AT+CSMP – Set text mode parameters
This command is used to select additional values, when a SMS is sent to the network, or placed in
storage, when text format.
Enter
AT+CSMP=<fo>,<vp>
Where <fo>
Where <vp>
Response
+CSMP<fo>,<vp>
The first octet of SMS-SUBMIT of GSM03.40
Validity period of the message in integer format.
Notes:
Result codes:
OK
ERROR
Message service failure result codes
None
5.1.47 AT+DR – Data compression report
This command is used to determine whether or not the intermediate result code of the current data
compression is reported after a connection set-up.
Enter
AT+DR=0
AT+DR=1
AT+DR?
AT+DR=?
Response
Disable reporting
Enable reporting
Displays the current value
Displays the supported values.
Notes:
Result codes:
OK
ERROR
+DR<type>
Where <type>
NONE Data compression is not used.
V42B Rec. V42bis for both directions
B42BRD Rec. V42bis for receive direction only
B42BTD Rec. V42bis for transmit direction only
None
Issue 1.0 ME 820047
03/00 Page 27
Page 36

MM6854/64 Dual Band GSM Data Modem
5.1.48 AT+DS – Data compression mode
This command is used to determine the possible data compression mode between the modem and
the compression negotiation with the remote modem after call set-up.
Enter
AT+DS=<p0>,<n>,<p1>,<p2
>
Where <p0>
0
1
2
3
Where <n>
0
1
Where <p1>
512 – 1024
Where <p2>
6 - 64
AT+DS?
AT+DS=?
Response
None
Transmit only
Receive only
Both directions, but allow negotiation
Allow negotiation of <p0> down
Don’t allow negotiation of <p0 down, disconnect if difference
Dictionary size
Maximum string
Displays the current value.
Displays the supported values.
Notes:
Result codes:
OK
ERROR
None
5.1.49 AT+FCLASS – Select, read or test service class
This command is used to toggle between fax and data commands.
Enter
AT+FCLASS=0
AT+FCLASS=1
AT+FCLASS?
AT+FCLASS=?
Response
Set to data mode
Set to fa x mode
Displays the current value
Displays the supported values
Notes:
Result codes:
None
None
5.1.50 AT+FMI – Report manufacturer ID
This command provides the name of the module manufacturer.
Enter Response
Notes:
Result codes:
OK
ERROR
None
ME 820047 Issue 1.0
Page 28 03/00
Page 37

MM6854/64 Dual Band GSM Data Modem
5.1.51 AT+FMM – Report module ID
This command provides the name of the module.
Enter Response
Notes:
Result codes:
OK
ERROR
None
5.1.52 AT+FMR – Report revision
This command provides the version of the module and the software creation date.
Enter Response
Notes:
Result codes:
OK
ERROR
None
5.1.53 AT+FRH – Receive HDLC data with carrier
Receive data with HDLC Framing. +FRH=n causes the modem to transmit data using HDLC protocol
and the modulation defined below. An ERROR response code results if this command is issued while
the modem is on-hook.
Enter
AT+FRH=<mod>
Where <mod>
3
Response
V.21 300bps
AT+FRH=?
Displays supported values
Notes:
Result codes:
OK
ERROR
None
5.1.54 AT + FRM – Receive data with carrier
Enter
AT+FRM=<mod>
Where <mod>
24
48
72
96
AT+FRM=?
Response
V.27 ter 2400bps
V.27 ter 4800bps
V.29 7200bps
V.29 9600bps
Displays supported values
Notes:
Result codes:
OK
ERROR
None
Issue 1.0 ME 820047
03/00 Page 29
Page 38

MM6854/64 Dual Band GSM Data Modem
5.1.55 AT+FTH – Transmit HDLC data with carrier
Transmit data with HDLC Framing. +FTH=n causes the modem to receive data using HDLC protocol
and the modulation defined below. An ERROR response code results if this command is issued while
the modem is on-hook.
Enter
AT+FTH=<mod>
Where <mod>
3
AT+FTH=?
Response
V.21 300bps
Displays supported values
Notes:
Result codes:
OK
ERROR
None
5.1.56 AT+FTM – Transmit data with carrier
Transmit data. +FTM=n causes the modem to transmit data using the modulation defined below. An
ERROR response code results if this command is issued while the modem is on-hook.
Enter
AT+FTM=<mod>
Where <mod>
24
48
72
96
Response
V.27 ter 2400bps
V.27 ter 4800bps
V.29 7200bps
V.29 9600bps
AT+FTM=?
Displays supported values
Notes:
Result codes:
OK
ERROR
None
5.1.57 AT+GMI – Request manufacturer ID
This command provides the name of the manufacturer, i.e. Maxon.
Enter Response
Notes:
Result codes:
OK
ERROR
None
5.1.58 AT+GMM – Request model ID
This command provides the model name, i.e. MM-6854.
ME 820047 Issue 1.0
Page 30 03/00
Page 39

MM6854/64 Dual Band GSM Data Modem
5.1.59 AT+GMR – Request revision ID
Enter Response
Notes:
Result codes:
OK
ERROR
None
5.1.60 AT+ICF – Character framing
This command is used to determine the start-stop (asynchronous) character framing that the modem
shall use.
Enter
AT+ICF=<format>,<parity>
Where <format>
1
2
3
4
5
6
Where <parity>
0
1
2
3
Response
8 data, 2 stop
8 data, 1 parity, 2 stop
8 data, 1 stop
7 data, 2 stop
7 data, 1 parity, 1 stop
7 data, 1 stop
Odd
Even
Mark
Space
AT+ICF?
AT+ICF=?
Displays the selected values
Displays the supported values
Notes:
Result codes:
OK
ERROR
None
Issue 1.0 ME 820047
03/00 Page 31
Page 40

MM6854/64 Dual Band GSM Data Modem
5.1.61 AT+IFC – Local flow control
This command is used to control the operation of local flow control between the modem and
equipment interfacing the modem.
Enter
AT+IFC=<DCE_DTE>,<DTE
_DCE>
Where <DCE_DTE>
1
2
3
4
Where <DTE_DCE>
0
1
2
AT+IFC?
AT+IFC=?
Response
None
Xon/Xoff local
RTS
Xon/Xoff global
None
Xon/Xoff local
CTS
Displays the selected values
Displays the supported values
Notes:
Result codes:
OK
ERROR
None
5.1.62 AT+ILRR – Display local report rate
This parameter setting determines whether or not an intermediate result code of local rate is reported
at connection set-up. The rate is applied after the final result code is transmitted to/ from the modem.
Enter
AT+ILRR=0
AT+ILRR=1
AT+ILRR?
Response
Disables reporting of local port rate
Enables reporting of local port rate
Displays the current selected value
Notes:
Result codes:
OK
ERROR
+ILRR<speed>
None
5.1.63 AT+IPR – Set terminal equipment data rate
This command is used to set the data rate between the modem and the interfacing equipment.
Enter
AT+IPR=<speed>
AT+IPR?
AT+IPR=?
Response
Where speeds supported are 300, 600, 1200, 2400, 4800, 9600,
19200, 28800, 38400, 57600
Displays the current selected values
Displays the supported values
Notes:
Result codes:
OK
ERROR
None
ME 820047 Issue 1.0
Page 32 03/00
Page 41

MM6854/64 Dual Band GSM Data Modem
5.1.64 CME ERROR<n>
<n>
0
3
4
10
11
12
13
16
26
30
5.1.65 CMS ERROR<n>
<n>
0 – 127
128 – 255
300
301
302
303
304
305
310
311
312
313
314
315
320
321
322
330
331
332
500
Phone failure
Operation not allowed
Operation not supported
SIM not inserted
SIM PIN required
SIM PUK required
SIM failure
Incorrect password
Dial string too long
No network service
GSM 04.11 values
GSM 03.04 values
ME failure
SMS service of ME reserved
Operation not allowed
Operation not supported
Invalid PDU mode parameter
Invalid text modem parameter
SIM not inserted
SIM PIN necessary
PH-SIM PIN necessary
SIM failure
SIM busy
SIM wrong
Memory failure
Invalid memory test
Memory full
SMSC address unknown
No network service
Network timeout
Unknown error
Issue 1.0 ME 820047
03/00 Page 33
Page 42

MM6854/64 Dual Band GSM Data Modem
5.1.66 S Register Summary
Register Function Default
S0
S1
S2
S3
S4
S5
S6
S7
S8
S10
S12
S0 Rings to auto-answer
Defines the number of rings before auto-answering an incoming call. Setting the S0 register to zero
will disable the auto answering.
S1 Ring counter
Contains the number of rings the modem has detected. The register is cleared when no rings occur
for 8 seconds, or when the value becomes equal to S0.
S2 Escape character
S2 contains the decimal value of the ASCII character used as the escape character. The default value
corresponds to an ASCII <+>. The value 127 disables the escape process.
Rings to auto answer
Ring counter
Escape character
CR character termination character
LF character
Backspace character
Pause before blind dialling
Wait time for carrier
Sets number of seconds to wait when comma dial modifier
encountered in dial string
Wait time before disconnection
Escape code guard time
Value
0
0
43
13
10
8
2
60
2
15
10
S3 CR character
Sets the command line and result code terminator character. Affects asynchronous operation only.
S4 LF character
Sets the character recognised as a line feed. Affects asynchronous operation only.
S5 Backspace character
Sets the character recognised as backspace. Affects asynchronous operation only.
S6 Pause before blind dialling
The value of this register is ignored.
S7 Wait time for carrier
After dialling, this register sets the time the modem must wait before hanging up if it fails to detect the
remote carrier. Time is in seconds.
S8 Wait time before dialling
Sets the number of seconds to wait when comma dial modifier encountered in dial string.
S10 Wait time before disconnection
Sets the number of tenth of seconds to wait before disconnecting after the modem has indicated the
absence of received line signal.
S12 Escape code guard time
Defines the maximum silence time, in fiftieths of a second, accepted between two characters in an
escape sequence.
ME 820047 Issue 1.0
Page 34 03/00
Page 43

MM6854/64 Dual Band GSM Data Modem
5.2 Summary
This section has listed all of the AT commands, which are used by the modem.
Issue 1.0 ME 820047
03/00 Page 35
Page 44

MM6854/64 Dual Band GSM Data Modem
ME 820047 Issue 1.0
Page 36 03/00
Page 45

MM6854/64 Dual Band GSM Data Modem
6 DEBUGGING & INDICATOR LIGHTS
The modem has a built-in indicator, which can show Red, Green or Yellow and flashes at different
speeds according to the status of the modem and battery.
RED: Not connected to the network, or low battery.
GREEN: Connected to the network.
YELLOW: Battery discharging.
Note
: In order to extend the battery life, the modem will discharge the battery once a month and then
recharge it to full capacity. This process takes around 30 minutes, during which time the modem is
not accessible. After around 45 minutes, the battery will be fully charged.
The indicator flashes with the following information:
Normal
In Service One Flash, Off, One Flash
Information
Missed calls, low battery, Two Flashes, Off, Two Flashes
SMS messages etc.
Alert
Incoming call Four Flashes, Off, Four Flashes
6.1 Summary
This section has described the indicator functions on the MM-6854 modem.
Issue 1.0 ME 820047
03/00 Page 37
Page 46

MM6854/64 Dual Band GSM Data Modem
ME 820047 Issue 1.0
Page 38 03/00
Page 47

MM6854/64 Dual Band GSM Data Modem
7 INSTALLATION
7.1 Introduction
This is an area, which is often overlooked and is, in fact, very important.
Cost and corner cutting are frequently observed in installations and, consequently, reliability suffers
and problems are seen.
We can only offer a few suggestions in this document, however, expert help is available from a
number of experienced installation companies. Knowledge of the vehicle in which the equipment is
being installed is inva lua b l e.
7.2 Antennas
The majority of GSM antennas do not require an additional ground plane. However, it is important that
any antennas are installed in the best possible location and, if necessary, provided with a suitable
ground plane.
The CA8401 antenna, which Maxon sell as an accessory, is designed for mounting inside of the
vehicle. This avoids any problems with car washes or vandalism. Mounting instructions are provided
with the aerial.
Ideally, multiple antennas should be separated by a minimum of a wavelength (at the lowest
frequency), whilst still retaining a good ground plane for each antenna. For instance, for a 400MHz
antenna, the ideal separation should be a minimum of 0.75m from any other antenna.
With the use of composite materials, especially on trucks, materials may have to be used to fabricate
a suitable ground plane, if required.
Note
: It is important that the antenna ground is not connected to the modem ground. This will not
happen where through-glass antennas are used. Antennas, which are through-chassis mounting and
connect to the vehicle chassis should not be used. Failure to observe this may result in damage to the
unit and will invalidate the warranty.
7.3 Power Sources
It is important that a “clean” source of power is used for the supply to the modem. Ideally, this is
achieved by taking the supply directly from the battery terminals. With modern vehicles, getting
access to the battery is very difficult and therefore alternative sources have to be found. The next best
source is the main fuseboard and then around the steering column.
Frequently, either a large voltage glitch, or total loss of voltage may be observed on some trucks at
start-up. The loss of voltage to the GSM data modem is avoided by the use of an internal battery.
It is recommended that star earthing is used for all connections to the –ve terminal of equipment. This
avoids the possibility of earth loops.
The power supply should be in the range of +9V to +28VDC.
Maxon can supply, as an accessory, a mains power supply which is capable of powering
MM-6854 modems. This power supply has the part number CA6823 and is a 12V, 1A power supply.
7.4 Fusing
It is strongly suggested that fuses for the data modem, and any associated equipment, are located in a
place away from the main fusebox. This is to avoid the possibility of the fuses being “borrowed” by the
driver for other uses.
A 500mA anti-surge fuse should be used for +12V powering or a 800mA anti-surge fuse used for
+24V powering.
Issue 1.0 ME 820047
03/00 Page 39
Page 48

MM6854/64 Dual Band GSM Data Modem
7.5 Cabling
Maxon provides a variety of accessories (see Section 8.4) which we recommend are used to interface
to the data modem.
The CA8360 interfaces the power and DTR line to the modem.
The CA8361 interfaces the RS-232 connection to the modem.
Alternative, custom made, cables can be produced to customer’s requirements for volume orders.
Please contact Maxon for further details.
The use of the correct cables removes the need for multiple connections and the possibility of the
wireman making an error.
If possible, run RF cables separately from other cables and keep RF cables apart from one another to
avoid interference / coupling.
7.6 Fixing
We recommend that the MM-6854 data modem is securely fixed to a surface, either directly, or with a
suitable bracket.
The fixing hole dimensions are shown below:
163mm
2 off holes 6.7mm dia.
Figure 7-1 - Fixing centres for MM-6854 modem
Note:
We do
ME 820047 Issue 1.0
Page 40 03/00
not
recommend that the data modem is fixed by cable ties to any wiring looms.
Page 49

MM6854/64 Dual Band GSM Data Modem
7.7 Connections
7.7.1 9 pin D-type (RS-232 Interface)
Pin Function
1 DCD
2TXD
3RXD
4DTR
5GND
6DSR
7RTS
8CTS
9RI
Table 7-1 - 9 pin D-type socket connections
7.7.2 25 pin D-type
Pin Function
1GND
2 Software update supply 5.2 to 7.2V
3 Software update programming voltage 0 – 5.2V
4 Software update serial data Rx 0 – 3 V
5 Software update serial data Tx 0 – 3 V
6 Reserved for future use
7 Reserved for future use
8 Reserved for future use
9 Reserved for future use
10 GND
11 Reserved for future use
12 Reserved for future use
13 GND
14 GND
15 Ignition (active low)
16 Power Supply (+9 to +28VDC)
17 Power Supply GND
18 Reserved for future use
19 Reserved for future use
20 Reserved for future use
21 Reserved for future use
22 Reserved for future use
23 Reserved for future use
24 Reserved for future use
25 Reserved for future use
Table 7-2 - 25 pin D-type plug connections
7.8 Summary
This section has briefly covered the installation of the MM-6854 data modem.
Issue 1.0 ME 820047
03/00 Page 41
Page 50

MM6854/64 Dual Band GSM Data Modem
ME 820047 Issue 1.0
Page 42 03/00
Page 51

MM6854/64 Dual Band GSM Data Modem
8 APPENDICES
8.1 Setting up Windows Modem interface
Follow these step-by-step instructions to set up the Windows Modem interface for use with TAPI
interface software (such as WinFax Pro).
8.1.1 Open up the Control Panel
8.1.2 Double click on the modem icon
Issue 1.0 ME 820047
03/00 Page 43
Page 52

MM6854/64 Dual Band GSM Data Modem
8.1.3 Highlight the don’t detect my modem box
8.1.4 Select the standard 19200 modem
ME 820047 Issue 1.0
Page 44 03/00
Page 53

MM6854/64 Dual Band GSM Data Modem
8.1.5 Select the appropriate COM port
8.1.6 Set the location information
Issue 1.0 ME 820047
03/00 Page 45
Page 54

MM6854/64 Dual Band GSM Data Modem
8.1.7 Finish Installation
8.1.8 Select Properties
ME 820047 Issue 1.0
Page 46 03/00
Page 55

MM6854/64 Dual Band GSM Data Modem
8.1.9 Select Connection
8.1.10 Set Data Bits, Parity and Stop bits
Select Advanced
Issue 1.0 ME 820047
03/00 Page 47
Page 56

MM6854/64 Dual Band GSM Data Modem
8.1.11 Select Flow Control and Software (XON/XOFF)
Note
: Some applications do not use Software Flow Control, therefore set flow control to Hardware.
In whichever case, the hardware or the software
must
provide flow control otherwise data will be lost.
8.1.12 RS-232
In order to turn on the modem, Pin 4 (DTR) must be pulled high. This pin will normally be high on a
PC COM port when the COM port is available.
ME 820047 Issue 1.0
Page 48 03/00
Page 57

MM6854/64 Dual Band GSM Data Modem
8.2 Setting up Hyper Terminal
Hyper Terminal is a very simple terminal package which can be used to send simple commands to /
from the modem.
8.2.1 Select Hyper Terminal from Programs Menu
Issue 1.0 ME 820047
03/00 Page 49
Page 58

MM6854/64 Dual Band GSM Data Modem
8.2.2 Select Hyper Terminal
Double click to open Hyper Terminal.
8.2.3 Select Properties
ME 820047 Issue 1.0
Page 50 03/00
Page 59

MM6854/64 Dual Band GSM Data Modem
8.2.4 Set Port
8.2.5 Port Settings
Issue 1.0 ME 820047
03/00 Page 51
Page 60

MM6854/64 Dual Band GSM Data Modem
8.2.6 Properties
Set Beep, if required.
8.2.7 ASCII settings
Append line feeds, send line ends and wr ap lines , if requ ir ed .
ME 820047 Issue 1.0
Page 52 03/00
Page 61

MM6854/64 Dual Band GSM Data Modem
8.3 Setting up Win Fax Pro
The following section illustrates how to set up Win Fax Pro. Other Fax software is available and this
section should not be taken as an endorsement of Win Fax Pro.
8.3.1 Communication Setup
Ensure that the computer modem settings are set to 19200,8,n,1, see Sections 10.1.9 and 10.1.10.
8.3.2 Win Fax Pro Setup
With Win Fax Pro Installed, setup the modem as follows:
Under Program Setup, select Properties
Issue 1.0 ME 820047
03/00 Page 53
Page 62

MM6854/64 Dual Band GSM Data Modem
Check Modem is Standard 19200, if not, go to 10.1.4. Select Properties
Check that the following setting are made:
ME 820047 Issue 1.0
Page 54 03/00
Page 63

MM6854/64 Dual Band GSM Data Modem
8.4 Accessories
Description of Accessory Maxon Part
5 metre Power Lead CA8360
9 way D-type Male to Female RS-232 Interface Lead CA8361
Dual-band GSM Antenna for in-vehicle mounting CA8401
12V 1 Amp Mains Power Supply fitted with Euro connector CA6823
Euro Connector to UK adapter ME440014
Number
Issue 1.0 ME 820047
03/00 Page 55
Page 64

MM6854/64 Dual Band GSM Data Modem
ME 820047 Issue 1.0
Page 56 03/00
Page 65

MM6854/64 Dual Band GSM Data Modem
9 GLOSSARY
Abbreviation Meaning
AT Hayes AT modem serial command set
commonly used for land line modems
CI Command Interpreter.
DTE Data Terminal Equipment
DTR Data Terminal Ready
GPS Global Positionin g S ystem
GSM Global System Mobile
I/O Input / Output
LED Light Emitting Diode
SIM Subscriber Identity Module
SMS Short Message Ser v ice
SMSC Short Message Service Centre
Issue 1.0 ME 820047
03/00 Page 57
 Loading...