

Maxon PC-50 Owner's Manual
PC-50
PERSONAL
COMMUNICATOR
Owner's Manual
English / Spanish / French

TABLE OF CONTENTS
Specifications 1
Product Description 2
Package Contents 2
Controls and Functions 3
Operating Instructions 6
Headset Operation 7
P-T-T Operation 8
VOX Operation 8
Warranty Service Instructions 9
Warranty Statement 10
Optional/Replacement 12
Accessories
Other Maxon Products 12

TABLA DE CONTENIDO
Controles y Funciones 3
Especificaciones 13
Descripción del Producto 14
Contenido del Paquete 14
Instrucciones de Operación 15
Operación de los Audifonos 16
Operación del Sistema P-T-T
(Presione para Hablar) 17
Operación del Sistema VOX
(Activado por la Voz) 17
Instrucciones para el Servicio
de Garantía 18
Garantía 19
Accesorios Opcionales
y de Repuesto 21
Otros Productos de Maxon 21

TABLE DES MATIÈRES
Commandes et Fonctions 3
Fiche Technique 22
Description du Produit 23
Contenu 23
Mode d’Emploi 24
Utilisation du Casque Combiné 25
Activation Manuelle (P-T-T) 26
Activation Automatique (VOX) 26
Instructions pour Réparations 27
Déclaration de Garantie 28
Accessoires Optionnels/de
Remplacement 30
Autres Produits Maxon 30

PC-50 SPECIFICATIONS
GENERAL
Channels: 5
Frequency Range: A - 49.830 MHz
B - 49.845 MHz
C - 49.860 MHz
D - 49.875 MHz
E - 49.890 MHz
Power Source: 3 AA Alkaline batteries
Dimensions: W x H x D 2-1/2" x 6" x 1-1/2"
Weight:
w/o headset: 8.2 oz.
with headset: 12.6 oz.
RECEIVER
Receiving System: FM Dual conversion
superheterodyne
Intermediate Frequency: 1st IF: 16 MHz,
2nd IF: 455 kHz
TRANSMITTER
Transmitting System: Manual push-to-talk or VOX
Output Power: 10,000 µV/ meter @ 3
Meters (FCC max.)
Modulation: FM (Frequency Modulation)
Specifications are subject to change without notice.
1

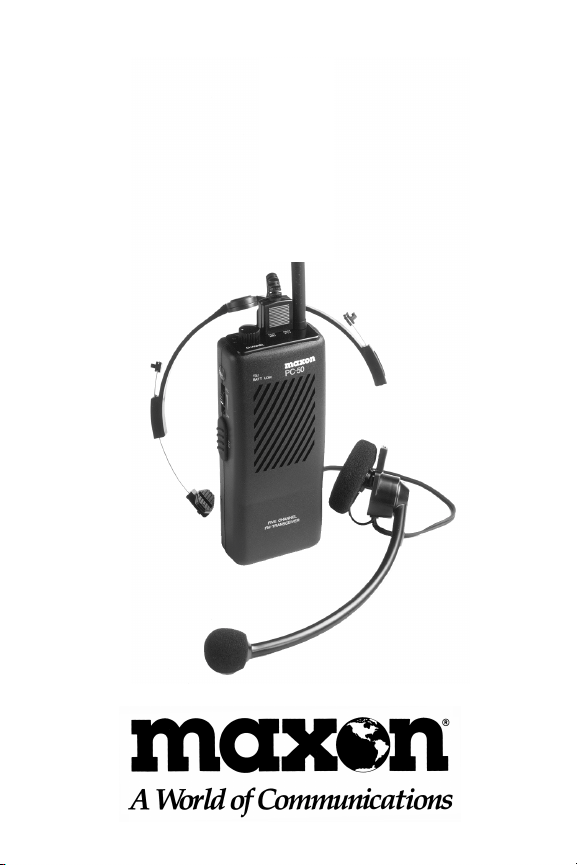
PRODUCT DESCRIPTION
Maxon’s PC-50 personal communicator is a five
channel, battery powered, 49 MHz FM two-way radio.
It is designed for general purpose indoor/outdoor use
with an average 1/4 mile operating range. It is completely compatible with all Maxon 49 MHz radios.
The controls and accessories are easy to use and the
PC-50 does not require an FCC license for operation.
The PC-50 transceiver can be utilized as a completely
portable handheld radio, or attached to a belt and
used with its specially designed headset with boom
microphone for hands-free VOX (voice operated)
operation.
Please take a few minutes to become familiar with
the features and operating instructions of your Maxon
PC-50 personal communicator.
PACKAGE CONTENTS
PC-50 Radio
Belt Clip
Rubber Duck Antenna (screw-in type)
Headset with Boom Microphone
Owner's Manual
2

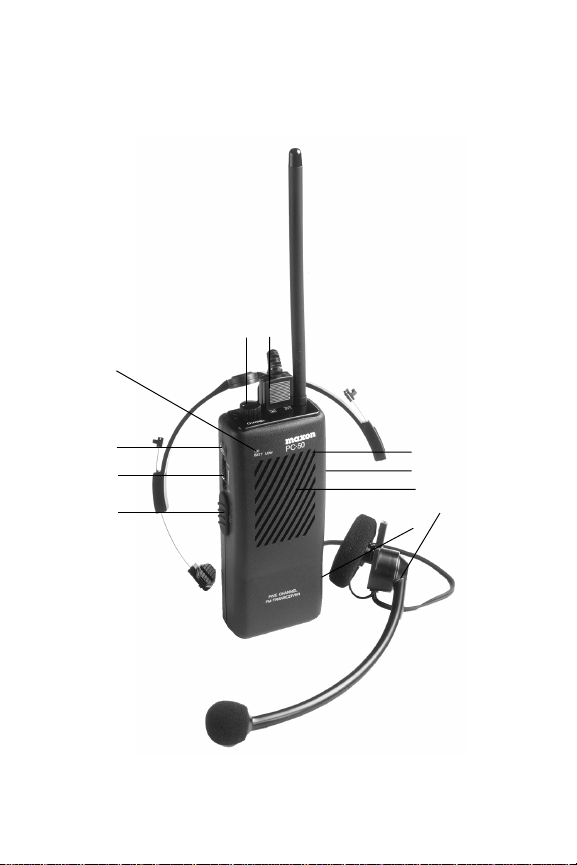
CONTROLS AND FUNCTIONS
CONTROLES Y FUNCIONES
COMMANDES ET FONCTIONS
A. Push-to-talk button - Push and hold to transmit (talk); release
to receive (listen) • Botón "presione para hablar" - Manténgalo
oprimido para transmitir (hablar); suéltelo para recibir (escuchar)
• Touche d’émission - Gardez enfoncée pour émettre (parler);
relâchez pour recevoir (écouter)
B. Power on/off-volume control - Turns power on/off and
adjusts volume level • Control de encendido/ apagado y volumen
- Enciende/apaga y ajusta el nivel de volumen • Interrupteur et
commande du volume - Allume/éteint l’appareil et permet de
régler le volume
C. Call Button - Used to transmit a 1 kHz tone signal to alert
second party you are calling • Botón de "Call" (llamada) - Se usa
para transmitir una señal de tono de 1 kHz para alertar a una
segunda persona que usted está llamado • Touche »Cal«l (appel) Utlisez cette touche pour transmettre un son de 1 kHz à l'autre
appareil et ainsi l'avertir que vous allez parler
D. TX/ Battery low LED indicator - Lights when Call or P-T-T
buttons are pressed. Will also light and stay on when battery
power is low • Indicadores LED TX y de battery low (batería
descargada) - Se iluminan cuando se presionan los botones de
Call o P-T-T. También se encienden y permanecen encendidos
cuando el voltaje de la batería cae por debajo del voltaje de
operación • Indicateur à LED TX et battery low - S'allume
lorsque la touche Call ou la touche d'émission est pressée.
S'allumera également lorsque le niveau de la pile tombe sous le
niveau de fonctionnement de l'appareil
E. Five channel selector knob - Used to select one of five
channels available • Botón selector de cinco canales - Utilizado
para seleccionar uno de los cinco canales disponibles • Molette à
cinq positions - Utilisez cette molette pour sélectionner le canal
désiré
3
EF
D
C
B
A
G
H
I
J
K
4

F. Headset / accessory jacks - Used to connect the headset or
Maxon’s optional WTA-9 ear speaker /microphone with remote
P-T-T • Enchufes de audífonos y accesorios - Se utiliza para
conectar los audífonos o el altavoz auricular/ micrófono opcional
WTA-9 de Maxon con botón remoto P-T-T • Prises pour casque/
accessoire - Utilisez ces prises pour raccorder le casque ou
l'écouteur-microphone WTA-9 de Maxon avec touche d'émission
à distance
G. Microphone - Used to transmit voice messages • Micrófono Usado para transmitir mensajes de voz • Microphone - Capte les
message à transmettre
H. VOX/P-T-T Control - Selects mode of operation (voice or
manual push-to-talk) and controls microphone sensitivity during
voice activated transmissions • Control VOX/ P-T-T - Con una
ruedecilla para mover con el pulgar se selecciona el modo de
operación (activado por voz o manual - presione para hablar) y se
controla la sensibilidad del micrófono durante transmisiones
activadas por la voz • Sélecteur activation par la voix/activation
manuelle - Utilisez la molette pour choisir le mode d’activation et
la sensibilité du microphone (activation par la voix)
I. Speaker - Used to produce clear sound • Altavoz Utilizasdo para producir un sonido claro • Haut-parleur - Sert à
rendre clairement les sons reçus
J. Headset with Boom Microphone • Audífonos con
micrófono de jirafa • Casque combiné avec microphone
réglable
K. Battery compartment - Houses three AA alkaline batteries
(batteries are not included) • Compartimiento de batería - Para
guardar tres baterías alcalinas AA (las baterías no estàn incluidas)
• Compartiment à pile - Accueille 3 piles alcalines AA (non
comprisres)
5

OPERATING INSTRUCTIONS
1) Install the PC-50’s antenna by turning it clockwise
until finger-tight into the antenna receptacle on the top
of the unit. Do not over-tighten.
2) Remove the battery cover and install three (3) new
AA alkaline batteries. When placing the batteries in the
PC-50, the bottom (-) (flat side), of the battery rests on
the spring, and the battery’s top (+) touches the battery
contact bar.
3) Turn the power on/off-volume control dial clockwise to a midway point to power the unit and set the
volume.
4) Move the channel selector knob to the desired
channel (A - E) to communicate with other 49 MHz
radio users on the same channel.
5) Use the Call button to send a 1 kHz tone signal
to alert second party you are calling. The red LED
will light when the button is pushed, indicating
the PC-50 is transmitting.
6) Hold the PC-50 about 2-3 inches from your mouth,
press the P-T-T button and speak into the microphone
to transmit. The red LED will light to indicate the
PC-50 is transmitting. Release the P-T-T button to
receive incoming signals.
NOTE: When transmitting (the P-T-T button is pressed)
you will override incoming signals. You will not be able
to receive a message when transmitting and you could
interrupt an incoming message if you accidently key
your P-T-T button.
6

HEADSET OPERATION
Note: If using the PC-50 as a belt worn radio with the
headset, range will average 1/8th mile or more. When
using the PC-50 as a handheld radio, range will
average 1/4th mile or more.
1) The PC-50 is supplied with a detachable headset
with boom microphone for hands-free operation.
2) Remove the headset from the box and plug the
two-prong connector into the two jacks on top of
the PC-50.
Note: The diameter and length of each prong
varies slightly. Match them to the jacks for correct
connection.
3) Adjust the headband to a comfortable fit, the ear
speaker pad should fit snugly in the center of your ear.
Adjust the boom microphone to a point about an inch
away from your mouth.
4) Follow all instructions under the Operating
Instructions section to install the batteries and antenna.
5) Turn the power on and set the volume to a
midway point.
6) Move the channel selector knob to the desired
channel (A - E) to communicate with other 49 MHz
radio users on the same channel.
7
 Loading...