

Page 1
MYSTIC
INSTALLATION
PROPER INSTALLATION IS IMPORTANT. IF YOU NEED ASSISTANCE, CONSULT A CONTRACTOR, ELECTRICIAN
OR TELEVISION ANTENNA INSTALLER (CHECK WITH YOUR LOCAL BUILDING SUPPLY, OR HARDWARE STORE
FOR REFERRALS). TO PROMOTE CONFIDENCE, PERFORM A TRIAL WIRING BEFORE INSTALLATION.
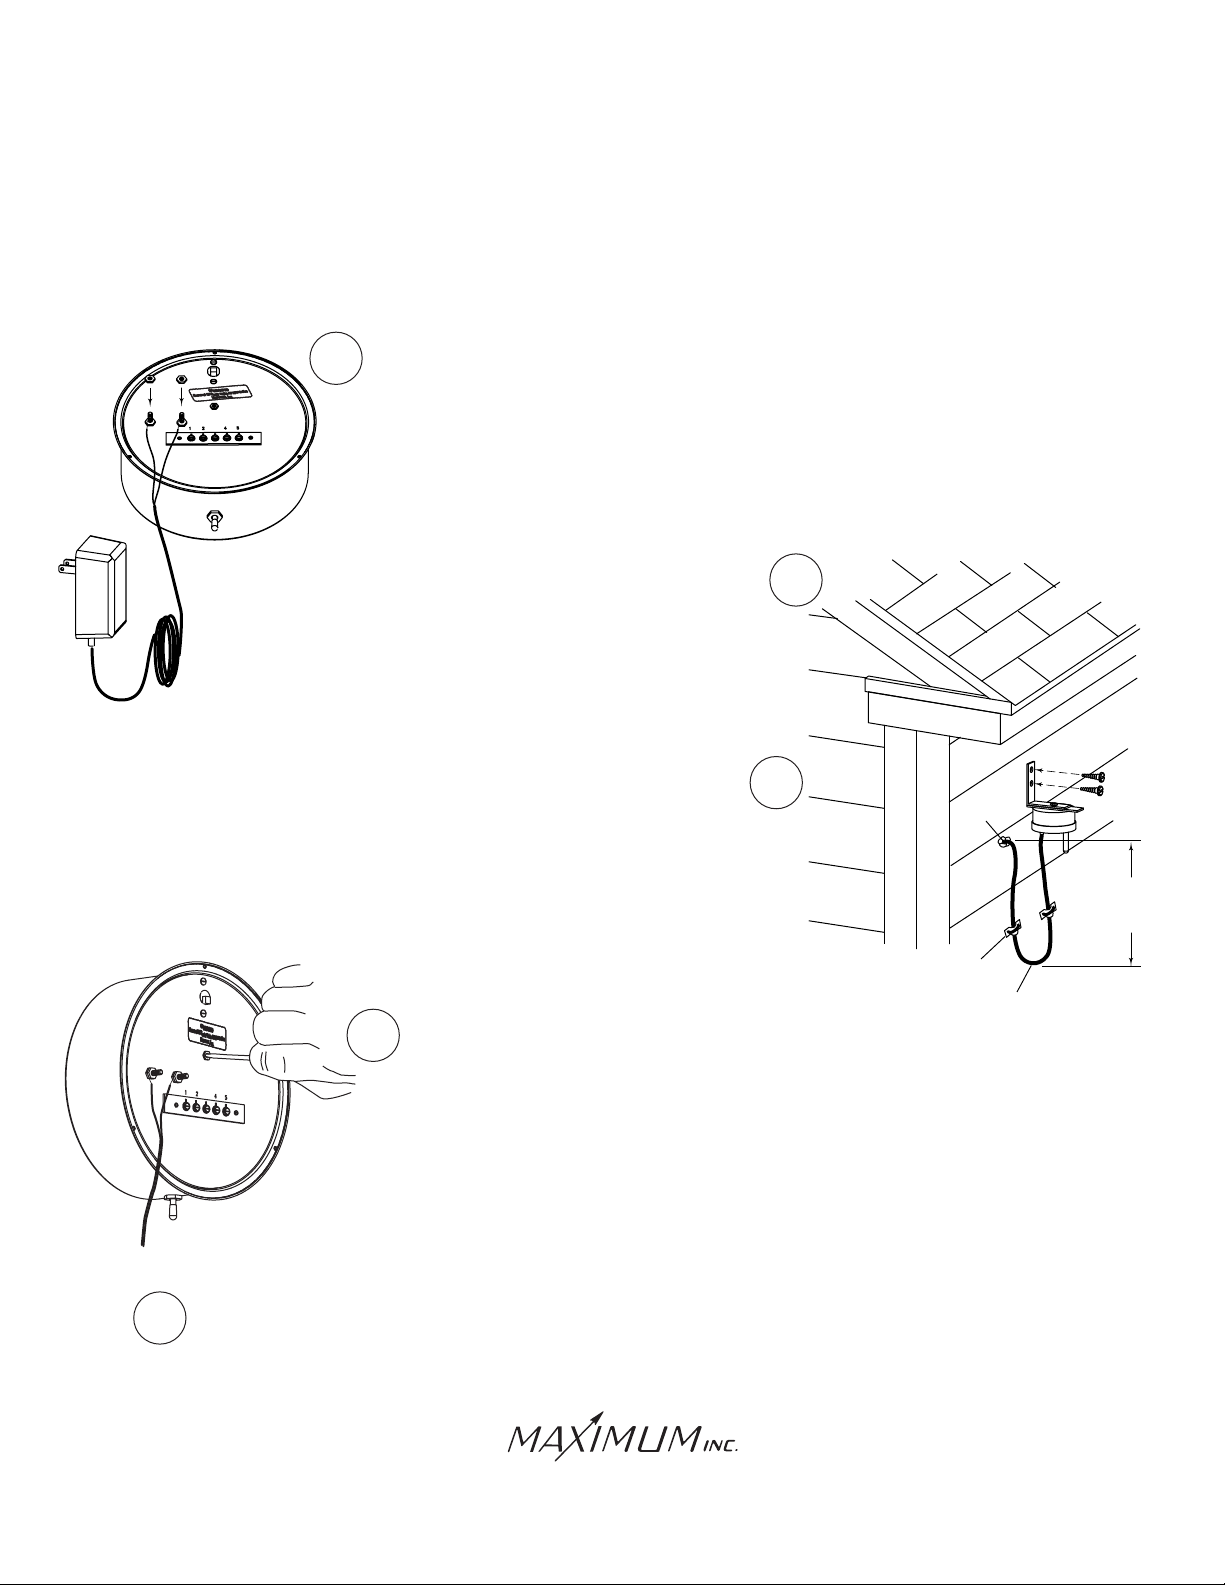
Connect the AC adapter to Mystic and plug into outlet. The display will
1
briefly light up all the indicator lights (self test) and then will show the
barometer function light and the center display will show a pressure
reading. Leave the instrument in this mode for two hours. Do not
activate the switch at the bottom of the case in any way. At the end
of the two hour wait Mystic will be ready to have the pressure adjustment
performed. The temperature sensor can be installed during this wait.
Mount the temperature sensor assembly with the two
large wood screws. Select a location that is protected
from direct sunlight and sheltered from rain and physical
damage. (A north exposure, six feet above the ground
will give the best results.)
Form a drip loop with the wire at least eight inches
below the exit from the sensor and at least eight inches
below the point of entry into the building. Anchor any
exposed wire with insulated cable clips. Run the wire
through the building to the location where the indicator
will be located. Caulk any holes when done.
4
If two hours has elapsed since Mystic was plugged in, the barometer can
now be calibrated for your location. Obtain the current barometric pressure
for your area by calling a near-by airport or an individual who has a properly set
barometer. Insert a small screw driver into the recessed slotted screw at the back
of Mystic. Turn the screw while observing the pressure read out on the front of
Mystic. Due to the sensitivity of this adjustment, the numbers on the display
may fluctuate during this procedure. It may take a minute to achieve the exact
setting.
3
2
CAULK
8"
MIN
CABLE
CLIP
DRIP
LOOP
Unplug the AC adaptor and disconnect the wires. Mystic is now ready for the final installation.
5
The adjustment that you have made will always remain intact.
Samuel Barnett Boulevard
New Bedford, MA 02745
(508) 995-2200
Page 2
OPTIONAL PANEL
MYSTIC
INSTALLATION (CONT.)
CABLES FROM AC ADAPTER
AND TEMPERATURE SENSOR
WALL
6
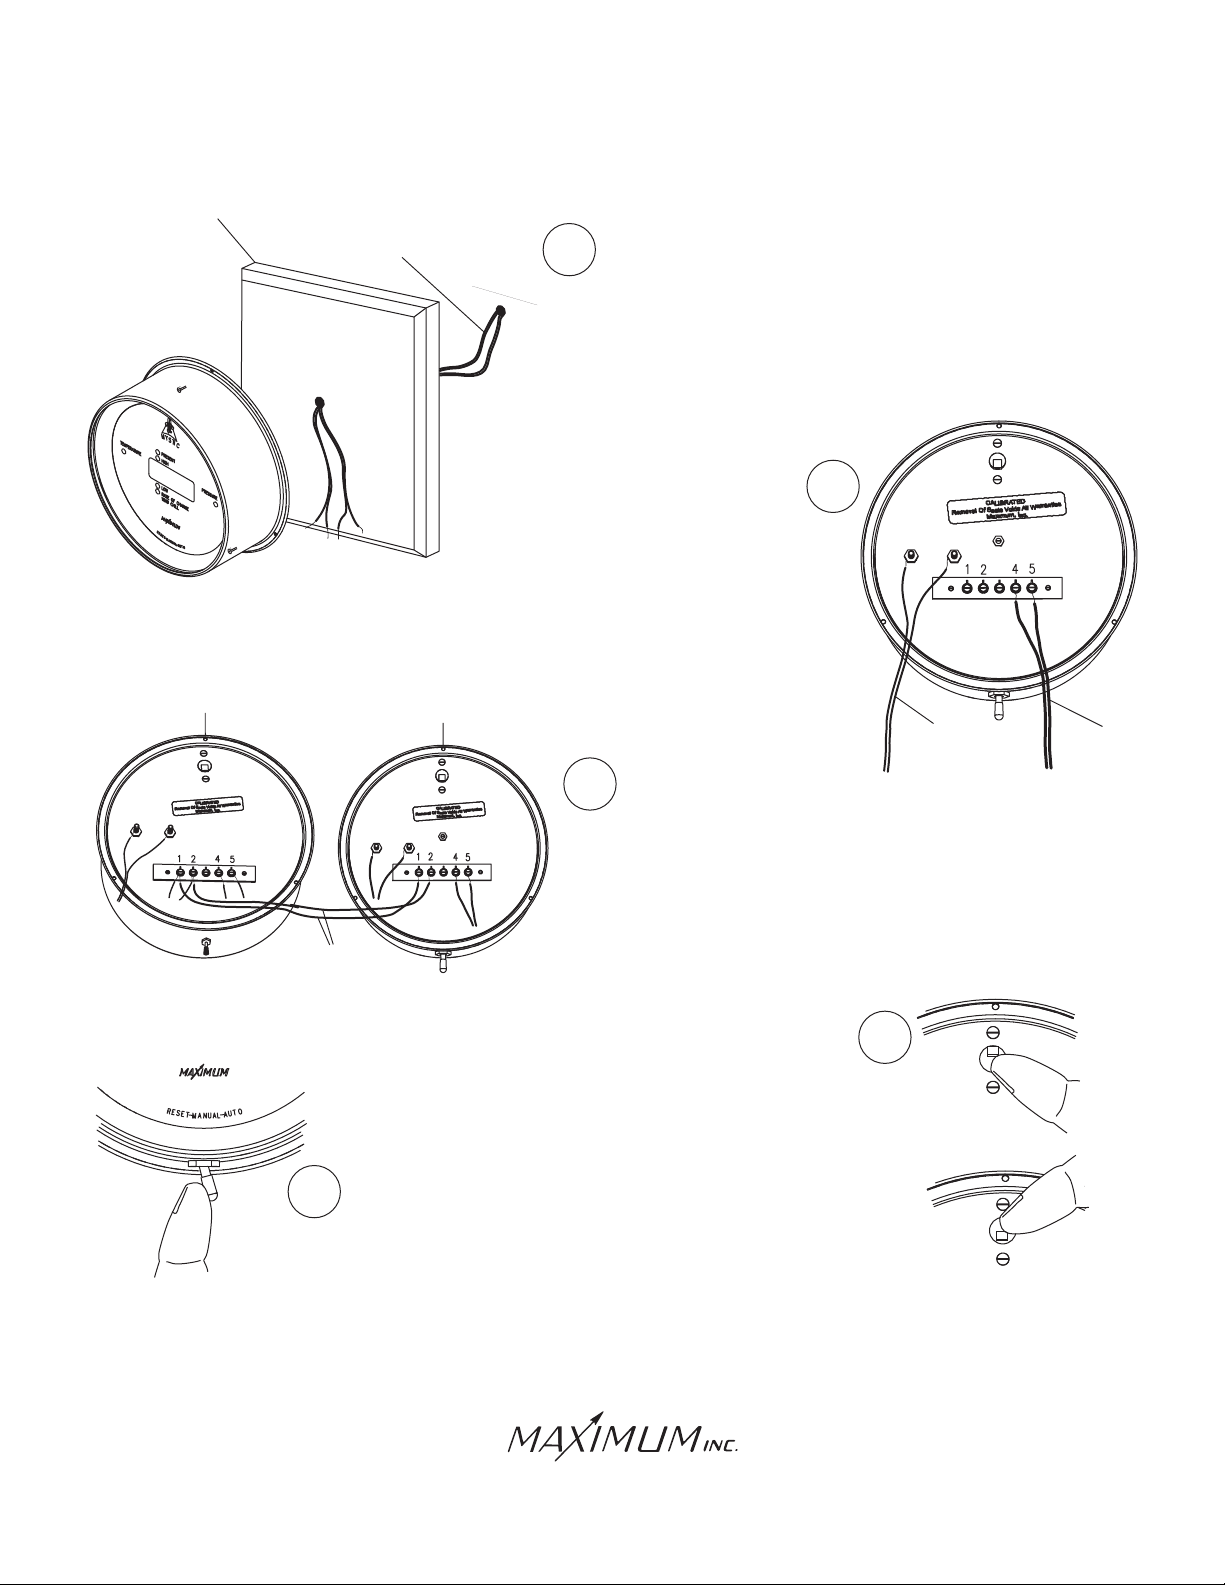
Feed the cables from the AC adapter and the temperature
sensor through the wall to Mystic. We recommend using one
of our pre-drilled panels for mounting Mystic. Take precautions
to avoid crimping the wires under the lip of the brass readout.
Connect the AC adapter wires with
the hex nuts. The polarity does not
matter. Connect the two wires from
the air-temperature sensor to
terminals 4 and 5. Again, the polarity
does not matter.
7
UNLATCH
NORMAL
MERLIN
UNLATCH
NORMAL
MYSTIC
UNLATCH
NORMAL
8
If you own a Merlin, connect the jumper wire (supplied)
to terminals #1 and #2 on Merlin. There will now be two
wires connected to terminals #1 and #2. Connect the
other end of the jumper wires to terminals #1 and #2 of
Mystic. Note that terminal #1 of Merlin connects to
JUMPER WIRE
CONNECTING
MERLIN AND MYSTIC
terminal #1 of Mystic and #2 connects to #2.
IMPORTANT: (a) Plug in the AC adapter
(b) Set the switch on the back of
Mystic to the UNLATCH position
(c) Wait 15 seconds
(d) Set switch to NORMAL
10
Mystic will power up and self test briefly then the center display
will show the pressure adjustment mode. You must exit the
adjustment mode by moving the switch to Auto and releasing it.
CABLE FROM
AC ADAPTER
9
CABLE FROM
TEMPERATURE
SENSOR
UNLATCH
NORMAL
UNLATCH
NORMAL
NOTE: After any full reset, Mystic will display the pressure adjustment mode. It is never necessary to
perform the pressure adjustment again. Simply exit this mode by moving the switch to Auto and
releasing it.
Samuel Barnett Boulevard
New Bedford, MA 02745
(508) 995-2200
Page 3
MYSTIC
OPERATION
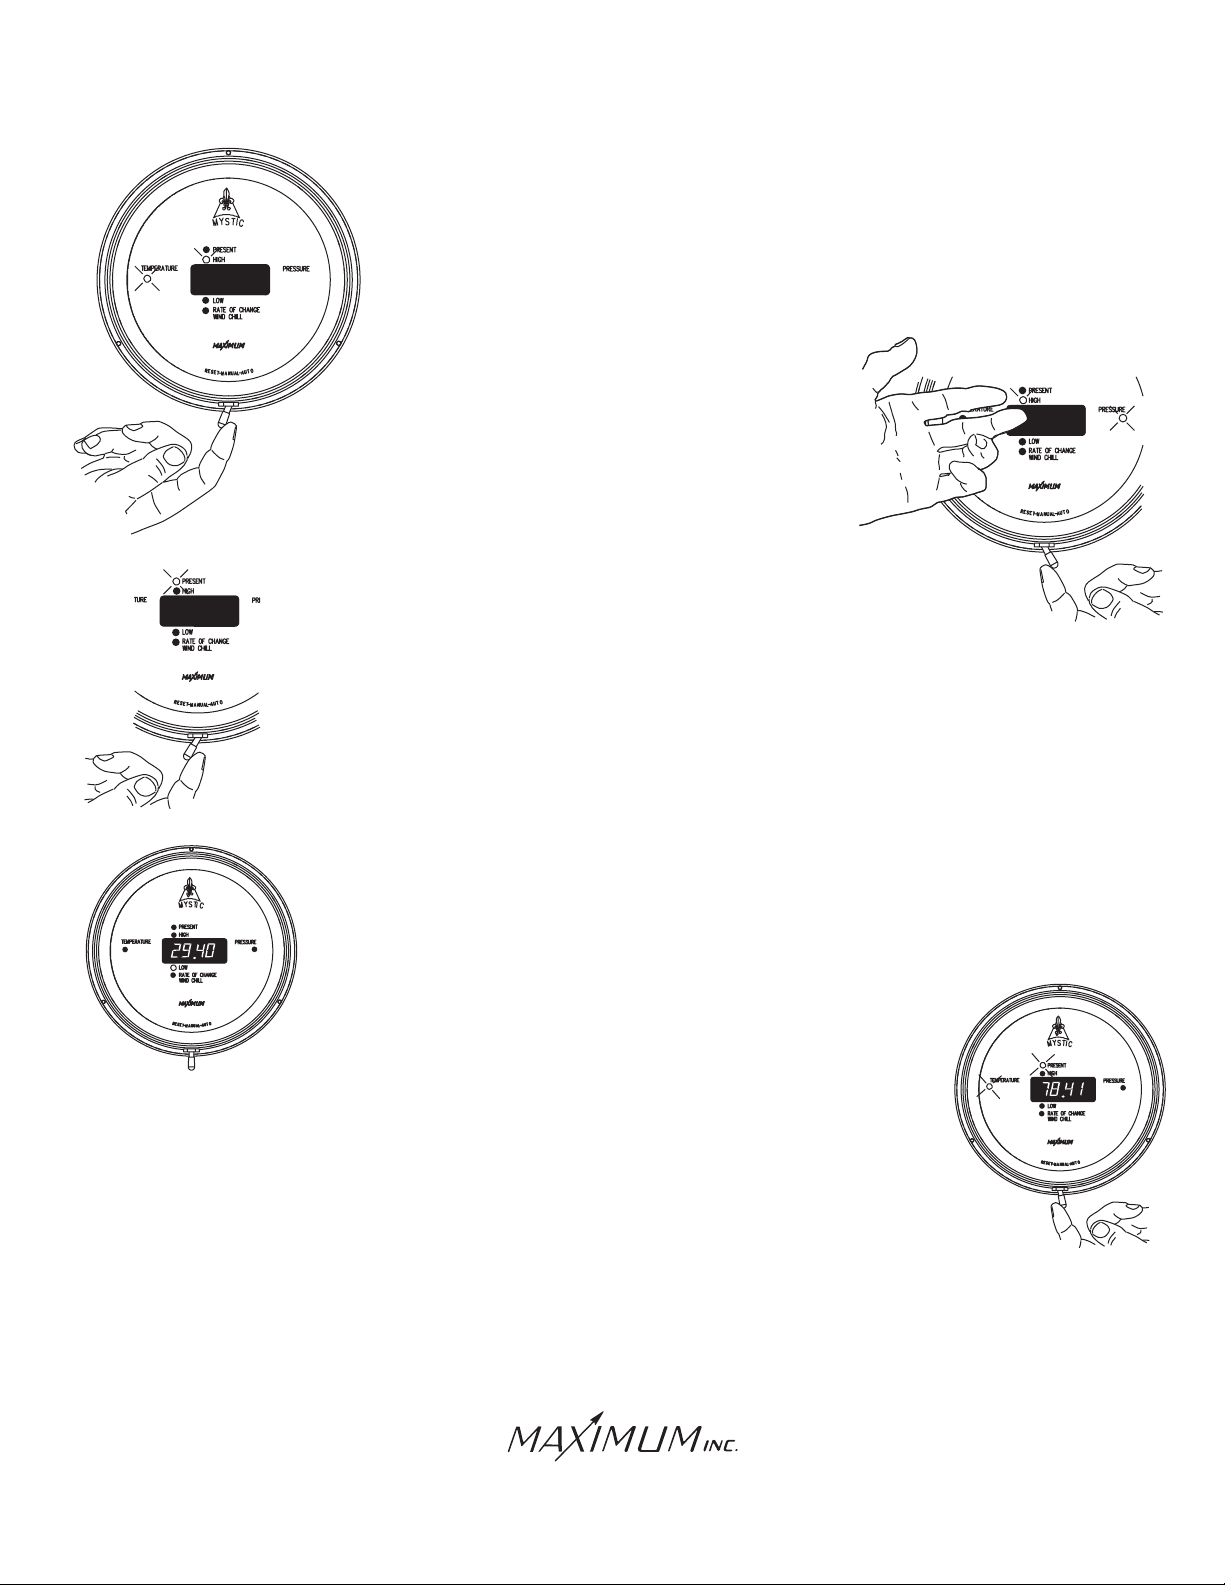
The memory within Mystic can be cleared by moving the bottom switch to
RESET and holding it there for six seconds. The display quickly blanks
indicating that the current functions memory is being erased.
By pushing the switch to AUTO one push at a time, you
can arrive at the function data that you selectively wish
to erase. Observe which funcition light is lit (pressure
or temperature). Also check which of the two memories
(high or low) you choose.
A "FULL" reset is achieved by holding the switch to RESET for six
seconds or more only when Mystic is on present. The display will
self-test. Exit the altitude adjustment mode by then moving the
switch to AUTO and releasing it.
NOTE: After any "FULL" reset, temperature and or wind chill data will be displayed and
stored after ten seconds. Pressure data will be displayed and stored after two minutes.
However, R.O.C./Pressure will show "HOLD" for 72 minutes following a "FULL" reset.
When the switch is in the center position Mystic will display the information
that is idicated by the function light. All the other functions data are being
recorded and stored.
Moving the switch to the right and allowing it to return will toggle Mystic
to the next function. This will be indicated by the illuminated function
light. Keep moving the switch to the right until the light for the function
that you wish to observe is illuminated.
Moving the switch to the right and holding it for at least three seconds
will put Mystic into its Auto sequencing mode. You will see each function
light stay on and that particular information displayed for approximately
four seconds and then move to the next function automatically.
If Mystic is Auto sequencing and you wish to observe the information for
longer than the display period - move the switch to AUTO and release it.
You can then manually step through the functions as previously mentioned.
Samuel Barnett Boulevard
New Bedford, MA 02745
(508) 995-2200
Page 4
MYSTIC
IMPORTANT FACTS ABOUT YOUR MYSTIC
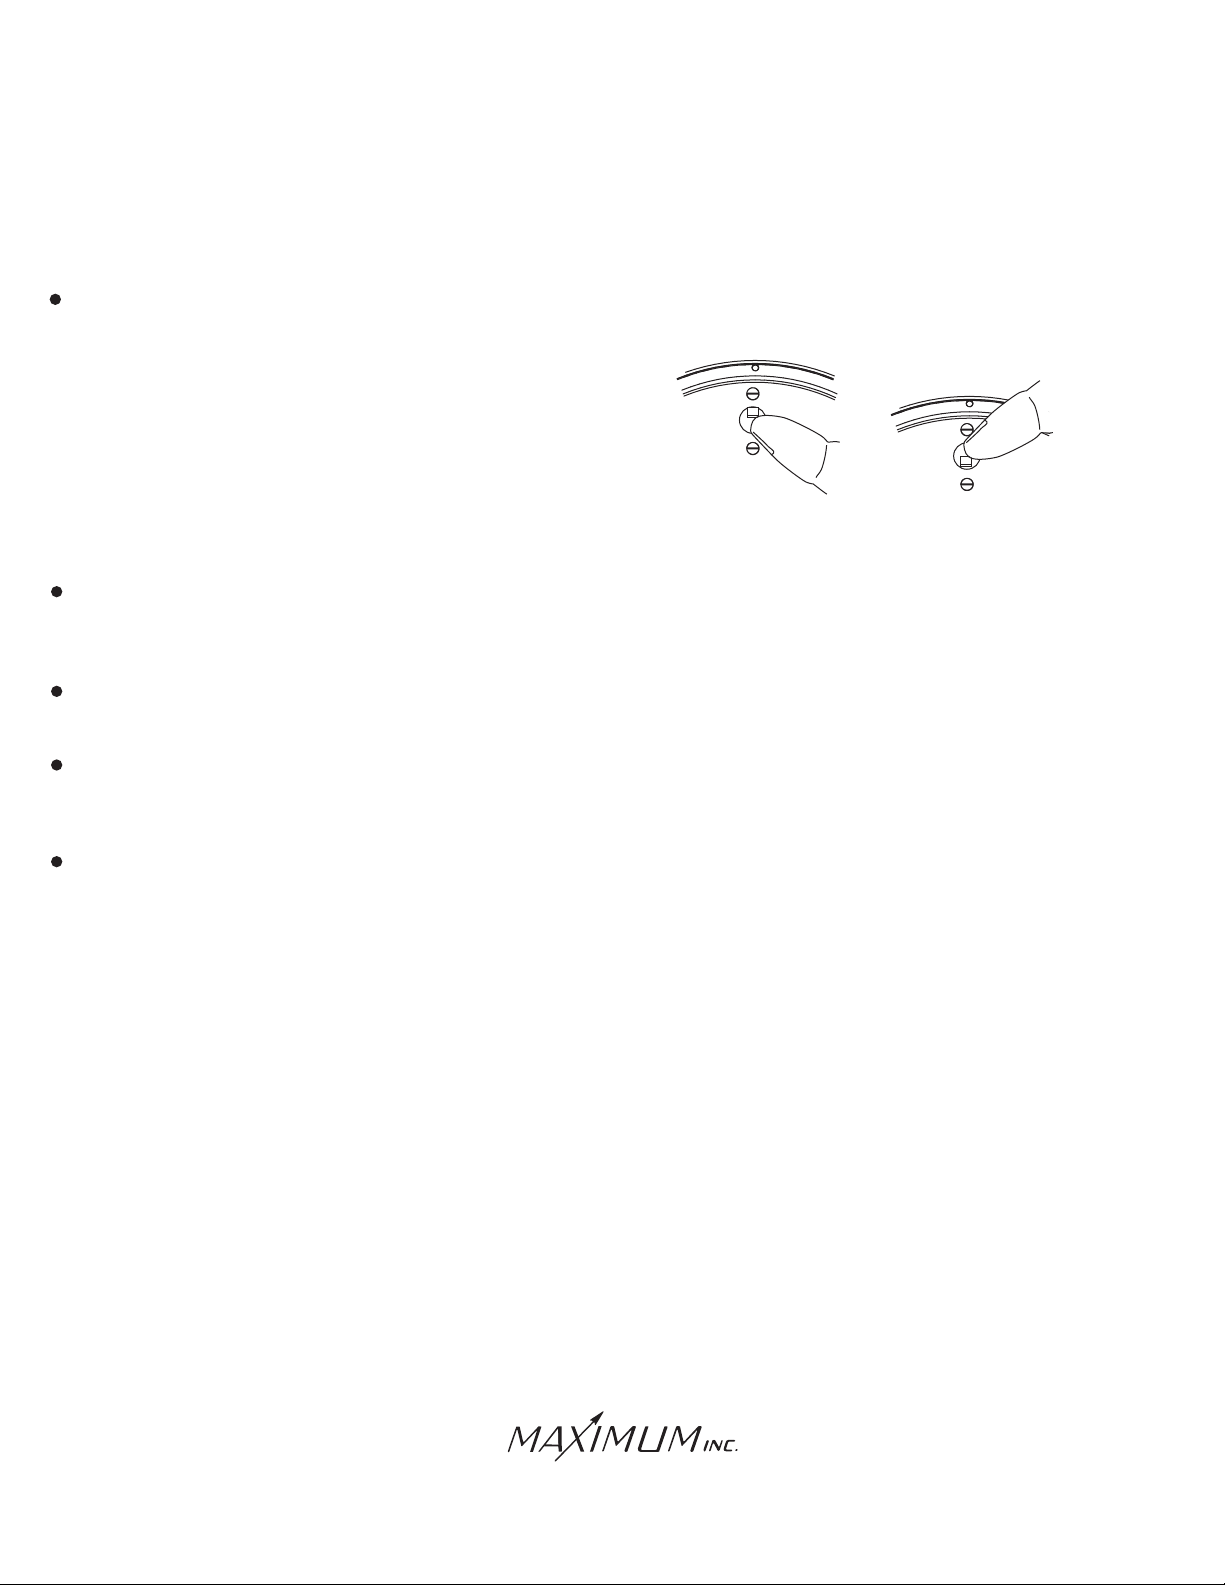
Latch Up- Power Line disturbances, improper powering up or an error in wiring can cause a blank or
improper display reading. If MYSTIC is "latched up" in this way proceed as follows:
1. Remove the Brass Indicator from the wall or panel.
2. Set the switch on the back of the indicator to the
UNLATCH position.
3. Wait 15 seconds.
4. Set switch to NORMAL
5. Remount Indicator on wall or panel.
During long power outages MYSTIC's display will blank out and the instrument will not continue to
accumulate data. It will preserve the previously accumulated data for up to 15 hours.
Moving the switch to Auto does not erase stored information.
UNLATCH
NORMAL
UNLATCH
NORMAL
You do not need to time the 6 second reset time. Mystic will blank out the display to indicate that the
memory has been erased.
Mystic has been tested and found to comply with the limits for a Class B digital device, pursuant to
Part 15 of the FCC Rules. This means that Mystic produces a minimum of radio frequency radiation.
If Mystic does produce interference to radio or television reception try moving the radio or television
to a different location or plugging it in to a different AC outlet.
Samuel Barnett Boulevard
New Bedford, MA 02745
(508) 995-2200
Page 5
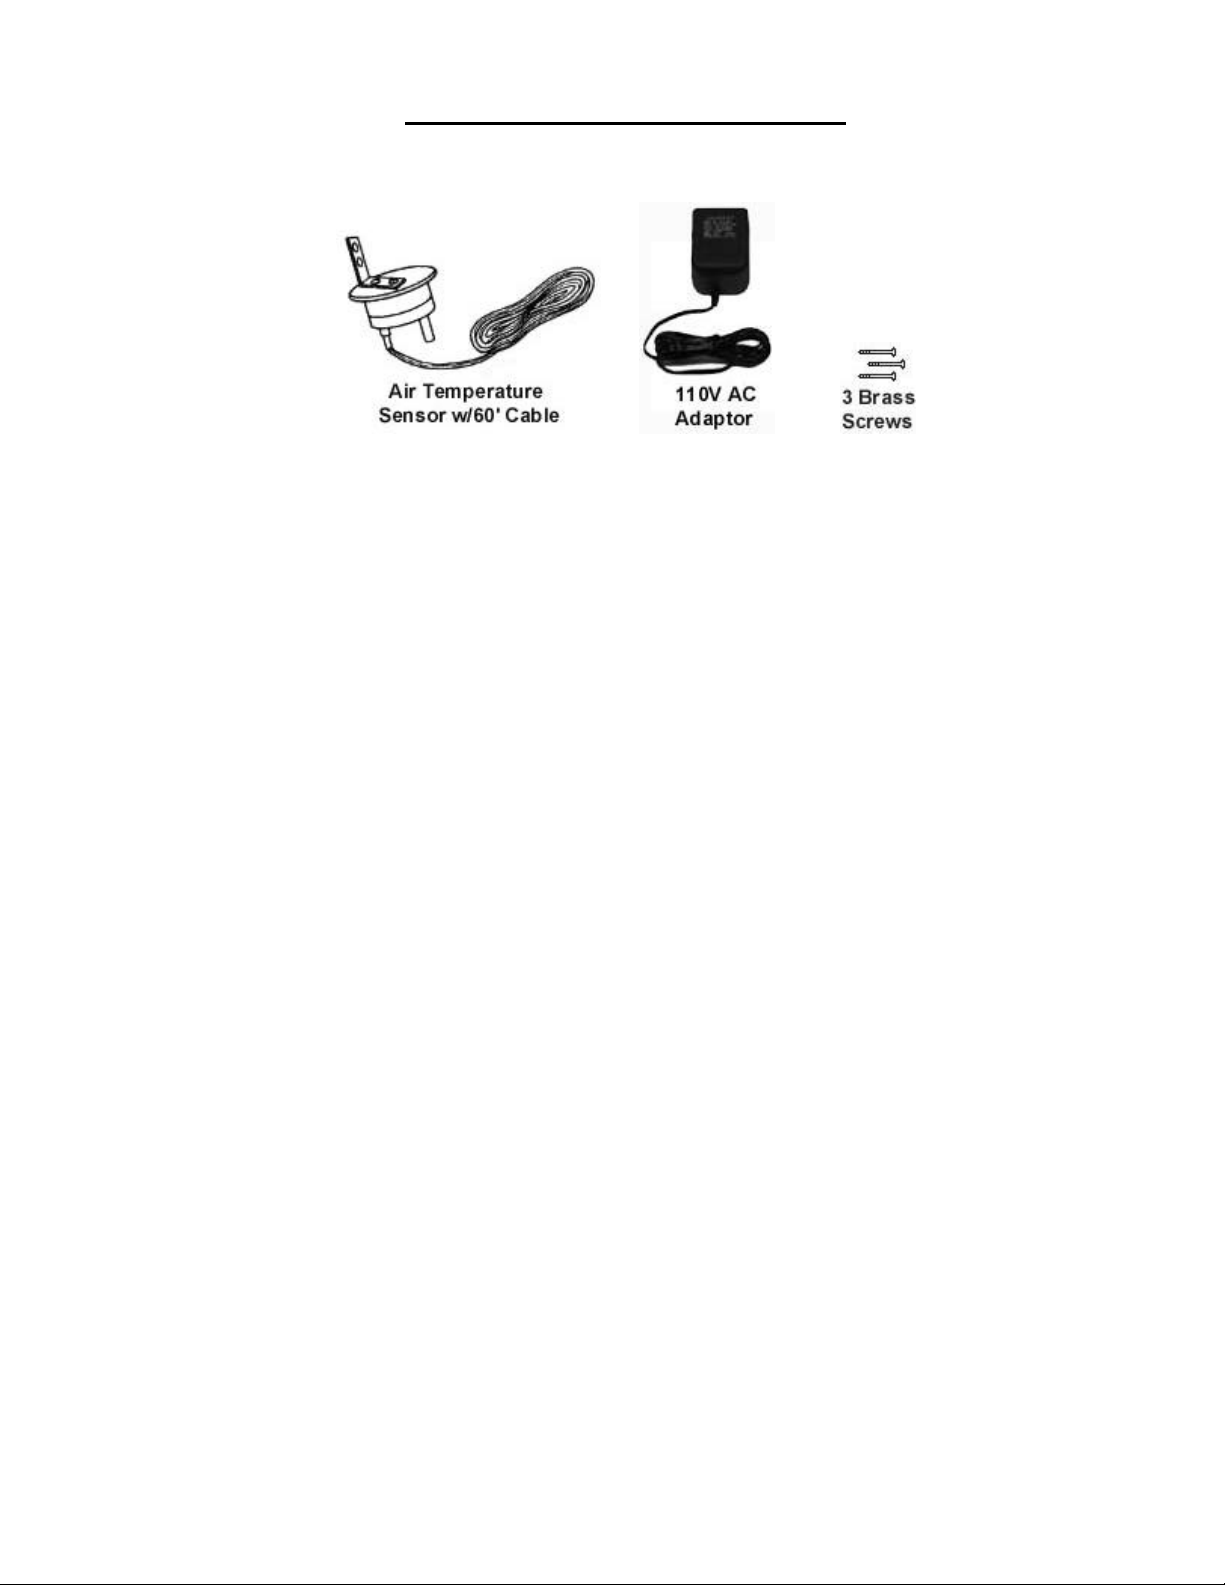
IMPORTANT ADDITIONAL INFORMATION
Components: Along with the indicator, the following components are included with this instrument:
AC Adaptor: This instrument requires its own AC Adaptor. Due to the various power
requirements of each Maximum instrument, attempting to run more than one instrument on a single
adaptor could cause improper operation and/or damage to the instrument(s) thereby voiding your
5-year warranty.
Brass Case: Your brass case is solid brass A70-30 Holloware quality, with a durable lacquer
finish. It is in fact a piece of jewelry and should be treated as such. It should be cleaned at least
once a week to keep airborne pollutants (dust, etc…) and any moisture from collecting on the case
thereby attacking the lacquer. At no time should you use an abrasive cleaner or cloth on the brass
case. Simply use a soft cloth or soft paper towel with a mild glass cleaner to wipe the case clean.
If your instruments are in a summer home, and you are not able to clean them regularly, simply lay
a small cloth or towel across the top two -thirds so that dust cannot settle on the finish.
Specifications: All instrumentation or measuring devices have accuracy tolerances and
specifications. Making comparisons between different pieces of equipment is appropriate provided
the specified accuracies of both are known.
Measurement Range Guaranteed Accuracy
Temperature (Indicator) -30 to 120°F ±1.5°F
Temperature (Sensor) ±.5°C., 1°F
Barometric Pressure 27.5 – 31.5 Inches of Hg ±0.08 Inches of Hg
 Loading...