

Page 1
CHIMNEY MOUNT
INSTALLATION
PROPER INSTALLATION IS IMPORTANT. IF YOU NEED ASSISTANCE, CONSULT A CONTRACTOR,
ELECTRICIAN OR TELEVISION ANTENNA INSTALLER (CHECK WITH YOUR LOCAL BUILDING SUPPLY,
OR HARDWARE STORE FOR REFERRALS).
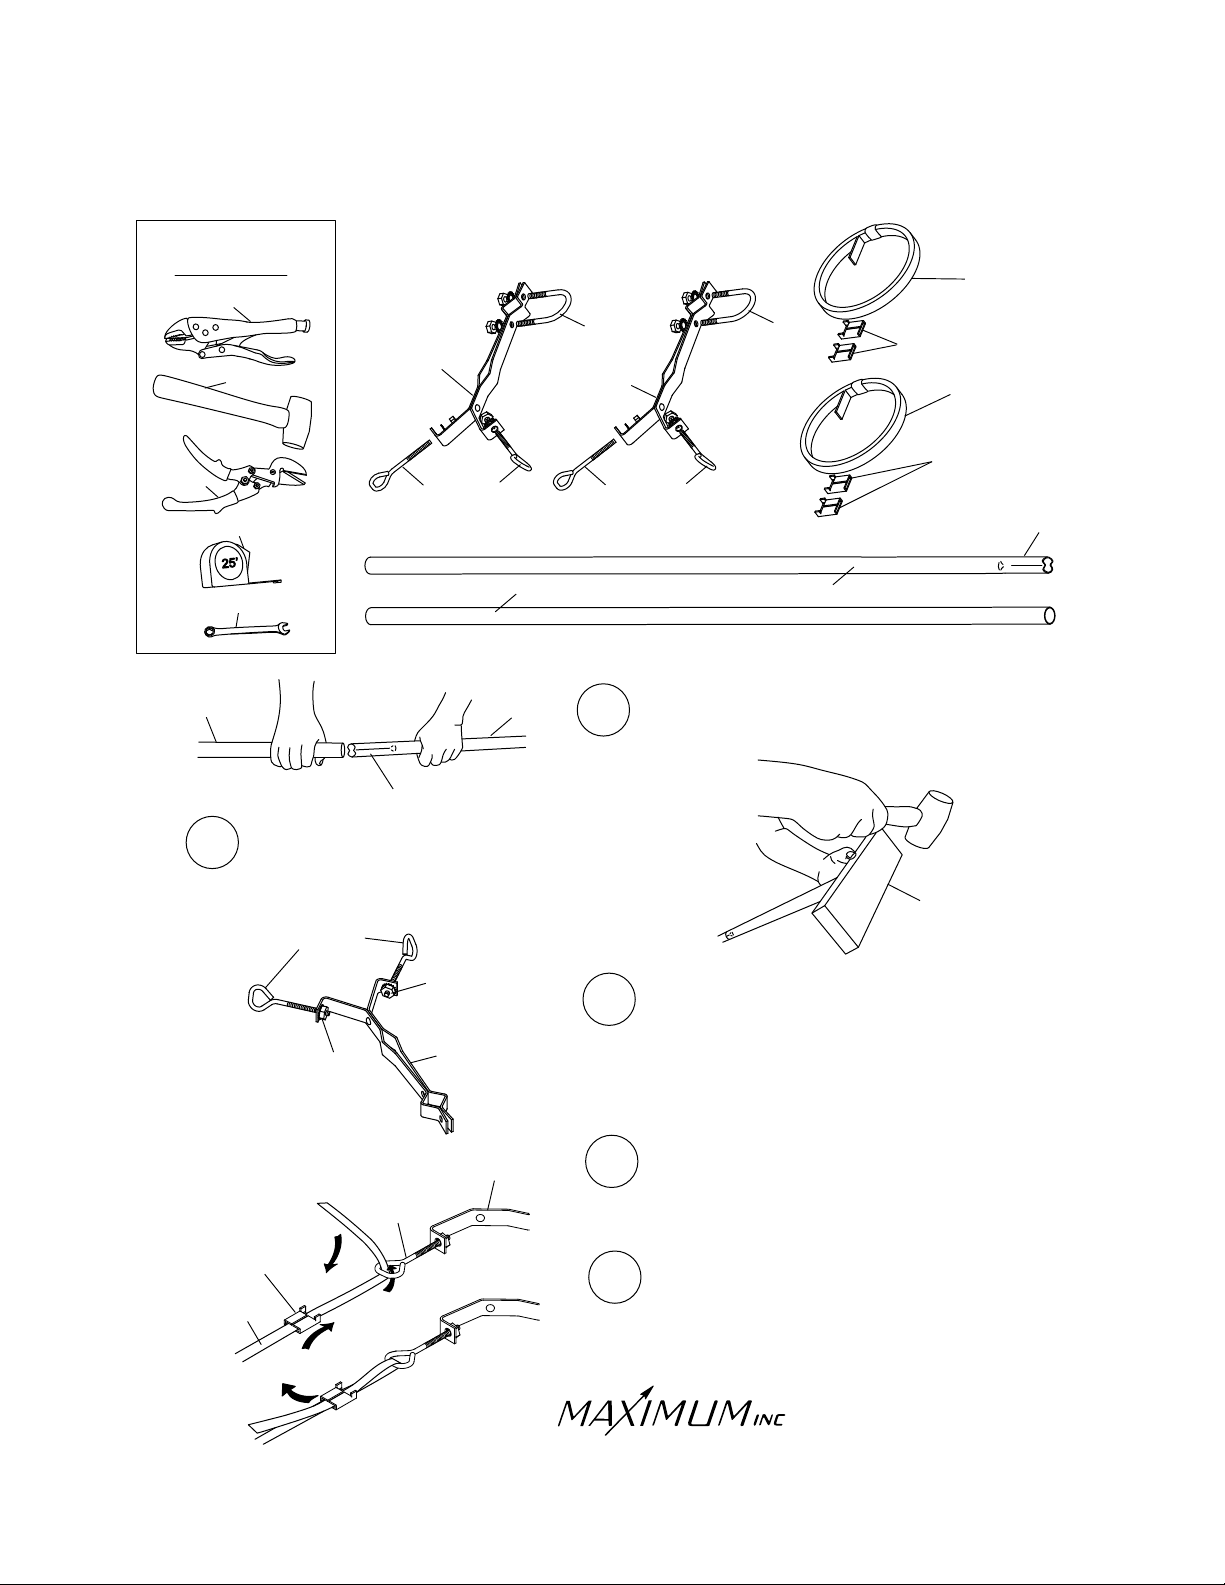
TOOLS
REQUIRED
VISE GRIPS
STAINLESS STEEL
STRAP
HAMMER
TIN
SNIPS
TAPE MEASURE
7/16” WRENCH
7/16”
MAST B
2
Tap the two sections together with a hammer.
A piece of wood will protect the end from
damage.
STRAP
CLIP
STRAP
SWAGED END
STRAP
BOLT
LOCK
WASHER
& NUT
CHIMNEY
BRACKET
STRAP
BOLT
STRAP
BOLT
MAST A
LOCK
WASHER
& NUT
CHIMNEY
BRACKET
CHIMNEY
BRACKET
U-CLAMP
CHIMNEY
BRACKET
MAST B
U-CLAMP
STAINLESS STEEL
STRAP
STRAP CLIPS
1
STRAP
BOLT
MAST A
Slip the swaged end of mast A into the
SWAGED
END
round end of mast B.
WOOD BLOCK
3
Insert all four strap bolts into chimney bracket holes,
securing approximately 1/4" thru external lock
washers into nuts. *Do not tighten any further
at this time*.
4a
Feed the strap through a strap clip as shown and
up through the strap bolt.
4b
Bend the strap and insert it back through the strap
clip.
30 Samuel Barnet Blvd.
New Bedford, MA 02745
(508) 995-2200
Page 1
Page 2
CHIMNEY MOUNT
INSTALLATION
CHIMNEY
BRACKET
STRAP
CLIP
STRAP
STRAP
BOLT
5
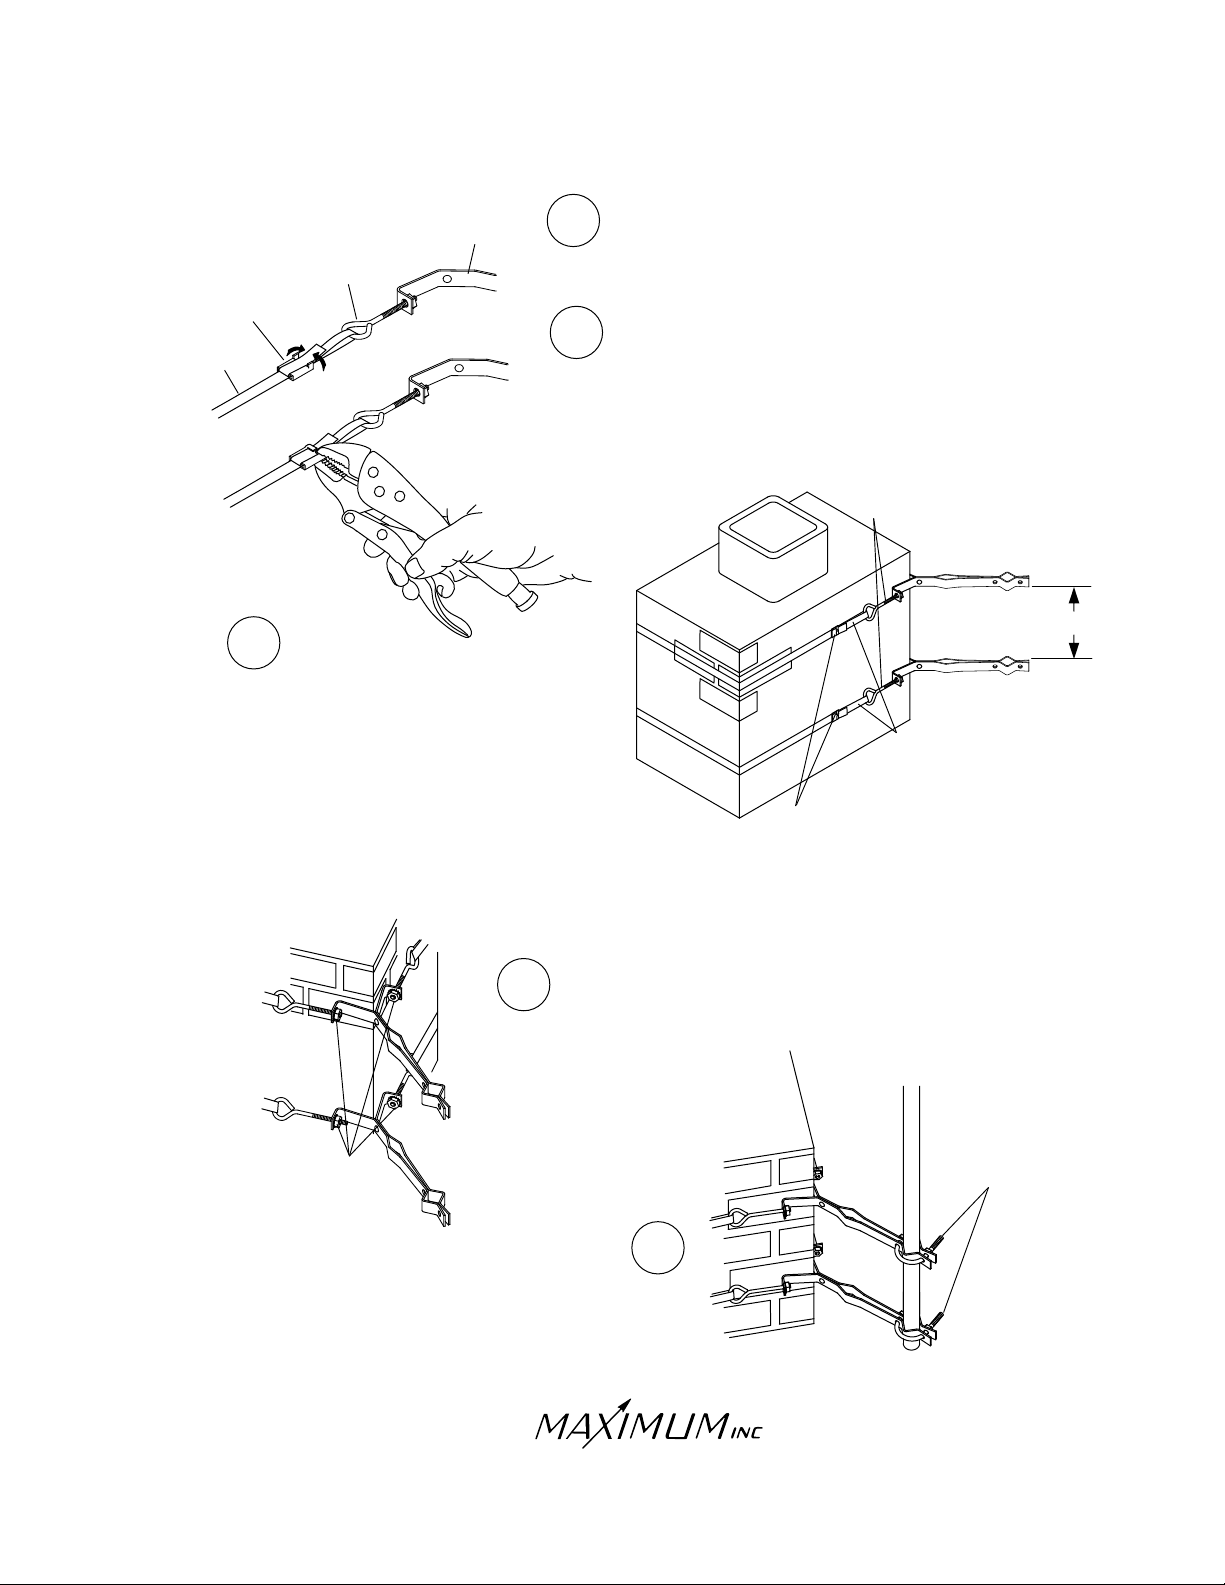
Feed the stainless straps around
the chimney without twisting them.
Repeat steps 4a-4d to secure the
loose strap ends to the brackets.
Cut off any excess material once
secure. Brackets should be at least
18” apart for proper mast support.
4c
Bend the strap back over the strap clip.
4d
Crimp the tabs of the strap clip securely
over the strap.
STRAP
BOLT
18” MIN
STAINLESS STEEL
STRAP
STRAP CLIPS
Tighten the stainless steel straps with the
6
ADJUSTMENT
NUTS
adjustment nuts at the ends of the strap bolts.
Make sure straps are centered on bricks and
not mortar.
7
Insert the bottom of the mast into the chimney
brackets and secure with the U-clamps.
30 Samuel Barnet Blvd.
New Bedford, MA 02745
(508) 995-2200
Page 2
U-Clamps
 Loading...