

Page 1
Instrument Reprocessing Labeler
Instructions For Use
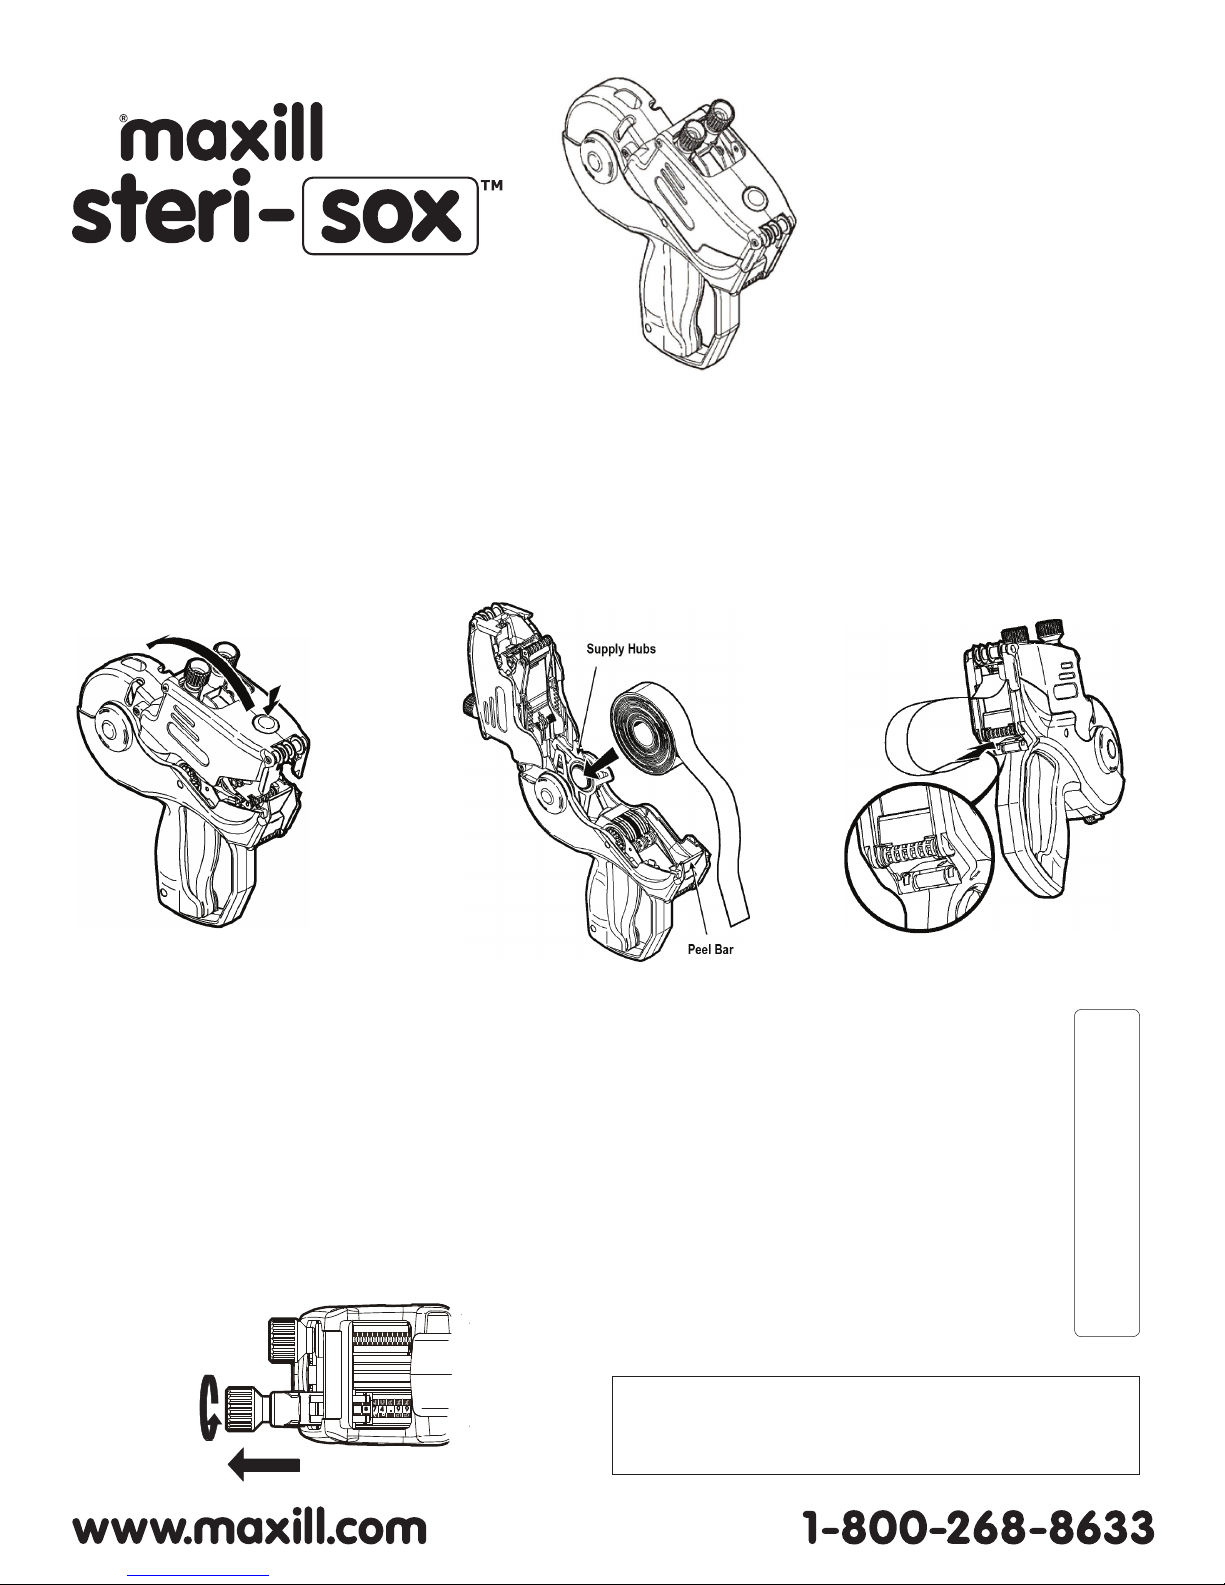
Loading Labels
1. Push the release button and swing the cover
open completely. You should hear a click.
Don’t force the cover past the click position.
2. For loading a new roll of supply, unwind the
outer wrap of labels and liner.
3. Peel and discard the first 12 labels from the
4. Place the label roll between the supply hubs.
Do not thread label strip through any rollers.
5. Drape the supply across the labeler and
center it over the peel bar. The supply
should hang out 6-7 inches (15-16 cm) past
the peel bar.
backing paper.
Setting Print Characters
1. Pull the knob out until the character pointers are on the
desired position.
2. Turn the knob until the desired character with a white
background appears between the pointers. To print a
blank, select the blank white space. Characters with a black
background should not appear in the window.
3. We do not recommend turning the knob past the white
characters.
4. Push in the knob when you’re finished.
6. Close the cover.
7. Feed the label strip under the large roller
and into the slot above the arrows. Hold the
strip in place and squeeze the trigger until
the label strip feeds through the rear exit.
Using the Alpha Conversion chart
When using the middle alpha/numeric dial on the
labeler what you read on the dial is not what is printed
onto the label.
Use the Alpha Conversion chart located on the handle
of the labeler to determine the letter you need to select
to print the intended letter.
For example, if you read an A on the dial you will print a
T on label. If you read a T you will print an A.
The letters on the middle row will read upside-down
and backwards on the labeler but will print with the
correct orientation.
Read
or Print
A - T
B - U
C - V
D - W
E - X
F - Y
G - Z
H - 1
J - 2
K - 3
L - 4
M - 5
N - 6
P - 7
Q - 8
R - 9
S - 0
Alpha Conversion
Special Instructions
Apply label to autoclave tape when using sterilization wrap.
Page 2

Removing the Ink Roller
1. Open the cover completely.
2. Hold the ink roller on each end and push the release bar to
release the ink roller.
3. Discard the used ink roller.
Installing the Ink Roller
1. Open the labeler cover completely.
2. Open the package and remove the ink roller.
3. Hold the new ink roller on each end.
4. Snap the ink roller into place.
Clearing Label Jams, Cleaning, and Lubrication
1. Open the cover and remove the supply.
2. Remove any loose labels from the inside of the labeler.
3. Pull up on the deflector frame to expose the backing paper path.
4. Remove loose labels from under the deflector frame.
5. Snap the deflector frame back into place.
6. Use a commercial adhesive solvent to clean adhesive build-up
7. Reload and close the cover.
Apply 1 drop of a commercial
100% silicone lubricant here.
MP-REF-91140D
Revision 1: 2018-03-27
 Loading...