

Page 1
NasDisk
User Manual
Page 2

Page i
Before start...
WARNING
This device complies with part 15 of the FCC Rules. Operation is subject to th e following two conditions: (1)
This device may not cause harmful interference, and (2) this device must acc ept any interference received,
including interference that may cause undesired operation.
Thank you for purchasing our product. This manual contains how-to of installing and using NasDisk. It
explains the pre-requirement and product specification to know before installing NasDisk. Please, be
sure to read before installing.
If you have any question, please refer to this user manual. Or if you are not sure of something after
reading this manual, please contact us.
Maverick System, Technical Support Team
Room 511 Seocho World Officetel 1355-3 Seocho-dong Seocho-gu Seoul, South Korea
Tel : 02-6283-7425 Fax : 02-6283-7421 E-mail : admin@mavericksys.co.kr
This manual is subject to modification for correcting spelling or for improvement of our products.
Copyright 2003 Maverick System Co., LTD, All right reserved.
No part of this publication may be reproduced, stored, in a retrieval system, or transmitted, in any
form or by any means, electronic, mechanical, photocopying, recording, or otherwise, without the
prior written permission of Maverck Co., LTD.
[Jan. 2003]
Page 3

Page ii
Warranty
Important : Read carefully
This Maverick System Co., LTD End User License Agreement ("EULA") is a legal agreement between
you (either an individual or a single entity) and Maverick System Co., LTD for the Maverick hardware &
software product identified above, which includes computer software and associated media and
printed materials, and may include "online" or electronic docume ntation ("HARDWARE PRODUCT" or
"SOFTWARE"). By installing, copying, or otherwise using
NasDisk™, you agree to be boun d by the
terms of this EULA.
NasDisk™
is protected by copyright laws and international copyright treaties, as well as other
intellectual property laws and treaties. The SOFTWARE PRODUCT is licensed, not sold.
1. GRANT OF PRODUCT LICENSE.
The NasDisk™ PRODUCT is granted for use as follows.
- Installation and Use
In consideration of the obligations entered into by You under this Agreement, Maverick
System Co., LTD hereby grants You a non-exclusive, non-transferable licens e (``License'')
to use this hardware product and related written materials in either printed text or
machine readable form (``Documentation'') in accordance with the terms and conditions
this Agreement.
2. DESCRIPTION OF OTHER RIGHTS AND LIMITATIONS
- License manifestation and preservation of it
Do not ever take off logo, trade mark or license manifestation from the NasDisk
product
-
Limitations on Reverse Engineering, De-compilation, and Disass embly.
The LICENSEE may not reverse engineer, de-compile, or disassemble the SOFTWARE PRODUCT
except for the case that a relevant laws and regulations demand LICENSEE.
- Assignment
The LICENSEE may not assign, sub-license or re-sell all or any of the rights granted under this
EULA, except as specified by extra agreement with Maverick System Co.,LTD.
- Transfer
The LICENSEE may transfer all of any of the rights granted under this EULA permanently on
condition that a transferee agree to all the details in this document.
Page 4

Page iii
- Applicable Law
You, who purchase and use the product, must observe the applicable law of
hardware and software applicable in relation to Nasdisk product use.
- Exemption from Liability : User
Your duty as specified on this agreement may be nullified by getting rid of the product
and documents enclosed with the product. In case that you do not observe the
agreement, the action is equal in meaning to the fact that you agree to the
destruction of the product and any relevant document.
- Exemption from Liability : Maverick System Co.,LTD.
Maverick System Co.,LTD is not responsible for any liability or engagement claimed
to be imposed upon Maverick System Co., LTD by any disinterested third party or
person other than Maverick System Co.,LTD in written or spoken form.
Maverick System Co.,LTD is not responsible for the result from operating the product
and for the damage resultant from not making use of the product.
- Acknowledgement
You acknowledge that you understand and agree to all the cond itions specified on
the agreement by installing and using the product. This agreement precedes any
other engagement or stipulation made between you and Maverick System Co.,LTD.
- Other
If you are not sure or want to get in touch with us concerning this EULA, please
contact Maverick System Co., LTD (02-6283-7425)
Page 5

Caution
Be sure to observe following cautions since they are related with the way you may be
safe from any possible damage or danger caused during the use of the product.
If any of the following cautions is neglected, user's data may be lost or equipment damaged.
And since you may possibly go through accident, you should be aware of the fact that using the
product may do harm to you. So, you need to be aware of basic knowledge.
Warning : When violated, it is possible that you may be injured or die of electrical shock
Caution : When violated, it is possible that you may be lightly hurt or the product may break.
Warning
1. Do not ever use multiple devices on single plug for there is possibility of electric shock or fire
2. Do not ever use broken electric cord or plug for there is possibility of fire
3. Do not ever touch with wet hand for there is possibility of electrical shock, or fire
4. Do not wear accessories such as necklace or watch. Once they graze the power or an earth
you may be electrically shocked or part may be burnt.
5. Please use only normal and standardized cable when connecting the product for defected
cable may do harm to internal circuit or may be the cause of electrical shock or fire.
6. Do not open, mend, or modify the body for yourself for there is possibility of electrical shock.
7. Do not leave the product where direct ray of light glows or heater is on, for there is possibility
of fire.
8. Do not place the product in wet, windy or humid space. Such condition is the cause of
electrical shock, fire, or malfunction of the product.
9. Keep the product off children. If a child pulls the product, it may fall and hit his or her body,
with the product crashed.
10. Do not put the vessel containing water, juice or coffee on the product. If they ooze into the
machine, there is possibility of fire or electrical shock.
11. When the product does not need to operate for long time, please, keep the plug pulled out.
The product may overheat or covering of power line may be melt down, causing fire.
12. In case of smoke or dust, please pull out the plug and contact our customer support team If
you continue to use it, it may cause fire or electrical shock.
Page iv
Page 6

Caution
1. The edge of product wrapping material is sharp, so be careful in dealing with it. It may cut
your finger.
2. Please keep the wrapping material off children so that they may not swallow or be hurt.
3. When installing the product, keep it ventilated well. Secure certain space (more than 10cm)
around the product. Internal space of the product may easily heat up.
4. Pull out the power plug before cleaning the product. And never pour water on or polish the
product with thinner or alcohol because it often becomes the cause for malfunction or electric
shock.
5. When moving the product, you need to turn off the power first. If it falls down, you may be
hurt or the product may malfunction.
6. Place the product on the even space and never put the product on the trembling or slanting
place such as shelf. If it falls down, you may be hurt or the product may malfunction.
7. Do not let the ventilating hole covered because it will heat up the internal temperature of the
machine, possibly causing fire.
8. When installing HDD, please turn off the power line and be fully aware of the procedure in
advance. And make sure that the HDD to be installed is proper to NasDisk. If this caution is
neglected, it will cause the product to be malfunctioning or damaged.
9. To prevent static electricity caused when disassembling the product, earth the product by
handling on the static-electricity-proof belt or metallic area. Static electricity may do harm to
the product.
10. Make sure that the power for the product is stable. Unstable supply of power is to shorten the
lifespan of the product or damage the internal circuit.
11. When pulling out the power plug, please hold it on the body of power plug, not the power line,
because the power line may be cut and cause fire.
Page v
Page 7

Chapter 1
Introducing NasDisk
Things to be aware before making use of NasDisk .
Introducing basic function, specification and make-up of the product
1 - 1 -
Page 8
1. Introducing NasDisk
NasDisk is the product characterized as NAS(Network Attach Storage) that is affordable and easy-touse for enterprise.
NasDisk can easily be connected to the Internet through broadband connection function such
as ADSL or Cable Modem without getting assisted by network engineer and such easy-to-use
features may be popular with small-scale office or home that is no t networked. The service
has built-in File Server and Internet (W eb) Storage function inclusive of IP sharing and Mail
Server through which NasDisk, a personal multi-purposes storage product, may be
conveniently used anywhere and anytime you want to be connected.
File Server + Internet (Web) Storage + IP Share Router + Mail Server +
External HDD
= NasDisk
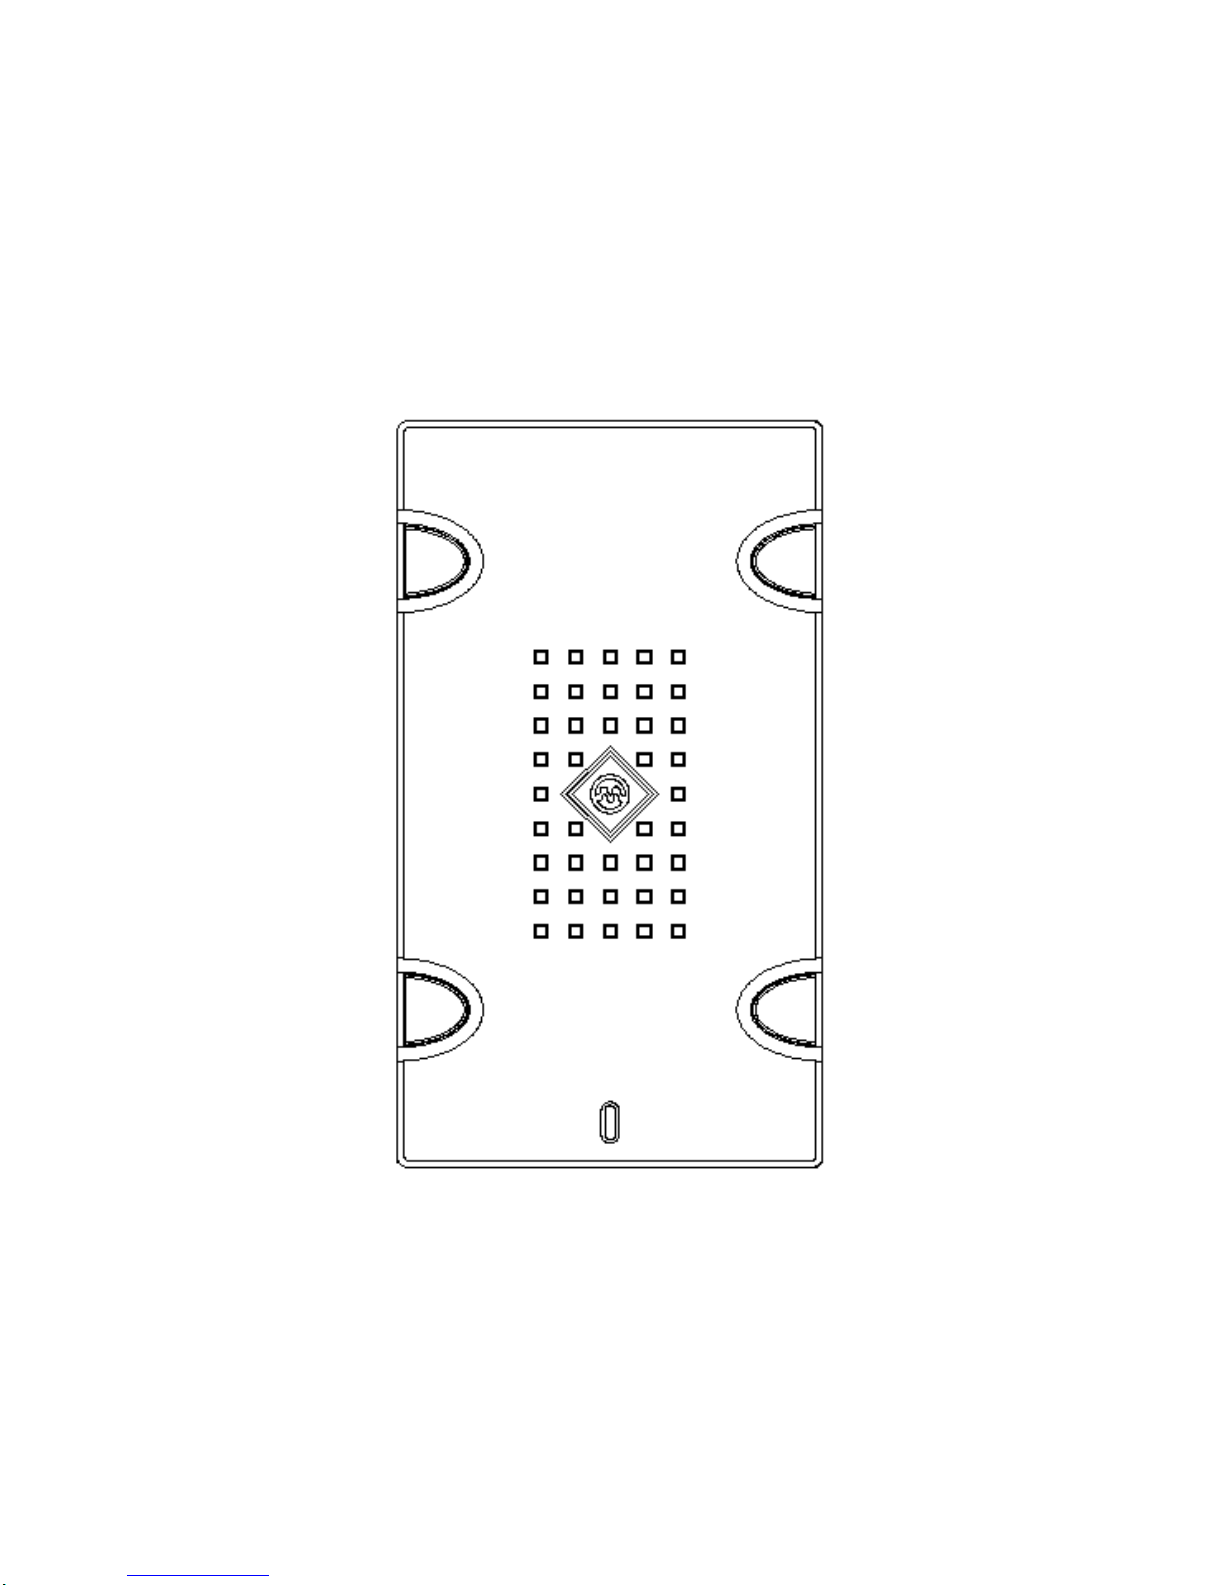
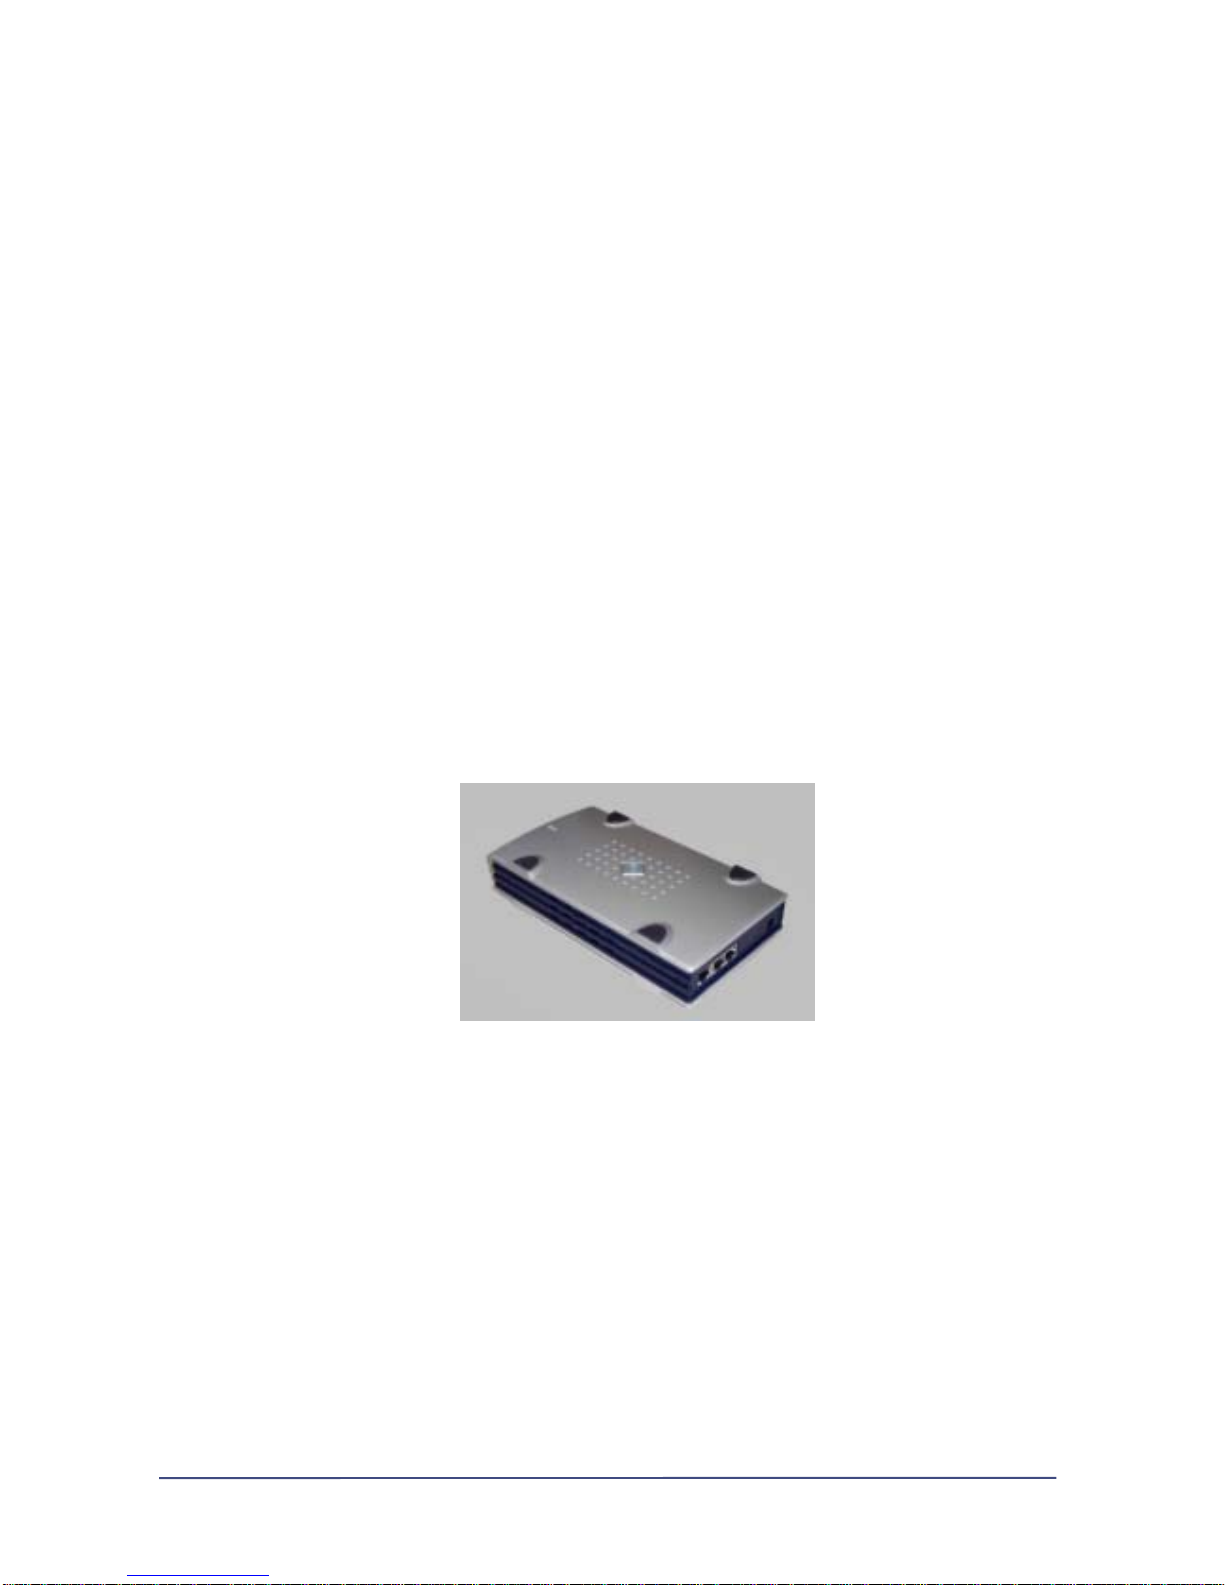
Exterior of NasDisk
No more expensive and massive storage.
Personal storage with affordable price and optimized
performance
Create your own internet world with NasDisk
1 - 2 -
Page 9

1. Introducing NasDisk
1) Feature of NasDisk
A. File Server
File server may easily be set up through the NetBEUI communication functionality built in
NasDisk.. NasDisk provides you with the simple way of setting up the network equal in
capacity and environment to existing File Server, which does not include the burdening
labor of complicated server configuration or using extra software.
B. Mail Server
You can run your personal mail server through the built-in Mail Server function in NasDisk.
Even under the environment without network, personal user may easily configure the mail
server based on ADSL or CABLE connection.
And all the features such as Dynamic DNS-related functionalities necessary for dynamic
IP-based environment are provided for nothing.
(Visit www.nasdisk.com and register for a member to enable “user ID.nasdisk.com” to work
as your mail server.
C . Internet Storage
You can move, save and copy even large chunks of files freely through FTP Server and
Web File Manager built in NasDisk
You can generate users and groups, including the capability of authentication on them and
share those files designated by you.(Web File Manager)
Free Dynamic DNS function can enable you to have your own storag e anywhere if you are
connected to the Internet even in dynamic IP environment.
D. IP Sharing
Using two PC at the same time with Internet connection is possible through the built-in IP
sharing technology of NasD isk an d in case that extra hub is used , as many as 253 per son al
computers may be connected to the internet.
With IP sharing applied, maximum 15Mbps Internet connection speed is guaranteed and
VDSL including Metro-based high-speed connection is compatible with BasDisk.
And even under the IP sharing environment, MSN Messenger file transmission is enabled
and existing problem known as “Identical room connection in Battlenet” has been solved.
(And any possible problem in the future will be patched the instance it is reported)
1 - 3 -
Page 10
1. Introducing NasDisk
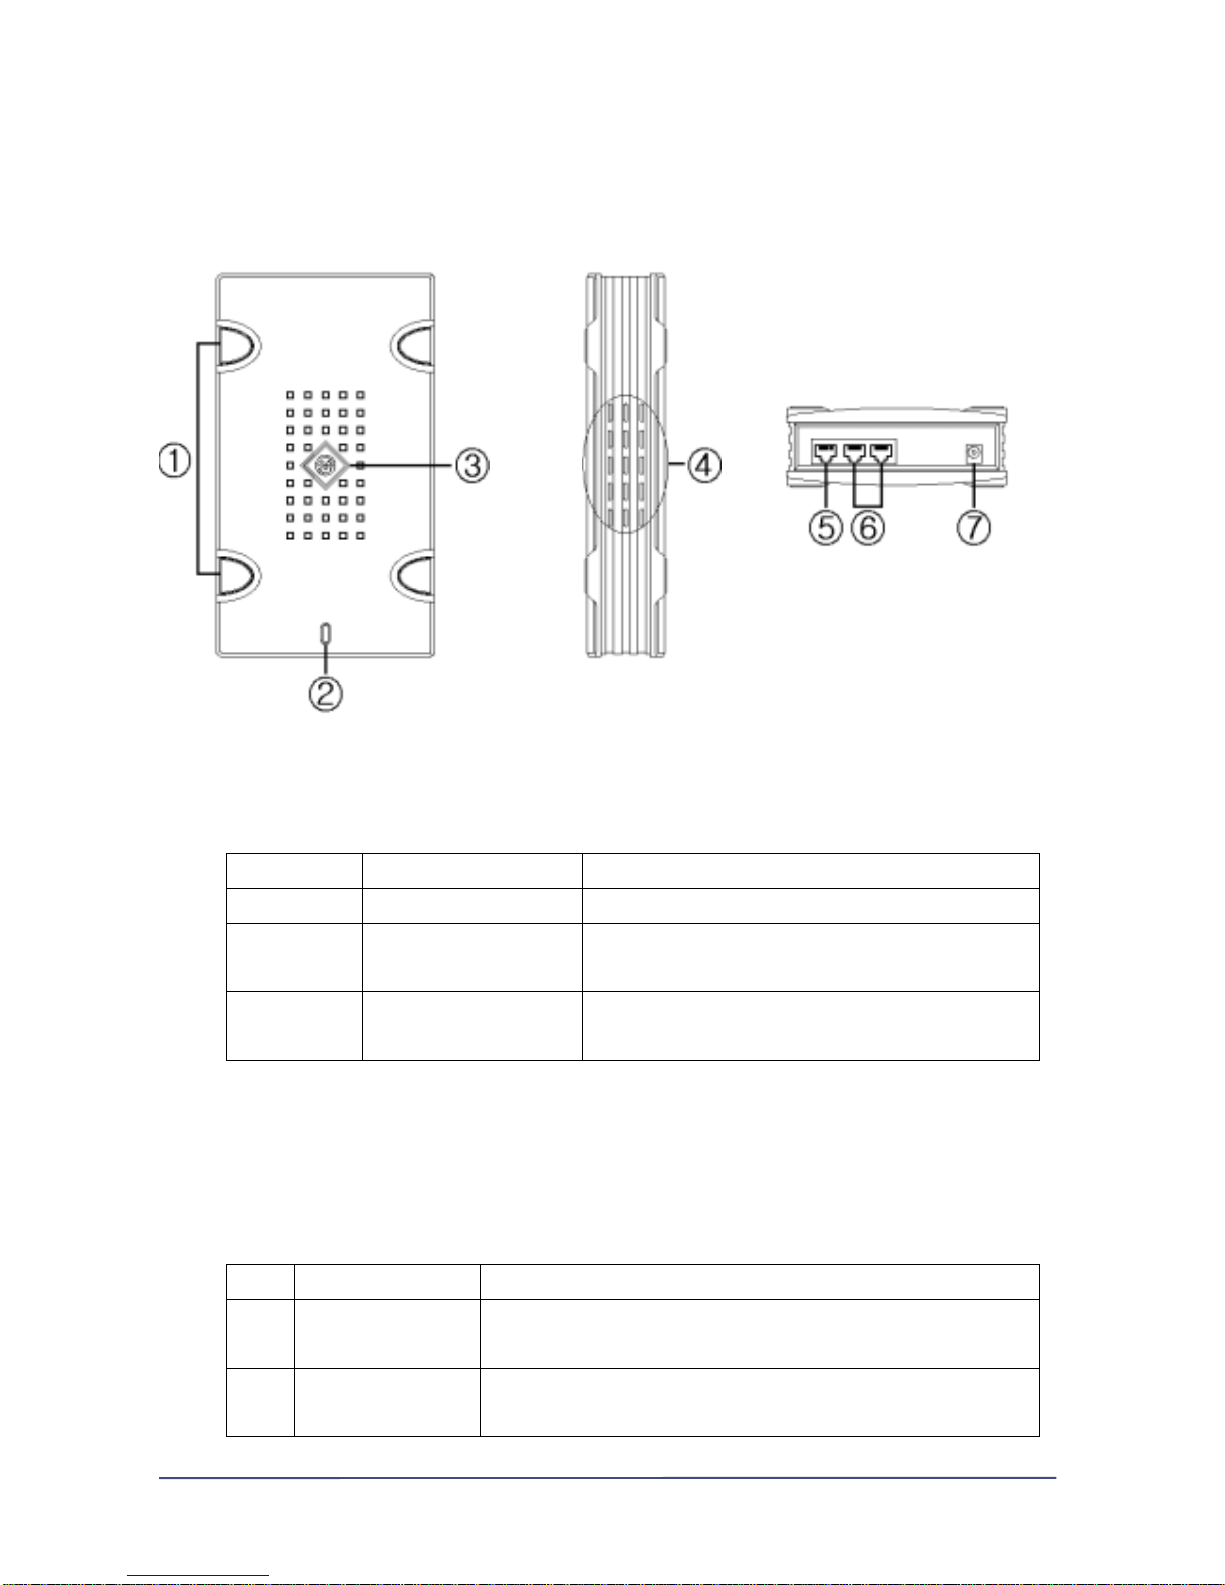
2) The term of NasDisk’s each part
Upper side lateral side back side
① Slide-proof rubber pad
② NasDisk behavior LED
LED Behavior Explanation
Green Operating (normal working) Signifying that NasDisk Booting is complete and working
Red
Booting (preparation in
progress)
Signifying that NasDisk is in booting procedure before normal
operating mode
Green + Red
In use (Storage device
working)
Signifying that a user is connected to NasDisk and it is in use
③ Emblem of NasDisk manufacturer
④ Ve ntila ting ope ning for ge tting heat dis cha rged out of inter na l HDD (prescribed space should
be secured when setting the device)
⑤ 10/100Mbps Ethernet WAN port(RJ-45) for the Internet connection
⑥ 10/100Mbps Ethernet Switching LAN port (RJ-45 ) for internal networking
LED Behavior Explanation
Yellow
In transition / In
removal / Conflicting
Connected while in transition (on) / Connected while in removal(off) /
Conflicting(flickering)
Green
Connecting / Operating
/ Speed
Connected (on) / operating (flickering) / Operating in 10M (120ms),
Operating in 100M (43ms)
1 - 4 -
Page 11

⑦ Direct current port for connecting electrical adaptor
1. Introducing NasDisk
3) NasDisk specification
CPU 32bit RISC Type Processor (CPU Clock 100MHz, Bus Clock 50MHz)
FLASH 4MB Flash
MEMORY 16MB SDRAM
HARD DISK 40 ~ 120GB(7200RPM) EIDE Type Hard Disk Drive
INTERFACE 10/100Base-TX Ethernet 3 Ports (WAN : 1Port, LAN : 2Ports)
PROTOCOL NetBEUI,TCP/IP,DHCP,NAT, WEB(HTTP),FTP,TELNET,SMTP,POP3
SUPPOTED CLIENT Windows 9X, Windows NT, Windows 2000, etc
POWER INPUT : 110 ~ 220VAC 50/60Hz, OUTPUT : 12VDC,3.5A
DIMENSION 218mm(L) X 124mm(W) X 46mm(H)
WEIGHT 1Kg (HDD included)
1 - 5 -
Page 12

1.Introducing NasDisk
4) NasDisk software specification
Network Transport Protocol TCP/IP, NetBEUI, SMTP, POP3
Network File Protocol
Microsoft Networks (CIFS/SMB)
File Transport Protocol (FTP)
Internet (HTTP)
Network Connection
xDSL(PPPoE), Cable(HFC),Dynamic/Static IP
(xDSL, Cable : External Modem Only)
NAT Based Internet Sharing
DHCP Server, Port Forwarding, DMZ Host
Special Application (MSN Messenger, Stacraft Battlenet, etc) and
DDNS Support
Security/Permission
User/Share/File Level Security/Permission,
Change Password
Access Control URL/IP Based Filtering (For Incoming/Outgoing Data)
Mail Server E-mail Server Feature Included (SMTP/POP3)
File Server SMB, FTP Server Feature Included
Web Storage Server Web Based User/Group/File Management
Device Configuration Web Based Configuration, Installer Software
Device Management
User/Configuration/Disk Space Quota Monitoring
Event Log, E-mail Notification, Web Based Administration
Client Support
Windows 9x/NT/2000/XP, Mac, Linux, Unix
(HTTP, FTP, NetBEUI)
1. Introducing NasDisk
1 - 6 -
Page 13
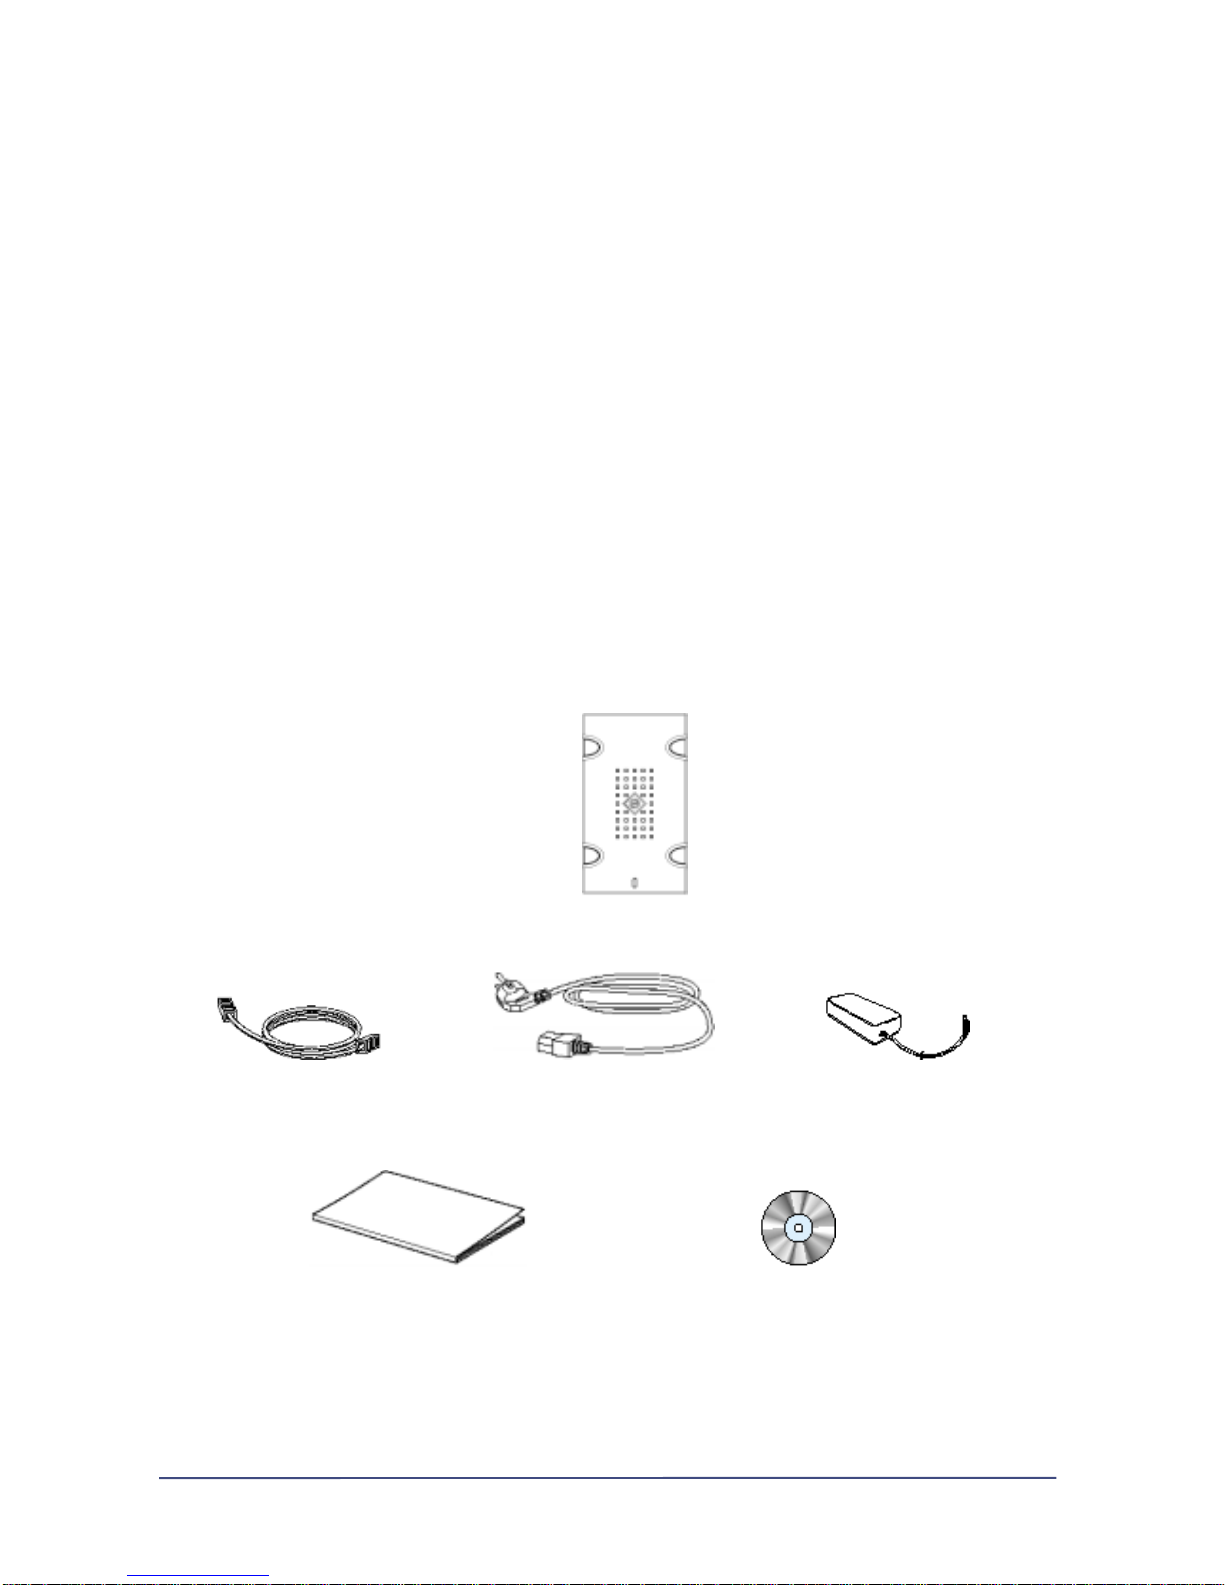
5) NasDisk make-up
NasDisk contains the following items
1. NasDisk body
2. Power adaptor
3. Adaptor
4. CAT.5 UTP CABLE (2M, 568B Type)
5. INSTALL CD ROM
6. User manual
In case the included items inside the product are different from the detail above, please get in contact
with vendor or our company.
㈜ Maverick System 511 Seocho World Officetel 1355-3 Seochodong Seochogu Seoul, South Korea
Tel : 02-6283-7425 Fax : 02-6283-7421 E-mail : admin@mavericksys.co.kr
NasDisk body
UTP Cable Power cable adaptor
User manual INSTALL CD ROM
1 - 7 -
Page 14

Chaptor 2
Installing NasDisk
This chaptor explains how to connect
NasDisk to the network and
to install each element.
And basic method of operating
the product will be explained
You can easily set up the product if you follow the user manual.
If you find yourself challenged to the network setup, please
Read the FAQ section of network configuration first and
Go on with the installation.
2 - 1 -
1
Page 15

2. Installing NasDisk
1) Things to know before installation
Please confirm the following particulars before installing NasDisk
Confirm the Internet conmnection method you have
① ADSL connection
② Cable connection
③ Static IP with Local Area Network connection
④ Dynamic IP with Local Area Network connection(DHCP).
① If you are connected through ADSL, you should be using external ADSL modem for installing
NasDisk.(Internal or USB modem is not compatible with NasDisk. You should replace the internal
modem with external one)
② If you are connected using CABLE modem, please confirm the Mac Address value in your
NIC(Network Interface Card). And some Internet service providers tend to limit the Mac Address.
③ If your network environment is LAN that uses static IP assignment, please memorize the network
configuration value and refer to the FAQ section on the backside of this manual for setting the IPrelated values automatically assigned.
④ If your LAN environment is based on DHCP(Dynamic Host Configuration Protocol), there are no
extra prepration for you.
And in case that you are not sure what sort of Internet connection you have or that you have different
Internet connection service from what is explained above, please consult the service provider to
confirm the detail.
2. Installing NasDisk
2) NasDisk configuration
a) NasDisk configuration for ADSL or CABLE
2 - 2 -
2
Page 16
You should confirm the kind of installation procedure you need to follow according to the way you
are connected to the Internet.
Internet
Use r PC
ADSL/Ca ble
Modem
Internet
Use r PC
ADSL/Ca ble
Modem
Na sDisk
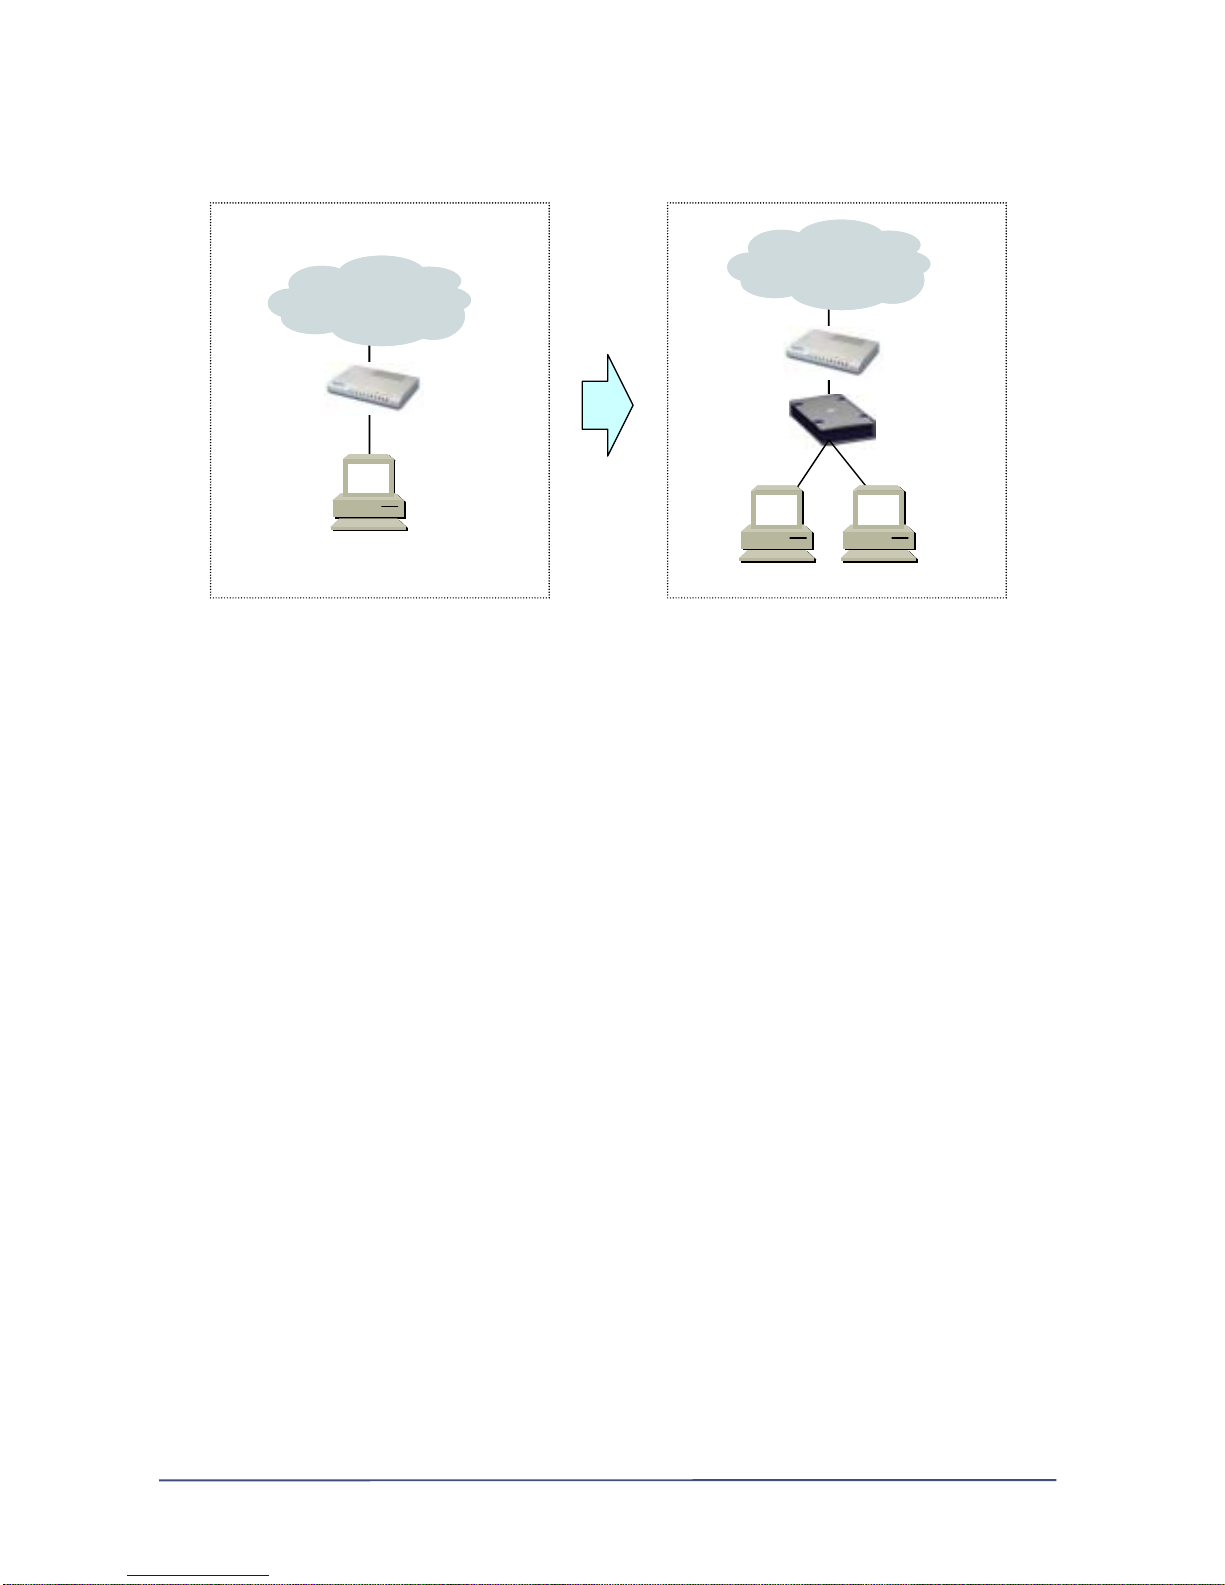
NasDisk installation diagram for ADSL and CABLE modem user
The illustration is the example of installing NasDisk when you’re using ADSL or CABLE modem. Before
installing NasDisk, you can see that ADSL or CABLE modem is directly connected to the PC, but if you
want to install NasDisk, it must lie between PC and ADSL or CABLE modem.
This connection method is identical to that of IP router through ADSL and CABLE modem. In case that
a user is using IP router for sharing the Internet connection, you can connect the UTP cable to the
LAN slot in IP router and configure the router software for setting Virtual Server or Port Forward.
(Set 80 for Web File Manager console, 21 for FTP Server function and 25 for Mail Server)
Although you are connected to the Internet through ADSL or CABLE modem, internal modem cannot
be used together with NasDisk. That is, those xDSL modems in the form of PCI card or USB and
Serial-based modem cannot be connected to NasDisk
In this case, you should consult your service provider to change the internal modem with external
one for installing NasDisk.
2.Installing NasDisk
2) NasDisk configuration
2 - 3 -
3
Page 17
b) Configuration of NasDisk on existing network environment
Installing how-to for the environment where LAN is already set u p for the Internet instead of ADSL or
CABLE modem.
Internet
Route r
S/W Hub
Lo c a l Use rs
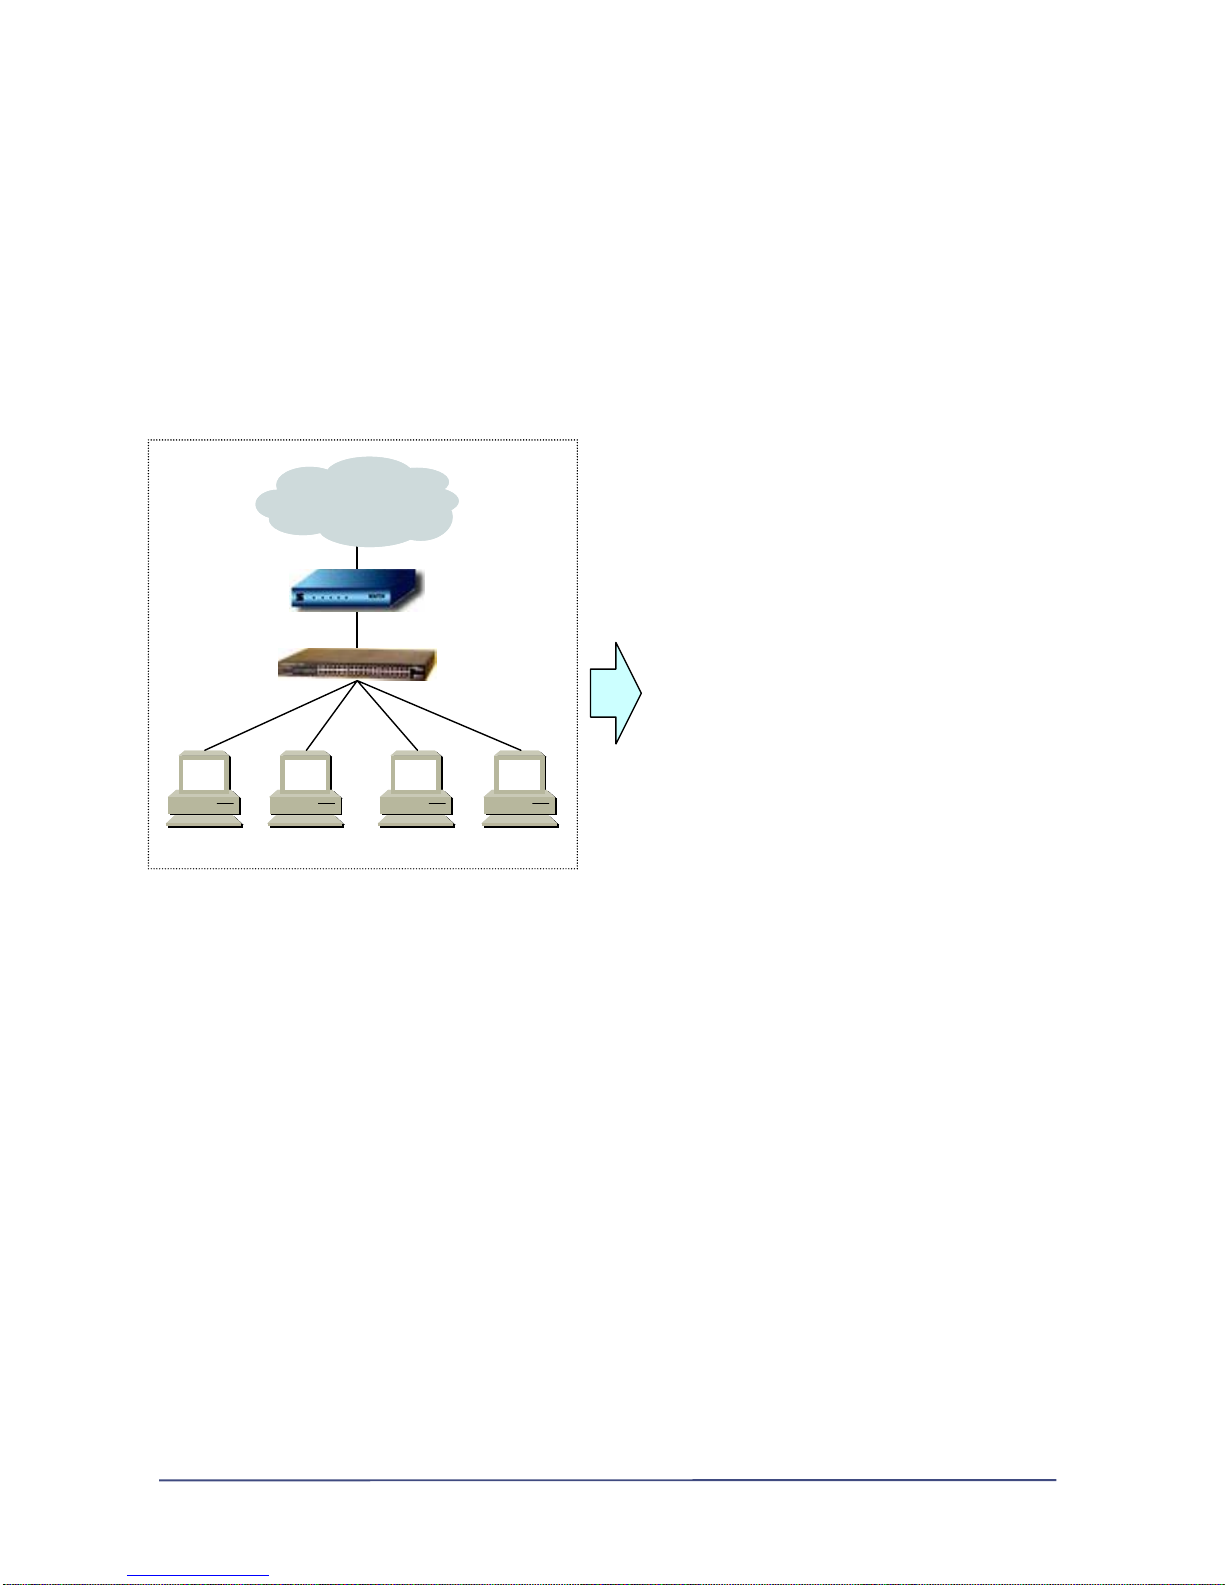
NasDisk connection on existing LAN configuration.
The figure above illustrates an example of connecting NasDisk to existing network in enterprise or
governmental ofiice in which if any extra IP is currently available, you don’t have to use sharing router
for connecting NasDisk. Instead, you can simply install Nasdisk onto the extra IP. If there is no more
IP available, your PC should be connected through NasDisk.
That is all the installation procedure of NasDisk for the case where there exists LAN configuration.
If you already has made sure what kind of network configuration and you use, please refer to the 3)
Installing NasDisk for installing NasDisk
2. Installing NasDisk
3) Installing NasDisk
2 - 4 -
4
Page 18
ADSL
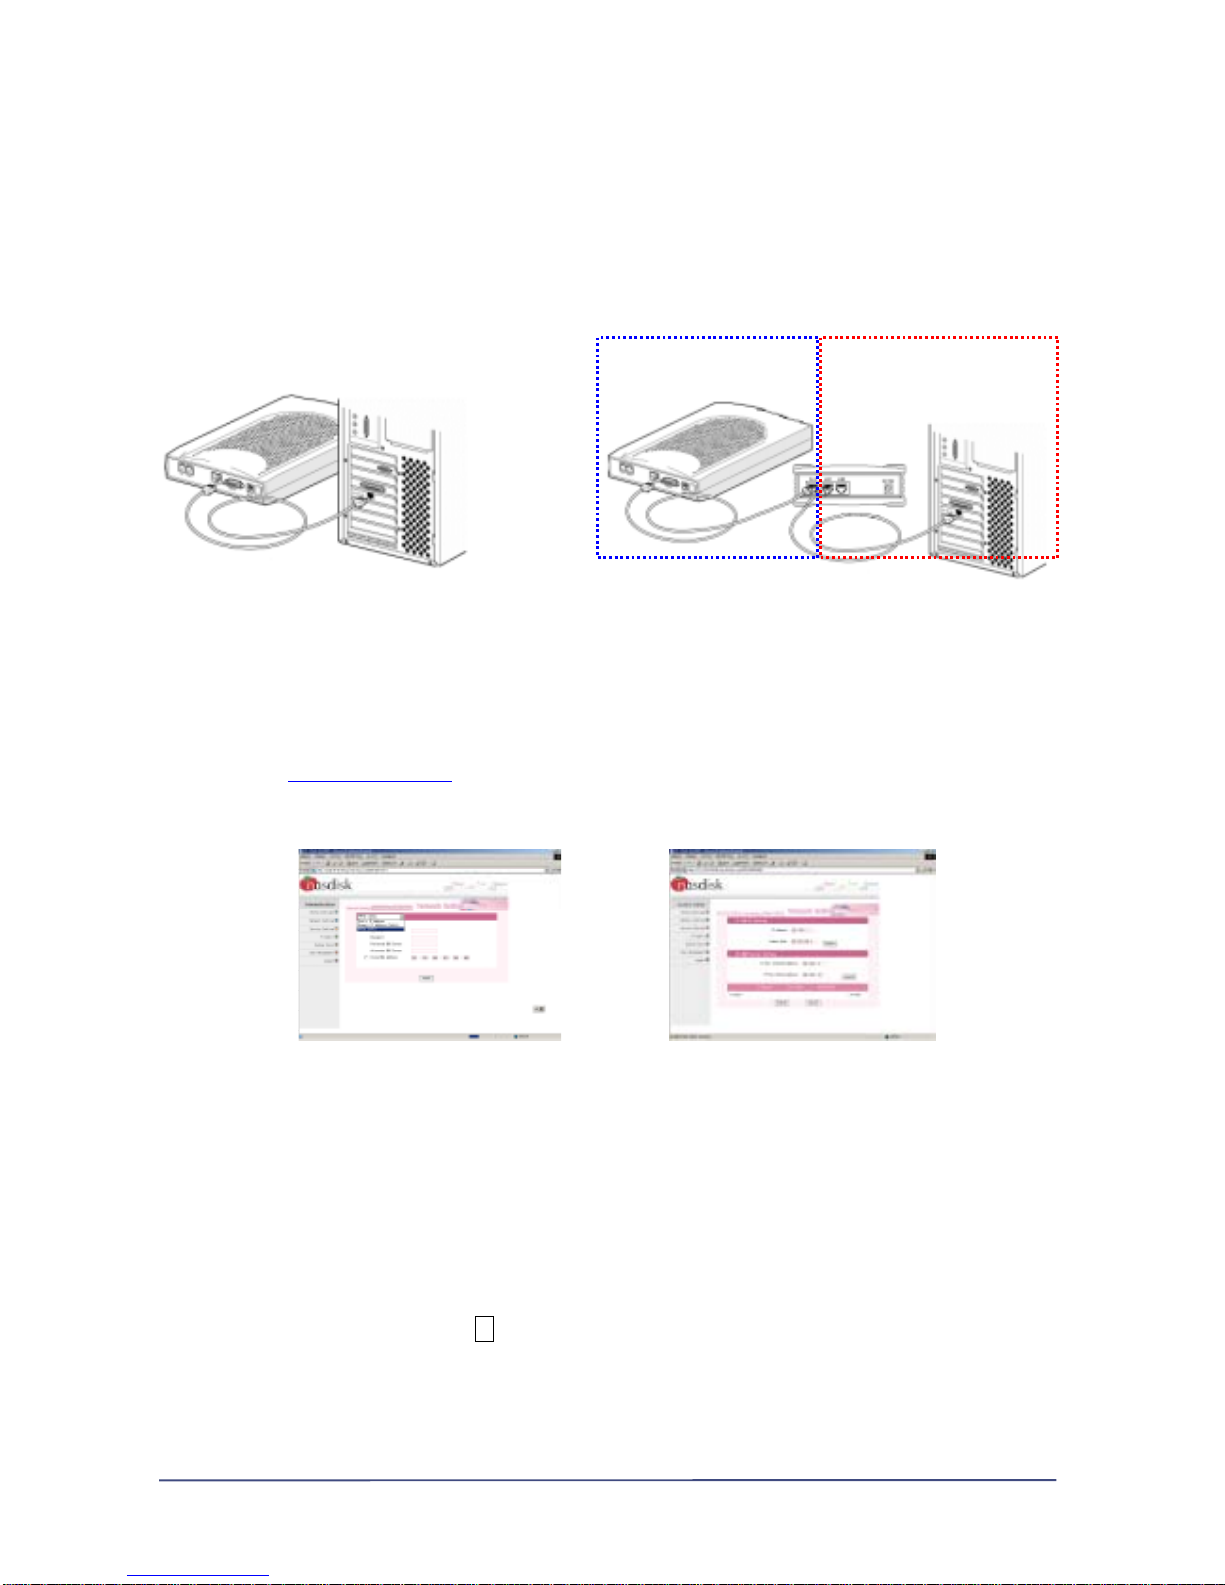
Connect the LAN Port in PC to LAN1 or LAN2 of NasDisk using the enclosed UTP cable in the product
and connect the UTP cable that had been connected ADSL or CABLE modem, to WAN of NasDisk.
(Connect ADSL or CABLE modem to WAN Port in NasDisk, and user’s PC to LAN Port of NasDisk)
And reboot the system after making sure that the connection is rightly done and that the network
configuration of PC is “automatic IP assignment” in TCP/IP panel in Windows (Refer to the FAQ for
“Automatic IP assignment
”)
NasDisk -> PC XDSL/CableModem->NasDisk
Connection between PC and xDSL/Cable Connection when installing NasDisk
Launch your web browser after your PC is normally booted (Microsoft Explorer only)
After inserting Http://192.168.1.1
in the address box, log into the page as follows.
(Initial value of the first log-in ID : root, Password : pass)
NasDisk Internet setting NasDisk LAN setting
In the main page, if you click on the network setup of left menu, you can see Internet Setting, LAN
setting and DNS tab.
Configure the setting as following direction to connect NasDisk to network
① Choose Network setup on the main page.
② Click on the combo button ▼ and connection method will pop up.
③ Choose PPPoE (xDSL.)
④ Insert your ID and Password for ADSL connection and fill in value for the DNS Server setting
(You may not have to change Clone MAC item except for necessary case)
⑤ Press “apply” button then your system will need to reboot. Press “yes” and restart your
2 - 5 -
5
Page 19

system.
Connect ⑥ to http://192.168.1.1 when LED changes from red to green.
our PC is automatically
⑦ tus view” in the main page after login.
cting ‘VIEW NETWORK STATUS’ on
⑨ g the IP on Internet connection
Address right after “http://”)
That is all for setting up NasDisk.
Disk special function manual” enclosed inside the CD
arning: For security sake, make sure you changed the initial value of password.
nd
2. Installing NasDisk
3) Installing NasDisk
namic IP)
(In case of connection failure, please refer to FAQ and confirm that y
assigned with IP)
Select “log and sta
⑧ Confirm the IP Address item in WAN CONNECTION by sele
the right side.(In case of 0.0.0.0, press the refresh button)
Make sure that NasDisk is working properly by confirmin
information
(Insert the IP
VIEW NETWORK STATUS’
For detail, please refer to the “Nas
W
If you neglect this warning, important data or set-up value will possibly be lost, a
our company will not be responsible for any loss inflcted.
b) Cable(dy
2 - 6 -
6
Page 20

Connect the LAN Port in PC to LAN1 or LAN2 of NasDisk using the enclosed UTP cable in the product
ork
able
aunch your web browser after your PC is normally booted (Microsoft Explorer only)
and connect the UTP cable that had been connected ADSL or CABLE modem, to WAN of NasDisk.
(Connect ADSL or CABLE modem to WAN Port in NasDisk, and user’s PC to LAN Port of NasDisk)
And reboot the system after making sure that the connection is rightly done and that the netw
configuration of PC is “automatic IP assignment” in TCP/IP panel in Windows (Refer to the FAQ for
“Automatic IP assignment
”)
Connection when installing NasDisk
XDSL/CableModem->NasDisk NasDisk -> PC
Connection between PC and xDSL/C
L
After inserting Http://192.168.1.1
in the address box, log into the page as follows.
(Initial value of the first log-in ID : root, Password : pass)
NasD NasDis
the main page, if you click on the network setup of left menu, you can see Internet Setting, LAN
onfigure the setting as following direction to connect NasDisk to network
① Choose Network setup on the main page.
tion method will pop up.
k LAN setting isk Internet setting
In
setting and DNS tab.
C
② Click on the combo button ▼ and connec
③ Choose Dynamic IP Address (Cable).
④ Insert MAC Address into Clone MAC Address
king through NasDisk)
⑤ Press “apply” button then your system will need to reboot. Press “yes” and restart your
system.
(Use MAC Address only when the Internet is not wor
2 - 7 -
7
Page 21

⑥ Connect to http://192.168.1.1 when LED changes from red to green.
(In case of connection failure, please refer to FAQ and confirm that your PC is automatically
⑦
⑧ ress item in WAN CONNECTION by selecting ‘VIEW NETWORK STATUS’ on
Tha
For detail, please refer to the “NasDisk special function manual” enclosed inside the CD
arning: For security sake, make sure you changed the initial value of password.
you neglect this warning, important data or set-up value will possibly be lost, and
2. Installing NasDisk
c) Installing xDSL and Cable(static IP)
onnect the LAN Port in PC to LAN1 or LAN2 of NasDisk using the enclosed UTP cable in the product
ed ADSL or CABLE modem, to WAN of NasDisk.
assigned with IP)
Select “log and status view” in the main page after login.
Confirm the IP Add
the right side.(In case of 0.0.0.0, press the refresh button)
⑨ Make sure that NasDisk is working properly by confirming the IP on Internet connection
information (Insert the IP Address right after “http://”)
VIEW NETWORK STATUS’
t is all for setting up NasDisk.
W
If
our company will not be responsible for any loss inflcted.
3) Installing NasDisk
C
and connect the UTP cable that had been connect
(Connect ADSL or CABLE modem to WAN Port in NasDisk, and user’s PC to LAN Port of NasDisk)
2 - 8 -
8
Page 22

And reboot the system after making sure that the connection is rightly done and that the network
configuration of PC is “automatic IP assignment” in TCP/IP panel in Windows (Refer to the FAQ for
“Automatic IP assignment
”)
NasDisk -> PC XDSL/CableModem->NasDisk
Connection between PC and xDSL/Cable Connection when installing NasDisk
Launch your web browser after your PC is normally booted (Microsoft Explorer only)
After inserting Http://192.168.1.1
in the address box, log into the page as follows.
(Initial value of the first log-in ID : root, Password : pass)
NasDisk Internet setting NasDisk LAN setting
In the main page, if you click on the network setup of left menu, you can see Internet Setting, LAN
setting and DNS tab.
Configure the setting as following direction to connect NasDisk to network
① Choose Network setup on the main page.
② Click on the combo button ▼ and connection method will pop up.
③ Choose Static IP Address
④ Insert IP address, subnet mask, gateway and DNS address
⑤ Press “apply” button then your system will need to reboot. Press “yes” and restart your
system..
⑥ Connect to http://192.168.1.1
when LED changes from red to green.
(In case of connection failure, please refer to FAQ and confirm that your PC is automatically
assigned with IP)
⑦ Select “log and status view” in the main page after login.
2 - 9 -
9
Page 23

⑧ Confirm the IP Address item in WAN CONNECTION by selecting ‘VIEW NETWORK STATUS’ on
⑩ t NasDisk is working properly by confirming the IP on Internet connection
(Ins dress right after “http://”)
네트워크 상태보기 화면
That is all for setting up NasDisk.
Disk special function manual” enclosed inside the CD
arning: For security sake, make sure you changed the initial value of password.
nd
2. Installing NasDisk
3) Installing NasDisk
(1) In case that there is no extra IP
LAN2 of NasDisk using the enclosed UTP cable in the product
the right side
Make sure tha
information
ert the IP Ad
For detail, please refer to the “Nas
W
If you neglect this warning, important data or set-up value will possibly be lost, a
our company will not be responsible for any loss inflcted.
d) LAN with static IP
Connect the LAN Port in PC to LAN1 or
and connect the UTP cable that had been connected ADSL or CABLE modem, to WAN of NasDisk.
(Connect ADSL or CABLE modem to WAN Port in NasDisk, and user’s PC to LAN Port of NasDisk)
2 - 10 -
10
Page 24

And reboot the system after making sure that the connection is rightly done and that the network
configuration of PC is “automatic IP assignment” in TCP/IP panel in Windows (Refer to the FAQ for
“Automatic IP assignment
”)
NasDisk -> PC XDSL/CableModem->NasDisk
Connection between PC and internal network Connection when installing NasDisk
Launch your web browser after your PC is normally booted (Microsoft Explorer only)
After inserting Http://192.168.1.1
in the address box, log into the page as follows.
(Initial value of the first log-in ID : root, Password : pass)
NasDisk Internet setting NasDisk LAN setting
In the main page, if you click on the network setup of left menu, you can see Internet Setting, LAN
setting and DNS tab.
Configure the setting as following direction to connect NasDisk to network
① Choose Network setup on the main page.
② Click on the combo button ▼ and connection method will pop up.
③ Choose Static IP Address.
④ Insert IP address, subnet mask, gateway, and DNS address.
⑤ Press “apply” button then your system will need to reboot. Press “yes” and restart your
system.
⑥ Connect to http://192.168.1.1
when LED changes from red to green. (In case of connection
failure, please refer to FAQ and confirm that your PC is automatically assigned with IP)
2 - 11 -
11
Page 25

⑦ Select “log and status view” in the main page after login.
⑧ Confirm the IP Address item in WAN CONNECTION by selecting ‘VIEW NETWORK STATUS’ on
the right side.
⑪ Make sure that NasDisk is working properly by confirming the IP on Internet connection
information
(Insert the IP Address right after “http://”)
VIEW NETWORK STATUS’
That is all for setting up NasDisk.
For detail, please refer to the “NasDisk special function manual” enclosed inside the CD
Warning: For security sake, make sure you changed the initial value of password.
If you neglect this warning, important data or set-up value will possibly be lost and
our company will not be responsible for any loss inflcted.
2. Installing NasDisk
3) Installing NasDisk
d) LAN with static IP
(2) In case that there is extra IP
Connect the internal network cable with WAN of NasDisk
.If you have difficuly with getting extra cable and with additional installation of cable, please follow the
2 - 12 -
12
Page 26

procedure for (1) No more extra IP.
When connection begins, copy NasDisk Installer into your PC. In this moment, your PC and NasDisk
should be in the same Hub or Collision Domain.
Connecting PC to internal network Internal Network Connection when installing NasDisk
NasDisk Installer is in the CD contained in the product.
NasDisk Installer is supposed to provide user with two functionalities.
① Searching NasDisk and setting network configuration wothout modifying user's PC
② Installing NasDisk internal application when replacing HDD of NasDisk.
Installing NasDisk using the method ① is explained here.
For detail, please refer to the “NasDisk special function manual” enclosed inside the CD
Installation procedure is as follows.
① Insert the NasDisk CD.
② Setup program will automatically run. If the installer doesn't start automatically, click on the
'Setup.exe'
③ Installation Wizard will guide you through the steps.
④ When the installation is complete, NasDisk group will be created on the 'Start menu.
Then you will see ‘NasDisk Installer.exe’ and ‘Uninstall NasDisk Installer’
⑤ Run NasDisk INSTALLER.EXE.
⑥ NasDisk INSTALLER Password panel Properties-TCP/IP
⑦ Select the NasDisk information as illustrated above and click on the left button of mouse will
let the password panel appear. Insert a correct password and execute "properties"(You
should insert the initial password).
2 - 13 -
13
Page 27

⑧ Click on the TCP/IP tab and insert IP address, subnet mask, gateway and DNS address.
⑨ Press "Yes" and your system will reboot.
⑩ When LED lights up greem, type http:// and the chosen IP.
NasDisk login page
⑪ If you see the page above, configuration is complete.
NasDisk installation is complete.
For detail, please refer to the “NasDisk special function manual” enclosed inside the CD
Warning: For security sake, make sure you changed the initial value of password.
If you neglect this warning, important data or set-up value will possibly be lost, and
our company will not be responsible for any loss inflcted.
2. Installing NasDisk
4) NasDisk User Set-up
a) Creating user
When NasDisk network configuration is complete, user account must be created.
NasDisk has two kinds of accounts.
① NasDisk administrator account for network and service set-up
② NasDisk user account for using NasDisk
NasDisk administrator account enables you to set overall value for network configuration, service and
users, but you cannot user general service from NasDisk with this administor account to which there
2 - 14 -
14
Page 28

can be no addition of new account. And you may change the default password for this account.
NasDisk user account is only related with the use of NasDisk service, not with administration
functionality.
Administrator may freely delete, modify and set the files in NasDisk, and in case of creating
sharing folder, administrator can change the permission on users and groups.
(Setting sharing folder is only enabled in user account, and sharing folder cannot be used when
connecting to FTP.)
Please register to NasDisk, following the steps below.
① Open your web brower and connect to NasDisk
② Choose uer setting menu in main page.
Registration page Users list page
③ When user setting page loads, user registration tab and user list tab will show.
Choose user registration tab and user registration page will load. For creating user, a group
should exist.
④ Type the group name. You can use both Ko rean and English for group name.
(\ / : * ? “ < > | must not be used)
⑤ After typing the group name, press registration button, then a group will be added to the list.
⑥ After creating group, type in the user registration form the ID, password and quota for the
group
⑦ User ID does not support Korean, so you should type only in English.
(\ / : * ? “ < > | must not be used.)
⑧ ID and password must be set with different character so as not to be used by stealth.
(There is no limitation in symbol to be typed in password.)
⑨ You can choose group using combo button ▼.
⑩ 'Quota assignment' is used for determining the capacity of storage per user. Choose the
quota assignment check-box '□' and type in the capacity in MByte unit.
(Quota assignment function may work only when the 'quota assignment' is set.)
⑪ If you have filled in every required form, press the registration button, then, 'complete'
message panel will pop up. Press 'confirm' and close the panel.
⑫ For deleting or modifying the registered user or user group, click on the user list tab.
2 - 15 -
15
Page 29

That's all about 'user registration procedure'.
For detail, please refer to the “NasDisk special function manual” enclosed inside the CD
NasDisk
4) NasDisk User Configuration
a) Using user account.
This section will explain how to use NasDisk with user account. Only simple feature will be explained,
so, if you need more detailed features, please refer to the “NasDisk special function manual”
enclosed inside the CD
(1) Using Web-storage
Web-storage page Sharing folder setting
① Log in NasDisk with the ID and Password created in user registration page..
② Folder creator. Choose this icon for creating folder.
( Folder name must not contain following symbols \ / : * ? “ < > | )
③ Folder sharing icon. Choose this icon for endowing read/write permission to user and
group through the setting page.
④ File save icon. Choose this icon for storing files into NasDisk on the Internet
⑤ File delete icon. Choose this icon for deleting file or folder.
⑥ File rename icon. Choose this icon for renaming file or folder.
(\ / : * ? “ < > | must not be used )
⑦ Permission change icon. Choose thic icon for changing permission for file or folder
(Although file sharing is on, limiting read/write permission using thic function is possible. That
2 - 16 -
16
Page 30

is, permission precedes folder sharing)
⑧ Copy icon. Choose this icon for copying files or folders.
Multiple copy of files or folder is enabled and 'paste' is also used. Copying the files into the
original position is not permitted)
⑨ Cut icon. Choose this icon for cutting files or folders
Just as copy function, cutting behavior cannot be done on the same area where the original
file exists.
Paste icon. Choose this icon for pasting files or folders.
It is used together with copy and cut. And you can see the presence of files or folder through
the selection information on the path (example; selectio information - two items chosen).
Since the user interface of Web Storage feature is similar to that of Windows, it is easy to use. And
you can exchange files with other through the sharing folder under the user folder tree on the left side.
(Sharing folder service is only applied to Web Storage and File Server, not to FTP service)
2. Installing NasDisk
4) NasDisk user configuration
a) Creating user account
(2) Using Mail Server
In order to use Mail Server service of NasDisk, Mail Server checkbox on the Service Set-up must be
turned on.
Since the default value is activated, you can set up the Mail Server through the following steps.
2 - 17 -
17
Page 31

① Open Mail Client such as Outlook Express.
(Only the Outlook Express configuration will be explained)
Outlook Express UI Account Menu Panel
② Choose 'Tool' menu and select 'Accounts' on the pull-down menu of 'Tool'
③ Select 'Accounts' and 'Accounts' menu panel will appear.
④ After selecting 'Mail' on the tab and click on 'Add' button.
Mail User Setting Mail Address Setting Mail Server Setting
⑤ Internet Connection Wizard will launch and require you to type user's name, e-mail adress,
and mail server address.
Type the following alphabetically.
(Example : User name > Jack, e-mail address > jack@maverick.nasdisk.com, Incoming Mail server
type > POP3, mail server > maverick.nasdisk.com, Outgoing mail server > maverick.nasdisk.com,
Account ID > NasDisk ID, Password > NasDisk Password )
⑥ Type the Nasdisk ID and Password and press the next button to complete procedure (Save
'password', then it will never ask you password whenever you launch you mail client.
⑦ Configuration is complete when mail Account is added to the list.
Mail Account is generated
2 - 18 -
18
Page 32

Now, you can try sending e-mail through Outlook Express. And you are advised to check your
incoming e-mail you sent to your own e-mail account just created to make sure the configuration is
working properly.
(You may try this through the web-based free mail such as u sing Hotmail ). If your mail client is not
working, go back to the first step and try again.
2. Installing NasDisk
4) NasDisk User configration
b) Using user account
(3) Using File Server
This section explains File Server service, one of basic functionality in NasDisk.
This service is available only when NetBEUI is activated in NasDisk Service Setup
Since the default value is on like Mail Server, if you have not changed the setting, you may use File
Server service.
Be aware of the following particulars before running system.
- NasDisk File Server service is dependent on the NetBEUI protocol provided by
Microsoft Networking. It means that sharing participans should be working inside
Microsoft Networking environment
- Windows series include single-ser OS Window9X and multiple-user OS Window NT. So
there is difference in sharing setting according to the OS.
- While NT user may have access to account with user ID and password that has been
registered in NasDisk, 9x user must have the same ID with the computer name.
-File server service is compatible only with Windows series. On the different platform
such as Macintosh or Linux, third party FTP client should be used.
Direction for use is as follows.
① Double-click on 'Network environment' in your PC
2 - 19 -
19
Page 33

② Doubel-click on Network neighborhood.
③ Find Nasdisk group.
④ Double-click on NasDisk in NasDisk group
⑤ When login panel shows up, insert password (Windows 9x) or ID and password (Windows NT)
After login, you will have folder titled 'home, home_dir, public'. Home contains all the users
and is not accessible. And 'Home_dir' is the user account to be clicked for login panel
⑥ Login procedure is necessary only forthe first time of logging if cookie is on in your browser
(If you have changed your password, you have to insert the modified password for login.)
⑦ Now, it is just like the fixed drive attached to your system.
⑧ You can also use Windows Exploror for network drive connection service.
( Pur IP or 'NasDisk' right after '\\' and add '\home_dir' example: \\192.168.1.1\home_dir
,
\\nasdisk\home_dir )
That's all about File Server service in NasDisk.
File Server service works only for Windows OS. If you are on the other OSs such as Mac or Linux,
NetBEUI protocol should be embedded in the system for using File Server service.
File Server service only supports local network.
File Server service does not recognize other network.
Filse Server service can be connected just like network folder using FTP in Windows ME, 2000 and XP.
① Double-click on 'Network' on your desktop.
② Doubel-click on 'Add Network' for executing Network Wizard.
③ Insert ftp://NasDisk IP or domain name.
④ Press "Next" and type user ID. (if anonymous account is actiated, no user ID is
required)
⑤ Type the name for the network connection and new connection icon will be created.
⑥ Insert the path of NasDisk in Windows Explorer address for completing Network folder
setup
That is all about File Server service.
For detail, please refer to the “NasDisk special function manual” enclosed inside the CD
2 - 20 -
20
Page 34

Chapter 3
Registering NasDisk
This chapter is about the product registration procedure on customer site after installing NasDisk
DDNS Server setting and NasDisk DDNS service will also be explained
Those customers who registered to the customer site become a member at DDNS service
automatically
Though you may have not registered, A/S or product guarantee is provided but the basis for A/S or
product guarantee is to be the day of purchase if not registered
3 - 1 -
1
Page 35

3. Registering NasDisk
1) NasDisk Customer Registration
After installing NasDisk, you need to register NasDisk through the Internet.
Registration is recommended to enable DDNS service and other customer services
Registration procedure is as follows.
① Launch your web browser.
② Connect to www.nasdisk.com
.
③ Select Customer Registration menu on the left bar.
NasDisk registration page
④ Read the "Service Agreement" and select "Agree" or "D o not agree".
⑤ "Do not agree" stops registering procedure and you are not entitled to DDNS service. For
details, please contact customer support team.
⑥ Selecting "Agree" will move you to the NasDisk User Registration page.
⑦ Fill in the blank and press registration button, then "Registration complete" panel will show up.
⑧ In case of "Registration failure" panel, press the refresh button and repeat filling in the blank.
⑨ When registration is complete, type the ID and Password to log in.
⑩ "‘User Name’ now logging in" message will appear.
That's all about 'Customer Registration'.
You must be careful in filling in your correct personal information to get full support such as DDNS
service.
Registration completion message will be sent to your e-mail address and all the details you ty ped in
will also be enclosed to the e-mail
All the personal information will be used only for customer support and service and will not be known
to anybody or other companies except Maverick System.
3 - 2 -
2
Page 36

For details, please refer to the service agreement that is provided when registering the product online.
3 - 3 -
3
Page 37

3. NasDisk registration
2) DDNS Server setting
Customers who registered at www.nasdisk.com are only required to do DDNS Server setting. If you
have not registered, this procedure of DDNS server setting will not apply.
To get the DDNS service from www.nasdisk.com
, you have to configure following two items.
① Host name to be used by NasDisk (Registering multiple host names is enabled.)
(ex : If Host name is Maverick, Domain name of NasDisk is maverick.nasdisk.com.)
② Domain name to be used by NasDisk (nasdisk.com and nasdisk.net are provided)
These two items precede all the DDNS service configuration procedure.
DDNS means Dynamic Domail Name Service.
The functional features and working principle of DDNS are as follow.
- DHCP-based Internet connection has not been able use HTTP or FTP server because IP
address of DHCP is subject to change everytime PC is connected to the Internet.
- DDNS is the new method for DHCP-based PC DDNS to set up HTTP, FTP or MAIL server just
as if its IP is static.
- To use DDNS service, you must register to the DDNS service and have DDNS-supportive
equipment and softwares.
- Connect the DDNS server to DDNS-supportive equipment by inserting the ID and Password of
the equipment.
- Then, user should connect to the DDNS-supportive equipment with the domain name
registered to DDNS server.
- DNS server having domain name is supposed to make query into the domain name
DDNS server that received the query from the other DNS, is to transmit the IP address for the
domain name..
- At this moment, DDNA server sends the unchanged IP because varied IP numeric value is
applied to DDNS server through the communication between DDNS server and DDNS-
supportive equipment.
- Then, user can connect to the DDNS-supportive equipment on the Internet through the IP
address transmitted to DNS server
-
- .
3 - 4 -
4
Page 38

In orde to use DDNS service contained in NasDisk, connect to www.nasdisk.com and start
configuration as follows.
① Launch your web-browser and connect to www.nasdisk.com
.
② Type your ID and Password in the box named ID and Pass each and click on login button.
③ After login, select DDNS configuration on the left.
DDNS configuration page
④ Insert Host name of NasDisk after DDNS configuration page is generated. At this point, Host
name does not need to be identical with that of NasDisk.
⑤ Previous IP list shows the list of IP registered in DDNS server and newly modified IP address is
automatically retrieved from the coonected equipment of user.
⑥ To insert the content of configurationm press the "registration" button below.
⑦ If error occurs, click on the "refresh" button to repeat the registration procedure.
⑧ When list is created, DDNS server configuration is complete.
⑨ In case that modfication or deletion of generated list is required, proceed by pressing
"modify" or "delete" button after selecting the leftmost check-box.
That's all about DDNS server configuration.
In order to connect the DDNS server to NasDisk, you have to configure also the setting of NasDisk
DDNS.
3 - 5 -
5
Page 39

3. Installing NasDisk
3) Configuring the function of DDNS.
Configure the function of connecting DDNS server to NasDisk.
Only after registeration at www.nasdisk.com and completing the DDNS server setting, you can go on
with this procedure.
Product registration should be preceded before this step.
DDNS configuration page
Follw the next direction for DDNS cofiguration of NasDisk
① Launch your web brower and log into NasDisk administration account.
② Select 'Network Set-up' item on the main page.
③ Select DDNS configuration tab when 'Network set-up' menu page loads.
④ When DDNS configuration page loads, type the ID and Password for www.nasdisk.com
.
⑤ Insert the domain name to be used in the DDNS server into NasDisk domain. (If registered
name is 'maverick.nasdisk.com', type 'maverick.nasdisk.com')
⑥ Confirm the inserted configuration and press the 'apply' button. Then, NasDisk will begin to
communicate with DDNS server of www.nasdisk.com
.
⑦ If connection starts normally, the message "Working" will show up on the status of DDNS
Client. (If it shows "Not working", please repeat the procedure again.)
That's all about DDNS configuration in NasDisk.
While multiple host names registration is enabled in DDNS server of www.nasdisk.com
, DDNS setting
registration in Nasdisk must have only single host name.
3 - 6 -
6
Page 40

In order to use Mail Server or Web Storage service out of internal network, you have to use general
domain name.
Concerning Mail Server, the mail address for user whose ID is 'Jack in NasDisk
is ' Jack@maverick.nasdisk.com
.
Concerning Web Storage, you can use the following general domain name.
http://maverick.nasdisk.com
ftp://maverick.nasdisk.com
The three addresses above is applied to the case that the host name registered to www.nasdisk.com
is 'maverick'.
The services provided from NasDisk using DDNS is only Web Storage and Mail Server service. Since
Internet Sharing and File Server service is enabled only inside internal network, user cannot have
access to those services ouf of the internal network in spite of the fact that DDNS service is
configured.
For details, please refer to "Using NasDisk" in enclosed CD.
3 - 7 -
7
Page 41

NasDisk 사용자 설명서 4. FAQ
Chapter 4
FAQ
This chapter includes frequently-asked questions for operating NasDisk.
with explanation on how to configure user's PC network and to manage when NasDisk does not work
properly.
4 - 1 - All rights Reserved. Copyright© 2003, Maverick Systems, Inc.
1
Page 42

NasDisk 사용자 설명서 4. FAQ
4. FAQ
1) Configuring PC Network
a) Setting Dynamic IP for Windows 9x (Windows 98/98SE/ME)
Click!
Obtain an IP address
automaticall
y
Click
Setting Dynamic IP for using NasDisk - Windows 9x
① Select 'Properties" after clicking on "Network" on desktop.
② When Network panel opens, select TCP/IP from Network components box and click on
"Properties"
③ On the TCP/IP properties panel, click on "IP Address" tab and choose "Obtain an IP address
automatically"
④ Click "OK" , and PC will reboot.
Type "winipcfg" winipcfg execution panel - apply concretly
For confirming that IP is rightly assigned, type "winipcfg" on the 'Run' panel.
① Start -> Run -> winipcfg -> Yes
② When IP Configuration panel loads, press "More Info." to make IP is properly assigned.
(Gateway address '192.168.1.1' is normal when DHCP Server works in NasDisk)
4 - 2 - All rights Reserved. Copyright© 2003, Maverick Systems, Inc.
2
Page 43

NasDisk 사용자 설명서 4. FAQ
4. FAQ
1) Configuring PC Network
나) Setting Static IP for Windows 9x (Windows 98/98SE/ME)
Click!
Use the following
address
Click!
Setting Static IP for using NasDisk - 1 Windows 9x
① Select 'Properties" after clicking on "Network" on desktop.
② When Network panel opens, select TCP/IP from Network components box and click on
"Properties"
③ On the TCP/IP properties panel, click on "IP Address" tab and choose "Use the following
address"
Setting Static IP for using NasDisk - 2 Windows 9x
④ Insert 192.168.1.2 (numeric value 2-254 except 1) in IP Address, and 255.255.255.0 in subnet
mask. And move on to Gateway.
⑤ Add 192.168.1.1 in 'New gateway' box, then press Add button.
⑥ Go to DNS configuration, and select 'Enable DNS'. Then, insert host name(user name) and
Domain name(optional).
⑦ Insert DNS IP in DNS Server Search Order and press 'Add'.
⑧ Press 'OK'확인 and restart your system.
4 - 3 - All rights Reserved. Copyright© 2003, Maverick Systems, Inc.
3
Page 44

NasDisk 사용자 설명서 4. FAQ
4. FAQ
1) Configuring PC Network
c) Setting Dynamic IP for Windows (Windows NT 4.0/2000/XP)
Click!
Click!
Click!
Setting Dynamic IP for using NasDisk - 1 Windows NT
① Select 'Properties" after clicking on "Network" on desktop.
② When 'Network and Dial-up Connection' window loads, right- click on 'Local Area
Connection' and choose 'Properties'.
③ When 'Properties' window loads, choose TCP/IP in "Components checked are used by this
connection" then press "Properties" button
Setting Dynamic IP for using NasDisk - 2 Windows NT
ipconfig /release
Obtain an IP
address
automatically
ipconfig /renew
④ When TCP/IP address properties panel loads, choose " Obtain an IP address automatically"
⑤ When configuration is complete, choose Start -> Run -> cmd, then a command prompt
window will show up.
ipconfig /all -> show all the information related with IP.
ipconfig /release -> release all the information related with IP.
ipconfig /renew -> loads all the information related with IP from DHCP.
⑥ If 'cmd' command works properly, configuration is complete. (In case that IP come from
NasDisk, Gateway is set to 192.168.1.1)
4 - 4 - All rights Reserved. Copyright© 2003, Maverick Systems, Inc.
4
Page 45

NasDisk 사용자 설명서 4. FAQ
4. FAQ
1) Configuring PC Network
d) Setting static IP for Windows (Windows NT 4.0/2000/XP)
Click
Click
클릭! Click!
Setting Static IP for using NasDisk - 1 Windows NT
① Select 'Properties" after clicking on "Network" on desktop.
② When 'Properties' window loads, choose TCP/IP in "Components checked are used by this
connection" then press "Properties" button
ipconfig /all
Setting Static IP for using NasDisk - 2 Windows NT
③ When TCP/IP address properties panel loads, choose " Use the following address "
④ When configuration is complete, choose Start -> Run -> cmd, then a command prompt
window will show up.
ipconfig /all -> show all the information related with IP.
If the result is identical to the set-up, the configuration procedure is complete.
4 - 5 - All rights Reserved. Copyright© 2003, Maverick Systems, Inc.
5
Page 46

NasDisk 사용자 설명서 4. FAQ
2) FAQ
a) Network connection does not work.
① Confirm that power is properly working in both NasDisk and equipment connected to NasDisk.
② Confirm the connection port Link LED of NasDisk and the equipment connected to NasDisk.
③ If you find the problem due to the initial configuration, go back to the first configuration
procedure and read the manual carefully.
④ If network failure occurred in the middle of operation, please read the procedure above
carefully.
b) Clattering sound from equipment with high frequency.
NasDisk is manufactured to minimize power consumption so that it can be changed into
Suspend mode when there is no operation for specific period of time.
So, the clattering sound with high frequency occurs when Suspend mode is changed into
Normal mode. You don't have to be worried about the noise.
c) Is it possible to replace internal HDD in NasDisk by another?
Yes,It is possible.
NasDisk was originally designed to be assembled by user and hard drive had to be installed for
yourself. So, replacing internal HDD by another product is possible.
You can use NasDisk Installer Software for replacing HDD.
For details, please refer to "NasDisk Special function" of the CD enclosed in the product box.
d) Is it possible to operate a server under the NasDisk when IP sharing is
dependent on NasDisk?
Yes, it is possible.
NasDisk has NAT-related functions such as DMZ Host or Port Forwarding .
For details, please refer to"NasDisk Special Function" of the CD enclosed in the product box.
e) Is it possible to use MSN Messenger File transmission or Starcraft Battle?
Yes, it is possible.
4 - 6 - All rights Reserved. Copyright© 2003, Maverick Systems, Inc.
6
Page 47

NasDisk 사용자 설명서 4. FAQ
We provide customers with various solutions when problems occur to NasDisk NAT.
Especially, concerning the program that users frequently use, we have customer support
system called 'Special Application'.
For details, please refer to "NasDisk Special Function" of the CD enclosed in the product box.
(We will create patches for any possible error in our software.)
4 - 7 - All rights Reserved. Copyright© 2003, Maverick Systems, Inc.
7
Page 48

Chapter 5
Appendix
This chapter contains helpful features for using NasDisk.
UTP Calbe connection, DNS Server address and some others.
5 - 1 -
1
Page 49

1) NasDisk cable connection
To use NasDisk, you need CAT.5 level UTP cable for making RJ-45 moduler plug.
EIA/TIA 568A EIA/TIA 568B
Color order: light green, green, light Color order: light orange, orange, light green
orange, blue, light blue,orange,light brown, brown: blue, light blue, greenm light brown, brown
The illustration above is EIA/TIA 568A and EIA/TIA 568B.
(EIA/TIA 568 : This is indoor wiring standard established by EIA(Electronic Industries Aliance) and
TIA(Telecommunication and Industry Association) in 1993. There are four kinds of EIA/TIA 568
standard - STP, UTP, Coaxial Cable and Optical Fuber.
So-called 1:1 or Direct cable is designed on EIA/TIA 568B type in its both end. And Cross-cable is
designed with one end in EIA/TIA 568B type and other end in EIA/TIA 568A type.
Proper cable connection to NasDisK should follow the next step.
1. Cross cable to be used between WAN (Uplink) Port and PC (Connection to ADSL and Vable
modem is compatible with existing cable).
2. Direct cable to be used between LAN 1/LAN 2 Port and PC.
Note : Use cross cable for connecting equipments except the connection with 'hub' in network.
NasDisk supports Auto MDI/MDIX to keep user from making mistake.
(Therefore, when connecting your equipment with NadDisk, you may use either Direct Cable or Cross
Cable)
5 - 2 -
2
Page 50

2) ISP DNS Server address list
DNS Server address for each Internet Connection Provider
KT (Korea Telecom) : kornet.net
168.126.63.1
168.126.63.2
211.216.50.150
211.216.50.160
Chollian/DACOM : chollian.net
211.106.67.221
164.124.101.2 (Bora homenet)
HANARO : hananet.net
210.220.163.82
210.94.6.67
210.180.98.69
thrunet : thrunet.com
210.117.65.1
210.117.65.2
Shinbito Shark : shinbiro.com
202.30.143.11
203.240.193.11
5 - 3 -
3
Page 51

3) Glossary
ADSL (Asymmetric Digital Subscriber Lline)
Asymmetric Digital Subscriber Line allows for transfer speeds of 1.5Mbps(or 6Mbps) into the
computer and up to 16kbps back up the telephone lines. ADSL uses standard telephone lines,
enabling ISDN basic speed interface (2B+D) to coexist with existing telephone line.
CGI (Common Gateway Interface)
CGI is the interface working between WWW server and back-end program (Gateway), and is used for
creating interactive web page like web browser (client) making query into database via web server.
CLIENT
Any intelligent device linked in a network to a server. A client can undertake its own computin g
using data provided by the server.
DDNS (Dynamic DNS)
DDNS system enables dynamic IP to simulate static IP.
DHCP (Dynamic Host Configuration Protocol)
Dynamic Host Configuration Protocol automatically allocates the information necessary fot TCP/IPbased communication, and is standardized in RFC 1541. It provides uniform administrative service of
IP address in TCP/IP environment.
DMZ (Demilitarized Zone)
Firewall zone to protect server from illegal access from external network. DMZ is an analogic
expression of firewall with demilitarized zone and is a intervening layer which filters out suspicious
data between internal network and external network.
DNS (Domain Name Service)
Domain Name Service provides the system that converts domain name into numerical IP address,
which means that you do not have to memorize all the numerical value of IP address to connect to
certain host of a network. While IP address is based on the address pointed off by 4-byte numerical
value, domain name is easily memorizable because it is readable as ‘www.nasdisk.co.kr’.
EIA (Electronic Industry Association)
Electronic Industry Association in U.S.
5 - 4 -
4
ETHERNET
Page 52

A LAN Transmission standard developed by DEC, Intel, and Xerox. It is featured by its capability of
transmitting data up to the data station 2.5km away at 10Mbps and 1,024 data stations can be
internetworked by the technology, one of the model originated from IEEE 802.3. The cable most
adopted by this standard includes 10BASE 5, 10 BASE 2 및 10 BASE-T out of which 10Base-T model
is most frequently used. Recently, Fast Ethernet with 100Mbps bandwidth has been put into market.
FTP (File Transfer Protocol)
This Internet protocol is used to copy files between computers--usually a client and an archive site.
It's old-fashioned, it's a bit on the slow side, it doesn't support compression, and it uses cryptic Unix
command parameters.
HFC (Hybrid Fiber Coax)
HFC networks combine both optic-fiber and coaxial cable lines. Optical fiber runs from the cable
head end to neighborhoods of 500 to 2,000 subscribers. Coaxial cable runs from the optical-fiber
feeders to each subscriber. Hybrid networks provide many of fiber's reliability and bandwidth benefits
at a lower cost than a pure fiber network.
HTTP (Hypertext Transfer Protocol)
The protocol used to transm it and receive all data over the World Wide Web. When you type a URL
into your browser, you're actually sending an HTTP request to a Web server for a page of information.
IEEE (Institute of Electrical and Electronics Engineers)
Institute of Electrical and Electronics Engineers in U. S.
IP ADDRESS
This address is a unique string of numbers that identifies a computer on the Internet. These numbers
are usually shown in groups separated by periods, like this: 130.69.240.4, which is 32-bit
arrangement each of 8bit(1 byte) pointed off by comma. All resources on the Internet must have an
IP address. IP address is administered by InterNIC in U.S., and KRNIC allocates the IP address for
domestic use.
JAVA
Sun Microsystems' Java, announced in May 1995, is a programming language for adding animation
and other action to Web sites. The small applications (called applets) that Java creates can play back
on any graphical system that's Web-ready, but your Web browser has to be java-capable for you to
see it. According to Sun's description, Java is a simple, object-oriented, distributed, interpreted,
robust, secure, architecture-neutral, portable, high-performance, multithreaded, dynamic, buzzwordcompliant, general-purpose programming language.
LAN (Local Area Network)
A local area network is a short-distance network used to link a group of computers together within a
5 - 5 -
5
Page 53

building. 10BaseT Ethernet is the most commonly used form of LAN. A piece of hardware called a hub
serves as the common wiring point, enabling data to be sent from one machine to another over the
network. LANs are typically limited to distances of less than 500 meters and provide low-cost, highbandwidth networking capabilities within a small geographical area.
MODEM (Modulator-Demodulator)
A modem is an external box or internal circuitry that converts computer data into sound that can be
transmitted over phone lines. First used to send telegrams, early modems alternated between two
different tones. This is called
modulation,
and the process of modulating (and demodulating at the
receiving end) gave the modem its name.
NAT (Network Address Translation)
Network address translation is a scheme that allows two connected networks to use different and
incompatible IP addressing schemes. Address translation allows hosts on a private internal network to
transparently communicate with destinations on an external network or vice versa. NAT also refers to
the name of a device that performs these functions. It enables certain TCP/IP application to be used
by converting the communication protocol of the applicative layer or transport layer.
NetBEUI (NetBIOS Extended User Interface)
NetBEUI is an extended version of NetBIOS that connects clients in a LAN environment. IBM
developed this standard protocol, which is a set of rules that an operating system uses to control how
computers on a network to talk to each other. The protocol is also used by Microsoft and Novell on
many network operating systems including LAN Server, LAN Manager, Windows NT, and Windows 95.
NetBIOS (Network Basic input/output System)
Application Program Interface used in PC-LAN provide d by IBM and Microsoft and it also works as a
protocol for local area network. ‘NetBEUI(NetBIOS extended user interface)’ is the extended version
of initial release. It is a basic format for Windows network environment in which NetBIOS name is
added to personal computer to be networked.
POP3 (Post Office Protocol Ver.3)
The current champ in Internet email mailbox access standards, but its limitations-basically, you
connect to a server and download
all
your messages, which are then deleted from the serverdiscourage flexibility. Of course, some clients let you leave all messages on the server, and/or refuse
to download messages above a certain size. The current version of POP is POP3
RFC (Request For Comments)
Public documents series announced by IAB for Internet-based inspection, suggetion, technologies,
and opinion. It is used as principle means for announcing the information on the Internet such as
procedure or format necessary when actualizing network protocol or service.
5 - 6 -
6
Page 54

SDSL (Symmetric Digital Subscriber Line)
SDSL stands for Symmetric Digital Subscriber Line, a relatively new technology that allows high data
transfer rates to be sent over existing copper telephone lines. SDSL is called symmetric because it
supports the same high data transfer rates for upstream and downstream traffic. SDSL works by
sending digital pulses in the high-frequency area of telephone lines that are not used by voice
communications. While double or triple pairs of copper-lines are used in HDSL, SDSL uses a pair of
copper-line, and is applicable to existing POTS or T1/E1 with maximum serviceable distance being
about 2.7km.
SERVER
The business end of a client/server setup, a server is usually a computer that provides the information,
files, Web pages, and other services to the client that logs on to it. (The word
server
is also used to
describe the software and operating system designed to run server hardware.) The client/server setup
is analogous to a restaurant with waiters and customers. Some Internet servers take this analogy to
extremes and become inattentive, or even refuse to serve you.
SMB (Server Message Block)
SMB, which stands for Server Message Block, is a protocol for sharing files, printers, serial ports, and
communications abstractions such as named pipes and mail slots between computers. TCP/IP ir
NetBEUI(Net BIOS extended user interface) can be 'communication network adaptor' for file/printer
sharing protocol used in Windows operating system.
SMTP (Simple Mail Transfer Protocol)
Protocol that regulates what goes on between the mail servers.
STORAGE
Technical term for digital device used to store data. Also called 'storage cell'. It is dividede into
internal memory unit and external memory unit.
SUBNET MASK
IPs are 32 bit binary numbers usually written as a decimal dotted quad, e.g. 209.139.205.2. There is
some additional structure in the number, called the net, subnet and hostnumber. Usually an ISP would
manage an entire net. There is a variable number of bits for each field. Depending on how big a fish
your ISP is, he would have a class A, B or C license. Class A would let him support 16,777,214 hosts,
B 65,534 hosts and C 254 hosts online at one time. The subnet mask is a binary number expressed as
a dotted quad to help determine how the IP number is composed.
TCP (Transmission Control Protocol)
Protocol coming under OSI 4-layer. And it is an element of TCP/IP. In TCP, arrangement or
5 - 7 -
7
Page 55

modification of packet is done in the order of packet arrival, which increases the reliability of data
transmission between two computers.
TCP/IP (Transmission Control Protocol/Internet Protocol)These two protocols were developed by
the U.S. military to allow computers to talk to each other over long distance networks. IP is
responsible for moving packets of data between nodes. TCP is responsible for verifying delivery from
client to server. TCP/IP forms the basis of the Internet, and is built into every common modern
operating system (including all flavors of Unix, the Mac OS, and the latest versions of Windows). .
TELNET
Telnet, developed as a service for ARPANET, is an application that lets you log on to a Unix computer.
Provided you have an account on that Telnet server, you can then use its resources. A drawback of
Telnet is that it's character-based, so you need to speak Unix to the other computer. It is in wide use
for TCP/IP-based Internet.
TIA (Telecommunications Industry Association)
Telecommunications Industry Association in U. S.
UDP (User Datagram Protocol)
Protocol basing TCP/IP, standard Internet protocol. In TCP/IP model, data trasmission is done through
the combination of IP, network layer protocol(OSI third layer), TCP, transmission control protocol or
UDP. While communication begins after session is set up, UPD does not include session set-up
procedure, which means faster transmission. But, there is no function such as error packet correction
or re-transmission as TCP does. UDP is adopted by multimedia application that requires high speed
rather than reliabilty.
URL (Uniform Resource Locator)
URLs are the Internet equivalent of standardized logical addresses. It is made up of protoco, host
name, address, and directory location. For example, http://www.nasdisk.com/index.html, or
ftp://ftp.nasdisk.com/pub/public.zip.
VDSL (Very high-Data rate digital Subscriber Line)
VDSL (Very high data rate Digital Subscriber Line) is a type of broadband transport technology for
twisted-pair access operating at data rates from 12.9 to 52.8 Mbps with corresponding maximum
reach ranging from 4500 feet to 1000 feet of 24 gauge twisted pair. VDSL is the most promising
technology capable of delivering full service today is for service providers. VDSL is both symmetric
and asymmetric and provides up to 52 Mbps of bandwidth, over voice, on a single twisted pair copper
loop. VDSL technology provides the service provider with the ability to create the type of business that
is critical for success in the new millennium. Those service providers that can deliver full narrowband
and broadband services consisting of voice, data, and video - including interactive TV - will be the
5 - 8 -
8
Page 56

dominating forces in the industry today, and in the near-term future, until fully fiber-optic solutions
are deployed.
WAN (Wide Area Network)
A WAN spans a large geographic area, such as a state, province or country. WANs often connect
multiple smaller networks, such as LANs or MANs. The most popular WAN in the world today is the
Internet. Many smaller portions of the Internet, such as extranets, are also WANs. WANs generally
utilize different and much more expensive networking equipment than do LANs. Technologies
sometimes found in WANs include SONET, frame relay, and ATM.
WWW / WEB (World Wide Web)
Also known as the WWW, the W3, or most often simply as the Web, it originally developed by CERN labs in
Geneva, Switzerland. Continuing development of the Web is overseen by the World Wide Web Consortium.
The Web can be described (dryly) as a client/server hypertext system for retrieving information across the
Internet. On the Web, everything is represented as hypertext (in HTML format) and is linked to other
documents by their URLs. The Web encompasses its native http protocol, as well as ftp, Gopher, and Telnet.
XDSL (x Digital Subscriber Line)
Various digital subscriber line.
4) Assembling HDD
5 - 9 -
9
Page 57

Warranty by Maverick System
Please, install the product following the set-up procedure specified in the user manual provided by
Maverick System Co., LTD.
1. Warranty period
Warranty period for the product is 12 months from the day of purchase and we guarantee that the
product will function well during the warranty period.
2. Warranty Details
(1) In case of the product default during the warranty period, you will be entitled to the repair or recall
in accordance with the regulation of consumer compensation.
(2) In any case, Maverick System Co., LTD will not be liable for more compensating fee than the
amount paid for the resultant damage done directly, indirectly, specially or accidentally by the
software or manual provided by Maverick System Co., LTD.
(3) In the section (1), the warranty is provided for nothing except for the following cases.
1) Damage of the product caused by force d' major such as disaster or accident
2) Damage caused by carelessness or misuse of user.
3) Damage resultan t from dealing with or moving the product with unacceptable way.
4) Damage resultant from using the module, power line or other options that are not included in
warranty specification.
5) Damage from modifying or adding to the product by the person or third parties other than the
representative staffs from Maverick system.
(3) The part used when replacing the product with defect is normal and standardized one and the
replaced part will belong to Maverick System.
(4) The warranty provided herein is valid only in South Korea.
3. Providing warranty service and procedure.
Warranty service specified in this document is provided from Maverick System during only the warranty
Page 50
Page 58

period.
4. Exclusion of warranty
Warranty specified in this document provides all the warranty details including explicit or implicit
liability on the product of Maverick System. In case of defect, all means for customer to claim damage
are comply with the regulation for consumer guarantee or product repair service in Maverick system.
5. Customer Information
Fill in the blank your personal information on the following (necessary when getting A/S)
Customer name :
Zip code:
Contact :
FAX :
Day of purchase :
Location of purchase :
Product name : Serial number :
Warranty period : 12 months
6. Contact
Technical Support Department, Customer support team,.
Address : 5th floor Seocho World Officetel 1355-3 Seocho-dong Seocho-gu Seoul, South Korea
Phone : 82-2-6283-7425
Fax : 82-2-6283-7421
7. Service hour
Monday ~ Friday, save holiday. a.m 9 ~ p.m 6
Page 51
 Loading...