

Page 1
4) Press any button o n the display and the alert will stop
temporarily. The OVEN TEMP display will continue to blink
as long as the OVEN TEMP reading exceed s the oven set
temperature.
5) If the OVEN TEMP temperature is still higher then the oven
set temperature afte r 2 minutes, the alert will activate again.
It will continue to reactivate every 2 minutes until the alert is
turned off or the temperatur e reading drops below the oven set
temperature.
6) Press the ALERT but ton until the alert symbol disappe ars
from the display to turn the alert off.
DIRECT IONS FOR COOKING
1) Pre-heat the oven to the desire d cooking temperature.
2) Sterilize the metal thermometer probe b efore every use.
Clean the metal probe and cable with a wet cloth s oaped with
mild detergent and dry thoroughly with a dr y cloth before every
use. Do not immerse the probe, cable or thermometer in water
while cleaning.
3) Be sure desired thermo meter reading is switched to either
°F or °C.
4) Set desirable food temp erature and oven temperature.
5) Insert the tip of the stainless s teel probe into the center
of the meat. Do not place the prob e near the bone, the
gristle or the cooking surfa ce as this will not give an accurate
temperature reading.
6) Place the meat in the oven with the wired probe in place .
The electronic display unit must be placed outside of the o ven.
The probe wire will be held in place by the oven door.
7) Make sure the probe plug is securely plugge d into the
display unit.
8) The food tempera ture will be displayed in the lower line of
the LCD display, while the oven temperature will be displayed
in upper line of the LCD display. When cooking in a barbecue
or smoker, do not use as a continuous read thermometer, use
only as an instant read thermometer.
TO SET COUN T DOWN TIMER
1) Press the MODE button until the TIMER display appear s.
2) Press the HR button until the de sired hours are reached in
the timer box on the display. Hold down the button to quickly
scroll.
3) Press the MIN button until the desire d minutes are reached
in the timer box on the display. Hold down the button to
quickly scroll.
4) Press the START/STOP but ton to begin the count down
function. The down arrows be gin to blink. Count down begins
counting in seconds digits. Count down c an be paused and
restarted by p ressing the START/STOP but ton.
5) When count down is complete, the aler t sounds a 3 tone
alert, and the display blink continuously for 20 seconds. T he
timer begins to count up in overtime. Pres s the START/STOP
button to turn the alarm off.
6) While the timer is counting up in overtime, press START/
STOP to pause the timer. Press the HR and MIN buttons
simultaneously to re-set a st art time. Press th e START/STOP
button again to resume the count up fro m the newly set time.
7) When overtime count up reache s the maximum timer time
of 9:59: 59, the numbers reset automatically to 0 :00 :00, a 4
tone alert sounds, and the display blinks continuously for 20
seconds.
8) To reset the timer to 00: 00, press the HR and the MIN
buttons simultaneously. This clears the time set in the TIMER
box on the display. If the timer is not reset to 00 :00, it will
default back to the last programm ed time when the countdown
is complete.
TO USE STO PWATCH TIMER
1) Press the MODE button until the timer display appea rs.
2) The display must be reset to 0 :00:00 by pres sing the HR
and MIN buttons simultaneously before the count up stopw atch
timer is begun.
3) Press the START/STOP b utton to begin stopwatch count up
timer.
The will begin flashing on the display unit.
4) Press the START/STOP but ton to pause/ stop the timer. This
stops blinking when the timer is paused or stoppe d.
PRECAU TIONS
1. Do not clean the unit with abrasive or corrosiv e compound.
It may scratch the plastic and corrod e the electronic circuit.
2. Do not subject the unit to excessive force , shock, dust,
temperature, direct sunlight, heavy ex posure to water or
humidity, which may result in malfunction, shorter electronic
life span, battery damage o r distorted par ts.
3. Do not tamper with the units internal compone nts. It will
invalidate the warranty.
4. Keep the metal probe and wire away from children.
5. Do not use this unit to measure cooking tempe ratures over
536°F or 280°C. Do ing so will deteriorate the durability of the
wire.
6. Do not use the probe /thermometer in a microwave oven.
7. Always wear a heat resistant glove to touch the metal p robe
or wire during or right after cooking. D o not touch with bare
hands.
8. Do not expose the plug of the p robe or the plug hole on the
thermometer/display unit to water /water vapo rs or liquids. This
will result in a bad connection and faulty readings. D ry the
plug thoroughly with a dry cloth before eve ry use.
9. Do not immerse the probe, ca ble or thermometer in water
while cleaning.
10. Do not use the thermometer to determine oven
temperature.
11. Never expose probe or wire to direct flame.
12. Do not place the display unit inside the oven.
NOTES
• When measured temp below 32° F, display shows blinking Lo.
• When measured temp ever exce eds 572°F, display shows
blinking Hi.
• Should the temp display shows Lo, check the cable
connection. The plug may not be well connected. If so, re -plug
again.
• Should the display shows “Hi or Lo”, and not fall into any of
the above conditions, it is likely that the probe is damaged and
needs to be replaced.
HOW TO INSTA LL/CHAN GE BATTERY
1) Remove the battery cover on the re ar side of the unit
2) Insert batter y according to the polarity indication inside the
battery compa rtment.
3) Replace the battery c over
HOW TO TUR N ON/ OFF
1) Press and hold the ALERT button fo r 2 seconds to turn the
unit ON.
2) Press and hold the ALERT but ton for 2 seconds to turn the
unit OFF.
CHANGE R EADING FROM °F TO °C
Press °C /°F but ton to switch units from Fahrenheit to Celsius.
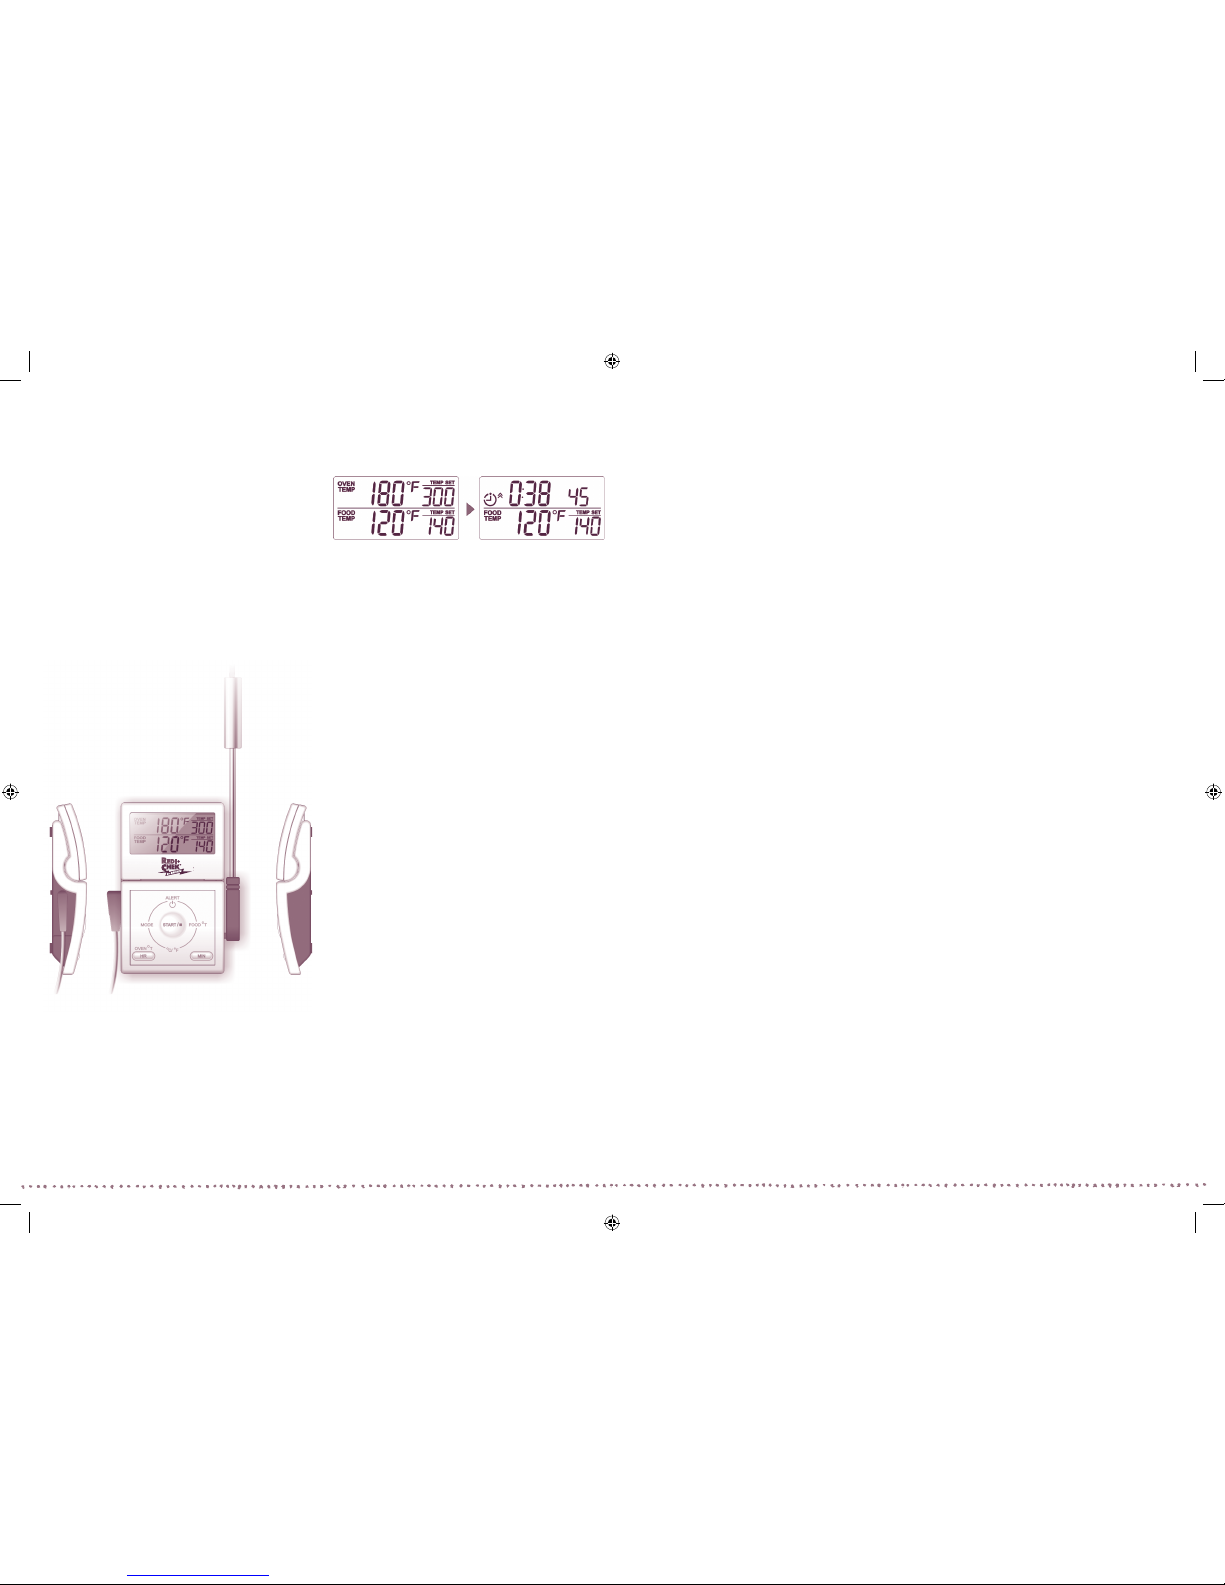
CHANGE DI SPLAY FROM OVEN TEM PERATURE TO TIMER
Press the MODE but ton to change the top portion of the
display screen between the OV EN TEMP and the TIMER.
ALERT SI GNALS
This timer has four different alerts to nes that represent
different features. The y are as follows:
• Oven: Alert will signal one tone pe r second.
• Food: Alert will signal two ton es per second.
• Timer: Alert will signal three tones per s econd.
• Overtime: Ale rt will signal four tones per seco nd.
SETTIN G THE FOOD TEMPER ATURE
Food Temperature Range:
Operating Food range : 32°F - 536°F / 0°C - 28 0°C
Displayable Food range: 32 °F - 572°F / 0°C - 300°C
Food Alert range : 86°F - 572°F / 30°C - 300 °C
1) Press the FOOD °T but ton until the desired food set
temperature is displayed. Hold the button do wn to scroll
quickly.
2) Press the ALERT but ton to turn the audio alert on, the alert
symbol will appear on the display.
The temperature alert will automatically so und a 2 tone alert,
a symbol will appear on the display, and the FOOD TEMP
temperature will blink continuously when the FOOD TEMP
temperature exceeds the foo d set temperature by one de gree.
3) Press any butto n on the display and the alert will stop
temporarily. The FOOD TEMP display will continue to blink
as long as the FOOD TEMP reading exce eds the food set
temperature.
4) If the FOOD TEMP temperature is still higher then the foo d
set temperature afte r 2 minutes, the alert will activate again.
It will continue to reactivate every 2 minutes until the alert is
turned off or the temperatur e reading drops below the food s et
temperature.
5) Press the ALERT but ton until the alert symbol disappe ars
from the display to turn the alert off.
SETTIN G THE OVEN TEMPER ATURE
Oven Temperature Range:
Operating Oven range : 32°F - 536°F / 0°C - 28 0°C
Displayable Oven range: 32 °F - 572°F / 0°C - 300°C
Oven Alert range : 86°F - 572°F / 30°C - 300° C
1) Press the OVEN °T button until the de sired oven set
temperature is displayed. Hold the button do wn to scroll
quickly.
2) Press the ALERT but ton to turn the audio alert on. The aler t
symbol will appear on the display.
3) When the OVEN TEMP temperature exc eeds the oven
set temperature by one deg ree, the temperature aler t will
automatically sound a 1 tone alert, a symb ol will appear
on the display, and the OVEN TEMP temperature will blink
continuously.
READ DIRECTIONS
THOROUGHLY BEFORE
USING THIS PRODUCT.
ET85 Instructions.indd 1
8/30/07
MAVERICK MODEL # ET-85
INSTRUCTION MANUAL
DUAL SENSOR
OVEN & ROASTING
DIGITAL THERMOMETER
WITH TIMER
TEMPERATURE RANGE
32°F TO 572°F
MAVERICK LIMITED 1 YEAR WARRANTY
Maverick Industries Inc. warrants this product to be free of defects in parts, materials and workmanship for
a period of 1 year, from date of purchase. Should any repairs or servicing under this warranty be required,
contact Maverick Customer Service by mail or phone for instructions on how to pack and ship the product to
Maverick’s National Service Center located as follows:
Maverick Customer Service
94 Mayfield Ave.
Edison NJ 08837
Telephone: (732) 417-9666
Hours:Weekdays 8:30 AM- 4:30 PM
Do not send any parts or product to Maverick without calling and obtaining a Return Authorization Number
and instructions. This warranty is VOID if instructions for use are not followed; for accidental damage; for
commercial use; for damage incurred while in transit; or if the scale has been tampered with. This warranty
gives you specific legal rights and you may also have other rights which vary from state to state.
www.maverickhousewares.com
 Loading...