

Page 1
INSTRUCTION MANUAL
MODEL #ET-705C
REMOTE BBQ THERMOMETER
INTRODUCTION
Congratulations on your purchase of the Remote BBQ Thermometer, a programmable radio frequency food thermometer.
You will now be able to remotely monitor the time and temperature of food cooking on your grill from anywhere, even
in your home.
COMPONENTS
1. 1 - receiverunit
2. 1 - transmitter unit
3. 1 - detachable stainless steel probe sensor
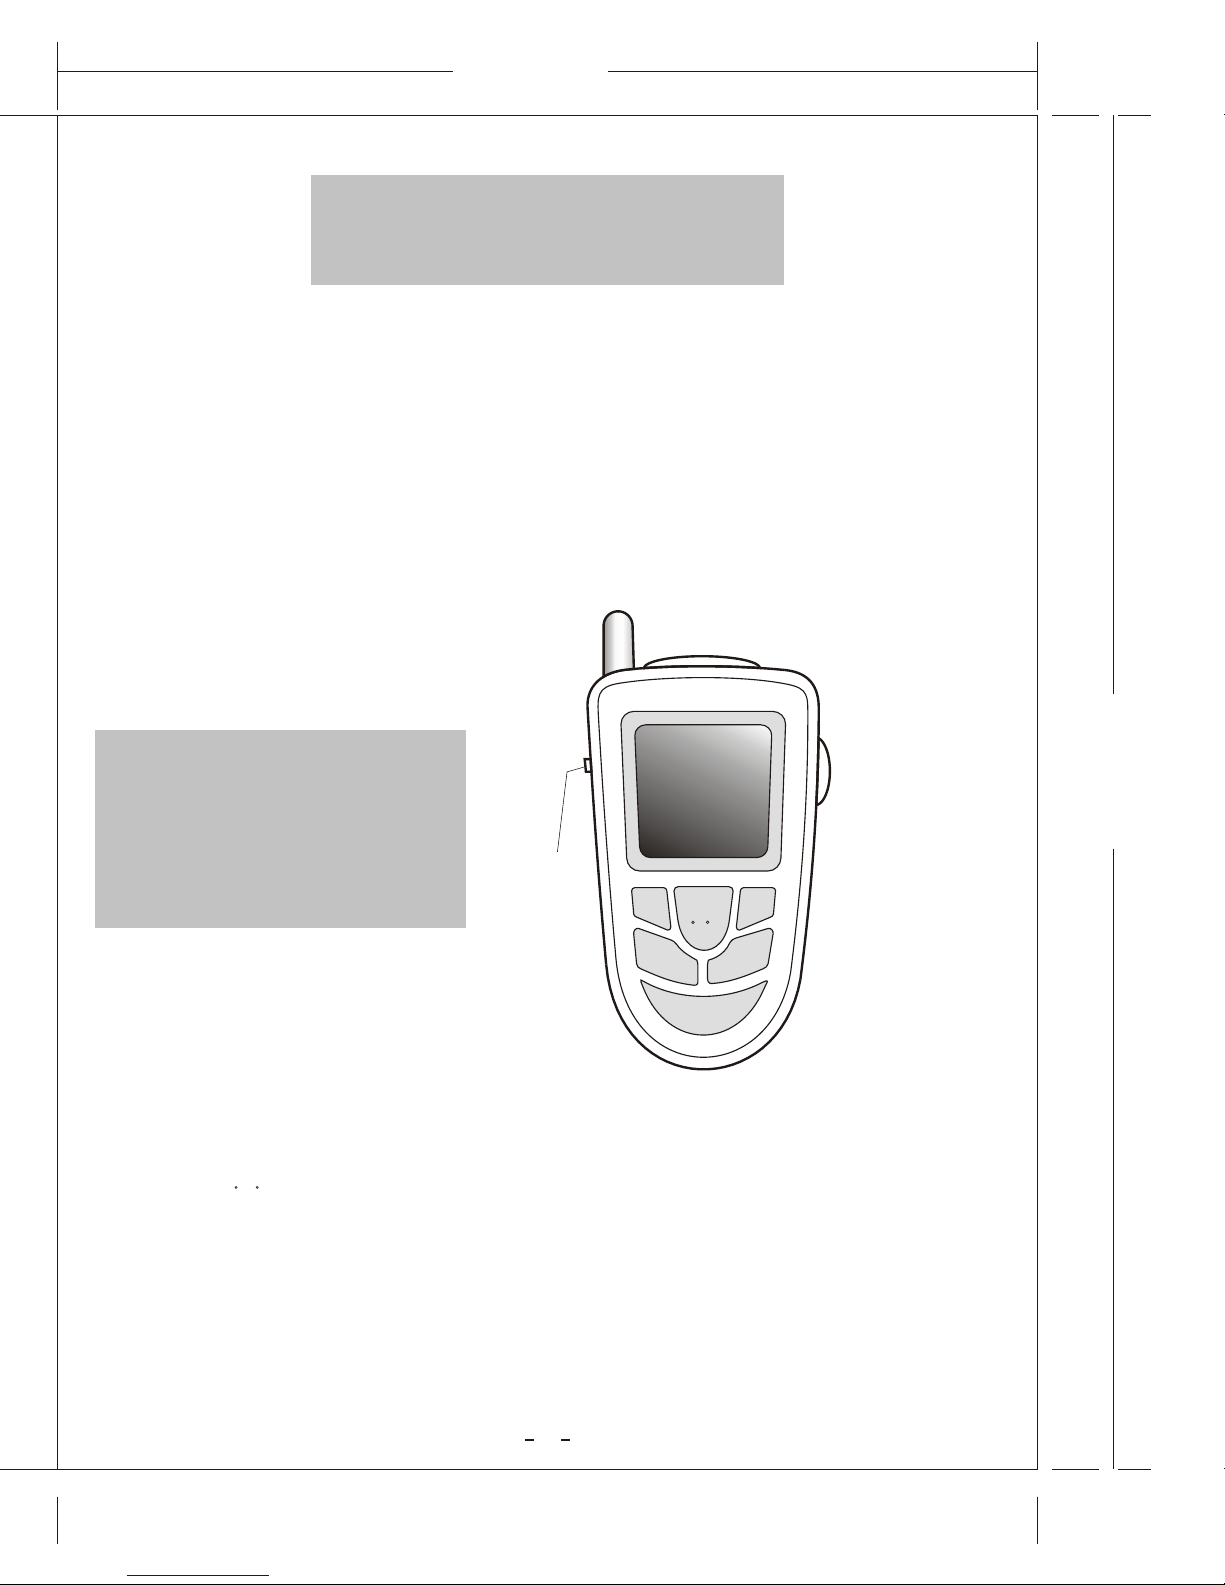
RECEIVER FEATURES
LCD(Liquid Crystal Display) - Displays all icons,
temperatureand time.See LCDdiagram for
detailed information.
CLIP-Battery compartment clip allowsyou to
be mobile.Clip the receiverunit to belt.
-
BATTERYCOMPARTMENT Holds 2 AAA batteries.
BUTTONS
1. HR - In timer mode, press to set hour. Press & hold for 2 seconds, the hours will increase 10 hours per second. In
thermometer mode, press to increase the temperature value. Press & hold for 2 seconds, the temperature value will
increase 10 degrees per second.
2. START STOP/F/ C - In timer mode, press to start or stop the timer. In thermometer mode press to select temperature
readings in Celsius or Fahrenheit.
3. MIN - In timer mode, press to set minutes. Press & hold for 2 seconds, the minutes will increase 10 minutes per second.
In thermometer mode, press to decrease the temperature value. Press & hold for 2 seconds, the temperature value will
decrease 10 degrees per second.
4. MEAT - In thermometer mode, press to select meat type, HAM, BEEF, G. BEEF (ground beef), VEAL, LAMB, PORK,
CHICK (chicken), TURKY (turkey) or PGM (program).
5. TASTE - In thermometer mode, select the taste level, W.DONE (well done), MEDIUM, M. RARE (medium rare) or RARE.
7. MODE - Press to select thermometer or timer mode. Press & hold for 2 seconds to register with the transmitter.
8. ON/OFF - Turns receiver functions on and off.
HRHR
STARTSTART
MEATMEAT
TASTETASTE
MODEMODE
F/ CF/ C
MINMIN
STOPSTOP
ON/OFFON/OFF
1
180.00 mm
130.00 mm
Page 2

TIMER
MEAT
W.DONE
M.RAR
E
MEDIUM
RAR
E
TEMP
SET
TEMP
PROBE
LCD
TRANSMITTER FEATURES
-
HOLDER Holds thereceiver.
-
BATTERYCOMPARTMENT holds2 AAA batteries.
-
S plug inforstainless steel probe sensor.
BUTTONS
ON/OFF - on normaloperation with full function. Off turns transmitter off.
REGISTRATION PROCEDURES
Open the battery compartment of receiverand insert the two AAA batteries. Open the battery compartment of
transmitter and insert the two AAA batteries.
The Remote BBQ Thermometerneeds the receiverto registerthe radio frequency signal from the transmitter.
TRANSMITTER & RECEIVER ARE OFF.
1. Plug the stainlesssteelprobe sensor into the plug in of the transmitter.
2. Turnthe receiveron by sliding switch on the side of the receiverfrom OFF to ON.
3. Turntransmitter on by sliding switch ontheside of the transmitter fromOFFto ON. This needs to be done within 60
seconds of turning on the receiverin order for the receiverto registerthe signal from the transmitter.If it doesn't
showthe probe temperaturewithin 5-10 seconds slide switch OFF waita fewseconds and then switch back ON.
4. Registrationis complete when the receivershows the probe temperaturewhere the --- was flashing.
MEASURE MEAT TEMPERATURE TO USDA DONENESS TEMPERATURE RANGE
1. PressMODEto select thermometermode. The upper display willshowa small MEATand a meat type such asHAM .
2. PressMEATto select meat type. HAM, BEEF, G.BEEF (ground beef),VEAL,LAMB,PORK, CHICK (chicken), TURKY (turkey)or
PGM (program).
3. Press TASTEto select the levelof donenessfor the meat type selected. W.DONE (welldone), MEDIUM, M. RARE
(medium rare)or RARE indicated by a .
Note: The temperature displayed to the
right
of the selected taste will show the preset temperature SET
TEMP according to USDA doneness levels. Example: Beef will be Well Done at 170 F.
4. Once thetemperatureof meatreaches the presetdoneness levelthe receiverwill beep,the icon and the probe
temperaturewill blink.
MEASURE MEAT TEMPERATURE SET TO YOUR SPECIFIC TASTE
1. PressMODEto select thermometermode. The upper display willshowa small MEATand a meat type such as
HAM.
2. Press HR or MIN toraise or lowerthe set temperature.Holding the button will raiseor lowerthe temperaturesetting
rapidly.The as wellas the taste levelwill disappear from thedisplay when setting for yourownindividual
taste.Pressing MEATor TASTEwill returnyou to the preset USDAranges.
3. Once the temperatureof meat reaches the preset doneness levelthe receiverwill beep,the icon and the probe
temperaturewill blink.
USING THE TIMER
Count down
1. Press MODE to select timer mode.The upper display will showa small TIMER and 0:00.
2. PressHRand MIN button to set the timer.Press START/STOPbutton to start countdown. Will blin for every
second.3. Tostop the countdownprocess , press START/STOPbutton. The becomes solid.
4. Press
HR & MIN
buttons togetherto clear the setting backto 0:00.
Note: The minimum setting for the timer is 1 minute.When the timer counts down below 1 hour 1:00 the
display will change to 59'59 display advising 59 minutes 59 seconds. The seconds will be shown
counting down then.When the countdown reaches 0'00 thetimer starts counting upand it will beep for
20 seconds. The timer and will blink. Press the START/STOP button to stop beeping. When the count
up reaches 23:59:59 (59 seconds are not displayed) the display will turn to 0:00, the unit beeps and
will blink for 20seconds.
Count up
1. PressMODEto select timer mode.The upper display will showa small TIMER and 0:00.
2. PressSTART/STOPbutton to start count up.The will blink for everysecond.
3. Tostop the count up process , press START/STOPbutton. The becomes solid.
4. Press
CLEAR
to clear the settingbackto 0:00.
PROCEDURE FOR TYPICAL USEON AN OUTDOOR GRILL:
The followingtypical examplewill gothrough thesteps to havethe
Remote BBQThermometer alertyou
to when abeef steak
is cookedto medium(USDAdoneness level)and remindyouto rotate hotdogs in5 minutes.
1. Followthe registrationprocedure.
2. Place steak andhotdogs on grill rack.
3. Insert probesensor into the center of thickest portion of the steak. Avoidtouching bone or heavy fat areas.
4. Positiontheprobe sensor wire so they will notcomeinto contact with flames and exit the grill surface areawithout
being pinched/crushed bythegrill cover.
5. Stand the transmitterawayfrom heat source of grill. DO NOT put transmitter on closedcoveror under the cover.
The transmitteris not waterproof DO NOT use in the rain.
6. PressMEATso BEEF is displayed.
7. PressTASTEso MEDIUM has aroundit 160 will be shownas the SET TEMP.
8. PressMODEto change to timer mode.
9. Press MIN 5 times to set for 5 minutes so that 0:05 is displayed. PressSTART/STOPto start the countdown.
Press MODEtogo back to thermometermode.
10. Turnon the grill.
11. Clip the receiverto your belt or pocketandmoveup to 100 ft awayfrom the outdoor grill. Goindoorsif desired.
12. When 5 minutesareup the receiverwill beep for 20 seconds.
13. When the temperatureof probe in the steak reaches MEDIUM the receiverwill beep continuously.The probe
temperatureand will blink continuously.
14. PressSTOPto turn off the alert. The alert will beep and blink after twominutes if the probe temperatureremains
abovethe set temperature.The alert stops when the probe temperaturefalls belowthe set temperature.
15. Turnoff grill. Removethe probe sensor from steak. Alwayswear a heat resistant gloveto touch the stainless
steel probe sensor or wireduring or just after cooking. Do not touch with bare hands.
32
 Loading...