

Page 1
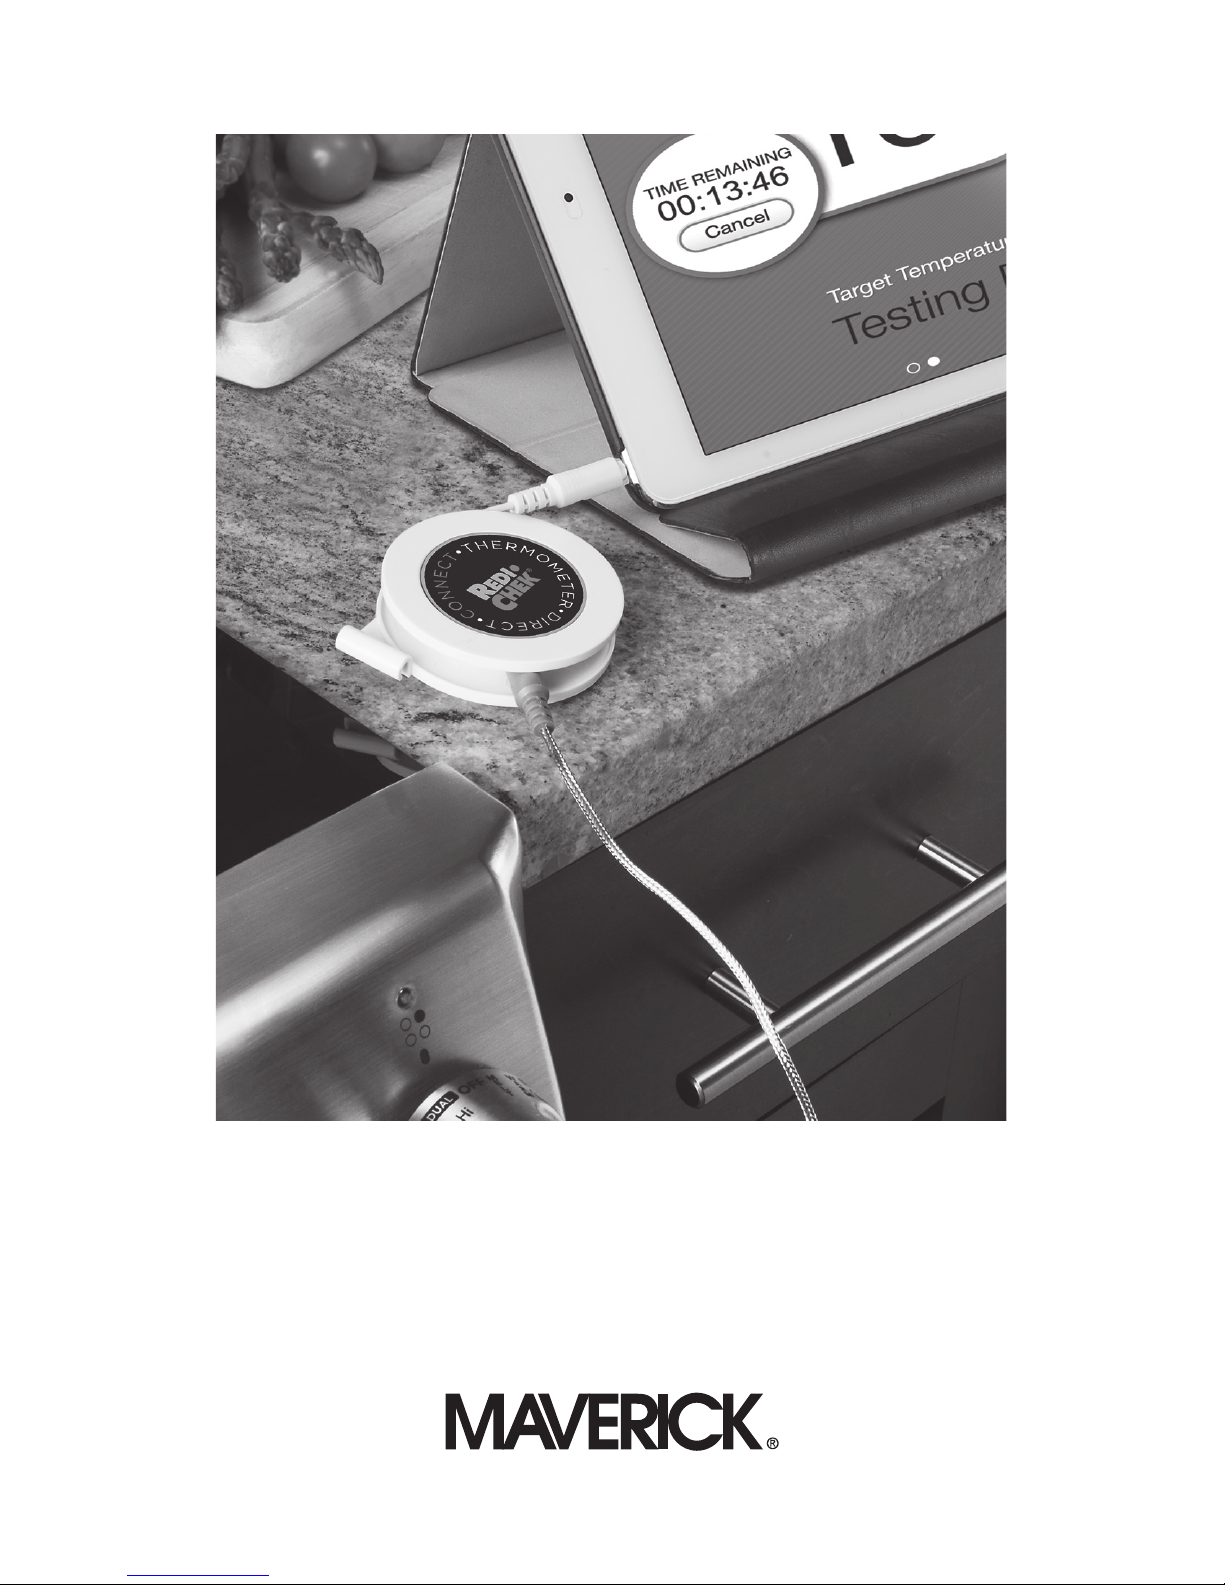
Thank you for selecting Maverick’s Redi Chek ET-11
Direct+Connect Roasting Thermometer. Turn your iPhone,
iPad, Android or Tablet into a roasting thermometer by
following these simple instructions.
ET-11 Redi Chek
Direct+Connect
Roasting
Thermometer
Page 2

Step 2:
Slide off the Redi Chek ET-11 Thermometer battery cover as
directed by the arrow. Insert the CR2032 battery (included),
plus side up. Slide the battery cover back in place until
it clicks.
Back of the Redi Chek ET-11
Direct+Connect Roasting Thermometer (shown here)
2
GETTING STARTED
Step 1:
Preheat the oven to your desired
roasting temperature.
C
R
2
0
3
2
3 VOLT
BATTERY
Suction
Cup
Smart Device
Jack
Probe Jack
Battery
Cover
White
Plastic
Probe Tip
Protector
Probe
Holder
Battery Goes Here
Page 3
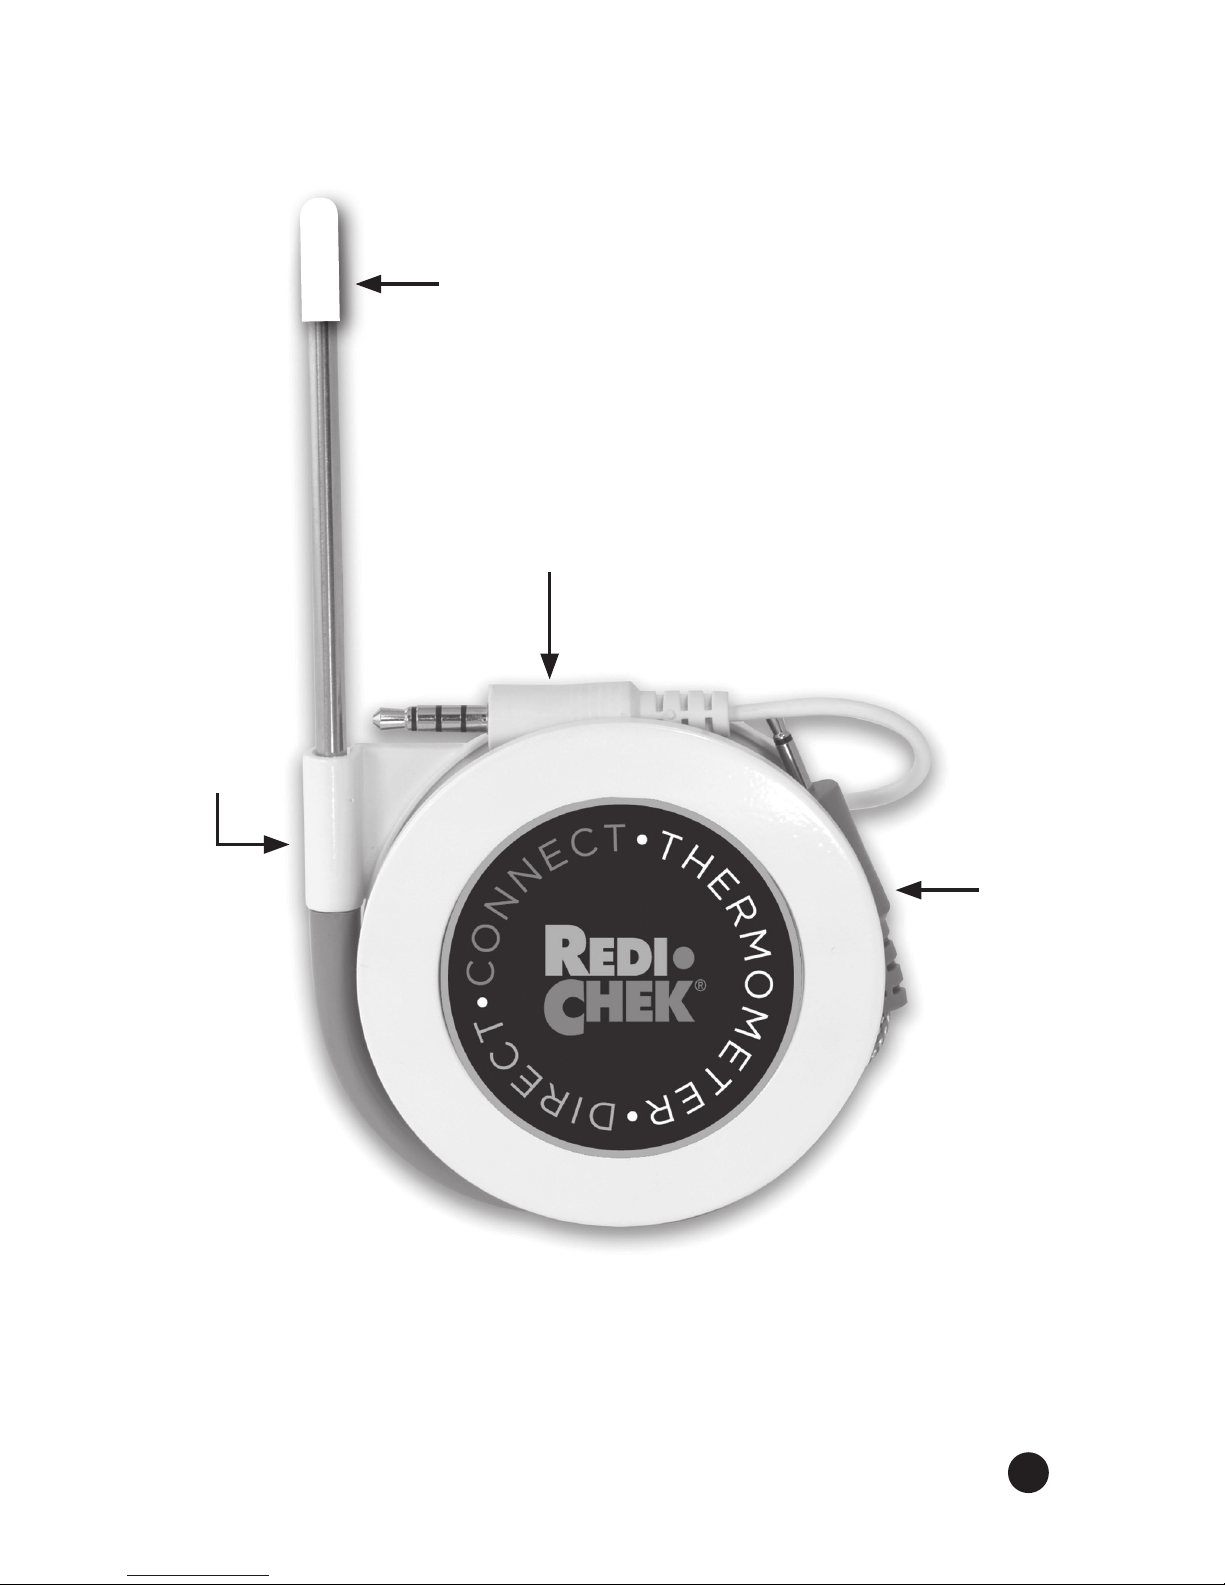
3
Front of the Redi Chek ET-11
Direct+Connect Roasting Thermometer (shown here)
White Plastic
Probe Tip Protector
Smart Device
Jack
Probe
Jack
Probe
Holder
Page 4

4
Step 3:
On your iPhone, iPad, Android or Tablet, go to the Apple App
Store or Google Play Store to download the Free RediCheck
ET-11 app. When searching for the app, make sure to type
RediChek as one word. Once you have successfully
downloaded the RediChekET-11 app, open it.
RediChekET-11 app icon
Step 4:
Plug the smart device jack securely into the port of your
smart device. Now plug the probe jack securely into the port
of the Thermometer base unit.
Page 5
5
Step 5:
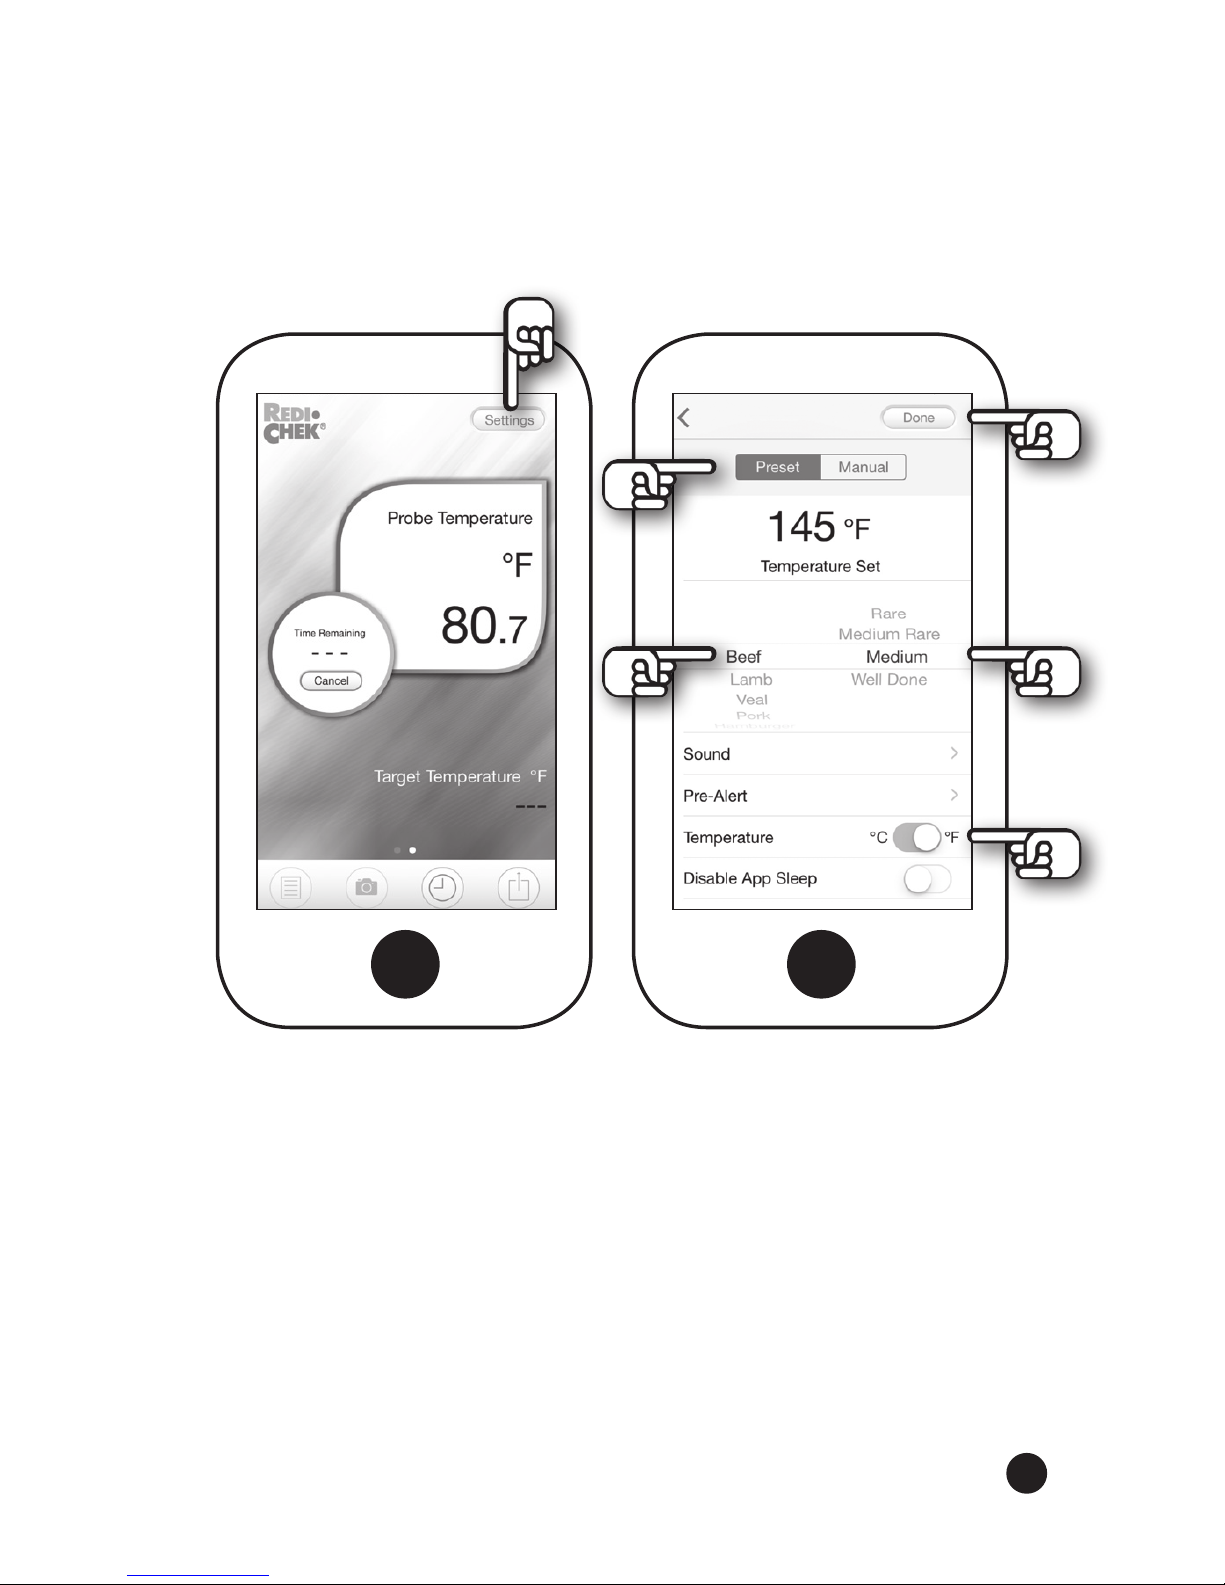
Now you are on the Redi Chek ET-11 monitor screen (A). Press
Settings in the upper right corner. Now you are on screen (B).
Step 6: (Preset Doneness Temperature Option)
Tap
0
C or 0F to set desired Temperature mode. You are now
in Preset mode. Scroll down the left side of the screen to
select the food to be cooked. Scroll down the right side of the
screen to set temperature doneness. The Temperature Set
will appear in the center of the screen. Tap Done in the top
right corner.
(A) (B)
Page 6

Step 7: (Manual Doneness Temperature Option)
Tap 0C or 0F to set desired Temperature mode. Tap Manual
which brings you to screen (C). Now press Peak. Under
Temperature Set, scroll to set the desired doneness
temperature. Tap Done in the top right corner.
(C)
6
(B)
Page 7

Step 8:
Tap Settings in upper right corner of screen (A). You are now
on screen (B). Tap Sound.
7
(A) (B)
Page 8

8
Step 9:
You are now on screen (E). Scroll through the preset Sound
Settings. You can tap the arrow on the lower left side to listen
to each sound. Select your preferred alert sound, then tap
Done at the top right corner. To record your own voice as the
alert, scroll down to Customize 1 and tap the Microphone
Icon on the lower right side. Press OK then unplug the probe
from your device. Tap the arrow to record your message,
then press Done at the top right corner. Re-insert the probe
securely into your device.
(E)
Page 9

9
Step 10:
Now you are back on screen (B). Tap Pre-Alert to select the
optional Time or Temp Pre-Alert signal.
You are now on the Pre-Alert screen (F). Tap Time then scroll
to set hours / minutes you want to be alerted in advance of
the finished set temperature.
(B) (F) Time
Page 10

10
Now Tap Temp, then scroll to select how many degrees in
advance of the set finished temperature you want to be
alerted. Press Done. This will return you to Preset (screen B).
(F) Temp (B)
Note: To change or adjust the Time or Temperature settings,
press the arrow on top left of screen to return to the Home
Screen. Press Cancel in the center circle. Press Settings at
top right corner to reset options.
Page 11

11
Step 11:
Tap the arrow in the top left corner of your screen to return to
the Redi Chek ET-11 Home screen (A). You now are ready to
cook! Remove the white plastic tip-protector from the metal
probe. Insert the metal probe into the center of the meat
before placing it into the oven. Leave the probe wire, the
Redi Chek ET-11 thermometer and your smart device outside
the oven door. When the internal temperature of the meat
reaches the programmed doneness / timer settings, the alert
will sound on your smart device.
(A)
Page 12

Cooking Photos, Notes & Sharing with Friends:
The Redi Chek ET-11 give you the opportunity to maintain
notes, maintain a history on your cooking experiences and
take photos you can share with friends and family. You can
access these features by tapping on the icons at the bottom
of the Redi Chek ET-11 Home screen (A). See call-outs below.
(A)
12
Notes Share
Photos
History
Page 13

Important Redi Chek ET-11 Direct+Connect
Roasting Thermometer Information
• Display cooking progress graph in real-time on your smart device
by swiping the Home Screen to the right to monitor the Target
Temperature and Time Remaining.
• For easy storage and mobility, wrap the probe wire around the
base unit and snap the probe into its slot.
• Do not touch hot stainless steel probe or wire with bare hands.
Always wear heat resistant gloves before removing probe and
wire from food during or just after cooking.
• ET-11 temperature range is 40F to 3920F (200C to 2000C).
• Clean the Food Probe by wiping it with a soft cloth and warm,
soapy water. Do not immerse the Food Probe, Probe Jack, Probe
Wire or Thermometer in water or dishwasher.
Cooking Tips
• When inserting the Food Probe, be sure the tip is not touching
bone or resting in fat.
• For steaks and chops, insert the Food Probe from the side to
the center.
• Allow meats to rest 3 to 5 minutes or longer before slicing
to allow its flavorful juices time to redistribute throughout
the meat.
• Meat continues to cook while resting. Final doneness temperature
can increase 3 to 10 degrees.
13
Page 14

Maverick Limited 90-Day Warranty
Maverick Industries, Inc. warrants this product to be free of
defects in parts, materials and workmanship for a period
of 90 days from date of purchase. Should any repairs or
servicing under this warranty be required, contact Maverick
Customer Service by mail or phone for instructions on how
to pack and ship the product to Maverick’s National Service
Center located as follows:
Maverick Customer Service
94 Mayfield Ave.
Edison, NJ 08837
Telephone: (732) 417-9666
Hours: Weekdays 8:30 am - 4:30 pm
Do not send any parts or product to Maverick without
calling and obtaining a Return Authorization Number and
instructions. This warranty is VOID if instructions for use are
not followed; for accidental damage; for commercial use;
for damage incurred while in transit; or if the product has
been tampered with. This warranty gives you specific legal
rights and you may also have other rights which vary from
state to state.
14
Page 15

Page 16

www.maverickhousewares.com
 Loading...