

Page 1
MANUAL
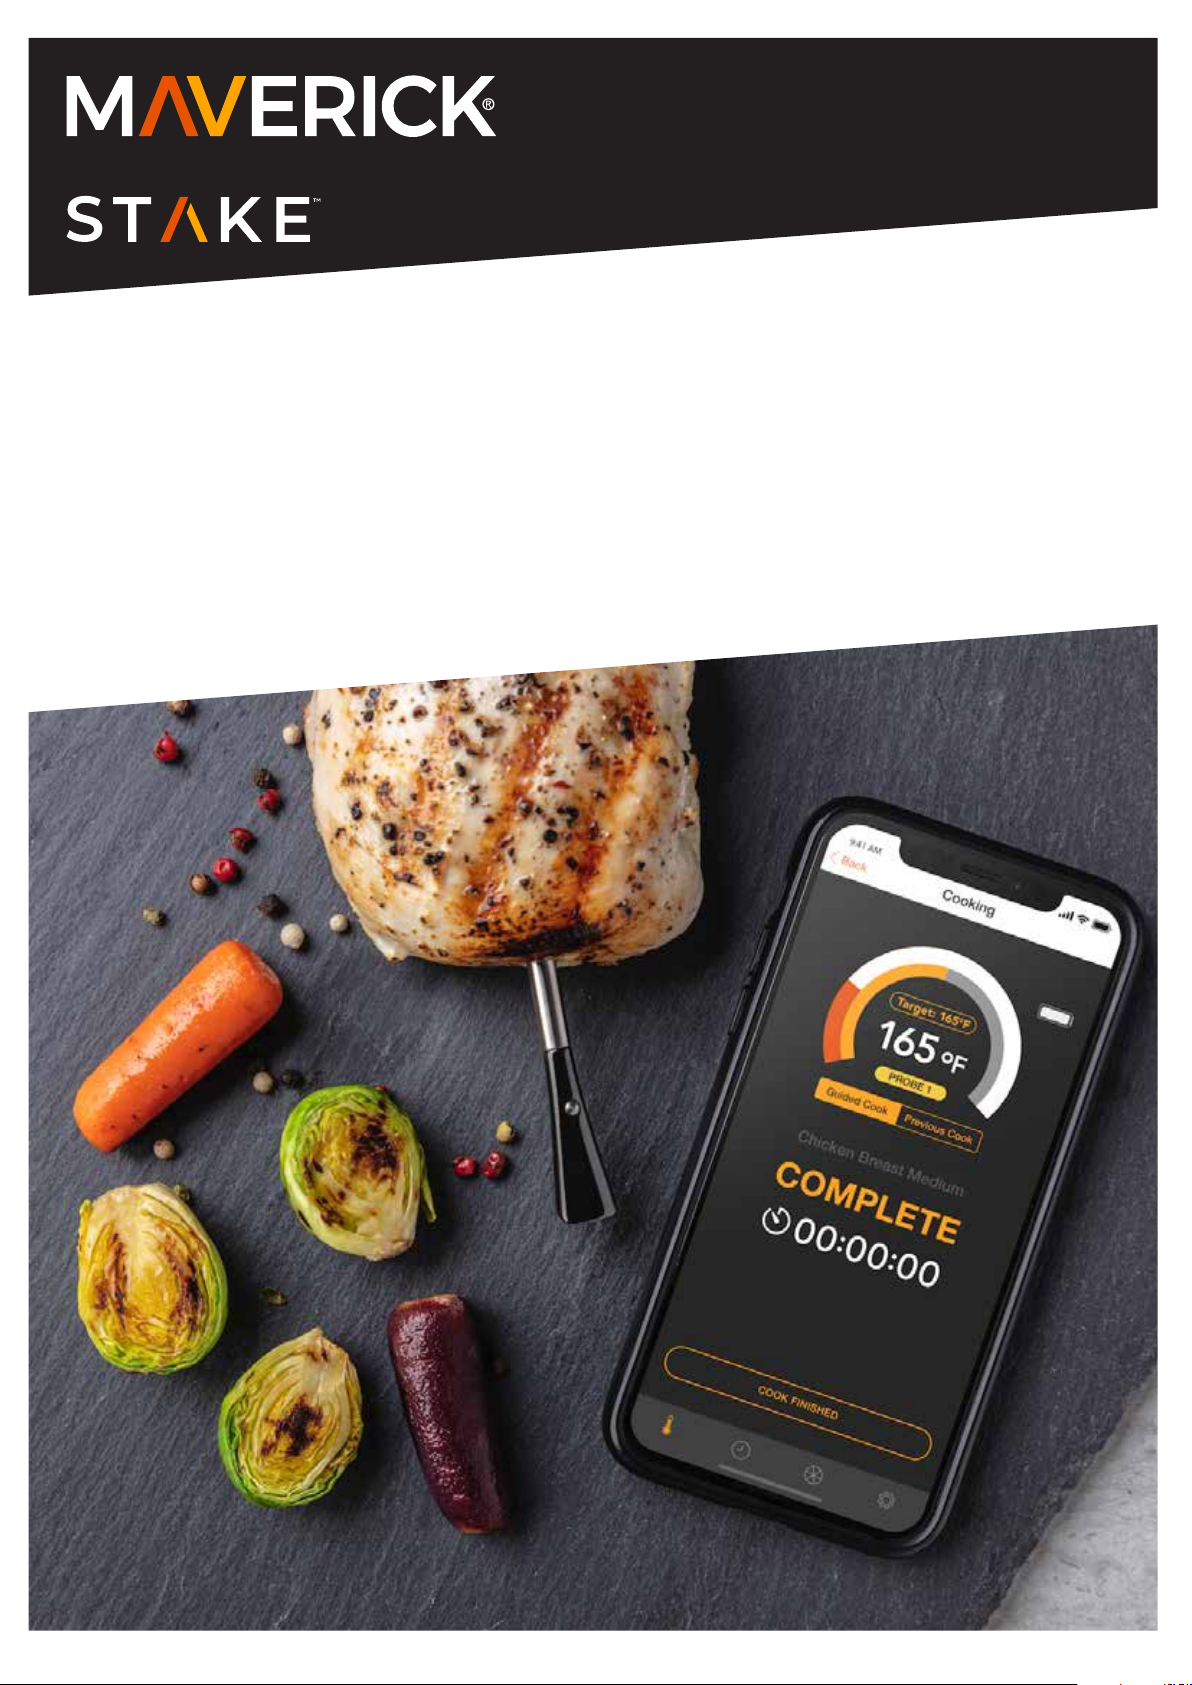
Intelligent Digital TRULY Wireless
FOOD THERMOMETER
Page 2
1.0 Introducon
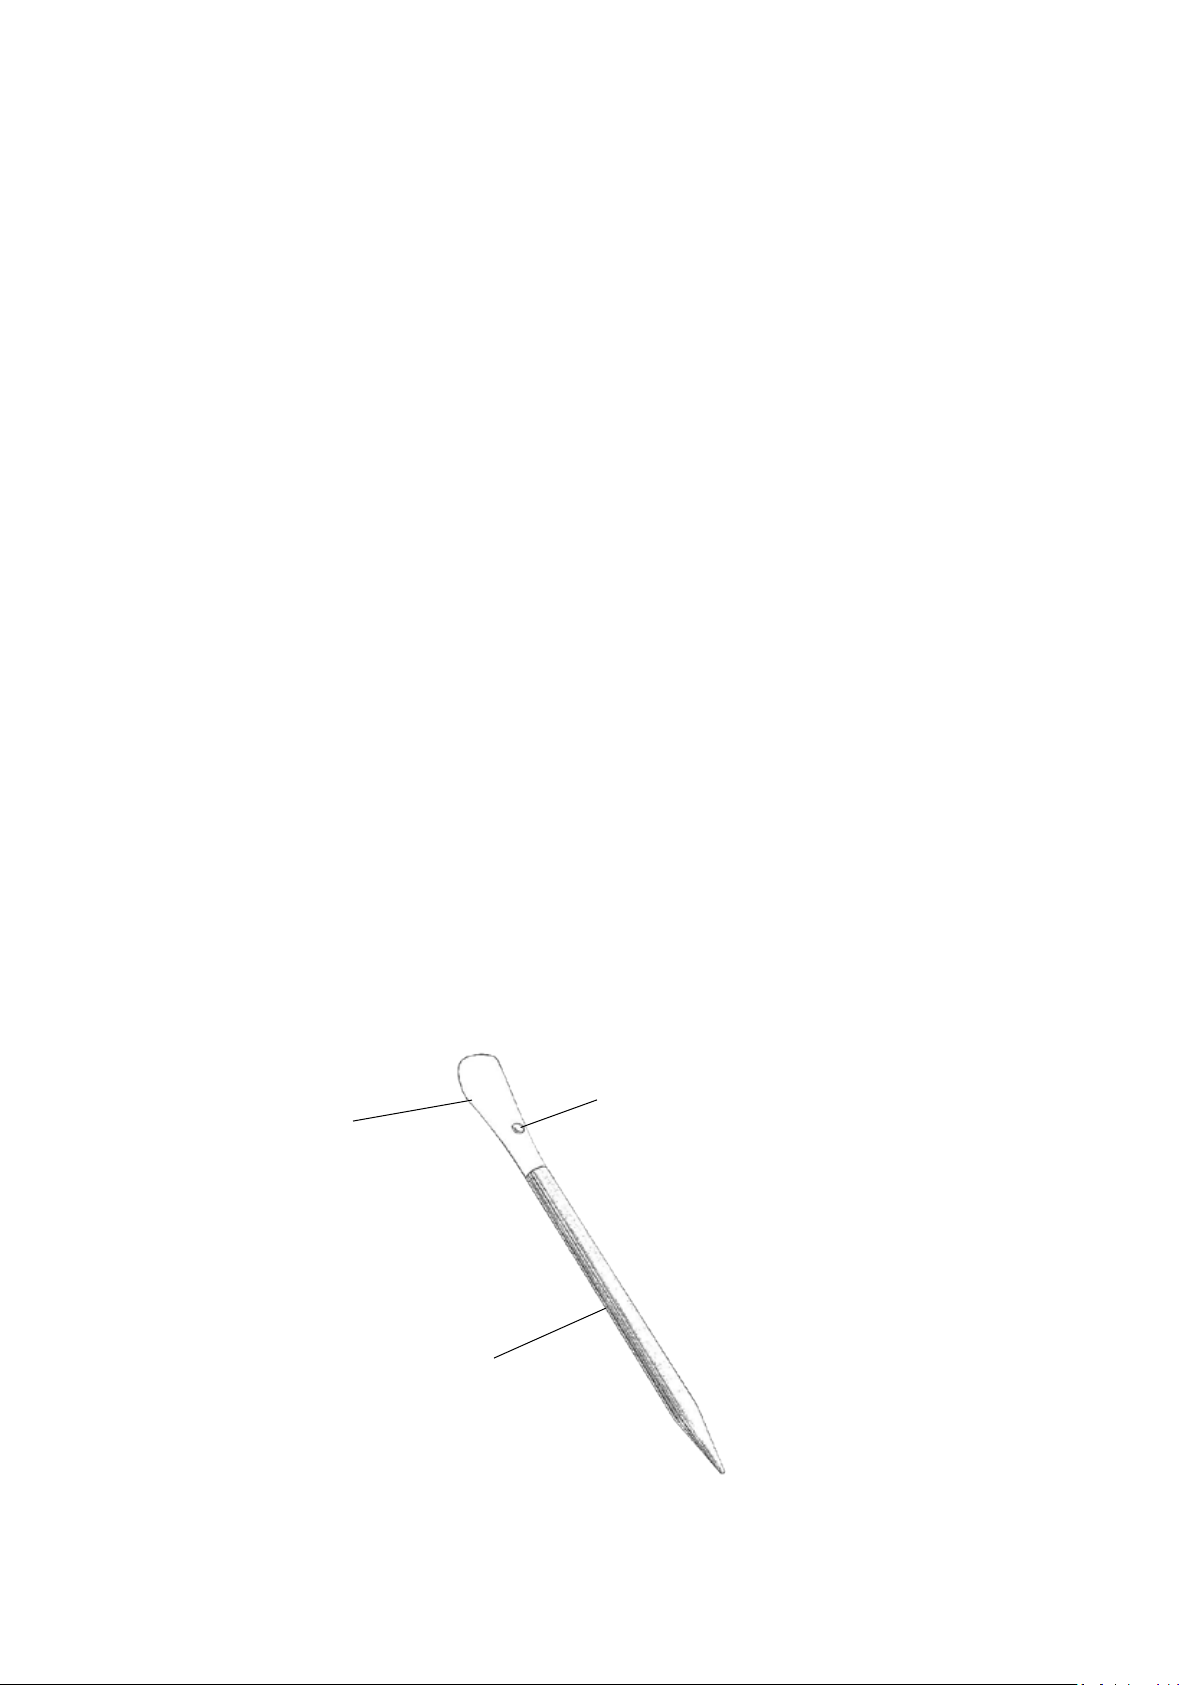
Ceramic Head
Stainless Steel Tube
Charging Pole
Congratulaons on your purchase of the truly Wireless Food Thermometer, STAKE™. STAKE™ is a
wireless food thermometer that gives home chefs real-me status inside the meat to avoid
undercooked or overcooked disasters and ensuring the perfect result every me. You can use
one or mulple STAKE™, depending on your cooking needs and the size of your dish.
connect to the STAKE™ APP via Bluetooth, and meaning you can stay at your party table even when
your steak is barbequing in
read from your phone, giving you the best result at the p of your fingers. STAKE™ is small and can
operate for up to 4 hours with just 2 minutes of ultra-fast charging. And rest assure, STAKE™ is
resistant to high heat and oven safe. We take your safety very seriously and it is one of our top
priories. STAKE™ uses premium quality stainless steel and ceramic that passes the requirement
of FDA in USA and Food Contact Tests in Europe.
1.
1 Before you start using STAKE™
1. Please make sure to read the instrucon manual carefully. This informaon will help you
to familiarize yourself with your new device, to find out important details about its first
use and how to operate it and to get advice in the event of malfuncon.
2. Following these instrucons will prevent damage to your device and loss of your statutory
rights arising from malfuncon due to incorrect use.
3. We shall not be liable for any damage due to non-compliance with these instrucons or
misuse of the device.
your backyard. Details and “this moment” status of the meat can be
1.2 Product Descripon
1.2.1 Intelligent Wireless Food Thermometer (STAKE™)
Figure 1. Intelligent Wireless Food Thermometer (STAKE™)
Page 3
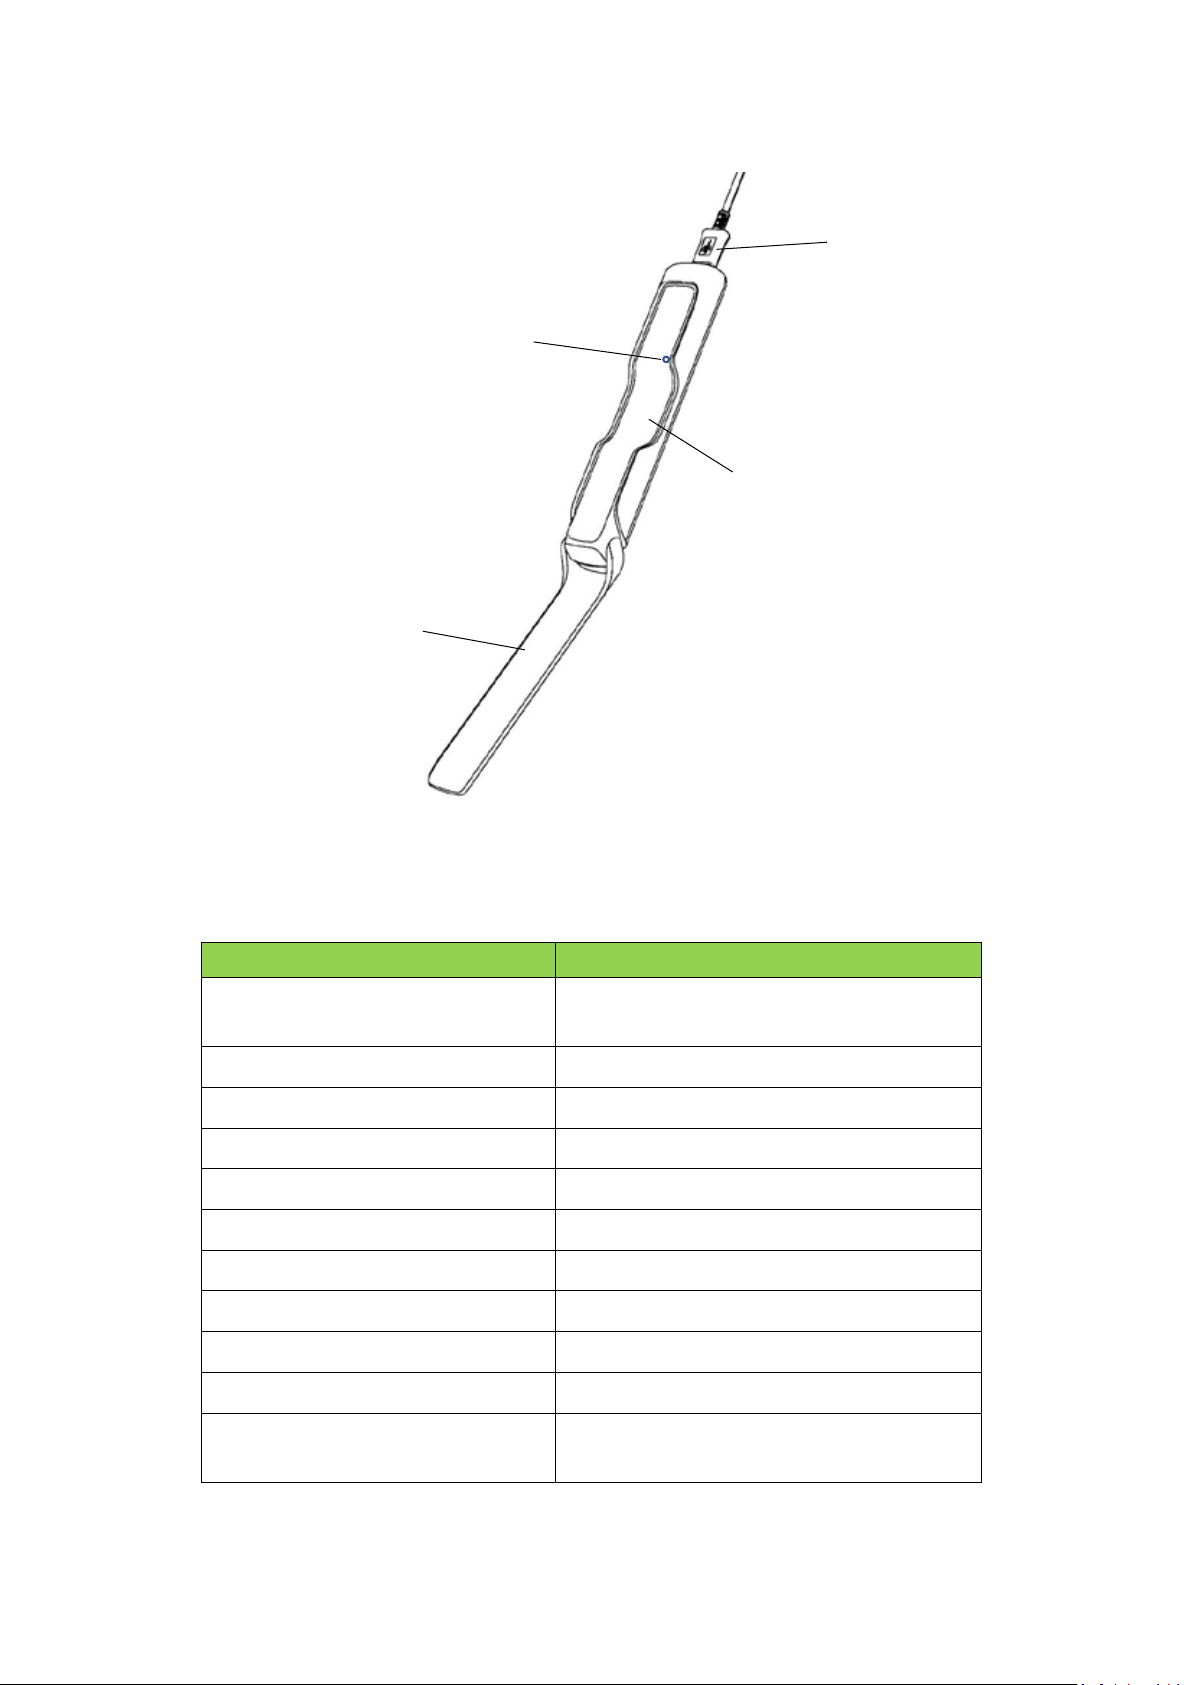
1.2.2 Charger
Item
Specificaon
Cover
STAKE™ Holder
USB Cable
Charging Pin
Figure 2. Charger for STAKE™
1.3 Product Specificaon - STAKE™
Dimension (metal part)
Oven temperature Up to 300 °C (572 °F)
Connecvity 2.4GHz Bluetooth (BLE)
Transmission Range Up to 10 meter (33 feet)
Operang Time Up to 4 hours
Standby Time Up to 6 hours
Charging Time Less than 3 minutes
Temperature precision 1 °C
Waterproof Water-resistant
Mul-probe Support
OS for Soware APP
Length : 81 mm
Diameter : 6 mm
iOS version 10.3.3 or above;
Android version 6.0 or above
Page 4
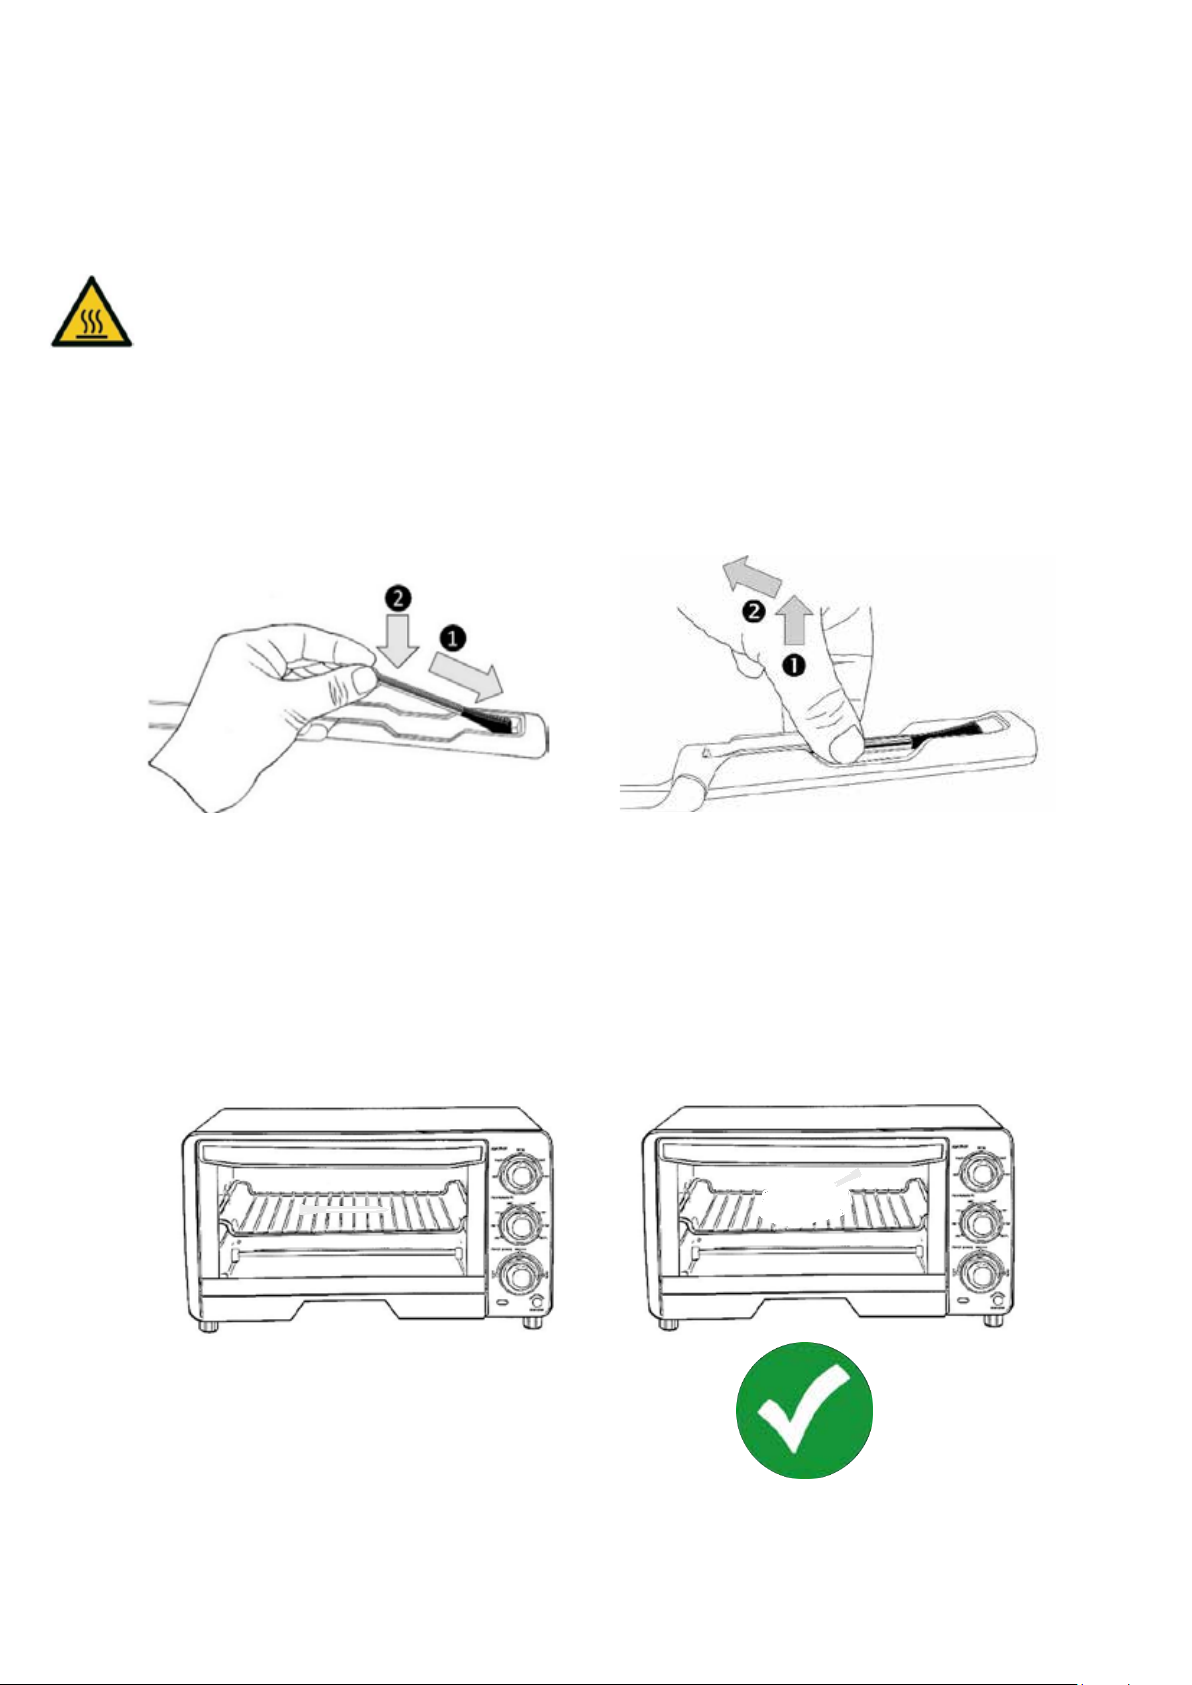
1.4 Important Notes – Please read this carefully before use
Please make sure the charging pole of
the charging pin of the charger.
Place your fingers at the lower part of
1. This product is not intended for using by persons with ages 12 and under.
2. This product is exclusively for cooking meat/food in grill or oven. It should only be used
as described within this User Manual.
3. DO NOT TOUCH THE WIRELESS THERMOMETER WITH BARE HANDS AFTER COOKING.
Always wear oven gloves to remove STAKE™ from the meat/food aer cooking. The
ceramic head will be hot aer cooking and it takes a while to cool down.
4. Do not use STAKE™ i
5. STAKE™ can be cleaned and washed with hot soapy water and a clean cloth or sponge,
but do not immerse it in water.
6. Before use, clean STAKE™ with cloth and soapy water; and dry it thoroughly.
7. Always use the given official charger to charge STAKE™.Please make sure STAKE™ is fully
charged before cooking. Fully charge STAKE immediately prior to beginning your cook.
n microwave oven.
Figure 3. Insert STAKE™ to the charger Figure 4. Take out from the charger
STAKE™ is facing down and contact with
8. STAKE™ must be properly inserted into the meat/food during cooking. Do not
expose the metal part of STAKE™ to the heat generated by oven directly.
STAKE™ to take it out from the charger.
Figure 5. Safety in using STAKE™
Page 5

9. Always use the latest version of the soware APP for STAKE™. Go to the official website
(Apple APP Store for iOS device and Google Play for Android device) to download and
install the soware APP for STAKE™.
10. Make sure the mobile phone is within the range of monitoring distance during cooking.
The distance of operaon is dependent on the actual cooking environment. It will be
shorter if STAKE™ is covered by a metal case.
11. Do not let the wireless food thermometer stay at high
temperature above 80°C or 176°F) for a long me.
12. The supplier will not be liable for any damage of STAKE™ due to misuse of the device.
temperature (meat or food
2.0 Using STAKE™ for Cooking
2.1 Geng Started
1. Install the mobile APP (name) on your mobile phone. Please go to Google Play
(for Android OS phone) or Apple App Store (for Apple iPhone) to download
the APP or go to maverickthermometers.com to download the corresponding APP.
When you are running the app for the first me, there will be a welcome screen and a
setup screen. Aer going
will be shown on the screen as shown Figure 6.
2. Clean STAKE™ with cloth and soapy water. Dry it thoroughly with a clean cloth.
3. Connect the charger to USB power source with the USB cable. The USB power source can
be power bank, output of USB adapter or any USB socket of PC/notebook.
4. Put STAKE™ into the charger. Please make sure that the charging pole of STAKE™ is connected
to the charging pin of the charger.
5. The LED of the
6. When the LED turns solid, STAKE™ is fully charged.
7. Launch the soware APP. You are requested to turn on the Bluetooth if the Bluetooth of
your mobile phone is off. Please allow the APP to turn on the Bluetooth of your mobile
phone accordingly.
8. The APP will search any available STAKE™ that nearby you and show the corresponding
reading on the screen of your mobile phone. When you see the reading of STAKE™ (see
example in Figure 6), it is now ready for use
charger will begin blinking.
through the welcome, setup and tutorial screens, the display
Page 6

Current Temperature
Baery Level
STAKE™ ID
Target Temperature
Cooking Status
Cooking Records
Seng
Temperature View
Back
Available Probes
122
72
Figure 6. Example of STAKE™ Reading
°
CURRENT
PROBE 1
F
TARGET:
READY TO USE
F
°
2.2 Guided Cook
STAKE™ APP has some built- in programs that can help you to cook the meat/food to the
desirable condion with STAKE™. Please follow these steps.
1. Insert STAKE™ to the meat/food.
Please make sure STAKE™ is fully charged. To obtain the best result, please make sure the
enre metal tube is inserted into the meat, up to the ceramic head. For best results, make
sure the charging pole is facing upwards.
2. Tap the field of informaon for the probe you are using on the “Available Probes” screen, the
“Cook Setup” screen will appear as shown in Figure 7.
3. Choose the type of meat to cook by tapping “I want to cook” once and then selecng the
meat type (see Figure 8).
4. Choose the cut of meat to cook by tapping “Cu
meat (see Figure 8).
5. Choose the doneness by tapping “Doneness” once and then select the desirable
doneness (see Figure 8).
t of meat” once and then selecng the cut of
Page 7

Back
Cook Setup
Target: 122°F
72
F
°
PROBE 1
Guided Cook
I want to cook:
Cut of meat:
Doneness:
Start Cook Add Reminder
Previous Cook
Figure 7. Display of Cook Setup
Back
Cook Setup
Target: 122°F
72
PROBE 1
Guided Cook
Guided Cook
I want to cook:
I want to cook:
Beef
Cut of meat:
Cut of meat:
Pork
Doneness:
Doneness:
Lamb
Poultry
Fish
Start Cook Add Reminder
Previous Cook
Previous Cook
Back
F
°
Cook Setup
Target: 122°F
72
F
°
PROBE 1
Guided Cook
Guided Cook
Cut of meat:
I want to cook:
Sirloin
Cut of meat:
Cut of meat:
Rib
Doneness:
Doneness:
Round
Brisket
Chuck
Start Cook Add Reminder
Previous Cook
Previous Cook
Back
Doneness:
I want to cook:
Cut of meat:
Cut of meat:
Doneness:
Doneness:
Start Cook Add Reminder
Figure 8. Displays of “Type of Meat”, “Cut of Meat” and “Doneness”
Cook Setup
Target: 122°F
72
Guided Cook
Guided Cook
Well Done
Medium Well
Medium
Medium Rare
Rare
PROBE 1
F
°
Previous Cook
Previous Cook
6. Seng up temperature reminder or me reminder(oponal). You can setup reminders
on temperature and me. For example, if you want to flip over the steak aer 1 minute
of cooking, you can setup a me reminder at 1 minute. Once the mer reaches 1 minute,
a reminder message is popped up on the screen with alerts.
7. Preheat the oven to the desirable temperature and put the meat/food into the
oven.
8. Tap the “Start Cook” to start monitoring the meat/food during cooking. You will see the
cooking screen in your mobile phone as shown in Figure 9.
Page 8

Back
Cook Setup
Target: 122°F
120
Guided Cook
Beef Sirloin Medium Rare
PROBE 1
F
°
Previous Cook
COOKING
00:00:05
2 REMINDER(S)
Stop Cook
Figure 9. Cooking
9. When the temperature is close to the target, you will receive an alert and the
corresponding message will be shown in the cooking screen as shown in Figure 10. Please
start get close to the oven.
Back
Cook Setup
Target: 122°F
120
Guided Cook
Beef Sirloin Medium Rare
PROBE 1
F
°
Previous Cook
CLOSE TO TARGET
00:05:21
2 REMINDER(S)
Stop Cook
Figure 10. Close to Target
10. When the temperature reaches the target temperature, you will receive an alert and the
corresponding message will be shown in the cooking screen as shown in Figure 11. Please
wear the oven gloves and use tools (if needed) to take out the meat/foo
NOTE : Please note that the ceramic head of STAKE™ is HOT aer cooking. If you want to
take out STAKE™ from the meat/food, please use the oven gloves to prevent from hurng
your hands.
d from the oven.
Page 9

Tap the clock icon to review
Back
Cook Setup
Target: 122°F
122
Guided Cook
Beef Sirloin Medium Rare
PROBE 1
F
°
Previous Cook
COOK COMPLETE
00:06:50 ELAPSED
00:00:05
SINCE COOK COMPLETED
Warm Reminder [ST10100472]
Take the meat out of the oven
before you accidentally overcook it.
Figure 11. Cooking Completed
11. Cooking Records. You can view the previous cooking records by tapping the icon.
Back
Cook Setup
2 REMINDER(S)
Finish Cook
Target: 122°F
previous cooking records
72
F
°
PROBE 1
Guided Cook
I want to cook: Beef
Cut of meat: Sirloin
Doneness: Medium Rare
Start Cook Add Reminder
Previous Cook
2 REMINDER(S)
Figure 12.
Aer tapping the icon, a list of previous cook records can be seen (see Figure 13 ). Tap
on the records, the corresponding cooking curve will be shown (see Figure 14).
Page 10

1. Tap “Previous Cook”
cook can be seen.
2. Scroll and choose
Cooking Records
Beef - Sir loin - Medium Ra re
4:13
22/11/19
4:50 PM
Custom Cook
4:13
22/11/19
4:50 PM
Beef - Sir loin - Medium Ra re
4:13
22/11/19
4:50 PM
Beef - Sir loin - Medium Ra re
4:13
22/11/19
4:50 PM
Peak
135˚F
Peak
135˚F
Peak
135˚F
Peak
135˚F
EDIT
Tar get
135˚F
Tar get
135˚F
Tar get
135˚F
Tar get
135˚F
Cooking Records
60
55
50
45
40
35
30
25
20
15
10
0m
6m
4m
2m
22/11/19 04:59
Cook Started
Target Temperature
Peak Temperature
Total Time
8m
10m
14m
12m
22/11/19 04:59
Figure 13. Previous Cooking Records Figure 14. Temperature Profile
2.2 Use Previous Cooking Records for Cooking
EDIT
20m
18m
16m
135˚ F
135˚ F
0:13
1. You can use previous cook record to setup the cook instead of entering type of meat,
cut of meat and doneness informaon every me.
2. In the cook setup screen, tap previous cook to show a list of previous records.
3. Scroll and choose which cook the user wants to repeat.
4. The corresponding seng is chosen automacally.
5. Simply tap “Start Cook” to start monito
Back
Beef - Sir loin - Medium Ra re
4:13
22/11/19
4:50 PM
Beef - Sir loin - Medium Ra re
4:13
22/11/19
4:50 PM
Cook Setup
Target: 122°F
72
Guided Cook
PROBE 1
F
°
Previous Cook
Peak
135˚F
Peak
135˚F
Tar get
135˚F
Tar get
135˚F
ring.
and a list of previous
which previous cook
that user wants to
repeat.
Figure 15. Previous Cook
Start Cook Add Reminder
Page 11

2.3 Custom Cook
Set the target
1. You can select the final temperature of the meat/food instead of using the temperature
seng in Guide Cook menu in order to cook the meat/food to your desirable texture and
taste.
2. In the Cook Setup screen, you can touch the yellow target bar and move to the final
meat/food temperature that you want the meat/food to be reached. Tap “Start Cook”
buon once when you put the meat/food into the oven.
Back
Cook Setup
Target: 122°F
72
PROBE 1
Figure 16. Manually adjust th
2.4 Setup of Reminder/Alert
There are two types of reminders, Temperature and Time, that you can set during the
monitoring and cooking process. For each cooking, you can set maximum of two
reminders in order to help you to take acons during cooking, such as flip over the steak.
Please follow the following steps to setup the reminder.
2.4.1 Temperature Reminder setup
°
F
e Target Temperature for cooking
temperature
manually by moving
this bar to the desire
temperature seng
In Cook Setup screen, tap “ADD REMINDER”. Select the
move the centre buon of the temperature bar to the set the temperature that you want
to have the alert. Tap “Add Reminder” at the boom of the pop-up window to finish the
setup.
“Temperature reaches” and
Page 12

Back
Cook Setup
Target: 122°F
72
F
°
PROBE 1
Select Temperature
Guided Cook
I want to cook:
Cut of meat:
Doneness:
Start Cook Add Reminder
Previous Cook
122
°
Add Reminder
F
Figure 17. Setup of Temperature Reminder
2.4.2 Time Reminder setup
In Cook Setup screen, tap “ADD REMINDER” buon. Select the “Time reaches” and scroll
the dials to setup the timer. Tap “Done” to finish the setup.
Back
Alert me when time reaches:
00 hr 00 min 00 sec
01 hr 01 min 30 sec
Cook Setup
Target: 122°F
72
F
°
PROBE 1
Guided Cook
I want to cook:
Cut of meat:
Doneness:
Start Cook Add Reminder
Previous Cook
Cancel Done
2.5 Overheat Alert
To prevent STAKE™ from being damaged by exposure to excessive heat, there is a builn
Overheat Alert. When the measured temperature is equal to or
Figure 18. Setup of Time Reminder
Page 13

higher than 80°C or 176°F, the Overheat Alert will be triggered. The meat should be
overcooked for a while and please take out STAKE™ from the heat source as soon as
possible with the oven gloves. Let STAKE™ resng at room temperature. Please do not
immediately immerse STAKE™ into cold water aer taking out from the heat source.
Back
COOK COMPLETE
Cook Setup
Target: 122°F
122
Guided Cook
Beef Sirloin Medium Rare
OVERHEAT
ST10100472- Please
remove the thermometer
from the ov en innediatel y
00:06:50 ELAPSED
PROBE 1
F
°
Previous Cook
00:00:05
SINCE COOK COMPLETED
2 REMINDER(S)
Finish Cook
Figure 19. Overheat Alert
3.0 Sharing Cooking Fun
Aer compleng the cooking, you can share the photos of your delicious food with your friends immediately by tapping the sharing icon at the boom. You can take the photos aer cooking and share
with other people by using STAKE™ APP.
Figure 20. Sharing
Page 14

4.0 Mulprobe Cooking
Somemes, you may need more than one STAKE™ for cooking. For example, the meat is too big or you
want to have BBQ of different meats at the same me. When you have more than one STAKE™, you
can use STAKE™ APP to manage all of them at the same me (see figure below). You can follow the
instrucons in this manual above to setup each STAKE™. Once you have setup all STAKES™, you just
let the APP to monitor them and tell you when it is ready for eat.
Back
Available Probes
72
F
°
CURRENT
PROBE 1
Beef - Sir loin - Medium Rare
72
F
°
CURRENT
PROBE 2
Beef - Sir loin - Rare
72
F
°
CURRENT
PROBE 3
Beef - Sir loin - Medium
5.0 Change the default seng
130
TARGET:
READY TO USE
125
TARGET:
READY TO USE
140
TARGET:
READY TO USE
F
°
F
°
F
°
Figure 21. Mul-probe operaon
You can change the seng of the APP in the Sengs manual by tapping the seng icon
at the boom.
Back
CORE SETTINGS
Select language
Switch unit to Fahrenheit (°F )
If not toggled, unit (℃) will be
used as default
INFORMATION
Tutorial
Regulation and Compliance
About Us
Version 1.0.0
Settings
English
Figure 20. Seng
Page 15

6.0 Support
Should you have any query in using STAKE™, please go to visit our official website
maverickthermometers.com
7.0 Regulaon and Compliance
STAKE™ complies of different regulaon and standard. You can find the informaon of regulaon by
tapping the seng icon and then selecng the “Regulaon and Compliance”. For more details, please
visit our website maverickthermometers.com.
Figure 23. Regulaon and Compliance
7.1 FCC Regulaon
FCC Compliance Statement
This device complies with part 15 of the FCC rules. Operaon is subject to the following two
condions: (1) This device may not cause harmful interference, and (2) this device must accept any
interference received, including interference that may cause undesired operaon.
Note: This equipment has been tested and found to comply with the limits for a Class B digital device,
pursuant to part 15 of the FCC Rules. These limits are designed to provide reasonable protecon
against harmful interference in a residenal installaon.
This equipment generates, uses, and can radiate radio frequency energy and, if not installed and used
in accordance with the instrucons, may cause harmful interference to radio communicaons.
Page 16

However, there is no guarantee that interference will not occur in a parcular installaon. If this
equipment does cause harmful interference to radio or television recepon, which can be
determined by turning the equipment off and on, the user is encouraged to try to correct the
interference by one or more of the following measures:
- Reorient or relocate the receiving antenna.
- Increase the separaon between the equipment and receiver.
- Connect the equipment into an outlet on a circuit different from that to which the receiver is
connected.
- Consult the dealer or an experienced radio/TV technician for help.
Any changes or modificaons not expressly approved by the party responsible for compliance
could void your authority to operate the equipment.
RF exposure statements
1. This Transmier must not be co-located or operang in conjuncon with any other antenna
or transmier.
2. This equipment complies with FCC RF radiaon exposure
environment.
3.
This equipment should be installed and operated with a minimum distance of 20 centimeters
between the radiator and your body or nearby persons.
limits set forth for an uncontrolled
Canadian Compliance Statement
This device complies with Industry Canada license-exempt RSSs. Operaon is subject to the
following two condions:
1) This device may not cause interference, and
2)
This device must accept any interference, including interference that may cause undesired
operation of the device.
Le présent appareil est conforme aux CNR d’Industrie Canada app
radio exempts de licence. L’exploitaon est autorisée aux deux condions suivantes :
1) l’appareil ne doit pas produire de brouillage;
2)
l’u ilisateur de l’appareil doit accepter tout brouillage radioélectrique subi, meme si le
brouillage est susceptible d’en compromettre le fonctionnement.
licables aux appareils
Radia i
This equipment complies with IC radia ion exposure limits set forth for an
uncontrolled environment.
This equipment should be installed and operated with minimum distance 20cm between the
radiator & your body.
Déclaration d’exposition aux radiations:
Cet équipement est conforme aux limites d’exposition aux rayonnements IC établies pour un
environnement non contrôlé. Cet équipement doit être installé et utilisé avec un minimum de
20 cm de distance entre la source de rayonnement et votre corps. .
on Exposure Statement:
 Loading...