


THE REVOLUTIONARY SHELVING SYSTEM
INSTRUCTION GUIDE
matteo gerbi presents:
WWW.RAYSHELF.matteogerbi.COm - store@matteogerbi.com
ray shelf
tm
installation guide
* FOR ADVICE ON SUITABLE WALL PLUGS CONTACT YOUR LOCAL DIY SHOP
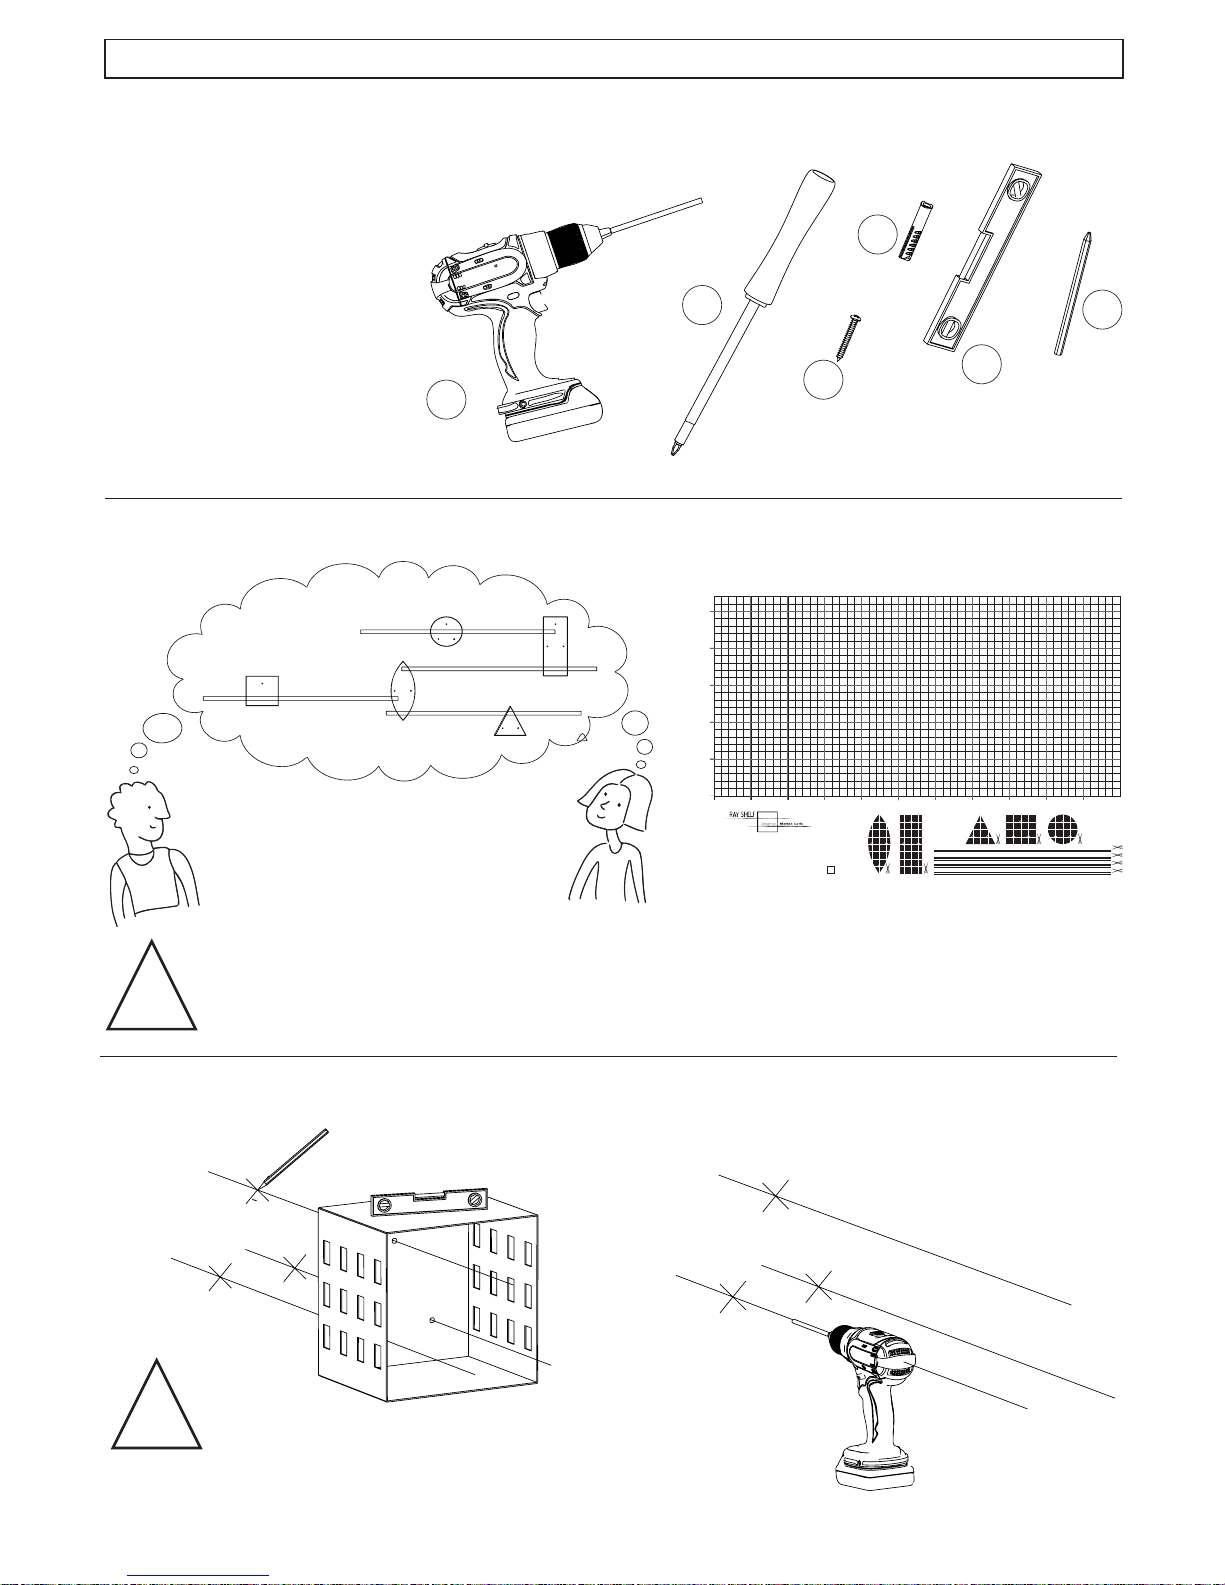
1. Power Drill
2. Screwdriver
3. Screw (INCLUDED)
4. Wall Plugs*
5. Spirit Level
6. Pencil
STEP 1: Make sure you have all tools
STEP 2: Choose your favourite shapes and shelf bars and decide your combinaon
1
-2-
2
3
4
5
6
5CMX5CM
0
VISUALIZATION GRID
WWW.RAYSHELF.MAT TEOGERBI.COM
CUT OUT YOUR SHAPES AND BARS
AND CREATE YOUR COMPOSITION
0
25 CM
50 CM
75 CM
100 CM
125 CM
25 CM 50 CM 75 CM 100 CM
125 CM
150 CM 175 CM 200 CM
225 CM
250 CM
It is important to visualise your chosen composion before commencing installaon.
A Visualisaon Grid is included in the packaging, or may be downloaded from
www.rayshelf.maeogerbi.com
!
STEP 3: INSTALL THE FIRST SUPPORT a) Mark the screw holes with a pencil b) Drill the holes in the wall
and insert the wall plugs.
Use the level to x the support correctly.
a) b)
!

We do not raccomand the use of Power Drill for inserng screws.
Only use screwdrivers as this add strength to the xing.
!
STEP 4: a) Screw the support to the wall b) Insert the rst set of bars into the rst support
STEP 5: INSTALL THE SECOND SUPPORT. Slide the rst set of bars into the second support. The level will
help you to nd the correct alignment
a) b)
a)
b)
c)
STEP 6: Once you have nalized the correct posion, take out the bars and x the second support to the
wall (see step 3 and 4)
STEP 7: You can now x all the other shapes just following steps 3,4,5 and 6.
As a general rule, always insert the
bars before installing the next support.
!

Ray ShelfTM system is design registered and patent pending
Ray ShelfTM is a trading name of Matteo Gerbi Limited.
Ray ShelfTM is distributed by Matteo Gerbi Limited
Matteo Gerbi Limited is registered in England and Wales Reg. No. 07880415
© COPYRIGHT MATTEO GERBI LIMited. REV 5.0
-4-
STEP 8: YOUR RAY SHELF IS NOW COMPLETE!
Note 1 : Maximum projecons,span and weight allowance
Note 2 : Tighten the bars to the support (Oponal)
< 50cm
< 110cm
20Kg (4 Bars)
10Kg (2 Bars)
15Kg (4 Bars)
7.5Kg (2 Bars)
The holes in the supports have been designed to be larger than the circumference of
the bars, to allow for movement and adjustment in case of uneven wall surfaces. If you
which to ghten the bars to the support please use the wedges provided within the box.
Please not that these funcon only to thigh the bars and not to x them to the support.
!
BAR
WEDGE
>5cm
 Loading...