

Page 1
R
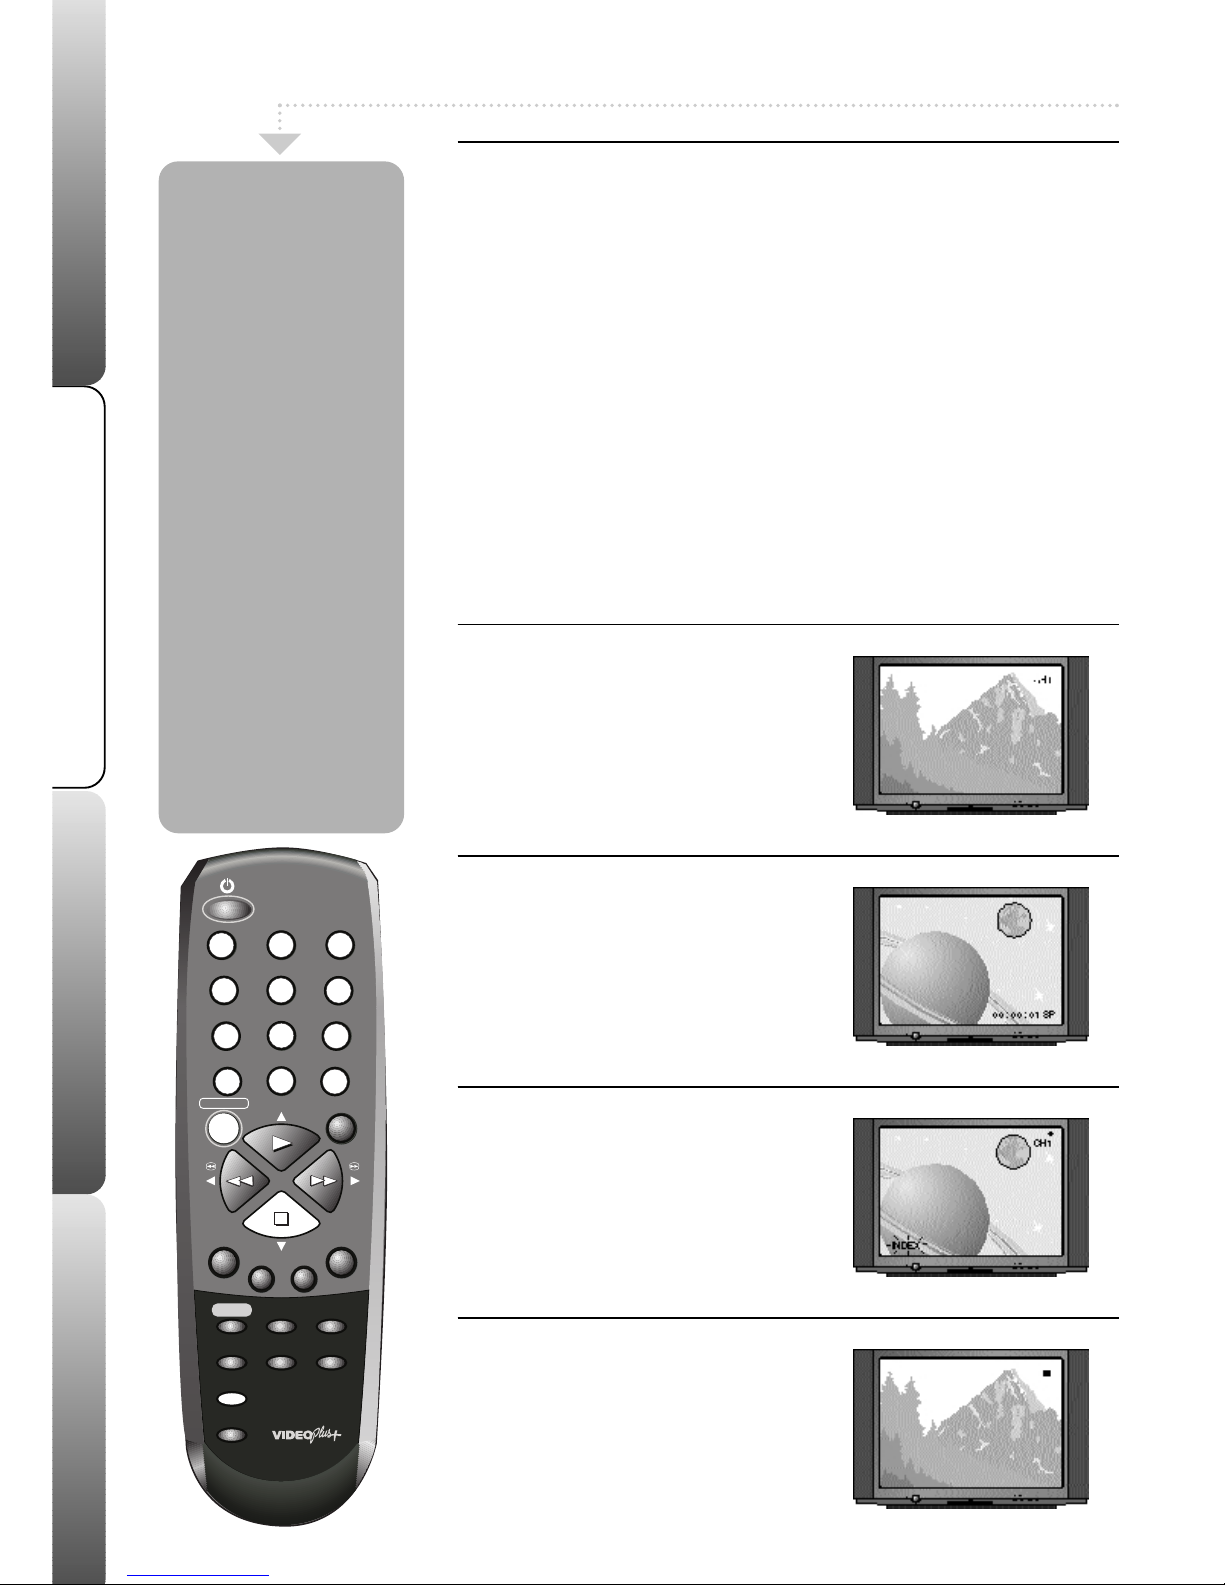
How to use your video
Page 2

Advanced features Help & specificationRecordingBasic VCR features
Safety Warnings
Your VCR is supplied with
an approved 13 amp fused
mains plug. When
replacing the fuse always
use a 3 amp (BS 1362)
approved type.
To obtain a replacement
fuse or fuse cover contact
your store.
Never use this plug if the
fuse cover is missing.
If the mains sockets in your
home differ or are not
suitable for the type of plug
supplied, then the plug
should be cut from the
mains lead and a suitable
type fitted. You must use a
13amp plug (BS 1363) and
fit a 3 amp fuse (BS 1362).
If any other type of plug is
used a 3 amp fuse must be
fitted, either in the plug,
adaptor or at the
distribution board. Please
refer to the wiring
instructions on page 15.
Damage - Never use your VCR if it
is damaged in any way. Always place
your VCR on a flat level surface
avoiding anywhere which may be
subject to strong vibration.
Weather - It is advisable to unplug
the aerial during an electrical storm.
Moisture - Do not allow your VCR
to be exposed to rain, moisture or
dust. If any liquid is spilt into your
VCR it can cause serious damage. If
you do spill liquid into your VCR
switch it off at the mains immediately
and contact your store.
Interference
Do not place your VCR on or near
appliances which may cause
electromagnetic interference (TV or HiFi speakers). If you do, it may
adversely affect the working of the
unit, causing erratic playback and
distorted picture or sound.
Temperature
Avoid extremes of temperature, either
hot or cold, place your VCR well
away from heat sources such as
radiators or gas/electric fires.
Ventilation
The VCR must be well ventilated. Do
not cover your VCR or place inside a
small confined space. It is
recommended that you leave a 10cm
gap all around your VCR.
Batteries
Batteries are easily swallowed by
young children. Do not allow young
children to play with the remote
control unit.
Covers - Do not remove any fixed
covers as this may expose dangerous
voltages.
Contents
Basic VCR Features
Playing a Video Tape . . . . . . . . . . . . . . . . .
page
1
Skipping channels/Removing interference . . .
page
2
Selecting Channels/Video Index Search . . . .
page
3
Recording a program
One Touch Recording (OTR) . . . . . . . . . . . . .
page
4
Recording Using the VIDEO Plus+ System . . . .
page
5
Timer Recordings . . . . . . . . . . . . . . . . . . . .
page
6
Checking or Cancelling
VIDEO Plus+ Recordings & Timer Recordings .
page
7
Advanced features
Clock/Counter Display & Zero Return . . . . . .
page
8
Auto Repeat Play . . . . . . . . . . . . . . . . . . . .
page
8
Using the Playback Sharpness Feature . . . . . .
page
9
Advanced Features continued....
Automatic Tracking & Call . . . . . . . . . . . . . .
page
9
Checking Video Plus+ Set-Up . . . . . . . . . . .
page
10
Setting the Security Protection . . . . . . . . . . .
page
11
Help and Specification
Help & Troubleshooting . . . . . . . . . . . . . . .
page
12
Connecting Your VCR to Another VCR . . . . .
page
13
Connecting Your VCR to a Camcorder . . . . .
page
13
Connecting Your VCR to a Hi-Fi . . . . . . . . .
page
14
SCART Socket Information . . . . . . . . . . . . .
page
14
Wiring Instructions . . . . . . . . . . . . . . . . . .
page
15
Record Protection Tab . . . . . . . . . . . . . . . .
page
15
Specifications . . . . . . . . . . . . . . . . . . . . .
page
16
Page 3
Advanced features
Help & specification
Recording
1
Basic VCR features
Playing a Video Tape
1
4
7
0
8
56
9
PAUSE
MENU
ENTER
CH TR/
AV
CANCEL
INDEX
2
3
REC/OTR
-
+
VIDEO PLUS +/
PROGRAM
CALL
CLOCK/
COUNTER
COUNTER
RESET
ZERO
RETURN
SPEED
SP/LP
EJECT
TIMER REC
Your VCR can playback
video tapes recorded using
the NTSC colour system (TV
system usually used in USA
and Japan) on a PAL I TV (TV
system used in the UK).
Play an NTSC tape as you
would a normal VHS tape.
Your VCR will playback NTSC
tapes recorded using
Standard play (SP), Long
play (LP) and Extended play
(EP). However, there will be a
deterioration in sound quality
in the LP and EP modes.
If your TV supports the NTSC
system, the picture from your
VCR will fill the whole screen,
if not, the picture will have a
black band at the top and
bottom of the screen.
Please note that there will be
no sound during PAUSE.
1
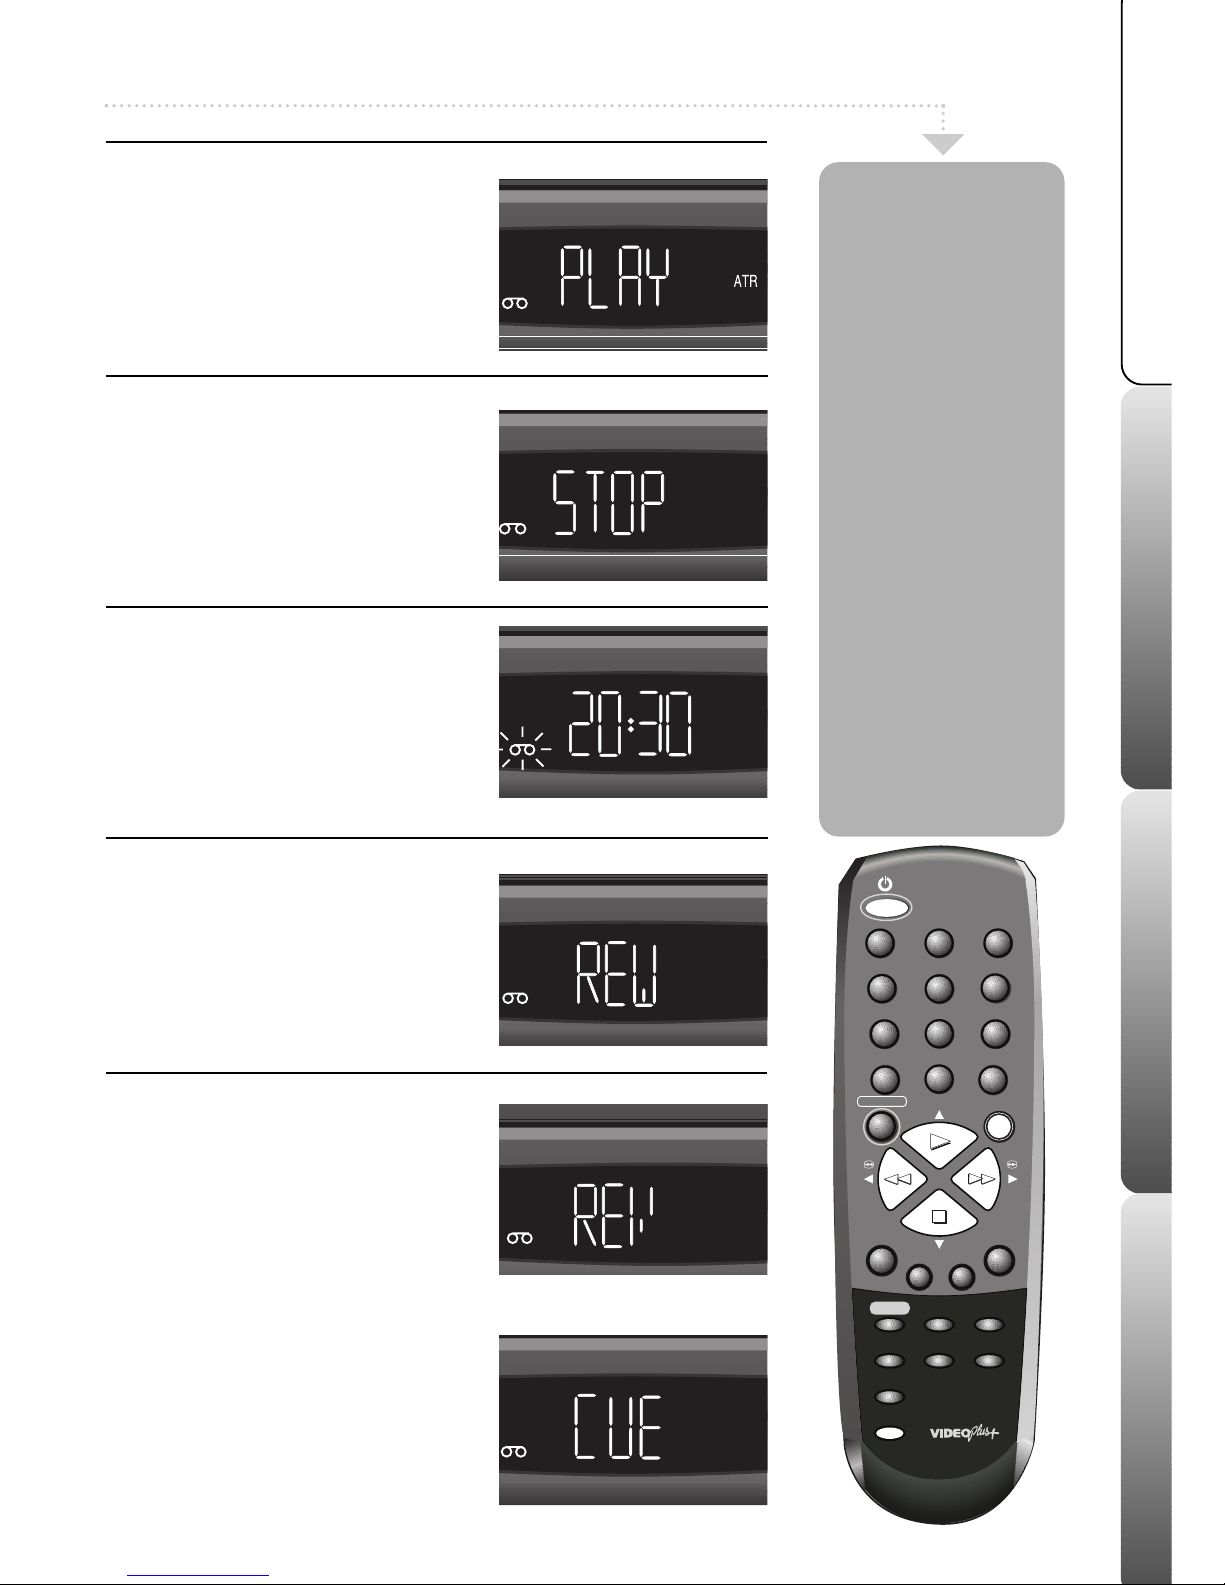
Playing a tape
Press the VCR ON button to switch your
VCR on. Insert a tape. If you insert a prerecorded video tape with the tab removed
(for example a rented or bought film) your
VCR will start to play automatically. If
playback doesn’t start press PLAY.
2
Stop or pause a tape
Press the STOP button to stop the tape.
Press the PAUSE button while the tape is
playing to pause the tape. Press the PLAY
button to resume playback.
3
Ejecting a tape
Press the STOP button to stop the tape.
Press the EJECT button. The tape will be
ejected from the VCR.
4
Rewind and Fast Forward
To rapidly wind the tape backwards or
forwards, press the REW or F.FWD buttons
when a VCR tape is NOT playing.
‘REW’ or ‘FF’ will appear in the VCR display.
5
Picture search
To rewind or fast forward the tape with the
tape’s picture on your TV screen (picture
search) press PLAY then either REW or
F.FWD.
‘REVEW’ or ‘CUE’ will appear in the
VCR display.
The speed of the search time depends on
the speed used during recording, either
standard play (SP) or long play (LP).
Standard Play (SP)
1st press . . . . . . 5 times normal speed
2nd press . . . . . 7 times normal speed
(NTSC times are slower)
Long Play (LP)
1st press . . . . . .7 times normal speed
2nd press . . . . . 13 times normal speed
Press PLAY to return to normal playback.
Page 4
Skipping channels/Removing Interference
1
4
7
0
8
56
9
PAUSE
MENU
ENTER
CH TR/
AV
CANCEL
INDEX
2
3
REC/OTR
-
+
VIDEO PLUS +/
PROGRAM
CALL
CLOCK/
COUNTER
COUNTER
RESET
ZERO
RETURN
SPEED
SP/LP
EJECT
TIMER REC
1
Skipping channels
Select the channel you want to skip. Press
the CANCEL button. The channel number
will then flash in the top right of the TV
screen and in the VCR display. When a
channel is skipped you will not be able to
select it with the -CH/TR+ buttons.
Press the relevent NUMBERED buttons and
then press CANCEL to unskip a channel.
Only follow these instructions if you notice interference on your TV screen when
watching TV stations on your VCR.
If you have connected your VCR to your TV using a scart lead you can ignore
this stage.
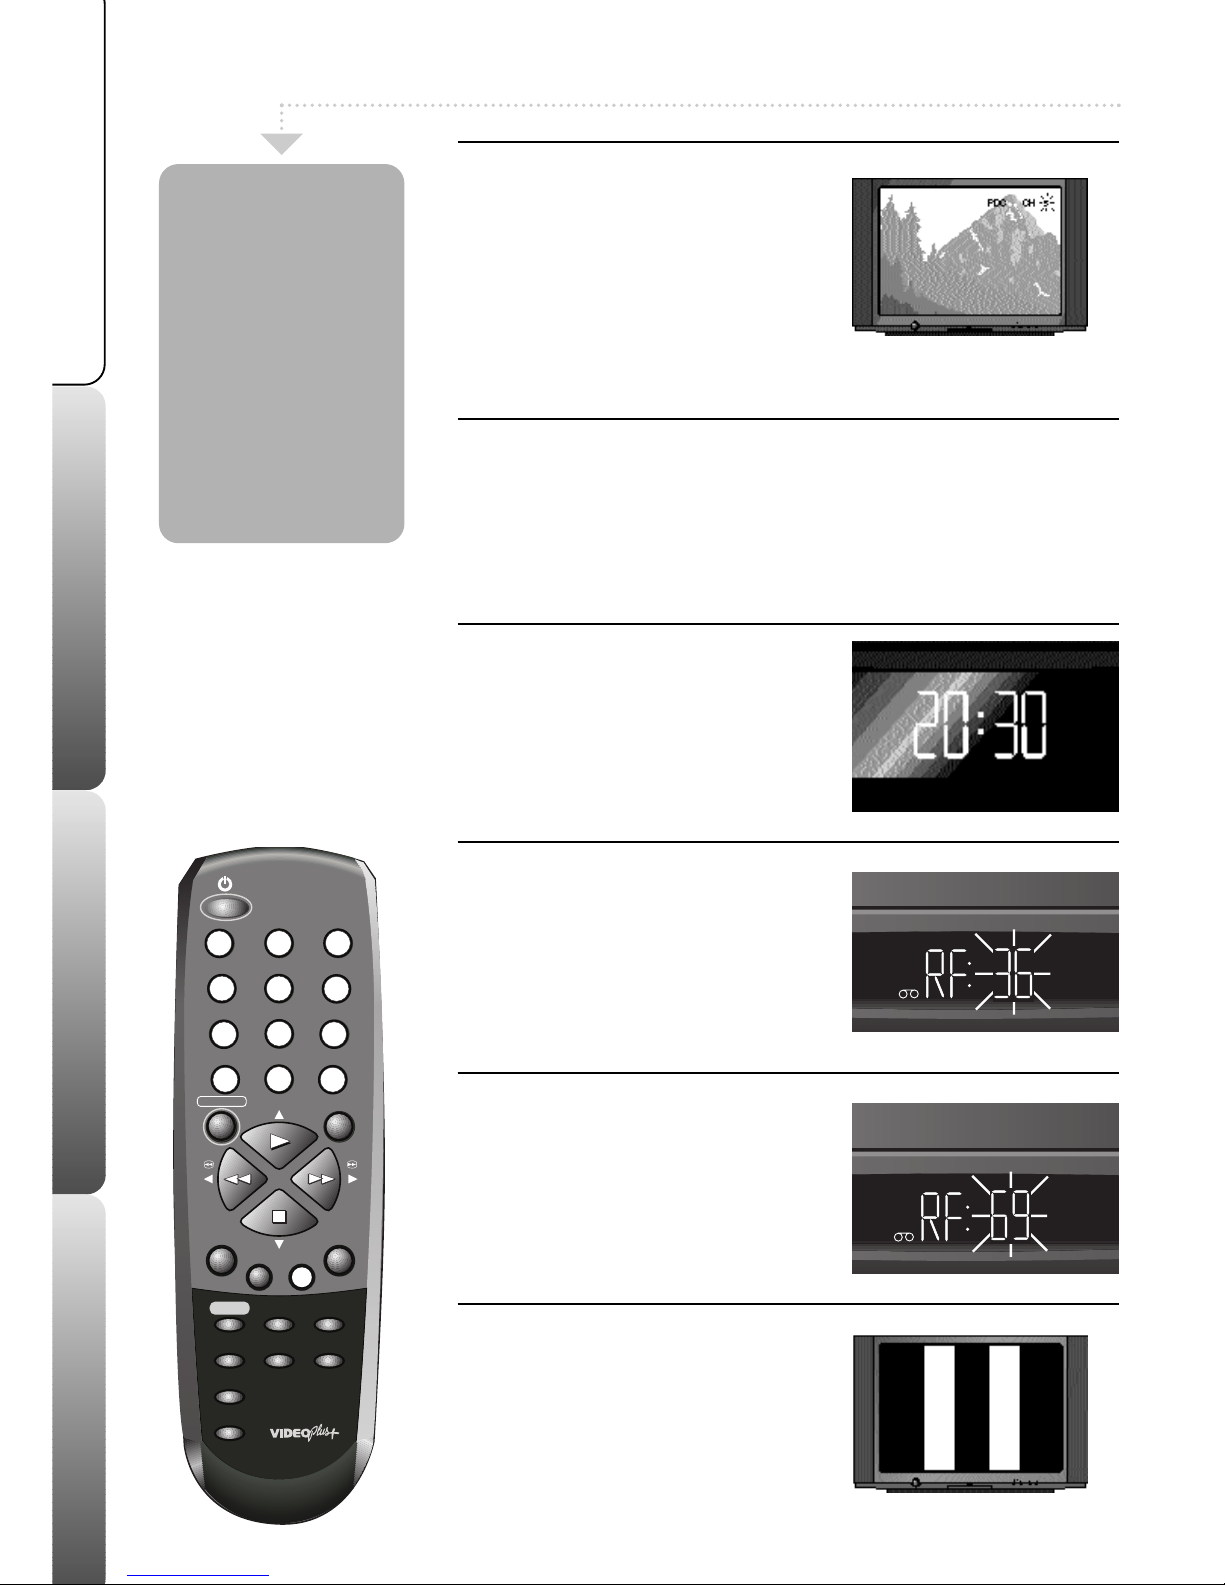
1
VCR in standby
Make sure your TV is switched on and your
VCR is in standby.
2
Select the VCR’s test pattern
Press and HOLD the ON button on the front
of your VCR until ‘RF 36’ appears in the
display.
If ‘CH 1’ stays in the display, press the ON
button once, then press and hold the ON
button until ‘RF 36’ appears.
3
Try changing output number
Press the -CH/TR+ buttons on the front of
your VCR to change the number. Now tune
your VCR channel on your TV again until
the black and white test pattern appears.
4
Store your selection
If the pattern is now clear, press the ON
button to remove the black and white test
pattern. If the pattern is still not clear, try
changing the number again (see stage 3)
and re-tune your TV until the pattern is
clear.
Sometimes during
SET-UP you may
store more than
one copy of the
same channel or
leave a channel
with a poor
picture. Using the
SKIP feature you
can disable these
unwanted
channels.
Advanced features Help & specificationRecordingBasic VCR features
Removing Interference
2
Page 5
Advanced features
Help & specification
Recording Basic VCR features
3
Selecting channels/Video Index Search
1
4
7
0
8
56
9
PAUSE
MENU
ENTER
CH TR/
AV
CANCEL
INDEX
2
3
REC/OTR
-
+
VIDEO PLUS +/
PROGRAM
CALL
CLOCK/
COUNTER
COUNTER
RESET
ZERO
RETURN
SPEED
SP/LP
EJECT
TIMER REC
1
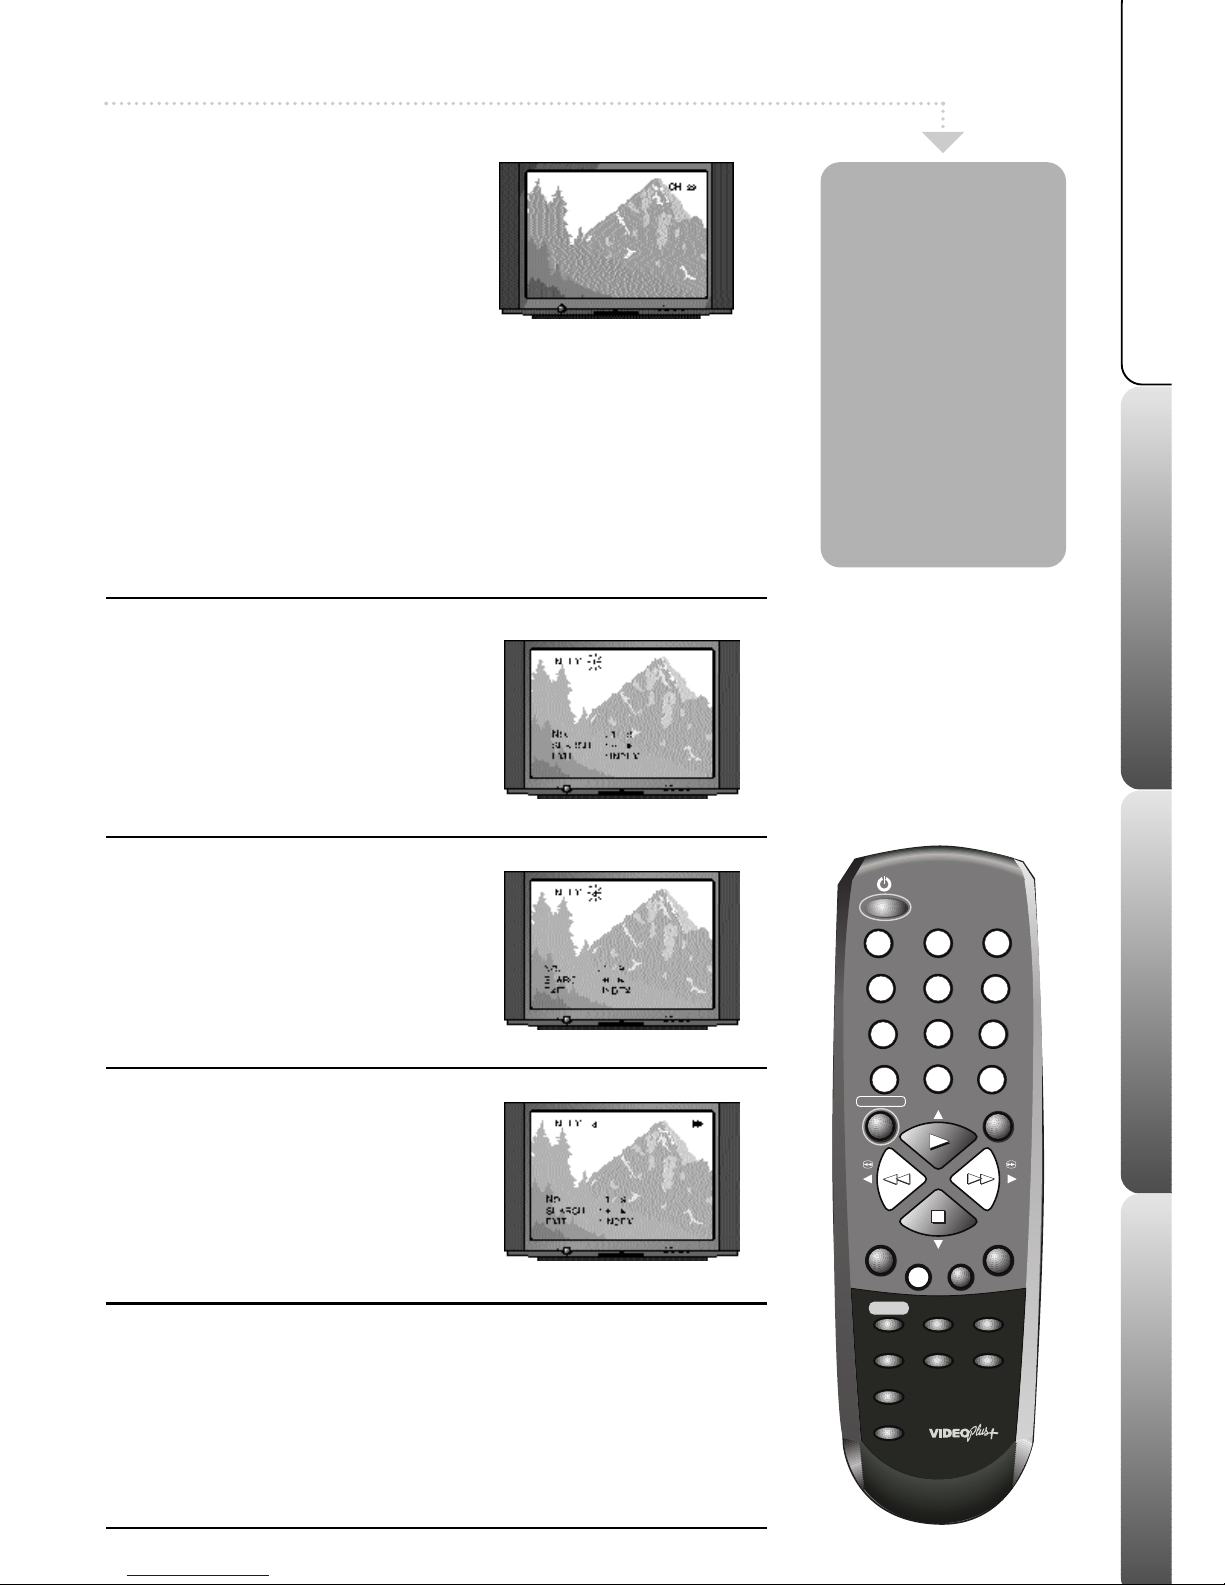
Select the index feature
Press the INDEX button on your remote
control during stop or playback.
The word ‘index’ will appear on your TV screen.
2
Select an index position
Press the NUMBERED buttons on the
remote control to select the number of index
positions to skip.
e.g. your VCR tape is at the beginning and you
want to watch the third recording on the tape,
press number 3 on the remote control.
3
Find the index position
Press the F.FWD button to search the
selected number of index positions forward
through the tape or REW to search
backwards.
Playback will start automatically when the
index position is found.
Video indexing
z
The Video Index Search system will only work once several recordings
have been made on a VCR tape.
z
Occasionally, when a recording starts at the very beginning of a VCR tape
the index mark will be missed.
z
When your VCR is searching for an index mark it will not fast forward or
rewind as fast as normal because it is searching for the index marks.
z
A maximum of 9 index marks can be searched on a single VCR tape.
The Video index
search system
allows you to
easily locate the
beginning of any
recording made on
your VCR.
Your VCR
automatically
records index
marks on the tape
whenever a
recording is
started.
1
Select VCR channel on TV
If your VCR is in standby, press the VCR
ON button on your remote control to switch
it on. Select the VCR channel on your TV
(e.g. AV or channel 0).
Video Index Search
2
Change channels
Press the -CH/TR+ buttons on the remote
control to change channels. You can also
select channels directly by pressing the
NUMBERED buttons on the remote control.
Page 6
Advanced features Help & specificationRecordingBasic VCR features
One Touch Recording (OTR)
1
4
7
0
8
56
9
PAUSE
MENU
ENTER
CH TR/
AV
CANCEL
INDEX
2
3
REC/OTR
-
+
VIDEO PLUS +/
PROGRAM
CALL
CLOCK/
COUNTER
COUNTER
RESET
ZERO
RETURN
SPEED
SP/LP
EJECT
TIMER REC
OTR information
With the one touch recording feature you can make recordings quickly and
easily. Make sure your VCR is properly installed and all the channels are tuned
in the correct order.
• Your VCR can record in Standard Play (SP) or Long Play (LP). When you
record in SP a 3 hour tape will be able to record 3 hours of programmes.
• When you record in LP a 3 hour tape will be able to record 6 hours of
programmes.
You may notice a slightly lower quality of recording in LP mode, especially when
using the PAUSE or PICTURE SEARCH features.
• If the record protection tab has been removed from a tape or you try to
record onto a bought or rented tape, the tape will eject when you press the
REC/OTR button.
1
Select a station
Insert a blank tape into your VCR.
Press the NUMBERED buttons or the
-CH/TR+ buttons on the remote control to
select the TV Station you wish to record.
2
Select the speed
Press the SPEED button to select the
recording speed, standard play (SP) or long
play (LP).
3
Start recording
Press the REC/OTR button to start
recording. The VCR will start recording.
4
Stop recording
Recording will end when either:
• The STOP button is pressed.
• The tape runs out.
• The VCR has finished recording for the
programmed OTR time.
If you wish to record for a
set length of time (e.g. 1
hour) you can set an
REC/OTR recording to stop
after a set length of time.
Each time you press the
REC/OTR button the
record time is increased
by 30 minutes (or 1
hour after 5 presses),
e.g:
1st press . . .continuous recording
2nd press . .30 minutes
3rd press . . .1 hour
4th press . . .1 hour 30 minutes
5th press . . .2 hours
6th press . . .3 hours
7th press . . .4 hours
8th press . . .5 hours
e.g. four presses will start
recording immediately but
stop after 1 and a half
hours.
You can add to the OTR
recording time at any point
by pressing the REC/OTR
button again.
When the tape speed LP is
selected, the recording time
can be set up to 10 hours.
4
Page 7

Advanced features
Help & specification
Recording Basic VCR features
Recording Using Video Plus+
1
4
7
0
8
56
9
PAUSE
MENU
ENTER
CH TR/
AV
CANCEL
INDEX
2
3
REC/OTR
-
+
VIDEO PLUS +/
PROGRAM
CALL
CLOCK/
COUNTER
COUNTER
RESET
ZERO
RETURN
SPEED
SP/LP
EJECT
TIMER REC
1
Enter a PlusCode
Insert a blank tape.
Press VIDEO Plus+/PROGRAM button
on the remote control.
Enter the PlusCode number for the
programme you wish to record using the
NUMBERED buttons.
If an incorrect PlusCode
is entered, the word ‘ERROR’ will be displayed.
2
Select how often to record
Repeatedly press PLAY or STOP to select
once, daily or weekly.
Select once for a single recording, daily to
record at the same time each day and weekly to
record at the same time weekly.
Press ENTER.
3
Set tape recording speed
Press PLAY or STOP to select SPEED (see
page 4 for more details). Press REW or
F.FWD to select the tape recording speed
(SP or LP).Press ENTER to confirm your
recording. To edit a recording, press PLAY
or STOP to highlight the recording and
then press ENTER.
SELECT
PLUSCODE NO.
START
SET
EXIT
END
3 4 6 8 4 2 7
MENU
DATE
CH
SPEED
8 MON
7:15
8:15
3
SP
OK
ENTER
4
Set to Timer Record Mode
Press the MENU button twice to remove the
timer recording screen.To programme further
recordings repeat stages 1 to 3. Press the
TIMER REC button to set your timer
recording.
(If the record protection tab has been
removed from your tape it will be ejected.)
Your
VCR will go into timer record mode (this
looks like standby, but the timer set symbol
will appear in the VCR display).If you do not
put your VCR into timer record mode your
recording will not take place. Your timer
recording is now set. At the set time your
VCR will switch on and record your
programme then go back into timer record
mode.When your VCR has recorded all your
programmes, press the TIMER REC button
to bring it out of timer record mode.
This recording system
makes programming a
recording much easier.
By entering the
PlusCode (the long
number after each
programme in your TV
listings) the correct
start time, end time,
channel and date are
set for you
automatically.
The VCR's timer allows
up to 8 programmings
to be set within a 1
month period.
VIDEO Plus+ and PlusCode are registered trademarks of Gemstar Development Corporation.
The VIDEO Plus+ system is manufactured under license from Gemstar Development Corporation.
5
VCR Channel
1
2
3
4
5
6
Station
BBC1
BBC2
ITV
Channel 4
Channel 5
decoder (if fitted)
In order for the VIDEO Plus+ system to work
correctly the channels in your VCR must be
stored in the order opposite. See the Quick
Start Guide tuning stations into your VCR to
change channel order.
R
system
This feature is only available on certain models.
Page 8

Advanced features Help & specificationRecordingBasic VCR features
Timer Recordings
1
4
7
0
8
56
9
PAUSE
MENU
ENTER
CH TR/
AV
CANCEL
INDEX
2
3
REC/OTR
-
+
VIDEO PLUS +/
PROGRAM
CALL
CLOCK/
COUNTER
COUNTER
RESET
ZERO
RETURN
SPEED
SP/LP
EJECT
TIMER REC
1
Set a timer position
Press the VIDEO PLUS+/PROGRAM
button twice on the remote control.
The timer
event menu will appear.
Press the PLAY or
STOP buttons to select a free timer position
(blank dotted line), then press ENTER.
The
timer record screen will appear.
2
Set the timer recording
Press the REW or F.FWD buttons to select
the date, start and end times, channel and
tape speed.
Press the STOP button to confirm all of
these settings.
3
Timer record mode
Press the ENTER button to confirm the timer
recording. To programme further recordings
repeat stages 1 to 2.
Press the TIMER REC button to set
your timer recording.
Your VCR will go into timer record mode
(this looks like standby, but the timer set
symbol will appear in the VCR display)
.
If you do not put your VCR into
timer record mode your recording
will not take place.
Your TIMER RECORDING is now set.
At the set time your VCR will switch on and
record your programme then go back into
timer record mode.When your VCR has
recorded all your programmes, it will
remain in standby mode.
Timer recordings
allow you to
program your VCR
to switch on and
record a programme
at a preset time.
Make sure your VCR
is properly installed
and all the channels
are tuned in and the
correct time and
date are set before
making a timer
recording.
If you make a mistake
during programming a
timer recording, press
the PLAY or STOP
buttons to select the
information you want to
change and then press
the REW or F.FWD
buttons to make your
changes.
6
Page 9

Advanced features
Help & specification
Recording Basic VCR features
Checking or Cancelling
Video Plus+
1
4
7
0
8
56
9
PAUSE
MENU
ENTER
CH TR/
AV
CANCEL
INDEX
2
3
REC/OTR
-
+
VIDEO PLUS +/
PROGRAM
CALL
CLOCK/
COUNTER
COUNTER
RESET
ZERO
RETURN
SPEED
SP/LP
EJECT
TIMER REC
1
Cancel Timer Set
If your VCR is in timer record mode press
the TIMER REC button to switch on your
VCR.
The timer set symbol will go out.
Press the VIDEO PLUS+/PROGRAM
button twice.
The timer event menu will appear.
2
Select a recording
Press PLAY or STOP to highlight the
recording that you wish to amend or
cancel.
3
Cancel/Check a recording
To cancel the recording press CANCEL; the timer
recording details will be deleted.
If you only want to check the details of a timer
recording repeatedly press the MENU button to
clear the screen. If you wish to amend a timer
recording, press the ENTER button.
See page 6
for details on setting the timer recording
.
4
Reset Timer Set
Press TIMER REC to put your VCR back
into timer record mode if there are any
more recording to be made. If you do not,
the recordings will not take place.
You can easily
check the details
of a VIDEO Plus+
recording or timer
recording before it
takes place. After
a recording has
been made it will
automatically be
removed from the
timer event menu.
You can cancel
VIDEO Plus+
recordings or
timer recordings
before they take
place.
7
Recordings
& Timer Recordings
R
This feature is only available on certain models.
Page 10

Advanced features Help & specificationRecordingBasic VCR features
Clock/Counter Display & Zero Return
1
4
7
0
8
56
9
PAUSE
MENU
ENTER
CH TR/
AV
CANCEL
INDEX
2
3
REC/OTR
-
+
VIDEO PLUS +/
PROGRAM
CALL
CLOCK/
COUNTER
COUNTER
RESET
ZERO
RETURN
SPEED
SP/LP
EJECT
TIMER REC
1
Selecting the counter
The clock displays the current time in the
VCR display. The counter displays how
much time has elapsed since the point at
which you started playing a tape.
To switch
between the two press the
CLOCK/COUNTER button.
2
Counter Reset
Select the counter and then press
COUNTER RESET to reset the counter to
00:00.
When you load a tape the counter will
reset.
If you rewind a tape from 00:00, a minus sign () will appear in front of the counter.
3
Zero Return
When the VCR is not playing, press the
ZERO RETURN button, the tape will
rewind or fast forward until the counter
reaches 00:00 automatically.
This feature is useful for returning to a point in a
tape you wish to view again.
4
Counter Pause
When you rewind or fast forward through
blank sections of tape, the counter will stop
counting.
When the Auto Repeat feature is switched ON your VCR tape will
play continuously. When the end of the tape is reached, it will
rewind to the beginning and start to play again.
1
Select Auto Repeat
Press MENU; the main menu will appear.
Press PLAY or STOP to highlight AUTO
REPEAT.
Press REW to select ON or OFF. Press
MENU to clear the screen.
Press PLAY to start playing your tape.
Your VCR has a
counter which can
display the actual
amount of time (in
seconds) that a VCR
tape has been
playing.
The Zero Return
feature allows you
to set the counter to
0:00 at any point in
the tape and then
rewind and start
playing from that
point when you
press the ZERO
RETURN button.
Auto Repeat Play
8
Page 11

Advanced features
Help & specification
Recording Basic VCR features
Using the Playback Sharpness Feature
1
4
7
0
8
56
9
PAUSE
MENU
ENTER
CH TR/
AV
CANCEL
INDEX
2
3
REC/OTR
-
+
VIDEO PLUS +/
PROGRAM
CALL
CLOCK/
COUNTER
COUNTER
RESET
ZERO
RETURN
SPEED
SP/LP
EJECT
TIMER REC
1
Play a tape
Start playing a VCR tape.
Press MENU, the main menu will appear.
Press PLAY or STOP to highlight
PLAYBACK SHARPNESS.
You will not be able to select the playback
sharpness feature unless a VCR tape is playing.
2
Select/Adjust Sharpness
Press ENTER, the playback sharpness
screen will appear. Press REW or F.FWD
to adjust the playback sharpness to the level
you require. Moving the bar to the left
makes the picture appear softer. Moving the
bar to the right increases the definition on
the picture.
3
Exit the Menu
Press the MENU button twice to remove the
playback sharpness screen.
The playback sharpness screen disappears
automatically after 60 seconds if no buttons
are pressed.
1
Manual/Automatic Tracking
If white lines appear during playback or the
picture starts to shake you can try to adjust
the tracking manually.
Press the TRACKING + or - buttons to
obtain the best picture. To return to automatic
tracking eject the tape and play again.
2
Call
When you press the CALL button, the
current time, channel and any other
relevant information (e.g. tape counter,
record sign) will appear on the screen.
Press CALL again to remove the
information.
Your VCR has a
Playback
Sharpness feature
which can be used
to improve the
picture quality
from a VCR tape
during playback.
Automatic Tracking and Call
Automatic tracking adjusts the picture to make sure you see the best
possible picture. When a VCR tape is played, the digital auto tracking
system automatically adjusts the tracking of the VCR to obtain the best
picture from the VCR tape. The Auto Tracking Indicator (ATR) flashes in
the VCR display while your VCR searches for optimum tracking (usually
the first few seconds of playing a tape). The ATR will remain lit as long
as automatic tracking continues.
9
Page 12

z In order for the VIDEO Plus+ system to
work correctly your TV Station must be
in the positions in the table opposite.
z Only follow the guidance on these
pages if the order is different.
z See page 5 for more details on VIDEO
Plus+.
Advanced features Help & specificationRecordingBasic VCR features
1
4
7
0
8
56
9
PAUSE
MENU
ENTER
CH TR/
AV
CANCEL
INDEX
2
3
REC/OTR
-
+
VIDEO PLUS +/
PROGRAM
CALL
CLOCK/
COUNTER
COUNTER
RESET
ZERO
RETURN
SPEED
SP/LP
EJECT
TIMER REC
1
Select the MAIN menu
In the following example the Satellite
channel has been incorrectly stored in
channel 8 in the VCR.
Press MENU; the main menu will appear.
Press PLAY or STOP to select CHANNEL
SETUP.
Press ENTER.
Press PLAY or STOP to select GUIDE CH
SET.
Press ENTER.
2
Select the GUIDE CH
Press PLAY or STOP until 'SAT' flashes
under 'GUIDE CH'.
This indicates the Satellite.
Press ENTER.
Press NUMBERED button 8 to enter a
number 8 underneath 'VCR CH'.
This tells your VCR that the Satellite has been
stored in channel 8.
Press ENTER to store the new setting.
If you have connected your satellite using the
SCART socket you must select AV underneath
'VCR CH'.
Repeat stage 2 to adjust any other
channels.
Press MENU three times to remove the
menu.
Before VIDEO
Plus+ recordings
will work properly
BBC1 must be
stored in
channel 1, BBC2 in
channel 2, ITV in
channel 3 etc. If
your order is
different or you
are having
problems with
VIDEO Plus+
recordings, follow
the instructions on
this page.
Checking VIDEO Plus+
VCR Channel Station
1 BBC1
2 BBC2
3 ITV
4 Channel 4
5 Channel 5
6 Decoder (if fitted)
10
R
Set-Up
This feature is only available on certain models.
Page 13

Advanced features
Help & specification
Recording Basic VCR features
Setting the Security Protection
1
4
7
0
8
56
9
PAUSE
MENU
ENTER
CH TR/
AV
CANCEL
INDEX
2
3
REC/OTR
-
+
VIDEO PLUS +/
PROGRAM
CALL
CLOCK/
COUNTER
COUNTER
RESET
ZERO
RETURN
SPEED
SP/LP
EJECT
TIMER REC
1
Select Pin Code
Press MENU; the main menu will appear.
Press PLAY or STOP to highlight PIN
CODE REGISTRATION.
Press ENTER; the pin code registration
screen will appear.
2
Enter Owners Name
Press ENTER to set the owners name. Press
PLAY or STOP until the desired letter is
displayed.Store the letter by pressing
F.FWD. You can enter up to 20 letters.
Press ENTER to store your OWNER’S
NAME.
3
Enter a Pin Code
Press PLAY or STOP to select PIN CODE,
then press ENTER.
Press the numbered buttons on the remote
control to enter a PIN code.
Your PIN code
can be a combination of any 4 digits.
Press
ENTER to store your PIN code.
4
Set Protection ON
Press PLAY or STOP to select PROTECT.
Press ENTER to select ON.
Press MENU twice to exit the menu, the
security protection is now on.
To switch protection off select OFF from the Pin
Code Registration menu.
5
Entering your Pin Code
After a power failure or after the VCR has
been unplugged from the mains for longer
than 30 minutes, the PIN code screen will
appear when you switch your VCR on.
Enter your PIN code using the numbered
buttons on the remote control, then press
ENTER. If you enter the correct PIN code,
“PIN CODE OK” will appear and you can
now use your VCR. If you entered an
incorrect PIN code, “ PIN CODE ERROR”
will appear and you can try to enter the
correct code again. If you enter an
incorrect PIN code more than 3 times your
VCR will lock itself and you will not be able
to use it. To unlock the VCR you must
unplug the VCR from the Mains supply for a
further 30 minutes, then plug the VCR back
in and enter the correct PIN code.
In an effort to fight
crime, we have equipped
your VCR with security
protection. When switched
ON you have to enter a PIN
code after your VCR has
been unplugged from the
mains for approximately
half an hour or longer.
You MUST write down your
PIN code and keep it in a
safe place.
The PIN code protection will
only work if your VCR is
unplugged from the mains
supply for approximately half
an hour or longer.
If your VCR needs to be
serviced, make sure that the
security protection is set to OFF,
otherwise you will be charged
for re-setting the feature.
PLEASE NOTE:
In the event of losing your PIN
code you will be charged by
Mastercare to reset your VCR.
11
Page 14

Advanced features Help & specificationRecordingBasic VCR features
Help and Trouble Shooting
Before requesting service please check the following points;
No Power
VCR will not switch ON even though
the power is ON
When the VCR is switched on and
connected with a SCART LEAD you
cannot change the TV STATIONS on
the TV
The TV programme selected on your
VCR does not appear on your TV
screen
VCR will not record
No colour or 'snow' during playback
In LP mode lines or
distortion on picture
during f.fwd, rewind or
pause
Remote control does not
work
Playback picture does not
appear
VCR does not record the TV
station or time you request
Is your VCR plugged in?
Is the mains power switch off?
Is your VCR in TIMER RECORD mode?
You may have pressed the CALL button on
the remote control
Menu appears on the screen
Input selector on your TV is in the VCR (AV)
position
Aerial connection is incorrect
Aerial cable is disconnected
Your TV is not on your VCR channel
Your VCR channel is not properly tuned in on
your TV
No tape in the VCR
Record Protection has been removed from
the VCR tape
VCR is switched OFF
VCR heads are dirty
Your TV might not be tuned to your VCR
properly
Your VCR tape is worn or damaged
The tracking adjustment is beyond the range
of the Automatic Tracking Circuit
This is normal and does not mean there is
anything wrong with your
VCR
It is not facing the remote control sensor
It is too far away or there is too much light in
room (bright direct sunlight)
Obstacle in path of beam
Batteries are inserted incorrectly; the + and polarities are the wrong way around
Batteries are weak
TV not set to the VCR channel
Your Stations have not been stored in the
correct channel positions on your VCR
The time is not set correctly
Plug your VCR into a mains socket
Switch on the mains power socket
Try pressing the TIMER REC button to bring
your VCR out of TIMER RECORD mode
Try pressing the CALL button again and then
selecting a different TV STATION on your TV
Press the MENU button to remove the on
screen display
Select the TV position on your TV
Re-connect the aerial
Reconnect the aerial
Switch your TV to your VCR channel
Retune a channel on your TV until you can
see the VCR's picture
Insert a VCR tape
Place a piece of adhesive tape over the
protection tab slot on the VCR tape
Switch the VCR on by pressing the VCR ON
button on the remote control or the ON
button on the front of your VCR
Call for a Mastercare Engineer
Re-tune your TV to your VCR
Try another VCR tape
Adjust the tracking manually
Aim it at the remote control sensor
Operate within 5 metres or reduce light
Clear path of beam
Insert batteries correctly
Replace batteries
Set your TV to your VCR channel
Re-tune your VCR stations
Reset the time correctly
Symptom Cause Solution
12
Page 15

Advanced features
Help & specification
Recording Basic VCR features
Connecting your VCR to Another VCR
If you connect your VCR to another VCR or Video camera it is possible to duplicate a pre-
recorded tape. Please note that the picture quality will not be as good as that on the
original tape. Make sure all appliances are unplugged from the mains supply and switched
off before you attempt to connect the relevant connection cable.
Connecting your VCR to a Camcorder
How to connect your VCR to a video camera
11
11
If you connect your camcorder, you can duplicate a previously recorded tape.
22
22 Make sure all connections are made before turning the power on. Insert the tape you wish to record ‘ON’ into your VCR.
33
33 Press the AV button to select the AV channel.
44
44 Insert the tape you wish to record ‘FROM’ into the video camera.
5555
Press the REC/OTR button on your VCR.
66
66 Press the play button, on the video camera; playback and recording will start.
How to connect your VCR to another VCR
1111
Link the two VCR's with a SCART cable (not supplied).
2222
Insert the tape you wish to record ‘ON’ into your VCR.
3333
Insert the tape you wish to record ‘FROM’ into the second VCR. Press the play button on the second VCR.
4444
Press the REC/OTR button on your VCR.
5555
Recording will start.
13
It is an infringement of the Copyright, Designs and Patents Act 1956, 1988 chapter 48 and the Performers Protection Act 1958-72 to copy Records, Pre-recorded Cassettes,
Pre-recorded video tapes and compact discs or to re-record them in any form without permission of the Copyright owners.
Page 16

Connecting your VCR to a Hi-Fi
Advanced features Help & specificationRecordingBasic VCR features
SCART Socket Information
How to connect your VCR to a Hi-Fi
You can connect your VCR directly to your Hi-Fi with an audio (phono) lead.
1111
All connections must be made with both your VCR and Hi-Fi unplugged from the mains supply.
2222
Connect one end into the SCART socket on the back of your VCR.
3333
Connect the other end to the audio in sockets (or SCART socket) on the back of your Hi-Fi.
4444
Press the PLAY button on your VCR to play the video sound track through the speakers of a Hi-Fi system. The sound from
your VCR through your Hi-Fi will be mono not stereo.
5555
Due to the wide variety of Hi-Fi equipment, the information on this page should be used only as guidance. Refer to your
Hi-Fi’s Instruction Book for more details.
If your VCR is connected to a TV using a SCART lead, a video tape when played will automatically be displayed on
the TV irrespective of the channel you are watching (unlike "normal" RF aerial connection where you must use a
nominated channel).
The AV button on your VCR provides a convenient method of switching between an appliance connected to the
SCART socket (e.g. a Satellite Receiver) or TV stations received by your 'normal' aerial connected to the AERIAL
SOCKET of your VCR.
If you do not have anything plugged into the SCART SOCKET of your VCR and you press AV the screen will go
blank. Press AV again and your TV will display the last station viewed on your VCR.
21 Pin SCART terminal
1. Audio output (right)
2. Audio input (right)
3. Audio output (left)
4. Audio earth
5. Blue earth
6. Audio input (left)
7. Blue In
15. Red In
16. Blanking signal
17. Video earth
18. Blanking signal earth
19. Video output
20. Video input
21. Shield/earth
8. Switching voltage (out)
9. Green earth
10. Date line 2
11. Green In
12. Date line 1
13. Red earth
14. Reserved
14
Page 17

Advanced features
Help & specification
Recording Basic VCR features
Wiring Instructions
Record Protection Tab
Record Protection Tab
When you insert a video cassette with the record protection tab removed
(for example a pre-recorded tape from a video hire shop) playback will
start straight away.
Video Head Cleaning
The video heads are the means by which the VCR reads pictures from the
tape during playback. In the unlikely event that they become dirty enough
to be clogged, no picture will be played back. This can easily be
determined if, during playback of a known good tape, there is good
sound but no picture (picture is extremely snowy). Manual cleaning may
still be necessary in some cases, if this is the case, have the VCR checked
and cleaned by qualified Mastercare personnel. Head cleaning
cartridges are not recommended because they can be abrasive to your
video heads. To help prevent video head clogging, use only good quality
VHS tapes. Discard worn out tapes.
To prevent accidental
erasure of a
recording, break off
the record protection
tab with a
screwdriver.
If you need to
record onto a
tape on which
the tab has
been removed
from, cover the
hole with a
small piece of
adhesive tape.
Warning: If the mains plug is cut from the mains lead of this appliance the plug must be destroyed. A mains plug with bared
wires is hazardous if engaged in a mains output socket.
The wires in your VCR mains lead are coloured in accordance with
the following:-
The wire which is coloured Blue must be connected to the terminal in
the plug which is marked with the letter N or coloured Black.
The wire which is coloured Brown must be connected to the terminal
in the plug which is marked with the letter L or coloured Red.
No connection must be made to the earth terminal of the plug.
You must use a 13 amp plug (BS 1363), and fit a 3 amp fuse (BS
1362).
If any other type of plug is used a 3 amp fuse must be fitted, either in
the plug, adaptor or at the distribution board.
15
Page 18

Specifications
Advanced features Help & specificationRecordingBasic VCR features
Operating Temperature: . . . . . . . . . . . . . . . . . . . . . . . . .5oC to 40oC
Heads: . . . . . . . . . . . . . . . . . . . . . . . . . . . . . . . . . . . . . . .Video: 2 Rotary Heads
. . . . . . . . . . . . . . . . . . . . . . . . . . . . . . . . . . . . . . . . . . . . .Audio/Control: 1 Stationary Head
. . . . . . . . . . . . . . . . . . . . . . . . . . . . . . . . . . . . . . . . . . . . .Erase: 1 Full Track Erase
Video recording system: . . . . . . . . . . . . . . . . . . . . . . . . .VHS, 2 Rotary Heads Helical Scanning System
Luminance Signal: . . . . . . . . . . . . . . . . . . . . . . . . . . . . . .FM azimuth recording
Colour signal: . . . . . . . . . . . . . . . . . . . . . . . . . . . . . . . . . .Low frequency converted direct recording
Television System: . . . . . . . . . . . . . . . . . . . . . . . . . . . . . .CCIR: 625 lines 50 fields PAL I
Audio Track: . . . . . . . . . . . . . . . . . . . . . . . . . . . . . . . . . . .1 track
Tape format: . . . . . . . . . . . . . . . . . . . . . . . . . . . . . . . . . .12.65mm high density tape
Tape speed: . . . . . . . . . . . . . . . . . . . . . . . . . . . . . . . . . . .PAL SP: 23.39 mm/s LP: 11.69mm/s
. . . . . . . . . . . . . . . . . . . . . . . . . . . . . . . . . . . . . . . . . . . . .NTSC SP:33.35 mm/s
Rewind/Fast Forward time: . . . . . . . . . . . . . . . . . . . . . .F.FWD : 1’48” (with E-180 cassette)
. . . . . . . . . . . . . . . . . . . . . . . . . . . . . . . . . . . . . . . . . . . . .REW : 1’48” (with E-180 cassette)
Input level: . . . . . . . . . . . . . . . . . . . . . . . . . . . . . . . . . . . .Video: 1.0Vp-p, 75 ohm unbalanced
. . . . . . . . . . . . . . . . . . . . . . . . . . . . . . . . . . . . . . . . . . . . .Audio: 500mV, 50k ohm unbalanced
Output level: . . . . . . . . . . . . . . . . . . . . . . . . . . . . . . . . . .Video: 1.0Vp-p, 75 ohm unbalanced
. . . . . . . . . . . . . . . . . . . . . . . . . . . . . . . . . . . . . . . . . . . . .Audio: 500mV, 1k ohm unbalanced
RF output channel: . . . . . . . . . . . . . . . . . . . . . . . . . . . . . .Channel 36 (23~69, Adjustable)
Power supply: . . . . . . . . . . . . . . . . . . . . . . . . . . . . . . . . .AC 230V-240V / 50Hz
Power consumption: . . . . . . . . . . . . . . . . . . . . . . . . . . . .12W (4W Standby)
Dimensions: . . . . . . . . . . . . . . . . . . . . . . . . . . . . . . . . . . .380mm (W) x 272mm (D)
. . . . . . . . . . . . . . . . . . . . . . . . . . . . . . . . . . . . . . . . . . . . .x 95mm (H)
Weight: . . . . . . . . . . . . . . . . . . . . . . . . . . . . . . . . . . . . . . .3.5kg
Because we continually strive to improve our products we may change specifications and designs without prior notice. Weight and
Dimensions are approximate.
No part of this publication may be reproduced, stored in a retrieval system or transmitted in any form or by any means, without
the prior permission in writing of Dixons Stores Group, nor be otherwise circulated in any form of binding or cover other than that in which is published and without
a similar condition including this condition being imposed on the subsequent purchaser.
16
Page 19

Page 20

4D76801A V
01.03
 Loading...