

Matrix Fitness MX-E5xc Service Manual
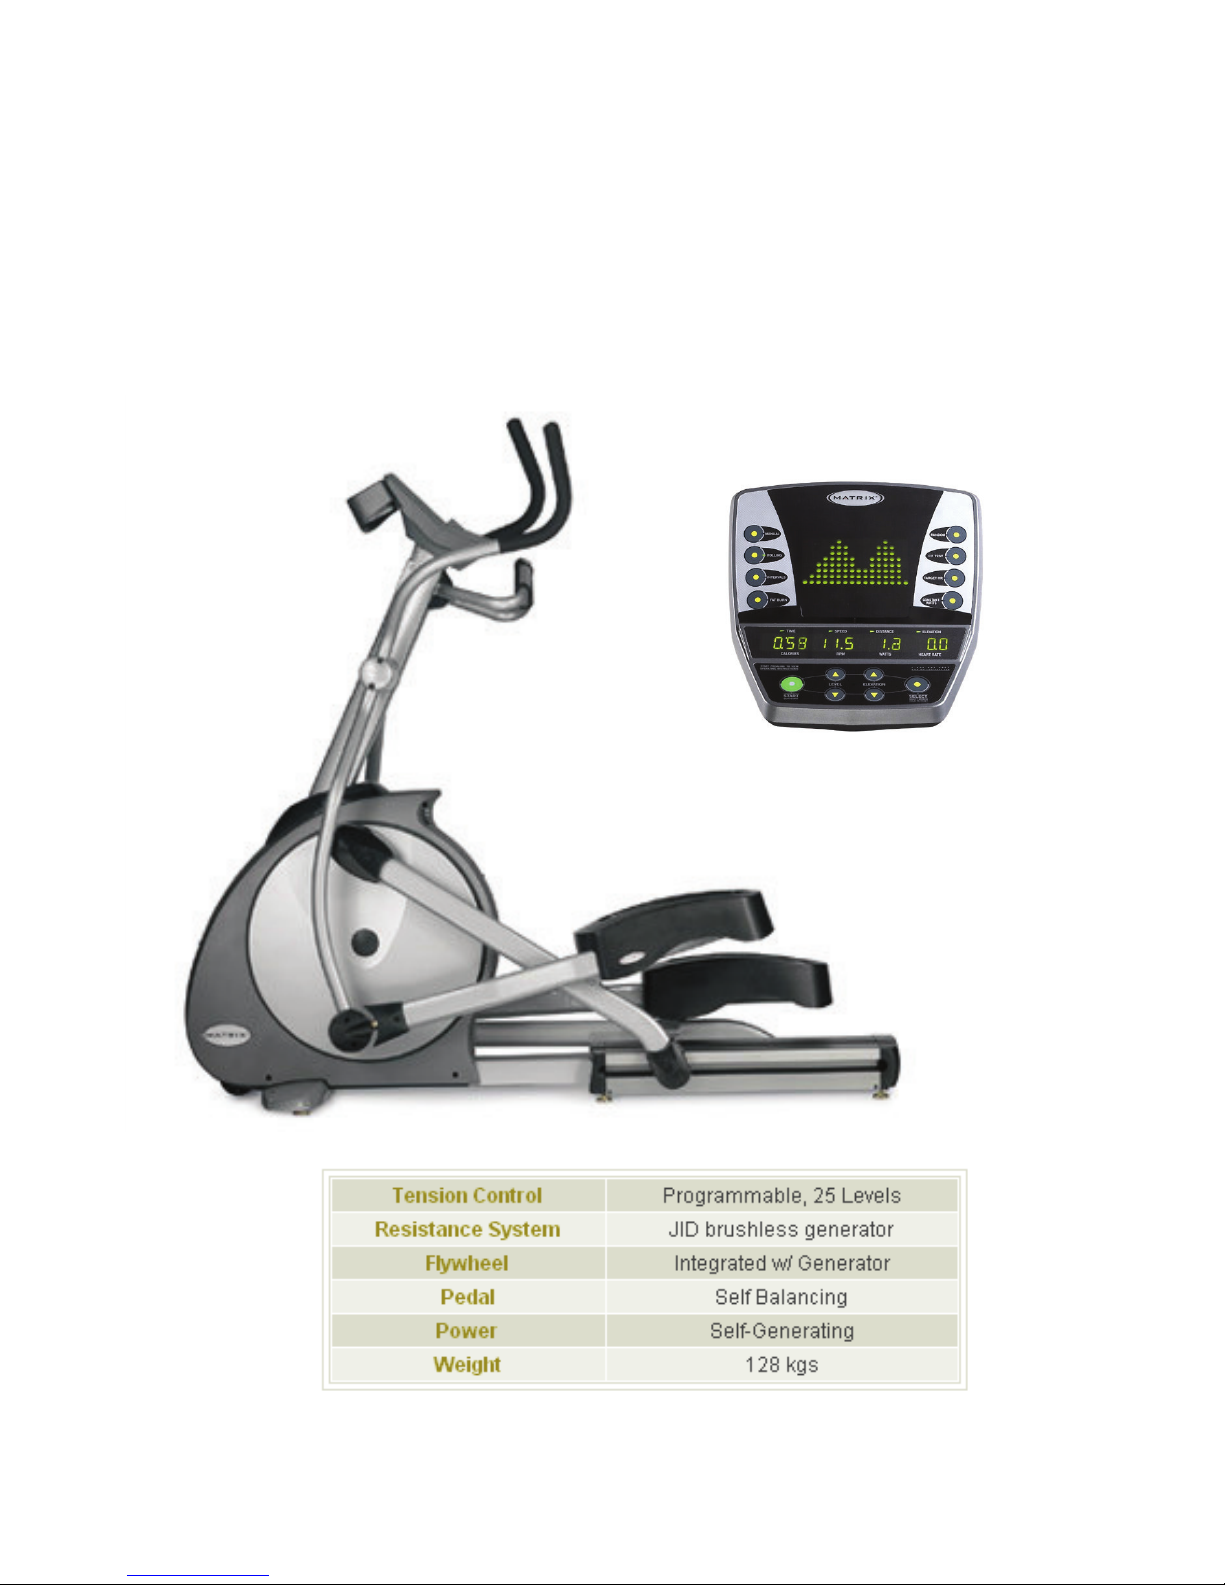
MX-E5xc SERVICE
MANUAL
1

TABLE OF CONTENTS
SECTION 1: MAINTENANCE PROCEDURE…………….…...3
1. Preventive maintenance schedule……………………..……..…..4
2. Cleaning the grooves………………………………………..........5
SECTION 2: WIRING DIAGRAM INSTRUCTION…...........…6
1. MX-E5xc wiring diagram instruction…………………………….7
2. Console cable wiring diagram ………………….………………..8
3. Pulse sensor wire wiring diagram…………………..……...….….8
SECTION 3: CONSOLE ENGINEERING MODE GUIDE…….9
1. How to enter into the engineering mode?...................................10-11
SECTION 4: TROUBLESHLOOTING…………………………..12
1. No display on the console or the display is dim……………….14
2. No RPM is displayed during the exercise……………………...15
3. All or some of the function keys do not respond…………...….16
4. No resistance change or too hard for pedaling…………………17
5. Feel slipping while pedaling……………………………………18
6. Knocking or creaking noises……………………………………18
7. Heart-Rate-Control function does not work…………………….19
SECTION 5: SOFTWARE UPGRADE PROCEDURE…………..20
1. MX-U5x bike software upgrade SOP….......................................21-22
2

SECTION 1
MAINTENANCE PROCEDURE
3

PREVENTIVE MAINTENANCE SCHEDULE
VISION BIKE
AnnualBiannualQuarterlyMonthlyWeeklyDailyItem
Console Mounting
Bolts
Handrail &
Handlebar
Inspect
InspectCleanFrame
InspectCleanDisplay Console
InspectCleanHandlebar
Inspect
InspectBelt Grooves
InspectCleanV Belt
LubricateAir Shock
4

CLEANING THE GROOVES
Caution:
If there is any dust in the grooves of the Poly-V belts and pulleys, noises
will be generated during operation.
Frequency: Every 3 to 4 months.
Procedure:
1.Remove the Poly-V belts and check
the grooves of the belt for dirt or dust
and clean it if any.
2.Check the grooves in the pulley for
dirt or dust and clean it if any.
3.Check the grooves in the roller pulley
for dirt or dust and clean it if any
5

SECTION 2
WIRING DIAGRAM INSTRUCTION
6
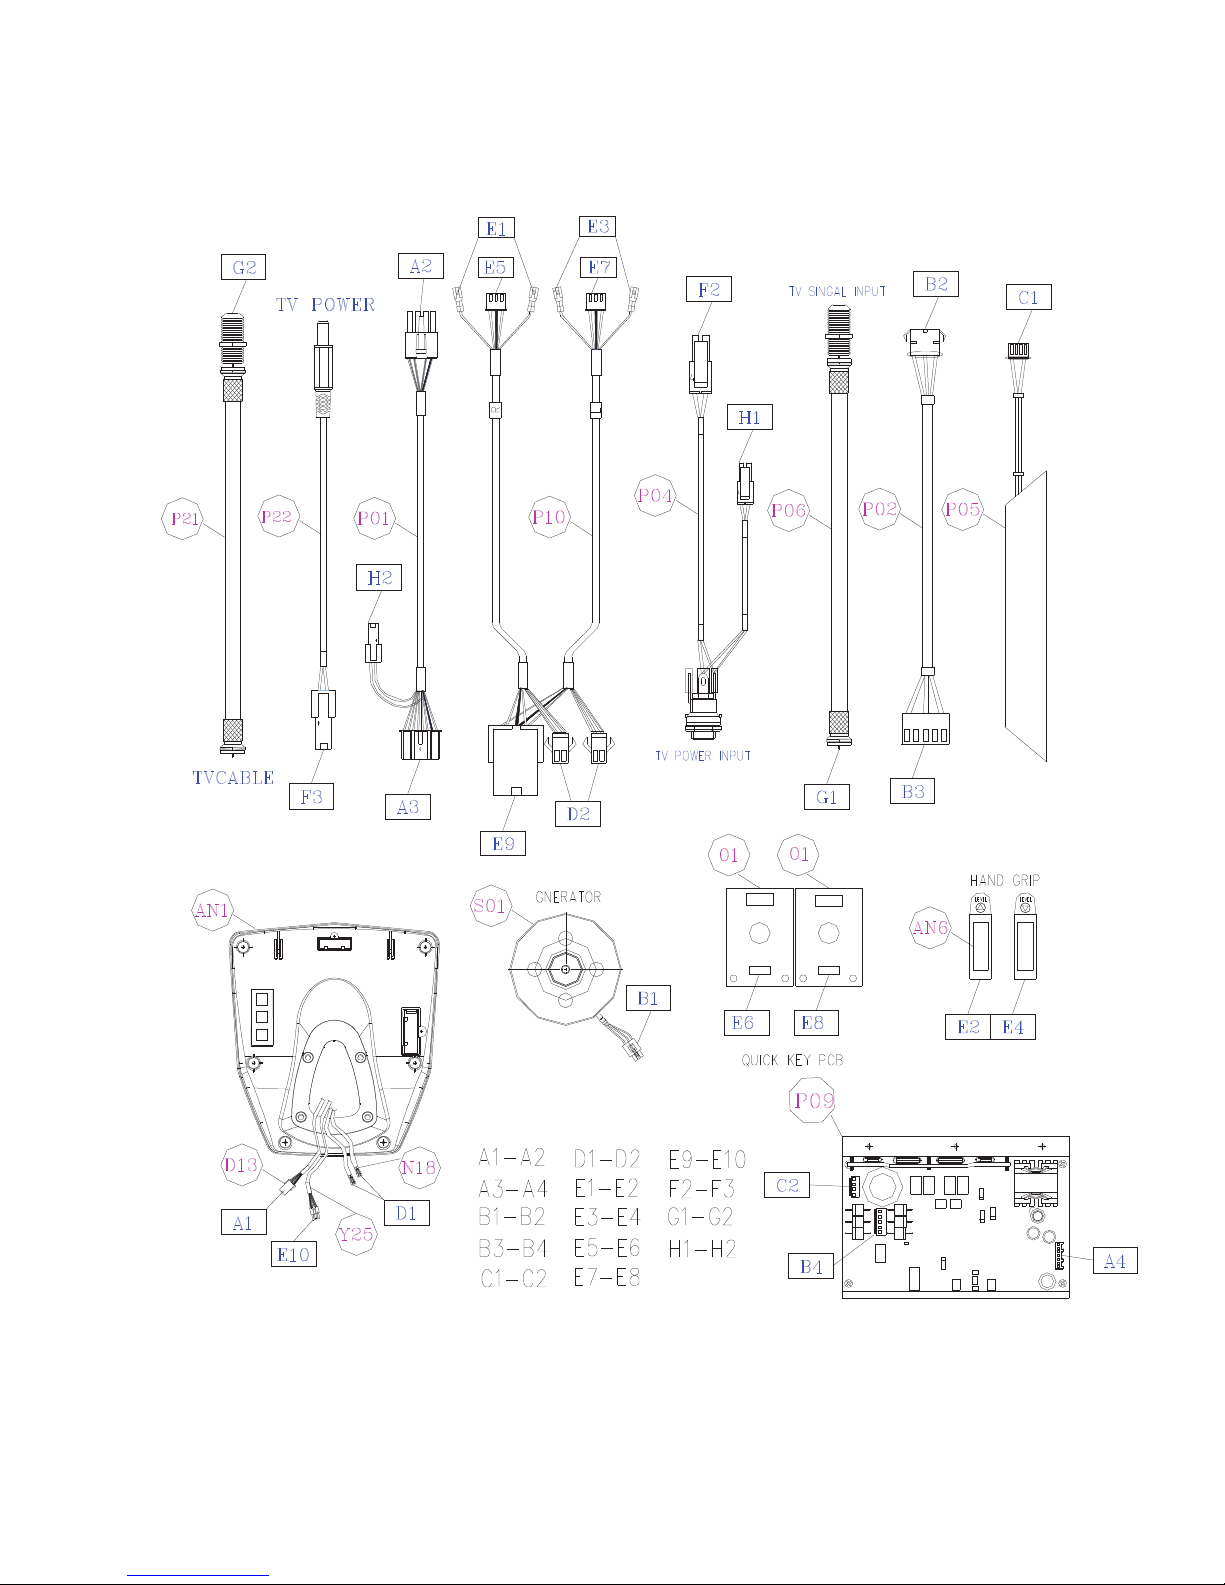
MX-E5xc WIRING DIAGRAM INSTRUCTION
7
 Loading...