

Page 1

SETU VG
Quick Start
Page 2

Page 3
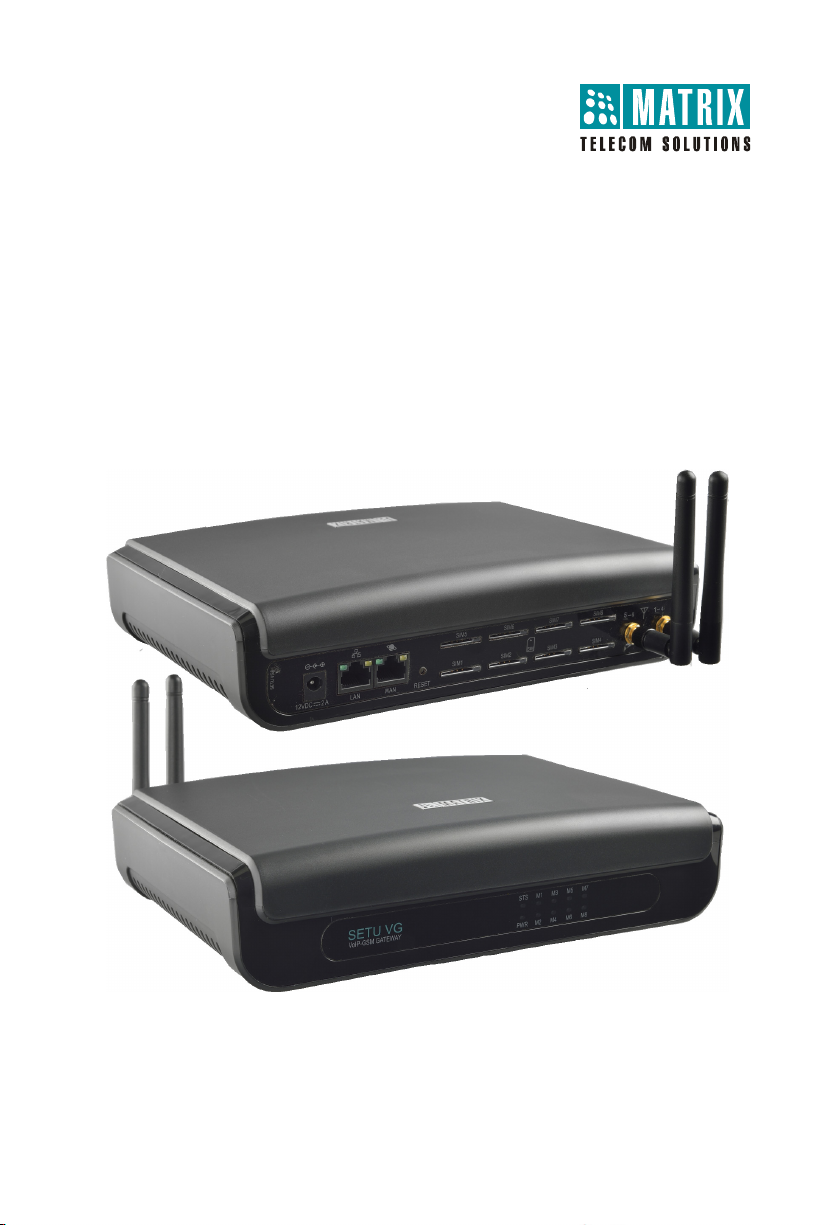
SETU VG
Multi-Port VoIP to GSM Gateway
Quick Start
Page 4

Documentation Disclaimer
Matrix Comsec reserves the right to change, at any time, without prior notice, the product design,
specifications, components, as engineering and manufacturing may warrant.
This is a general documentation for all models/configurations of the product. The product may not
support some of the features/facilities described in this document.
While every reasonable effort has been made to ensure accuracy of content in this document,
Matrix Comsec assumes no responsibility for errors or omissions that may occur herein. No
liability is assumed for damages, costs, expenses resulting from unauthorized modifications or
repairs to the product; failure to use information or to comply with the installation, operation and
maintenance instructions contained in this document.
Copyright
All rights reserved. No part of this quick start may be copied or reproduced in any form or by any
means without the prior written consent of Matrix Comsec.
Version V1
Release date: December 28, 2016
Page 5

Contents
Know Your SETU VG ..................................................................................... 1
Overview .......................................................................................................... 1
Installing SETU VG ......................................................................................... 3
Before You Start ................................................................................................ 3
Getting Started .................................................................................................. 3
Connecting SETU VG ..................................................................................... 5
Power ON SETU VG ......................................................................................... 8
Accessing Jeeves (GUI) .............................................................................. 11
Connecting a Computer .................................................................................. 11
Configuring SETU VG .................................................................................. 15
Using the Wizard ............................................................................................. 15
Using Selective Configuration ......................................................................... 16
Table of Contents i
Page 6

ii Table of Contents
Page 7
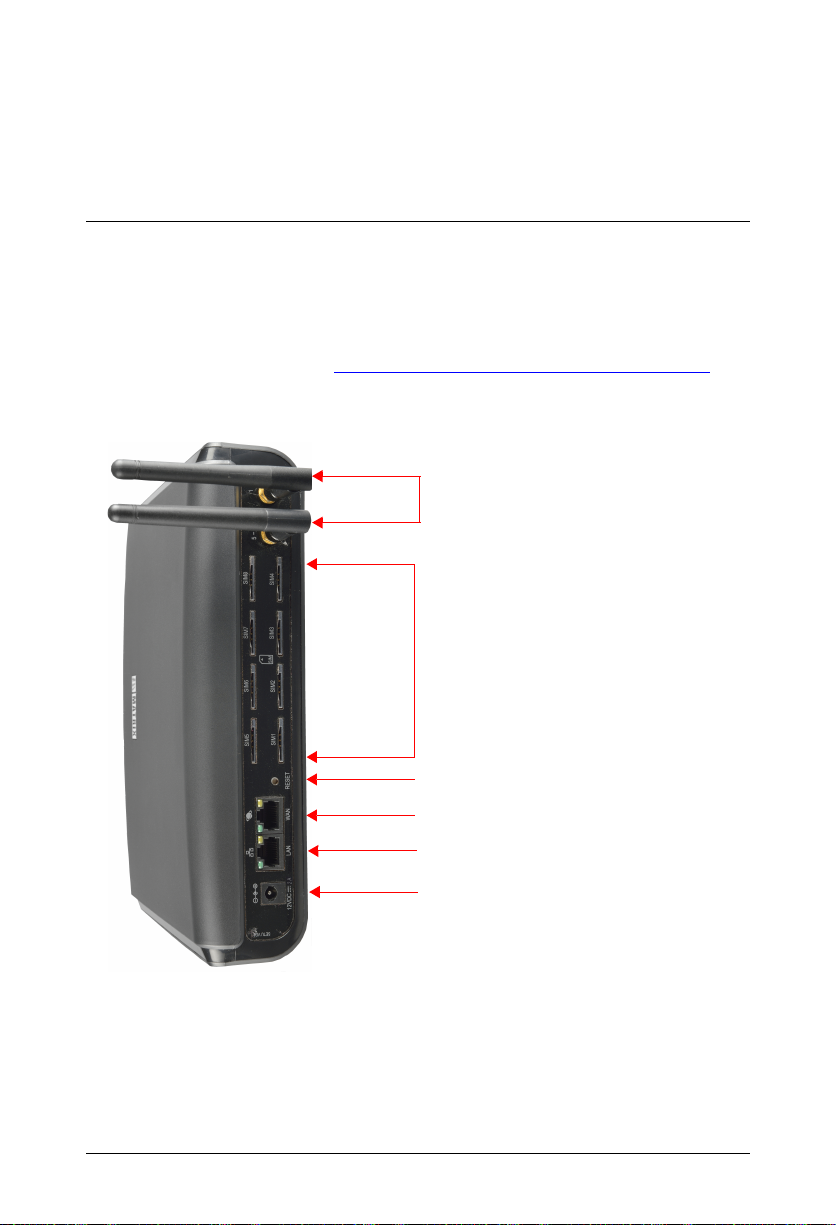
Know Your SETU VG
Antenna
SIM Card Slots
Reset Button
WAN Port
LAN Port
DC Power Jack
Thank you for choosing the Matrix SETU VG. Please read the instructions in this Quick Start to
install and operate SETU VG.
This Quick Start is meant to help you install and configure the basic parameters of the system. For
Advanced configuration and feature description, please refer the SETU VG System Manual
available Online. To download, click http://www.matrixtelesol.com/technical-document.html
Overview
.
SETU VG is available in two configurations:
• SETU VG8 with 9 SIP Trunks and 8 Mobile Ports.
• SETU VG4 with 9 SIP Trunks and 4 Mobile Ports.
Matrix SETU VG Quick Start 1
Page 8
Ports and Connectors
Port Connector Description
SMA (Male) To connect Antenna for the Mobile Ports.
SIM Card Slots
(SIM1 to SIM8)
Reset Button --- To restart the system or to restore the default LAN IP Address.
WAN Port RJ45
LAN Port RJ45 To connect a computer or a LAN Switch.
12VDC-2A DC Jack To connect 12VDC, 2A Power Adapter.
a. When the 3G module is installed in the system, you must disable Call Waiting on the SIM before insert-
ing it into the system to prevent current calls from being disconnected.
---
To connect to GSM/UMTS networka.
To connect to the IP network over a DSL Modem or Router or a
LAN Switch.
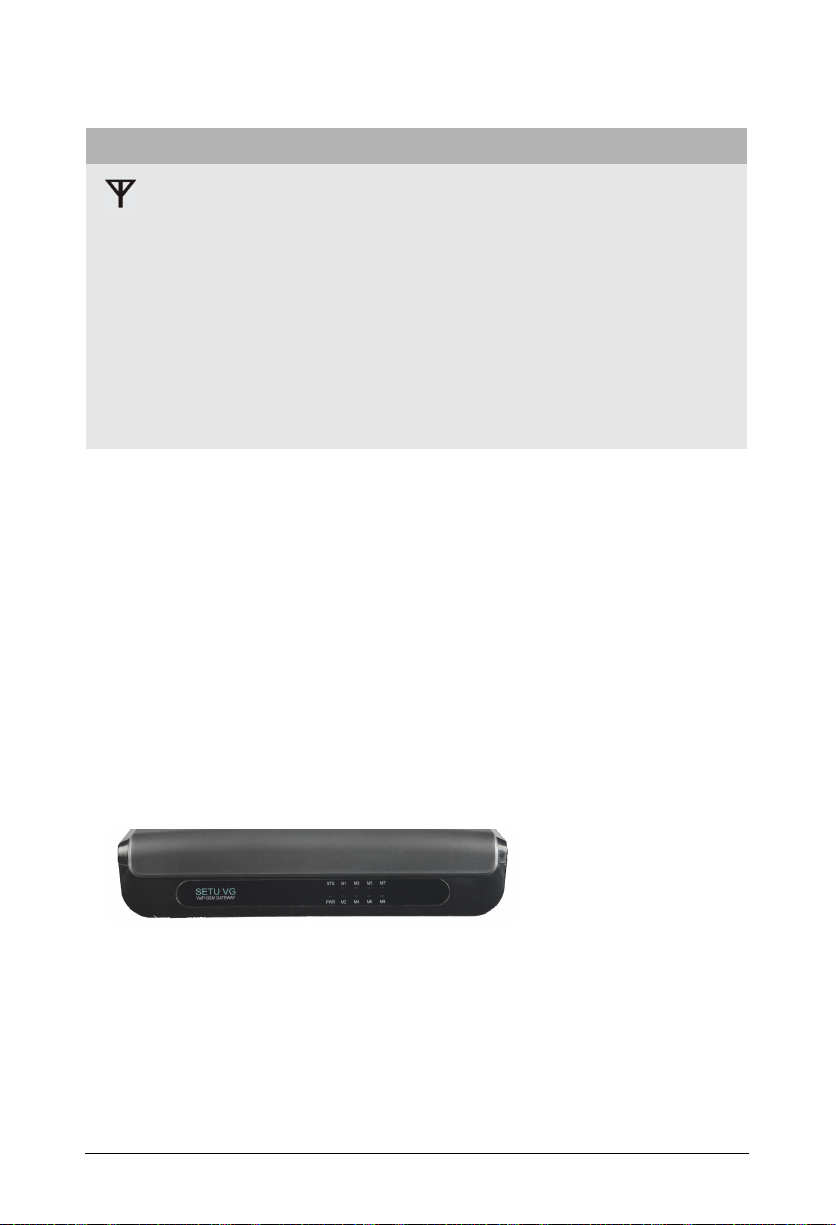
LEDs
SETU VG has a Power LED (PWR), a Status LED (STS) and eight Port LEDs. By default,
• In SETU VG8, the Port LEDs M1 to M8 are assigned to Mobile Port 1 to Mobile Port 8
respectively.
• In SETU VG4, the Port LEDs M1 to M4 are assigned to Mobile Port 1 to Mobile Port 4
respectively. The LEDs M5 to M8 cannot be assigned to any port.
The LEDs indicate the status of the ports and various events occurring on the ports,
including errors
.
If required, to each port LED—M1 to M8 in SETU VG8 and M1 to M4 in SETU VG4—you may reassign a port of your choice. To know more, see Port LED topic under Maintenance in the System
Manual.
SETU VG is easy to install and operate. The built-in web server, Jeeves, allows you to configure
the system parameters and features On-site as well as from a remote location.
2 Matrix SETU VG Quick Start
Page 9

Installing SETU VG
Before You Start
Before you begin to install and set up the hardware of SETU VG, make sure you have the following
ready:
• A suitable location to install SETU VG.
•Power supply.
• A SIP Account from an ITSP to test VoIP connectivity.
• A standalone computer or a computer connected in a LAN to access Jeeves, the web-based
configuration tool of SETU VG.
• Appropriate cables and connectors to set up and test the WAN interface of SETU VG and the
LAN connection.
• A SIM Card to test Mobile connectivity.
• Do not install this product near any area where,
• it is exposed to direct sunlight, heat, excessive cold or humidity, dust, oil, corrosive fumes.
• there is a water source (wash basin, tub, shower, pool, sprinkler, etc.)
• there is source of electromagnetic noise such as radio equipment, heavy transformers, faulty electric
chokes of tube-lights, device having a faulty coil.
• Ensure proper electrical earth and telecom earth for the safety of the product and persons handling it.
• Always wear an electro static discharge preventive wrist wrap or belt and use a grounding mat when handling
the product and its parts.
• SETU VG contains a 3VDC/18mAh (Li-Al) alloy-Manganese Dioxide Coin Battery (ML 1220 - Rechargeable)
of diameter 12.5mm and height 2.0mm. Battery should be replaced only by authorized dealers of Matrix.
There is a risk of explosion if the Battery is replaced in an incorrect manner. Please dispose-off used
Batteries.
Getting Started
• Select an appropriate site to install the SETU VG, considering the safety precautions listed
earlier in this chapter.
• Unpack SETU VG and verify the package contents. The Package of SETU VG8 contains:
•SETU VG Unit
• Power Adapter - 12VDC, 2A (Country Specific)
• Universal Converter Plug 2 PIN
• Interchangeable Plug EU
1
•Two
Matrix SETU VG Quick Start 3
GSM Antenna with SMA Connector
Page 10

• Ethernet Cable (RJ45)
• Two M7/30 Screws with grips
• Wall Mounting Template
• A Warranty Card set
• SETU VG Quick Start (printed copy)
If any of these items is missing or damaged, please contact the dealer/reseller from whom
you purchased the system.
• Place the system at the selected site.
If you are mounting the system on a wall, refer to the mechanical dimensions of the product
and use the mounting template for drilling holes on the wall.
1. The Package of SETU VG4 contains only one GSM Antenna with SMA Connector.
4 Matrix SETU VG Quick Start
Page 11

Connecting SETU VG
SETU VG8 has a WAN Port, a LAN Port, a Reset Button, 8 Mobile Ports, 9 SIP Trunks, a Power
Jack and 10 LEDs.
If you are connecting a GSM Cable Antenna to the SETU VG, make sure the Antenna cable is atleast
4 inches away from the LAN and the WAN cables. It is recommended that you do not pass the
Antenna cable through the duct, as it will degrade the signal strength.
Connecting to the IP Network
•Connect the WAN Port of SETU VG to the IP Network—a DSL modem/router or a LAN
Switch—using the Ethernet cable supplied for the port.
Matrix SETU VG Quick Start 5
Page 12

If connecting to the Public IP Network,
• Plug one end of the Ethernet cable into the WAN Port of SETU VG and the other end into the
DSL modem/Router.
If connecting to a Private Network (Behind a NAT Router),
• Plug one end of the Ethernet cable into the WAN Port of SETU VG and the other end into the
LAN Switch/Hub.
The default IP Address of the WAN Port is: 192.168.1.100
6 Matrix SETU VG Quick Start
Page 13

The default Subnet Mask of the WAN Port is: 255.255.255.0
Connecting to the Mobile Network
Make sure the site you have installed the system has sufficient network signal strength.
Enabling SIM PIN Protection
Protect the SIM Card from unauthorized use with a Personal Identification Number (PIN) on the
SIM (in consultation with the customer/owner of the SIM).
To enable SIM PIN protection,
• Get a mobile handset. Insert the SIM Card into the mobile handset.
• From the mobile handset enable PIN Protection.
• Assign a value as the SIM PIN.
• Remove the SIM Card from the mobile handset.
• If you do not want to use PIN Protection, insert the SIM card in the mobile handset and disable
PIN protection. Remove the SIM Card from the mobile handset and insert it in the SIM Slot of
the SETU VG.
• If your SETU VG has a 3G module, you must disable Call Waiting in the SIM Card before
inserting it into the SIM Slot. This will prevent current calls from being disconnected whenever
there is a waiting call on the Mobile Port.
Inserting the SIM Card
• Insert the SIM Card into the desired SIM Slot, with its contact side facing down.
• Push the SIM Card backwards into the slot. The SIM Card will be locked inside the slot.
To unlock the SIM Card, push the protruded portion of the SIM Card backwards again.
• Repeat the same steps to insert another SIM Card.
• Connect the Antenna to the Antenna Connector.
• SETU VG supports WWAN over the Mobile Port. To use WWAN over the Mobile Port 1, you
must have a 3G module installed in the system and Internet services activated on the SIM.
• At every power on, it takes about 3 minutes for the Mobile Ports to get registered with the
network. Once registration with the mobile network is completed, the Mobile Port can be used.
Matrix SETU VG Quick Start 7
Page 14

Power ON SETU VG
• Connect the Power Adapter into the Power Jack, and plug it into a Power Outlet.
• Switch ON the power supply and observe the reset cycle.
LED Indication
At Power ON, Power LED will turn ON (Continuous Green). Other LEDs will follow the sequence
summarized in the table below, during initialization.
System Status Color STS M1 M2 M3 M4 M5 M6 M7 M8
Kernel UP OFF OFF OFF OFF OFF OFF OFF OFF OFF
Application and
LED Driver
Loaded
Few Initialisation
(i.e SysConfig,
Resolver,
SysLog etc.)
Few Initialisation
(i.e WebJvs,
CallManager,
PortCnfg etc.)
VOPP Program
Download
Success
All Init Done,
System goes
Live
Green OFF ON OFF OFF OFF OFF OFF OFF OFF
Green OFF ON ON OFF OFF OFF OFF OFF OFF
Green OFF ON ON ON OFF OFF OFF OFF OFF
Green OFF ON ON ON ON OFF OFF OFF OFF
Green ON ON ON ON ON ON ON ON ON
Red ON ON ON ON ON ON ON ON ON
OFF OFF OFF OFF OFF OFF OFF OFF OFF
Green ON OFF OFF OFF OFF OFF OFF OFF OFF
Time
in MS
1000
ms
1000
ms
1000
ms
1000
ms
OFF OFF OFF OFF OFF OFF OFF OFF OFF
(Continuous Green blinking as given in last 2 steps)
1000
ms
8 Matrix SETU VG Quick Start
Page 15

During initialization, System LED (STS) will display following error/events/status:
LED Status Color Comment
1 sec On (Red)
1 sec On (Green)
(Continuous)
500 ms On - 500ms Off Green Modules not detected.
1sec On - 1sec Off Green
500 ms On - 500ms Off 500 ms On - 500ms Off 500 ms On - 500ms Off 500 ms On - 500ms Off (4 Blinks)
500 ms On - 500ms Off 500 ms On - 500ms Off 500 ms On - 1500ms Off (3 Blinks)
500 ms On - 500ms Off 500 ms On - 500ms Off 500 ms On - 500ms Off 500 ms On - 500ms Off (4 Blinks)
1sec On - 1sec Off Red
500 ms On - 500ms Off 500 ms On - 500ms Off 500 ms On - 1500ms Off (3 Blinks)
Red and
Green
Green
Green
Red
Red
VoPP program download fail.
SETU VG started successfully.
Network link is Up.
SIP stack is Up.
CDR buffer is not full.
Network link is down.
SIP stack is down.
CDR buffer is not full.
Network link is Up.
SIP stack is down.
CDR buffer is not full.
Network link is down.
SIP stack is down.
CDR buffer is full.
Network link is up.
SIP stack is down.
CDR buffer is full.
Network link is up.
SIP stack is up.
CDR buffer is full.
During initialization, the Mobile Port LEDs will indicate the following error/event/status:
LED Status Color Event/State/Status
500ms On- 500ms Off Green GSM Initialization
500ms On - 500ms Off Red PUK required
500ms On- 500ms Off - 500ms On-500ms Off500msOn-1500ms Off (3 Blinks)
500ms On - 500ms Off 500ms On - 2500ms Off (2 Blinks)
500ms On - 3500ms Off (1 Blink) Red SIM Absent
1sec On - 1sec Off Red GSM network absent
Red SIM PIN Required
Red SIM PIN Wrong
Matrix SETU VG Quick Start 9
Page 16

During normal functioning, Mobile Port LEDs will display following error/events/status:
LED Status Color Event/State/Status
Continuous OFF --- Port Idle/Disable
400ms On - 200ms Off 400ms On - 3000ms Off (2 Blinks)
Continuous On Red Off-hook Event
Continuous On Green Speech
Continuous On Green
Red Incoming Ring Event
Sending SMS/ Processing Balance Inquiry / Processing
Balance Recharge
You can assign any of the port status LEDs to SIP Trunks. To know more, see Port LED topic
under Maintenance in the System Manual.
When an LED is assigned to a SIP Trunk, it will display the following error/event/status:
LED Status Color Event/State/Status
Continuous Off - SIP Disable
Continuous On Green SIP Registered
Continuous On Red SIP Registration Failed
200ms On - 200ms Off - 200ms On - 3400 Off
(2 Blinks)
Red SIP Authentication Failed
When the Reset Cycle is completed, you may configure the system using the embedded web
server, Jeeves.
10 Matrix SETU VG Quick Start
Page 17

Accessing Jeeves (GUI)
SETU VG provides an embedded web server with a Graphic User Interface (GUI), Jeeves, for
configuration.
To access Jeeves, you will need to connect a computer to SETU VG.
Connecting a Computer
You may connect a standalone computer to SETU VG or grab any computer connected in the
same LAN as SETU VG.
• Connect a standalone computer to SETU VG, when installing the system for the first time. You
may connect it to the LAN after you have finished installation and configuration of the system.
• If the computer for accessing Jeeves is connected in a LAN Switch and the WAN Port of SETU
VG is connected behind a NAT router, make sure that both the LAN and WAN connections are in
different Subnets.
To connect a standalone computer,
• Plug one end of the Ethernet cable supplied with the system into the LAN Port of SETU VG.
Plug the other end into the LAN Port of the computer.
• Make sure the IP Address of the computer and the LAN Port of SETU VG do not conflict, and
that both are in the same Subnet.
The default IP Address of the LAN Port of SETU VG is: 192.168.2.100
The default Subnet Mask of the LAN Port of SETU VG is: 255.255.255.000
Matrix SETU VG Quick Start 11
Page 18

Change the Subnet of the computer, if necessary.
• Make sure a Web-browser, either Internet Explorer version 7 or later or Mozilla Firefox version
3.5 or later, is installed on the computer.
• Open the browser on the computer.
• In the address bar of the browser, enter the default IP address of the LAN Port:
192.168.2.100
•The Login page will open.
•In Login Password, enter 1234, the default Password.
•Click the Login button.
On successful login, the Home page of Jeeves opens.
12 Matrix SETU VG Quick Start
Page 19

The left navigation bar displays the links Basic Settings, Advanced Settings, Maintenance
and Status.
Basic Settings break down the complexities of configuration and are sufficient to get your
system into operation.
Advanced Settings enable you to configure the advanced features and facilities of SETU VG.
Maintenance allows you to carry out system maintenance and monitoring activities like
uploading/upgrading firmware and configuration, system debug, system restart.
Status allows you to view the system details and the status of all the ports.
You may now configure the Basic Settings of SETU VG.
Matrix SETU VG Quick Start 13
Page 20

14 Matrix SETU VG Quick Start
Page 21

Configuring SETU VG
There are two ways to do the basic system configuration using Jeeves:
•using the Wizard.
Or
• through Selective Configuration of basic settings.
Using the Wizard
The configuration Wizard leads you step-by-step through the configuration of the basic settings.
To use the Wizard,
•Click the Wizard icon , on the top right of your screen.The Home page of the Wizard
opens.
• To navigate the Wizard pages use the Next and Back buttons.
• When you press the Next button, the changes on the current page are saved and the Wizard
takes you to the next page.
• When you press the Back button, you will be prompted to save changes made on the current
page.
•The Expand button , expands a link on the page to display all parameters under the link.
•The Collapse button , collapses a link, hides all the parameters under a link on the page.
•The Settings icon , enables you to configure / edit the settings of a parameter further.
Matrix SETU VG Quick Start 15
Page 22

•The Default button assigns factory set values to all the parameters on the page.
•The Add button enables you to add a new record/entry.
•The Delete button enables you to delete a record/entry.
•The Close button enables you to exit a window.
• You may exit the Wizard at any time by clicking the Quit button . The changes you made
before you exit will be saved.
Using Selective Configuration
You can choose the parameters you want to configure, and the order in which you want to
configure. To do this,
•Click the Basic Settings link.
• The parameter sub-links appear on the left navigation bar.
• Click the parameter sub-link you wish to configure.
• The respective parameter page opens.
• Get familiar with the buttons and icons listed below before you begin to change the settings of
the parameters on each page.
Expand: expands a link to display all parameters under the link.
Collapse: collapses a link; hides all parameters under the link.
Settings: enables you to configure / edit the settings of a parameter further.
16 Matrix SETU VG Quick Start
Page 23

Logout: enables you to exit Jeeves.
The Default button assigns factory set values to all the parameters on the page.
The Add button enables you to add a new record/entry.
The Delete button enables you to delete a record/entry.
The Close button enables you to exit a window.
• Set the parameters on the page to the desired values and click the Submit button to save.
You may use the Wizard or selectively configure the Basic Settings pages, whichever works best
for you. Read the SETU VG System Manual for detailed instructions.
Matrix SETU VG Quick Start 17
Page 24

MATRIX COMSEC
Head Office
394-GIDC, Makarpura, Vadodara - 390010, India.
M: +91 85111 73344
E-mail: Customer.Care@MatrixComSec.com
www.MatrixTeleSol.com
Version 1, December 2016
 Loading...