

Page 1
a.
CD
c
Cit
0
::::::r
BY
AUDIOTEC
CH
FISCHER
CD
~
<0
en
::::::r
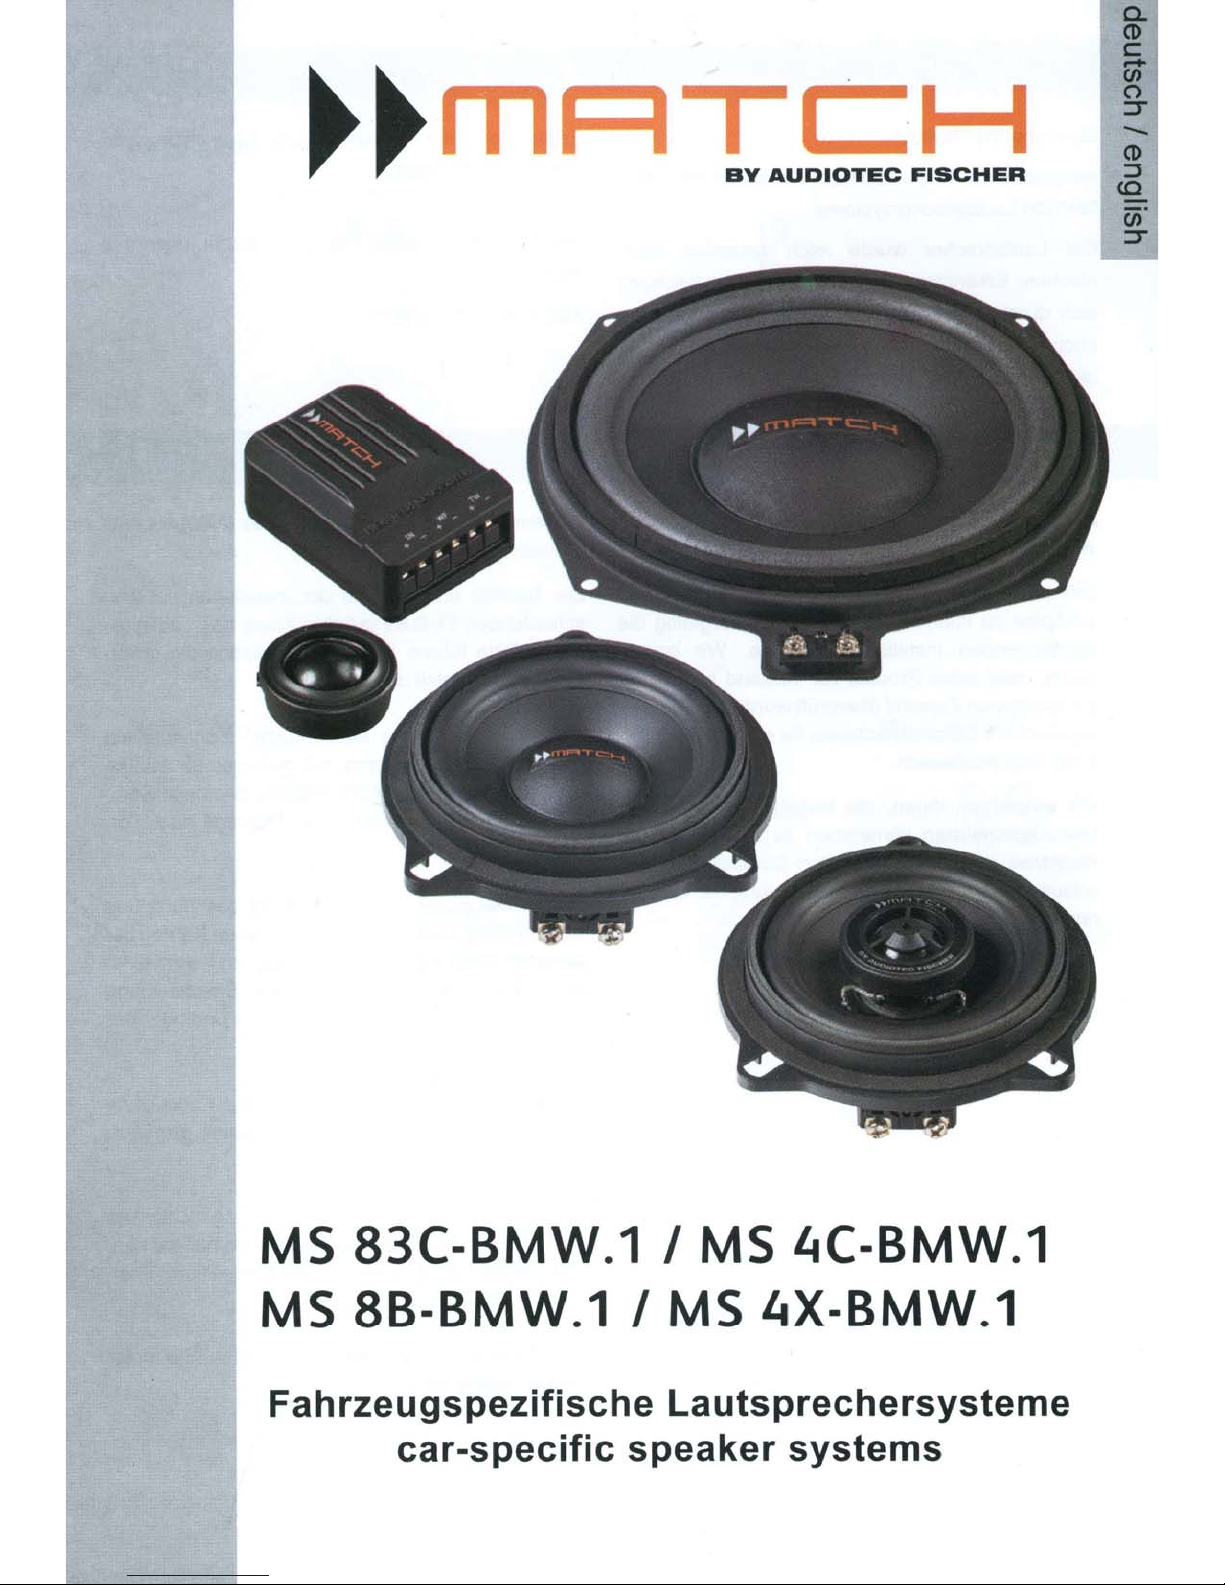
MS 83C-BMW.1 I
MS
Fahrzeugspezifische
8B-BMW.1 I
car-specific
MS
MS
4C-BMW.1
4X-BMW.1
Lautsprechersysteme
speaker
systems
Page 2
Sehr
geehrter Kunde,
wir
gratulieren Ihnen
zum Kauf dieses hochwertigen
MATCH Lautsprechersystems.
Die Lautsprecher wurde nach neuesten tech-
nischen Erkenntnissen
sich durch hervorragende Verarbeitung und
zeugende
als
Kunde direkt von unserer uber 30-jahrigen
Technologie
entwickelt
und zeichnen
uber-
aus. Dabei profitieren Sie
Erfahrung
in
der Forschung und
Aud io-kom ponenten.
Viel
Freude
an
diesem Produkt wunscht
Team von
AUDIOTEC FISCHER
Entwicklung von
Ihnen
das
Allgemeines
nenten
Um aile Moglichkeiten
schopfen
zum Einbau von MATCH-Kompo-
des Produktes optimal
zu
konnen,
lesen Sie
bitte sorgfaltig
aus-
die
nachfolgenden lnstallationshinweise. Wir garantieren, dass jedes Produkt vor Versand auf seinen
einwandfreien Zustand
leg
dient
als Garantienachweis
uberpruft
wurde.
fur
lhr
etwaige Repara-
Kaufbe-
turen oder Austausch.
Wir
empfehlen Ihnen, die
Einbauspezialisten vornehmen
Installation
zu
lassen,
von einem
da der
Nachweis eines fachgerechten Einbaus und Anschlusses
des Gerates Voraussetzung
fur
die Ga-
rantieleistungen sind.
Allgemeines
sprechersystems
Die
Qualitat
scheidenden Einfluss auf den
chers. Bitte fuhren
moglicher Sorgfalt
Wir
empfehlen Ihnen
des
kompletten Systems
durchzufuhren um
ponenten vor ihrer
zum Anschluss eines MATCH Laut-
und Sorgfalt
Sie
der
jede
Installation
Klang
des Lautspre-
Installation
durch.
einen kurzen Funktionstest
bei geringer Lautstarke
sicherzustellen, dass
endgultigen
Montage auch kor-
rekt arbeiten.
Stellen Sie
sicher
sicher, dass aile Kabel
verlegt
sind
und
nicht
geschutzt und
an
scharfen Kanten
schadigt werden konnen. Dies kann zu
sen fuhren, die
lhres Steuergerats, lhres
unweigerlich eine Beschadigung
Verstarkers und/oder der
Lautsprecher verursachen.
hat
ent-
mit grol1t-
aile Kom-
be-
Kurzschlus-
2
Stellen Sie ebenfalls
Spannnung und
sicher, dass
in
ausreichender
aile Kabel ohne
Lange
am
sprecher befestigt sind.
Wenn
aile
Komponenten richtig
angeschlossen
sind und den Funktionstest bestanden haben,
nen
Sie
die Lautsprecher
in
ihrer
endgultigen
tion befestigen.
Detailliertere
Einbauanleitungen finden
Sie unter
www.audiotec-fischer.com
Laut-
kon-
Posi-
Page 3
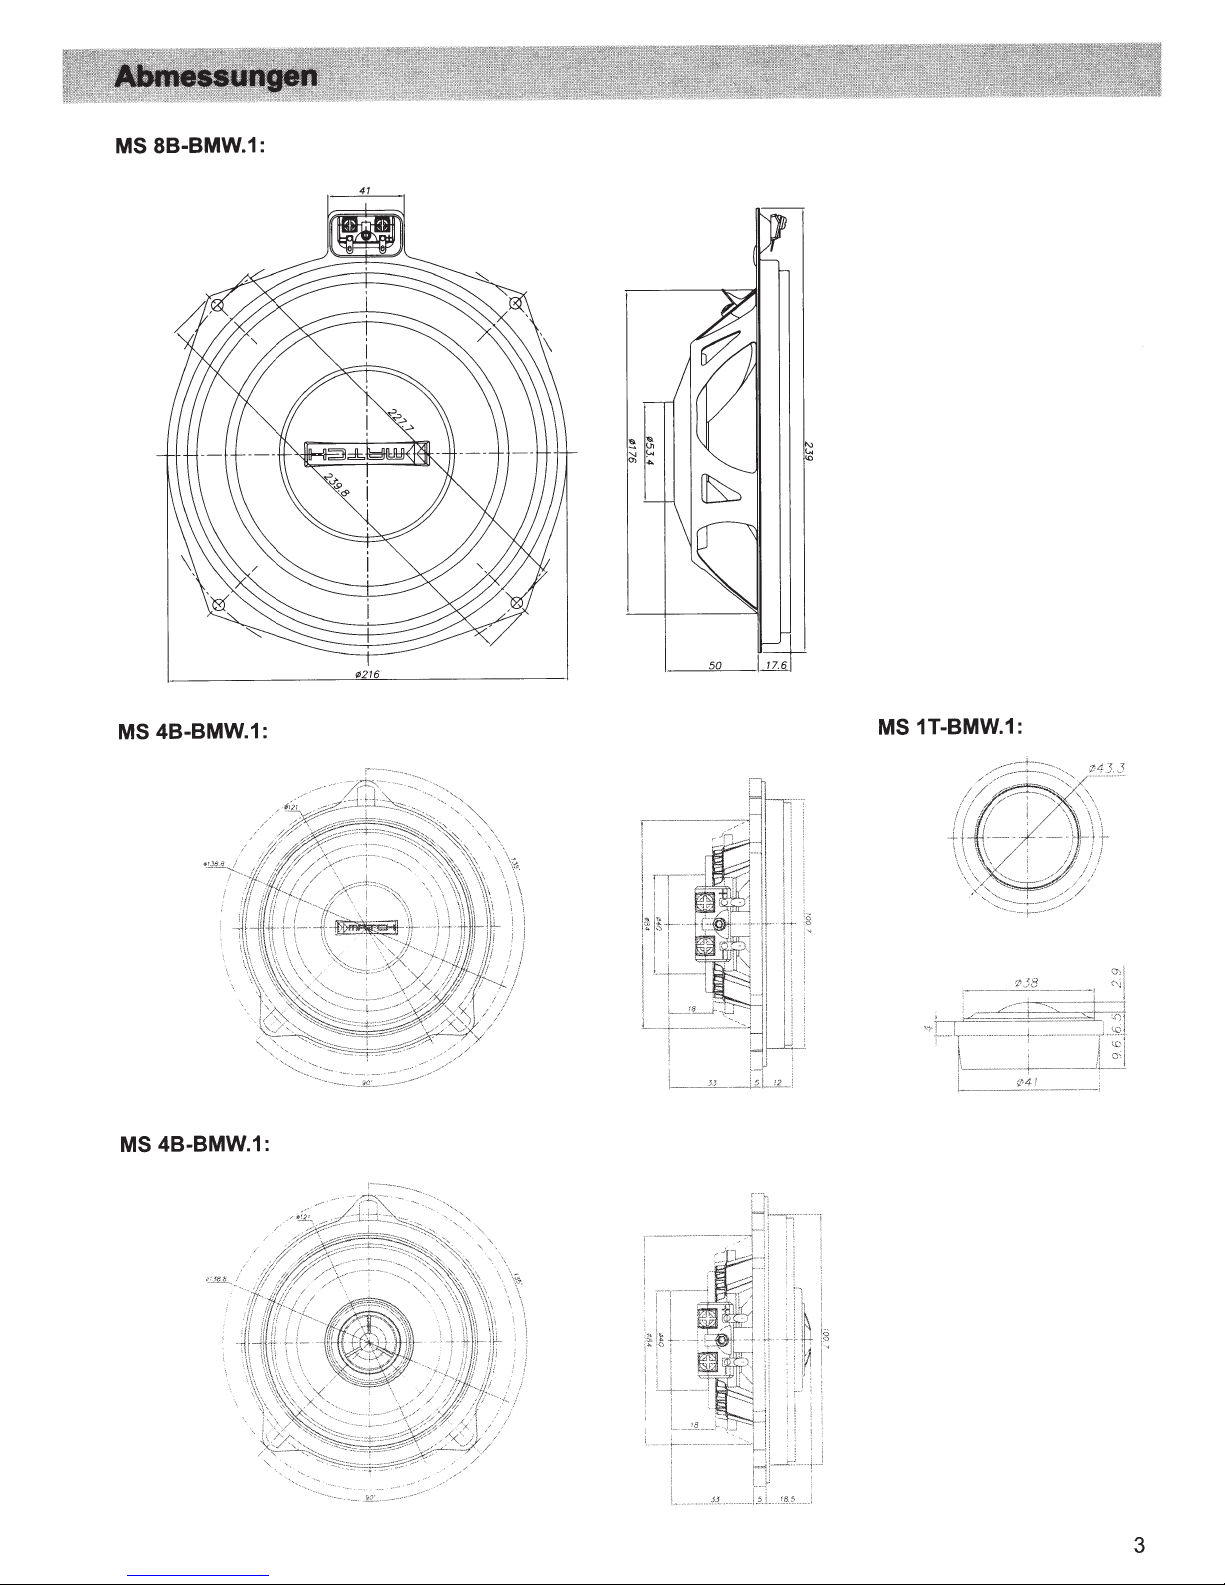
8B-BMW.1:
MS
_,,17.61
____,5=-0
, _
4B-BMW.1:
MS
MS 4B-BMW.1:
1T-BMW.1:
MS
3
Page 4
Turverkleidung entfernen
Zur Montage der Lautsprecher
baupositionen muss die Turverkleidung entfernt
werden.
Sollten Sie sich nicht sicher sein, wie Sie die Turverkleidung entfernen, fragen Sie ihren Car Hifi
oder Autofachhandler. Befolgen Sie
die Hinweise des Fahrzeugherstellers.
Beachten Sie hierbei die folgenden Hinweise:
1.
Die Turverkleidung ist
verdeckten Schrauben
Vergewissern Sie sich, dass Sie aile Schrauben gelost haben, bevor Sie die Verkleidung abnehmen.
2.
Zusatzlich ist die Turverkleidung meist mit Halteclips befestigt. Achten Sie beim Losen der Turverkleidung darauf, dass Sie diese vorsichtig entfernen
und dabei nicht zerstoren. Die Umgebungstemperatur beim Entfernen der Clips sollte mindestens
oo
C betragen.
1
an
an
in
die Originalein-
in
jedem Fall
bestimmten Stellen mit
dem Turblech befestigt.
Montage des MS 4C-BMW.1
Das
MS
4C-BMW.1 besteht aus einem 2-Wege
in
Komponentensystem, welches
Einbauposition montiert wird. Nachdem Sie die
Turverkleidung demontiert haben, konnen Sie den
Originai-Mitteltoner entfernen. AnschlieBend konnen Sie den MATCH Tiefmitteltoner mit Hilfe der
beiliegenden Schrauben montieren.
Zur Montage des Hochtoners nehmen Sie das
Originai-Spiegeldreieck und entfernen den OriginaiHochtoner.
den MATCH-Hochtoner ersetzen. Sollten Sie ein
Fahrzeug ohne Hochtoner-Einbauplatz besitzen,
konnen Sie diese Spiegeldreiecke bei lhrem BMWFachhandler als Ersatzteil erwerben.
Nachdem Hoch- und Mitteltoner installiert sind konnen Sie diese mit den beiliegenden Kabeln mit der
Frequenzweiche verbinden. Beachten Sie hierbei,
dass die Kabel schon fertig konfektioniert sind und
mit den beiliegenden Steckverbindern versehen
werden.
mit der Frequenzweiche verbunden werden. Achten
Sie hierbei auf die richtige Polaritat.
Als nachstes sollte die Frequenzweiche
verkleidung gut fixiert werden. Hierzu sollte eine
geeignete Aussparung gewahlt werden.
Danach muss das Originai-Lautsprecherkabel
den Eingang der Frequenzweiche angeschlossen
Anschlie~end
Anschlie~end
konnen Sie diesen durch
mussen die Kabelschuhe
die Originai-
so
in
der Tur-
an
werden. Dafur muss der Originai-Stecker entfernt
werden. Schneiden Sie diesen groBzugig ab, damit
zu
dieser ggf.
gebracht werden kann.
einem spateren Zeitpunkt wieder an-
Montage des MS 4X-BMW.1
Das MS4X-BMW.1 ist ein 2-Wege Koaxialsystem,
in
welches
montiert wird. Nachdem Sie die Turverkleidung
demontiert haben, konnen Sie den Mitteltoner entfernen. AnschlieBend konnen Sie den MATCH Koaxiallautsprecher mit Hilfe der beiliegenden Schrauben montieren.
Nachdem der Lautsprecher montiert wurde verbinden Sie diesen mit der beiliegenden Kabelfrequenzweiche. Danach muss das Originai-Lautsprecherkabel mit der Kabelfrequenzweiche verbunden
werden. Dafur muss der Originai-Stecker entfernt
werden. Schneiden Sie diesen groBzugig ab, damit dieser ggf.
angebracht werden kann. Das Originalkabel kann
nun mit den beiliegenden Steckverbindern (diese
stecken
schlie~end
den werden.
die Originai-Mitteltoner Einbauposition
zu
einem spateren Zeitpunkt wieder
an
der Kabelweiche) versehen und an-
mit der Kabelfrequenzweiche verbun-
Montage des MS 8B-BMW.1
Zur Montage der Untersitz-Subwoofer mussen die
vorderen Sitze ausgebaut werden, welche jeweils
mit 4 Schrauben befestigt sind. AnschlieBend entfernen Sie die Originai-Lautsprecherabdeckung.
Tauschen Sie nun den Originai-Lautsprecher gegen
Um
den MATCH Subwoofer aus.
zu
Betrieb des Subwoofers
Teil
Sie ggf. einen
sprecheroffnung entfernen. Danach montieren Sie
die Originai-Lautsprecherabdeckung wieder uber
dem Subwoofer.
Zuletzt konnen Sie die Sitze wieder mit Hilfe der
vier Schrauben befestigen. Achten Sie
darauf, dass die Sitze wieder ordnungsgemaB und
fest montiert sind.
des Schaumstoffs
gewahrleisten, mussen
einen optimalen
um
die Laut-
in
jedem Fall
4
Page 5

Anschluss MS
83C-BMW.1 ist ein 3-Wege Lautsprechersystem, welches zwei verschiede Konfigurationsmog-
MS
Das
lichkeiten bietet. Das System kann sowohl
als 3-Wege Teilaktivsystem. Dabei unterscheiden sich die beiden Varianten nur durch den Anschluss des
Subwoofers.
3-Wege Passiv-System:
1.
Bei dieser Konfiguration werden
wie auch bei dem Original-BMW Lautsprechersystem.
guration 2 Verstarkerkanale benotigt. Dabei wird
Untersitz-Subwoofer verbunden. Von da aus wird die Verkabelung weiter bis
Dabei wird der Untersitz-Subwoofer
Verkabelung bis
Sollten
empfehlen wir, ein
die genutzen Verstarkerkanale
83C-BMW.1
kann das
Tur
die
in
Subsonicfilter
als 3-Wege Passivsystem angeschlossen werden,
drei Lautsprecher einer
aile
ein Kanal zuerst mit dem rechten und linken
je
parallel
Originalkabel
(Hochpassfilter) von ca.
zu den Lautsprechern
verwendet werden.
eine integrierte, aktive Frequenzweiche verfugen so
uber
Seite mit nur einem Kanal betrieben,
werden zum Betreiben dieser Konfi-
Somit
Tur
der
in
40Hz
einzustellen.
auch
als
verlegt.
Tur
die
in
angeschlossen. Zur
3-Wege
2.
Bei dieser Konfiguration werden die Untersitz-Subwoofer von einem separaten Verstarkerkanal
angesteuert. Somit
ein Kanal mit dem rechten und
2-Wege Frequenzweiche
kabel verwendet werden. Diese Konfiguration bietet die Moglichkeit das System auch an weniger
leistungsstarken Mehrkanai-Verstarkern zu benutzen, die nicht bruckbar sind.
Sollten
empfehlen wir
ein Tiefpassfilter von ca.
filter von ca.
hoheres Hochpassfilter
Anschluss MS
4X-BMW.1 ist ein 2-Wege Lautsprechersystem, welches den Originai-BMW-Breitbandlautspre-
MS
Das
der
in
cher
tetem Verstarker betrieben werden.
weiche zu benutzen, da ansonsten der
einen
uber
die Kabelfrequenzweiche weglassen.
Hochpassfilters nicht unter 100
Teilaktiv-System
werden bei dieser Konfiguration 4 Verstarkerkanale benotigt. Dabei ist je
linken
zu verbinden. Zu Verkabelung bis
Tur
der
in
die genutzen Verstarkerkanale
die Untersitz-Subwoofer ein
fur
einzustellen.
Hz
100
konnen aber auch
Sie
Hz.
100
wah len.
Untersitz-Subwoofer und
eine integrierte, aktive Frequenzweiche verfugen, so
uber
Subsonicfilter
Das 2-Wege System hat ein integriertes Hochpass-
uber das regelbare Hochpassfilter des Verstarkers ein
jeweils
(Hochpassfilter) von ca.
ein weiterer Kanal mit der
kann das Original-
Tur
die
in
40
4X-BMW.1
auch an einem dazwischen geschal-
ersetzt. Das
Tur
oder eine integrierte, aktive Frequenzweiche verfugen, so konnen diese benutzen und
DSP
System
kann sowohl direkt am Radio
beiden
In
Koxiallautsprecher
In
Hz (Fiankensteilheit mindestens 12 dB
Fallen
diesem
empfehlen wir dringend die beiliegende Frequenz-
zerstort werden kann.
ist zu beachtet werden, dass die Trennfrequenz des
Fall
als
Okt.)
I
Sollte
gewahlt
ihr Verstarker
wird.
Hz und
Anschluss MS
8B-BMW.1 ist ein Untersitz-Subwoofer, welcher den Originai-BMW-Untersitz-Subwoofer ersetzt.
MS
Der
empfehlen, die Subwoofer immer mit einem separaten Verstarker zu betreiben, da die Leistung des
Wir
Werksradios unter Umstanden zu gering sein kann.
oder integrierter, aktiver Frequenzweiche genutzt wird, empfehlen wir einen Subsonicfilter(Hochpassfilter)
von ca. 40 Hz und einen Tiefpassfilter von ca.
8B-BMW.1
Sofern
100 Hz
der Subwoofer an einem Verstarker mit
einzustellen.
DSP
5
Page 6

MS 83C-BMW.1
Leistung RMS I Max ................................................................. 100 I 200 Watt
Frequenzbereich ....................................................................... 30 - 25.000 Hz
Wirkungsgrad ........................................................................... 90 dB 1
WI
1m
lmpedanz .................................................................................. 4 Ohm
Durchmesser Subwoofer I Mitteltoner I Hochtoner ................... 200
Frequenzweiche ....................................................................... separat, 6 dB I
mm
I 100
mm
12
I 25
mm
dB
Flankensteilheit mit
Sperrkreis
MS4C-BMW.1
Lei
stung RMS I Max. . ............................................................... 60 I 120 Watt
100-
Frequenzbereich .......................................................................
Wirkungsgrad ........................................................................... 90 dB 1
25.000 Hz
WI
1m
lmpedanz .................................................................................. 4 Ohm
Durchmesser Mitteltoner I Hochtoner ....................................... 1 00 mm I 25
Frequenzweiche ....................................................................... separat, 6 dB I
mm
12
dB
Flankensteilheit mit
Sperrkreis
MS 8B-BMW.1
Leistung RMS I Max ................................................................. 100 I 200 Watt
Frequenzbereich ....................................................................... 30 - 140 Hz
Wirkungsgrad ........................................................................... 90 dB 1
WI
1m
lmpedanz .................................................................................. 4 Ohm
Durchmesser ............................................................................ 200
MS4X-BMW.1
Lei
stung RMS I Max ................................................................. 60 I 120 Watt
Frequenzbereich .......................................................................
Wirkungsgrad ........................................................................... 90 dB 1
100-
mm
25.000 Hz
WI
1m
lmpedanz .................................................................................. 4 Ohm
Durchmesser Mitteltoner
I Hochtoner ....................................... 1 00
mm
I 20
mm
Frequenzweiche ....................................................................... separat, 6 dB Flankensteilheit
Fahrzeugkompatibilitat (Stand Okt. 2013) ................................. 1 er
bzw.
MATCH by Audiotec Fischer
rische Motoren Werke (BMW)
verbunden, oder handeln
in
die Audiotec Fischer GmbH sind
AG
oder einer ihrer Tochtergesellschaften oder Partner-Unternehmen
deren Auftrag oder mit deren Autorisierung.
(E81
(E60161
182187
188),
3er
(E90191
),
X1
(E84)
in
keiner Weise mit der Baye-
Aile geschutzten Produktnamen und Markennamen sind das Eigentum ihrer jeweiligen lnhaber
Die Kompatibilitat mit den angegebenen Fahrzeugtypen entspricht dem lnformationsstand vom
Oktober 2013.
Technische Anderungen und lrrtum vorbehalten
Die Garantieleistung entspricht der gesetzlichen
Regelung.
Von
der Garantieleistung ausgeschlossen sind Defekte und Schaden, die durch Oberlastung oder
unsachgema~e
Behandlung entstanden
sind. Eine Rucksendung kann nur nach vorheriger
Absprache
in
der Originalverpackung, einer detaillierten Fehlerbeschreibung und einem gUitigen
Kaufbeleg erfolgen.
Technische Anderungen und lrrtumer vorbehalten!
Fur Schaden am Fahrzeug oder Geratedefekte,
hervorgerufen durch Bedienungsfehler des
Gerates, konnen wir keine Haftung ubernehmen.
Aile MATCH Lautsprecher sind sowohl mit einer
CE-Kennzeichnung versehen. Damit sind die Gerate fur den Betrieb
in
Fahrzeugen innerhalb der
Europaischen Union (EU) zertifiziert.
192193),
5er
6
Page 7

Dear Customer,
Congratulations on your purchase of this highquality MATCH speaker system.
This system highlights best quality, excellent manufacturing and state-of-the-art technology.
After 30 years
of
experiences
in
research & deve-
lopment
of
audio products this speaker
neration sets new standards.
We wish you many hours
of
new MATCH speakers.
Yours
AUDIOTEC FISCHER
Team
syster:n
ge-
enjoyment with your
General installation instructions for MATCH General instruction for
components speaker systems
To
prevent damage to the speakers and possible injury, read this manual carefully and follow all installation instructions. This product has been checked
for proper function prior to shipping and
is
guaran-
The method
of
installation chosen and level
execution will effect the overall performance
speaker system. Treat each installation step with a
high degree of attention.
teed against manufacturing defects.
We strongly recommend that you operate the com-
For a proper performance and to ensure full warranty coverage, we strongly recommend
product installed by
an
authorized MATCH dealer.
to
get this
plete audio system at low volume before final installation. This will allow a trial listening test before
securing the loudspeakers into their mounting locations.
Install the cabling
danger
of
the leads being exposed to shear, crus-
in
a manner which precludes any
hing or rupture forces. If there are sharp edges
the vicinity (e.g. holes
must
be
cushioned and protected to prevent fraying.
in
the bodywork) all cables
Make sure that all speaker wires easily reach the
speaker terminals without stress
nectors.
~nstalling
MATCH
of
on
the wire or con-
of
the
in
Once you have tested the complete speaker
system and have confirmed correct operation, turn
the audio system off and prepare the loudspeaker
for final mounting.
Further installation guides at
www.audiotec-fischer.com
7
Page 8

MS 8B-BMW.1:
4B-BMW.1:
MS
\
61
.
1----"'-'50"------11
17
1T-BMW.1:
MS
4B-BMW.1:
MS
8
Page 9

Removal
In
order to install the MATCH speakers
ginal mounting positions it
the door panels.
If you are uncertain how to remove the panels,
please either ask your local BMW dealer or
perienced car audio dealer for assistance.
case follow the instructions
Here are some important hints:
1.
The door panel
screws to the metal sheet
that you have loosened all screws before you try to
remove the door panel.
2.
Additionally the door panel
plastic clips, which may be damaged during the
disassembly when the ambient temperature
ooc.
low 1
to
loosen the
Note that broken plastic clips have to be replaced
before reinstalling the door panel
undesired rattle and noise.
Installation
The
MS
system, which will be mounted
ker locations. After you have dismantled the door
panels, you can remove the original midrange speakers. Then reinstall the new MATCH midwoofers,
using the included screws.
For the installation
move the mirror triangles that incorporated the ori-
ginal tweeters. Extract the original tweeters from
the triangles and replace them by the new MATCH
tweeters. If you own a car that hasn't any tweeters
installed ex works, you have to buy the appropriate
mirror triangles as spare parts from your BMW dealer first before you install the
After the installation of the midwoofers and the
tweeters you have to connect them to the crossover
network using the included cable harness. Please
note that all wires from speaker to crossover net-
work are already pre-assembled with cable shoes
that can simply be fixed using a Phillips-head screw
driver. Carefully check for the right polarity of each
connection.
Then you have to fix the crossover network to the
door panel, e.g. by using some strong, doublesided adhesive tape or hot glue. Make sure that
you choose
as position for the crossover network itself, so that
it does not collide with any other part
of
the door panel
in
the ori-
is
mandatory to remove
an
In
of
the car manufacturer.
is
fastened with several hidden
of
the door. Make sure
is
fixed by numerous
Always pull the door panel horizontally
clips-
4C-BMW.1 consists
an
never apply any vertical force.
in
order to avoid
of
the MS 4C-BMW.1
of
a 2-way component
in
the original spea-
of
the tweeters you have to re-
MS
4C-BMW.1.
appropriate recess
in
the door panel
of
the door
is
ex-
any
be-
structure when you reassemble the door panel.
Finally you have to connect the original speaker
cable to the input
quires cutting off the original connector with pincers.
Never cut the cables directly behind the connector
itself if you like to reconnect them at a later date.
The original speaker cables have to be equipped
with the crimp terminals. These crimp terminals
stick
in
one
don't have a dedicated crimping tool you can use
combination pliers for fixing the terminals to the original cables
Installation
The MS 4X-BMW.1
which will be installed
speaker positions. After you have dismantled the
door panels, you can remove the original midrange
speakers. Then reinstall the new MATCH coaxial
speakers, using the included screws.
After the installation of the speakers you have to
connect them to the inline crossover networks. Finally you have to connect the original speaker cable
to the input of the inline crossover network. This requires cutting off the original connector with pincers.
Never cut the cables directly behind the connector
itself if you like to reconnect them at a later date.
The original speaker cables have to
with the crimp terminals. These crimp terminals
stick
in
the cables
If you don't have a dedicated crimping tool you can
use combination pliers for fixing the terminals to the
original cables as well.
Installation
The installation of the under-seat subwoofers re-
quires dismantling the front seats of the
fixed by four screws. Next you have to remove the
original speaker grilles, allowing accessing the woofers themselves. Now replace the original woofers
by the new MATCH subs. For proper operation
of the subwoofers it might be necessary to partly
remove the foam around the speaker mounting
hole. After that you have to re-assemble the original speaker grilles. Finally you have
front seats. Please double-check that you have tigh
ten each of the four mounting screws of each seat
properly!
of
the crossover network. This re-
of
the pre-assembled cables. If you
as well.
of
the MS 4X-BMW.1
is
a 2-way coaxial system,
in
the original midrange
be
equipped
of
the inline crossover network.
of
the MS 8B-BMW.1
car,
to
reinstall the
each
9
Page 10

Connection
MS 83C-BMW.1 is a 3-way speaker system that can be configured
The
can either be connected as a 3-way passive system as
gurations
3-way passive system
1.
this configuration
In
driven by one single amplifier channel
possible
is a must to achieve the
two-channel
a
crossover network for the midwoofers/tweeters
are routed to the speakers
rates an active crossover network with a subsonic (highpass)
to a cut-off frequency
3-way semi-active system
2.
this configuration the under-seat subwoofers are driven by separate
In
that you need
amplifier will
nels will
cables that are routed to the speakers
amplifier incorporates an active crossover network, we recommend the
channels:
dB/oct.). The other two
sarily
Hz
100
of
well
the manner the subwoofer is connected.
in
differ
only
three speakers (tweeter, midrange and subwoofer)
all
the
(same as
to drive this system with the
acoustical
full
amplifier
four
be connected to the left
be hooked up to the MATCH crossover networks
subsonic (highpass)
require any additional filtering, but you can set as
slightly
or
above.
is sufficient as the under-seat subs are
the doors by removing the front
in
approx.
of
channels
in
channels that drive the midwoofers and tweeters
original radio head unit, an extra amplifier
potential
40 Hz.
to drive the
total
and right under-seat subs whereas the remaining two chan-
the doors by removing the front
in
40Hz
filter
in
the
of
the doors.
in
complete MS
and the lowpass filter
as a 3-way
original BMW speaker system). Though it is
83C-BMW.1.
MS
in
well
83C-BMW.1
MS
the
two different ways. The system
in
"semi-active"
In
simply connected
can get access to the
You
covers. If
sill
we recommend setting this
filter,
amplifier channels,
83C-BMW.1. Two channels
the doors.
approx.
a highpass
You
sill
following settings for the sub
100Hz
in
filter
system. Both confi-
channel are
each
of
with way more power
this passive configuration
in
amplifier
your
can get access to the
covers.
(minimum
the doors do not neces-
your amp to approx.
in
cables
incorpo-
means
of the
slope
to the
that
filter
parallel
your additional
If
12
Connection
The MS
the doors.
be driven either
both cases we
speakers.
possible
high pass
recommended).
4X-BMW.1 is a 2-way speaker system, which
to
filter
Connection of the MS
The MS
experience
a separate amplifier. The output power of the original head unit isn't sufficient to drive these speakers pro-
perly. If
achieve the best acoustical
filter
8B-BMW.1 is an under-seat subwoofer, which
the
to approx. 100
of
several
In
you use an additional
If
leave
to a cut-off frequency
cars it fits instead
directly
strongly
away the
by the
recommend to use the inline
original head unit or
crossover network.
inline
8B-BMW.1
the MATCH subs we
full potential
the
8B-BMW.1 is connected to an
MS
Hz (minimum
of
results
replaces
the front and the rear speakers as
of
combination with an additional power amplifier.
in
crossover network
amplifier that incorporates a DSP
that case, please
In
least 100
at
of
when setting the subsonic (highpass) filter
dB/oct.).
12
slope
Hz or higher
replaces
strongly recommend using them
amplifier with DSP or integrated crossover network, you will
the simple original fullrange
order to avoid damaging the
in
or an active crossover, it might be
make sure that you set your
minimum
(a
least
original
the
MS 4X-BMW.1 can
The
well.
of
slope
BMW woofers.
combination with
in
Hz and the
40
to
speakers
12 dB/oct.
you want to
If
lowpass
in
In
MS 4X-BMW.1
the
10
Page 11

MS
83C-BMW.1
Power handling
Frequency range ......................................................................
Sensitivity .................................................................................
Impedance ................................................................................ 4
Diameter subwoofer
Crossover ................ : ................................................................ separate, 6 dB
MS 4C-BMW.1
Power handling
Frequency range ...................................................................... 1
Sensitivity .................................................................................
Impedance ................................................................................
Diameter midrange
Crossover ................................................................................. separate, 6 dB
MS
8B-BMW.1
Power handling
Frequency range ......................................................................
Sensitivity .................................................................................
Impedance
Diameter ...................................................................................
RMS
I
Max ...................................................... 1
I
RMS
midrange
I
Max ......................................................
I
tweeter .................................
90
4
I
tweeter ....................................................
RMS
I
Max ...................................................... 1
30-
................................................................................ 4
90
200
00
3090
dB 1
Ohms
200
filter
60
I
00
dB 1W
Ohms
100
filter
00
dB 1
Ohms
I
200
25.000
W
mm
I
120
Watts
-
25.000
mm
I
I
200
140Hz
W
mm;
8"
Watts
Hz
I
1 m
100
mm
I
12 dB slope with bandstop
Hz
I
1m
25 mm; 4"
I
12 dB slope with bandstop
Watts
I
1m
I
MS4X-BMW.1
Power handling
Frequency range ...................................................................... 1 00
Sensitivity .................................................................................
impedance ................................................................................ 4
Diameter midrange
Crossover ................................................................................. separate, 6 dB slope
RMS
I
Max. . ....................................................
I
tweeter .................................................... 1
60
I
90
dB 1W
Ohms
00
120
Watts
-
25.000
mm
I
I
20
Hz
1m
mm;
4"
25 mm;
I
1"
I
0,
75"
8"
I
4"
I
1"
Vehicle compatibility (Stand
MATCH
Motoren Werke AG or any
behalf or with its authorization.
All registered product names, trade marks and brands are the property
The compatibility with the specified types
2013.
Technical changes and errors reserved
The limited warranty comply with legal regulations.
Failures or damages caused by overload or improper use are not covered by the warranty.
Please return the defective product only with a
valid proof
description.
Technical specifications are subject to change!
Errors are reserved!
by
Audiotec Fischer or Audiotec Fischer GmbH are
of
purchase and a detailed malfunction
Okt. 2013)
of
..................................... 1 series (E81
92193),
its subsidiaries or affiliated companies connected to, or is acting on its
of
vehicles reflects the information available on
For damages on the vehicle and the device, caused
by handling errors
liability.
All
MATCH speakers are tagged with a CE-Certification mark. Thereby these devices are ceritified
for a use inside vehicles inside the European Union
(EU).
182187
188),
5 series
in
no way affiliated with the Bayerische
(E60161
of
their respective owners.
of
the device, we can't assume
3 series
),
X1
(E90191
(E84)
Oktober
I
11
Page 12

Gewerbegebiet Lake
Tel.: +49 2972 9788
E-mail:
match@audiotec-fischer.com
AUDIOTEC
FISCHER
Audiotec Fischer GmbH
· D-57392
· Hunegraben
II
0 ·
26
Fax: +49 2972 9788 88
· Internet:
www.audiotec-fischer.com
Schmallenberg
 Loading...