

Page 1

Installation Guide
Active Antenna - Pit
Master Meter • 101 Regency Parkway • Manseld, Texas 76063 • Tel: 817.842.8000 • Fax: 817.842.8100
MasterMeter.com
Page 2
The Master Meter Active Antenna provides an efcient installation-friendly design that installs in minutes and activates with plug-
and-play convenience to keep deployment moving quickly while helping reduce overall installation costs. We recommend that you
read this installation guide thoroughly to walk you through the basic installation process before you begin.
PLEASE NOTE: Any changes and modications to the equipment not expressly approved by Master Meter could void warranty
and the user’s authority to operate the equipment. Professionally trained personnel should install the equipment.
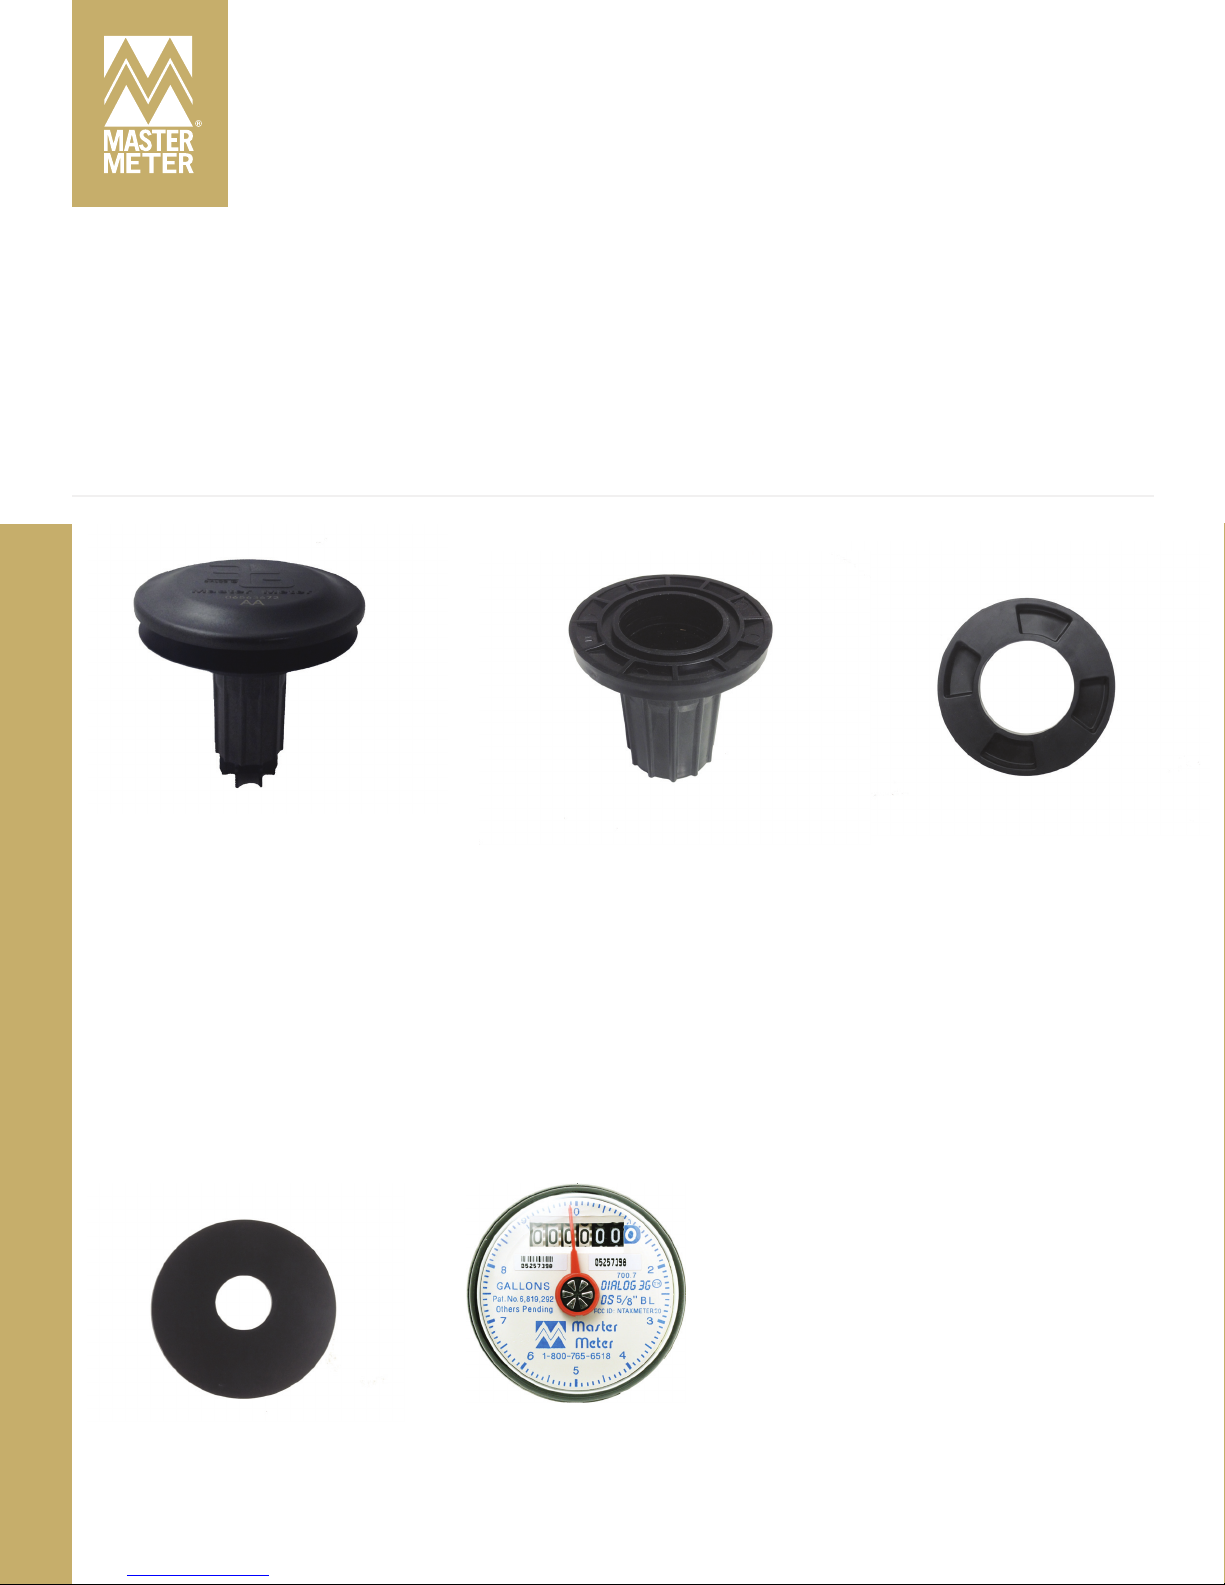
COMPONENTS
Master Meter Active Antenna
Collar Spacer
O-Ring Standard 3G Register
Page 3
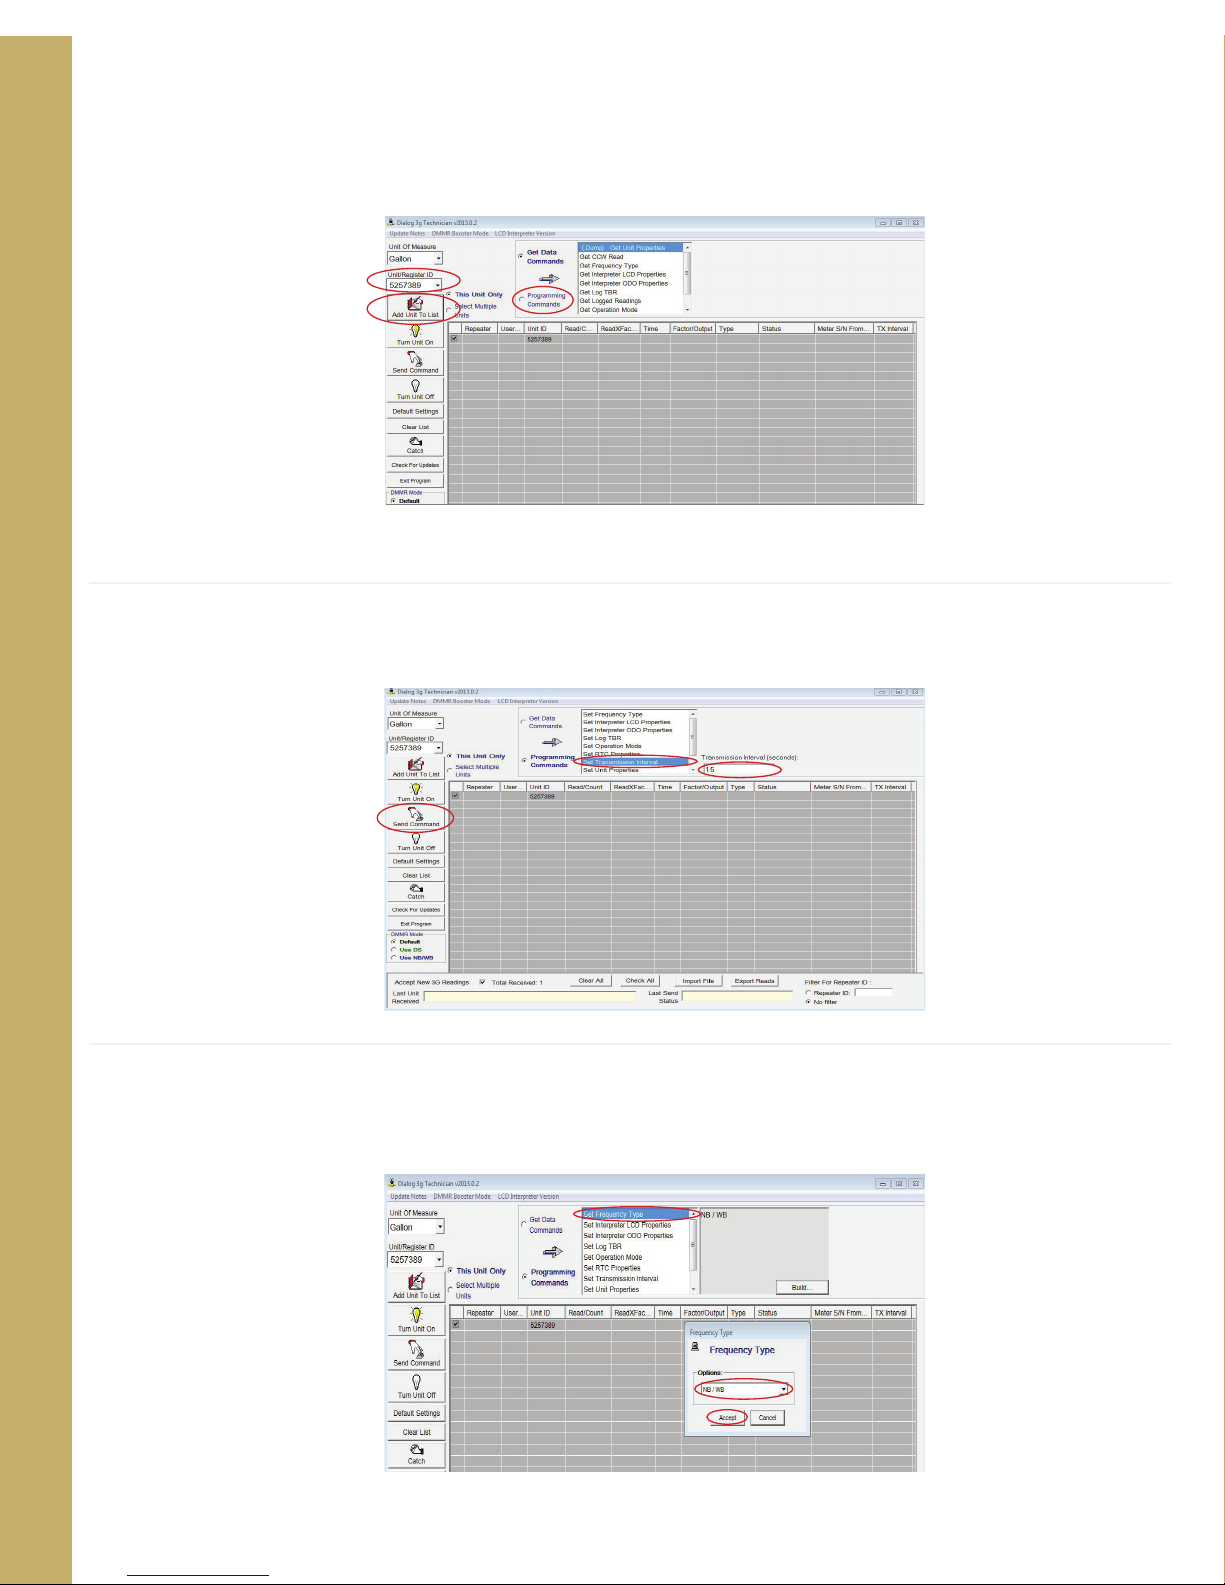
Prior to installation, please follow procedures below to correctly program registers to comply with the Active Antenna.
STEP 1: Open 3G Tech, locate EID that is to be attached to the Active Antenna. Type that EID into the “UNIT/REGISTER
ID” box. Then press “Add Unit to List”.
PROGRAMMING
Click on the “Programming Commands” tab.
STEP 2: Choose “Set Transmission Interval” and change the interval from 10 secs to 15 secs. Highlight the EID of choice
and then press “Send Command”.
STEP 3: Next select “Set Frequency Type” and “Build” to change the register from FH/DS to WB/NB compatible. Choose
“NB/WB” from the drop down box and press “Accept”. Highlight the EID of choice and then press “Send Command”.
If commands are not accepted, repeat step 2 and 3.
Page 4
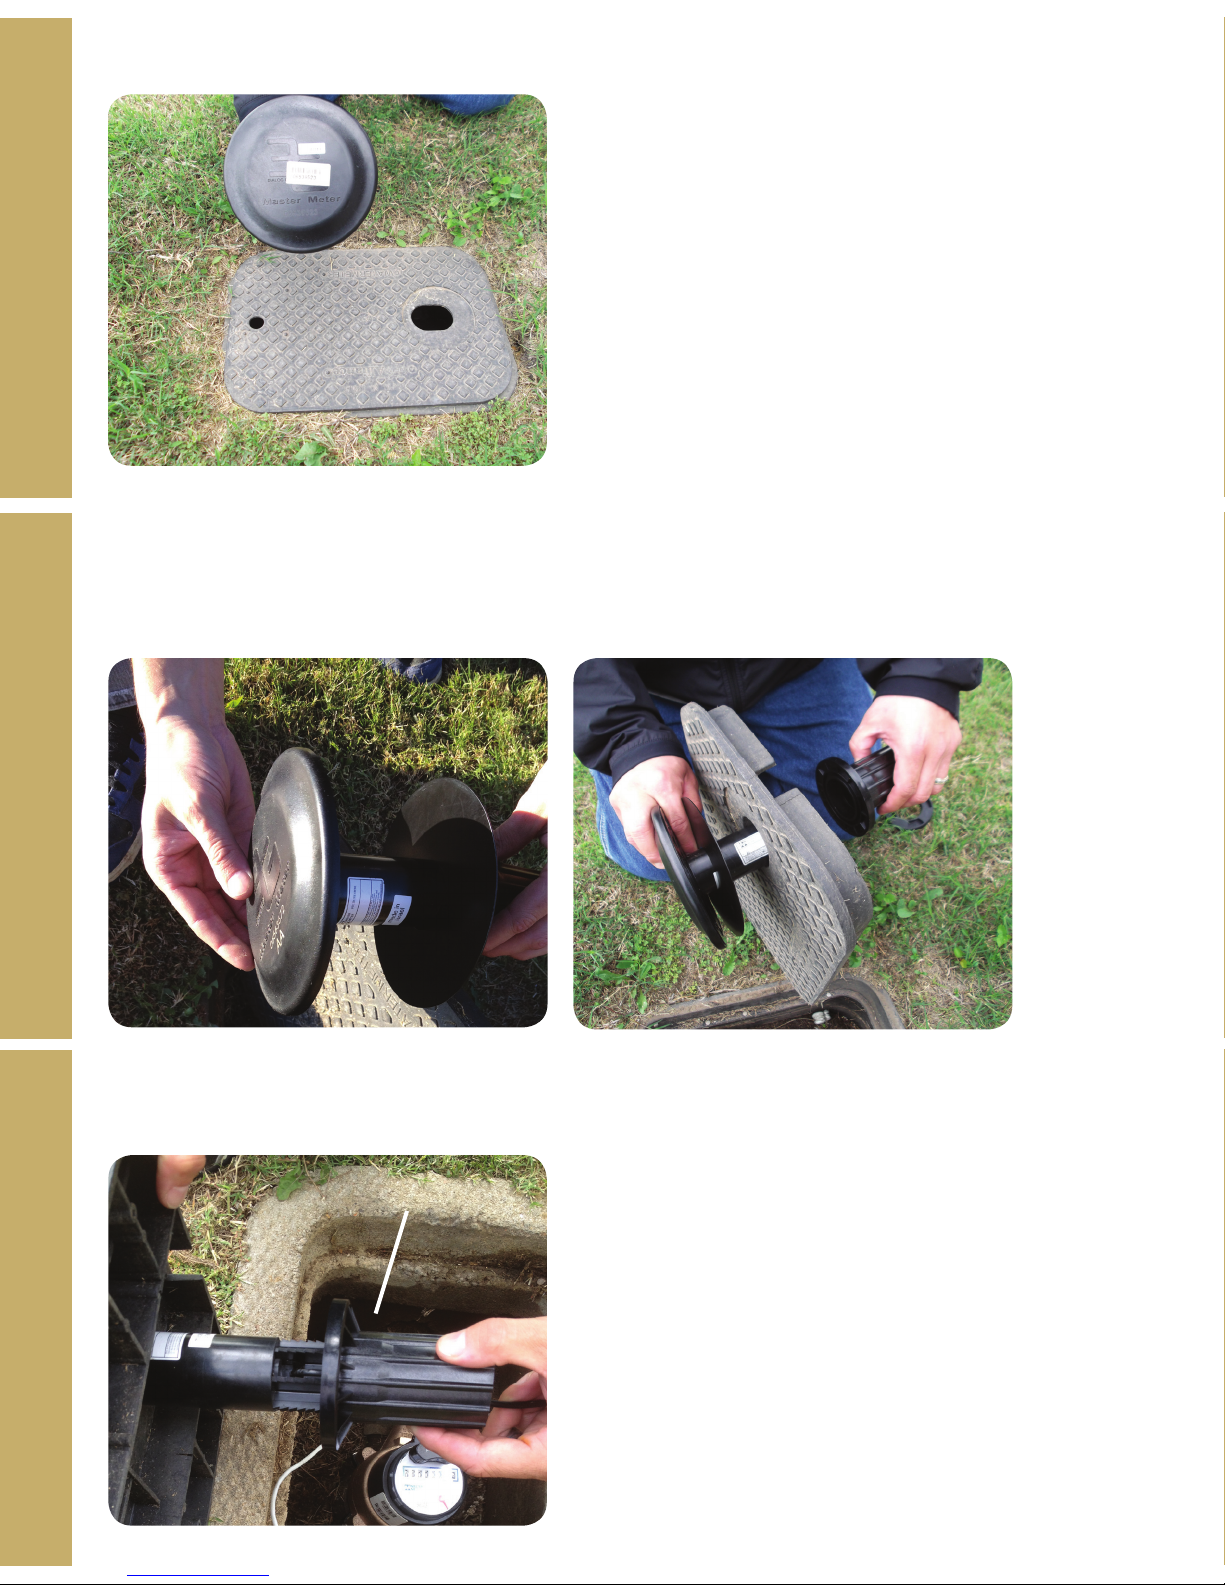
Make sure meter box lid has a 1.75” hole cut-out for Active Antenna installation.
STEP 1
All Active Antennas being installed into a plastic lid MUST use a metal O-Ring. If it’s a metal lid, you do not need to use
STEP 2
STEP 3
a metal ring. Slide O-Ring onto the Active Antenna before tting into the lid. Please note, O-Ring must be installed
between the Active Antenna and the lid.
To secure the Active Antenna, screw on the Collar underneath the lid until tight. Now the Active Antenna is installed.
Collar
→
Page 5
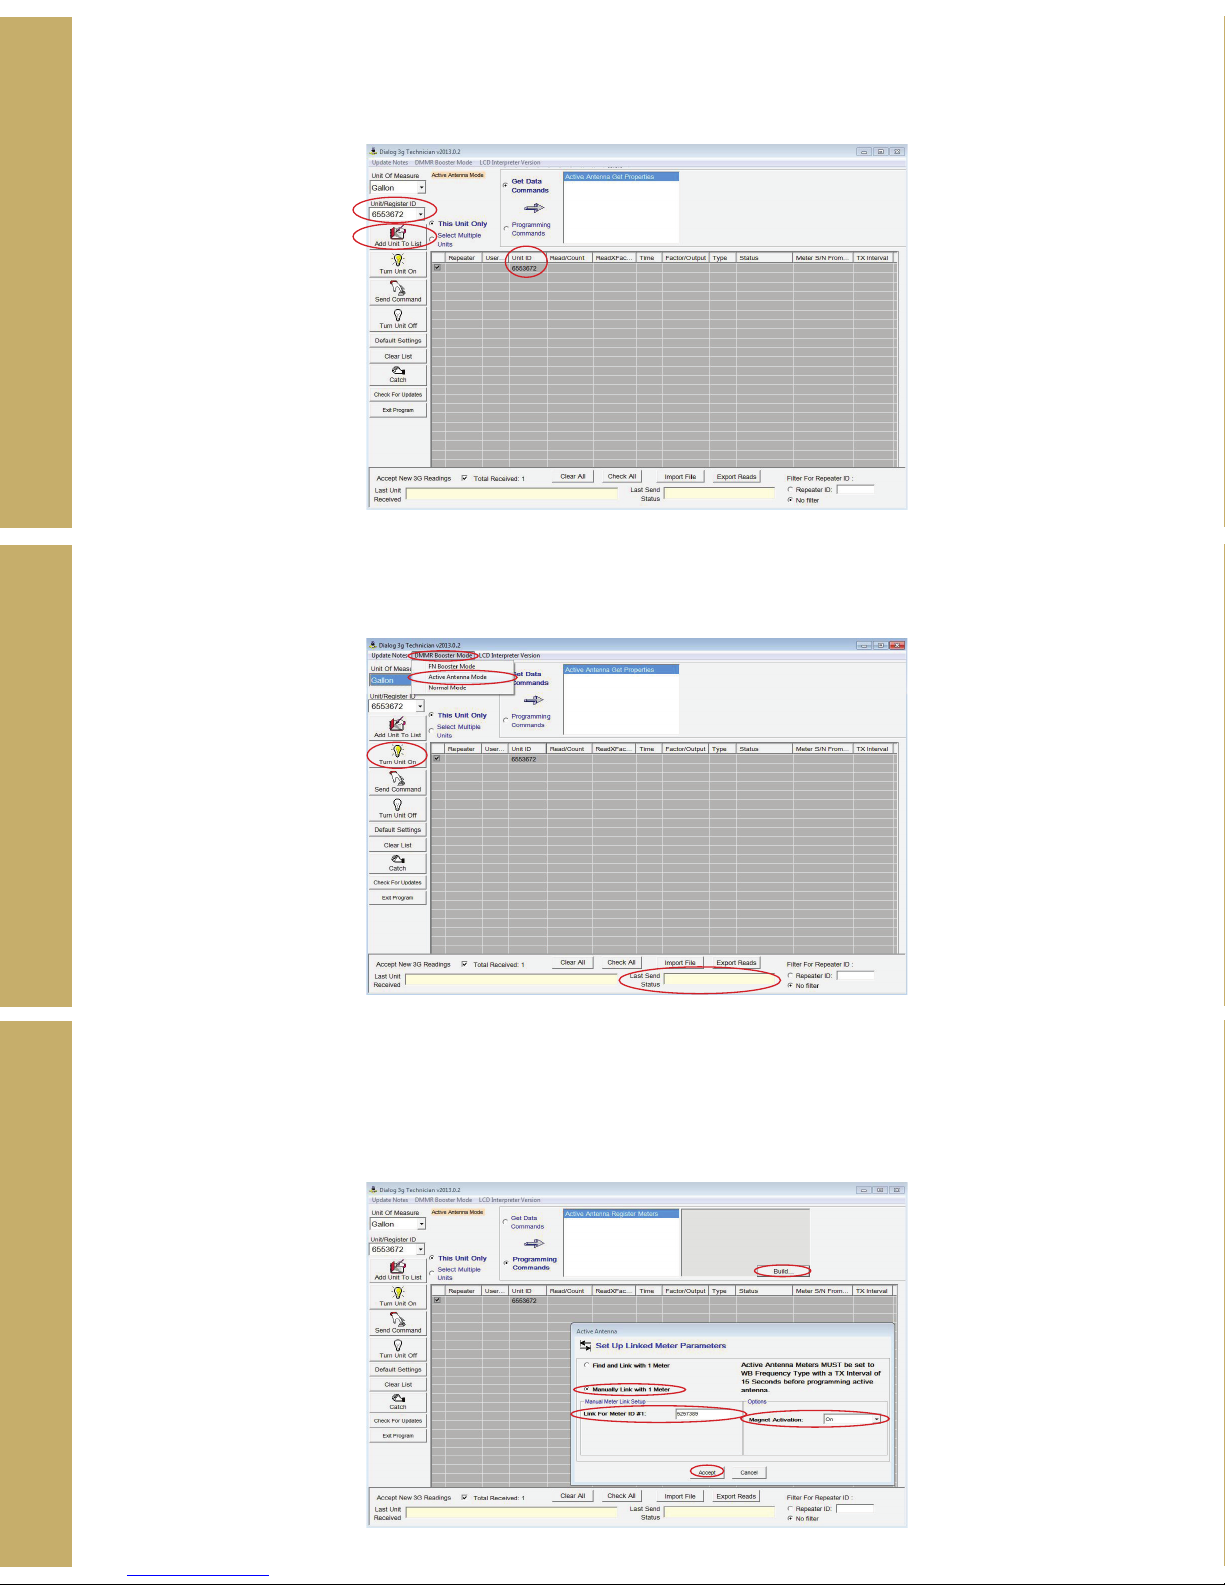
In 3G Tech, Type in the Acitve Antenna number in the box labeled “Unit Register ID.” Click “Add Unit to List”.
STEP 4STEP 5
The number of the AA that you entered will appear in the grid as seen below.
Click on “DMMR Booster Mode” and select “Active Antenna Mode” from the drop down box. Click “Turn Unit On” to activate
the Active Antenna. Once the Active Antenna has be activated, the word “OK” will appear in the “Last Send Status” box.
OK
Click on the tab “Build” in the box on the right. A new box will appear named “Active Antenna.” Click on the tab labeled
STEP 6
“Manually Link with Meter(s)” located on the left hand side. Under “Manual Meter Link Setup” Type in the register numbers
that are to be synced to AA. Magnet Activation should be “On” and Beep Notication should be “Off.” Click “Accept”.
Page 6
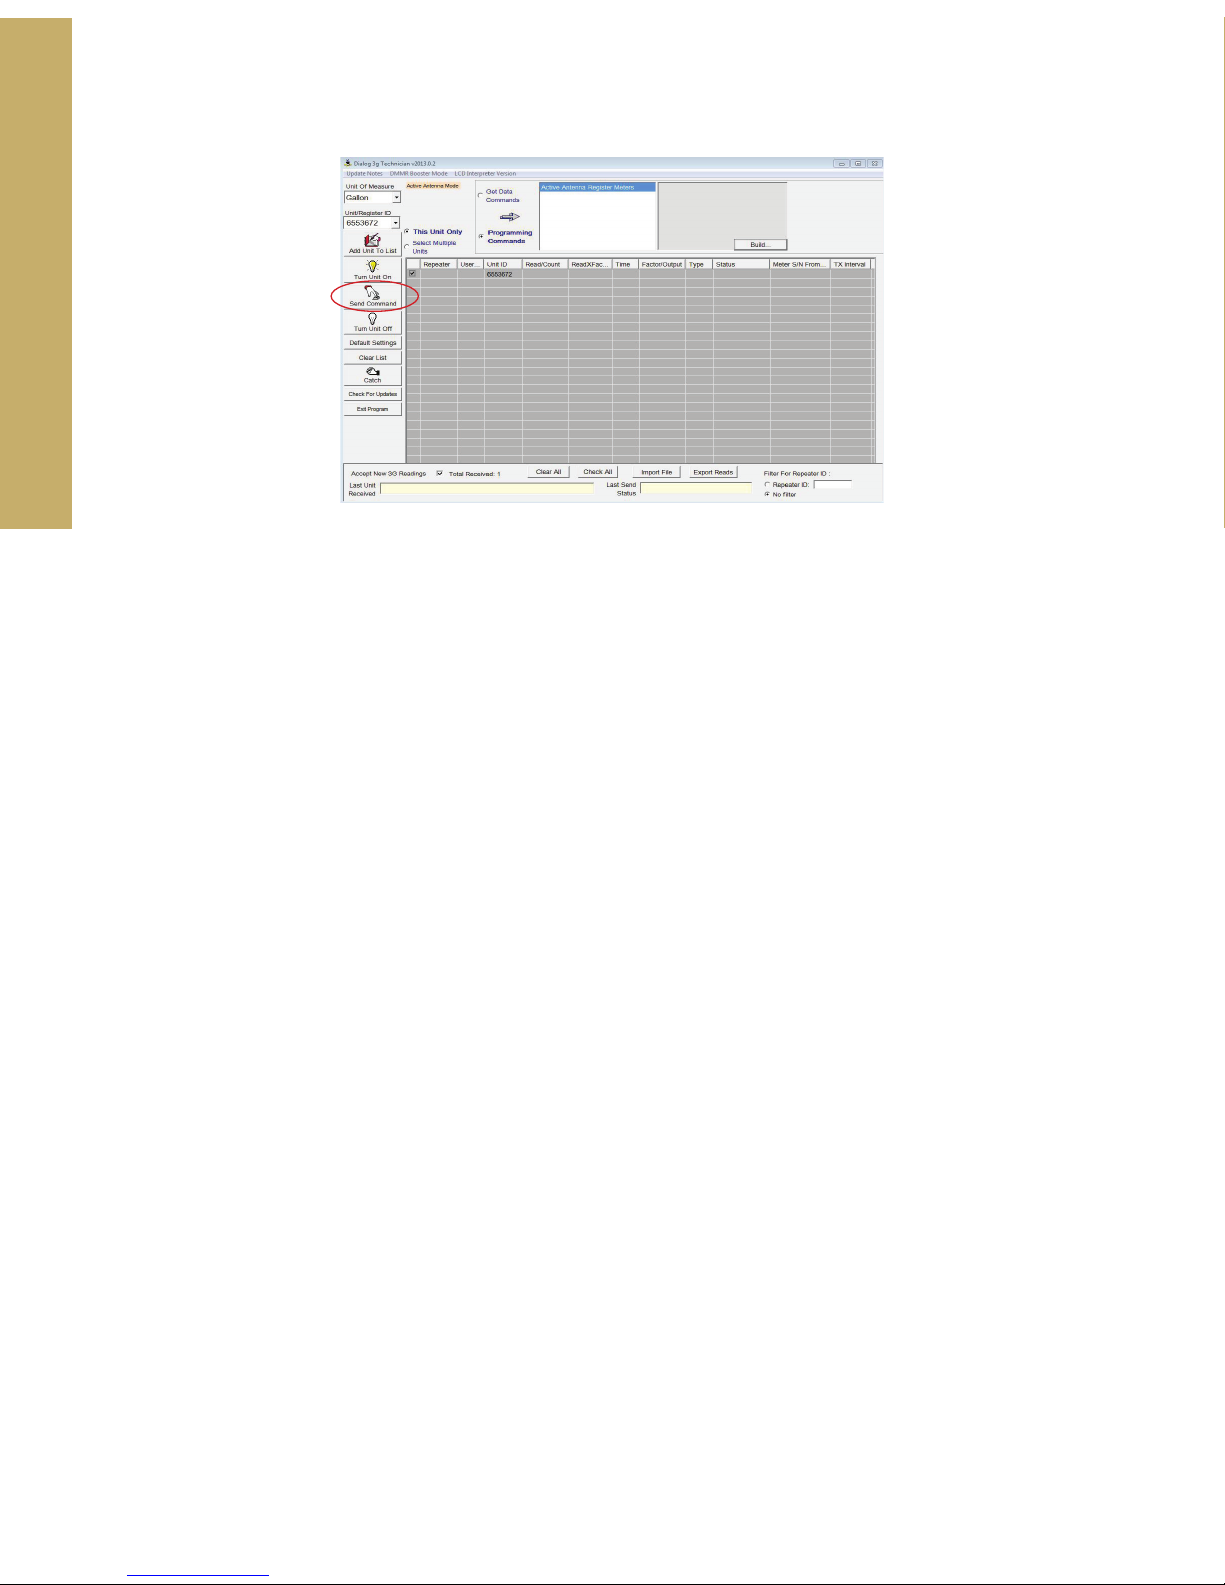
Click “Send Command.” Once the Active Antenna has connected with the register you will hear a “ping” sound 2 times
STEP 7
within 15 seconds versus the 1 “ping” within 11 seconds you usually hear when reading a normal register in 3G Tech. The
Active Antenna is now linked to the register.
Page 7

Master Meter // 101 Regency Parkway // Manseld, Texas 76063 // mastermeter.com
 Loading...