

Page 1
241-0445
PRESET
VOL-
VOL+
MODE/
SCAN
BASS/
CLOCK
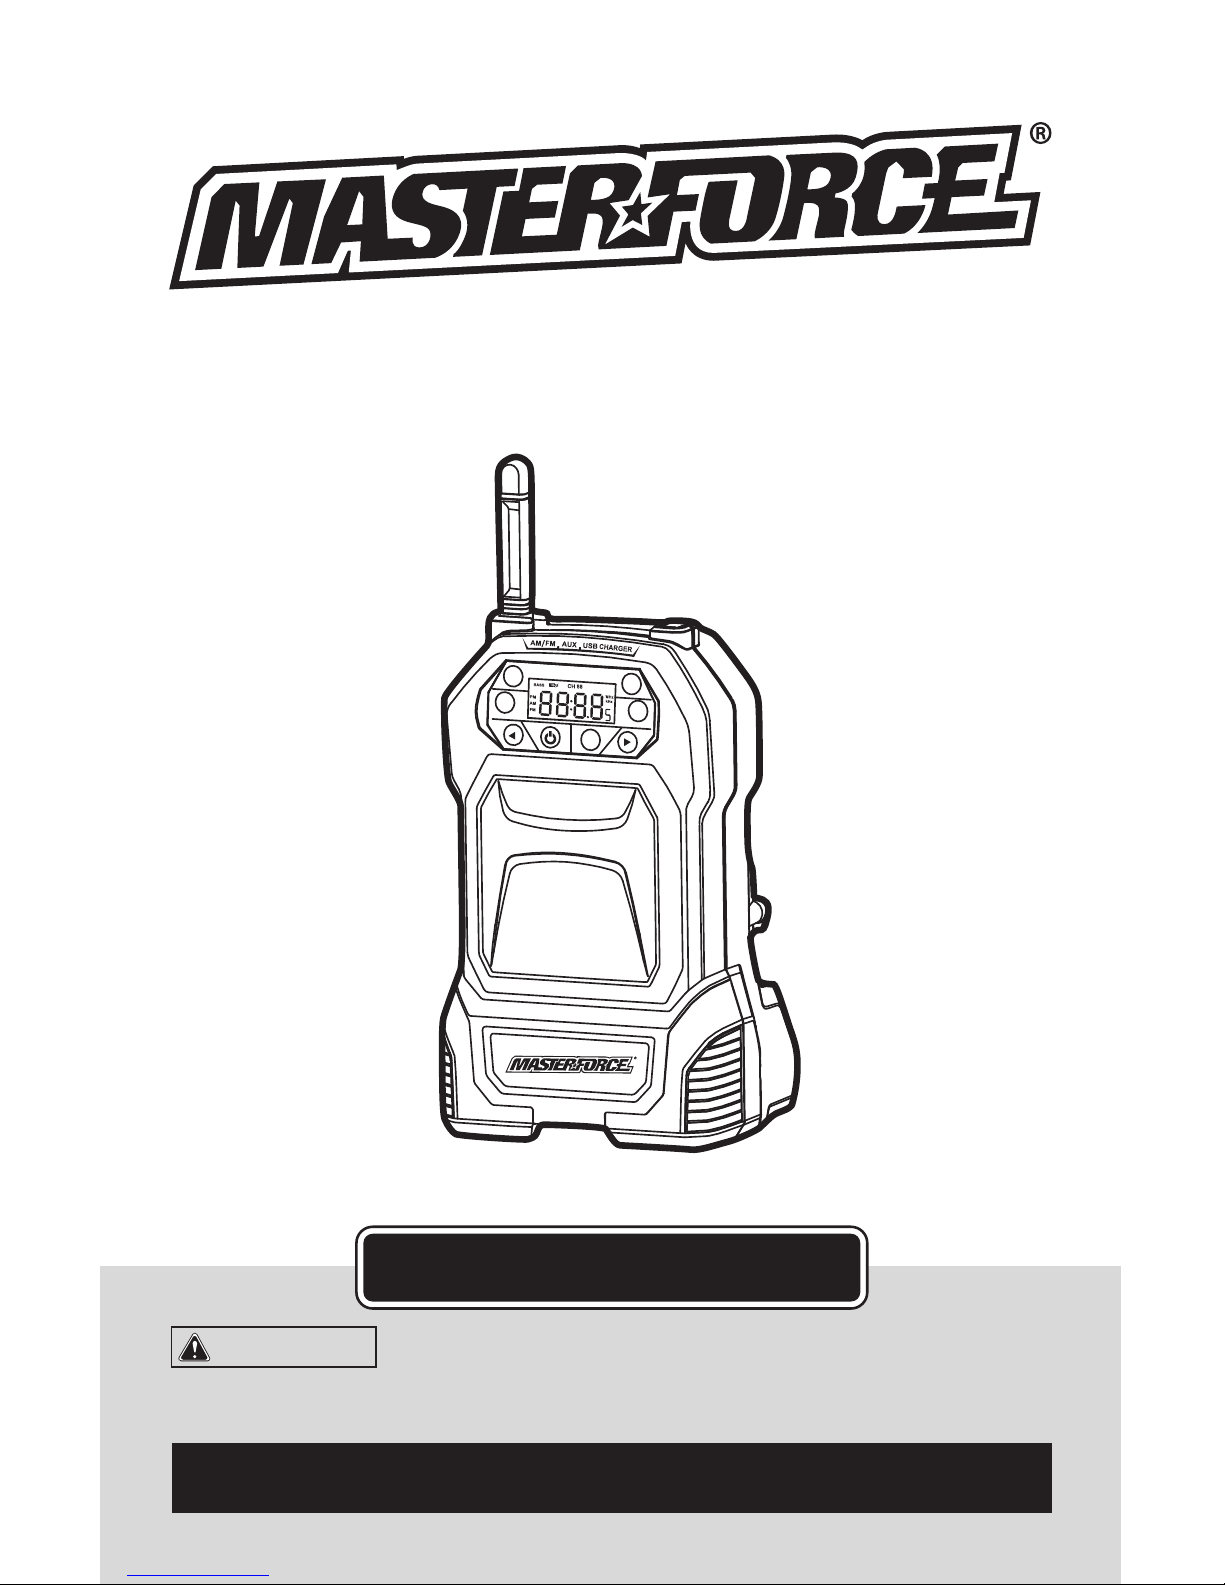
Radio
OPERATOR’S MANUAL
CAUTION:
To Reduce the Risk of Injury, User Must Read
and Understand Operator’s Manual. Save These Instructions
For Future Reference.
For questions / comments, technical assistance or repair parts –
Please Call Toll Free: 1-866-917-4374. (M-F 8am – 6pm EST.)
Page 2

TABLE OF CONTENTS
Safety Symbols ......................................................... Page 2
Safety Instructions ...................................................... Page 3
Overview/Specifications .................................................Page 7
Assembly .............................................................Page 8
Operation ............................................................. Page 9
Maintenance .......................................................... Page 12
Troubleshooting .......................................................Page 12
Warranty .............................................................Page 14
Page 3
Page 2
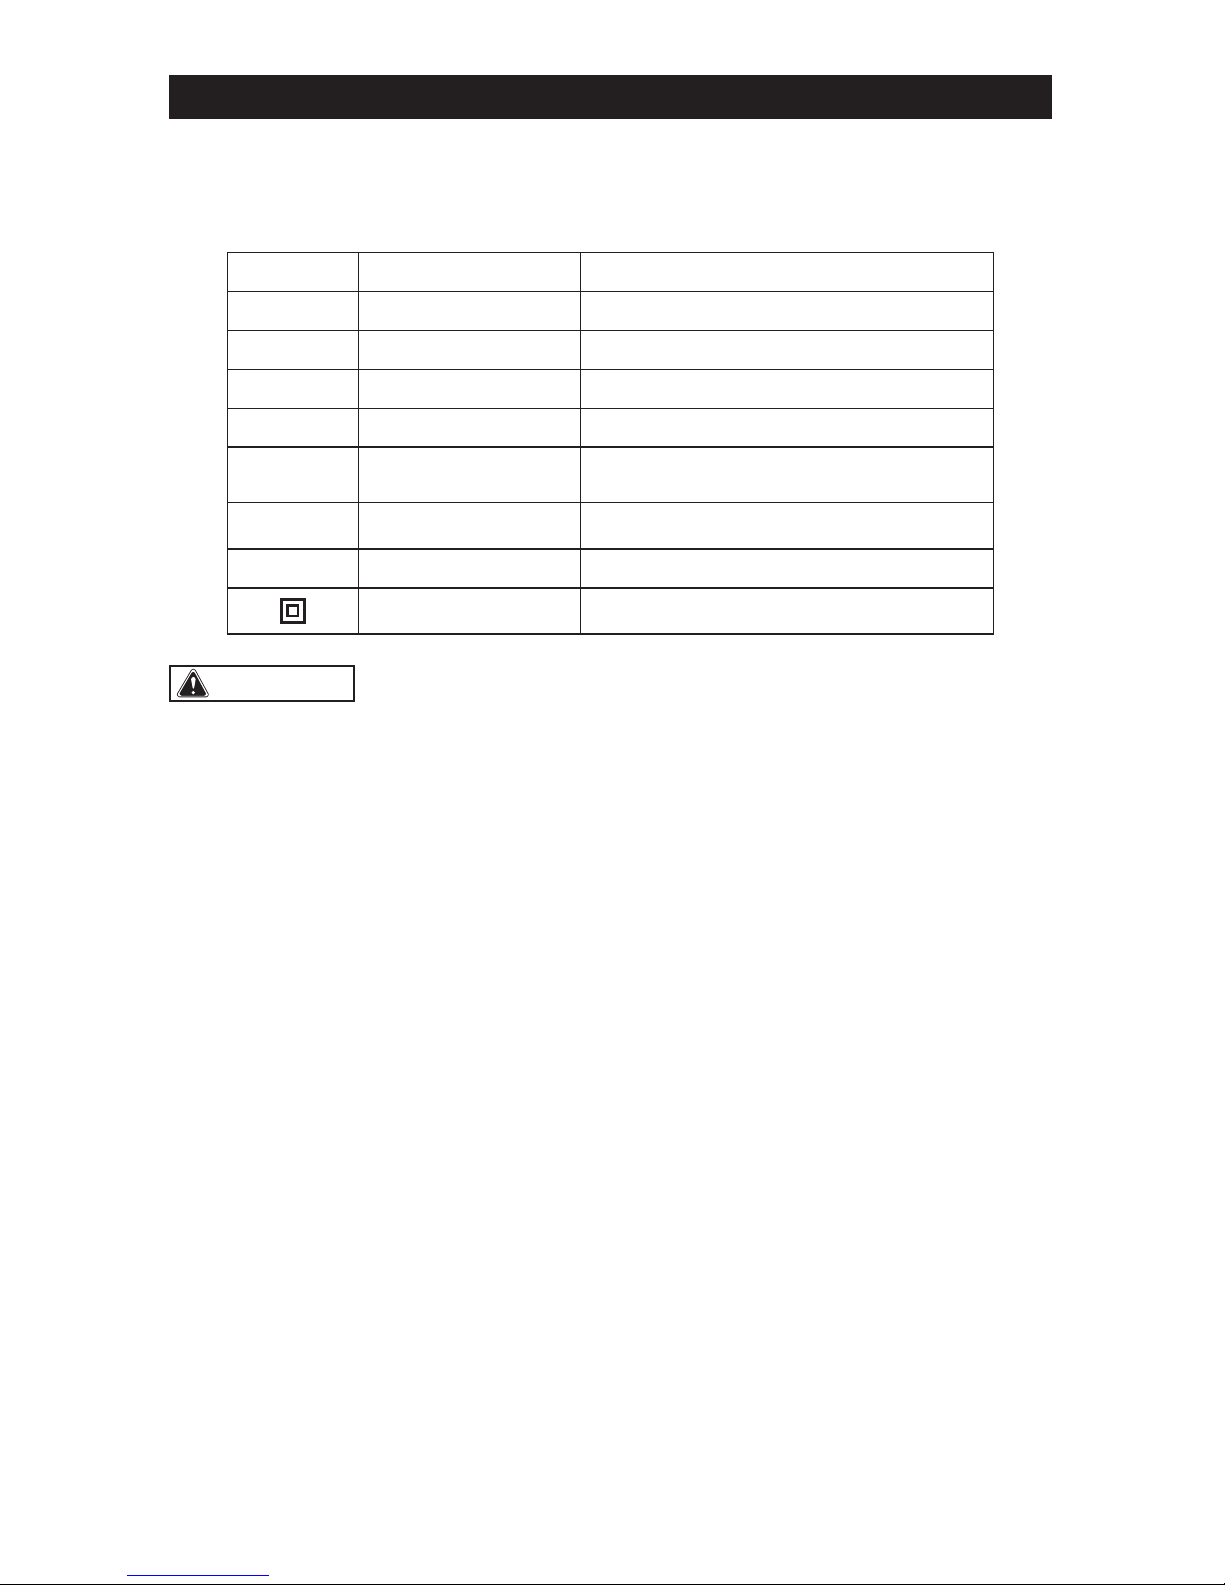
SAFETY SYMBOLS
Some of these following symbols may be used on this tool. Please study them and learn their
meaning. Proper interpretation of these symbols will allow you to operate the tool better and
more safely.
Symbol
Name
Designation / Explanation
V Volts Voltage
A Amperes Current
Hz Hertz Frequency (cycles per second)
W Watts Power
∿
Alternating current Type of current
�
Direct current Type or characteristic of current
lbs Pounds Weight
Class II construction Double insulated construction
WARNING:
To ensure safety and reliability, all repairs should be performed by a
qualified service technician.
Page 4
Page 3
SAFETY INSTRUCTIONS
The purpose of safety symbols is to attract your attention to possible dangers. The safety
symbols and the explanations with them deserve your careful attention and understanding.
The symbol warnings do not, by themselves, eliminate any danger. The instructions and
warnings they give are no substitutes for proper accident prevention measures.
WARNING:
Be sure to read and understand all safety instructions in this manual,
including all safety alert symbols such as “DANGER,” ”WARNING,” and “CAUTION”
before using this tool. Failure to following all instructions listed below may result in
electric shock, fire, and/or serious personal injury.
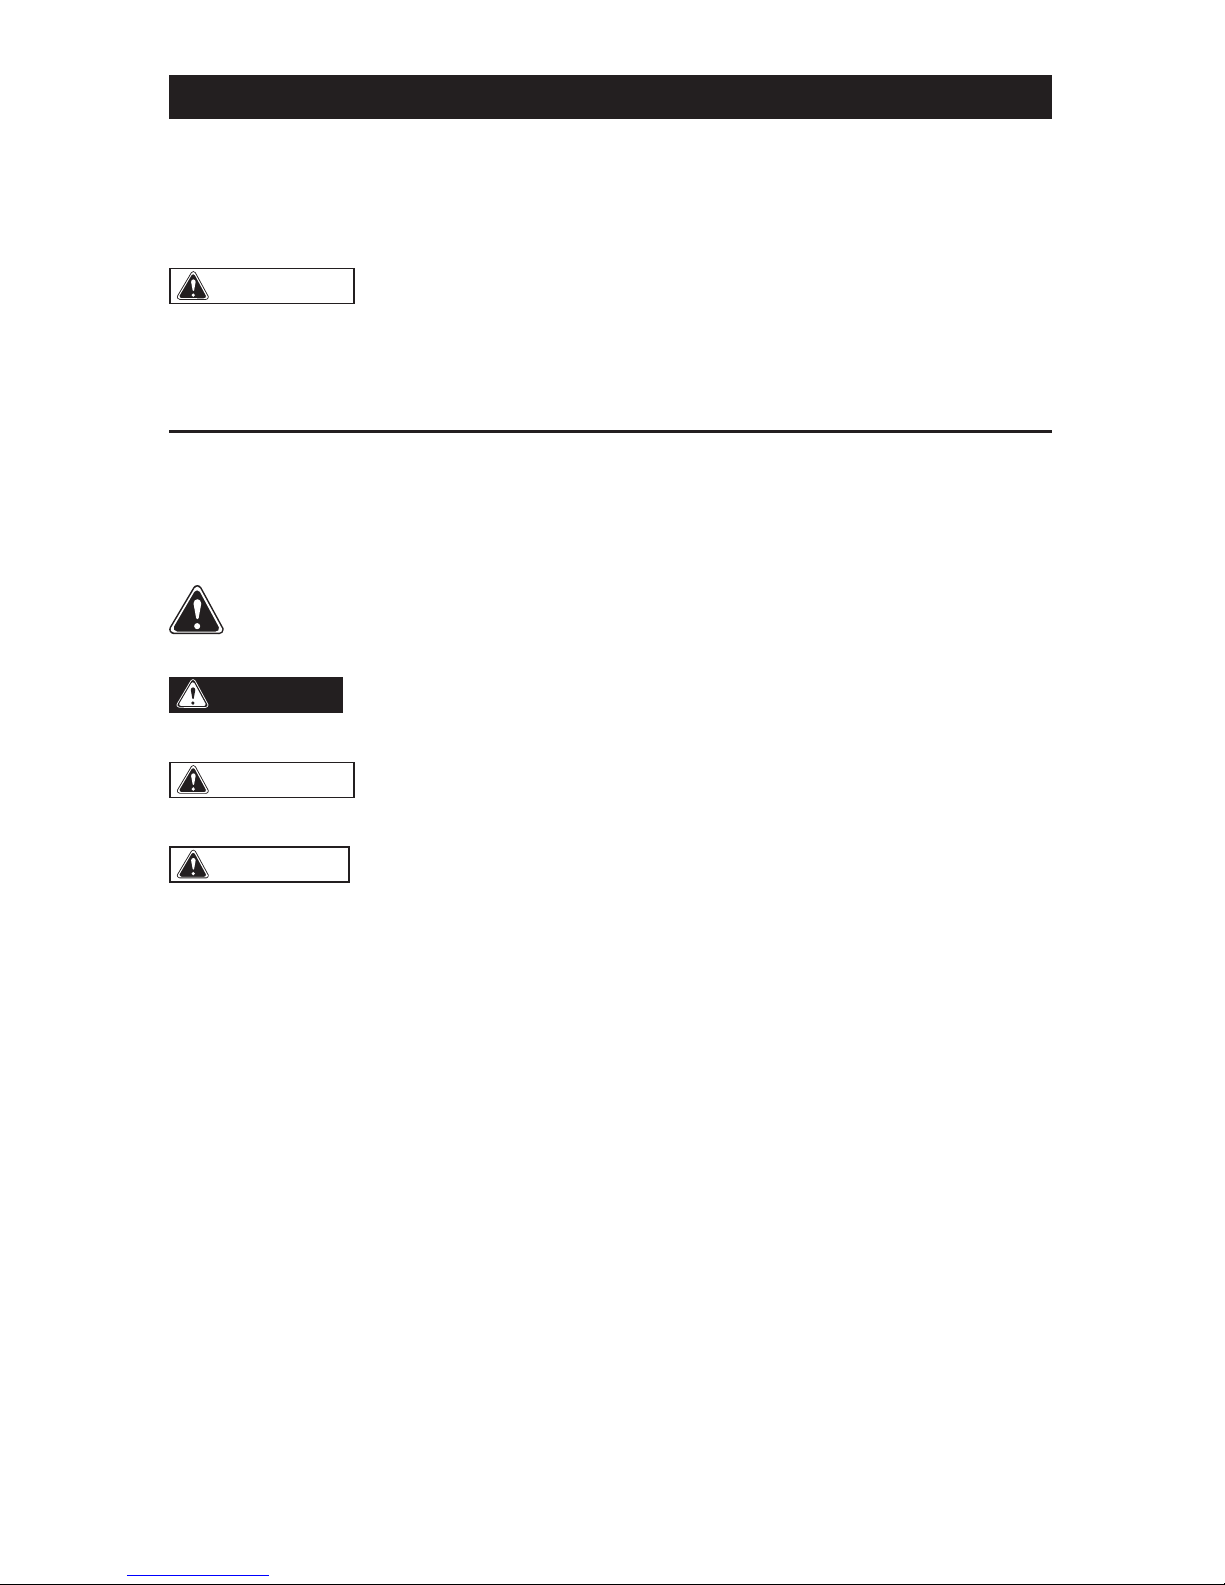
SYMBOL MEANING
SAFETY ALERT SYMBOL: Indicates DANGER, WARNING, or CAUTION.
May be used in conjunction with other symbols or pictographs.
DANGER:
Indicates an imminently hazardous situation, which, if not avoided,
will result in death or serious injury.
WARNING:
Indicates a potentially hazardous situation, which, if not avoided,
could result in death or serious injury.
CAUTION:
Indicates a potentially hazardous situation, which, if not avoided, could
result in minor or moderate injury.
NOTICE: (Without Safety Alert Symbol) Indicates a situation that may result in property
damage.
SAVE THESE INSTRUCTIONS!
Page 5

Page 4
SAFETY INSTRUCTIONS
WARNING:
Read all safety
warnings and instructions!
Failure to follow the warnings and instructions
may result in electric shock, fire and/or serious
injury. Save all warnings and instructions for
future reference.
The term power tool in the warnings refers to
your mains-operated (corded) power tool or
battery-operated (cordless) power tool.
WORK AREA SAFETY
1. Keep the work area clean and well lit.
Cluttered or dark areas invite accidents.
2. Do not operate power tools in explosive
atmospheres, such as in the presence of
flammable liquids, gases or dust. Power
tools create sparks which may ignite the
dust or fumes.
ELECTRICAL SAFETY
1. A battery operated product with
integral batteries or a separate battery
pack must be recharged only with the
specified charger for the battery. A charger
that may be suitable for one type of battery
may create a risk of fire when used with
another battery.
2. Use battery operated product only with
specifically designated battery pack. Use
of any other batteries may create a risk of
fire.
3. Use only with charger listed.
PERSONAL SAFETY
1. Do not overreach. Keep proper footing
and balance at all times. This enables better
control of the power tool in unexpected
situations.
2. Do not use on a ladder or unstable
support. Stable footing on a solid surface
enables better control of the product in
unexpected situations.
PRODUCT USE AND CARE
1. Do not use the power tool if the switch
does not turn it on and off. Any power tool
that cannot be controlled with the switch is
dangerous and must be repaired.
2. Disconnect battery pack from product
or place the switch in the locked or off
position before making any adjustments,
changing accessories, or storing the
product. Such preventive safety measures
reduce the risk of starting the product
accidentally.
3. When battery pack is not in use, keep
it away from other metal objects like:
paper clips, coins, keys, nails, screws, or
other small metal objects that can make a
connection from one terminal to another.
Shorting the battery terminals together may
cause sparks, burns, or a fire.
4. Keep the radio and its handle dry, clean
and free from oil and grease. Always use
a clean cloth when cleaning. Never use
brake fluids, gasoline, petroleum-based
products, or any strong solvents to clean
your radio. Following this rule will reduce
the risk of loss of control and deterioration
of the enclosure plastic.
5. Do not use this apparatus near water.
6. Clean only with dry cloth.
7. Do not block any ventilation
openings. Install in accordance with the
manufacturer’s instructions.
8. Do not install near any heat sources
such as radiators, heat registers, stoves,
or other apparatus (including amplifiers)
that produce heat.
9. Only use attachments/accessories
specified by the manufacturer.
Page 6

Page 5
SAFETY INSTRUCTIONS
SERVICE
1. Have your power tool serviced by a
qualified repair person using only identical
replacement parts. This will ensure that the
safety of the power tool is maintained.
IMPORTANT SAFETY
INSTRUCTIONS
1. Know your product. Read operator’s
manual carefully. Learn its applications
and limitations, as well as the specific
potential hazards related to this product.
Following this rule will reduce the risk of
electric shock, fire, or serious injury.
2. Battery products do not have to be
plugged into an electrical outlet; therefore,
they are always in operating condition. Be
aware of possible hazards when not using
your battery product or when changing
accessories. Following this rule will reduce
the risk of electric shock, fire, or serious
personal injury.
3. Do not place battery products or their
batteries near fire or heat. This will reduce
the risk of explosion and possibly injury.
4. Do not crush, drop or damage battery
pack. Do not use a battery pack or charger
that has been dropped or received a sharp
blow. A damaged battery is subject to
explosion. Properly dispose of a dropped or
damaged battery immediately.
5. Batteries can explode in the presence
of a source of ignition, such as a pilot light.
To reduce the risk of serious personal
injury, never use any cordless product in
the presence of open flame. An exploded
battery can propel debris and chemicals. If
exposed, flush with water immediately.
6. Do not charge battery product in a
damp or wet location. Following this rule
will reduce the risk of electric shock.
7. Under extreme usage or temperature
conditions, battery leakage may occur.
If liquid comes in contact with your skin,
wash immediately with soap and water,
then neutralize with lemon juice or vinegar.
If liquid gets into your eyes, flush them
with clean water for at least 10 minutes,
then seek immediate medical attention.
Following this rule will reduce the risk of
serious personal injury.
8. To reduce the risk of personal injury
and electric shock, the product should
not be played with or placed where small
children can reach it.
9. To reduce the risk of electric shock, do
not expose to water or rain.
10. Do not use the radio to listen to music
or other audio programs while operating
machinery. Doing so may cause distractions
that could result in serious personal injury.
11. This radio is capable of producing
sound levels that can be dangerous to
long-term hearing. Listening to music at
high volume for any period of time may
cause noise-induced hearing loss. The
higher the volume, the less time required
before your hearing may be affected.
12. Save these instructions. Refer to them
frequently and use them to instruct others
who may use this tool. If you loan someone
this tool, loan them these instructions also to
prevent misuse of the product and possible
injury.
Page 7

Page 6
SAFETY INSTRUCTIONS
FEDERAL COMMUNICATIONS
COMMISSION
WARNING:
Changes or
modifications to this unit not expressly
approved by the party responsible for
compliance could void the user’s authority
to operate the equipment.
This equipment has been tested and found
to comply with the limits for Class B digital
device, pursuant to Part 15 of the FCC
Rules. These limits are designed to provide
reasonable protection against harmful
interference in a residential installation.
This equipment generates uses and can
radiate radio frequency energy and, if not
installed and used in accordance with the
instructions, may cause harmful interference
to radio communications.
However, there is no guarantee that
interference will not occur in a particular
installation. If this equipment does cause
harmful interference to radio or television
reception, which can be determined by
turning the equipment off and on, the user is
encouraged to try to correct the interference
by one or more of the following measures:
• Reorient or relocate the receiving antenna.
• Increase the separation between the
equipment and receiver.
• Connect the equipment into an outlet on
a circuit different from that to which the
receiver is connected
• Consult the dealer or an experienced
radio/TV technician for help.
Page 8
Page 7
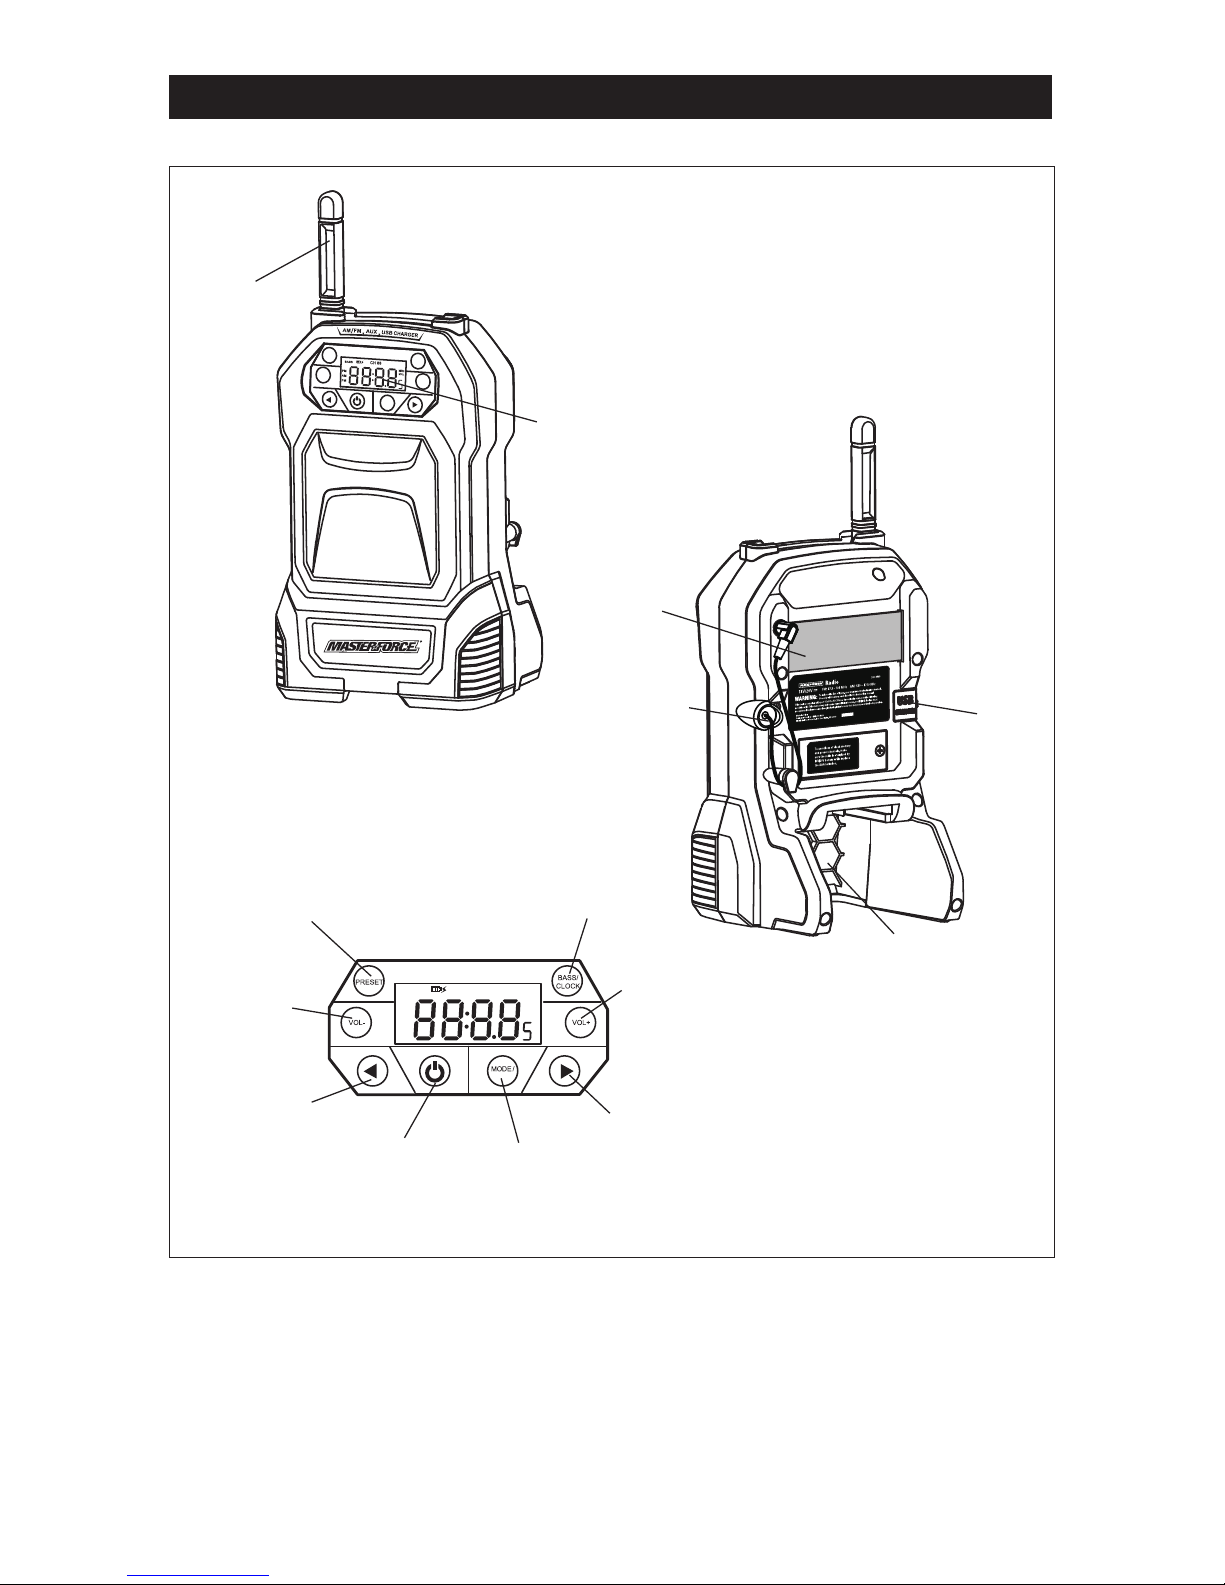
OVERVIEW
PRESET
VOL-
VOL+
MODE/
SCAN
BASS/
CLOCK
PM
BASS
CH 88
MHz
kHz
AM
FM
SCAN
Antenna
LCD display
Retainer strap
USB power
port
Battery port
Integrated
auxiliary cable
Preset button
Volume Down
button
Tune/Seek
down button
ON/OFF
button
Mode/Scan
button
Tune/Seek
up button
Volume Up
button
Bass/Clock button
Page 9
Page 8
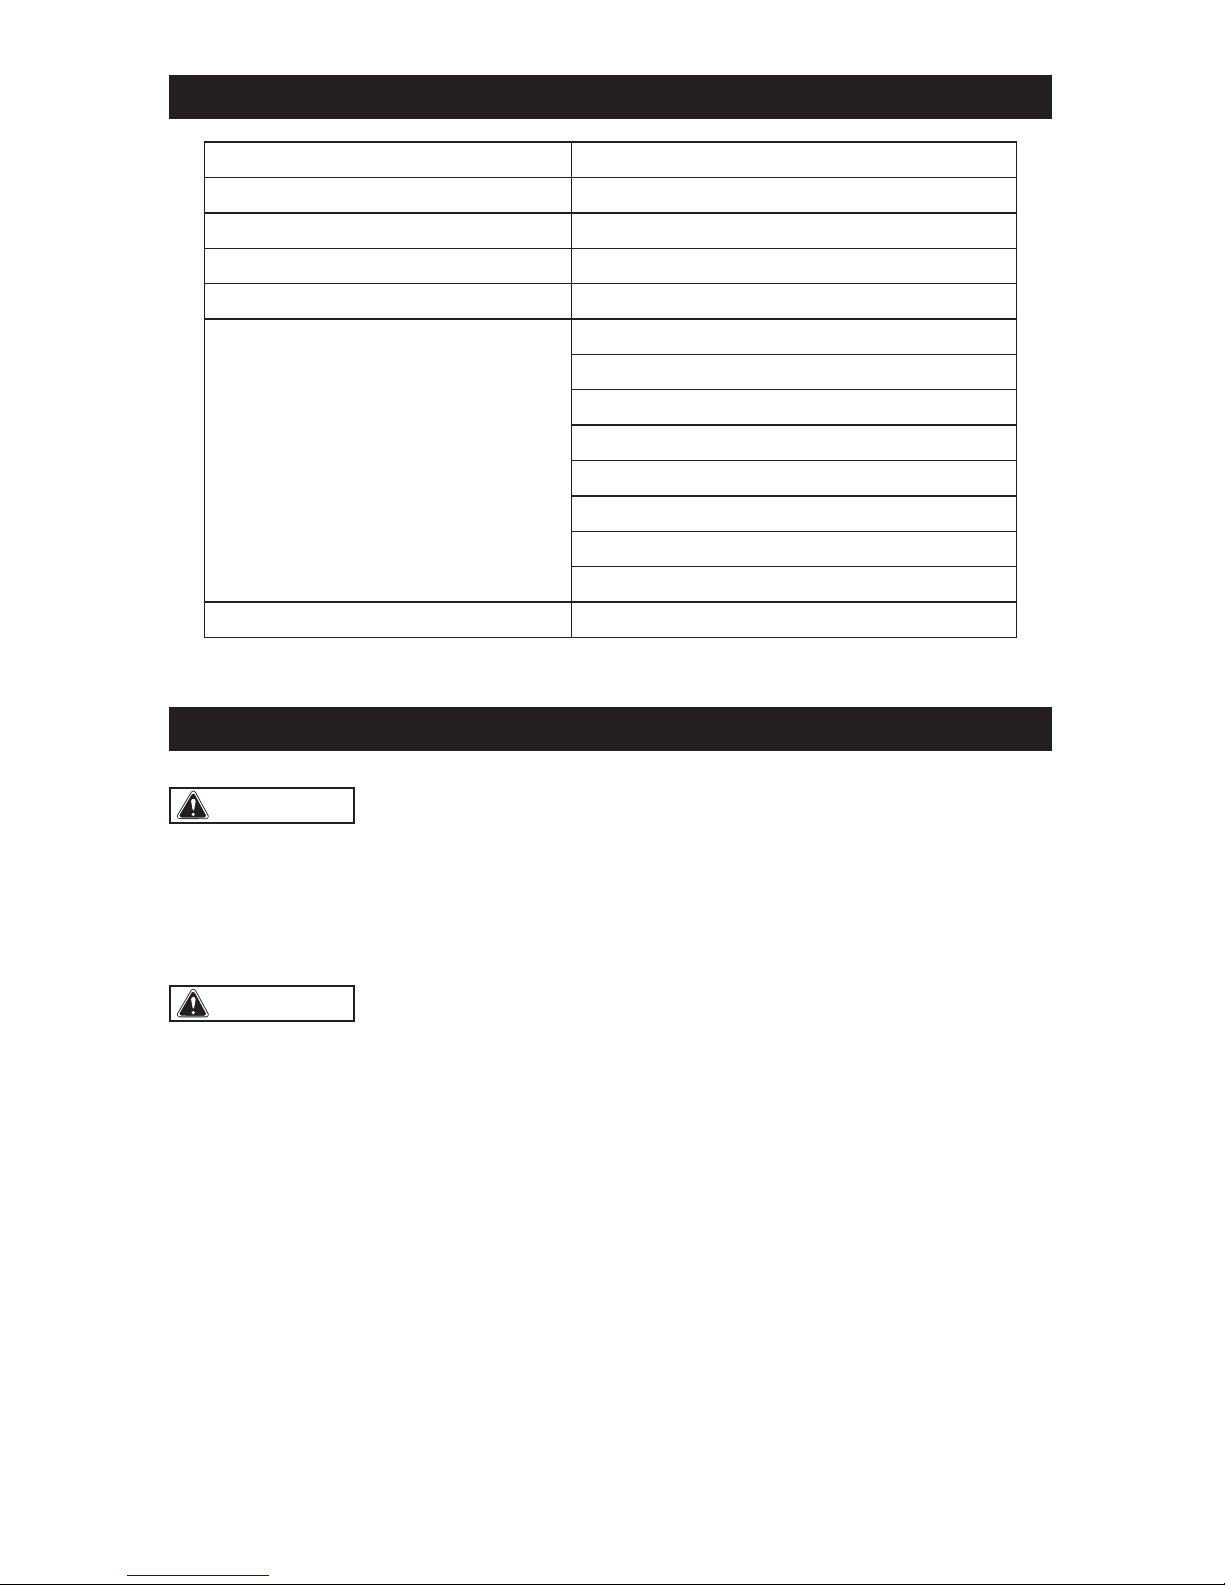
SPECIFICATIONS
AM Tuner 530-1710 KHz
FM Tuner 87.5-108 MHz
Auxiliary Cable 3.5 mm plug
USB Charge Port 5V DC, 1 A (max)
Weight (without battery) 1 lbs. 8 oz.
Compatible Battery Packs 252-8024
252-8028
252-8029
252-8030
252-8031
252-8032
252-8033
252-8034
Battery Chargers 252-8025, 252-8036, 252-8037, 252-8044
ASSEMBLY
WARNING:
If any part is broken
or missing, DO NOT attempt to attach the
battery pack, or operate the tool until the
broken or missing part is replaced. Failure
to do so could result in possible serious
injury.
WARNING:
Do not attempt to
modify this tool or create accessories not
recommended for use with this tool. Any
such alteration or modification is misuse
and could result in a hazardous condition
leading to possible serious injury.
CONTENTS
Radio and Operator’s manual
UNPACKING
1. Carefully remove the radio and any
accessories from the carton. Make sure
that all items listed in the packing list are
included.
2. Inspect the radio carefully to make sure
that no breakage or damage occurred
during shipping.
3. Do not discard the packing material
until you have carefully inspected and
satisfactorily operated the radio.
Page 10
Page 9
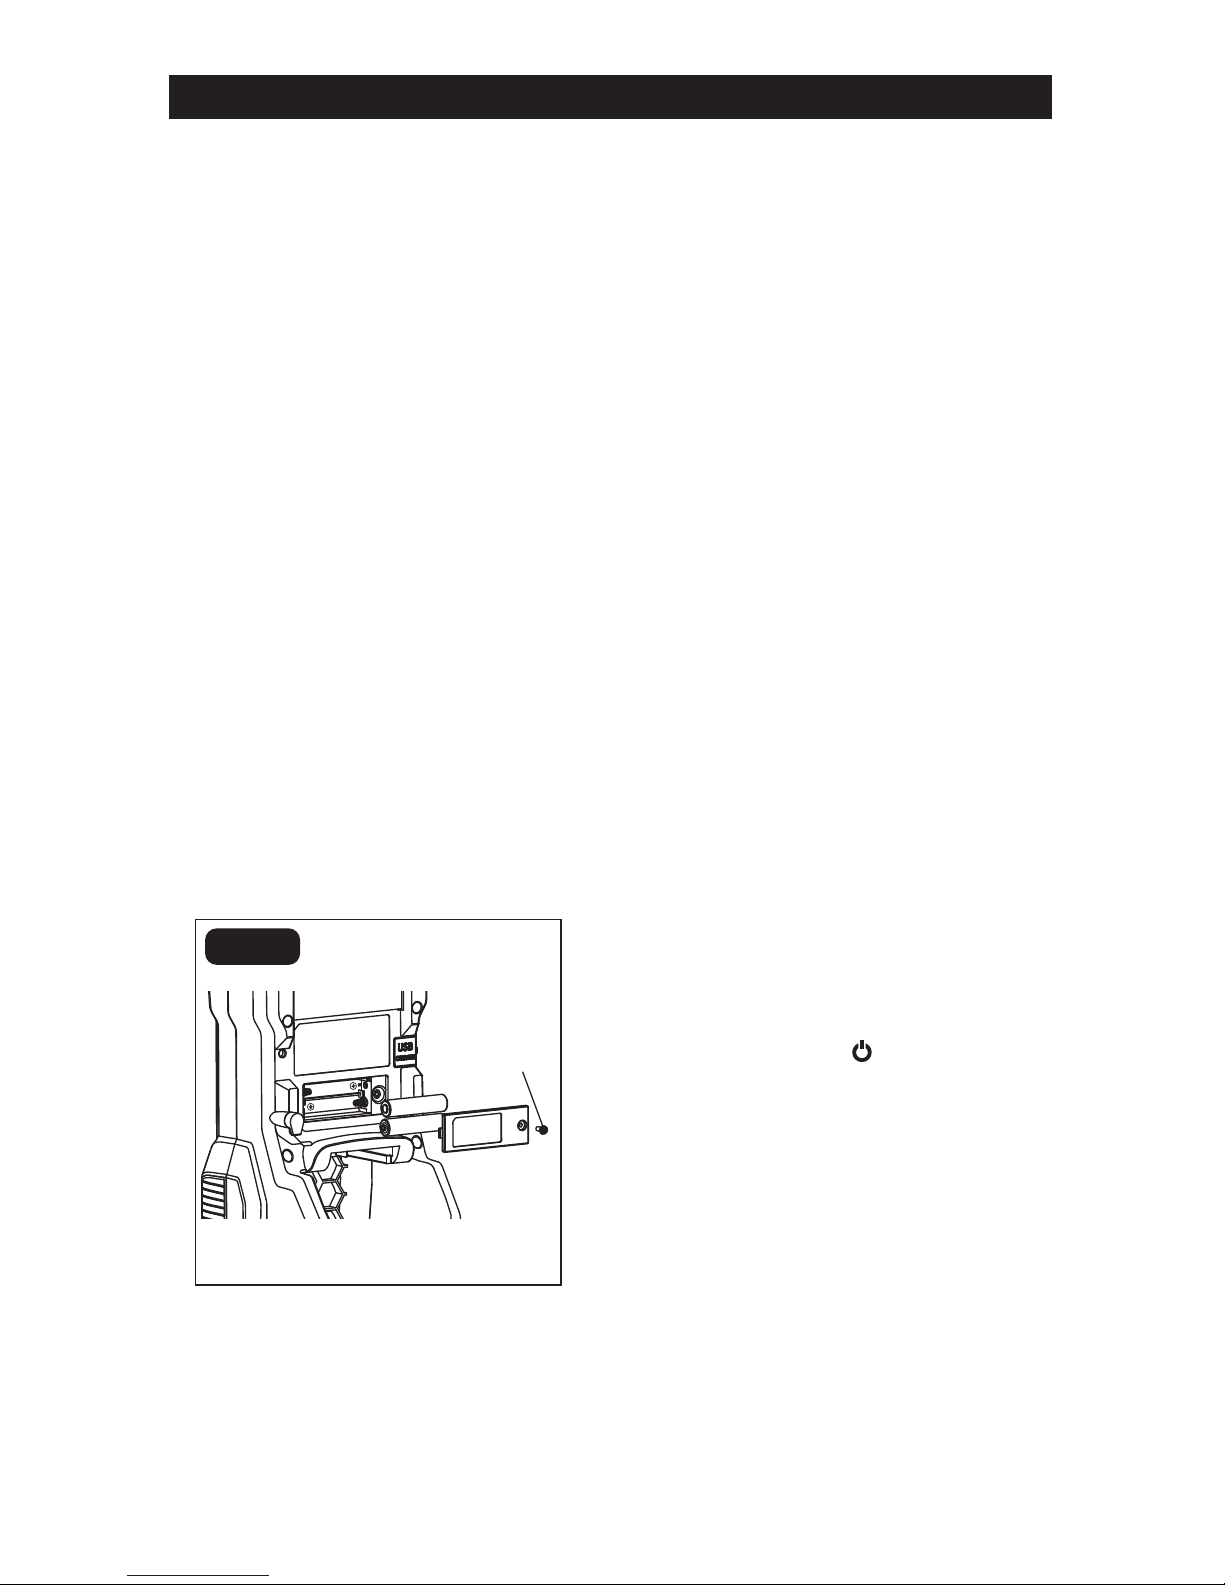
TO INSTALL/REMOVE
AAA BATTERIES
It is advisable to write down stored
frequencies before replacing the AAA
batteries if, at the time of AAA battery
replacement, the 18/20V battery pack
is removed or has no charge. The radio
will lose all settings previously stored in
memory when replacing the AAA batteries
in this situation, and they will require
reprogramming.
Always use new alkaline batteries for
replacement.
1. Use a Philips screwdriver to loosen the
screw from the battery cover. Remove
the screw
2. Remove the battery cover.
3. Install two new AAA batteries according
to polarity indicators inside the battery
compartment.
4. Replace the battery cover and secure it
with the screw.
NOTICE: Do not mix old and new batteries.
FIG. 1
Screw
TO INSTALL/REMOVE 18/20V
BATTERY PACK
To install:
1. Place the battery pack in the radio,
aligning the raised rib on the battery
pack with the groove in the radio’s
battery port.
2. Make sure that the latches on each side
of the battery pack snap into place and
the battery pack is secured to the radio.
To remove:
1. Depress the battery-release button,
located on the front of the battery pack
to release the battery pack.
2. Pull the battery pack and remove it from
the radio.
LCD DISPLAY
The LCD display on the front of the radio
illuminates when the radio is turned on. It
will display the radio mode and frequency/
channel setting. The LCD will be dark if there
is no operation within 10 seconds.
TURNING THE RADIO ON/OFF
Press and hold the button for three
seconds to turn the radio on or off.
NOTICE: If AAA batteries have been
installed, the time will be displayed when
the radio is off, even if the 18/20V battery
pack is removed.
OPERATION
Page 11

Page 10
OPERATION
ADJUSTING THE VOLUME
When the radio is turned ON, it will initially
return to the last volume setting used.
NOTICE: If both 18/20V battery pack and
AAA batteries are removed from the radio
or have no charge, the radio will return to
the default volume setting.
To increase the volume: Press the VOL+
button.
To decrease the volume: Press the VOL-
button.
To change volume quickly, hold the VOL+ or
VOL- button.
EQ ADJUSTMENT
To increase the bass sound, press the
BASS/CLOCK button and quickly release it.
To go back to the balance setting press the
BASS/CLOCK button and quickly release it
again.
MODE SELECTION
To switch modes, press the MODE/SCAN
button and quickly release it. The selected
mode will be shown in the digital display.
There are three modes:
• FM mode
• AM mode
• AUX mode
NOTICE: When turned on, the radio will
return to the last mode that was used,
unless both AAA batteries and 18/20V
battery pack are removed or lose charge.
CHANGING CHANNELS
The buttons are used to manually tune
to the desired radio frequency. The selected
frequency is displayed on the digital display.
To use tune feature:
1. Press the
or button and quickly
release to manually scroll through radio
channels one frequency at a time.
To use seek feature:
1. Press and hold the
button for three
seconds to tune to the next lowest
frequency with clear reception.
2. Press and hold the
button for three
seconds to tune to the next highest
frequency with clear reception.
To use scan feature:
1. Press and hold the MODE/SCAN button
for three seconds to seek through the band.
2. The scanning will pause when each
channel is found and all channels will
be saved automatically in the memory.
3. Press the
or button to stop scanning
To use the FM antenna:
Raise or lower radio antenna until the radio
channel can be heard clearly.
Page 12

Page 11
OPERATION
STORING A PRESET IN MEMORY
The memory feature saves up to 40
frequencies as presets in the radio’s
memory. You can save 20 frequencies in FM
mode and 20 in AM mode.
To store a frequency in memory:
1. Tune to the frequency you want to save.
2. Press and hold the PRESET button. A
memory location number will blink on
and off.
3. Press the
or button to select a
memory location.
4. Press the PRESET button and quickly
release it to store the frequency in the
selected memory location.
To recall a preset frequency:
1. Press the PRESET button and quickly
release it to cycle through the stored
frequencies.
SETTING THE CLOCK
The time is always displayed when the radio
is turned off and in AUX mode.
NOTICE: If both AAA batteries and
18/20V battery pack are removed
or lose their charge, the clock settings will be lost. Settings are not
affected by the removal of only the 18/20V
battery pack.
To set the clock:
1. Press and hold the BASS/CLOCK
button. The number representing the
hours will blink on and off.
NOTICE: If you do not press a button
within 10 seconds, the clock programming
feature will automatically return to the
previous setting.
2. Press the
or button to set the hour.
For AM/PM settings, scroll through
the first 12 numbers until AM/PM is
displayed.
3. Press the BASS/CLOCK button quickly.
The number representing the minutes
will blink on and off.
4. Press the
or button to set the
minutes.
5. Press the BASS/CLOCK button again to
save.
USING MEDIA PLAYER
1. Select AUX mode. Refer to MODE
SELECTION.
2. The RETAINER STRAP may be used to
secure the media player into position.
3. Connect the integrated auxiliary cable
to the media player .
4. The media player must be ON and
in PLAY mode for sound to be heard
through the speaker.
5. All media player controls can be used
normally while connected to the radio.
NOTICE: Volume for any device connected
through the auxiliary connector can be
adjusted using the volume control for that
device or with the VOL+ or VOL- buttons
on the radio.
• Turning the radio OFF will NOT turn the
media player OFF.
NOTICE: The integrated auxiliary cable
DOES NOT provide a charging function for
auxiliary devices.
CHARGING/POWERING
A USB DEVICE
The USB POWER PORT charges/pow-
ers most devices that can accept power
through a USB connection.
Page 13
Page 12
MAINTENANCE
WARNING:
To avoid serious
personal injury, always remove the battery
pack from the radio when cleaning or
performing any maintenance. Contact a
qualified service technician for all repairs.
WARNING:
When servicing, use
only identical replacement parts. Use
of any other parts may create a hazard
or cause product damage. For more
information, call the toll-free helpline, at
1-866-917-4374.
WARNING:
Avoid using solvents
when cleaning plastic parts. Most plastics
are susceptible to damage from various
types of commercial solvents and may be
damaged by their use. Use a clean cloth
to remove dirt, dust, oil, grease, etc.
WARNING:
Using compressed
air may be the most effective cleaning
method. Always wear safety goggles
when cleaning tools with compressed air.
TROUBLESHOOTING
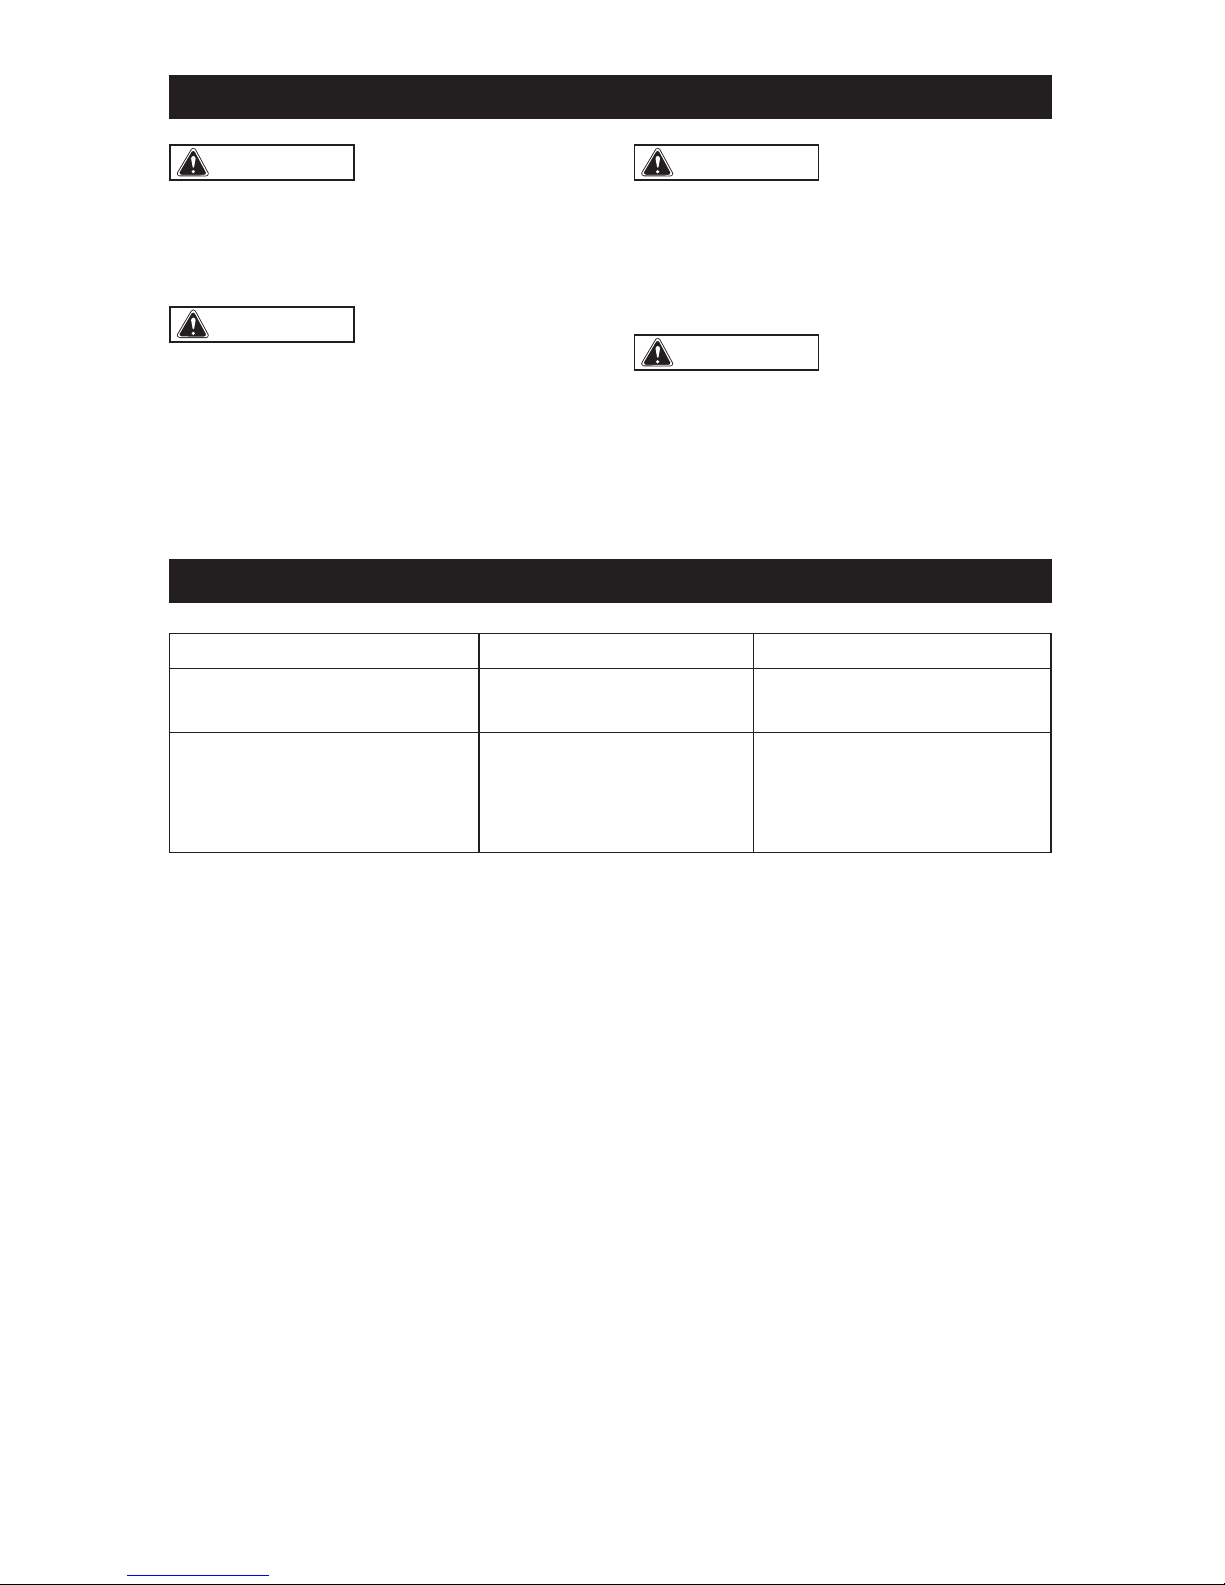
PROBLEM CAUSE SOLUTION
The radio does not work
The 18/20V battery pack
is depleted
Charge the battery pack
The radio lost clock memory
and preset channels after
the 18/20V battery pack is
removed.
The AAA size batteries are
depleted
Replace the AAA batteries
Page 14

Page 13
NOTES
Page 15
SAVE YOUR RECEIPTS
THIS WARRANTY IS VOID WITHOUT THEM
RADIO
WARRANTY
90-DAY MONEY BACK GUARANTEE:
This MASTERFORCE® brand power tool carries our 90-DAY Money Back
Guarantee. If you are not completely satisfied with your MASTERFORCE® brand
power tool for any reason within ninety (90) days from the date of purchase, return
the tool with your original receipt to any MENARDS® retail store, and we will provide
you a refund – no questions asked.
3-YEAR LIMITED WARRANTY:
This MASTERFORCE® brand power tool carries our famous No Hassle 3-Year Limited
Warranty to the original purchaser. If, during normal use, this MASTERFORCE® power
tool breaks or fails due to a defect in material or workmanship within three (3) years
from the date of original purchase, simply bring this tool with the original sales receipt
back to your nearest MENARDS® retail store. At its discretion, MASTERFORCE®
agrees to have the tool or any defective part(s) repaired or replaced with the same or
similar MASTERFORCE® product or part free of charge, within the stated warranty
period, when returned by the original purchaser with original sales receipt. Not
withstanding the foregoing, this limited warranty does not cover any damage that
has resulted from abuse or misuse of the Merchandise. This warranty: (1) excludes
expendable parts including but not limited to blades, brushes, belts, bits, light bulbs,
and/or batteries; (2) shall be void if this tool is used for commercial and/or rental
purposes; and (3) does not cover any losses, injuries to persons/property or costs. This
warranty does give you specific legal rights and you may have other rights, which vary
from state to state. Be careful, tools are dangerous if improperly used or maintained.
Seller’s employees are not qualified to advise you on the use of this Merchandise.
Any oral representation(s) made will not be binding on seller or its employees. The
rights under this limited warranty are to the original purchaser of the Merchandise
and may not be transferred to any subsequent owner. This limited warranty is in lieu
of all warranties, expressed or implied including warranties or merchantability and
fitness for a particular purpose. Seller shall not be liable for any special, incidental, or
consequential damages. The sole exclusive remedy against the seller will be for the
replacement of any defects as provided herein, as long as the seller is willing or able
to replace this product or is willing to refund the purchase price as provided above.
For insurance purposes, seller is not allowed to demonstrate any of these power tools
for you.
For questions / comments, technical assistance or repair parts – Please Call Toll
Free at: 1-866-917-4374. (M-F 8am – 6pm)
Page 16

09/2014
© 2014 Menard, Inc., Eau Claire, WI 54703
 Loading...