

Page 1

1.OUT LINE
HANDY-700 ,a compact type printer with various functions which may be used
as a hand-held/belt-hung, Battery-operated unit, Infrared interface or as desktop/wall-hung unit to meet a today printing needs.
1-1.FEATURES
*. Ultra small-sized portable and desk-top configuration.
*. Quiet and fast printing(50mm/sec) using the direct line thermal printing
method.
* One(1) hour continuous printing with fully charged Lit-ion battery
*. Extremely easy to load a paper by CLAMSHELL unit.
*. Easy maintenance and head cleaning.
*. Setting the baud rate, handshaking, International Characters, density ETC.
by external button.
*. Support for many bar code types(JAN/EAN-8,JAN/EAN-13,
CODE39,CODE128,CODE93).
*. Command selection of font sizes(12x24,8x16).
*. Current printer status.
*. Auto online mode
*. Self-test facility
*. Dump mode function.
Page 2
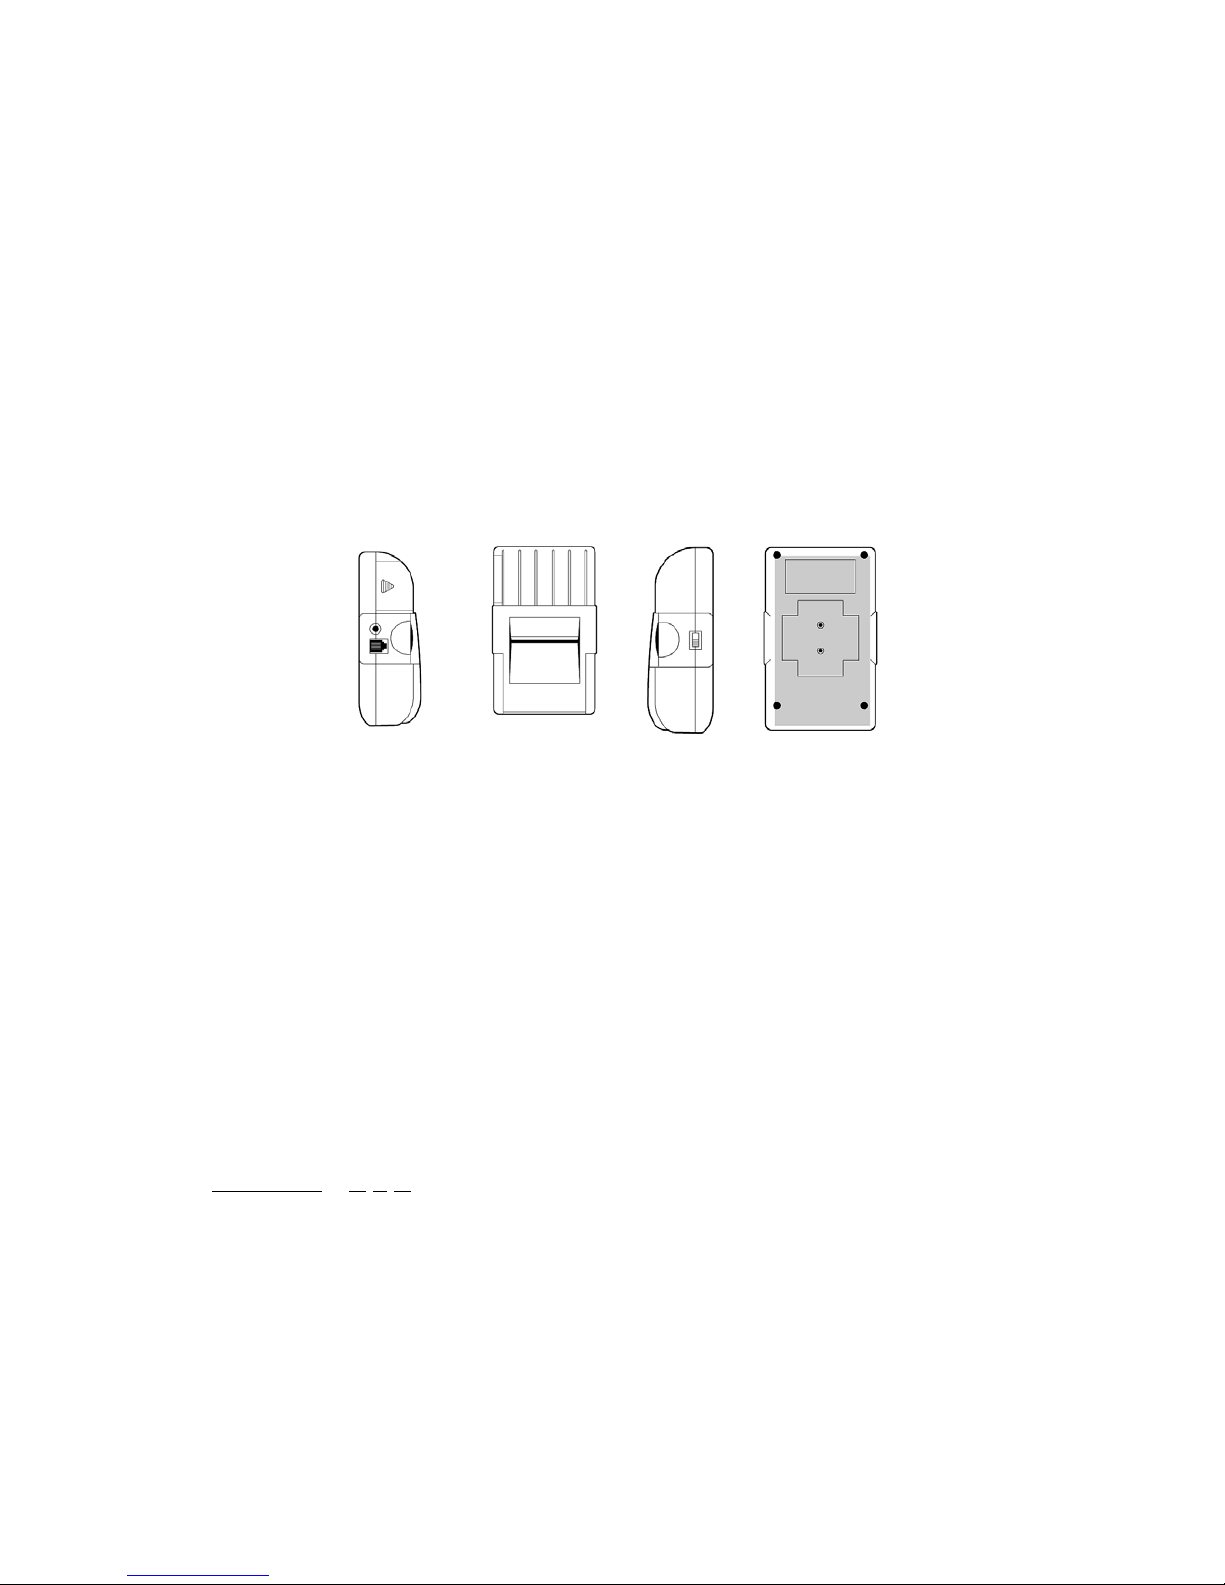
1-2. Printer Parts & Accessories.
1-2-1 Printer parts :
1) Printer cover
2) Operation panel
3) Power connector
4) Interface connector
5) Infrared window
6) Battery door
7) Power switch
8) Belt rack
1-2-2 Accessories.
The set, besides the printer main unit, contains the following accessories :
Roll paper (x 1)
Interface cable (x 1)
Rack mounting bracket (x 1)
Screw for bracket (x 2)
Instruction Manual (x 1)
Belt rack (x1)
Lit-ion battery (x1)
Adapter for recharging (x1)
1-2-3 Model classfication
Handy700 – R S B
Handy700 : Model Name
Interface : R(Serial RS-232C)
I(IrDA-Sir)
Character Set : S(Standard)
J(External font)
Power supply : D(No battery)
Page 3

B(Battery with external charging)
C(Battery with internal charging)
2.General Guide.
2-1.Description of printer parts
The HANDY700 printer is based around a patented easy-loading printer
mechanism designed. This mechanism consists of a main cavity into which a paper
roll is dropped for loading. The thermal print head is at the front of this cavity and a
rubber roller is attached to the lid of the mechanism. When the lid is closed, The
paper is trapped between the rubber roller and the print-head to give a close
alignment and a consistent pressure.
2-1-1.Indicator lights
The HANDY700 printer has two LEDs on the front panel.
The control panel lights provide information on printer conditions.
POWER LED(Green) : The POWER light is ON when power is turned ON.
The POWER light flashes when head temperature is high(60C).
BATTERY(Red) : The BAT light is ON when battery is under charge the battery.
When the battery is full charged, light is blinks every second.
The BAT light is OFF when printer have no line adapter.
ERROR(Green): The POWER light flashes every second when the paper roll is nothing or
The paper cover is opened.
NOTE : Printer go into online mode automatically and print the remaining
Data 5 seconds after closing paper cover.
2-1-2. Buttons.
FEED Button : Press the FEED button to advance paper. You can also press the FEED button
Continuously to feed paper continuously.
FEED button is not operated when ON line button is off.
SEL Button : SEL Button perform set-up program(See Chapter self-test and set-up mode).
2-1-3.Connectors
The Power connector is fitted on the right side of printer.
This Power connector is for Battery charging and direct DC power supply.
In case of battery with internal charging type, Printer does not work when printer is connected with
adapter directly, without battery.
Page 4

The Interface connector is fitted at right side of printer. This is 6pins RJ connector for RS-232C
Communication.
2-1-4.Belt rack holes
There are two holes in the base of the printer which allow the printer to be attached to vertical
Surface Such as a wall or waistband.
2-1-5.Sensors
The HANDY700 Printer is fitted with three sensors.
The DOOR –CLOSED SENSOR is to avoid the damaging the print-head, When the door is open.
The END-OF-PAPER SENSOR(EOP) detects the presence of paper near to the print-head.
To avoid damage the print-head, When no paper is detected.
The Infrared IrDA SENSOR is fitted on the front panel. This sensor is used to interface with
Infrared communication.
2-2.Paper specification.
Paper width : 57mm
Maximum paper roll diameter : 40mm
Maximum paper thickness : 60gsm
Emulsion(sensitive) side : On out side of roll.
Recommended paper : Mitsubishi,P220AG
2-3.Power supply.
2-3-1. Adapter :
The Internal battery charging adapter is a DC12V and current capacity of 1A or more.
External Direct power supply is DC12V and current capacity 2.5A or more.
It packs a DC JACK type connector in which the inner contact is with
External diameter(3.5mm),Internal diameter(1.3mm),length(10mm).
Page 5

2-3-2 Battery
1) Kind of Specified Products
Name : Camcorder battery pack
Pack type : IN-5XL
Cell type : LITHIUM-ION
2) Basic Characteristics
Normal Voltage : 7.2V
Minimum Capacity : 1650mAh
Charge Conditions : Charge Voltage : 8.40±0.05V
Maximum Charge Current : 1650mAh
Charge Method : CCCV(Constant Current/Constant Voltage)
Discharge Condition : Maximum Discharge Current : 2475mAh(1.5C)
Discharge End Voltage : 5.5V/pack
Temperature : Charge : 0 ~ +45°C
Discharge : -10 ~ +40°C
Storage : -20 ~ +50°C within a month(50% charged condition)
Long term Storage : -20 ~ +35°C within 3 months(50% charged condition)
Relative Humidity : 65 ±20%
Weight : About 100g
2-3-3 Charging battery
1) Turn OFF the power switch, Connect the adapter to the printer and make the adapter Electrified
2)then begin to charge. Full charging may need 3 hours under condition of no electric energy in battery.
Battery light flash every second when it is charged fully.
3)Printer does not operate normally when the battery energy is about exhausts.
At that time battery light is ON .
NOTE : Normally, Printer does not work when printer is connected with adapter directly
Without battery.
4)When printer only uses full charged battery without external power connection, It will
Work one(1) hour printing continuously.
Page 6

2-4.Specifications
.
Printing method Direct thermal
No. of columns 32 columns : 384 dots/lines
Character size 1.5mm x 3.0mm (12x 24)
Line pitch 4.0mm
Paper 57.5 x 60mm
Interface Serial(RS-232C) and IrDA
International character
U.S.A., FRANCE, U.K., DENMARK I,
SWEDEN,ITALY, SPAIN, JAPAN,
NORWAY, DENMARK II, KOREA
Buffer 7Kbyte(option:128KByte)
Bar code UPC-A,EAN13,EAN8, ITF, CODABAR,
CODE39,CODE93, CODE128
Mechanical lifetime 50Km
Baud rate 2400 – 115200 bps
Power requirement
12V, 1.2A (With Battery)
12V, 3A (Without battery)
Battery Lit-ion 7.2V
Operating temperature
0 – 40 °C
Humidity 20 - 80 %
Dimensions(mm) 92 x 140 x 51
Page 7

3.Operation
.
3-1.Precautions for installation
.
HANDY-700 Printer may be installed in a variety of applications but, to Maintain
your unit in optimum working conditions, the following recommendations should
Be followed.
Avoid dirty or dusty location or those with excessive heat or humidity.
Choose a stable level or solid wall on which to mount the printer.
Ensure that the adapter provides the correct operating voltage.
Care must be taken to ensure that any power adapter supplied by the customer meets
With national safety requirements and has the correct output voltage and polarity.
3-2.Opening/Closing of printer cover
Applying your finger on both side of printer, push it up when the lock is released as
Shown in the drawing. It open by about 120° centering around the fixed axis.
For the closing. Pressing the Top cover, Tightly close it until click sound is heard.
Also, confirm, on closing, that paper is free of slackening.
3-3.Installing paper.
Please ensure that the correct grade of paper is used with the HANDY-700.
It is extremely easy to load a new paper roll into the printer by following thease
simple steps :
Open the cover and remove the old paper core.
Drop the new roll into the reservoir so that it will rotate in the correct direction
(i.e. so that the emulsion side of the paper outside rests against the print-head)
Insert the edge of the roll paper into the hole of cover and closing cover.
Page 8

NOTE : If there are unprinted data in the memory after changing paper, The printer
Go into online mode automatically and print the remaining data 5 seconds
After closing paper cover.
3-4.Self-test.
The purpose of the self test The self test checks whether the printer has any
problems.
When the printer does not function properly, Please contact the supplier.
* The self test checks the following
+.Control circuit functions +.Software version
+. Setting parameters +. Printer quality
* Running the self test
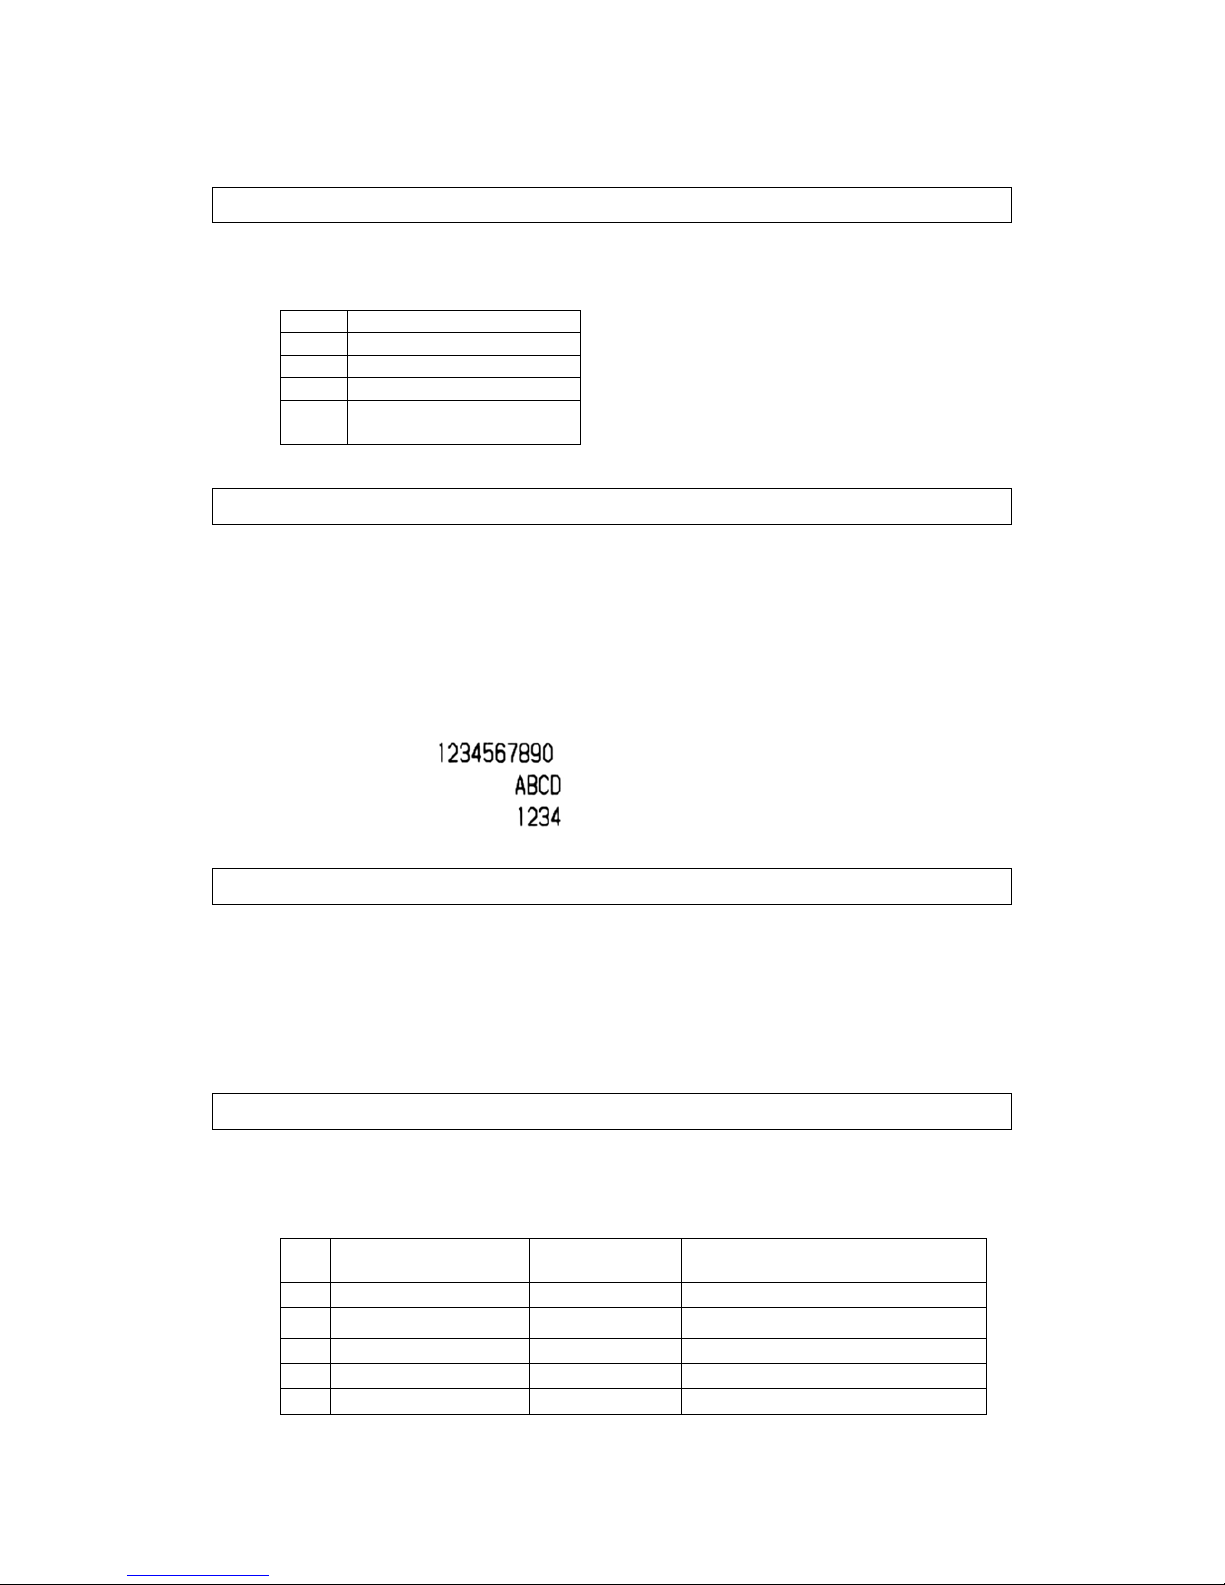
+.Make sure the cover is closed and roll paper is installed correctly.
+.Turn on the power while pressing the FEED button. The self test begins.
+.The following contents are printed for printer current status printing.
Version : 1.1.6
Data bit : 8 bit
Parity : None
Baud rate : 9600 bps
Handshaking : DTR
Country : USA
Print mode : Text(upright)
Paper : Normal paper
Density : 100%
IrDA : IrDA-SIR
Buffer size : 7000Byte
Head volt : 7.1V
Head temp : 23C
*
+ The self test automatically ends after printing on the paper.
+ The printer becomes ready to receive data from the host.
Page 9
3-5.Set-up mode.
Following thease step when setting the program.
Turn ON the power while pressing SEL button then printer will go into set-up
Mode And print the current parameter status.
The power LED indicator will flash every second to indicator SET-UP mode.
Each time the FEED button is pressed and released the next printer parameter is
Printed. Pressing the SEL button will cause the status of that parameter to change
In the sequence shown.
Once the correct status has been selected then press SEL button while pressing
FEED button.
NOTE : If no buttons are pressed for 15 seconds ,The set-up mode is automatically
Terminated without changing the original parameters
.
SET-UP S/W FEED S/W
Baud rate 2400,4800,9600,19200,38400,57600,115200
Handshaking DTR, X-on/X-off
Country USA,Korea,Cyrillic,Denmark2,Norway,Japanese,Spain,Italy,Sweden,Denmark1,UK,
Germany,France
Print mode Text(upright), Data(inverted)
Paper Normal paper, Reprint paper
Density 50%,55%,60%,65%,70%,75%,80%,85%,90%,95%,100%,105%,110%,115%,120%,
125%,130%,135%,140%,145%,150%
IrDA Chamjin –Ir, IrDA-Sir, BHT-Ir(DENSO),EL-ME-Ir
3-6.Dump mode
.
*The purpose of Dump mode
Dump mode check whether printer receive data correctly from host or not.
*Running the dump mode
Turn ON the power while pressing SEL and FEED button together ,Then printer
Print [DUMP TEST] and wait data from host.
3-7.Maintenance.
The HANDY-700 printer is requires very little maintenance but may benefit From
cleaning as detailed below.
Cleaning the printer
The external surfaces may be kept clean by wiping a lightly damp cloth but this
Only be done after unplugging all electronic connections. Great care should
Be taken to ensure that the inside surfaces are kept dry at all times and that the
External surfaces are thoroughly dry before re-making any electrical connections
Page 10

Cleaning the print-head
Depending of the environment in which the printer is used, The print-head may
The print-head may accumulate dust. Therefore it is necessary to clean it periodically.
In order to maintain a good print quality. The cleaning period is dependent on the
Environment and usage of the printer but the print-head should be cleaned at least
Once a year or up to once a month in heavy duty applications.
The print-head should always be cleaned immediately if the print becomes visibly
Fainter due to contamination of the print-head. To clean the print-head :
+.Switch off the printer.
Never clean the head immediately after printing, The print-head may be hot.
+. Open the printer cover and remove the paper roll.
+. Clean the heating dots of head with a cotton stick containing a alcohol solvent
(ethanol, methanol or IPA) but do not touch the print-head with your fingers.
+. Allow the solvent to dry.
+. Reload the paper and close the cover.
3-8.Connectors & Cables
.
3-8-1. Interface connectors
1).RS-232C
Page 11

IrDA Protocol
1. Transmission control character
SYMBOL VALUE SYMBOL VALUE
SOH
STX
ETX
PR_RES(ACK)
PR_RES(NAK)
01h
02h
03h
06h
15h
PR_RES(WAIT)
PR_START
PR_END
PR_DATA
PR_STAT
3Bh
31h
32h
33h
34h
2. FCS Calculation
2.1 Polynomial(CCITT X.25 )
2.2 Examination( "C" Language)
union u_crc{
unsigned char low;
unsigned char buf[2];
unsigned int value;
}crc;
unsigned int crctable[260];
void Crc(unsigned char value){ crc.value=crc.buf[1] ^ crctable[crc.low^value] ;}
void CrcTableMake(void){
unsigned int i,j,k;
for(i=0;i<256;i++){
k=i;
for(j=0;j<8;j++){
if(k&1) k=(k>>1)^0x8408U;
else k>>=1;
}
crctable[i]=k;
}
void main(void){
crc.value=0xFFFFU; //Init
Crc(0x30);
Crc(0x31);
printf("Result:0x%04X\n",crc.value^0xFFFFU);
}
3. Transmmission Format
3.1 Status check
<State Response>
<State Command >
Page 12

3.2 Data format
<Start Response>
<Start Command>
<Data Response>
<Data Command>
<End Response>
<End Command>
(Note) Page : Page number( 1 to 7, 1 to 7, …)
Length : data size(0 to 2Kbyte)
4. Example(Normal transmission)
4.1 Normal phase 1
Host Direction Printer
Start Command
Start Response(Ack)
Data1 Command
Data1 Response(Ack)
.
.
.
DataN Command
DataN Response(Ack)
End Command
End Response(Ack)
4.2 Normal phase 2
Host Direction Printer
Start Command
Start Response(Ack)
Data1 Command
Data1 Response(Ack)
State Command
State Response(Ack)
Page 13

Data2 Command
Data2 Response(Ack)
End Command
End Response(Ack)
4.3 Normal phase 3
Host Direction Printer
Start Command
Start Response(Ack)
Data1 Command
Data1 Response(Ack)
Data2 Command
Wait Response
Wait 0.5sec(max)
Data2 Response(Ack)
End Command
End Response(Ack)
5. Abnormal transmission
5.1 Phase with no receive command over 3 times
Host Durection Printer
Command
(Wait 0.5sec )
Command
(Wait 0.5sec )
Command
(Wait 0.5sec )
(No action due to receipt
of no command)
The status is that obstacles or power of the printer is off.
The host indicate “no communication proceed”
5.2 Phase with no start command
Host Direction Printer
Start Command
(Wait 0.5sec )
(No action due to receipt
of no Command)
Start Command
Start Response(Nak)
Start Command
Start Response(Ack)
Data Command
Data Response(Ack)
End Command
End Response(Ack)
5.3 Phase 1 with no data command
Host Direction Printer
Start Command
Start Response(Ack)
Page 14

Data1 Command
(Wait 0.5sec )
(No action due to receipt of no command)
Data1 Command
Data1 Response(Ack)
Data2 Command
Data2 Response(Nak)
Data2 Command
Data2 Response(Ack)
Data3 Command
(Due to no response,Waiting
for 0.5sec)
Data3 Response(Ack)
Data3 Command
Data3 Response(Ack)
(The printer,that received data3 two times,Only send ACK
response and do not print second data3)
End Command
End Response(Ack)
5.4 Phase 2 with Data Command
HOST Direction Printer
Start Command
Start Response(Ack)
Data1 Command
Data1 Response(Nak) or no response
Data1 Command
Data1 Response(Nak) or no response
Data1 Command
Data1 Response(Nak) or no response
End Command
(Ignore the Response)
Due to obstacle or printer’s problem,The host indicate no communication
Proceed
5.5 Phase 3 with no Data Command
Host Direction Printer
Start Command
Start Response(Ack)
Data1 Command
(No receipt of data1 response within
0.5sec after receiving wait response
Wait Response
Data1 Response(Ack)
Data1 Command
Data1 Response(Ack)
(The printer,that receiced data1 two times,Only send ACK
response and do not print second data1
Data2 Command
Data2 Response(Ack)
End Command
End Response(Ack)
5.6 Phase with no End Command
Host Direction Printer
Start Command
Start Response(Ack)
Data Command
Page 15

Data Response(Ack)
End Command
End Command
End Command
(Because there was nornal
printing action,This case does
not involve in error)
(No action due to receipt of no Command)
6. Example
6.1 Status check
Host Direction Printer
01h,02h,34h,DFh,87h,03h
(stat:00h)
01h,02h,06h,00h,97h,5Bh,03h
(Note : Refer ESC v command for status valus)
6.2 Printing data
Host Direction Printer
01h,02h,31h,72h,D0h,03h
01h,02h,06h,00h,97h,5Bh,03h
01h,02h,33,02h,00h,01h,1bh,40h,4Bh,43h,03h
01h,02h,06h,01h,1Eh,4Ah,03h
01h,02h,33,05h,00h,02h,30h,31h,32h,33h,34h,
99h,ACh,03h
01h,02h,06h,02h,85h,78h,03h
01h,02h,33,05h,00h,03h,35h,36h,37h,38h,39h,
37h,DFh,03h
01h,02h,06h,03h,0Ch,69h,03h
01h,02h,33,01h,00h,04h,0Ah,EBh,D2h,03h
01h,02h,06h,04h,B3h,1Dh,03h
01h,02h,33,08h,00h,05h,1bh,21h,10h,30h,31h,
32h,33h,34h,0Ah,22h,93h,03h
01h,02h,06h,05h,3Ah,0Ch,03h
01h,02h,33,08h,00h,06h,1bh,40h,35h,36h,37h,
38h,39h,10h,51h,03h
01h,02h,06h,06h,A1h,3Eh,03h
01h,02h,33,09h,00h,07h,1bh,21h,20h,30h,31h,
32h,33h,34h,0Ah,26h,1Dh,03h
01h,02h,06h,07h,28h,2Fh,03h
01h,02h,33,09h,00h,01h,1bh,21h,30h,30h,31h,
32h,33h,34h,0Ah,3Dh,40h,03h
01h,02h,06h,01h,1Eh,4Ah,03h
01h,02h,32h,E9h,E2h,03h
01h,02h,06h,00h,97h,5Bh,03h
<Result>
Page 16

Command Summary
Command Name Page
HT Horizontal tab
LF Print and line feed
FF
(1)Print and return
(2)Print and feed label to print starting position
CAN Cancel print data
ESC FF Print data in label mode
ESC ! n Select print modes
ESC $ nL nH Set absolute print position
ESC * m nL nH[d1…dk] Select bit-image mode
ESC – n Turn underline mode on/off
ESC 2 Set 1mm line spacing
ESC 3 n Set line spacing
ESC @ Initialize printer
ESC J n Print and feed paper
ESC R n Select international character set
ESC d n Print and feed paper n lines
ESC E Emphasized character
ESC SP Setting of character space
ESC V n Turn 90 clockwise rotation mode on/off
ESC v Transmit printer status
ESC { n Set/cancel upside-down character printing
FS & Setting Kanji mode
FS ! Specify Kanji print mode
FS - Kanji underline
FS . Cancel Kanji mode
FS S Setting Kanji character space
FS W 4 fold character of Kanji
FS 2 External character
GS ! n Select character size
GS B n Turn white/black reverse printing mode
GS H n Select printing position of HRI characters
GS L nL nH Set left margin
GS h n Select height of bar code
GS k m[d1…dk] NUL Print bar code
GS k m n[d1…dn] Print bar code
GS w n Select bar code width
GS x n Set bar code print starting position
DC2 ! n Select print paper
DC2 # n Select print density
DC2 E Set the printing finished
DC2 T Test Printing
DC2 m s nL nH The length of mark position
DC2 * r n [d1…dn] Set bit image
DC2 V nL nH Set MSB bit image
DC2 v nL nH Set LSB bit image
FS C n Select code system
Page 17

HT
(Horizontal tab)
[Format] ASCII : HT
Hex : 09
Decimal : 9
[Description] Moves the print position to the horizontal tab position.
This command is ignored If the next horizontal tab go over possible printing area.
Horizontal tab position(units:dot)
- Font A( 8x16): 64,128,192,256,320
- Font B(12x24): 96,192,288
[EX] Data : “1234567890123456789012”,0Ah,”123”,09h,”456”,09h,
”789”,09h,”012”,09h,”345”,0Ah
Print :
LF
(Print and line feed)
[Format] ASCII : LF
Hex : 0A
Decimal : 10
[Description] Print the data in print buffer and performs next line feed.
[EX] Data : “1234567890”,0Ah,”12345”,0Ah
Print :
FF
(Print and return, Print and feed label to print starting position)
[Format] ASCII : FF
Hex : 0C
Decimal : 12
[Description] (1) Standard mode : Print data in the buffer and feed the paper to cutting line.
(2) Label mode : Print data in the print buffer and moves to starting position of next page.
[Reference] DC2 m s nL nH , DC2 E
[EX] Data : ”1234567890”,0Ch,”ABCDEF”,0Ah
Print :
CAN
(Cancel print data)
[Format] ASCII : CAN
Hex : 18
Decimal : 24
[Description] Cancel print data in current line.
Page 18

[EX] Data : “12345”,18h,”ABCDE”,0Ah
Print :
ESC FF
(Print data in label mode)
[Format] ASCII : ESC FF
Hex : 1B 0C
Decimal : 27 12
[Description] In the Label mode,Print the data in the print buffer and moves to starting position of
next pages.
[Reference] FF, DC2 E,DC2 m s nL nH
ESC ! n
(Select print modes)
[Format] ASCII : ESC ! n
Hex : 1B 21 n
Decimal : 27 32 n
[Description]
Bit Off/On Hex Decimal Function
Off 00 0 Character font A(12x24) selected. 0
On 01 1 Character font B(8x16) selected.
1
2
3
Off 00 0 Double-height mode not selected 4
On 10 16 Double-height mode selected
Off 00 0 Double-width mode not selected 5
On 20 32 Double-width mode selected
6
Off 00 0 Underline mode not selected 7
On 80 128 Underline mode selected
[EX] Data : “12”,1Bh,21h,01h,”34”,1Bh,21h,10h,”56”,1Bh,21h,20h,”78”,
1Bh,21h,80h,”90”,0Ah
Print :
ESC $ nL nH
(Set absolute print position)
[Format] ASCII : ESC $ nL nH
Hex : 1b 24 nL nH
Decimal : 27 36 nL nH
[Description] Set the print position of beginning(Left).
[nL + nH x 256] x 0.125 mm
0<= n <300
Default : 0
[Reference] GS L nL nH
[EX] Data : “1234567890”,0Ah,1Bh,”$”,3Ch,00,”1234”,0Ah
Print :
Page 19

ESC * m nL nH[d1…dk]
(Select bit-image mode)
[Format] ASCII : ESC * m nL nH [d1…dk]
Hex : 1B 2A m nL nH [d1…dk]
Decimal : 27 42 m nL nH [d1…dk]
[Description] Select bit-image mode using n for the number of dots specified by nL and nH,as follows;
Print bit-image mode continouse : (1) Set the line specing to 24
(2) Select bit-image mode
(3) LF(Line feed)
(4) Repeat (2) and (3).
Verticak Direction Horizontal Direction
M Mode
No. of Dots Number of Data(k)
0 8-dot single-density 8 nL + nH x 256
1 8-dot double-density 8 nL + nH x 256
32 24-dot single-density 24 (nL + nH x 256) x 3
33 24-dot double-density 24 (nL + nH x 256) x 3
ESC – n
(Turn underline mode on/off)
[Format] ASCII : ESC - n
Hex : 1B 2D n
Decimal : 27 45 n
[Description] Turns underline mode on or off,based on the following values of n.
N Function
0,48 Turns off underline mode
1,49 Turns on underline mode(1-dot thick)
2,50 Turns on underline mode(2-dot thick)
[Reference] ESC ! n
[EX] Data : “123”,1Bh,”-“,01,”456”,1Bh,”-“,00,”789”,0Ah
Print :
Page 20

ESC 2
(Set default line spacing)
[Format] ASCII : ESC 2
Hex : 1B 32
Decimal : 27 50
[Description] Set the line spacing to 32(default) for each lines.
[Reference] ESC 3 n
ESC 3 n
(Set line spacing)
[Format] ASCII : ESC 3 n
Hex : 1B 33 n
Decimal : 27 51 n
[Description] Set the line spacing.
Spacing : n x 0.125mm(1 dot size)
Range : 24<= n <= 255,
Default : 32
[Reference] ESC 2
[EX] Data : “12345”,0Ah,1Bh,”3”,40h,”12345”,0Ah, 1Bh,”@”,”67890”,0Ah
Print :
ESC @
(Initialize printer)
[Format] ASCII : ESC @
Hex : 1B 40
Decimal : 27 64
[Description] Clear the data in the print buffer and resets the printer mode (to the same state as when the
power is turned on)
[EX] Data : 1Bh,”-“,01,”12345”,0Ah,”12345”,1Bh,”@”,”ABCD”,0Ah
Print :
ESC J n
(Print and feed paper)
[Format] ASCII : ESC J n
Hex : 1B 4a n
Decimal : 27 74 n
[Description] Print the data in the print buffer and feeds nx0.125mm.
[Reference] ESC d n
[EX] Data : ”12345”,1Bh,4Ah,40h,”ABCD”,0Ah
Print :
Page 21

ESC R n
(Select international character set)
[Format] ASCII : ESC R n
Hex : 1B 52 n
Decimal : 27 82 n
[Description] n selects an international character set from the following table.
[EX]
N Character Set N Character Set
0 U.S.A. 6 Italy
1 France 7 Spain
2 Germany 8 Japan
3 U.K. 9 Norway
4 Denmark I 10 Denmark II
5 Sweden 11 Korea
Default : n = 0 (In case of no external ROM))
Default : n = 8 (In case of external Japanese ROM)
Default : n = 11(In case of external Korean ROM)
Default : n = 0(In case of external other cuntry ROM)
ESC d n
(Print and feed paper n lines)
[Format] ASCII : ESC d n
Hex : 1B 64 n
Decimal : 27 100 n
[Description] Print the data in the print buffer and feed the paper n lines..
[Reference] ESC J n
[EX] Data : ”12345”,0Ah,1Bh,64h,02h,”ABCD”,0Ah
Print :
ESC v
(Transmit printer status)
[Format] ASCII : ESC v
Hex : b 76
Decimal : 27 118
[Description] Transmit current status to host(Paper,voltage,temperature).
[Return] 1Byte status return
Bit 1 0
0(Paper) Paper not present Paper present
1(Temp) Head high temperature Head normal temperature
2(Label paper) Label paper not present Label paper present
3(Label hole) Label hole not present Label hole present
4(Cover) Open Close
5(Battery volt) Battery low Battery high
6(On-line) Off-line On-line
7(paper mode) Label print Normal print
Page 22

ESC { n
(Set/cancel upside-down character printing)
[Format] ASCII : ESC { n
Hex : 1B 7B n
Decimal : 27 123 n
[Description] Sets or cancel the Upside-down characters.
(Valid only when input at the beginning of a line.)
bit of n = 1(Sets), bit of n = 0(Cancel).
Default = 0
[EX] Data : ”12345”,0Ah,1Bh,7Bh,01h,”ABCDE”,0Ah
Print :
GS ! n
(Select character size)
[Format] ASCII : GS ! n
Hex : 1D 21 n
Decimal : 29 33 n
[Description] Selects the character width/height.
Bit Off/On Hex Decimal Function
Off 00 0 Double-height mode not selected 0
On 01 1 Double-height mode selected
Off 00 0 Double-width mode not selected 4
On 10 16 Double-width mode selected
[Reference] ESC ! n
[EX] Data : “12”,1Dh,21h,01,”34”,1Dh,21h,10h,”56”,1Dh,21h,11h,”78”,0Ah
Print:
GS B n
(Turn white/black reverse printing mode)
[Format] ASCII : GS B n
Hex : 1D 42 n
Decimal : 29 66 n
[EX] Turns on or off white/black reverse printing mode.
If, n=0 , white/black reverse printing mode is turned off(Default).
If, n=1 , white/black reverse printing mode is turned on.
[EX] Data : “12345”,1Dh,42h,01h,”ABCD”,1Dh,42h,00h,”67890”,0Ah
Print :
Page 23
GS H n
(Select printing position of HRI characters)
[Format] ASCII : GS H n
Hex : 1D 48 n
Decimal : 29 72 n
[Description] Selects printing position of HRI characters when printing a bar code.
n Printing position
0,48 No printed(default)
1,49 Above the bar code
2,50 Below the bar code
3,51 Both above and below the
Bar code
[Reference] GS w n, GS h n, GS k m[d1…dk] NUL, GS k m n[d1…dn]
GS L nL nH
(Set left margin)
[Format] ASCII : GS L nL nH
Hex : 1D 4C nL nH
Decimal : 29 76 nL nH
[Description] Sets the left margin.
Sets the left margin using nL and nH : [nL + nH x 256] x 0.125 mm
Range : 0 ≤ n < 300 (default = 0)
[Reference] ESC $ nL nH
[EX] Data : “1234567890”,0Ah,1Dh,4Ch,50h,00h,”ABCD”,0Ah,”1234”,0A
Print :
GS h n
(Select height of bar code)
[Format] ASCII : GS h n
Hex : 1D 68 n
Decimal : 29 104 n
[Description] Selects the height of bar code.
Height of bar code : n x 0.125 mm
Range : 0 ≤ n < 255 (default :100)
[Reference] GS w n, GS H n, GS k m[d1…dk] NUL, GS k m n[d1…dn]
GS k m[d1…dk] NUL
(Print bar code)
[Format] ASCII : GS k m [d1…dn] NUL
Hex : 1D 6B m [d1…dn] 00
Decimal : 29 107 m [d1…dn] 0
[Description] Selects a bar code system and prints the bar code.
M selects a bar code system as follows;
M Bar Code System Number of
characters
Remarks
0 UPC-A
11 ≤k ≤12 48 ≤d ≤57
1 UPC-E
11 ≤k ≤
12
48 ≤d ≤57
2 EAN13(JAN)
12 ≤k ≤13 48 ≤d ≤57
3 EAN8(JAN)
7 ≤k ≤8 48 ≤d ≤57
4 CODE39
1 ≤k 48 ≤d ≤57, 65 ≤d ≤90
Page 24

32,36,37,43,45,46,47
5 ITF
1 ≤k 48 ≤d ≤57
6 CODABAR(NW-7)
1 ≤k 48 ≤d ≤57, 65 ≤d ≤68
36,43,45,46,47,58
7 CODE128A
2 ≤k 0 ≤d ≤127
8 CODE128B
2 ≤k 0 ≤d ≤127
9 CODE128C
2 ≤k 0 ≤d ≤127
[Reference] GS H n, GS w n, GS h n, GS k m n[d1…dn]
GS k m n[d1…dn]
(Print bar code)
[Format] ASCII : GS k m n [d1…dn]
Hex : 1D 6B m n [d1…dn]
Decimal : 29 107 m n [d1…dn]
[Description]
M Bar Code System Number of
characters
Remarks
65 UPC-A
11 ≤n ≤12 48 ≤d ≤57
66 UPC-E
11 ≤n ≤
12
48 ≤d ≤57
67 EAN13(JAN)
12 ≤n ≤13 48 ≤d ≤57
68 EAN8(JAN)
7 ≤n ≤8 48 ≤d ≤57
69 CODE39
1 ≤n 48 ≤d ≤57, 65 ≤d ≤90
32,36,37,43,45,46,47
70 ITF
1 ≤n 48 ≤d ≤57
71 CODABAR(NW-7)
1 ≤n 48 ≤d ≤57, 65 ≤d ≤68
36,43,45,46,47,58
72 CODE93
2 ≤n 0 ≤d ≤127
73 CODE128
2 ≤n 0 ≤d ≤127
[Reference] GS H n, GS w n, GS h n, GS k m[d1…dk] NUL
GS w n
(Select bar code width)
[Format] ASCII : GS w n
Hex : 1D 77 n
Decimal : 29 119 n
[Description] Sets the horizontal size of the bar code.
N specifies the bar code width as follows :
(1dot=0.125mm)
Binary-level Bar Code
N Module Width(dots) for
Multi-level Bar Code
Thin element width(dots) Thick elsment wodth(dots)
1 1 (0.125mm) 1 (0.125mm) 3 (0.375mm)
2 2 (0.250mm) 2 (0.250mm) 5 (0.625mm)
3 3 (0.375mm) 3 (0.375mm) 8 (1.000mm)
4 4 (0.500mm) 4 (0.500mm) (1.250mm)
- Multi-level Bar Code : UPC-A, UPC-E, EAN13(JAN), EAN8(JAN),
CODE93 CODE128
- Binary-level Bar Code : CODE39, ITF, CODABAR
- Default : 2
[Reference] GS H n, GS h n,GS k m [d1…dn] NUL, GS k m n [d1…dn]
Page 25

GS x n
(Set bar code print starting position)
[Format] ASCII : GS x n
Hex : 1D 78 n
Decimal : 29 120 n
[Description] Sets the bar code print position of beginning(left).
Sets the print position of beginning using the : n x 0.125 mm
Range : n ≤255
Default : 0
[Reference] GS H n, GS w n, GS h n, GS k m[d1…dk] NUL, GS h n, GS k m[d1…dn]
DC2 ! n
(Select print paper)
[Format] ASCII : DC2 ! n
Hex : 12 21 n
Decimal : 18 33 n
[Description] Selects the print paper(defaut = 0).
N Paper
0 Normal
1 Reprint
DC2 # n
(Select print density)
[Format] ASCII : DC2 # n
Hex : 12 23 n
Decimal : 18 35 n
[Description] Sets print density.
N Density N Density n Density
0 50% 7 85% 14 120%
1 55% 8 90% 15 125%
2 60% 9 95% 16 130%
3 65% 10 100% 17 135%
4 70% 11 105% 18 140%
5 75% 12 110% 19 145%
6 80% 13 115% 20 150%
Standard paper : Mitsubishi ,P220AG(100%)
DC2 E
(Set the printing finished)
[Format] ASCII : DC2 E
Hex : 12 45
Decimal : 18 69
[Description] Print data in the print buffer and moves to starting position of next page when printer is
in label mode.
[Description] FF, ESC FF,DC2 m s nL nH
DC2 T
(Test Printing)
[Format] ASCII : DC2 T
Hex : 12 54
Decimal : 18 84
[Description] Print the defaut seting,volt,head temperature and buffer space.
DC2 m s nL nH
(The length of mark position)
[Format] ASCII : DC2 m s nL nH
Page 26
Hex : 12 6d s nL nH
Decimal : 18 109 s nL nH
[Description] Sets the length of mark potion in label mode.
s=0 : mark type label paper
s=1 : no merk type label paper
Label length : (nL + nH x 256) x 0.125mm
Label range : 320 < label length < 4000
[Reference] FF, ESC FF,DC2 E
[Ex] (1) DC2 m 00h 00h 01h
Print Data1
DC2 E
DC2 m 00h 00h 01h
Print Data2
DC2 E
(2) DC2 m 00h 00h 01h
Print Data1
DC2 E
Print Data2
DC2 E
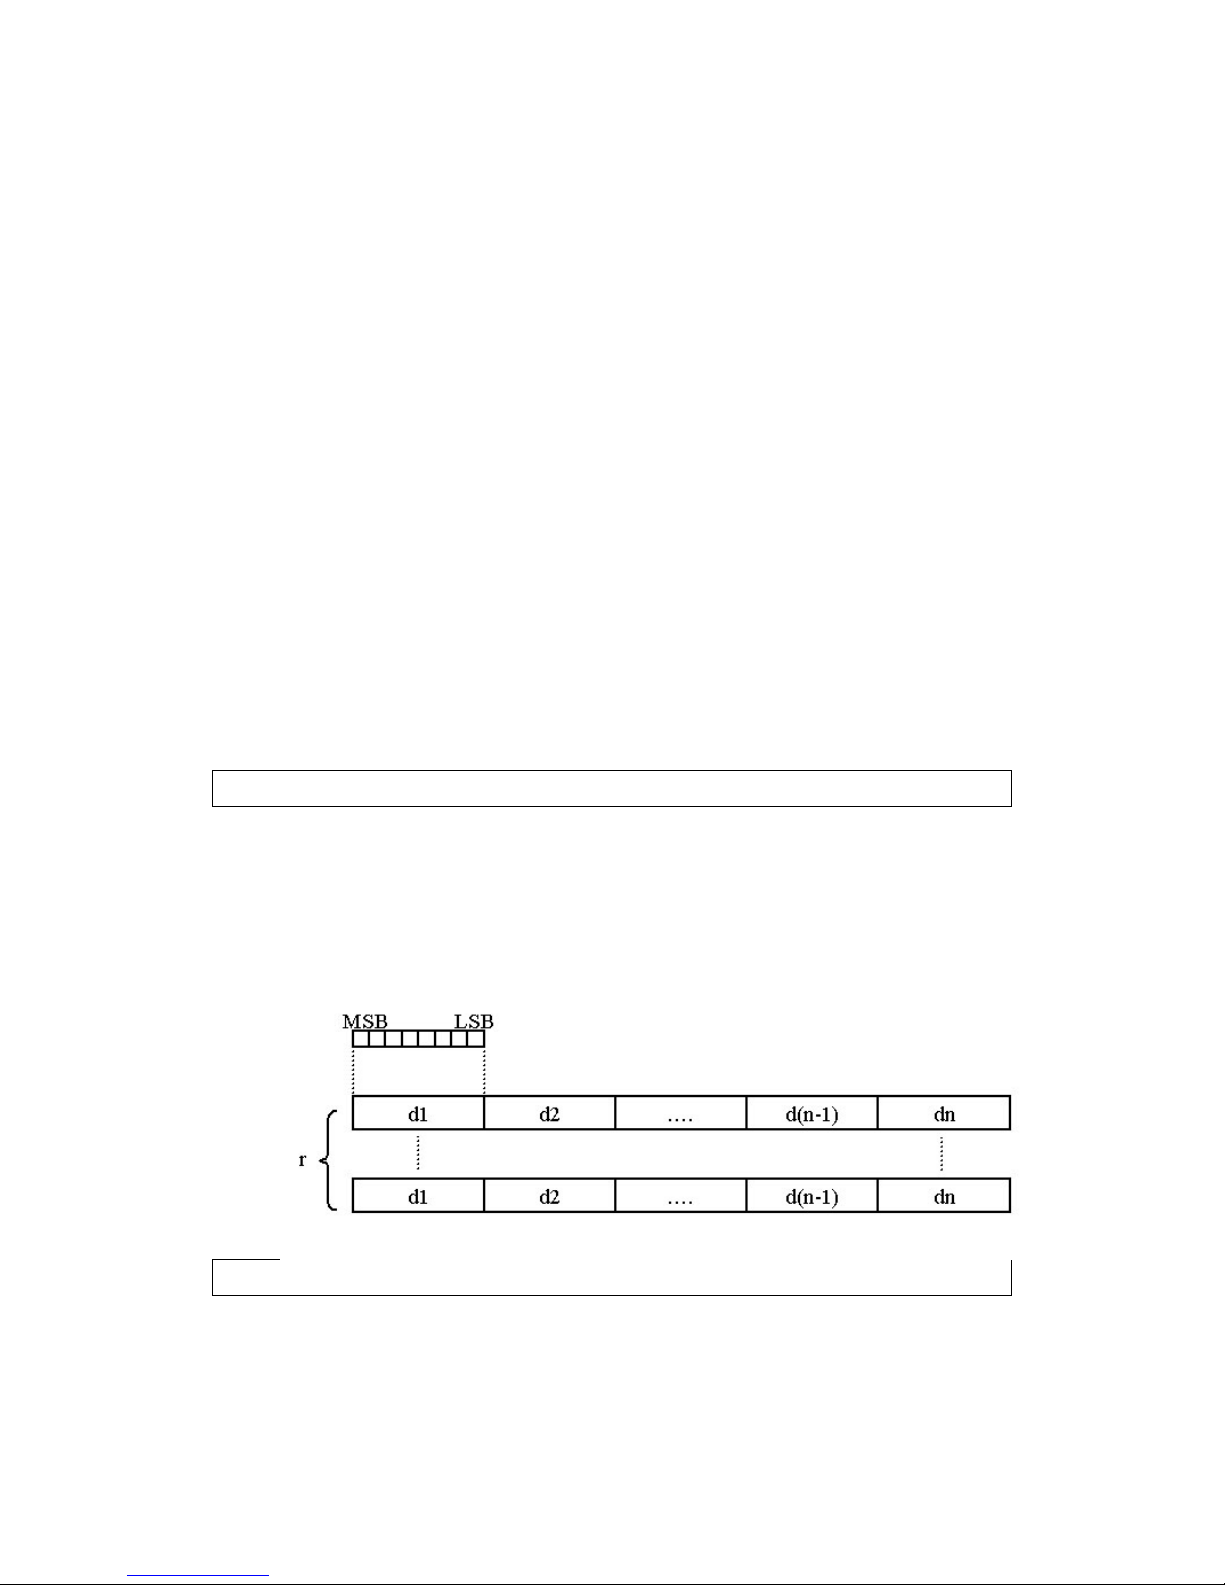
DC2 * r n [d1…dn]
(Set bit image)
[Format] ASCII : DC2 * r n [d1…dn]
Hex : 12 2A r n [d1…dn]
Decimal : 18 42 r n [d1…dn]
n = 0x30(48) Fixed ,r = number of line
[Description]
DC2 V nL nH
(Set MSB bit image)
[Format] ASCII : DC2 V nL nH
Hex : 12 56 nL nH
Decimal : 18 86 nL nH
[Description]
Page 27

DC2 v nL nH
(Set LSB bit image)
[Format] ASCII : DC2 v nL nH
Hex : 12 76 nL nH
Decimal : 18 118 nL nH
[Description]
FS C n
(Select code system)
[Format] ASCII : FS C n
Hex : 1C 43 n
Decimal : 28 67 n
[Description] : This command is valid in external ROM only(option).
N Code system
0 JIS
1 Korean, Shift-JIS, CHINA …
2 Korean
3 Not used
- If external ROM is Japanese, Defaut = 0.
Korea = 1
Other cuntry = 0.
FS M n
(Selects symbol of money)
[Format] ASCII : FS M n
Hex : 1C 4D n
Decimal : 28 77 n
[Description] Print the symbol of the momey.
Page 28

n Cuntry n Cuntry
0 Korea 3 Japan
1 U.S.A 4 Euro
2 England 5
Page 29

 Loading...