

Page 1
SAFETY,
PERATION
O
AND
MAINTENANCE
MANUAL
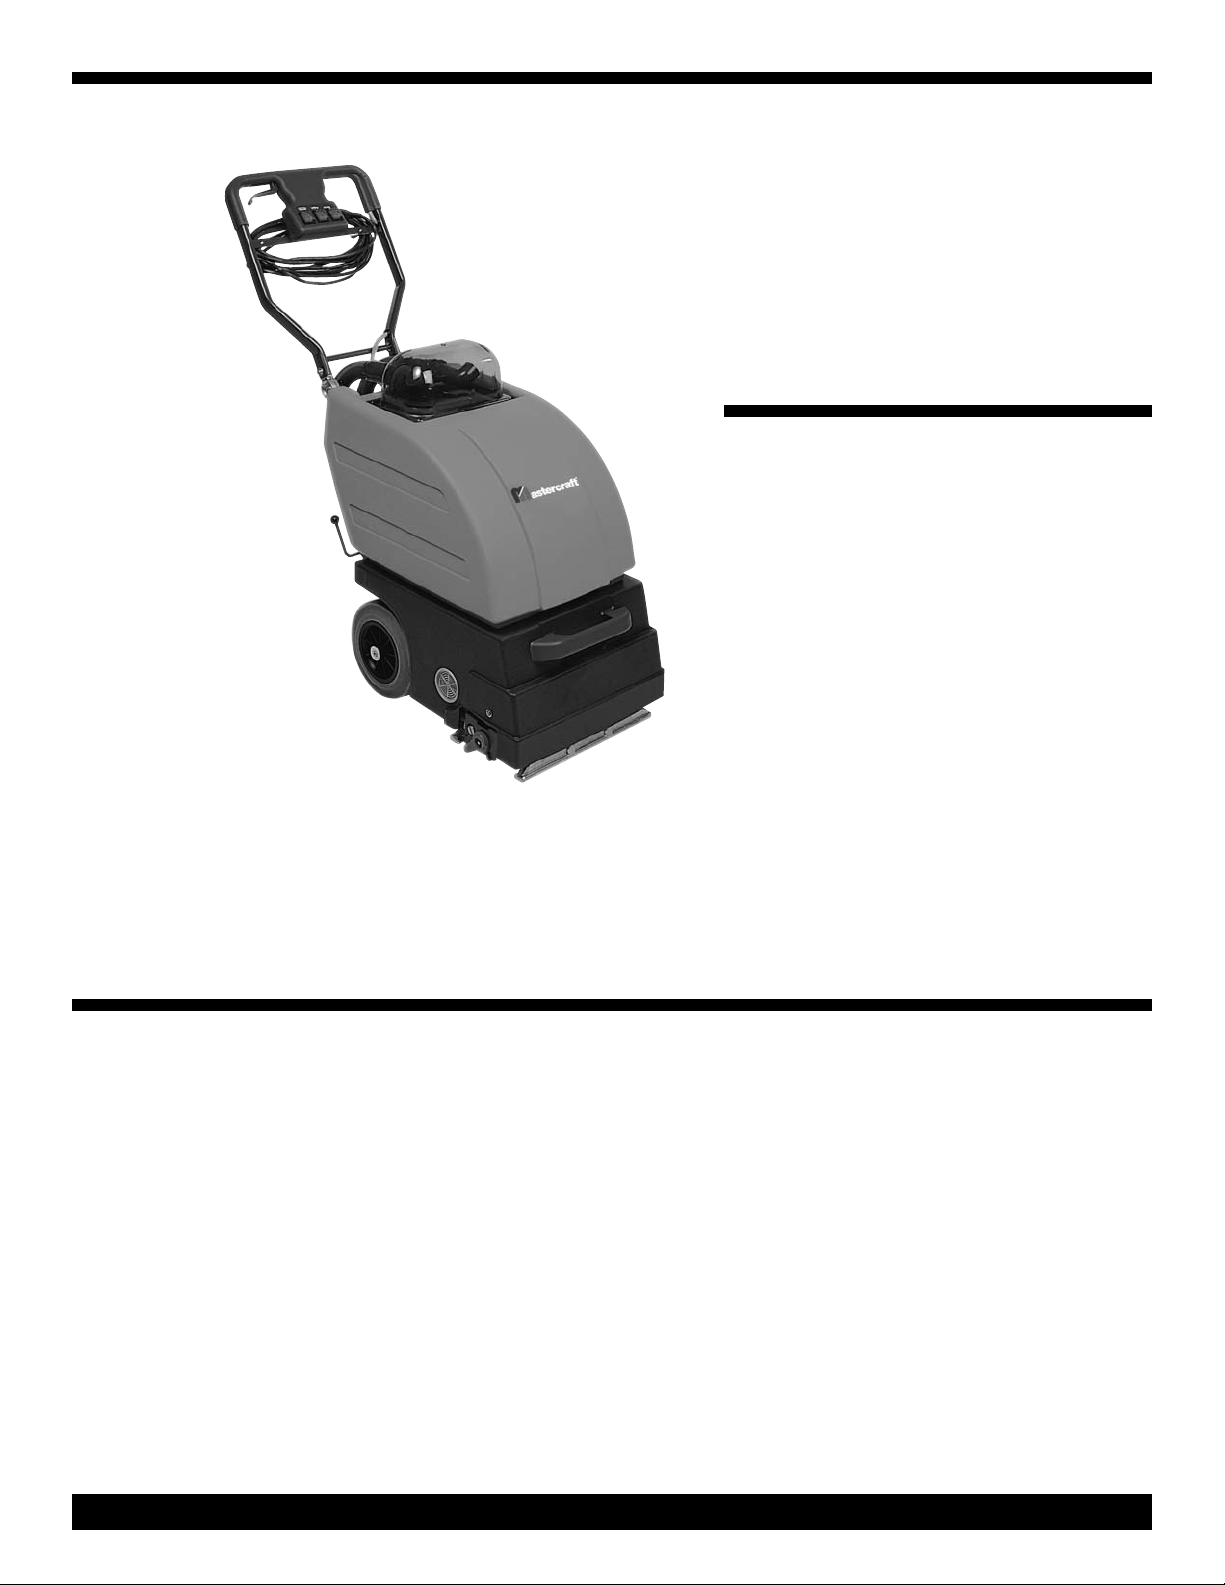
MX-1408
ELF-CONTAINED
S
EXTRACTOR
This unit is intended for commercial use.
READ & FOLLOW ALL INSTRUCTIONS,
WARNINGS & CAUTIONS
BEFORE USING THIS EXTRACTOR
This self-contained extractor will afford
you many years of trouble-free operating
satisfaction, provided it is given proper
care. All parts have passed rigid quality
control standards prior to their being
assembled to produce the finished product. Prior to packaging, the extractor
was again inspected for assurance of
flawless assembly.
This extractor is protectively packed to
prevent damage in shipment. We recommend that upon delivery, unpack the
unit and inspect it for any possible
damage. Only a visual examination will
reveal damage that may have occurred.
If damage is discovered, immediately
notify the transportation company that
delivered your extractor. As the shipper,
we cannot file a claim for any damage.
You must originate any claim within 5
days.
The manufacturer takes no responsibility
for damages caused to property or
persons due to improper use of the
extractor. Operating instructions must
always be available for the operator.
This extractor may only be operated by
persons who have been fully trained and
authorized to use this machine.
READ ALL
INSTRUCTION
BEFORE
OPERATING
SAVE THESE INSTRUCTIONS
PAGE 1
MX-1408 Manual - PN 350060 - Printed in USA 05/17/05
Page 2

IMPORTANT
SAFETY
INSTRUCTIONS
WARNING:
To Avoid Electric Shock, Do Not Expose to Rain
Store Indoors
When using this self-contained extractor, basic precautions
should always be followed, including the following
1. DO NOT leave extractor when plugged
in. Unplug from the outlet when not in
use and before servicing.
2. To avoid electric shock, DO NOT
expose to rain. Store indoors.
3. This is NOT a toy. Close attention is
necessary when used around or near
children.
4. Use only as described in this manual.
Use only manufacturer's recommended
attachments and accessories.
5. DO NOT use with damaged cord or
plug. If extractor is not working as it
should, because it has been dropped,
damaged, left outdoors, or dropped into
water, contact an authorized service
center or the factory.
6.DO NOT pull or carry by cord, use
cord as a handle, close a door on
cord or pull cord around sharp
edges or corners. DO NOT run unit
over cord. Keep cord away from heated
surfaces.
7. DO NOT unplug by pulling on cord. To
unplug, grasp the plug, not the cord.
8. DO NOT handle plug or extractor with
wet hands.
9. Store this extractor indoors in a dry
area. DO NOT expose to freezing temperatures. (See Page 7)
10. DO NOT put any objects into the
openings. DO NOT use with any opening
blocked; keep free of dust, lint, hair and
anything that may reduce air flow.
11. Keep hair, loose clothing, fingers and
all parts of body away from openings and
moving parts.
12. DO NOT pick up anything that is
burning or smoking, such as cigarettes,
matches or hot ashes.
13. DO NOT use extractor for totally dry
vacuuming. This machine is not fitted
with a fine dust filter.
14. Turn OFF all the controls before
unplugging.
15. DO NOT use to pick up flammable or
combustible liquids such as gasoline or
use in areas where they may be present.
16. DO NOT use where anesthetics or
oxygen are used.
17. DO NOT use an extension cord
unless absolutely necessary. If an extension cord is used, then wire size must be
#14 gauge or larger and should not
exceed 50 feet in length. Use only (3)
conductor grounded extension to ensure
"GROUNDING" protection.
18. Replace damaged or worn parts
immediately with genuine original equipment parts to maintain safety and to
protect your limited warranty.
19. DO NOT run the pump dry. When
solution tank is empty, turn the pump
OFF.
This extractor must be connected to a
properly grounded outlet only. (See
Grounding Instructions)
SAVE THESE INSTRUCTIONS
PAGE 2
Page 3
DANGER:
GROUNDING
Improper use of the grounding plug can result
in a risk of electric shock.
Electrical equipment must be grounded. If
it should malfunction or breakdown,
grounding provides a path of least resistance for electrical current to reduce the
risk of electric shock. This extractor is
equipped with a cord having an equipment-grounding conductor and grounding
plug. The plug must be inserted into an
appropriate outlet that is properly installed
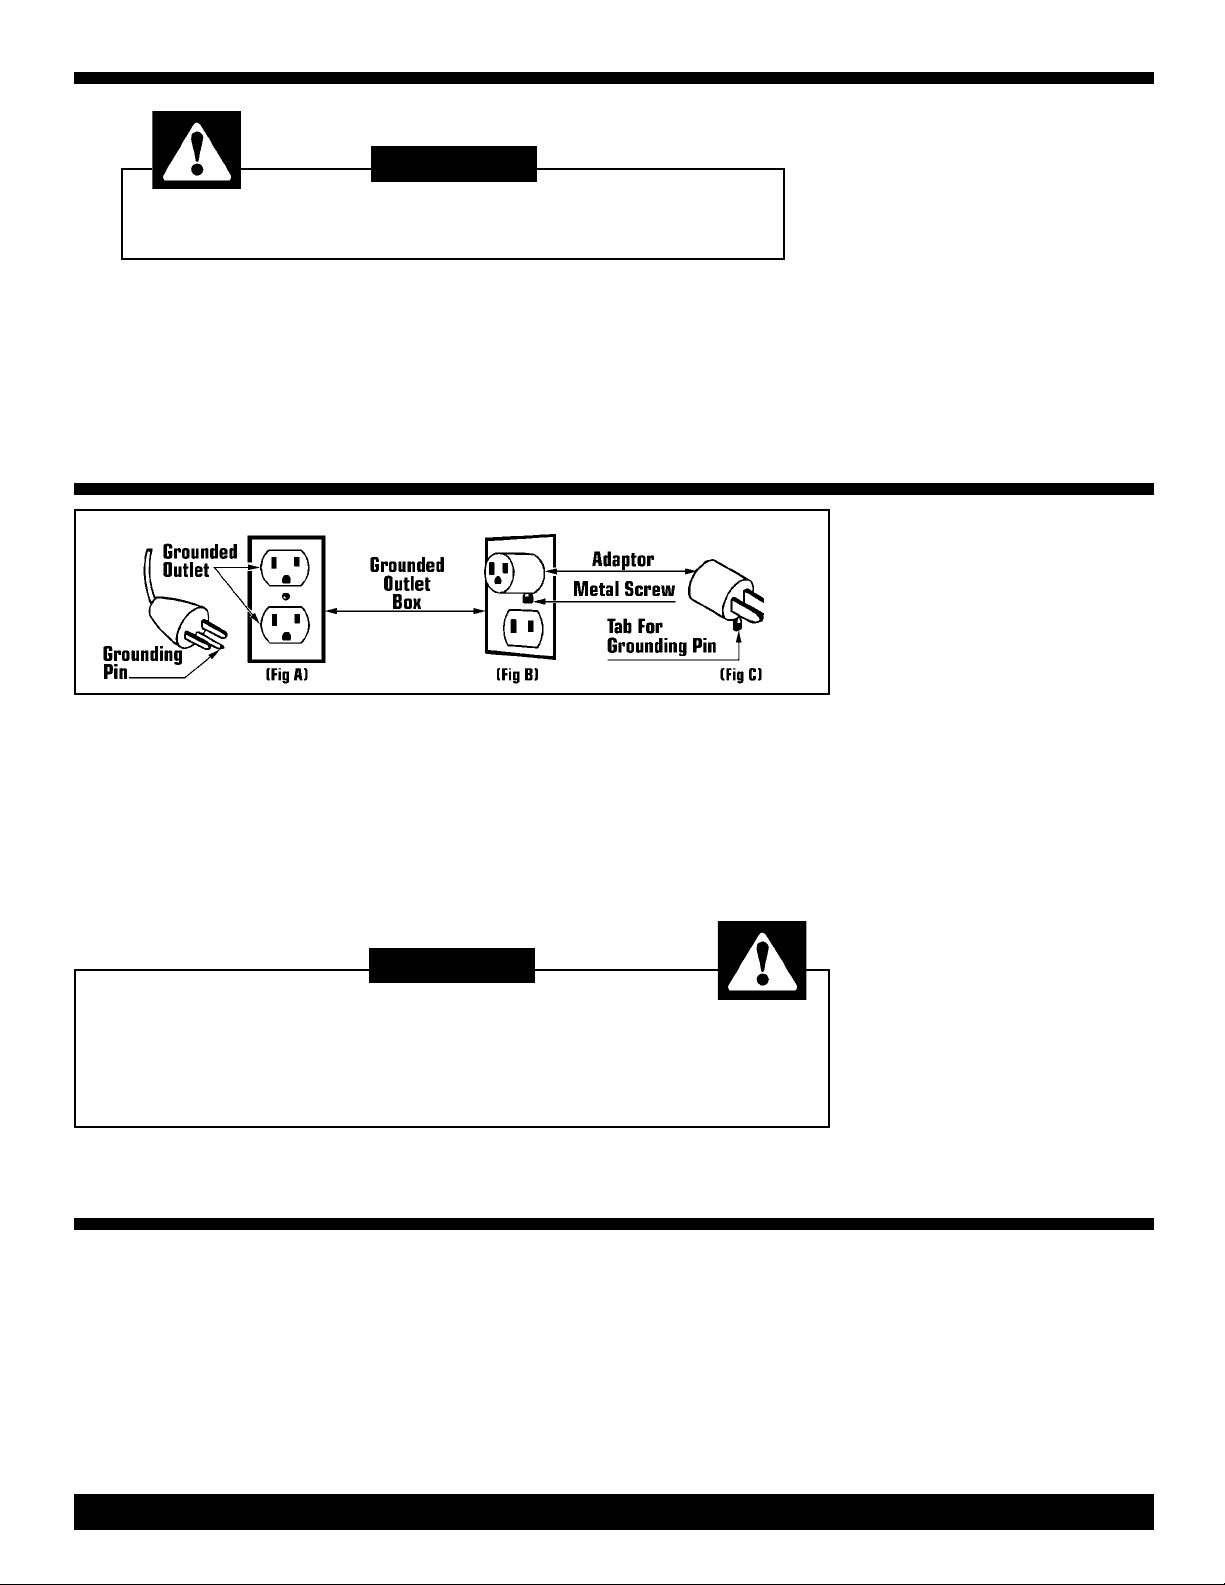
This extractor is for use on a nominal 120
volt circuit, and has a grounded plug that
looks like the plug illustrated-rated in (Fig
A). A temporary adaptor that looks like
the adaptor illustrated in (Fig B & C) may
be used to connect this plug to a 2-pole
receptacle as shown in (Fig B) if a properly grounded outlet is not available.
INSTRUCTIONS
and grounded in accordance with all local
codes and ordinances.
If repair or replacement of the cord or
plug is necessary, DO NOT connect the
grounded wire to either flat blade terminal. The wire with insulation having an
outer surface that is green with or without
yellow stripes is the grounding wire.
GROUNDING
METHODS
The temporary adaptor should be used
only until a properly grounded outlet (Fig
A) can be installed by a qualified electrician. The green color rigid ear, lug, or the
like, extending from the adaptor must be
connected to a permanent ground such
as a properly grounded outlet box cover.
Whenever the adaptor is used, it must be
held in place by a metal screw (Fig C).
WARNING:
Improper connection of the equipment-grounding conductor can result in a risk of
electric shock. Check with a qualified electrician or service person if you are in
doubt as to whether the outlet is properly grounded.
DO NOT modify the plug provided with the extractor. If it will not fit the outlet,
have a proper outlet installed by a qualified electrician.
NOTE: In Canada, the use of a temporary adaptor is not permitted by
the Canadian Electric Code.
This extractor is designed to be safe
when used to perform cleaning functions
as specified. Should damage occur to
electrical parts, the unit should NOT be
used until the damage is repaired by the
manufacturer or authorized service center. This will avoid further damage to the
unit or injury to the user.
These instructions are for your protections and information PLEASE READ
CAREFULLY! Failure to follow the precautions or instructions could result injury or
damage to the user and/or extractor.
PAGE 3
CARE OF THE
EXTRACTOR
Page 4

BOUT THE
A
EXTRACTOR
Backward/Forward
Lever
Solution Switch
Folding Handle
Adjustment Lever
Brush Pressure Lever
Brush Switch
Vacuum Switch
Solution Tank Cover
Vacuum
Shoe
GENERAL
INFORMATION
Power Cord
Drain Hose
Accessory
Disconnect
This extractor is shipped assembled. It
is suitable for cleaning all piled carpeting, cemented, stretched and looselaid carpets with synthetic or woven
backing.
Vacuum Hose
Recovery Hose
Solution Hose
Solution Tank Knob
Care should be taken when cleaning
fitted carpets with a jute backing. It may
shrink and be come discolored from
over saturation of liquids.
PAGE 4
Page 5

PROCEDURES BEFORE
USING THE EXTRACTOR
1. Remove furniture from the area to
be cleaned. Large pieces can be moved
to opposite end of the room from
where you start cleaning.
2. Vacuum carpet thoroughly to
remove all loose debris.
3. Make sure all switches are in the
OFF position.
4. Using the bucket shipped with unit,
mix cleaning chemical following the
direction on the label. Make sure The
DO NOT operate extractor without a cord ground pin.
This is necessary to avoid electric shock.
To Operate Extractor
1. Position the extractor where you are
going to start cleaning.
2. Turn solution knob to the horizontal
position.
3. Turn ON
switches in
the following
order.
(A) Vacuum
(B) Brush
(C) Solution
4. When the brush is switched ON, the
extractor operates in the forward direction. To operate backwards, squeeze
lever (D) on right side of handle to
reverse brush action.
5. Clean slowly and evenly in the forward
and backward direction.
6. Turn OFF the solution switch
approximately 12 inches before completing each pass. This allows dispensed solution to be recovered.
bucket is CLEAN and always clean the
bucket after each use.
5. If you are using heated water, the
temperature should not exceed 120° F.
This improves the cleaning effectiveness when removing oil or grease from
the carpet.
6. Lift up the solution tank cover and fill
solution tank with the cleaning mixture.
Replace cover.
WARNING:
OPERATION PROCEDURES
7. Each pass should overlap the previous
pass by 2
extractor for a while, some streaking
may occur. (See Trouble Shooting Guide,
Pg 8)
8. This extractor WILL NOT shut off
automatically when recovery tank is full.
It is important to visually inspect the
tank so it DOES NOT over fill or water
may get into the motor.
9. Work from light areas to shade areas,
i.e from windows towards the door.
10. Work away from cleaned surface
towards the unclean surface.
Brush
Pressure
When finished
cleaning or stop
using extractor
temporarily, the
brush pressure
should be relieved.
1. Press the red lever on the right-hand
side of the extractor downward.
1
/2” to 5”. After operating the
7. Before plugging power cord into
grounded outlet all switches must be in
the OFF position.
NOTE: A non-foaming chemical must be
used. Carpet that has been previously
cleaned may have a heavy build-up of old
shampoo residue which may cause
excessive foaming in the recovery tank
and could damage the vacuum motor.
Use a defoaming agent if this occurs.
brush.
To Empty Recovery
Tank
1. Tur n OFF solution, brush and vacuum
switches.
2 Unhook the drain hose from rear of
extractor.
3. Position the hose over a bucket or
drain, and remove cap. Rinse tank with
clean water, replace cap.
To Empty Solution Tank
Connect the PVC drain hose shipped
with the extractor to the accessory disconnect and turn on the solution switch.
This will increase the service life of the
CAUTION: DO NOT run the pump without solution,this could damage the pump.
PAGE 5
Page 6

XTRACTOR MAINTENANCE
E
After each use:
1. Drain recovery tank after each use.
2. Remove all soil and debris from the
recovery tank.
3. Flush out recovery tank with clean
water.
End of day:
1. Pour 2 gallons of clean hot water in
the solution tank. Turn the pump ON
and flush the entire system for about a
minute to prevent alkaline build-up.
Using hose provided, drain tank into a
bucket or floor drain.
2. Relieve the brush pressure. Clean
debris from around brush and brush
tunnel. This will be easier if you remove
the brush.
3. Clean vacuum shoe with stiff wire.
CAUTION: DO NOT leave water in tanks
over night or store with water in tanks.
After repeated use:
Spray Nozzles: Remove and clean the
spray nozzles of any debris or build-up.
Replace when necessary. When
replacing fitting nozzles, they should be
positioned parallel to the brush.
Solution Filter: After 4 to 6 uses,
remove the in-line solution filter (located
in solution tank) and clean with a small
brush and rinse.
Brush: Clean the brush of any debris.
Solution Lines and Fittings: Flush
extractor at least once a month with a
solution of 1 part water to 3 parts
white vinegar in order to neutralize the
alkaline residue left by the cleaning
solution.
Accessory Disconnect: Spray with silicone lubricant to prevent coupler from
sticking.
Pump: Follow procedure used above on
solution line and fittings to flush out
pump. In order to service the pump,
contact the factory or authorized service
center. (
See Trouble Shooting Guide Pg 8)
To Replace and Install
Brush:
1. Remove the
screw next to the
brush pressure
lever.
2. Remove the
brush holder and
brush.
3. When installing the brush, make
sure the centering pins on the brush
are properly placed in the holes of the
drive pulley.
4. Re-insert the brush holder securely,
replace the screw tightly.
CLEANING TIPS
Pre-Test:
Pre-test an area so cleaning problems
will not develop during cleaning or after
the carpet is cleaned. Not all products
can be safely used on all fibers and dyes.
1. Mix the cleaner you are using
according to directions and select an
inconspicuous area, such as a corner,
behind a chair etc.
2. Place approximately 1 teaspoon of the
mixed solution on a spot about the size of
a nickel. Work solution in with fibers.
Vacuum Motor: Carbon brush mechanisms holder should be replaced after
operating 700 hours or when carbon
brushes are worn down to
length. Replace both brushes at the
same time.
3. Press a clean white cotton cloth
against the wet spot and hold it there
for about 10 seconds. Examine the
cloth to see if any dye has transfer.
4. Examine the wet spot carefully to
make sure there is no color change to
the carpet that did not appear on the
cloth.
3
/8" in
Pre-Treat Heavily Soiled
Area:
Pre-treat heavily soiled carpet or areas
of concentrated foot traffic with prespotting or pre-spray chemical. If a spotter is used, follow label directions exactly. DO NOT allow to dry on carpet as it
may damage the carpet permanently.
After Cleaning:
After cleaning the carpet when replacing the furniture, place a small square
of styrofoam under the furniture legs to
prevent moisture from damaging the
finish or rusting metal slides.
CAUTION:
Disconnect the power cord from the outlet before working on this unit
PAGE 6
Page 7

Accessory Tool
Quick-Connect
Accessory Tool
Vacuum Hose
Accessory Tool
Solution Hose
Accessory Tool
Quick-Connect
Solution Control Knob
Cleaning Tool and Wand
ACCESSORY
INSTALLATION
1. Remove the vacuum hose from the
left side of the tank cover.
2. Connect the accessory tool vacuum
hose to the left fitting on tank cover and
on to the end of the cleaning tool wand.
Note: The hose must be connected
tightly.
3. Connect solution hose to accessory
quick-connect in the back of the extractor and to quick connect located on the
handle of the tool.
If it becomes necessary to store or
transport the unit where temperatures
could drop below freezing, 32° F, the
pump, solution hoses and valve on the
tools must be protected from freezing
with a solution of automotive radiator
antifreeze.
1
1. Mix
lon of antifreeze in the solution tank.
Hook up the hoses and tools to the
extractor.
/2gallon of water and 1/2gal-
4. Turn solution control knob in the back
of the extractor to the upright position.
5. Turn ON the solution and vacuum
switches. DO NOT turn on brush
switch.
6. Start cleaning by squeezing trigger
on the wand while slowly pulling the tool
towards you.
7. When finished, turn OFF vacuum and
solution switches, disconnect vacuum
and solution hoses from unit.
2. Turn the pump ON and press the
valve to let antifreeze mixture fill the
solution line system.
3. Disconnect solution supply hoses and
vacuum out remaining antifreeze from
the solution tank
4. To prevent damage to unit, allow the
extractor to reach room temperature
before using. The antifreeze MUST be
flushed out of solution system with clean
water, otherwise, the carpet may be
damaged.
8. Re-connect the extractor’s vacuum
hose to left fitting on the tank cover.
9. Return the solution control knob to
the normal position.
FREEZING
TEMPERATURE
PRE-CAUTIONS
PAGE 7
Page 8

TROUBLE
SHOOTING
GUIDE
WARNING:
Service and repairs should only be performed by
an authorized service center.
PROBLEM: Streaking, uneven or no spray from jets.
Possible Cause Possible Solution
1. Solution control knob in wrong 1. Correct knob position.
position (auxiliary).
2. Dirty or plugged spray jets. 2. Clean or replace spray jets.
3. Worn spray jets. 3. Replace spray jets.
4. Solution line filter plugged. 4. Clean or replace solution line filter.
5. Faulty pump. 5. Replace pump.
PROBLEM: Loss of vacuum.
Possible Cause Possible Solution
1. Drain valve open. 1. Close drain valve.
2. Tank cover not properly seated or 2. Reseat tank cover correctly or replace
gasket on cover damaged. damaged gasket.
3. Damaged vacuum hose or loose cuffs. 3. Replace hose or tighten cuffs.
4. Defective vacuum motor. 4. Replace vacuum motor.
5. Vacuum shoe is clogged. 5. Clean with stiff wire.
STORAGE OF
EXTRACTOR
PROBLEM: Motors (vacuum, brush & pump) will not run.
Possible Cause Possible Solution
1. Fuse blown or circuit breaker tripped. 1. Replace fuse or re-set breaker.
2. Faulty ON/OFF switch. 2. Replace switch or switches.
3. Loose wiring. 3. Trace and repair.
4. Faulty motor. 4. Replace motor.
This extractor should be stored in an
upright position. Objects should not be
stored or stacked on top of unit.
Address: 777 South Street P.O. Box 2310
TEL: (800) 835-7812 (845) 565-8850
FAX: (800) 752-6883 (845) 565-9392
URL: www.mastercraftusa.com
E-Mail: techsupport@mastercraftusa.com
Always store the extractor in a dry, protected area at temperatures above freezing.
This unit should not be stored in vehicles or
areas where extreme heat or cold occurs.
Newburgh, New York 12550-0606
MX1408 Manual - PN 350060 - Printed in USA 05/17/05
PAGE 8
 Loading...