

Page 1
model no. 299-5514-8
IMPORTANT:
Please read this manual carefully before running this air
engraving pen and save it for reference.
INSTRUCTION
MANUAL
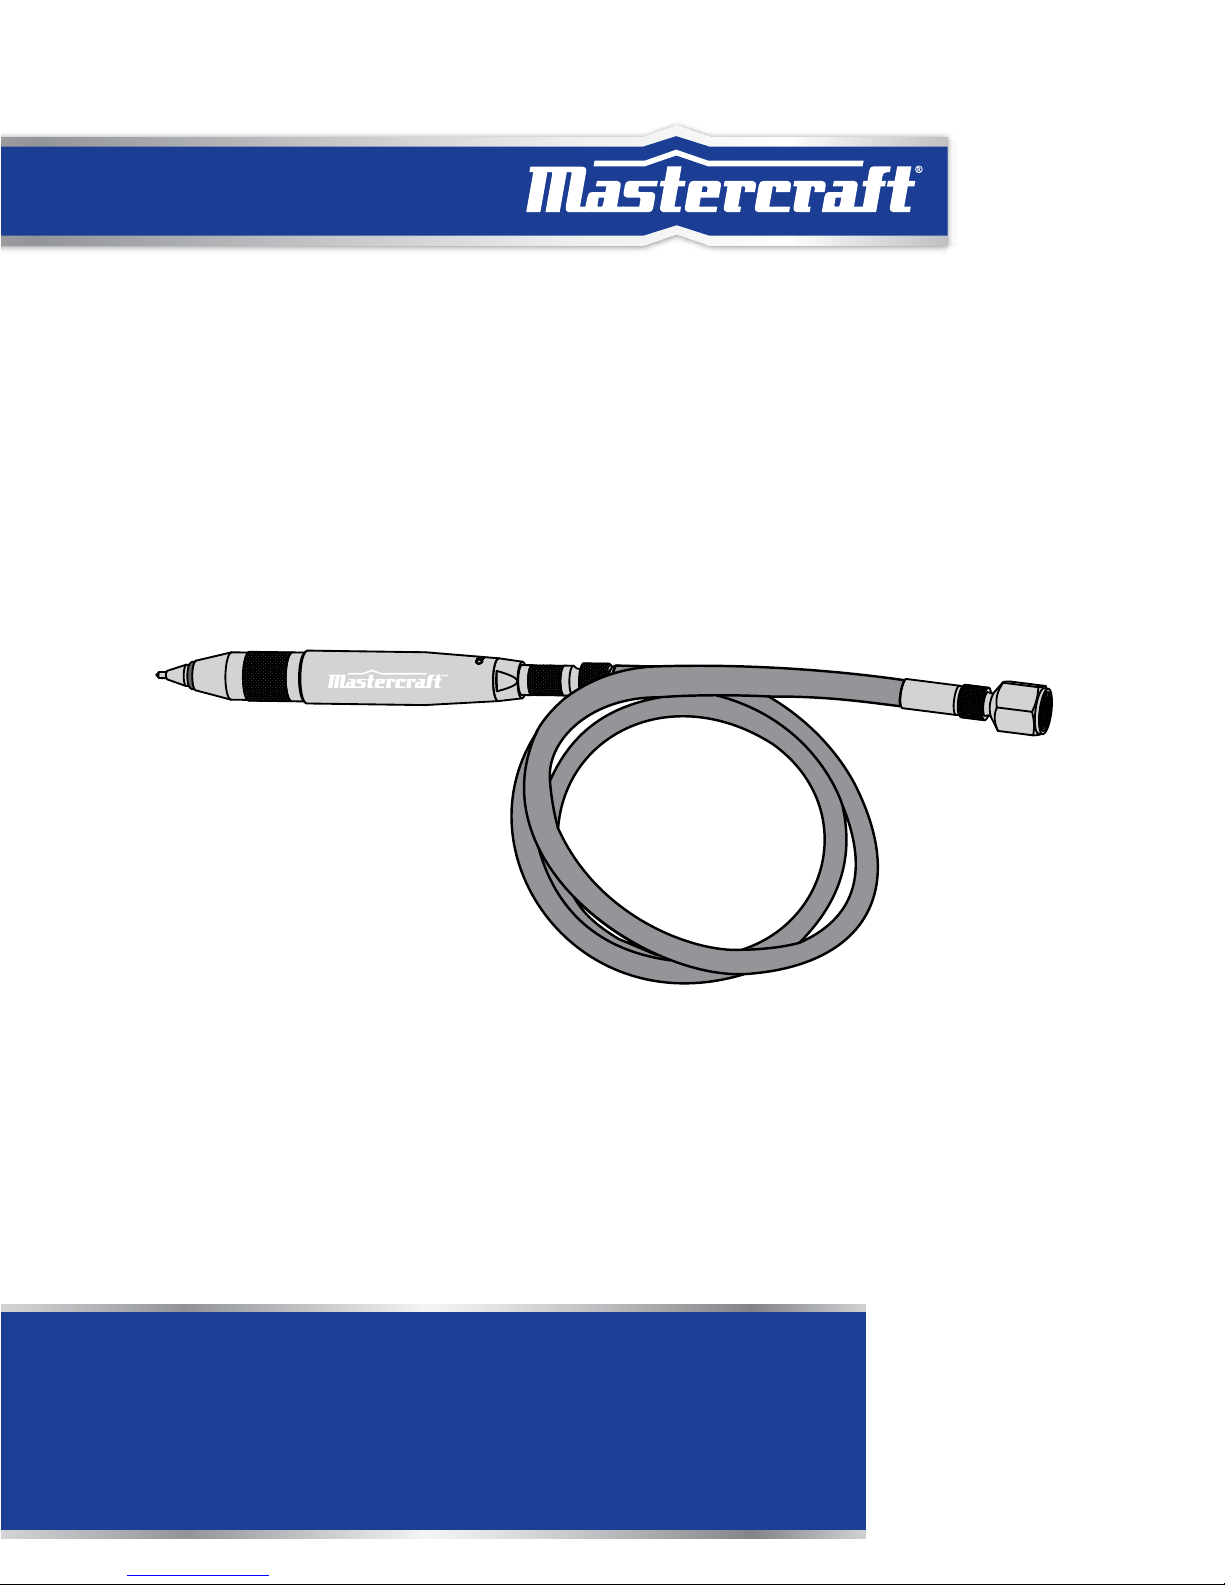
AIR-POWERED
ENGRAVING PEN
Page 2

headline bars
3
headline bars
model no. 299-5514-8 | contact us 1-800-689-9928
2
Mastercraft is Canadian Tire’s exclusive line of reliable and hardworking hand tools,
power tools and hardware products. Designed for the DIY customer but with the
features and benefits of the leading professional series tools, there are over 100
practical and powerful products available under 6 different categories including;
Stationary Power Tools, Handheld Power Tools, Hand Tools, Air Tools, Tool/Garage
Storage, and Other Hardware accessories. Now more than ever, Canadians can
tackle just about any project around the house or garage with confidence using a
Mastercraft product!
CanadianTire.ca
NOTE:
If any parts are missing or damaged, or if you have any questions, please call our
toll-free helpline at 1-800-689-9928.
SAVE THESE INSTRUCTIONS
This manual contains important safety and operating instructions. Read all
instructions and follow them with use of this product.
TABLE OF CONTENTS
TABLE OF CONTENTS
SPECIFICATIONS 4
SAFETY GUIDELINES 5
AIR SUPPLY 7
KEY PARTS DIAGRAM 8
SETUP 9
OPERATING INSTRUCTIONS 10
MAINTENANCE 11
TROUBLESHOOTING 12
PARTS LIST 13
WARRANTY 14
Page 3

headline bars
model no. 299-5514-8 | contact us 1-800-689-9928
4 5
SPECIFICATIONS
SPECIFICATIONS
Speed 13,000 BPM (no load)
Working pressure 90 PSI
CFM Requirement 0.25 CFM @ 90 PSI
Air inlet 1/4"-18 NPT
Air hose (from air compressor) 3/8" (9.5 mm) (inner diameter)
SAFETY GUIDELINES
• Keep work area clean. Never operate the product near flammable substances like gasoline, naphtha,
cleaning solvents, etc. Work in a clean, well-ventilated area free of combustible materials. Cluttered
areas invite injuries.
• Ensure that there are no electrical cables, gas pipes, etc., which can cause a hazard if damaged
by use of the tool.
• Never connect to an air source that is capable of exceeding 200 PSI. Always verify prior to
using this tool that the air source has been adjusted to the rated air pressure range.
• Do not exceed maximum working pressure of 90 PSI for the tool. Over pressurizing the
tool may cause bursting, abnormal operation, breakage of the tool or serious injury to persons. Use
compressed air regulated to a maximum pressure at or below the rated pressure of any attachments to
this product.
• Never use oxygen, carbon dioxide, combustible gases or any other bottled gases as an air
source for the tool. Such gases are capable of explosion and serious injury to persons.
• Disconnect the tool from the air source before making any adjustments, changing
accessories, or storing the tool. Such preventative safety measures reduce the risk of starting the
tool unintentionally.
• Observe work area conditions. Don’t expose to rain. Keep work area well lighted.
• Keep children away. Children must never be allowed in the work area. Do not let them handle
machines, tools, extension cords, or air hoses. Keep visitors a safe distance from the work area.
• Store idle equipment. When not in use, the tool must be stored in a dry location to inhibit rust.
Always lock up tools and keep out of reach of children.
• Dress properly. Do not wear loose clothing or jewellery as they can be caught in moving parts.
Protective, electrically non-conductive clothes and non-skid footwear are recommended when working.
Wear restrictive hair covering to contain long hair.
• Do not overreach. Keep proper footing and balance at all times, which enables better control of the
tool in unexpected situations.
• Protect your eyes by wearing safety glasses or a face shield when using this tool. Ear protectors
should also be worn.
• Maintain the product with care. Inspect hose periodically and, if damaged, have it repaired by an
authorized technician.
• Install an in-line shutoff valve to allow immediate control over the air supply in an emergency, even
if a hose is ruptured.
• Use the right tool for the job. Do not attempt to force a small tool or attachment to do the work of a
larger industrial tool. There are certain applications for which this product was designed. Do not modify
this tool and do not use this tool for a purpose for which it was not intended.
SAFETY GUIDELINES
Page 4

headline bars
7
headline bars
model no. 299-5514-8 | contact us 1-800-689-9928
6
SAFETY GUIDELINES
• Do not apply excessive force of any kind to the tool. Let the tool perform the work at the rate for
which it was designed.
• Stay alert. Watch what you are doing. Use common sense. Do not operate any tool when you are
tired.
• Do not operate tool under the influence of alcohol or drugs. Read warning labels on
prescriptions to determine if your judgment or reflexes are impaired while taking drugs. If there is any
doubt, do not operate the tool.
• Check for damaged parts. Before using any tool, any part that appears damaged should be
carefully checked to determine that it will operate properly and perform its intended function. Check
for alignment and binding of moving parts, any broken parts, and any other condition that may affect
proper operation. Any part that is damaged should be properly repaired or replaced by a qualified
technician.
• Keep working parts of the tool away from hands and body during operation.
• Replacement parts and accessories. When servicing, only use identical replacement parts. Use of
any other parts will void the warranty. Only use accessories intended for use with this tool.
• Use proper size and type of air connection hose. If an air connection hose is required, it must
be of the proper size and type to supply the correct current to the tool without heating up. Check your
compressor manual for extension cord information.
• Keep the air supply hose away from heat, oil and sharp edges. Check hose for wear before
each use.
• Do not carry the tool by air hose.
• Do not remove any labels on the tool. Replace if they become obscured or damaged.
• Maintenance. For your safety, maintenance should be performed regularly by a qualified technician.
• CA PROP 65: This product contains chemicals known to the state of California to cause cancer and
birth defects or other reproductive harm. Wash hands after handling.
AIR SUPPLY
AIR SUPPLY
Please refer to the typical air system layout recommended below.
1. Use only clean, dry, regulated compressed air as the power source.
2. Make sure that the air compressor being used for the tool operation supplies the correct output (CFM).
3. Have the tool in "off" position when connecting the tool to the air supply.
4. Use normal 90 PSI working pressure for the tool. High pressure and unclean air will shorten the tool life
due to the faster wear and also may create a safety hazard.
5. Drain water from the air compressor tank daily, as well as any condensation in the air lines. Water in the
air line may enter the tool and cause damage to the tool mechanisms at operation.
6. Clean the tool air inlet screen filter for blockage weekly. Clean if necessary.
7. Usually a 3/8" (9.5 mm) inner diameter air hose is recommended for air supply and airflow to get the
optimum performance of tool.
8. A long air hose (usually over 25' (8 m)) may cause up to 15 PSI drop in pressure, so you need to set the
output pressure of the air compressor higher to maintain the required working pressure at the tool.
9. Use proper hoses and fittings. We do not suggest connecting quick change couplings directly to the tool
since they may cause failure due to tool vibration at operation. Instead, add a lead hose and connect
coupling between air supply and hose whip.
10. Check hoses for wear before each use. Make certain that all connections are secure.
6
9
13
14
15
8
7
12
10
5
4
3
2
11
1
6. Shut Off Valve
7. Whip Hose
8. Coupler Body and Connector
9. Drain Daily
10. 1/2" (12.5 mm) or Larger Pipe and Fitting
AIR SYSTEM LAYOUT:
1. Air Tool
2. Air Hose 3/8" (I.D.)
3. Oiler
4. Pressure Regulator
5. Filter
11. Air Dryer
12. 1" (25 mm) or Larger Pipe and Fitting
13. Air Compressor
14. Auto Drain
15. Drain Daily
WARNING!
Compressed air can be dangerous. Ensure that you are familiar with all precautions relating to the use of compressors and
compressed air supply.
WARNING!
Read all safety warnings and instructions before using this tool. Failure to follow the warnings and instructions may result in
personal injury and property damage. Save all warnings and instructions for future reference.
WARNING!
INSTRUCTIONS PERTAINING TO A RISK OF FIRE, ELECTRIC SHOCK, OR INJURY TO PERSONS
•Keepbystanders,children,andvisitorsawaywhileoperatingthetool.Distractionsareabletoresultinthelossofcontrolof
the tool.
•Avoidunintentionalstarting.Besuretheswitchisoffbeforeconnectingtotheairsupply.Donotcarrythetoolwithyour
finger on the switch or connect the tool to the air supply with the switch on.
•Removeadjustingkeysandwrenchesbeforeturningthetoolon.Awrenchorakeythatisleftattachedtoarotatingpart
of the tool increases the risk of personal injury.
•Useonlythelubricantssuppliedwiththetoolorspecifiedbythemanufacturer.
CAUTION!
The warnings, precautions, and instructions discussed in this instruction manual cannot cover all possible conditions and
situations that may occur. It must be understood by the operator that common sense and caution are factors which cannot
be built into this product, but must be supplied by the operator.
Page 5

headline bars
model no. 299-5514-8 | contact us 1-800-689-9928
8 9
KEY PARTS DIAGRAM
SETUP
SETUP
This product is already assembled before it leaves the
factory. Just unpack and make sure that it is in good
condition.
1. Remove the air inlet protective cap from the air inlet
(1). (Fig. 1)
2. Place 2-3 drops of air tool oil (not included) in the air
inlet (1) before each use. (Fig. 2)
3. Connect air supply hose to the air inlet (1). (Fig. 3)
4. Set the working pressure at 90 PSI for best tool
performance.
IMPORTANT: Working pressure refers to the air line
pressure set to the tool under working conditions.
Fig. 1
1
Fig. 2
1
Fig. 3
1
KEY PARTS DIAGRAM
No. Description
A Engraving needle tip
B Air inlet
C Air hose
B
C
A
E
F
D
WARNING!
If any part is missing or damaged, do not use the product until the missing or damaged part has been replaced.
No. Description
D Hose connector
E On-Off switch/Speed control
F Engraving pen
Page 6

headline bars
model no. 299-5514-8 | contact us 1-800-689-9928
10 11
OPERATING INSTRUCTIONS
1. Hold the tool (2) firmly like a pen and slowly turn the
On-Off switch/speed control (3) counterclockwise to
start the tool. (Fig. 4)
2. Apply the engraving needle tip to the workpiece to be
engraved.
3. Turn the On-Off switch/speed control (3) clockwise to
stop the tool. (Fig. 5)
IMPORTANT: Secure loose workpiece using a vise or
clamps to prevent movement while working.
IMPORTANT: Keep a slow but steady speed when
engraving. Let the tool do its work. Do not use excessive
force on the tool unless you are engraving deeply on
materials like hardened steel, metal, glass, plastic,
ceramic and stone.
IMPORTANT: The tool's speed is variable. Rotate the OnOff switch/speed control counterclockwise to increase speed or clockwise to decrease speed.
IMPORTANT: This tool features front exhaust which directs air away from workpiece and keeps the
engraving surface clean.
OPERATING INSTRUCTIONS
MAINTENANCE
Fig. 4
2
3
Fig. 5
2
3
WARNING!
•Neverforcethetoolwhileworking.Keepsteadypressureonthetoolandletthetooldoitswork.
•Alwaysdisconnectthetoolfromairsupplybeforechangingaccessoriesand/oraftereachuse.
MAINTENANCE
1. Always operate the tool with care by following the instructions in the manual.
2. Always disconnect air connection hose and air supply when tool is not in use.
3. Check air hose for frays and tears.
4. If the tool fails, have it repaired or replaced by an authorized technician.
5. In the event that it becomes necessary to store the tool for an extended period of time, it should receive a
generous amount of lubrication at that time. The tool should be lubricated through the air inlet and should
run for approximately 30 seconds to ensure that the lubricating oil has been evenly distributed throughout
the tool.
6. When you are not using the product for a long time, wipe it clean with a dry cloth and store it in a dry and
safe place out of reach of children.
Page 7

headline bars
model no. 299-5514-8 | contact us 1-800-689-9928
12 13
PARTS LIST
TROUBLESHOOTING
Problem Possible Cause Corrective Action
Tool runs
slowly or will
not operate
1. Grit or gum in tool.
2. No oil in tool.
3. Low air pressure.
4. Air hose leaks.
5. Pressure drops.
6. Worn rotor blade.
7. Moisture blowing
out of tool exhaust.
1. Flush the tool with air-tool oil or gum solvent.
2. Lubricate the tool according to the lubrication
instructions in this manual.
3. a. Adjust the regulator on the tool to maximum
setting.
b. Adjust the compressor regulator to tool maximum
of 90 PSI/6.3 BAR.
4. Tighten and seal hose fittings if leaks are found. Use
sealing tape.
5. a. Be sure the hose is the proper size. Long hose or
tools using large volumes of air may require a hose
with an I.D. of 1/2" (12.5 mm) or larger depending
on the total length of the hoses.
b. Do not use a multiple number of hoses connected
together with quick-connect fittings. This causes
additional pressure drops and reduces the tool
power. Directly connect the hoses together.
6. Replace rotor blade.
7. Water in tank: drain tank. (See air compressor
manual.) Oil tool and run until no water is evident.
Oil tool again and run 1-2 seconds.
Abnormal
vibration and/or
excessive heat
develops in
the tool.
Improper lubrication.
Follow proper lubrication procedures in
this manual.
WARNING!
Follow all safety precautions whenever diagnosing or servicing the engraving pen. Disconnect air supply
before service.
TROUBLESHOOTING
NOTE:
The manufacturer and/or distributor has provided the parts list and assembly diagram in this manual as a reference tool only. Neither the manufacturer nor distributor makes any representation or warranty of any kind to the buyer that he or she is qualified to make any repairs to the product, or
that he or she is qualified to replace any parts of the product. In fact, the manufacturer and/or distributor expressly states that all repairs and parts
replacements should be undertaken by certified and licensed technicians, and not by the buyer. The buyer assumes all risk and liability arising out of
his or her repairs to the original product or replacement parts thereto, or arising out of his or her installation of replacement parts thereto.
No. Description Qty.
1 Main housing 1
2 Sliding block 1
3 Rubber sleeve 1
4 O-ring 1
5
On-Off switch/Speed
control
1
6 Set ring 1
7 O-ring 1
8 O-ring 1
9 Needle seat 1
10 Engraving needle 1
No. Description Qty.
11 Spring 1
12 Front cover 1
13 Needle holder 1
14 O-ring 1
15 Air hose 1
16 Bushing 2
17 Hose connector 2
18 Hose barb 2
19 O-ring 2
20 Air inlet 1
1
2
3
4
5
6
9
10
11
12
13
14
15
19
18
17
16
16
17
18
19
20
7
8
Page 8

headline bars
15
headline bars
model no. 299-5514-8 | contact us 1-800-689-9928
14
3-Year Limited Warranty
This Mastercraft product is guaranteed for a period of three (3) years from the date of original retail
purchase, against defects in materials and workmanship.
Subject to the conditions and limitations described below, this product, if returned to us with proof of
purchase within the stated warranty period and if covered under this warranty, will be repaired or replaced
(with the same model, or one of equal value or specification), at our option. We will bear the cost of any
repair or replacement and any costs of labour relating thereto.
These warranties are subject to the following conditions and limitations
a) a bill of sale verifying the purchase and purchase date must be provided;
b) this warranty will not apply to any product or part thereof which is worn or broken or which has become inoperative
due to abuse, misuse, accidental damage, neglect or lack of proper installation, operation or maintenance
(as outlined in the applicable owner’s manual or operating instructions) or which is being used for industrial,
professional, commercial or rental purposes;
c) this warranty will not apply to normal wear and tear or to expendable parts or accessories that may be supplied with
the product which are expected to become inoperative or unusable after a reasonable period of use;
d) this warranty will not apply to routine maintenance and consumable items such as, but not limited to, fuel, lubricants,
vacuum bags, blades, belts, sandpaper, bits, fluids, tune-ups or adjustments;
e) this warranty will not apply where damage is caused by repairs made or attempted by others (i.e. persons not
authorized by the manufacturer);
f) this warranty will not apply to any product that was sold to the original purchaser as a reconditioned or refurbished
product (unless otherwise specified in writing);
g) this warranty will not apply to any product or part thereof if any part from another manufacturer is installed therein or
any repairs or alterations have been made or attempted by unauthorized persons;
h) this warranty will not apply to normal deterioration of the exterior finish, such as, but not limited to, scratches, dents,
paint chips, or to any corrosion or discolouring by heat, abrasive and chemical cleaners; and
i) this warranty will not apply to component parts sold by and identified as the product of another company, which shall
be covered under the product manufacturer’s warranty, if any.
Additional Limitations
This warranty applies only to the original purchaser and may not be transferred. Neither the retailer nor
the manufacturer shall be liable for any other expense, loss or damage, including, without limitation, any
indirect, incidental, consequential or exemplary damages arising in connection with the sale, use or inability
to use this product.
Notice to Consumer
This warranty gives you specific legal rights, and you may have other rights, which may vary from province
to province. The provisions contained in this warranty are not intended to limit, modify, take away from,
disclaim or exclude any statutory warranties set forth in any applicable provincial or federal legislation.
Made in China
Imported by
Mastercraft Canada Toronto, Canada M4S 2B8
WARRANTY
WARRANTY
 Loading...