

Page 1
INSTRUCTION
MANUAL
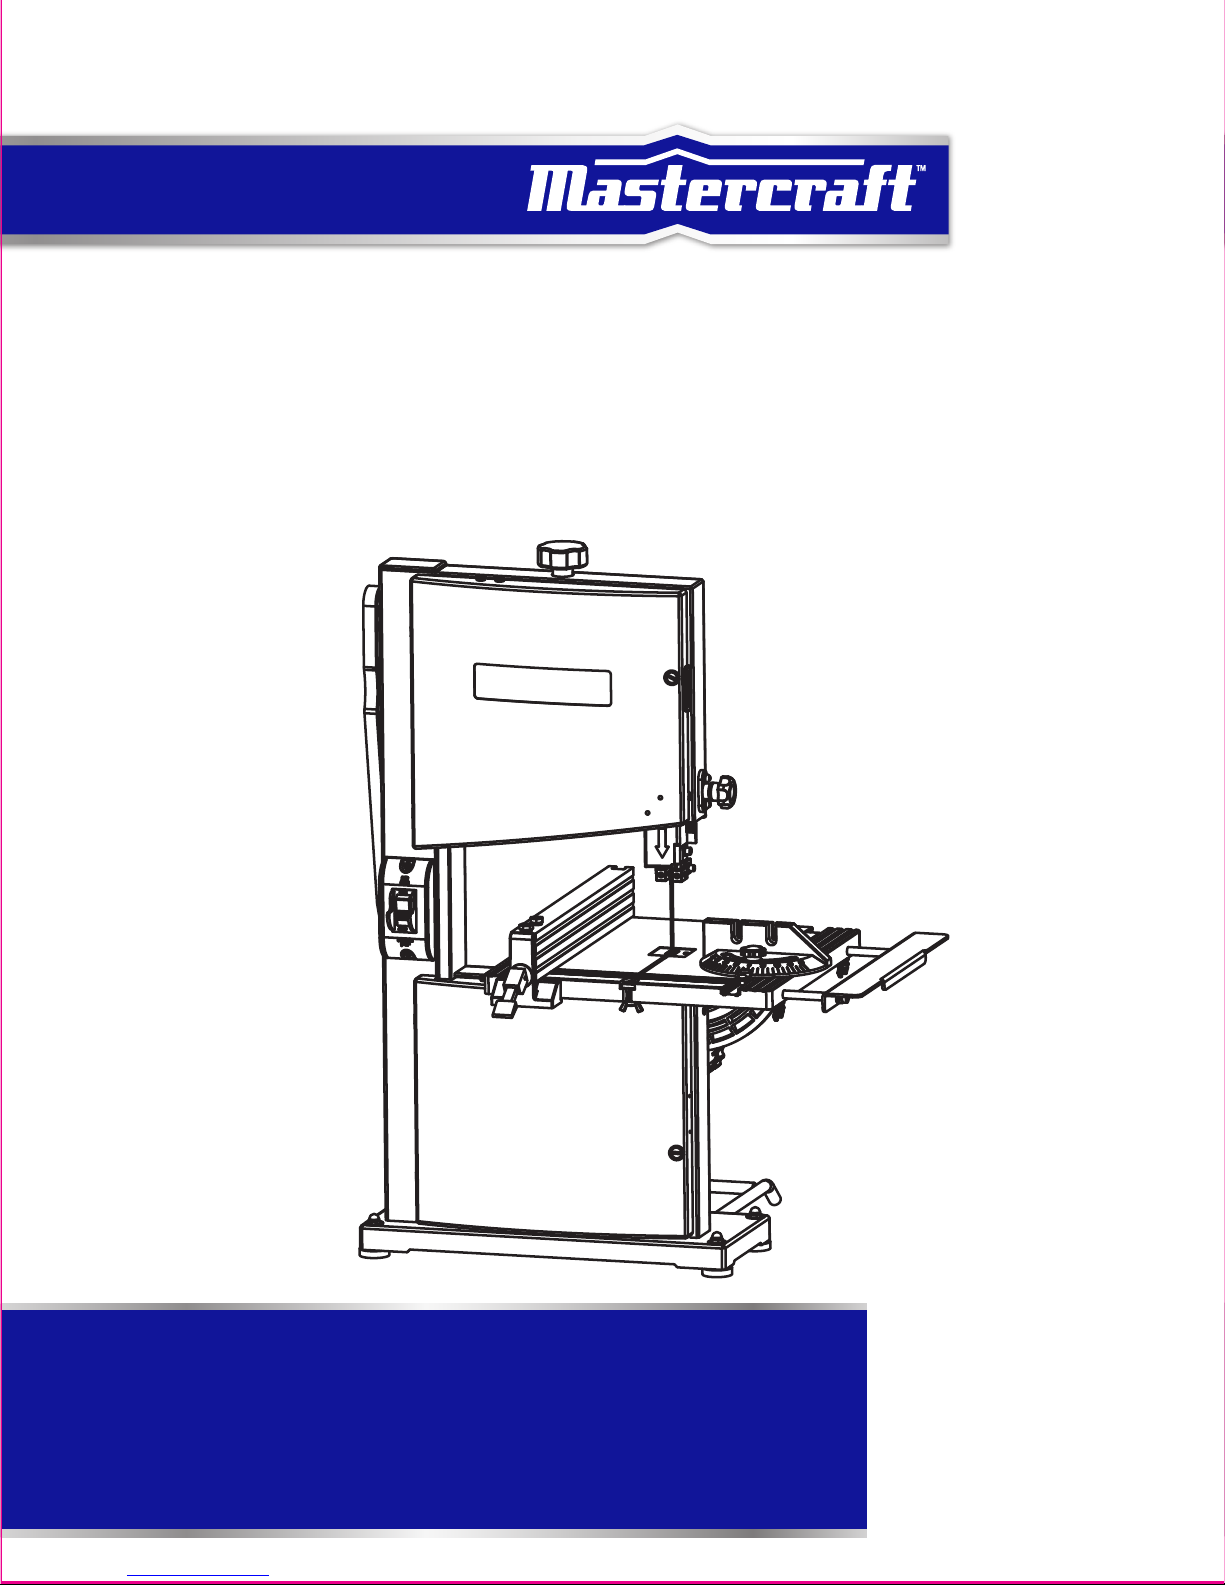
BAND SAW WITH
EXTENSION TABLE
IMPORTANT:
Please read this manual carefully before running this band saw
and save it for reference.
model no. 055-6748-6
Page 2

3
TABLE OF CONTENTS
SAVE THESE INSTRUCTIONS
This manual contains important safety and operating instructions. Read all
instructions and follow them when using this product.
NOTE:
If any parts are missing or damaged, or if you have any questions, please call our
toll-free helpline at 1-800-689-9928
TABLE OF CONTENTS
Quick Start Guide
Specifications
Safety Guidelines
Know Your Band Saw
Assembly Instructions
Operating Instructions
Maintenance
Troubleshooting
Exploded View
Parts List
Warranty
4
5
6-10
11-15
16-26
27-29
30
31-33
34-35
36-38
39
Page 3
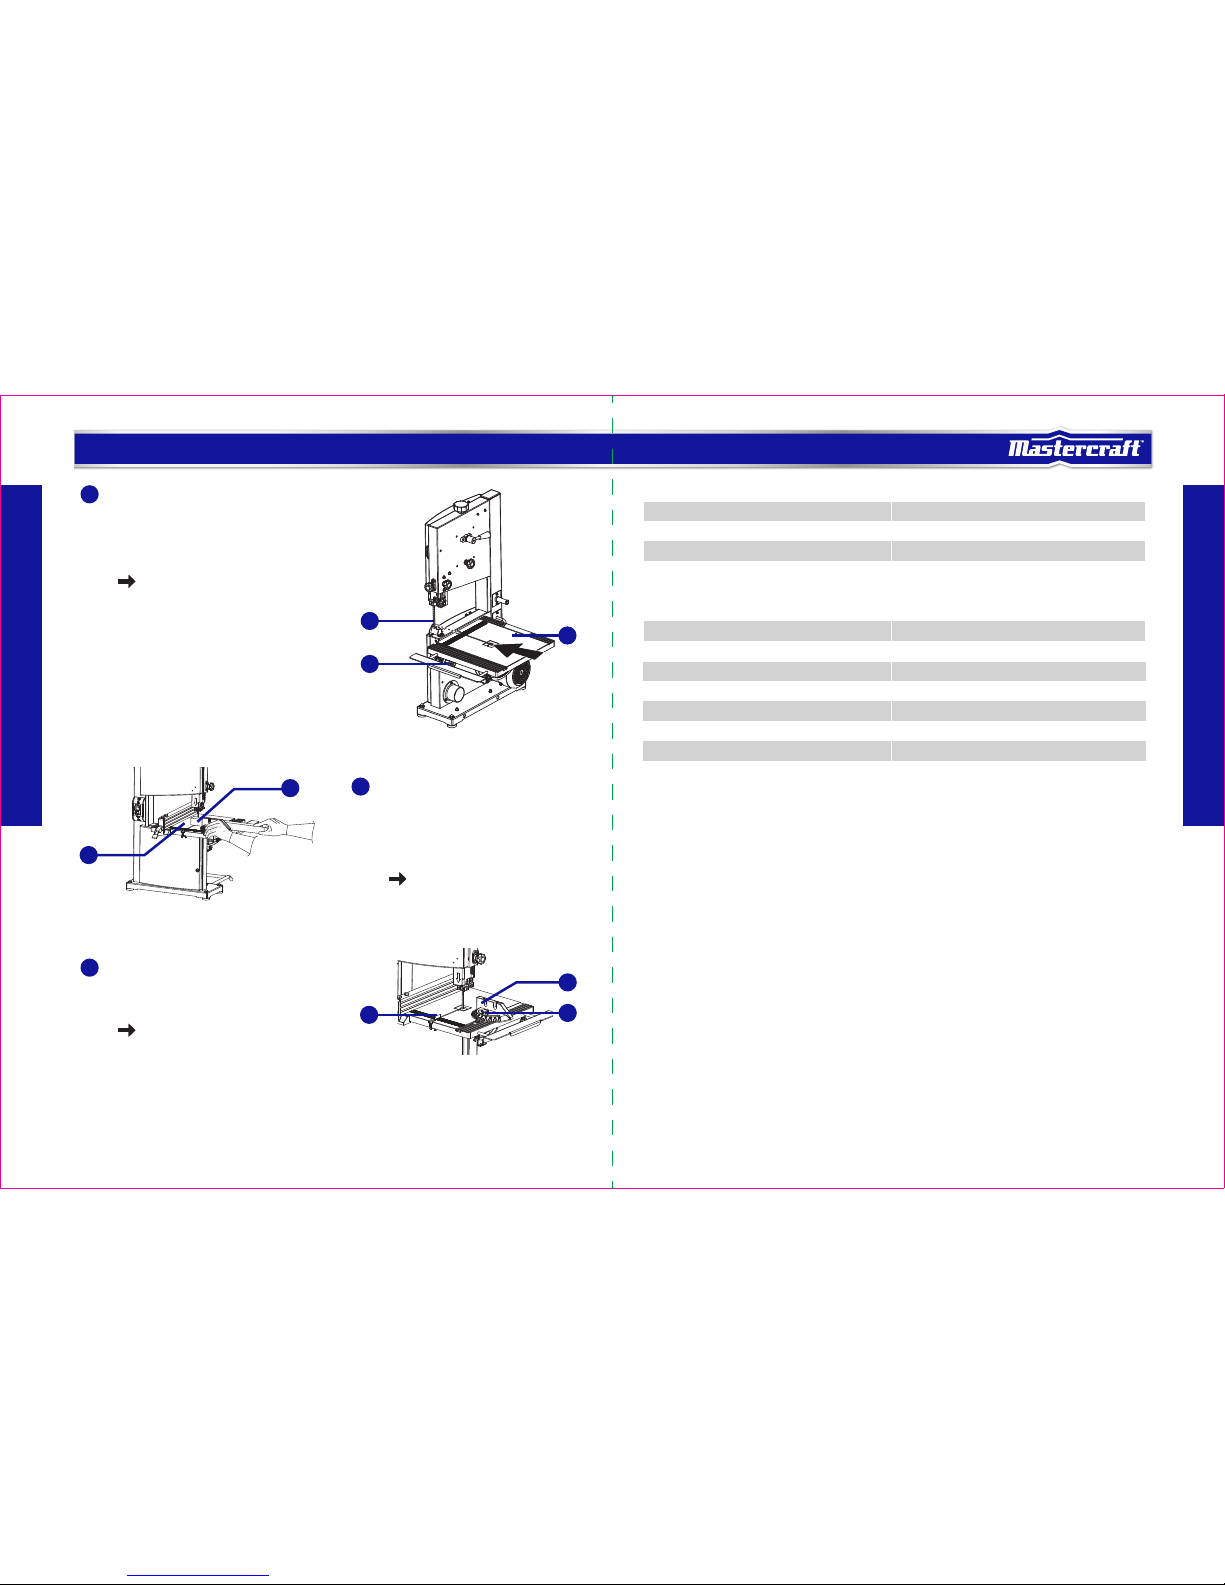
• Holding the work table with your left
hand while pulling the table, tilt
adjustment knob (6) away from the saw
frame, align the teeth on the table
support assembly (7) with the teeth on
the table tilt adjustment knob (6).
see page 21
1
• Use both hands to hold the workpiece (3)
flat against the work table (4) and to guide
along desired path.
• Turn the band saw On. Wait until the band
saw reaches maximum speed (refer
section “Specifications”).
see page 29
2
model no. 055-6748-6 | contact us 1-800-689-9928
SPECIFICATIONS
Motor
Motor speed
Blade length
width
teeth
thickness
Main table size
Extension table size
Table Tilting Range
Max. extension table range
Max. cutting depth
Max. cutting width
Weight
120 V, 60 Hz, 2.5A
2556 SFM (no load)
62" (157.5 cm)
1/4" (6.35 mm)
6 TPI
1/64" (0.3 mm)
11 3/4 x 11 3/4" (30 x 30 cm)
11 3/4 x 1 9/16" (30 x 4 cm)
0°-45°
2 5/32" (5.2 cm)
3 1/8" (8 cm)
9" (23 cm)
40 lb 13 oz (18.5 kg)
5
SPECIFICATIONS
4
QUICK START GUIDE
• Place the mitre gauge (1) on the mitre
gauge slot of the work table (2).
• Use the gauge knob (3) to set the desired
angle on the gauge scale.
see page 29
3
5
4
6
3
2
1
3
4
Page 4
WARNING!
To avoid mistakes that could cause serious injury, do not plug in the band
saw until you have read and understood the following rules.
DANGER!
Potential hazard that will result in serious injury or loss of life.
WARNING!
Potential hazard that could result in serious injury or loss of life.
CAUTION!
Potential hazard that may result in moderate injury or damage to equipment.
model no. 055-6748-6 | contact us 1-800-689-9928
7
SAFETY GUIDELINES
6
SAFETY GUIDELINES
SAFETY GUIDELINES
This manual contains information that relates to PROTECTING PERSONAL SAFETY and PREVENTING
EQUIPMENT PROBLEMS. It is very important to read this manual carefully and understand it thoroughly before
using the product. The symbols listed below are used to indicate this information.
Note: The word “Note” is used to inform the reader of something the operator needs to know about the tool.
SAFETY RECOMMENDATIONS
These precautions are intended for the personal safety of the operator and others working with the operator.
Failure to follow these instructions may result in a permanent loss of vision, serious personal or even fatal
injury, property damage and/or tool damage. Please take time to read and understand them.
Safety is a combination of common sense, staying alert, and knowing how your band saw works.
• READ and become familiar with this entire instruction manual. LEARN the tool’s applications, limitations,
and possible hazards.
• AVOID DANGEROUS CONDITIONS. DO NOT use power tools in wet or damp areas, and DO NOT expose
them to rain. Keep work areas well lit. Attach the dust extraction unit. If there are connections for dust
extraction and collection equipment, then make sure that the equipment is correctly attached and used.
• DO NOT use power tools in the presence of flammable liquids or gases.
• ALWAYS keep your work area clean, uncluttered and well lit. DO NOT work on floor surfaces that are
slippery with sawdust or wax.
• KEEP BYSTANDERS AT A SAFE DISTANCE FROM the work area, especially when tool is operating. NEVER
allow children or pets near the tool.
• DO NOT FORCE THE TOOL to do a job that it was not designed to do.
• DRESS FOR SAFETY. DO NOT wear loose clothing, gloves, neckties, or jewellery (rings, watches, etc.)
when operating the tool. Inappropriate clothing and items can get caught in moving parts and pull you in.
ALWAYS wear non-slip footwear, and tie back long hair.
• WEAR A FACE MASK OR DUST MASK. Sawing operations produce dust.
Dust generated from certain materials can be hazardous to your health. Always operate the band saw in
a well-ventilated area, and provide for proper dust removal. Wear a face mask or dust mask when
operating.
• ALWAYS remove the power cord plug from the electric outlet when making adjustments, changing parts,
cleaning or working on the tool.
• KEEP GUARDS IN PLACE AND IN WORKING ORDER.
• AVOID ACCIDENTAL START-UPS. Turn the power switch to the Off position before plugging in the power
cord.
• REMOVE ADJUSTMENT TOOLS. ALWAYS make sure all adjustment tools are removed from the band saw
before turning it on.
• NEVER LEAVE A RUNNING TOOL UNATTENDED. Turn the power switch to the OFF position. DO NOT leave
tool until it has come to a complete stop.
• NEVER STAND ON THE TOOL. Serious injury could result if the tool tips or is accidentally jarred. DO NOT
store anything above or near the tool.
• DO NOT OVERREACH. Keep proper footing and balance at all times. Wear oil-resistant, rubber-soled
footwear. Keep the floor clear of oil, scraps and other debris.
• MAINTAIN TOOLS PROPERLY. ALWAYS keep tools clean and in good working order. Follow instructions for
lubricating and changing accessories.
• CHECK FOR DAMAGED PARTS. Check for alignment of moving parts, jamming, binding, breakage,
improper mounting or any other conditions that may affect the operation. Any part that is damaged
should be properly repaired or replaced before use.
• MAKE THE WORKSHOP CHILDPROOF. Use padlocks and master switches, and ALWAYS remove starter
keys.
• DO NOT operate the tool if you are under the influence of any drugs, alcohol or medication that could
affect your ability to use the tool properly.
ADDITIONAL SAFETY GUIDELINES FOR BAND SAW
• TO AVOID INJURY FROM UNEXPECTED MOVEMENT, make sure the saw is on a firm, level surface and
that it is properly secured to prevent rocking. Make sure there is adequate space for operations. Bolt the
saw to a support surface to prevent slipping or sliding during operation.
• TURN OFF AND UNPLUG the saw before moving it.
• USE THE CORRECT SIZE AND STYLE OF BLADE.
• MAKE SURE THE BLADE TEETH POINT DOWN AND TOWARD THE TABLE.
• BLADE GUIDE, SUPPORTS, BEARINGS AND BLADE TENSION must be properly adjusted in order to avoid
accidental blade contact, and to minimize blade breakage. To maximize blade support, always adjust the
upper blade guide and blade guard so that it barely clears the workpiece.
• TABLE LOCK HANDLE SHOULD BE TIGHT.
• USE EXTRA CAUTION with very large, very small, or awkward workpieces.
Page 5
WARNING!
For your own safety, read the instruction manual before operating the band saw.
• Wear eye protection.
• Do not wear gloves, a necktie or loose clothing.
• Make sure the saw is on a firm, level surface and that it is properly secured.
• Use only the recommended accessories.
• Use extra caution with very large, very small or awkward workpieces.
• Keep your hands away from the blade at all times in order to prevent accidental injury.
WARNING!
• Use the proper extension cord. Make sure to use an extension cord that is heavy enough to carry
the current required by the tool. An undersized cord will cause a drop in line voltage, resulting in
loss of power and overheating of the tool.
• Use the extension cord only for intended purpose. Do not pull the extension cord to remove it
from the power socket.
CAUTION!
This band saw is intended for indoor use only. Do not expose it to rain or use in damp locations.
model no. 055-6748-6 | contact us 1-800-689-9928
9
SAFETY GUIDELINES
8
SAFETY GUIDELINES
• USE EXTRA SUPPORTS to prevent workpieces from sliding off the tabletop. Never use another person in
place of a table extension, or to provide additional support for the workpiece.
• WORKPIECES SHOULD BE SECURED so that they do not twist, rock, or slip while being cut.
• PLAN INTRICATE OR SMALL WORK CAREFULLY in order to avoid pinching the blade. Avoid awkward
operations and hand positions in order to prevent accidental contact with the blade.
• SMALL PIECES SHOULD BE SECURED with clamps or fixtures. Do not hold small pieces with your hand,
because your fingers might go under the blade guard.
• SUPPORT ROUND WORK PROPERLY (use a V block or press it against the mitre gauge) to prevent it from
rolling and the blade from biting.
• CUT ONLY ONE WORKPIECE AT A TIME. Make sure the table is clear of everything except the workpiece
and its guides before you turn the saw on.
• ALWAYS WATCH THE SAW RUN BEFORE EACH USE. If there is excessive vibration or unusual noise, stop
immediately. Turn the saw off and unplug it immediately. Do not start the saw again until the problem
has been located and corrected.
• TO FREE JAMMED MATERIAL, turn the switch off. Remove the switch key and unplug the saw. Wait for
all moving parts to stop before removing the jammed material.
• DON’T LEAVE THE WORK AREA UNTIL ALL MOVING PARTS HAVE STOPPED. Shut off the power to master
switches. Remove the switch key from the band saw and store it in a safe place, away from children.
Childproof the workshop!
USE SAFETY GOGGLES AND EAR PROTECTION:
ALWAYS WEAR EYE PROTECTION THAT CONFORMS WITH CUL REQUIREMENTS. FLYING
DEBRIS can cause permanent eye damage.
The tool is loud and the sound can cause hearing damage. Always wear ear protection to help
prevent hearing damage and loss. Failure to comply may result in moderate injury.
USE DUST MASK:
Some dust created by sawing contains chemicals that are known to cause cancer, birth defects
or other reproductive harm. Some examples of these chemicals come from lead-based paints,
crystalline silica from bricks, cement and other masonry products, arsenic and chromium from
chemically treated lumber. To reduce exposure to these chemicals, work in a well-ventilated
area with approved safety equipment, such as dust masks that are specially designed to filter out microscopic
particles.
ELECTRICAL SAFETY
GUIDELINES FOR USING EXTENSION CORDS:
In the event of a malfunction or breakdown, grounding provides a path of least resistance for electric current
to reduce the risk of electric shock. This tool is equipped with an electric cord having an equipment-grounding
conductor and a grounding plug. The plug must be plugged into a matching outlet that is properly installed
and grounded in accordance with all local codes and ordinances.
Do not modify the plug provided. If it will not fit the outlet, have the proper outlet installed by a qualified
electrician.
Improper connection of the equipment-grounding conductor
can result in a risk of electric shock. The conductor with
a green outer surface, with or without yellow stripes, is the
equipment-grounding conductor. If repair or replacement
of the electric cord or plug is necessary, do not connect the
equipment-grounding conductor to a live terminal.
Check with a qualified electrician or service technician if
the grounding instructions are not completely understood,
or if in doubt as to whether the tool is properly grounded.
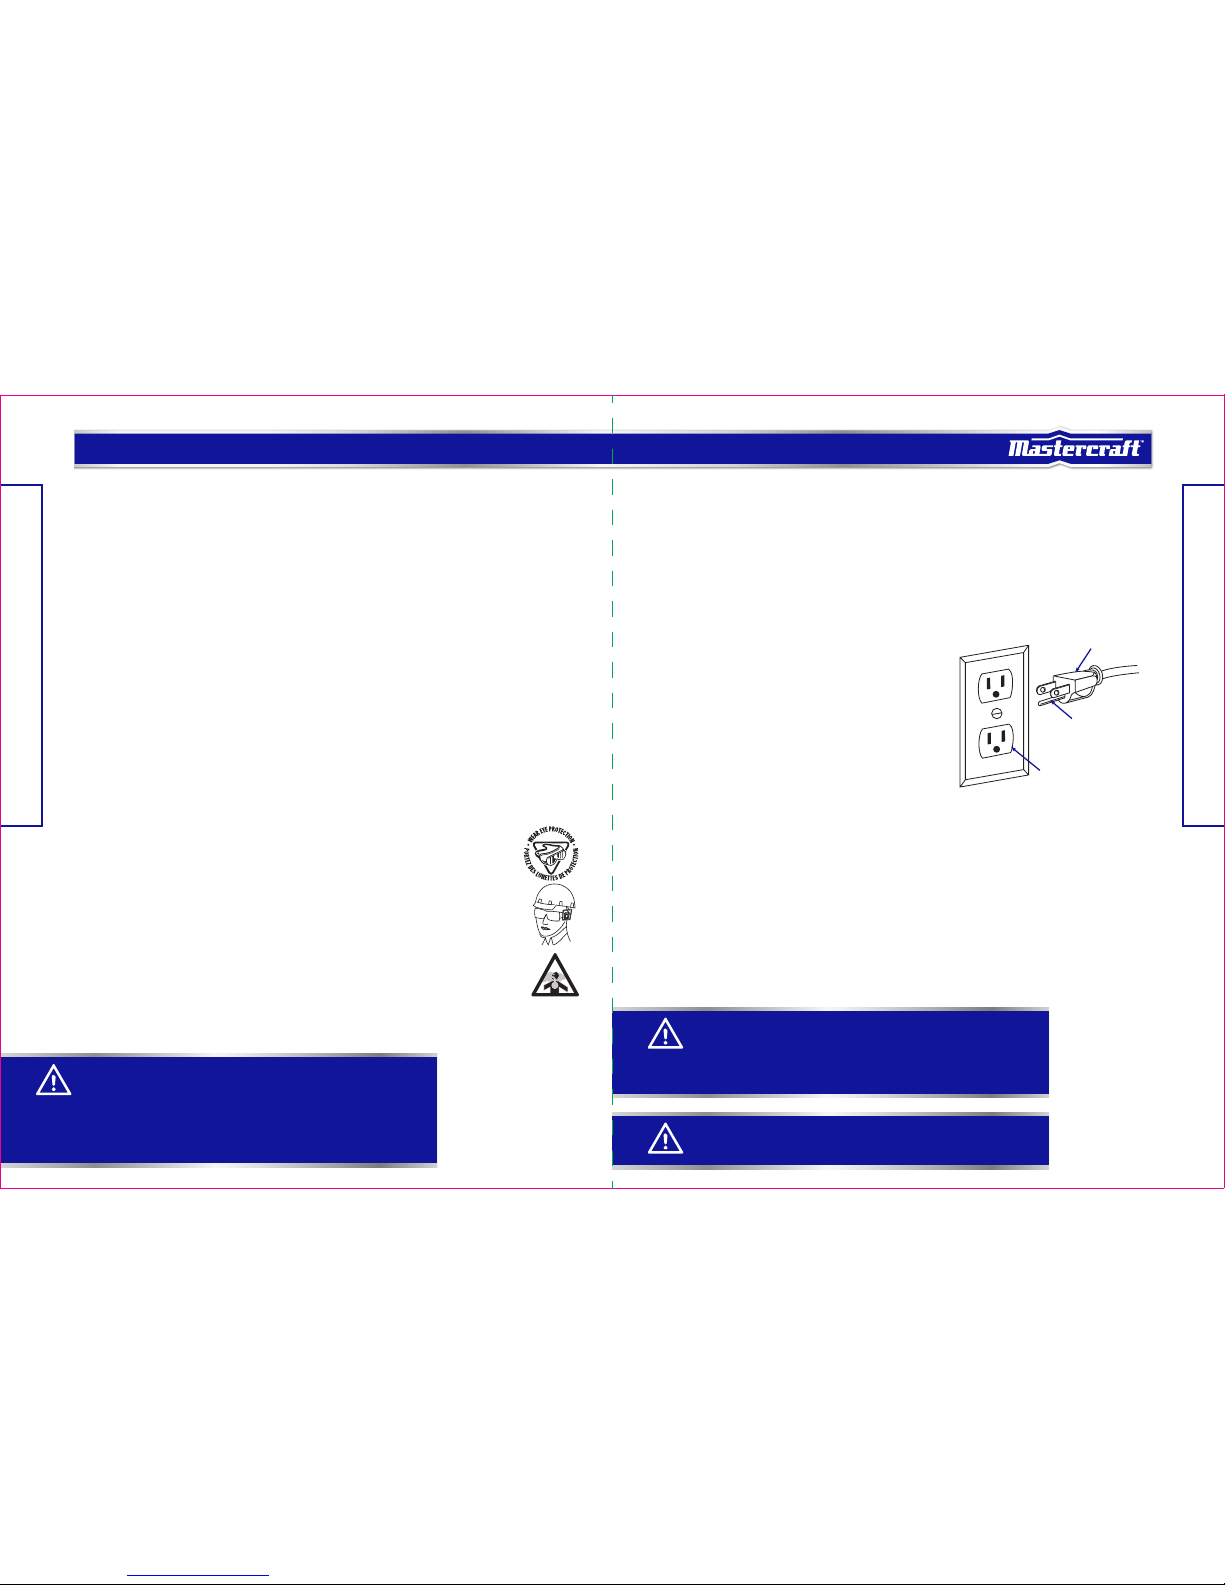
Use only three-wire extension cords that have three-prong
grounding plugs and three-pole receptacles that accept the
tool's plug, as shown in Fig. 1. Repair or replace a damaged or worn cord immediately.
GROUNDING INSTRUCTIONS:
• Make sure the extension cord is in good condition. When using an extension cord, be sure to use one
that is heavy enough to carry the current that your product will draw. An undersized cord will cause a
drop in line voltage, which will result in loss of power and overheating. The table on the next page shows
the correct size to be used according to cord length and nameplate ampere rating. When in doubt, use
the next heavier gauge. The smaller the gauge number, the heavier the cord.
• Make sure your extension cord is properly wired and in good condition. Always replace a damaged
extension cord, or have it repaired by a qualified person before using it. Protect your extension cords from
sharp objects, excessive heat, and damp or wet areas.
Fig. 1
Three-prong plug
Grounding prong
Properly grounded outlet
Page 6
NOTE:
Recycle unwanted materials rather than disposing of them as waste. Sort the tool and its components in
specific categories and take to the local recycling centre or dispose of them in an environmentally safe way.
AMPERAGE RATING OF THE TOOL
(120 V CIRCUIT ONLY)
MORE THAN
0
6
10
12
NOT MORE THAN
6
10
12
16
25’ (7.6 m)
18
18
16
14
50’ (15.2 m)
16
16
16
12
100’ (30.5 m)
16
14
14
Not recommended
150’ (45.7 m)
14
12
12
TOTAL LENGTH OF THE EXTENSION CORD
MINIMUM GAUGE FOR THE EXTENSION CORD (AWG)
WARNING!
This tool must be grounded while in use in order to protect the operator from electric shock.
model no. 055-6748-6 | contact us 1-800-689-9928
11
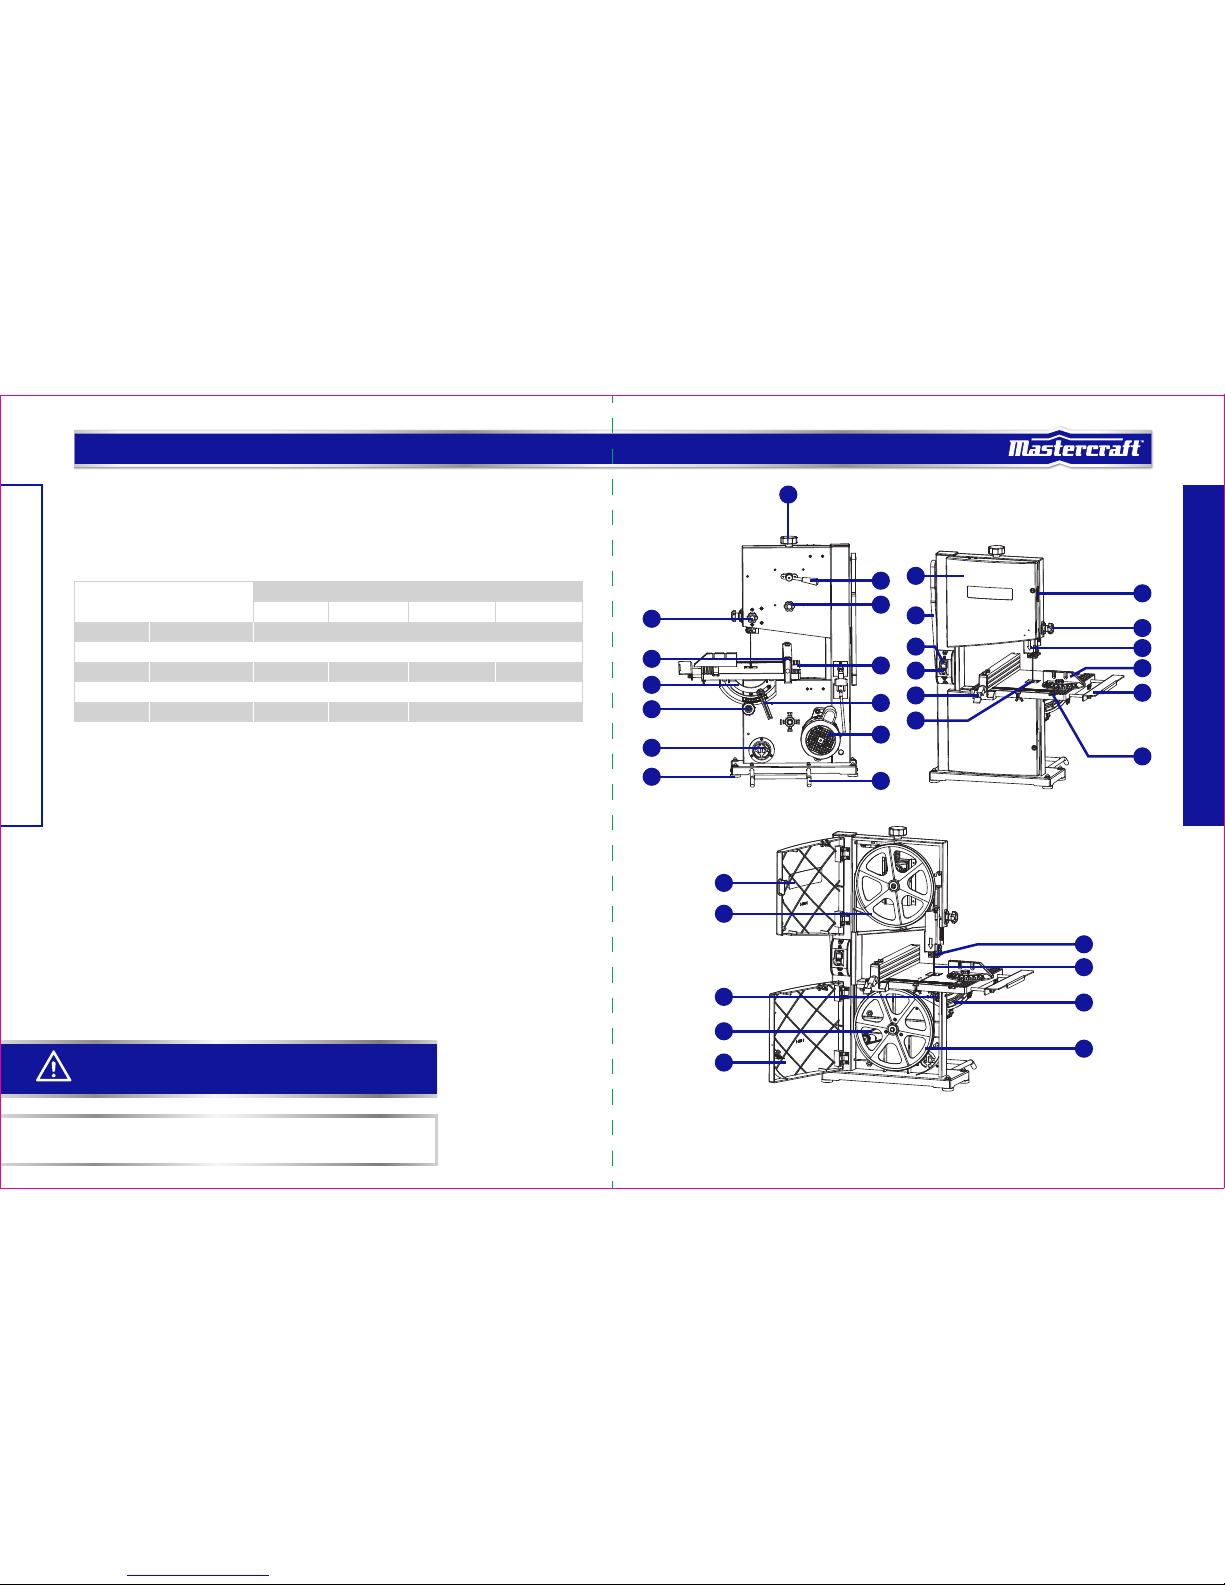
KNOW YOUR BAND SAW
10
SAFETY GUIDELINES
Recommended size for extension cords
• Use a separate electrical circuit for your tools. This circuit must consist of not less than #12 wire with a
20 A time-delayed fuse or a #14 wire with a 15 A time-delayed fuse. Before connecting the motor to the
power line, make sure the switch is in the Off position and the electric current is rated the same as the
current stamped on the motor nameplate. Running at a lower voltage will damage the motor.
2
14
17
18
27
28
29
30
31
32
33
34
26
19
15
16
3
13
12
11
9
8
10
4
5
6
20
21
23
22
24
25
7
1
Page 7

model no. 055-6748-6 | contact us 1-800-689-9928
13
KNOW YOUR BAND SAW
12
KNOW YOUR BAND SAW
Table tilt locking knob:
Loosening the table tilt locking knob allows the work table to be tilted at different angles. Tightening the table
tilt locking knob locks the work table in place.
Tracking knob:
Adjusts tracking knob to keep blade centred on the wheels.
Tracking window:
The tracking window makes tracking adjustments easier to see.
Blade tension knob:
Controls blade tension when changing blades and making adjustments for various sawing applications.
Mitre gauge:
This mitre gauge aligns the wood for a crosscut. The easy-to-read indicator shows the exact angle for a mitre
cut at 90° and 45°.
Dust collection system:
The system is connected with a dust extraction port at the motor side of the band saw. If the band saw is
operated without this system, some of the dust will be blown out.
Blade guides:
Upper and lower blade guides help keep the blade from twisting during operation.
Blade guard:
The guard is attached to the upper blade guide. It protects the operator from coming in contact with the blade.
Table tilt adjustment knob:
The adjustment knob is located under the work table, to adjust the work table to a desired angle.
Table tilt locking knob:
The locking wheel is located under the work table, to lock the work table at a desired angle.
Push stick:
Always use the push stick to feed the workpiece until it is clear of the table.
Fence locking lever:
The lever is located on the front of the rip fence to release or lock the rip fence with respect to the work table.
Blade tension lever:
This lever is located at the back of the tool to apply tension on the blade.
Blade cleaning brush:
The brush is used to remove foreign particles from the drive wheel by contacting the blade.
Blade:
The blade furnished with the band saw is a carbide-tipped combination blade, 62" (157.5 cm) long and 1/4"
(6.35 mm) wide, used for producing a good quality cut for many applications.
Blade pitch:
The blade pitch is the number of teeth per inch or tooth size. A blade with more teeth per inch produces a
smoother cut. The type of material to be cut determines the number of teeth that should be in contact with
the workpiece. When cutting soft materials, use a proper blade having six to eight teeth per inch. When
cutting hard materials, where vibration is more detrimental, use a blade with eight to twelve teeth per inch.
The blade vibration occurs when the pitch is too large. This vibration can strip the teeth from blade.
Blade thickness:
The blade thickness is the distance between sides of blade. A thicker blade has more rigidity and stronger
teeth. A narrow thick blade is used to make curves and a wide thin blade is used to make long, straight cuts.
Table insert:
The table insert is located on the table slot to support the workpiece with respect to the blade. It prevents the
movement of the workpiece from the work table.
No.
1
2
3
4
5
6
7
8
9
10
11
12
13
14
15
16
17
No.
18
19
20
21
22
23
24
25
26
27
28
29
30
31
32
33
34
Description
Extension table
Mitre gauge groove
Table insert
Fence locking lever
Safety key
On/Off switch assembly
Push stick
Cabinet
Upper blade guide
Blade
Table support assembly
Lower drive wheel
Lower door
Drive belt
Lower blade guide
Upper idler wheel
Upper door
Description
Blade tension knob
Blade tension lever
Tracking knob
Work table
Table tilt locking knob
Motor assembly
Additional support
Rubber feet
Dust extraction port
Table tilt adjustment knob
Table tilt gauge
Rip fence
Blade tracking knob
Tracking window
Upper guide knob
Blade guard
Mitre gauge
Page 8

WARNING!
Do not keep your hands near the saw blade. There is a chance of your hands suddenly slipping
from the workpiece and coming into contact with the blade.
WARNING!
• Use only blades at maximum safe operating speeds of 2556 SFM. Failure to heed this warning
could result in personal injury.
• The blades should always be kept sharp. Use a reputable sharpening service to sharpen the
blades when needed.
• Never store the blades stacked on top of one another. Place material such as cardboard
between them to keep the blades from coming into contact with one another.
model no. 055-6748-6 | contact us 1-800-689-9928
15
KNOW YOUR BAND SAW
14
KNOW YOUR BAND SAW
Drive belt:
The drive belt is fitted onto the lower drive wheel. The belt must be properly tensioned to enable smooth
operation of the drive wheel.
Lower drive wheel:
The lower drive wheel drives the blade in an endless loop.
Rubber feet:
The rubber feet are provided on four corners of the table base.
Table tilt gauge:
The tilt gauge is provided below the work table. The gauge has a scale that enables the operator to set the
work table at required angle between 0 to 45°.
Upper idler wheel:
The upper idler wheel can be adjusted to apply tension on the blade.
Upper and lower doors:
The upper and lower doors cover the upper idler wheel and lower drive wheel, respectively.
On/Off switch assembly:
The switch assembly located on the front of the cabinet allows the operator to easily turn On/Off the band
saw. To lock the switch in the Off position, remove the switch key from the switch. Place the key in a
location that is not accessible to children and others who are not qualified to use the tool.
Work table:
The surface where the workpiece rests while performing the cutting operation.
Table support assembly:
The support assembly attaches the work table with respect to the band saw.
Causes of kickback:
Kickback can be caused by any action that pinches the blade in the wood, such as the following:
• Incorrect blade depth
• Sawing into knots or nails in the workpiece
• Twisting the wood while making a cut
• Failing to support the workpiece
• Forcing the blade to cut the workpiece
• Cutting warped or wet lumber
• Not using the appropriate type of blade
• Not following correct operating procedures
• Misusing the band saw
• Cutting with a dull, gummed-up or improperly set blade
Avoiding kickback:
• Inspect the workpiece for knots or nails. Knock out any loose knots or remove any nails in the workpiece
with a hammer before cutting the workpiece. Never perform cutting operation into a loose knot or nail of
the workpiece.
• Always use the rip fence when rip cutting and the mitre gauge when crosscutting to prevent twisting of the
wood during cutting operation.
• Always use clean, sharp, and properly set blades. Never make cuts with dull blades.
• Support the workpiece properly before starting the cutting operation to avoid blade pinching.
• When cutting the workpiece, apply constant and uniform pressure to the workpiece. Never force the
workpiece while cutting.
• Do not cut wet or warped lumber.
• Use the correct type of blade according to the cut being made.
• Always hold the workpiece firmly with both hands or with push sticks. Keep your body in a balanced
position in order to resist kickback. Never stand directly in line with the blade.
Page 9

NO. Description Qty. Illustration
M6 Flat washers
M5 Flat washers
M5 Hex nuts
M6x30 Hex bolts
M5x20 Hex bolts
3, 4, 5 mm hex keys
M6 Cap nuts
Table tilt locking knob
9
10
11
12
13
14
15
16
4
2
2
4
2
3
4
1
PACKAGE CONTENTS
No. Description Qty Illustration
Band saw assembly
Mitre gauge
Rip fence
Additional support
Work table assembly
Push stick
Rubber feet
M8 Flat washer
1
2
3
4
5
6
7
8
1
1
1
1
1
1
4
1
model no. 055-6748-6 | contact us 1-800-689-9928
17
ASSEMBLY INSTRUCTIONS
16
ASSEMBLY INSTRUCTIONS
Page 10

NOTE:
All bolts should be inserted from the top. Install the lock washers and hex nuts from the underside of
the bench.
TOOLS NEEDED FOR ASSEMBLY
Star-head screwdriver Framing square
Wrench
WARNING!
If any parts are damaged or missing, do not operate this tool until the parts are replaced. Use of
this product with damaged or missing parts could result in serious personal injury.
• Do not attempt to modify this tool or create accessories not recommended for use with this tool.
Any such alteration or modification is misuse and could result in a hazardous condition leading
to possible serious personal injury.
• Do not connect to power supply until assembly is complete. Failure to comply could result in
accidental starting and possible serious personal injury.
• Risk of injury! Always pull out the mains plug (disconnect the product from its power supply)
before commencing work on the product.
• Never stand directly in line with the blade or allow hands to come within 3" (7.6 cm) of the
blade. Failure to heed this warning could result in serious injury.
• To avoid serious injury, always make sure the tool is securely mounted on the work table. Never
operate the tool on the floor.
UNPACKING
Do not use this product if any parts of the package contents are already assembled to your product when you
unpack it. Package contents are not assembled to the product by the manufacturer and require customer
installation. Use of a product that may have been improperly assembled could result in serious personal injury.
• Carefully lift the tool from the carton and place it on a level work surface.
• Inspect the tool carefully to make sure no breakage or damage occurred during shipping.
• Do not discard the packing material until you have carefully inspected and satisfactorily operated the tool.
• If any parts are damaged or missing, please call 1-800-689-9928 for assistance.
model no. 055-6748-6 | contact us 1-800-689-9928
19
ASSEMBLY INSTRUCTIONS
18
ASSEMBLY INSTRUCTIONS
MOUNTING RUBBER FEET ON THE BASE (Fig. 2)
• Insert the four rubber feet (1) into holes provided in
the four corners of saw base.
• Insert M6 hex bolts (2) into the holes and tighten them
with M6 flat washers (3) and M6 cap nuts (4).
MOUNTING BAND SAW TO WORKBENCH
If the band saw is to be used in a permanent location, the band saw must be mounted to a firm supporting
surface such as a workbench. Four bolt holes have been provided in the saw’s base for this purpose. Bolts
(not included) should be of sufficient length to accommodate the saw base, lock washers (not included), hex
nuts (not included), and the thickness of the workbench. Tighten all four bolts securely.
Carefully check the workbench after mounting to make sure that no movement can occur during use. If any
tipping, sliding, or walking is noted, secure the workbench to the floor before operating.
• Place band saw on the workbench. Using the saw base as a pattern, locate and mark the holes where the
band saw is to be mounted.
• Drill holes through the workbench.
• Place band saw on the workbench, aligning holes in the saw base with the holes drilled in the workbench.
• Insert bolts (not included) and tighten securely with lock washers and hex nuts (not included).
1
3
4
2
Fig. 2
CLAMPING BAND SAW TO WORKBENCH (Fig. 3)
If the band saw is to be used as a portable tool, it is recommended that you fasten it permanently to a
mounting board that can easily be clamped to a workbench or other supporting surface. The mounting board
should be of sufficient size to avoid tipping of the saw while in use. Any good grade plywood or chipboard
with a thickness of 3/4" (19 mm) is recommended.
Page 11

NOTE:
It may be necessary to countersink hex nuts and washers on bottom side of mounting board.
model no. 055-6748-6 | contact us 1-800-689-9928
21
ASSEMBLY INSTRUCTIONS
20
ASSEMBLY INSTRUCTIONS
If lag bolts are used, make sure they are long enough to go
through holes in the saw base and material the saw is being
mounted to. If machine bolts are being used, make sure
bolts are long enough to go through holes in the saw base,
the material being mounted to, and the lock washers and
hex nuts.
• Mount saw to board using holes in saw base as a
template for hole pattern. Locate and mark the holes
where the band saw is to be mounted.
• Follow the last three steps in the section MOUNTING
BAND SAW TO WORKBENCH.
ASSEMBLING THE WORK TABLE (Fig. 5-7)
• Remove the D-nut (1), flat washer (2) and wing screw
(3) from the hole located in the front edge of the work
table (4). (Fig. 4)
• Standing at the front of the band saw, slide the work
table (4) past the blade (5) and through the slot moving
from the right side of the work table to the left.
• Holding the work table with your left hand while pulling
the table tilt adjustment knob (6) away from the saw
frame, align the teeth on the table support assembly (7)
with the teeth on the table tilt adjustment knob (6).
Release the knob.
• Fit the pins on the frame into the slots of the table
support assembly (7)
• Insert the washer (8) on the threaded end of the table tilt
locking lever (9). Tighten the work table to the saw
frame by turning the table tilt locking lever (9)
clockwise.
• Attach the D-nut, flat washer and wing screw to the
work table.
Make sure that the wing screw goes below the saw table.
MOUNTING ADDITIONAL SUPPORT ON THE BASE (Fig. 4)
• Place the additional support (1) on the rear side of the
base.
• Align the two holes in the additional support with the
corresponding holes on the rear side of the saw base.
• Secure the additional support with two hexagon bolts
(2), two flat washers (3) and two nuts (4).
Fig. 3
Fig. 4
1
2
4
3
2
3
1
4
5
4
7
6
6
9
8
Fig. 5
Fig. 6
Fig. 7
6
8
9
Page 12

WARNING!
Never use miter gauge and rip fence at the same time. If you do, the blade may bind into the
workpiece, thereby resulting in the serious injury of the operator and/or damage to the workpiece.
NOTE:
Always make a test cut to insure the squareness of the blade prior to beginning any new project. If not
square, it may be necessary to loosen the screws under the work table to make the adjustment (mitre slot
must be parallel to the saw blade). Once square, retighten screws.
model no. 055-6748-6 | contact us 1-800-689-9928
23
ASSEMBLY INSTRUCTIONS
22
ASSEMBLY INSTRUCTIONS
SQUARING THE SAW TABLE TO THE BLADE (Fig. 8-9)
• Turn the blade tracking knob (1) counter-clockwise to
unlock the blade guide assembly (2). Turning the upper
guide knob (3) clockwise, raise the blade guide assembly
(2) as far as it will go. Turn the blade tracking knob
clockwise to retighten.
• Place a small combination square (4) on the saw table
beside the blade (5).
• Loosen the table tilt locking knob (6) and rotate the table
tilt adjustment knob (7) to tilt the work table up or down
to align table 90° to blade (0° position). Retighten the
table tilt locking knob (6).
• Using an adjustable wrench, loosen the locking nut (8).
• Turn the adjusting bolt (9) until the bolt just touches the
saw housing.
• Check squareness of the work table to the blade. Make
readjustments if necessary.
• Once squareness is confirmed, retighten the locking nut.
• Set scale indicator (10) to zero and tighten screw with
a star-head screwdriver.
WORK TABLE TILT ADJUSTMENT (Fig. 10)
Before adjusting the band saw, turn Off the band saw,
remove the safety key, and unplug the power cord from the
electrical outlet.
The work table can be tilted from 0° - 45° to the right side.
• Turn the table tilt locking knob (1) counter-clockwise.
• Rotate the table tilt adjustment knob (2) until the pointer
is at the desired angle on the table tilt gauge (3). Now the
work table is tilted to the desired angle.
• Tighten the table tilt locking knob in order to secure the
work table in position.
SETTING THE RIP FENCE ON THE WORK TABLE (Fig. 11)
• Raise the fence locking lever (1) on the rip fence (2).
• Place the rip fence on the work table (3) so that the
fence locking lever is at the front of the work table.
• Lower the fence locking lever in order to lock the rip
fence in position on the work table.
• To move the rip fence, raise the fence locking lever and
slide the fence to the desired location. Lower the fence
locking lever to lock the fence in position.
CONNECTING DUST EXTRACTION PORT TO DUST COLLECTION SYSTEM (Fig. 12)
Connect the dust extraction port (1) located on the motor
side of the band saw to the dust collection system by
connecting the inlet of the dust collection hose to the dust
extraction port.
Fig. 8
Fig. 9
Fig. 10
Fig. 11
Fig. 12
4
35
40
45
30
25
20
15
10
0
5
3
2
1
1
1
2
3
8
9
10
7
6
5
3
1
2
3
Page 13

NOTE:
Proper tracking is achieved only when upper idler wheel and lower drive wheel are aligned.
WARNING!
Always ensure correct tracking of the blade, as an improperly tracked blade may spring out from
the blade wheels, thereby causing serious injury. Do not perform the tracking adjustment while
band saw is operating.
model no. 055-6748-6 | contact us 1-800-689-9928
25
ASSEMBLY INSTRUCTIONS
24
ASSEMBLY INSTRUCTIONS
REMOVING AND INSTALLING THE BLADE (Fig. 13-15)
• Loosen and remove the D-nut, flat washer and wing
screw from the work table (1).
• Open the upper and lower door (2) by unscrewing the
cover locking screw (3).
• Turn the blade tracking knob (4) counter-clockwise to
unlock the blade guide assembly (5). Turning the upper
guide knob (6) (clockwise raises the blade guide
assembly (5); counter-closewise lowers it), position the
blade guide assembly (5) about halfway between the
work table and saw housing. Retighten the blade
tracking knob (4).
• Open the blade guard by pulling the left side of the
guard out and away from the idler wheel.
• Release all blade tension from the blade.
• Carefully remove the old blade (7).
• Wearing gloves, carefully uncoil the new blade at arms,
length. If the new blade was oiled to prevent rusting, it
may need to be wiped to keep the oil from your
workpiece. Carefully wipe in the same direction the
teeth are pointing so the rag does not catch on the teeth
of the saw blade.
The blade may need to be turned inside out if the teeth are
pointing In the wrong direction. Hold the blade with both
hands and rotate it inward.
• With the teeth of the blade toward the left of the saw
and facing downward, place the blade through the
lower blade guides (8) and around both idler wheels.
• Slowly turn the upper idler wheel (9) to the right or
clockwise by hand to centre the blade on the rubber
tires.
• Re-engagee the blade tension lever (10) then adjust the
blade tension; check or adjust the blade tracking.
• Adjust both upper and lower blade guides as explained
later in this manual.
• Re-attach the D-nut, flat washer and wing screw.
Tighten securely.
• Close the blade guard and upper and lower door.
Tighten the cover locking screw.
TRACKING THE BLADE (Fig. 16-17)
• Disconnect the band saw from power source.
• To check the position of the blade, rotate the lower
drive wheel (1) by hand in clockwise direction. View the
blade through tracking window.
• Loosen the blade tracking knob (2). If the blade rides
away from the cabinet, turn the tracking knob
clockwise. If the blade rides toward the cabinet, turn
the tracking knob counter-clockwise.
• Tighten the blade tracking knob to secure the blade in
the proper position.
Fig. 14
Fig. 15
Fig. 13
Fig. 16
Fig. 17
4
5
7
8
9
6
10
6
2
1
3
3
1
2
Page 14

WARNING!
• Always remove the switch key when the tool is not in use, and keep it in a safe place. In the
event of a power failure, turn Off the switch and remove the key, as doing so may prevent the
tool from accidentally starting when the power returns.
• Make sure the workpiece does not come into contact with the blade before operating the
switch. Failure to heed this warning may cause the workpiece to be kicked back toward the
operator, and could result in serious injury.
WARNING!
• Always handle the band saw with care. Failure to comply could cause serious injury.
• Always wear safety goggles or safety glasses with side shields when operating the tool, as
doing so may prevent flying particles from getting into eyes.
• Do not use any attachments or accessories that are not recommended by the manufacturer
of this tool. Failure to comply could result in serious injury.
• Do not operate the band saw without having the blade guard attached.
• Mount the band saw on a firm, supporting and waist-high surface. Failure to comply could result
in serious injury.
• Before using the band saw, check whether the power outlet is properly installed and grounded in
compliance with all local codes and ordinances. Improper connection could result in electric
shock.
• Do not alter three-pronged plug of the table saw. If the plug does not fit into the power outlet,
allow a qualified electrician to install the power outlet.
TRACKING THE BLADE (Fig. 18-19)
• Loosen the screws (1) to adjust guide pins (2) provided
on the blade sides.
• Use a feeler gauge to check that the guide pins are
0.002" away from the blade. Now tighten the screws
to lock the guide pins in the proper position.
• Adjust the ball bearing (3) at rear of blade by loosening
socket head bolt and repositioning the blade shaft.
• Use a feeler gauge to check that the ball bearing is
0.002" away from the back of blade. Secure the ball
bearing in position by tightening the socket head bolt.
• Loosen upper guide knob (4) to adjust the height of
upper blade guide (5) so that the blade guide is set at
a distance of 1/4" (6.35 mm) from the workpiece (6).
Tighten the upper guide knob after adjustment.
ADJUSTING THE LOWER BLADE GUIDE (Fig. 20)
• Loosen the screws (1) to move guide pins (2) away from
the blade sides.
• Loosen socket head bolts (3) and adjust the bearing (4)
so that the rear part of blade is positioned 0.002" away
from the bearing.
• Tighten the socket head bolts.
• Adjust the guide pins to the blade sides. Inserting a
playing card between guide and blade to check that
guide pins are 0.002" away from blade.
• Tighten the screws to lock the guide pins in proper
position.
ON/OFF SWITCH ASSEMBLY (Fig. 21)
• Insert switch key (1) into switch (2), and move the
switch to the On position to turn On the band saw.
• Move the switch (2) to the Off position to turn Off the
band saw.
• To lock the band saw, move the switch to the Off
position. Then remove the switch key (1) from the
switch and store the switch key in a safe and secure
location.
model no. 055-6748-6 | contact us 1-800-689-9928
27
OPERATING INSTRUCTIONS
26
ASSEMBLY INSTRUCTIONS
Fig. 18
Fig. 19
Fig. 20
Fig. 21
1
1/4"
1 1
2 2
4
5
6
3
1
4
1
2 2
3
SUR
DEHORS
(OFF)
(ON)
ON
REMOVE
TO LOCK
2
Page 15

NOTE:
The beveled cuts can be made freehand, or use the rip fence to guide and support the workpiece.
WARNING!
Use care when making this bevel cut freehand. The workpiece may slip from the work
table, thereby causing pressure on the blade, making it hard to follow the pattern line on the
workpiece and resulting in damage to the tool.
CAUTION!
• Never use mitre gauge and rip fence simultaneously, as the blade may bind into the workpiece
and could result in damage of the workpiece.
• Hold the workpiece firmly against the mitre gauge and feed the workpiece slowly into the blade
to restrict the movement of workpiece.
USING THE EXTENSION TABLE (Fig. 22)
When cutting a wider workpiece, you can use the extension.
The maximum extension table range is 2 5/32" (55 mm).
• Loosen the two wing screws (1) located underneath the
extension table (2).
• Pull the extension table to desired length.
• Tighten two wing screws (1).
CUTTING OPERATIONS
BEVEL CUTTING (Fig. 23-24)
• Unlock the work table (1) by loosening the table tilt
locking knob (2).
• Tilt the work table to desired position by rotating the
table tilt adjustment knob (3).
• Lock the work table in position by tightening the table
tilt locking knob.
• Adjust the upper blade guide (4) using the upper guide
knob (5) so that the upper blade guide is positioned at a
distance of 1/4" (6.35 mm) from the workpiece (6).
• Insert the switch key and turn On the band saw by
moving the switch to the On position. Wait until the
band saw reaches maximum speed. (Refer the
“Specifications” section.)
• Hold the workpiece firmly on the work table and against
the rip fence.
• Slowly feed the workpiece through the blade to make
beveled cuts on the workpiece.
CONTOUR CUTTING (Fig. 25-26)
• Adjust the upper blade guide (1) using the upper guide
knob (2) so that the upper blade guide is positioned at
a distance of 1/4" (6.35 mm) from the workpiece (3).
• Stand in front of the band saw and keep hands over
the work table exactly to the right of blade.
• Use both hands to hold the workpiece (3) flat against
the work table (4) and to guide it along the desired path.
• Turn the band saw on. Wait until the band saw
reaches maximum speed. (refer to the section
“Specifications” section.)
• Slowly feed the workpiece through the blade to cut
small corners of the workpiece. Continue the operation
until scrap is removed from the workpiece and desired
shape is obtained.
MITRING (Fig. 27-28)
This operation is performed by setting the mitre gauge to
an angle other than 0°.
• Place the mitre gauge (1) on the mitre gauge slot of
the work table (2).
• Use the gauge knob (3) to set the desired angle on the
gauge scale.
• Hold the workpiece (4) firmly against the mitre gauge
(1), and slowly feed the workpiece into the blade (5) .
model no. 055-6748-6 | contact us 1-800-689-9928
29
OPERATING INSTRUCTIONS
28
OPERATING INSTRUCTIONS
Fig. 25
Fig. 26
Fig. 27
Fig. 28
1/4"
1/4"
Fig. 23
Fig. 22
Fig. 24
5
4
6
1
3
2
1
1
2
1
3
2
2
1
3
5
2
4
1
4
3
Page 16

PROBLEM Possible Causes Solution
Excessive vibration. • Blade is out of balance.
• Blade is damaged.
• Saw accessories are not securely
mounted.
• The workpiece is not placed or
used on a flat surface.
• Blade is warped.
• Replace the blade.
• Replace the blade.
• Securely tighten all saw
accessories.
• Reposition the workpiece on a flat
surface.
• Replace the blade.
Rip fence does not move
smoothly.
• Rip fence is not mounted correctly. • Remount the rip fence in a correct
and stable position.
Excessive damage of
blade.
• Material is not secured on the work
table.
• Blade is too coarse.
• Teeth are in contact with the
workpiece before sawing.
• Blade guides are misaligned.
• Blade is thicker than the wheel
diameter.
• Crack occurs at weld.
• Place the workpiece firmly on the
work table.
• Use finer pitch blade.
• Allow the blade to contact the
workpiece only after the band saw
is started.
• Adjust the blade guides properly.
• Use thinner blade.
• Replace the blade.
Blade is dull. • Blade is too coarse.
• Inadequate workpiece feed
pressure.
• Hard spots or irregular layers
found on the workpiece.
• Blade is installed backwards.
• Use finer tooth blade.
• Gently increase the feed pressure.
• Increase rate of feed to remove the
layers and change the blades to
remove hard spots.
• Remove the blade, twist the blade
teeth inside and reinstall the blade.
Rough cuts. • Workpiece feeding rate is high.
• Blade is too coarse.
• Reduce the workpiece feeding rate.
• Use finer-tooth blade.
TROUBLESHOOTING
WARNING!
• Do not allow brake fluid, gasoline, petroleum-based products, penetrating oils, etc., to come
into contact with plastic parts. Failure to comply leads to tool damage, which in turn creates
a spark or fire resulting in serious personal injury.
• Make sure the tool is disconnected from power source before attempting to service or remove
any component.
GENERAL MAINTENANCE
Avoid using solvents when cleaning plastic parts. Most plastics are susceptible to damage from various types
of commercial solvents. Use a clean cloth to remove dirt, dust, oil, grease, etc.
• Periodically check all clamps, nuts, bolts, and screws for tightness and condition.
• Check and clean the blade guard periodically. Replace the blade guard if required.
• Clean the blades using a gum and pitch remover.
• To prevent the workpiece from slipping during cutting operations, do not wax the working face of the
mitre gauge.
• Protect the saw blade by cleaning sawdust accumulated under the work table and between the blade
teeth, and applying a resin solvent on the blade teeth.
• Clean plastic parts only with a soft damp cloth. Do not use any aerosol or petroleum solvents.
• Keep the upper and lower blade wheels clean. Debris on the wheels will cause poor tracking and blade
slippage.
LUBRICATION
• Apply small amount of machine oil to belt tension mechanisms and threaded or sliding surfaces.
• Lubricate all screw threads, nuts, and bearing points of the band saw (including the blade guard and the
mitre gauge).
• Apply a coat of paste wax to the tabletop to keep the work table slick and corrosion free.
SERVICE
• Replace the power cord if it is worn or damaged.
• Replace any damaged or missing part.
model no. 055-6748-6 | contact us 1-800-689-9928
31
TROUBLESHOOTING
30
MAINTENANCE
Page 17

model no. 055-6748-6 | contact us 1-800-689-9928
33
TROUBLESHOOTING
32
TROUBLESHOOTING
PROBLEM Possible Causes Solution
Saw does not start. • Motor cord or wall cord is not
plugged in.
• In-house circuit fuse is blown.
• In-house circuit breaker is tripped.
• In-house circuit switch is damaged.
• Improper electrical connections.
• Plug in the motor cord or wall cord.
• Replace the circuit breaker.
• Reset the circuit breaker.
• Repair or replace the in-house
circuit switch. Have the cord or
switch replaced by a qualified
service technician.
• Have a qualified technician check
the electrical connections.
PROBLEM Possible Causes Solution
Crooked cuts. • Workpiece is not placed properly
on the work table.
• Rate of feed of workpiece is too
high.
• Blade guides are not adjusted
properly.
• Upper blade guide is too far from
the workpiece.
• Blade is not sharp.
• Blade guide assembly or blade
thrust bearing is loosened.
• Use miter gauge to adjust tilt of the
work table to 90º.
• Reduce the rate of feed.
• Use feeler gauge to move the blade
guides within 0.002" from the
blade.
• Set the upper blade guide at a
distance of 1/4" (6.35 mm) from
the workpiece.
• Replace the blade.
• Tighten the blade thrust bearing
within 0.002" behind the back of
blade.
Twisting of the blade or
unusual wear on the
side/back of the blade.
• Blade binds into the workpiece.
• Blade guides or bearings are
damaged.
• Blade guides or bearings are not
adjusted properly.
• Blade guide brackets are loosened.
• Decrease the workpiece feed
pressure.
• Replace the blade guides or
bearings.
• Adjust the blade guides. (Refer to
the “Assembly Instructions”.)
• Tighten the blade guide brackets
properly.
Motor runs too hot. • Blade tooth is too coarse.
• Workpiece feed rate is high.
• Workpiece vibrates.
• Blade guide brackets are loosened.
• Use blade with finer teeth.
• Decrease the workpiece feed rate.
• Hold the workpiece firmly.
• Tighten the blade guide brackets
properly.
Ripping of the teeth from
the blade.
• Blade teeth are too coarse
especially when cutting pipe.
• Blade tooth is too fine especially
when cutting slick or soft material.
• Excessive dirt and chips on the
motor.
• Use blade with finer teeth.
• Use blade with coarser teeth.
• Clean the motor thoroughly.
Page 18

model no. 055-6748-6 | contact us 1-800-689-9928
35
EXPLODED VIEW
34
EXPLODED VIEW
2
3
4
5
6
7
10
4
28
27
26
18
19
20
21
24
6
25
31
44
39
40
43
41
39
38
37
42
36
34
33
40
4
4
4
54
52
51
50
49
48
11
47
46
43
40
39
61
6
60
59
58
57
56
55
26
28
63
6
29
62
25
67
69
84
6
11
13
11
13
11
78
115
113
110
111
112
103
11
106
108
108
10
10
11
9
8
11
53
40
39
42
66
105
106
107
68
49
64
32
35
105
109
6
104
24
65
10
48
116
32
81
6
45
4
166
17
22
23
9
8
11
12
11
3
29
6
30
24
10
12
166
14
4
1
15
16
11
11
3
114
6
154
1
119
54
55
118
121
122
123
117
78
120
56
98
99
100
102
101
125
126
127
28
124
6
81
32
78
4
155
69
80
81
82
83
6
84
85
86
88
6
11
13
32
87
89
32
81
4
4
4
65
70
72
73
75
71
32
6
74
66
67
68
46
76
11
81
147
79
149
94
93
92
91
90
77
78
148
11
46
95
96
119
142
140
78
143
144
145
151
150
153
152
97
78
137
138
139
140
141
6
32
158
136
146
67
133
134
128
6
129
130
131
135
156
46
11
49
132
157
159
160
161
162
163
164
165
Page 19

PARTS LIST
No.
1
2
3
4
5
6
7
8
9
10
11
12
13
14
15
16
17
18
19
20
21
22
23
24
25
26
27
28
29
30
31
Qty
2
1
4
17
1
21
1
2
2
8
26
2
8
1
1
1
1
1
1
1
1
1
1
2
3
4
1
5
2
1
2
Description
Bolt
Lower bezel panel
Hinge
Cross-shaped sunk bolt
Brush
Flat washer
Cross-shaped self-tapping bolt
Door holder
Door lock spring
Nut
Flat washer
Pressing paw
Cross-shaped bolt
Upper bezel panel
Bezel panel lens
Cross-shaped self-tapping bolt
Shield
Spring
Cross-shaped self-tapping bolt
Sliding block (B)
Sliding block (C)
Sliding block (A)
Up-down part
Bolt
Bolt
Round pin
bracket (A)
Set screw
Bearing
Pin stop (B)
Bolt
No.
32
33
34
35
36
37
38
39
40
41
42
43
44
45
46
47
48
49
50
51
52
53
54
55
56
57
58
59
60
61
62
Qty
12
2
1
1
1
1
1
4
4
1
2
2
1
1
7
1
3
3
2
2
2
1
4
4
3
1
1
1
3
1
1
Description
Spring washer
Split washer
Fixed pin
Fixed block
Nut
Moving block
Shaft for driven wheel
Bearing
Retainer ring for hole
Driven wheel
Rubber band
Retainer ring for shaft
Blade
Lock switch
Cross-shaped bolt
Switch box
Cross-shaped bolt
Spring washer
Grounding terminal
Gear pad
Grounding signal
Locking plate
Flat washer
Spring washer
Bolt
Shaft for driving wheel
Synchronize wheel (B)
Synchronize belt
Cross-shaped self-tapping bolt
Driving wheel
Fixed pin (A)
No.
94
95
96
97
98
99
100
101
102
103
104
105
107
108
109
110
111
112
113
114
115
116
117
118
119
120
121
122
123
124
125
Qty
1
2
1
1
1
1
1
1
1
1
1
2
4
2
4
1
1
1
1
1
1
1
1
1
2
1
1
1
2
1
1
Description
Cord clip
Nut
Fine adjusting knob
Spring
Eccentricity shaft
Wave-shaped washer
Locating sleeve(B)
Compression handle
Roller
Block
Bolt
Box
Bolt
Cover
Bolt
Square-neck bolt
Compression spring
Swelling knob
Locknut
Lower shield(A)
Lower shield(B)
Bolt
Clamp handle
Spring round pin
Big flat washer
Connecting screw rod
Fixed pressing paw
Guide tube
Hexagon bolt
Connecting rod
Square washer (A)
No.
63
64
65
66
67
68
69
70
71
72
73
74
75
76
77
78
79
80
81
82
83
84
85
86
87
88
89
90
91
92
93
Qty
1
1
4
4
4
4
1
1
2
1
4
4
1
1
1
11
1
1
9
1
2
1
1
2
1
1
1
1
2
2
1
Description
Bracket (B)
Lower fixed block
Cap nut
Big flat washer
Footing
Hexagon bolt
Body
Supporting
Hexagon bolt
Clip
Hexagon bolt
Nut
Dust outlet
Angle adjusting gear
Spring
Flat washer
Bolt
Bolt
Bolt
Indicator
Locating sleeve
Adjusting gear
Locating sleeve(A)
Wave-shaped washer
Up-down knob
Protecting bush
Locking knob
Power cord
Bolt
Flat washer
Fixed plate assembly
model no. 055-6748-6 | contact us 1-800-689-9928
37
PARTS LIST
36
PARTS LIST
Page 20

3-Year Limited Warranty
This Mastercraft product is guaranteed for a period of 3 years from the date of original retail purchase against
defects in workmanship and materials, except for the following component:
Component A: Accessories, which are guaranteed for a period of 1-year from the date of original retail
purchase against defects in workmanship and materials.
Subject to the conditions and limitations described below, this product, if returned to us with proof of purchase
within the stated warranty period and if covered under this warranty, will be repaired or replaced (with the
same model, or one of equal value or specification), at our option. We will bear the cost of any repair or
replacement and any costs of labour relating thereto.
These warranties are subject to the following conditions and limitations:
a. a bill of sale verifying the purchase and purchase date must be provided;
b. this warranty will not apply to any product or part thereof which is worn or broken or which has become inoperative due
to abuse, misuse, accidental damage, neglect or lack of proper installation, operation or maintenance (as outlined in
the applicable owner’s manual or operating instructions) or which is being used for industrial, professional, commercial
or rental purposes;
c. this warranty will not apply to normal wear and tear or to expendable parts or accessories that may be supplied with the
product that are expected to become inoperative or unusable after a seasonable period of use;
d. this warranty will not apply to routine maintenance and consumable items such as, but not limited to, fuel, lubricants,
vacuum bags, blades, belts, sandpaper, bits, fluids, tune-ups or adjustments;
e. this warranty will not apply where damage is caused by repairs made or attempted by others (i.e. persons not
authorized by the manufacturer);
f. this warranty will not apply to any product that was sold to the original purchaser as a reconditioned or refurbished
product (unless otherwise specified in writing);
g. this warranty will not apply to any product or part thereof if any part from another manufacturer is installed therein or
any repairs or alterations have been made or attempted by unauthorized persons;
h. this warranty will not apply to normal deterioration of the exterior finish, such as, but not limited to, scratches, dents,
paint chips, or to any corrosion or discolouring by heat, abrasive and chemical cleaners; and
i. this warranty will not apply to component parts sold by and identified as the product of another company, which shall
be covered under the product manufacturer’s warranty, if any.
Additional Limitations
This warranty applies only to the original purchaser and may not be transferred. Neither the retailer nor the manufacturer
shall be liable for any other expense, loss or damage, including, without limitation, any indirect, incidental, consequential
or exemplary damages arising in connection with the sale, use or inability to use this product.
Notice to Consumer
This warranty gives you specific legal rights, and you may have other rights, which may vary from province to province.
The provisions contained in this warranty are not intended to limit, modify, take away from, disclaim or exclude any
statutory warranties set forth in any applicable provincial or federal legislation.
This product is not meant for industrial or commercial purposes. This product is for household
projects, read manual carefully
Made in China
Imported by Mastercraft Canada Toronto, Canada M4S 2B8
No.
126
127
128
129
130
131
132
133
134
135
136
137
138
139
140
141
142
143
144
145
Qty
1
1
1
1
1
1
1
1
1
1
1
1
1
1
6
4
1
1
1
1
Description
Spring
Movable clamp paw
Bolt
Knob for mitre angle
Mitre angle
Pointer
Fence
Worktable
Table insert
Bolt
Snap gauge
Bolt
Cushion cap
Wing bolt
Spring washer
Bolt
Mitre seat
Lock bolt
Securing handle
Compression spring
No.
146
147
148
149
150
151
152
153
156
157
158
159
160
161
162
163
164
165
166
Qty
2
1
1
1
2
1
1
1
1
2
1
2
2
2
1
2
2
2
4
Description
Bolt
Big flat washer
Synchronize wheel (A)
Motor
Bolt
Push stick
Spanner
Spanner
Scale label
Worktable steel board
Nut
Uncork pin
Butterfly bolt
Expand pole
Extension table
Washer
Spring washer
Lock nut
Star-head pan head screws
model no. 055-6748-6 | contact us 1-800-689-9928
39
WARRANTY
38
PARTS LIST
 Loading...