

Page 1
INSTR
UCTION MANUAL
98310 Wireless Refrigerant Charging Scale without Solenoid
98315 Wireless Refrigerant Charging Scale with Solenoid
English
A. Notice: The changes or modifications not expressly a
compliance could void the user’s
B. IMPORT
C. This device complies with P
ANT NOTE: To
to the antenna or the device is permitted. Any
in the device exceeding the RF exposure requirements and void user’s
device.
conditions: (1) this device may not cause harmful interference, and (2) this device must accept
any interference received, including interference that
comply with the FCC RF exposure compliance requirements, no change
authority to operate
art 15 of the FCC Rules. Opera
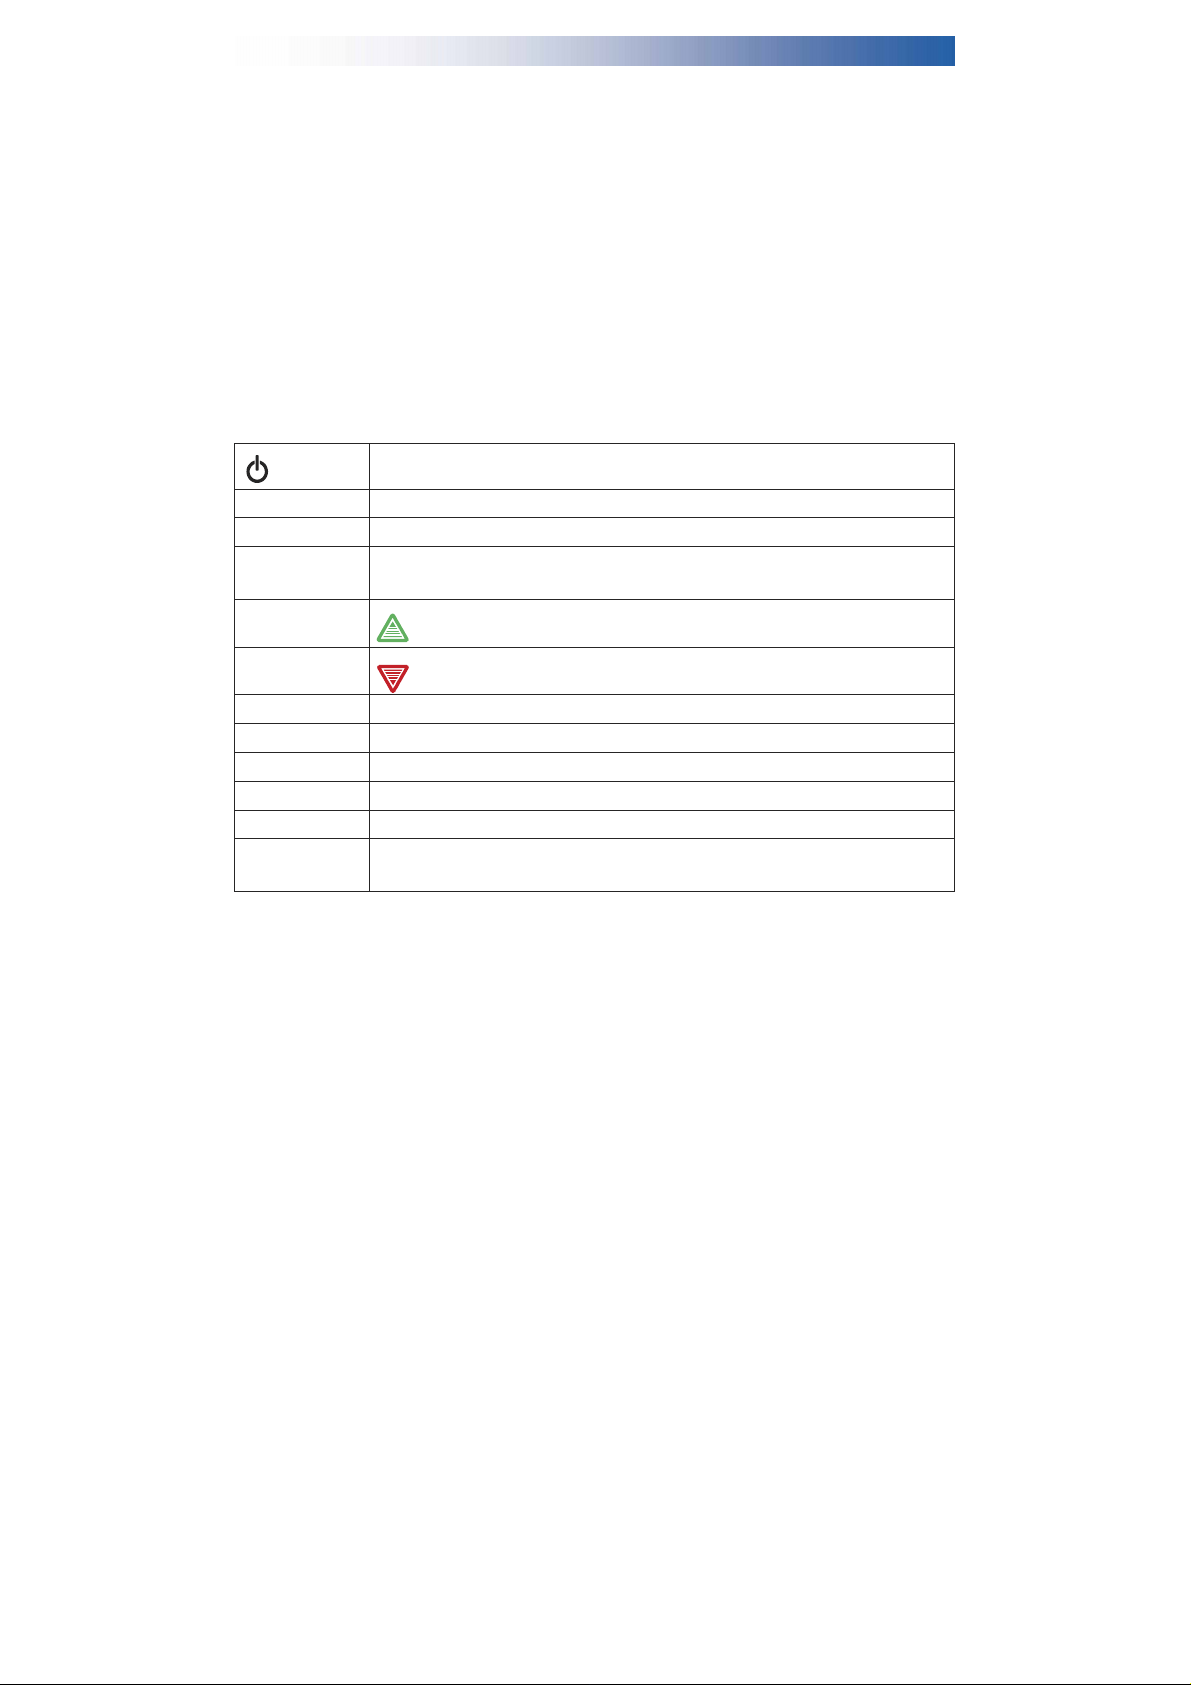
KEY FUNCTIONS:
SYNC:
UNITS/SHIFT
T
urns unit ON or OFF
To
synchronize
: UNITS - Select readout in lb, oz or kg
SHIFT - Move from one digit to the next, to edit display, to
ca
pacity
To
increase value
To
decrease value
pproved by the party responsible for
the equipment.
change to the antenna or the device could result
tion is subject to the follo
may cause undesired opera
authority to operate
wing two
tion.
set up tank
the
CHARGE/PAUSE:
T
ARE/ENTER: T
REPEAT:
CLEAR:
CHARGE - To
PAUSE - To
ARE - Zeros out display in BASIC CHARGING
ENTER - To
To
repeat
Use to c
for any
start CHARGE/RECOVERY
pause and resume in CHARGE/RECOVERY
mode
start opera
the last action
lear the display during PROGRAM CHARGE ONLY. (Do not use c
other function!)
tion or input da
ta
mode
CHECKLIST (Prior to 1st use)
Install ba
ON/OFF button on the pla
CHARGING.
* If the digital readout displays a small weight (±.5 ounce or ±20 grams) press and hold the
ttery in
both pla
T
ARE/ENTER button for a
automa
tically zero out. Proceed to BASIC or PROGRAM CHARGING.
SYNCHRONIZA
When “No Signal” is displayed, it indica
TION
tform and monitor.
tform and monitor to turn unit on. Proceed to
pproxima
tely 30 seconds until you hear a DOUBLE DEEP.
Place the pla
tes synchroniza
tform on a flat
tion is disabled or channel is wrong.
surface and press the
BASIC or PROGRAM
The scale will
lear
Page 2

Synchronize monitor with pla
1. Press SYNC button on pla
2. Press SYNC button on monitor,
3. If synchroniza
the pla
4. Resume BASIC CHARGING.
tion is successful, display will show
tform will stop blinking.
tform by follo
tform, po
wer LED and SYNC LED will blink.
display will show
wing the procedure below:
“SYNC.”
“good” and the po
wer LED and SYNC LED on
BASIC CHARGING
1. Place pla
2. Place DOT tank in center of pla
do
wn.)
3. Make sure the charging lines and the system are free of air using deep vacuum pump. (F
vacuum instructions.)
4. Press ON/OFF button on monitor and pla
5. Press T
6. Open the valve to begin charging.
7. When the desired amount is reached, c
8. Press the ON/OFF button on the monitor and pla
ARE/ENTER button - display will read zero. (If the scale has not been used for a while
press and hold T
tform on level surface.
ARE/ENTER button to reset scale.)
tform and connect to liquid port. (Place disposable tank upside
tform to turn unit on.
lose the valve.
tform to turn unit off.
ollo
PROGRAM CHARGING
1. Repeat
2. Press CHARGE/P
3. Set amount of refrigerant you want to charge by using CLEAR,
4. Press ENTER to start.
5. Open the valve on the tank to begin charging. Just before charging is complete, a short alarm
6. When charging is completed, scale will sound an alarm a
7. When the desired amount is reached, c
The unit is preprogrammed for minimum and maximum cylinder weight 0 oz
kgs.) To
steps (1 through 4) in BASIC CHARGING.
will sound, allo
button (except the ON/OFF button) to stop alarm. (If the tank is empty and the charge is not
complete, “E-Pty” will display.
charging.)
monitor and pla
change cylinder weight setting refer to INSTRUCTIONS FOR SETTING TANK CAPACITIES.
AUSE button.
wing time to turn off supply.
tform to turn unit off.
Replace the tank and press CHARGE/P
lose the valve and press the ON/OFF button on the
⇑, ⇓
and SHIFT buttons.
gain and display “CH-End.” Press any
AUSE button to resume
/
243 lbs (0 kg
/
REPEAT
1. Press REPEAT to
2. Open the valve.
3. When desired amount is reached, c
CHARGING
and pla
tform to turn the unit off. (If the scale was turned off, follow
BASIC CHARGING,
start charging the previously stored amount.
lose the valve and press the ON/OFF button on the monitor
then follow
the REPEAT
CHARGING steps.)
steps (1 through 4) of
RECOVERY
1. Repeat
steps (1 through 6) in BASIC CHARGING.
w
110
Page 3

2. Begin recovery.
3. When the weight is idle for more than 4 minutes, the recovery is
alarm and display will show
completed, scale will sound an
“donE.”
INSTR
UCTIONS FOR SETTING T
1. T
urn on the unit.
2. Select desired units using UNITS/SHIFT.
3. Press and hold down
4. Use CLEAR,
5. Press ENTER to save the empty tank weight. The display will read “GOOD” to confirm.
6. Use CLEAR,
7. Press ENTER to save the full tank weight. The display will read “GOOD” to confirm.
8. Press ON/OFF button on the monitor and pla
the UNITS/SHIFT a
⇑, ⇓
and shift buttons to input the empty tank weight.
⇑, ⇓
and shift to input full tank weight.
ANK CAPACITY
gain until the last digit in display “blinks.”
tform to turn unit off.
C
ALIBRATION PROCEDURE
1. T
urn on pla
2. T
urn on monitor.
3. Press T
“SEt-12” will display.)
4. A “-----” 5 digit number will be displayed, press
5. Place calibration weight on scale.
6. Press
to be changed, press UNITS/SHIFT to activate
the number.
7. When the number displayed a
Calibra
tform.
Press
ARE/ENTER. Display will show
⇑.
Press T
ARE/ENTER. Number displayed must ma
Repeat
tion is complete. Monitor will restart automa
⇑
and
⇓
together.
Press T
ARE/ENTER to confirm.
until all digits are changed.
grees with the weight on the scale press T
Display will then show
“SEt-11” for kg calibration (for lb calibration press
digit (digit will blink.) Press the
⇓.
“SEt-1.”
tch calibration weight. If a digit needs
tically.
⇑ or ⇓ to
ARE/ENTER.
SPECIFICATIONS:
• Ca
pacity: 243 lbs (110 kg)
• Accuracy:
• Resolution: 0.02 lb
• Automa
• Opera
• Ba
tic Shut-Off: After 3 hours
ting T
ttery
[±0.01 lb
empera
Life: Monitor - a
/
±0.005 kg] or 0.1% of reading whichever is grea
/
0.01 kg
ture: 32˚F to 120˚F (0˚C to 49˚C)
pproxima
tely 20 hours; pla
tform - a
pproxima
ter.
tely 30 hours
REPLACING THE BA
Replace 9V ba
LCD. DO NOT OPERATE WITH A LOW BA
TTERY:
ttery in
monitor or AA ba
tteries in pla
TTERY.
tform when lo
w-ba
ttery
symbols prompt on
⇑
change
and
 Loading...