

Page 1
AVERTISSEMENT
1. Ne pas entreposer d’huile
supplémentaire à proximité de cet
appareil ou de tout autre appareil
de cuisson.
2. Ne pas entreposer ni utiliser
d’essence ou tout autre liquide ou
vapeur inflammable à moins de 25
pieds (8 m) de cet appareil ou de
tout autre appareil de cuisson.
3. Ne pas entreposer une bouteille
de gaz de pétrole liquéfié (LP) de
rechange à moins de 10 pieds (3
m) de cet appareil ou de tout autre
appareil de cuisson.
4. Veillez à ce que la bouteille de gaz
soit placée dans le sens du vent
(en amont du réchaud) lorsqu’elle
est utilisée.
5. Lorsque vous cuisinez avec de
l’huile ou de la graisse, ne pas
dépasser 350
˚F (177˚ Celsius).
6. Ne jamais laisser l’huile ou la
graisse sans surveillance.
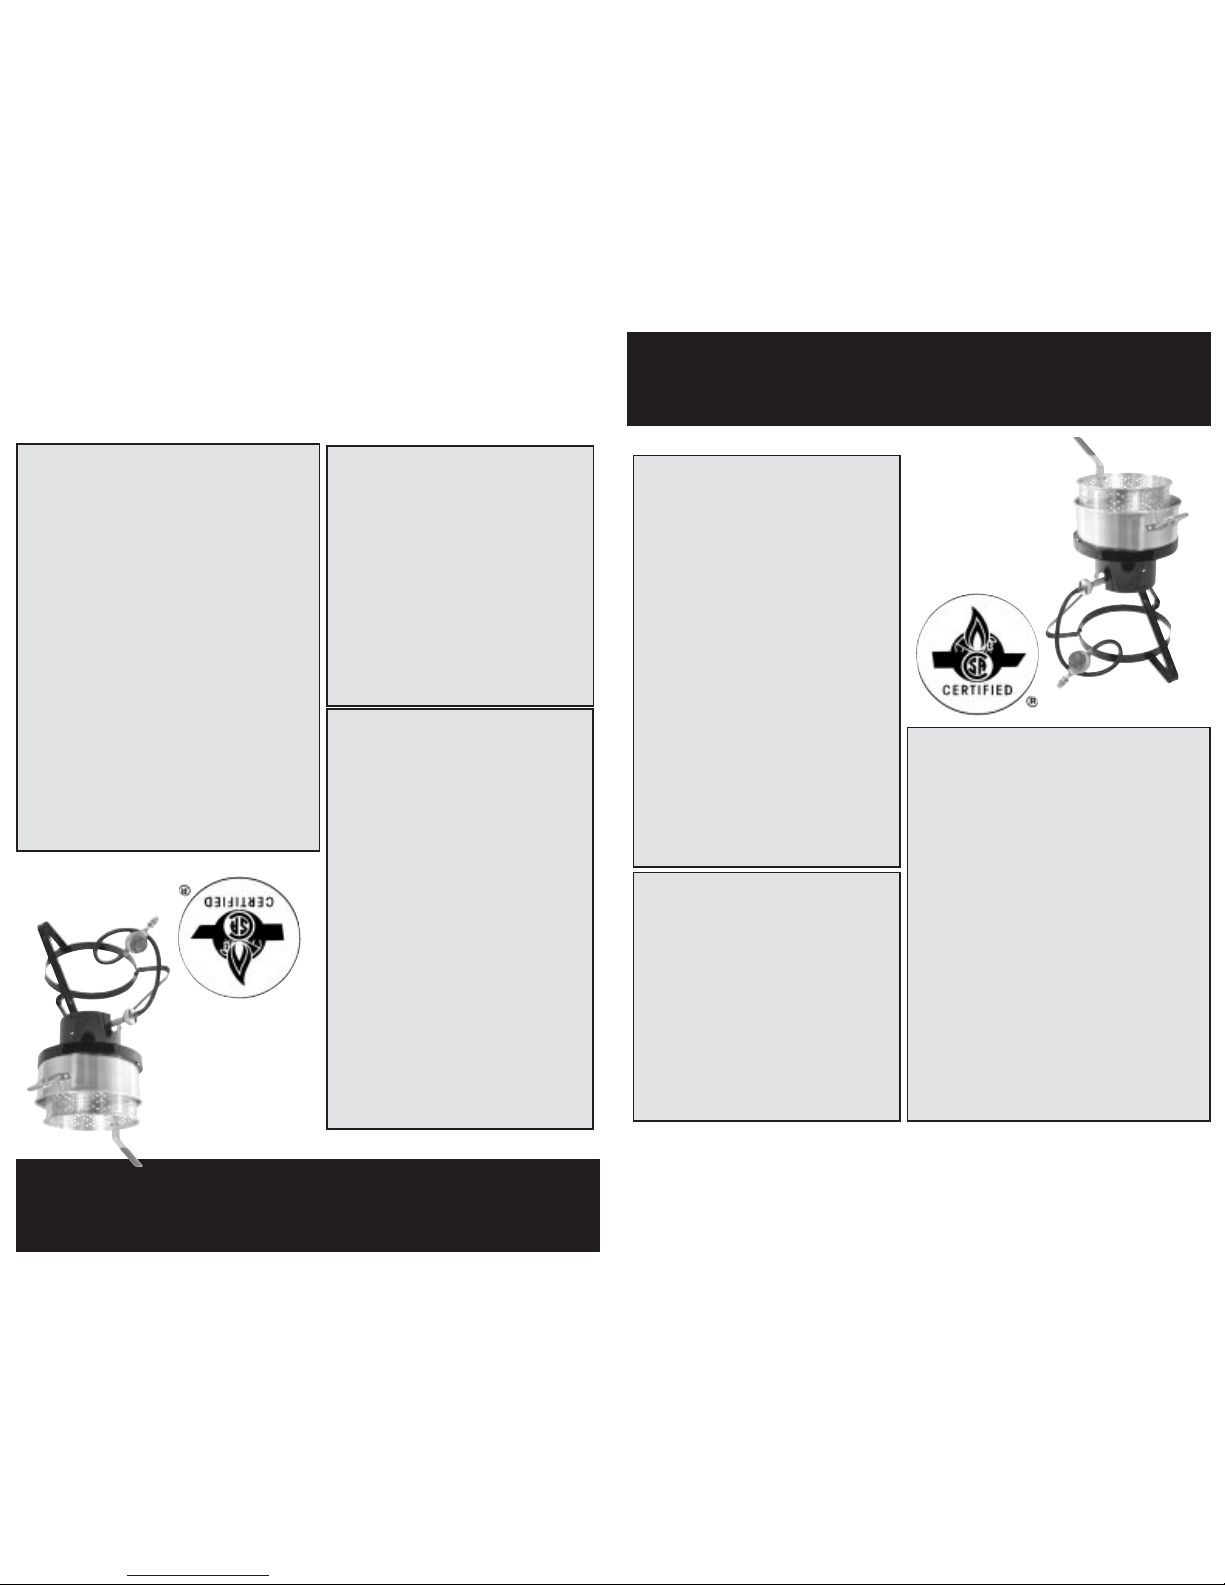
Friteuse de Dinde à Gaz
LP pour Usage en Plein Air
NOTICE DE MONTAGE ET D’UTILISATION
CONSIGNES DE SÉCURITÉ
ARRÊTEZ ET LISEZ
Bouteille de gaz
non fournie avec
l’appareil.
Modèle MB10
Le non-respect de ces consignes de sécurité risque de provoquer un incendie ou une
explosion pouvant entraîner des dégâts matériels, des blessures graves voire la mort.
Si des pièces s’avèrent manquantes, Ne Pas Utiliser le Réchaud.Contactez CookMaster
au 800-489-1581 pour toute pièce de rechange. Ne Pas Renvoyer l’appareil à votre
revendeur sans nous contacter en premier. Les conseils et les recettes sont ‡ l'intÈrieur du
manuel, veuillez le conserver afin de pouvoir le consulter ultÈrieurement.
POUR VOTRE SÉCURITÉ
Si vous sentez une odeur de gaz:
1. Coupez l’arrivée de gaz à l’appareil.
2. Éteignez toute flamme nue .
3. Effectuez à nouveau le test
d’étanchéité avec de l’eau
savonneuse.
4. Si l’odeur persiste,contactez
immédiatement votre revendeur de
bouteille de gaz ou les pompiers.
5. Toute fuite de gaz risque de
provoquer un incendie ou une
explosion entraînant des dégâts
matériels, des blessures graves
voire la mort.
POUR VOTRE SÉCURITÉ
1. Ne pas entreposer d’huile supplémentaire
à proximité de cet appareil ou de tout
autre appareil de cuisson.
2. Lorsque vous cuisinez avec de l’huile ou
de la graisse, ne pas dépasser 350˚F (177˚
Celsius). Un gallon (3,7 litres) d’huile peut
atteindre une température de 350˚F
(177˚C) en 7 à 10 minutes. Utilisez un
thermomètre afin de vérifier la
température. NE JAMAIS LAISSER LE
RÉCHAUD SANS SURVEILLANCE lorsque
ce dernier fonctionne car l’huile chauffera
rapidement et s’enflammera à toute
température entre 550˚ et 700˚F (287˚ et
371˚C). Un gallon d’huile maximum pour
récipients de 10 à 12 quarts de gallon (9,5
à 11,3 litres), trois gallons d’huile
maximum pour récipients de 26 à 30
quarts de gallon (24,6 à 28,3 litres).
3. Ne pas entreposer une bouteille de gaz
de pétrole liquéfié (LP) à proximité de
cet appareil ou de tout autre appareil.
Masterbuilt
Gas Cooker
Outdoor LP Gas Turkey Fryer
ASSEMBLY AND OPERATING INSTRUCTIONS
WARNING AND SAFETY INFORMATION
Masterbuilt
Gas Cooker
WARNING
1. Do not store extra cooking
oil/grease in the vicinity of this
or any other cooking
appliance.
2. Do not store or use gasoline
or other flammable vapors
and liquids in the vicinity or
within 25 feet (8 m) of this or
any other cooking appliances.
3. Do not store spare LP Gas
cylinder within 10 feet (3m) of
this or any other cooking gas
appliance.
4. Keep LP Gas cylinder up wind
when in use.
5. When cooking with oil/grease,
do not allow the oil/grease to
get hotter than 350° F (177° C).
6. 6. Do not leave the oil/grease
unattended while cooker is in
use.
FOR YOUR SAFETY
If you smell gas:
1. Shut off gas to the appliance.
2. Extinguish any open flame.
3. Perform soapy water test
4. If odor continues, immediately
call your gas supplier or your
fire department.
5. Leaking gas may cause a fire
or explosion which can cause
serious injury or death, or
damage to property.
STOP AND READ
FOR YOUR SAFETY
1. Do not store or use gasoline or
other flammable vapors and liquids
in the vicinity of this or any other
cooking appliance.
2.When cooking with oil or grease, do
not allow oil/grease to exceed 350° F
(177° C). One gallon of oil can reach
350° in 7 to 10 minutes. Use a
thermometer to check temperature.
When cooker is in operation, NEVER
LEAVEUNATTENDED. Oil will heat
up quickly and ignite at 550° to 700°.
(Use a Max of one gallon of oil in the
10qt to 12qt pots, and a Max of
Three gallons of oil in the 30qt pot.)
3. An LP cylinder not connected for
use shall not be stored in the
vicinity of this or any other
appliance.
LP Cylinder
Not Included
Model:MB10
Failure to follow these instructions and warnings properly
could result in fire or explosion, which could cause property
damage, personal injury, or death.
Rev 6/01
If parts are missing Do Not Use Cooker. Call 800-489-1581 for
replacement parts. Do Not Return to dealer without contacting us first.
Tips and Recipes are inside the manual, so save this manual for future reference.
Page 2
Veuillez lire et suivre attentivement TOUTES LES INSTRUCTIONS et CONSIGNES DE
SÉCURITÉ avant toute utilisation.
• Le Réchaud à Gaz Multifonctions pour Usage en Plein Air de
MASTERBUILT doit
être utilisé EN PLEIN AIR UNIQUEMENT.
Ne pas utiliser l’appareil en espace clos (patios, garage) ou si ce dernier est en
surplomb au bord du toit d’une maison ou d’un immeuble.
• Lorsque vous cuisinez, l’appareil doit être sur une surface plane, stable et dans un
endroit ne comportant aucun élément combustible (terrasse en bois, herbe sèche,
feuilles, etc.).Conservez l’appareil dans une zone découverte à au moins 10 pieds (6
m) de la maison ou de toute matière risquant de s’enflammer (rambardes en bois,
buissons, etc.). Il est déconseillé de placer l’appareil sur une surface en bitume ou
asphalte.
• NE PAS utiliser ce produit pour un usage autre que celui pour lequel il a été prévu.
Cet appareil n’est pas destiné à un usage commercial ou industriel. Il n’est pas sensé
être utilisé en tant que radiateur ou appareil de chauffage.
• NE PAS laisser cet appareil sans surveillance.Veillez à ce que les enfants et les
animaux domestiques demeurent à l’écart de l’appareil en tout temps jusqu’à ce que
l’appareil ait complètement refroidi.
• Il est nécessaire de surveiller l’appareil de façon continue lorsque ce dernier
fonctionne et jusqu’à ce que ce dernier et son huile ou sa matière grasse aient
complètement refroidis.
• NE PAS déplacer l’appareil lorsque ce dernier fonctionne. Laissez l’appareil refroidir
avant de le déplacer ou de l’entreposer.
• Veillez à toujours porter des chaussures lorsque vous utilisez cet appareil.
• Veillez à ne pas toucher les surfaces brûlantes.Veillez à TOUJOURS porter des gants
de cuisine lorsque vous utilisez l’appareil.
• Il n’est PAS recommandé d’utiliser des accessoires de fixation NON fabriqués par
MASTERBUILT Mfg. pour ce produit particulier.
• Cet appareil n’est pas sensé être installé à bord de caravanes ou de bateaux de
plaisance.
• En cas de pluie, lorsque vous cuisinez avec de l’huile ou de la graisse, couvrez
immédiatement le récipient.Tournez le régulateur afin de le placer sur OFF (ARRÊT),
puis réglez le bouton de la bouteille de gaz sur OFF (ARRÊT). NE PAS DÉPLACER
l’appareil, le pied ou le récipient.
• Lorsque vous cuisinez avec de l’huile ou de la graisse, veillez à disposer de matériel
d’extinction d’incendie à portée de main. En cas de feu de graisse ou d’huile, ne tentez
pas d’éteindre le feu avec de l’eau.Utilisez un extincteur à poudre de type BC ou
étouffez le feu avec de la terre, du sable ou
du bicarbonate de soude.
La bouteille de gaz LP que vous comptez
utiliser doit être fabriquée conformément
aux directives du Département des
Transports des États-Unis (DOT) et du
service de normalisation canadien, norme
CAN/CSA-B339 se reportant aux bouteilles
et tuyaux destinés aux transport de
marchandises dangereuses et doit
comporter une étiquette indiquant cette conformité.
AVERTISSEMENTS
LISEZ ATTENTIVEMENT TOUTES LES INFORMATIONS DE CE MANUEL!
POUR USAGE EXTÉRIEUR UNIQUEMENT / NE JAMAIS
LAISSER SANS SURVEILLANCE
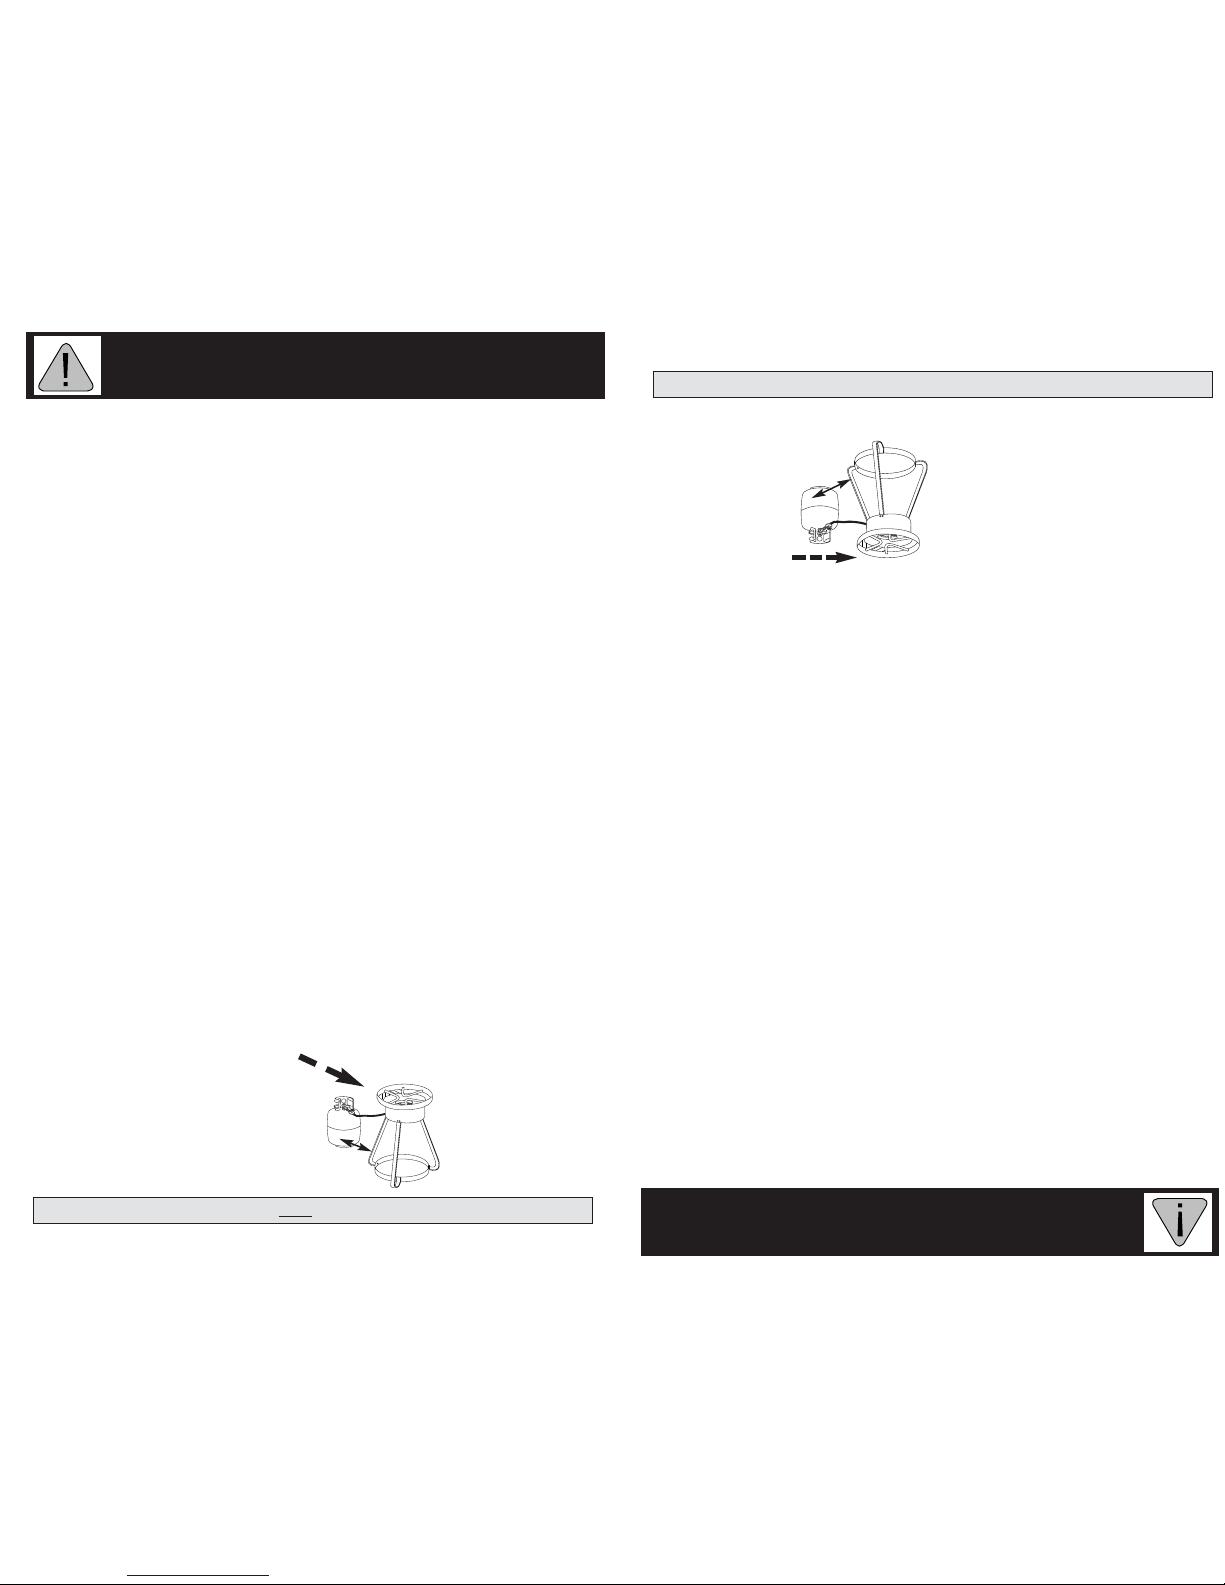
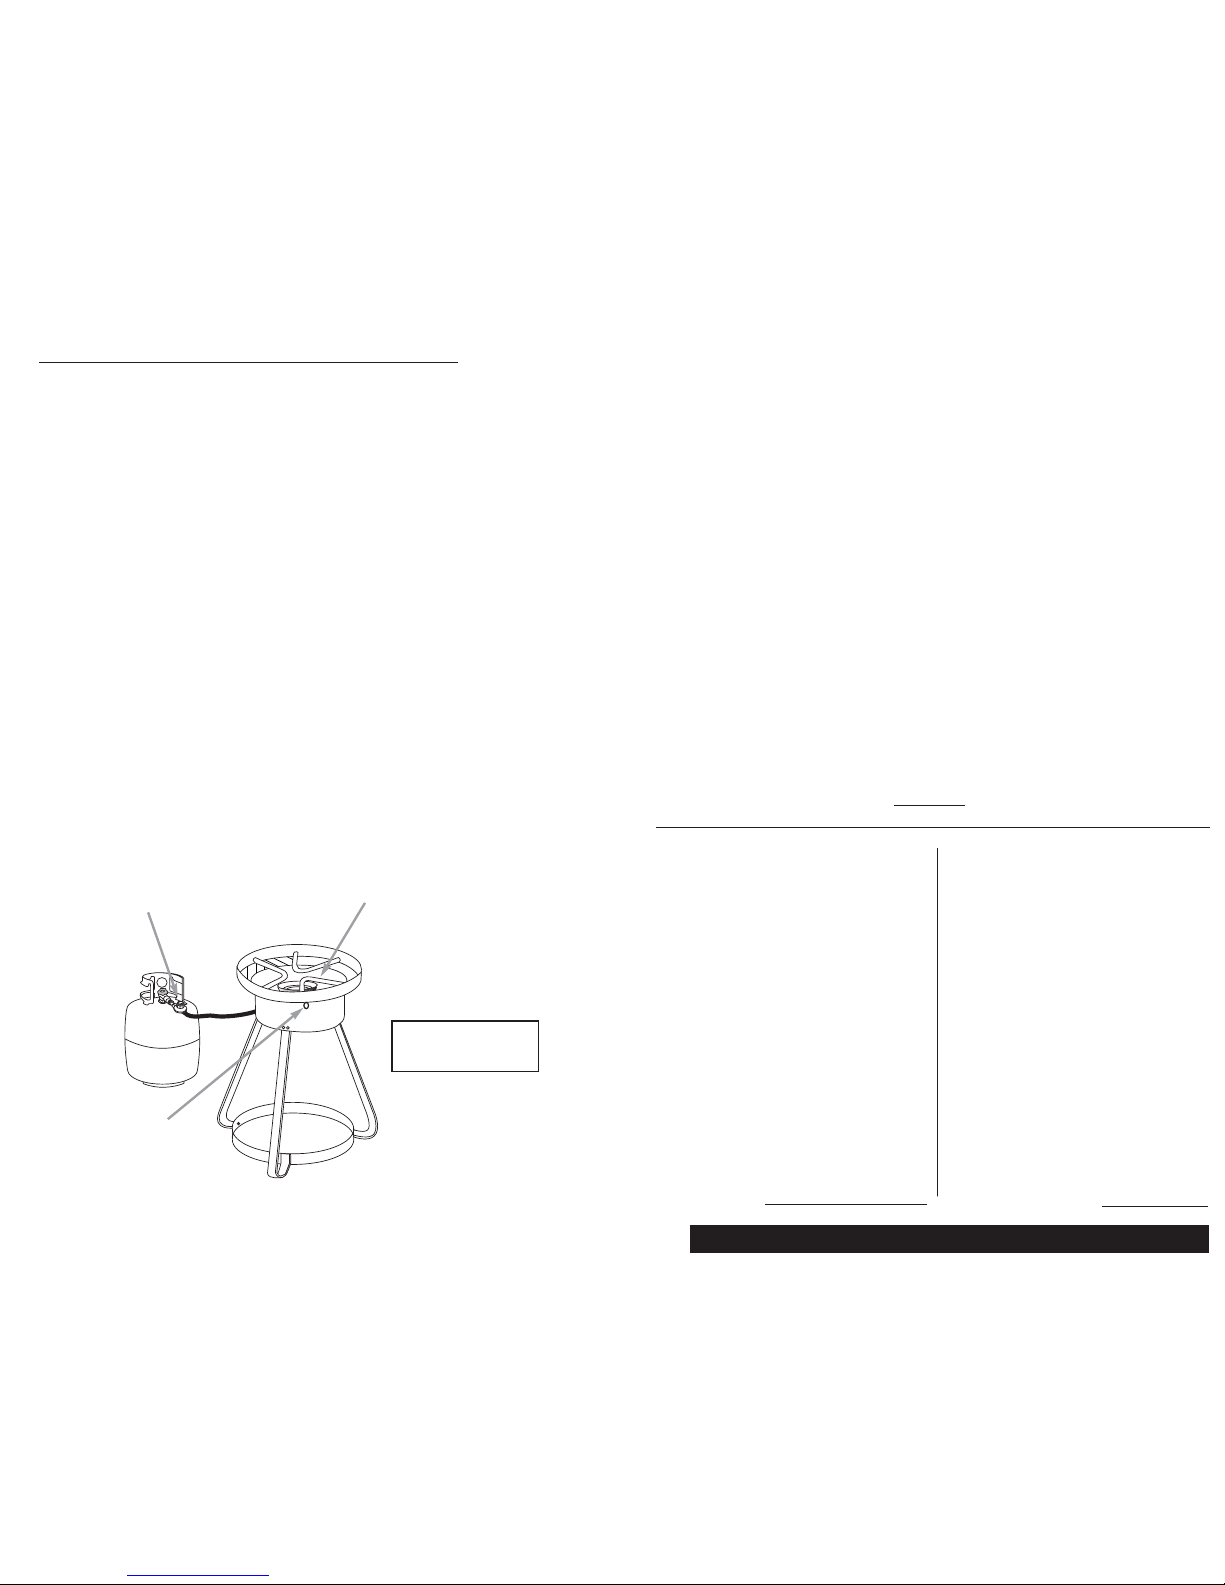
Sens du vent
Avant de commencer
à cuisiner, vérifiez le
sens du vent et
placez la bouteille EN
AMONT du réchaud
et à environ 20 po.
(50 cm) de ce
dernier.
Distance
de 20 po.
(50 cm)
Read and follow ALL INSTRUCTIONS and WARNINGS carefully before operating.
• The Masterbuilt 3010 Outdoor Gas Cooker is for OUTDOOR USE ONLY.
Do not use inside an enclosed area such as Patios, Garage or overhang of a
house or building.
• When cooking, the appliance must be on a level, stable surface in an area clear
of combustible materials (wood decks, dry grass, leaves etc.) Keep
appliance in an open area 10 feet away from home or any materials that
will catch fire and burn (wood rails, shrubs etc.). An asphalt surface
(black top) may not be acceptable for this purpose.
• DO NOT use this product for anything other than its intended purposes.This
appliance is not intended for commercial use; it is not intended, nor should
it be, used as a heater.
• DO NOT leave appliance unattended. Keep children and pets away from the
appliance at all times until the appliance and/or cooking vessel has
completely cooled.
• Constant supervision is necessary when this product is in use and until the
appliance, oil/grease, and water has cooled.
• DO NOT move the appliance when it is in use. Allow the appliance to cool before
moving or storing it.
• Always wear shoes during operation of this appliance.
• Avoid touching hot surfaces. ALWAYS wear cooking mittens.
• Accessory attachments NOT manufactured by CookMaster for this
appliance are NOT recommended for use.
• This appliance is not intended to be installed in or on recreational vehicles and/or
boats.
• In the event of rain, while cooking with oil or grease, cover the cooking vessel
immediately. Turn the regulator to the OFF position, then turn the gas cylinder
to the OFF position. DO NOT MOVE cooker stand or pot.
• When cooking with oil or the grease, fire extinguishing materials shall be readily
accessible.
In the event of an oil or grease fire, do not attempt to extinguish with water. Use Type
BC dry chemical fire extinguisher or smother fire with dirt, sand, or baking soda.
The LP-gas cylinder being used must be
constructed and marked in accordance
with the specifications for LP-gas cylinders
of the U.S.Department of Transportation
(DOT) CFR 49 or the National Standards
of Canada, CAN/CSA-B339, Cylinders,
Spheres and Tubes for the Transportation
of Dangerous Goods.
1
1
WARNINGS
PLEASE CAREFULLY READ ALL INFORMATION IN THIS MANUAL!
OUTDOOR USE ONLY / NEVER LEAVE UNATTENDED
Wind Flow
Before you start to
cook check the wind
direction & place the
cylinder UP - WIND
and place cylinder
upright 20” away
from the cooker.
20”
Apart
Page 3

• Veillez à toujours effectuer le test d’étanchéité avec de l’eau savonneuse avant toute
utilisation.
• Veillez à
toujours débrancher la bouteille de gaz après avoir fini d’utiliser le réchaud.
• Conservez les mains, les cheveux et le visage loin du brûleur.Ne pas se pencher au-
dessus de l’appareil pour l’allumer.Faites tout particulièrement attention si vous avez des
cheveux longs et portez des vêtements amples car ils pourraient s’enflammer.
• Ne janais raccorder une bouteille de gaz, déplacer ou modifier les raccords lorsque le
réchaud est chaud.
•
Ne jamais débrancher la bouteille de gaz, ni ne déplacer ou modifier les raccords
lorsque l’appareil fonctionne.
•
Ne jamais utiliser une bouteille de gaz si elle présente des signes d’usure tels que:
bosses, entailles, déformations, dégâts causés par le feu, corrosion, fuites, rouille
excessive ou toute autre forme de dégât externe visible. La bouteille risque d’être
dangereuse et devrait être vérifiée par un distributeur de propane liquide.
• Lorsque vous allumez le brûleur, retirez le couvercle du fumoir afin d’éviter toute
accumulation de gaz risquant d’entraîner une explosion.
• Si le brûleur ne s’allume pas, coupez le gaz et attendez 5 minutes avant de tenter de
rallumer le réchaud. Si le brûleur s’éteint lorsque le réchaud fonctionne, fermez (OFF)
tout d’abord le régulateur ou le robinet à pointeau, puis fermez (OFF) la bouteille de gaz.
• Interdisez à quiconque de demeurer à proximité de l’appareil pendant qu’il fonctionne et
jusqu’à ce que ce dernier ait refroidi. L’appareil est brûlant lorsqu’il fonctionne et demeure
chaud longtemps après l’avoir utilisé.
• Ne jamais laisser le tuyau de gaz toucher une surface chaude quelconque de l’appareil.
• Pour éviter tout risque de brûlure grave, veillez à toujours laisser l’eau ou l’huile bouillante
du récipient refroidir complètement avant de le déplacer.
• Soyez extrêmement prudent lorsque vous retirez la nourriture préparée avec cet appareil.
•
Ne jamais utiliser d’articles en verre ou en plastique ni de batterie de cuisine en
céramique avec cet appareil.
• Si vous utilisez la friteuse,
faites attention lorsque vous retirez le panier du récipient afin
d’éviter que le récipient ne se décroche du réchaud également.
• Lorsque vous n’utilisez pas le réchaud, tournez
toujours en premier le régulateur sur la
position “OFF” puis le robinet d’arrivée de gaz sur “OFF”.
• Si vous buvez de l’alcool, prenez des médicaments ou toute autre drogue, vous courez le
risque de mal assembler les pièces de l’appareil et ne pourrez l’utiliser en toute sécurité.
• Veillez à ce que l’huile ne dépasse
jamais 350˚F (177˚C). Utilisez un thermomètre afin
de vérifier régulièrement la température.
L’huile s’enflammera entre 550˚ et 700˚F (287˚
et 371˚C).
• Assurez-vous que rien ne gène le flux de gaz ni la ventilation.Veillez à ce que rien ne
bouche les ouvertures d’aération du logement contenant la bouteille de gaz.
• L’installation de ce réchaud doit être conforme aux codes locaux ou, en l’absence de
codes ou ordonnances, aux codes ou normes américaines et canadiennes suivantes:
National Fuel Gas Code (Code national sur le gaz combustible), ANSI Z223.1, (norme
établie par l’Institut américain de normalisation), Storage and Handling of Liquefied
Petrolium Gas (Réglement sur le stockage et la manutention de gaz de pétrole liquéfié),
ANSI/NFPA 58 (norme américaine) ou CSA-B149.1 (norme canadienne), Natural Gas
Installation Code (Code d’installation du gaz naturel) ou CAN/CGA-B149.2 (norme
canadienne), Propane Installation Code (Code d’installation du propane).
Remarque: Il existe un kit de conversion réf. NGCK pour gaz naturel également disponible.
POUR USAGE EXTÉRIEUR UNIQUEMENT / NE JAMAIS
LAISSER SANS SURVEILLANCE
AVERTISSEMENTS
2
•Always perform the soapy water test every time you use this appliance.
•Always disconnect your gas cylinder from your cooker stand when not in use.
•Keep your hands, hair and face away from the burner. Do not lean over the
cooker stand
when lighting the burner when cooking.This appliance has an
open flame so be careful of loose hair and clothing during operation.They
could catch fire.
•Never attach a gas cylinder, move or alter fittings when the cooker is hot.
• Do not attempt to disconnect any gas fitting while your cooker is in operation.
•Never use a gas cylinder if it shows signs of: dents, gouges, bulges, fire
damage, erosion, leakage, excessive rust, or other forms of visible
external damage. The cylinder may be hazardous and should be
checked by a liquid propane supplier.
• When lighting your cooker, remove all parts from cooker stand to prevent an
explosion from gas build up.
• If burner does not ignite, turn off the gas and wait 5 minutes before trying to
light it again. If the burner goes out during operation, first turn regulator
OFF, then the gas cylinder OFF.
• Do not allow anyone to conduct activities around your cooker during or
following its use until the unit has cooled.The cooker is hot during
operation and remains hot for a period of time following its use.
•Never allow the gas hose to touch any hot surface on the cooker stand.
•Always allow the hot water or oil in the pot to cool completely before moving to
avoid the possibility of severe burns.
• Be careful when removing food from the cooker for it is hot and could cause
burns.
•Never use glassware, plastic, or ceramic cookware on your cooker.
• When using your boiler/fryer, use caution when removing the basket from the
pot to avoid pulling the pot off of your cooker stand.
• When cooker use is complete, always turn the regulator control valve OFF first,
then the gas cylinder valve OFF.
• The use of alcohol, prescription or nonprescription drugs may impair the
consumer’s ability to properly assemble or safely operate the appliance.
•Never allow oil or grease to exceed 350°F. Use a thermometer to keep a
constant temperature check, Cooking oil will ignite at 550°F to 700°F.
• Do not obstruct flow of combustion and ventilation. Keep the ventilation
opening(s) of the cylinder enclosure free and clear of debris.
• The installation of this cooker must conform with local codes or, in the absence
of local codes, with the National Fuel Gas Code, ANSI Z223.1, Storage
and Handling of Liquefied Petroleum Gases, ANSI/NFPA 58 or CSA
B149.1, Natural Gas Installation Code or CAN/CGA-B149.2, Propane
Installation Code.
Note: A natural gas converter kit is available Model #NGCK
OUTDOOR USE ONLY / NEVER LEAVE UNATTENDED
WARNINGS
2
Page 4
Si le brûleur en fonte brûle jaune ou pas du tout (marche à suivre)
Si votre brûleur ne brûle pas, s’éteint ou brûle jaune ou il y a une flamme à
l’intérieur du venturi, vérifiez le venturi du brûleur afin de vous assurer qu’il
n’est pas bouché. Les araignées ainsi que d’autres insectes risquent d’y
faire leur nid et de bloquer le flux d’air et de gaz.CONSERVEZ LE
REGISTRE DE RÉGLAGE FERMÉ APRÈS CHAQUE UTILISATION.
Comment nettoyer
Retirez le tuyau du brûleur à l’aide d’une clé de 7/16 po.Introduisez une
petite tige dans le trou où le tuyau était raccordé.
Tenez le brûleur en l’air afin de voir si la lumière
passe le trou. Si le trou n’est toujours pas propre,
rincez-le avec de l’eau. Une fois le brûleur propre,
remontez le brûleur (registre de réglage d’air, ressort,
tuyau.)
1. Retirez l’écrou du régulateur du brûleur et du
tuyau. Placez le brûleur sur la barre de support
du brûleur dans le trou central et fixez avec
l’écrou.
1 Fixez les trois jambes au pare-flammes en
premier à l’aide de 2 écrous de 1/4 po.et des
boulons pour chaque jambe. (Placez les jambes à
l’intérieur du pare-flammes).
2. Fixez la bague inférieure à chaque jambe avec
écrou et un boulon de 5/16 po.pour chaque jambe.
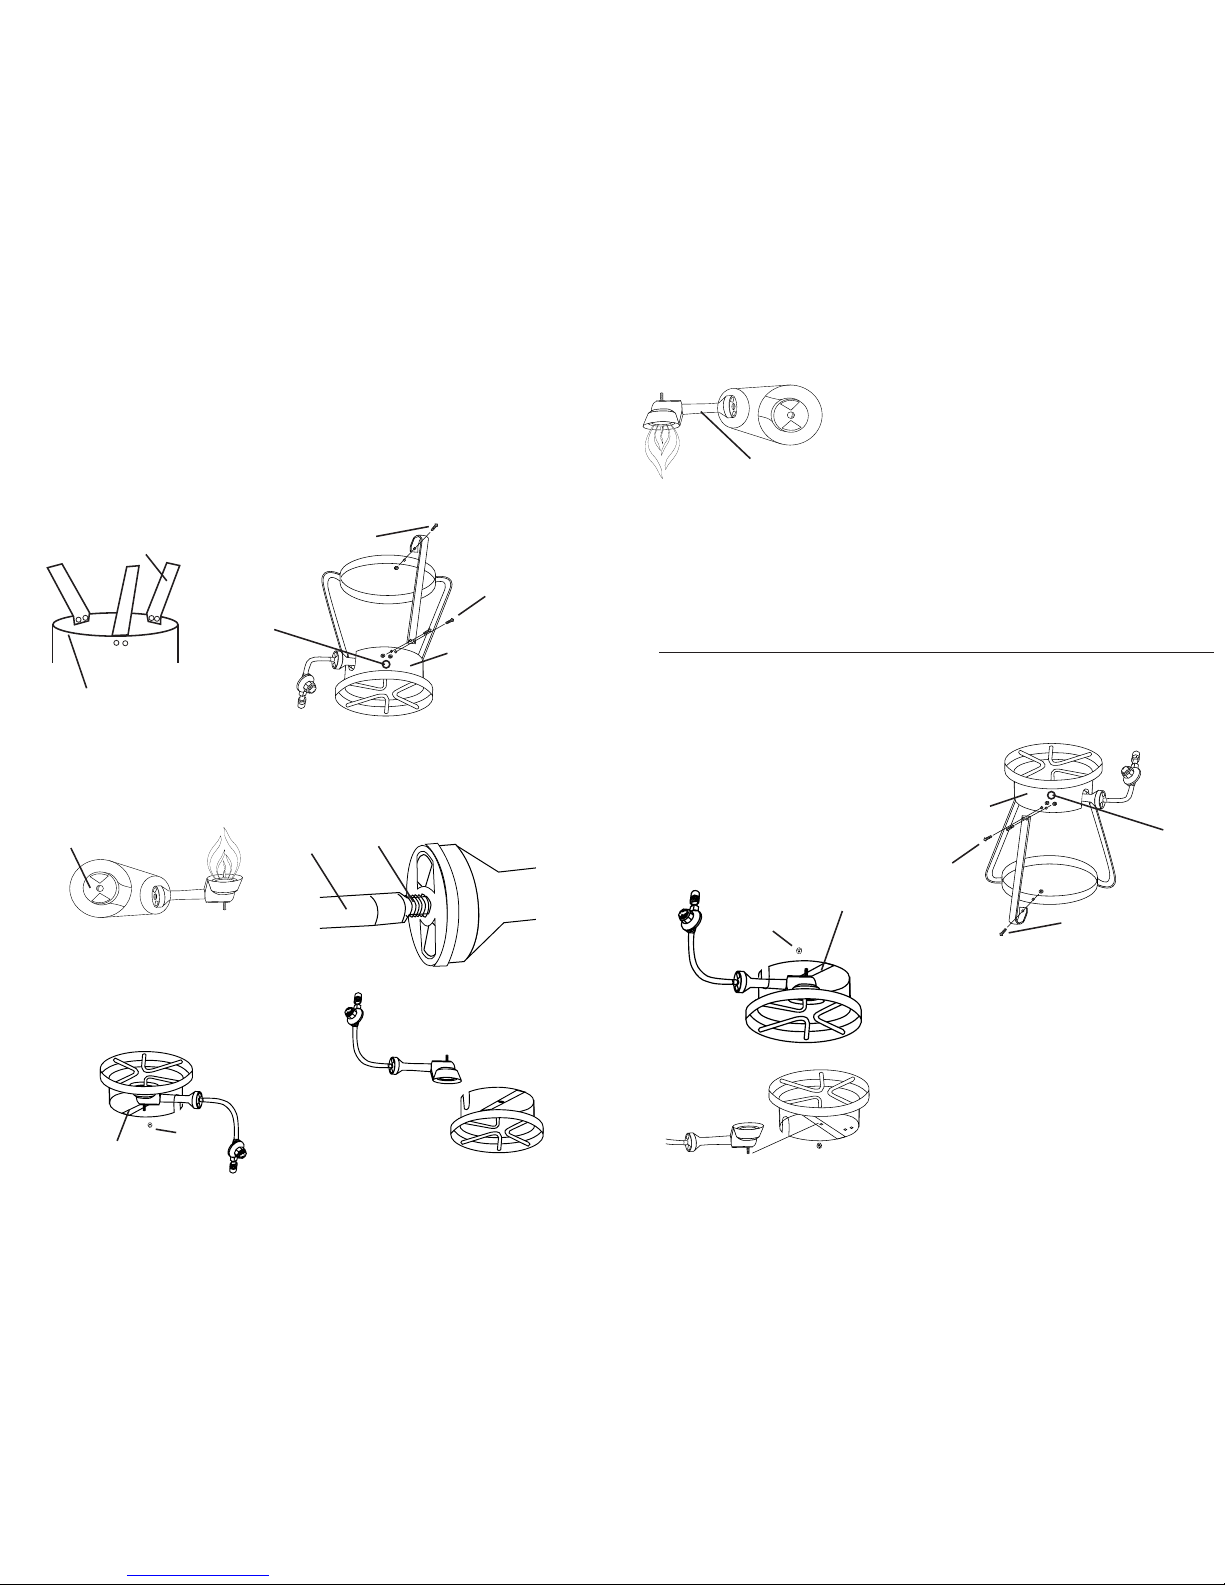
Instructions de Montage pour Friteuse et Cuiseur à
Gaz LP pour Usage en Plein Air
LIRE ATTENTIVEMENT TOUTES LES MISES EN GARDE AVANT D’ASSEMBLER OU D’UTILISER
VOTRE RÉCHAUD. VÉRIFIER QUE LA BOÎTE CONTIENT TOUTES LES PIÈCES.
Montage du brûleur
sur réchaud simple
Montage des jambes du réchaud
Barre de support
du brûleur
Écrou et boulon de
5/16 po.
Écrou de 1/4
po.et boulons
Pare-flammes
Trou d’allumage
Écrou
POUR USAGE EXTÉRIEUR UNIQUEMENT / NE JAMAIS
LAISSER SANS SURVEILLANCE
Liste des pièces:
Réchaud, brûleur en fonte avec tuyau et robinet
régulateur, 3 jambes, bague inférieure.Sachet de boulons pour
jambes, récipient, couvercle, thermomètre, panier à crochet, crochet.
Venturi
3
Outdoor LP Gas Fryer / Boiler Assembly Instructions
READ ALL INSTRUCTIONS AND WARNINGS CAREFULLY BEFORE
ASSEMBLY OR OPERATION OF YOUR COOKER.
PLEASE CHECK CONTENTS OF BOX FOR ALL PARTS.
Burner Assembly to Cooker Stand
Burner and Hose Assembly
1. Remove nut from pre-assembled
burner regulator and hose. Place
burner onto burner mount bar in
center hole and secure with the nut.
1. Place air shutter onto the venturi.
2. Slide the small open end of the spring onto the threaded end of the hose.
3. Hold back on the spring and thread the hose into the end of the burner venturi.
Burner Mount Bar
Air Shutter
Hose
Nut
OUTDOOR USE ONLY / NEVER LEAVE UNATTENDED
Parts List:
Cooker Head, 3 Legs, Foot Ring, Cast Iron Burner with Hose and Regulator
and Hardware Pack
Spring
5/16” Nut and Bolt
1/4” Nut
and Bolts
Wind Shield
Cooker Leg
Wind Shield
Lighting Hole
Mounting Cooker Legs
1. Secure all 3 legs to the windshield first using 2- 1/4” nuts and
bolts per leg. ( Place legs inside wind shield as shown )
2. Secure bottom ring to each leg using a 5/16” nut and bolt
per leg.
3
Page 5

POUR USAGE EXTÉRIEUR UNIQUEMENT / NE JAMAIS
LAISSER SANS SURVEILLANCE
RACCORDEMENT DE LA BOUTEILLE DE GAZ AU RÉGULATEUR
FONCTIONNEMENT DU RÉGULATEUR
COMMANDE DE RÉGLAGE DE
FLAMME DU RÉGULATEUR
ON
OFF
ON
OFF
UTILISEZ UNE CLÉ DE 7/8 DE PO.
POUR SERRER. NE PAS SERRER À
LA MAIN NI UTILISER DE PINCES
RACCORDEMENT POL À
LA BOUTEILLE DE GAZ
Avant toute utilisation, ouvrez (ON) l’arrivée de gaz, puis ouvrez (ON) le
robinet régulateur et allumez. Après usage, tournez le robinet régulateur
pour le fermer (OFF), puis fermez (OFF) le robinet de la bouteille de gaz.
(Suivez les instructions d’allumage).
RACCORDEMENT BRÛLEUR / TUYAU
Réglez le débit d’air au brûleur jusqu’à ce que la
flamme du brûleur soit aussi bleue que possible.
SENS
HORAIRE
SENS
ANTI-HORAIRE
OFF
On
RACCORDEMENT DE TYPE
1 À LA BOUTEILLE DE GAZ
SENS
HORAIRE
SENS
ANTI-HORAIRE
Votre réchaud peut être équipé d’un
raccord de Type 1 ou POL
Si le tuyau et le régulateur présentent des traces d’usure et doivent être
remplacés, le numéro de MODÈLE du fabricant est RL04.Le régulateur et le
tuyau fournis avec cet appareil doivent être remplacés par le modèle indiqué ci-
dessus (RL04).
SENS
HORAIRE
SENS
ANTI-HORAIRE
4
Our #1 Asked Question
When The Cast Iron Burner Burns Yellow or Not At All What Do I Do?
If your burner does not burn, blows out, burns yellow, or there’s a flame
inside the ventura, you need to check the burner ventura for any
obstructions. Dirt Dobers, Spiders and other insects will build a nest inside
the burner ventura blocking air and gas flow.
KEEP AIR SHUTTER CLOSED AFTER EACH USE.
How T o Clean
1. Remove the hose from the burner using a 7/16” wrench.
2. Insert a small rod in the hole that the hose was removed from.
3. Hold the burner up to a light looking into the hole that the hose was
removed from to see any obstructions.
4. If burner has not cleared flush with water.
5. Once the burner has been cleared, reassemble
the burner (air shutter, spring, hose.)
Ventura
SAFE STORAGE & MAINTENANCE
• Always disconnect your gas cylinder after using your cooker.
• Always allow your cooker to cool completely before handling.
• Always cover and store your cooker in a protected area.
• If rusting occurs, use steel wool to clean or buff the affected area.
• The exterior of your cooker may be touched up by using a high temperature-resistant
paint.
• Coat the cooker stand with cooking oil after the unit has cooled.
• Check the regulator, hose, and burner par ts, air shutter and ventura section carefully
before and after each use for any sign of wear.
• Always turn gas OFF at the gas cylinder valve prior to inspecting parts.
• Before each use of the cooker, check and clean the burner/venturi tubes for insects and
insect nests. A clogged tube can lead to a fire beneath the cooker.
• When the cooker is not in use, the gas must be turned OFF at the supply cylinder.
• Indoor storage of the cooker is permissible only if the cylinder is disconnected and
removed from the cooker.
• Cylinders must be stored outdoors, out of the reach of children, and must not be stored in
a building, garage, or any other enclosed area.
• The cylinder supply system must be arranged for vapor withdrawal.
• Always store the cooker in an area where the temperature won’t exceed 125°F, and
Do Not store a spare cylinder on, or near, your cooker stand, or place connected gas
cylinder under the cooker stand. Always keep the gas cylinder 18 inches away from
the cooker stand.
When a flame occurs inside the ventura this is caused by a
blockage and could cause damage to the hose assemble.
4
Page 6
Robinet régulateur
AVERTISSEMENTS et TEST D’ÉTANCHÉITÉ À L’EAU SAVONNEUSE
• Le test d’étanchéité à l’eau savonneuse doit être effectué à chaque fois que la bouteille de gaz est
raccordée au réchaud ou à chaque fois que vous utilisez ce dernier.
• Le test d’étanchéité à l’eau savonneuse doit être effectué à l’extérieur dans un endroit largement
ventilé.
• Lorsque vous effectuez le test d’étanchéité à l’eau savonneuse, veillez à ce que le réchaud soit à
l’écart de toute flamme ouverte, étincelle ou cigarette allumée.
• Le Réchaud Pour Usage En Plein Air de Masterbuilt a été conçu afin de fonctionner avec du
propane uniquement. Ce réchaud ne fonctionnera pas avec du gaz naturel.
• Ne pas utiliser de flamme nue pour rechercher une fuite de gaz.
•Veillez à toujours retirer toute casserole ou couvercle en dôme du réchaud lorsque vous effectuez le
test d’étanchéité à l’eau savonneuse.
MARCHE À SUIVRE:
1. Retirez toute casserole ou couvercle en dôme du réchaud
lorsque vous effectuez le test d’étanchéité à l’eau savonneuse.
2. Placez le robinet de commande et le robinet de gaz de la
bouteille sur “OFF” (ARRÊT).
3. Préparez votre solution d’eau savonneuse en mélangeant (1)
une dose de liquide-vaisselle avec (3) doses identiques d’eau
afin de vérifier que le tuyau et les raccords du régulateur et de
la bouteille de gaz ne présentent pas de fuites. Appliquez la
solution savonneuse sur le robinet de la bouteille de gaz, sur
le robinet régulateur et le tuyau allant au brûleur et sur les
robinets à pointeau. Les réchauds sont vendus avec des
robinets de commande au niveau du régulateur ou des
robinets à pointeau.
4. Ouvrez le robinet de la bouteille de gaz en le plaçant sur “ON”
(MARCHE) (le régulateur ou les robinets à pointeau sont en
position fermé, “OFF”) et vérifiez visuellement la bouteille de
gaz, le régulateur, le tuyau et les raccords des robinets à
pointeau afin de vous assurer qu’ils n’y a pas de bulles.Ne
laissez pas le gaz ouvert pour plus de 12 secondes. Si des
bulles apparaissent, arrêtez, fermez (OFF) la bouteille de gaz
et serrez à nouveau le raccord.Effectuez le test à nouveau.
5. Après avoir placé le robinet régulateur sur “OFF” (ARRÊT),
ouvrez (ON) le robinet de la bouteille de gaz. Ouvrez le robinet
régulateur en le tournant 1 tour complet, PAS LES ROBINETS
À POINTEAU et vérifiez qu’il n’y a pas de bulles au niveau du
robinet régulateur, le long du tuyau, et aux raccords des
brûleurs. NE PAS LAISSER LE GAZ OUVERT POUR PLUS
DE 12 SECONDES.Si le mélange savonneux commence à
faire des bulles, le gaz fuit au niveau du raccord ou du tuyau.
Fermez le robinet du régulateur et le robinet de la bouteille de
gaz en les plaçant sur “OFF” (ARRÊT) et serrez à nouveau le
raccord qui présente une fuite.Après avoir effectué le test et
après avoir vérifié qu’il n’y a aucune fuite, patientez 5 minutes
afin que les vapeurs de gaz se dissipent avant d’allumer le
réchaud.
SI DES BULLES CONTINUENT À SE FORMER LORS DU
TEST D’ÉTANCHÉITÉ À L’EAU SAVONNEUSE, ARRÊTEZ,
N’UTILISEZ PAS LE RÉCHAUD ET CONTACTEZ VOTRE
DISTRIBUTEUR DE BOUTEILLES DE GAZ PROPANE OU
MASTERBUILT AU 800-489-1581 POSTE 101.
REMARQUE: UTILISEZ UNE BOUTEILLE DE 20 LBS (9 KG)
OU INFÉRIEURE AVEC VOTRE RÉCHAUD POUR USAGE
EXTÉRIEUR!
Robinet à pointeau
Bulles lors du test d’étanchéité
Soupape du brûleur et
raccord du tuyau
Brûleur, tuyau, régulateur et robinet de la bouteille
POUR USAGE EXTÉRIEUR UNIQUEMENT / NE JAMAIS LAISSER
SANS SURVEILLANCE
5
OUTDOOR USE ONLY / NEVER LEAVE UNATTENDED
COUNTER
CLOCKWISE
REGULATOR TO GAS CYLINDER VALVE CONNECTION
REGULATOR CONTROL VALVE OPERATIONS
REGULATOR CONTROL
FLAME ADJUSTMENT
ON
OFF
ON
OFF
USE A 7/8” WRENCH TO
TIGHTEN. DO NOT HAND
TIGHTEN OR USE PLIERS.
POL CONNECTION
TO GAS CYLINDER
Before using, turn the gas cylinder ON first, then the regulator
control valve ON and light. After use, turn regulator control valve
OFF first, then the gas cylinder OFF. ( Follow Lighting Instructions)
BURNER / HOSE CONNECTION
Adjust Air Shutter To the Burner Until the
Burner Flame Is As Blue As Possible
CLOCKWISE
CLOCKWISE
COUNTER
CLOCKWISE
OFF
On
Type 1 CONNECTION
TO GAS CYLINDER
CLOCKWISE
COUNTER
CLOCKWISE
Your Cooker May Be Equipped with Either a
Type 1 or POL Connection
If the hose and regulator shows signs of wear and needs
replacing, the manufactures MODEL # for this part is RLO4.
The regulator and hose supplied with this unit must be
replaced with the Model # listed (RLO4).
5
Page 7

Trou
d’allumage
Registre
de réglage
Tous les Réchauds Simples possèdent des
trous pour le raccordement d’un bouton
allumeur en option et une tablette latérale
Réchaud
Robinet
régulateur
1. Assurez-vous que le robinet régulateur se trouve sur “OFF” (ARRÊT) et effectuez le test
d’étanchéité avec de l’eau savonneuse avant chaque utilisation.
2. Retirez le couvercle (si présent) et tournez le robinet de gaz de la bouteille afin de le placer sur
“ON” (MARCHE). Utilisez une longue allumette ou un allumeur piézo-électrique à travers le trou
d’allumage du brûleur.Tournez lentement le robinet régulateur ou le robinet à pointeau jusqu’à ce
que le brûleur s’allume. (Si le brûleur ne s’allume pas dans les 5 secondes qui suivent, replacez le
robinet de commande sur “OFF” (ARRÊT) et le robinet de gaz de la bouteille sur “OFF” (ARRÊT).
Patientez 5 minutes afin que les vapeurs se dissipent avant de tenter d’allumer à nouveau le
brûleur).
3. Après avoir allumé le brûleur, ouvrez le robinet régulateur ou le robinet à pointeau jusqu’à ce que
la flamme augmente. Réglez la flamme du brûleur au niveau de la grille d’admission d’air afin
qu’elle devienne bleue.
4. Remplissez le récipient avec de l’eau ou de l’huile. NE PAS remplir le récipient au-delà du 1/3 de
sa contenance.Vous éviterez ainsi tout risque de débordement.
Remarque: NE PAS placer le récipient au-dessus d’une flamme nue s’il est vide, vous
endommagerez ce dernier.
5. Chauffez niveau du robinet de commande et immergez lentement le panier dans le récipinet afin
d’éviter tout risque de débordement.
L’HUILE NE DOIT JAMAIS DÉPASSER 350˚F (177˚C)!
L’huile s’enflammera entre 550˚ et 700˚F (287˚ et 371˚C).
6. Il est recommandé d’utiliser un thermomètre lors de toute cuisson en friture.
7. Après chaque utilisation, replacez le robinet de commande ou le robinet à pointeau sur “OFF”
(ARRÊT), puis le robinet de la bouteille de gaz sur “OFF” (ARRÊT). Laissez le réchaud et le
récipient d’eau ou d’huile complètement refroidir avant de les toucher, déplacer, ranger ou
entreposer.
Préparez tous vos aliments hors du réchaud avant de l’allumer.
L’HUILE CHAUFFERA TRÈS VITE EN QUELQUES MINUTES!
Taille de la bouteille de gaz, entreposage et remplissage
A) Ne pas entreposer une bouteille de gaz LP de rechange en-dessous ou à
proximité de cet appareil.
B) Ne jamais remplir la bouteille à plus de 80%. Si vous ne suivez pas exactement
les instructions des paragraphes (A) ou (B), un incendie risque de se produire et
d’entraîner des blessures graves voire la mort. Les bouteilles de gaz doivent être
entreposées à l’extérieur, hors de portée des enfants et ne doivent pas être
entreposée dans un immeuble, garage ni tout autre espace clos.
Utilisez uniquement une bouteille de 20 lbs. (9 kg) ou infér ieure avec collier pour ce
type de réchaud.
Conseil afin de transporter la
bouteille de gaz en toute sécurité:
Ne jamais transporter la bouteille de
gaz dans une voiture ou dans le coffre
de cette dernière.Veillez à toujours
transporter la bouteille à l’arrière d’une
camionnette de type pick-up.
Instructions d’allumage du gaz pour bouillir ou frire:
6
Regulator Control Valve
SOAPY W ATER TEST WARNINGS and PROCEDURES
• The Soapy Water Test must be performed each time the gas cylinder is connected to
your appliance or each time the appliance is used.
• The Soapy Water Test must be performed outdoors in a well-ventilated area.
• When performing the Soapy Water Test, always keep cooker away from open
flames, sparks, or lit cigarettes.
• The CookMaster Outdoor Gas Cooker is designed to operate with propane gas only.
This product will not operate with natural gas.Optional Natural Gas Converter Kit
is Available Model NGCK
• Never use an open flame to test for gas leaks.
• Always remove any cookware from cooker stand when performing the Soapy Water
Test.
PROCEDURE:
1. Remove any cookware from your cooker stand.
2. Turn regulator or needle valve to OFF position, and
turn the gas cylinder valve to the OFF position.
3. Prepare your soapy water solution by combining (1)
one part dish washing liquid with (3) three parts water
to test for the possibility of any gas leaks in the hose
or connections to regulator and the regulator
connection to gas cylinder. Apply soapy water solution
to the gas cylinder valve, regulator and up the hose to
the burner. Cookers are sold with regulator control
valve or needle valve.
4. Turn gas cylinder valve ON (regulator control valve is
in the OFF position) and observe gas cylinder valve for
bubbles. Do not leave gas on for more than 12
seconds. If bubbles appear, stop, turn gas cylinder
OFF, and retighten the fitting. Repeat test.
5. When the gas cylinder has been tested, open the
regulator control valve one full turn and check for
bubbles at regulator control valve, along the entire
length of hose and at the connection to the burner .
DO NOT LEAVE GAS ON FOR MORE THAN 12
SECONDS. If soapy mixture starts bubbling, gas is
leaking through the connection or hose. Turn the
regulator valve OFF and then the gas cylinder OFF
and retighten the connection that is leaking gas. After
test is complete, and there are no leaks, wait a
minimum of 5 minutes for gas fumes to diminish before
lighting cooker.
DURING ANY PORTION OF THE SOAPY WATER TEST, IF
BUBBLES CONTINUE TO APPEAR, STOP, DO NOT USE
AND CONTACT YOUR LOCAL PROPANE DEALER OR THE
MASTERBUILT HOTLINE AT 800-489-1581 EXT.101.
NOTE: USE A 20 LB. CYLINDER OR SMALLER WITH YOUR
OUTDOOR GAS COOKER!
Needle Valve
Bubbles in Soapy Water Test
Burner and Hose
Connection
Burner, Hose, Regulator and
Cylinder Valve
OUTDOOR USE ONLY / NEVER LEAVE UNATTENDED
6
Page 8
GARANTIE
MASTERBUILT Manufacturing, Inc. couvre le brûleur, le robinet du régulateur, le tuyau, le
thermomètre, les ustensiles et le support du réchaud des Friteuses et Cuiseur à Gaz LP pour Usage en
Plein Air de MASTERBUILT contre tout défaut de matériel et de fabrication pour une période de cinq (5)
ans. Cette garantie de MASTERBUILT, Mfg., Inc. ne couvre pas la rouille ni la corrosion pouvant
apparaître sur un de ces quelconques appareils.MASTERBUILT Manufacturing, Inc. s’engage à réparer
ou à remplacer les pièces défectueuses de l’appareil ou à fournir les pièces de ce dernier port payé à
partir de Columbus, GA. MASTERBUILT Mfg., Inc.requière une preuve d’achat et vous recommande de
conserver votre reçu. Il est obligatoire de remplir et de renvoyer cette carte sinon la garantie sera nulle et
non avenue.Au terme de la garantie, toute responsabilité et obligation vis à vis de la garantie cessera.
Cette garantie ne couvre pas le coût financier de dégâts matériels survenant suite à une défaillance
du produit ou de toute utilisation incorrecte, négligence ainsi que tout mauvais traitement ou dommage
suite au transport ou entraîné si l’appareil est utilisé à des fins commerciales ou industrielles. CETTE
GARANTIE EXPRESSE TIENT LIEU DE GARANTIE UNIQUE FOURNI PAR LE FABRICANT ET
REMPLACE TOUTE AUTRE GARANTIE EXPRESSE OU IMPLICITE Y COMPRIS TOUTE GARANTIE
D’APTITUDE À LA COMMERCIALISATION OU D’APTITUDE À UN USAGE PARTICULIER.
MASTERBUILT ni le magasin vendant ce produit n’a le droit de stipuler d’autres garanties ou de
promettre des recours supplémentaires ou incompatibles avec ceux mentionnés ci-dessus.La
responsabilité de MASTERBUILT se limitera à et en aucun cas ne dépassera le prix d’achat du produit
payé par l’acheteur initial.Certains états ne permettent pas l’exclusion ou la limitation de dommages
directs ou indirects. Par conséquent, les exclusions ou limitations indiquées ci-dessus peuvent ne pas
vous être applicables.Malgré les limitations de cette garantie, les restrictions suivantes s’appliquent aux
habitants de Californie. Si réparer ou remplacer le produit en question ne s’avère pas rentable pour le
revendeur, ce dernier ou MASTERBUILT remboursera le prix payé à l’achat du produit après
dépréciation et après déduction d’une somme équivalente à la durée d’utilisation par l’acheteur initial
avant la découverte du vice ou de la non-conformité. En Californie uniquement, il vous est possible de
retourner le produit au magasin revendeur afin de bénéficier des services offerts par la garantie. Cette
garantie expresse vous confère des droits juridiques spécifiques et il est possible que vous en ayez
d’autres selon l’état.
REMARQUE: Le fini de peinture risque de brûler lors d’une utilisation normale et n’est donc couvert
par aucune garantie.
POUR USAGE EXTÉRIEUR UNIQUEMENT / NE JAMAIS
LAISSER SANS SURVEILLANCE
RECETTES
AILES BUFFALO
- 1 gallon (3,7 l) d’huile végétale
- 24 ailes de poulet
- 1 petite bouteille de sauce épicée (de
votre choix)
- 1/2 cuillère à café de sel
- 1/4 de cuillère à café de poivre
- 1/4 de tasse de beurre ou de margarine
(fondu)
- 1 cuillère à café de vinaigre blanc
- 1 pincée de sel à l’ail
- Quelques tiges de céleri
- Sauce au fromage persillé bleu
Décongelez les ailes de poulet (si
elles sont congelées), et placez-les dans
un panier.Versez 1 gallon (3,7 l) d’huile
dans 10 récipients de 450 ml et chauffez
à 350˚F (177˚C). (ATTENTION:
BRULANT).Placez lentement les ailes de
poulet dans l’huile et cuisez pendant 8 à
12 minutes. Retirez le panier et égouttez
les ailes puis placez-le dans un bol.
Mélangez la sauce épicée avec la
margarine et le sel à l’aile.Versez le tout
sur les ailes, mélangez et servez.
CHA
UDRÉE À LA CAJUN
- 1 livre (450 g) de crevettes
- 1 livre (450 g) d’écrevisses
- 1 livre (450 g) de saucisse
- 8 épis de maïs
- 2 sachet-mélanges pour la cuisson des
crabes
- 2 livres (450 g) de pommes de terre
entières
Utilisez un grande casserole à panier
amovible, ajoutez de l’eau et 2 sachet-
mélanges pour la cuisson des crabes et
chauffe l’eau jusqu’à ébullition.Laissez l’eau
bouillir pendant 15 minutes puis ajoutez la
saucisse (coupez la saucisse en rondelles
de 6 mm).Trois minutes plus tard, ajoutez
les pommes de terre; 3 minutes plus tard
ajoutez le maïs, 3 minutes plus tard ajoutez
les crevettes et les écrevisses en même
temps, 3 minutes plus tard, retirez le tout.
Pour une dégustation digne de
Louisiane, versez le plat sur un papier
journal ayant été déplié au préalable sur la
table et bon appétit!
7
Lighting
Hole
Single Cooker is
Pre-Drilled for Optional
Push Button Ignitor
Cooker Stand
with Cast Burner
Regulator
Control Valve
1. Check the regulator control valve to be certain it is in the OFF position and
perform soapy water test before each use.
2. Open lid if applies and turn gas cylinder valve ON. Use a long match or spark
ignitor through the burner lighting hole. Slowly turn on the regulator control valve
or needle valve until the burner lights. (If burner does not light within 5 seconds,
turn regulator control valve OFF, then the gas cylinder valve OFF.) Wait 5
minutes for fumes to diminish before relighting.
3. After the burner is lit, open the regulator valve or needle valve until the flame
increases. Use the air shutter on the burner to adjust the flame until it turns blue.
4. Fill Pot with water or oil. DO NOT fill pot more than 1/3 the pots full capacity.
This will help avoid dangerous boil-overs.
Note: DO NOT place your empty pot over the open flame. This will damage pot.
5. Bring your water or oil to the desired temperature by adjusting regulator control
valve and lower basket into pot slowly to avoid boil-overs. THE OIL SHOULD
NEVER EXCEED 350°F! Oil Will Ignite at 550°F to 700°F.
6. We recommend a thermometer for frying.
7. After each use, first turn the regulator control valve or needle valve OFF first,
then the gas cylinder OFF. Always allow gas stove and pot with water or oil to
cool completely before touching, moving, or storing.
Have food prepared and outside with appliance before lighting.
OIL WILL HEAT UP QUICKLY!
Gas Boiling, Frying, Lighting Instructions:
7
Page 9
ENTREPOSAGE ET ENTRETIEN EN TOUTE SÉCURITÉ
• Veillez à toujours débrancher la bouteille de gaz après avoir fini d’utiliser le réchaud.
• Laissez toujours le réchaud complètement refroidir avant de le transporter.
• Veillez à toujours couvrir et ranger le réchaud dans un endroit bien à l’abri.
• En cas d’apparition de rouille, nettoyez la zone affectée avec de la paille de fer.
• Il vous est possible de retoucher le revêtement extérieur du réchaud avec une peinture
résistante aux hautes températures.
• Appliquez une couche d’huile de cuisine sur le support du réchaud après que ce dernier
ait refroidi.
• Vérifiez attentivement le régulateur, le tuyau, et les pièces du brûleur, le registre de
réglage et l’ensemble venturi-vanne et assurez-vous que ces pièces ne présentent pas
de traces d’usure.
• Veillez à toujours couper (OFF) l’alimentation en gaz au niveau de la vanne de la
bouteille de gaz avant d’inspecter les pièces.
• Avant chaque utilisation, vérifiez et nettoyez les tuyaux du brûleur et du venturi afin de
vous assurer qu’ils ne comportent aucun nid d’insectes.Tout tuyau bouché risque de
provoquer un feu sous le réchaud.
• Lorsque vous n’utilisez pas le réchaud, éteignez le gaz (OFF) au niveau de la bouteille
d’alimentation en gaz.
• Il vous est possible d’entreposer le réchaud à l’intérieur à condition de débrancher la
bouteille et de la retirer du réchaud.
• Toute bouteille de gaz doit être entreposée à l’extérieur, hors de portée des enfants et
ne doit pas être entreposée dans un immeuble, garage ni tout autre espace clos.
• Le dispositif d’alimentation de la bouteille de gaz doit permettre la retrait des vapeurs.
• Veillez à toujours entreposer le réchaud debout et dans un endroit où la température ne
dépassera pas 125˚F (50˚C). N’entreposez jamais une bouteille de gaz de rechange
sur, ou à proximité du réchaud, ni placez de bouteille de gaz raccordée sous le réchaud.
Veillez à toujours conserver la bouteille de gaz à au moins 18 po. (45 cm) du réchaud.
OUTDOOR USE ONLY / NEVER LEAVE UNATTENDED
8
Gas Cylinder Size, Storage, and Filling
A) Do Not Store a Spare LP-Gas Cylinder Under or Near Appliance.
B) Never Fill the Cylinder Beyond 80 Percent Full.
If the Instructions in “(A)” or “(B)” are not Followed Exactly, a Fire
Causing Death or Serious Injury May Occur.
C) Cylinders Must Be Stored Outdoors Out of Reach of Children and Must
Not be Stored in a Building, Garage, or Any Other Enclosed Area.
D) Use Only a 20lb Cylinder or Smaller With a Collar With This Appliance.
Gas Cylinder Transporting
Safety Tip:
Never transport a gas
cylinder inside your car or
trunk of car.Use an open
vehicle such as a pickup truck.
FOR YOUR SAFETY
1.When cooking with oil or grease, do not allow oil/grease to exceed
350° F (177° C). One gallon of oil can reach 350° in 7 to 10 minutes.
Use a thermometer to check temperature.When cooker is in
operation, NEVER LEAVE UNATTENDED. Oil will heat up quickly
and ignite at 550° to 700°. (Use a Max of one gallon of oil in the 10qt
to 12qt pots, and a Max of Three gallons of oil in the 30qt pot.)
2. Do not store or use gasoline or other flammable vapors and liquids
in the vicinity of this or any other cooking appliance.
3. An LP cylinder not connected for use shall not be stored in the
vicinity of this or any other appliance.
4. Do not leave the oil/grease unattended while cooker is in use.
Free Video Offer
“Outdoor Cooking Made Simple”
From European and Southern style cooking,
to Louisiana Cajun and Midwest flavors,
hosts Don and John McLemore guide viewers, step by step,
through the world of smoking, grilling, frying, and boiling.
Let more than 20 recipes, tempt your taste buds and open up a
world of rich flavor and awesome eating.
English Speaking Only.Viewing Time: Approx. 48 mins.
To return this registration of warranty, simply remove the form from this booklet
and mail to:
CookMaster Gas Cooker
450 Brown Ave.Columbus, GA 31906
We thank you for taking the time to complete this form.
Yes, I would like the free video “Outdoor Cooking Made Simple.”
I have included my payment (check or money order) for shipping and handling charges.
Shipping within continental United States ............
$5.95
For shipping rates outside the continental United States or for Visa or Mastercard orders, call
800–489-1581 and ask for one of our Customer Service Representatives.
8
Page 10

DEEP FRIED TURKEY RECIPE
LOWER BIRD INTO OIL VERY SLOWLY
•One turkey Up To 20 Pound Max (whole bird) in 30 Qt Pot.
•Inject turkey and season outside of the turkey with Masterbuilt’s Cajun Spices.
•The amount of oil needed is determined by the size of the turkey.
STEP 1 - Place turkey, wild or domestic, into MASTERBUILT’s drain and
steamer basket and place into pot. Fill pot with water until butt of bird is covered.
Remove bird from pot allowing all water to drain and mark waterline;empty water
from pot; this will tell you how much oil is needed.Three inches of space is needed
from top of pot to the top of bird. Do not use a bird larger than 20 pounds; remove
plastic pop-up thermometer from bird. Bird must be completely thawed and free of
excess water.
STEP 2 - Cover outside and inside cavity of bird with cajun spices and inject
with seasonings if desired. Bring oil temperature to 350°F, keeping a close watch
on the temperature. (It is important to maintain as close to 350°F as possible while
cooking.) Place turkey in basket with legs of bird up. Lower into 350°F grease or
oil very slowly. (Wear a cooking glove.) Cook bird 3 minutes per pound and then
add 5 minutes to total cooking time.
STEP 3 - Tur n Cooker OFF and remove bird slowly, allowing oil to escape the
bird inside and out.
Example: Cooking a 11.5 pound turkey
3 minutes per pound plus 5 minutes, for a total cooking time of 39.5 minutes .
(20 Pounds x 3 Minutes = 60 + 5 Minutes = 65 Total Minutes)
Note: If the turkey floats before cooking time is complete, this does not mean
the turkey is done. Continue to follow time in Step 2. For pheasant, cornish hen,
chicken, and quail, follow Step 1. You may deep fry more than one of these birds
at a time, Do Not allow oil to overflow. Use water method in step 1. For proper
cooking time, do not total the weight of more than one bird. For example: For
three cornish hens at 2 lbs. each, cook 6 minutes plus 5 minutes with a total
cooking time of 11 minutes. Do not total the number of pounds for all three birds;
this will over cook the birds.
Cool, Carve, and Eat!
Reminder: Please Read
Never leave cooker unattended while Oil/Grease is heating up and while the
food is cooking and until Oil/Grease has cooled completely. Oil will heat up fast.
Watch the thermometer until it reaches 350º and while the food is cooking
to make sure Oil/Grease maintains 350º. Oil/Grease will catch FIRE and cause
serious damage to yourself and/or property, even death. Use cooker outdoors in
an open area away from anything flammable such as overhang of house or wood
patio.
OUTDOOR USE ONLY / NEVER LEAVE UNATTENDED
9
WARRANTY INFORMATION
Masterbuilt warrants the burner, regulator valve, hose, thermometer, cookware and stand of the
Outdoor LP Gas Fryer / Boiler to be free from defects in material and workmanship for five years.
CookMaster warranty does not cover rust of the unit.Within this period, CookMaster shall correct any
defect by repairing or replacing defective parts of the equipment or making available the parts from,
Columbus, Georgia, F.O.B.
CookMaster Manufacturing, Inc.requires reasonable proof of purchase and suggests that you keep
your receipt. Failure to complete and return warranty information will make product warranty null and
void. Upon the expiration of such warranty, all such liability shall terminate.
This warranty does not include the cost of property damage due to the failure of the product and does
not cover damage due to the misuse, abuse, accident, damage arising out of transportation, or damage
incurred through commercial use of this product. THIS EXPRESS WARRANTY IS THE SOLE
WARRANTY GIVEN BY THE MANUFACTURER AND IS IN LIEU OF ALL OTHER WARRANTIES,
EXPRESSED OR IMPLIED, INCLUDING IMPLIED W ARRANTY OR MERCHANTABILITY OR FITNESS
FOR A P AR TICULAR PURPOSE. Neither CookMaster , nor the retail establishment selling this product,
has authority to make any warranties or to promise remedies in addition to or inconsistent with those
stated above. CookMaster’s maximum liability, in any event, shall not exceed the purchase price of the
product paid by the original consumer/ purchaser. Some states do not allow the exclusion or limitation
of incidental or consequential damages. In such a case, the above limitations or exclusions may not be
applicable.
Not withstanding this limitation of warranty, the following specific restrictions apply for California
residents. If service, repair, or replacement of the product is not commercially practicable, the retailer
selling the product or CookMaster will refund the purchase price paid for the product, less the amount
directly attributable to use by the original buyer prior to the discovery of the nonconformity. In the state
of California only, you may take the product to the retail establishment selling this product, in order to
obtain performance under warranty.
This expressed warranty gives you specific legal rights, and you may also have other rights which
vary from state to state.
NOTE: Paint finish may burn off under normal use and therefore it carries no warranty.
Masterbuilt Outdoor LP Gas Tur key Fryer / Boilers
WARRANTY INFORMATION
To validate your warranty, please fill out and return this portion within
30 days of the date of purchase.
Send to: Masterbuilt, Attn: Warranty Dept.
450 Brown Avenue, Columbus, GA 31906
1. Name________________________________________________
2. Address______________________________________________
City__________________________________________________
State____________________________Zip__________________
3. Dealer’s Name________________________________________
4. Dealer’s Location______________________________________
5. Date of Purchase______________________________________
6. What brand of outdoor cookers have you previously owned?
______________________________________________________.
7. Serial # ___________________and/or Model # ______________.
Cut Line
14
Page 11

10
OUTDOOR USE ONLY / NEVER LEAVE UNATTENDED
• Choose steaks to your desired thickness.
• Season the outside of the steak with Masterbuilt’s Sizzlin’Steak seasoning rub.
• The amount of oil needed is
2 gallons. (Use 30 Quart Pot)
STEP 1 - Place each steak in basket
STEP 2 - With each steak seasoned it’s time to heat up the cooking oil. Bring oil
temperature to 350°F, keeping a close watch on the temperature. (It is important to
maintain a 350°F temperature while cooking.) Place rack in basket or directly into
pot (Using basket is optional.) Lower basket into 350°F grease or oil very slowly.
(Wear a cooking glove.)
Cooking Time for 1 to 4 steaks:
STEP 3 - When cooking is complete Turn Cooker OFF and remove food slowly.
•1 to 4 Completely Thawed Cornish Hens
•Inject each Hen with MASTERBUILT’s Butter y Creole Marinade and season the
outside of the hens with Masterbuilt’s Kic kin’Cajun seasoning rub.
•The amount of oil needed is
2 gallons. (Use 30 Quart Pot)
Cooking Time:
If you are cooking 4 cornish hens use the hen that weighs the most.
Example:
3 minutes per pound plus 5 minutes to the total cooking time.
(1.87 Pounds for 1 hen x 3 Min utes = 5.61 + 5 Min utes = 10.61 Total
11 Minutes)
11 minutes is the total cooking time required for all 4 hens.
When cooking is complete Turn Cooker OFF and remove food slowly.
Reminder Please Read
Never leave cooker unattended while Oil/Grease are heating up and while the
food is cooking and until Oil has cooled completely. Oil will heat up fast.
Watch the thermometer until it reaches 350º and while the food is cooking
to make sure Oil/Grease maintains 350º. Oil/Grease will catch FIRE and cause
serious damage to yourself and/or property even death.Use cooker outdoors
in an open area away from anything flammable (Overhang of House or
Wood P atio.) DONOT TURN BURNER TO A LOW SETTING TO KEEP
OIL/GREASE HOT.THE TEMPERATURE OFTHE OIL/GREASE WILL
CONTINUE TO RISE AND CA TCH FIRE.
WHAT’S NEEDED & HOW TO FRY A STEAK
WHAT’S NEEDED & HOW TO FRY CORNISH HENS
Thickness Medium Rare Medium Well Done
12” 1 Minute 2 Minute 3 Minute
3/4” 2 Minute 3 Minute 4 Minute
1” 3 Minute 4 Minute 5 Minute
1 1/4” 4 Minute 5 Minute 6 Minute
1 1/2” 5 Minute 6 Minute 7 Minute
13
OUTDOOR USE ONLY / NEVER LEAVE UNATTENDED
Aluminum Fry
Pan and Basket
Model # 10PB
Optional Accessories
Auto Ignitor
Model # GSIGN
Cast Iron Griddle
Ridged on one side
and smooth on the
other side.
Model # CG15
Turkey Pot, Basket, Grab
Hook and Thermometer
Model #30TSB
6” Food Skimmer
Model # MS6
Call 800-489-1581
Page 12

11
OUTDOOR USE ONLY / NEVER LEAVE UNATTENDED
FRIED FISH, HOT WINGS & BOILED SEAFOOD
BUFFALO WINGS
1 gallon vegetable oil
24 chicken wings
1 small bottle of hot sauce (your choice)
1/2 teaspoon of salt
1/4 teaspoon of pepper
1/4 cup butter or margarine, melted
1 teaspoon white vinegar
Pinch of garlic salt
Celery sticks (Optional Side Dishes)
Blue cheese dressing
Thaw wings (if frozen) and place into
basket. Pour 1 gallon of oil/grease into a
10 1/2-quart pot and bring temperature
to 350°F. (CAUTION: HOT) Slowly
place the basket of wings into grease
and cook 8 to 12 minutes. Remove and
drain wings; pour into bowl. Mix hot
sauce with remaining ingredients. Pour
over wings, mix well, and serve.
LOW COUNTRY BOIL
1 lb.shrimp
1 lb.craw fish
1 lb.link sausage
8 pieces of short ear corn
2 bags of crab boil mix
2 lbs. of whole new potatoes
Use a large pot and bailing basket,
add water and 2 bags of crab boil mix
to the pot and bring water to a boil.
Allow water to boil for 15 minutes and
add sausage (cut sausage in 1/4-inch
thick slices). Three minutes later, add
potatoes; 3 minutes later, add corn; 3
minutes later, add shrimp and craw
fish together; 3 minutes later, remove
and serve.
For a Cajun flair, pour on top of
newspaper in the middle of your table
and enjoy.
CAJUN-FRIED FISH
4 fresh or frozen catfish, red snapper
or fillets, 1/2- to 3/4-inch thick
(1 to 1 1/4 lbs.)
1/4 cup all-purpose flour
1/4 cup yellow cornmeal
1 teaspoon dried basil, crushed
1 teaspoon onion powder
1/2 to 1 teaspoon ground red pepper
1/2 teaspoon garlic salt
1/2 teaspoon ground white pepper
1/2 teaspoon dried thyme, crushed
1/4 to 1/2 teaspoon black pepper
1/4 teaspoon ground sage
1/4 cup margarine or butter
Thaw fish, if frozen. In a shallow
mixing bowl, combine flour, cornmeal,
basil, onion powder, red pepper, garlic
salt, white pepper, thyme, black pepper,
butter and sage. Coat both sides of the
fish with the flour mixture. Bring 1 gallon
of oil to 350°F and deep fry for 3 to 4
minutes.
DEEP FRIED ONION
4 Med. Onions
Cajun Seasoning
Pill the outer skin off the onion. Next
cut about a 1/4” off one end of the onion
creating a flat top.Cut from the flat part of
the onion down but not all the way
through (1/4” from the bottom). Repeat
this step 3 to 4 more times in a pie shape.
Loosen up the onion with your fingers and
season the outside and inside of the
onion.Fry the onion for 3 to 4 minutes flat
side down in 350°F cooking oil.
Send us your recipe We would love to try it.
Marketing Dept.
Masterbuilt Mfg. Inc.
450 Brown Ave Columbus, GA 31906
12
Dry Seasonings
Kickin’ Cajun Seasoning for Frying Turkeys
Steak Seasoning for Frying or Grilling
BBQ Rub for Smoking Ribs
Injectable T urkey Marinades
Garlic & Herb
Buttery Creole
Glazing Honey
Marinades
Sizzlin Steak
Kickin Cajun Hot Wing Sauce
BBQ Sauces
Hot and Spicy
Grandma’s Mild
Fish and Seafood Batters
Original Crispy Batter
Original Crispy Cajun Batter
Southern Style Corn Meal Breading
Spices, Marinades, BBQ Sauces, and Batters
Ask About Our Spice Kit
Turkey Kit
Steak and BBQ Kit
Fish & Wing Kit
Call 1-800-489-1581
for Information
10” Thermometer
Model # DF10
6” Thermometer Injecting Syringe
Model # DFTH Model # Is35
Cooker and Grill Mat
Model # DGM
Call 800-489-1581
 Loading...