

Page 1
1
www.masterappliance.com
VARITEMP® HEAT GUN
Instruction Manual
Mode d’emploi
Manual de instrucciones
Assembled in U.S.A. using foreign and domestic components
Assemblé aux Etats-Unis en utilisant des composants étrangers
et nationaux
Ensamblado en EE.UU. utilizando componentes nacionales y extranjeros
Please read, understand and keep this manual
for future reference.
Lire et bien comprendre les instructions contenues
dans ce manuel et les conserver comme référence.
Por favor lea, comprenda y guarde este manual para
futura referencia.
Page 2
2
www.masterappliance.com
Description & Introduction
Temperature (Max.) Velocity
Models °F °C Volts Amps Watts F/M CFM
VT-750C 1000 540 120 14.5 1740 2200 17
VT-752C 750 400 230 7 1610 2800 21
The Varitemp® Heat Gun is a
heavy-duty, Industrial-quality, general-purpose heat gun. High temperature Industrial jobs are done
faster with this heat gun, because
our MASTER models have higher
power and air flow ratings.
Your Varitemp
®
Heat Gun is
equipped with an electronic stepless temperature control dial which
regulates the current going through
the heating element. This allows
outlet temperatures to be set from
ambient to a maximum of 1000°F.
Power ratings go up to 1740 watts
(120 volts) and 1610 watts (230
volts).
Heat Guns are a source of
extremely high temperature
flameless heat (up to 1000°F/
540°C). As with other products
which generate extremely high
temperatures, regardless of your
specific application, extreme care
and caution should be observed
when using this product.
Therefore, we recommend that
you pay particular attention to the
safety instructions which we
have provided for your protection.
SpecificationS
Size 8"L x 5-1/4"W x 9-1/2”H
Nozzle opening .......................................................1-3/16" dia.
Nozzle diameter ........................................................ 1-1/2" dia.
Nozzle shield length .......................................................4-3/16”
Cord length ................................................................6 Ft.
Net weight .............................................................3-1/2 Ibs.
120V models ..............................................................60 Hz
230V models ...........................................................50/60 Hz
WARNING: THIS PRODUCT IS A
SOURCE OF VERY HIGH
TEMPERATURE FLAMELESS HEAT.
AS WITH ANY ELECTRICAL TOOL,
WHEN USING HEAT TOOLS,
ALWAYS FOLLOW SAFETY
PRECAUTIONS TO REDUCE THE
RISK OF FIRE, ELECTRIC SHOCK
OR PERSONAL INJURY.
1) Read and understand this
instruction manual before using
this product. Save this manual
for future reference.
2) WARNING: With a heat gun, as
with all other heat tools, keep a
fire extinguisher handy and
observe all sensible fire precautions.
We do not recommend using
this heat gun on hollow surfaces
such as outdoor siding, walls,
soffits, panels and partitions, etc.
These areas often contain flammable materials such as dust,
wood chips, insulation, rodent
nests and other debris which
could accidentally ignite.
Your heat gun is best used for
stripping paint from solid woodwork with ins and outs such as
solid interior trim, mouldings,
turnings, doors, balusters and
porch trim, etc.
When stripping paint, always
keep the heat gun moving in a
continuous back and forth
motion. Stopping or pausing too
long in one spot could ignite the
surface you are working on or
the area behind it. See our Paint
Stripping Instructions for more
information.
3) Do not breathe or swallow lead
based paint in any form. Many
old homes and other buildings
contain lead based paint. Dust,
scrapings, residues and vapors
of lead based paint are
extremely poisonous. Prevent
possible lead poisoning when
stripping this type of paint by
using adequate ventilation (such
as a window fan in the exhaust
mode), and keeping a clean
work area. When dust or vapors
are present, use a respirator
designed to filter lead. Move
work outside when possible.
Failure to follow adequate safety
precautions when working with
lead based paint could result in
lead poisoning. See our Paint
Stripping Instructions for more
information.
4) WARNING: to reduce the risk of
fire or electric shock, do not
expose heat guns to rain or
moisture. Store indoors. Connect
to grounded outlet only.
5) Do not use plug adaptors or
remove the ground prong from
the plug. This tool is equipped
with a 3-prong plug and a 3-wire
grounding system. Connect to
properly grounded outlets only.
6) Use heat gun only on adequately rated circuits to avoid
overheating of elec trical systems.
7) Varitemp
®
heat guns can produce up to1000°F (540°C) of
flameless heat out of the nozzle.
Do not direct this hot air stream
at your clothing, hands or other
body parts. Do not use as a hair
dryer.
8) Do not touch nozzle opening or
nozzle shield until cool. When in
“hot” mode, extreme heat is
generated at those areas. Always
hold tool by the handle or use
permanently attached stand.
9) Run on “cold” before turning off.
The nozzle and shield require
approximately 3 minutes to
become cool to the touch.
10) Do not touch work surface with
nozzle. Keep nozzle face at
least 1" away.
11) Keep a clean work area. Messy
or cluttered work areas invite
accidents or injury.
12) Keep away from children or
persons with reduced physical,
sensory or mental capabilities,
important Safety inStructionS
Page 3

3
www.masterappliance.com
Important Safety Instructions (cont’d)
or lack of experience and
knowledge. All visitors should
be kept at a safe distance from
the work area. Do not let visitors touch the tool or extension
cord.
13) Use tool in a well-ventilated
area. Do not use near flammable liquids or in an explosive
environment (where fumes,
gases or dust are present).
14) Remove all highly flammable
materials and other debris from
the work area.
15) Wear safety glasses at all
times.
16) When using an extension cord,
use only a 3-wire grounded cord
with a minimum of 14 gauge
capacity. We recommend they
be listed by Under writers
Laboratories (UL) in the U.S.A.
or (CSA) Canadian Standards
Association in Canada and be
suitable for outdoor use. Cords
marked for outdoor use are also
suitable for indoor use.
17) Don’t abuse cordset. Never
yank by cord to remove from
electrical outlet or carry tool by
cord.
18) Don’t remove adjustable stand.
When not hand held, place tool
on a level surface. Position
cordset so it does not cause
tipping.
19) Keep a fully-charged fire extinguisher close at hand.
20) Do not leave heat gun unattended while running or cooling
down.
21) Stay alert. Do not operate tool
when you are tired. Use common sense and watch what you
are doing.
22) Store properly. Do not store
while hot. Store in a dry, high or
locked-up location. Keep out of
the reach of children.
23) WARNING: This product, when
used for soldering and similar
applications, can expose you
to LEAD, which is known to the
State of California to cause
cancer and birth defects and
other reproductive harm. For
more information go to www.
P65Warnings.ca.gov
Your Varitemp® Heat Gun is a
heavy-duty, industrial-quality heat
gun. You can do more heating jobs
faster with this heat gun because
of its high power and air flow ratings.
This product provides a fast flow of
heated air for applications such as
activating adhesives, bending and
forming plastics, curing epoxies,
deburring plastics, defrosting frozen coils, drying negatives and
parts, heating solids and liquids,
loosening nuts and bolts, removing
floor tiles and putty, repairing vinyl,
shrinking tubing and packaging,
softening materials and stripping
paint. It's your dependable answer,
“Wherever a fast, portable heat is
the need.”
The proper amount of heat for each
application is dependent upon the
adjustment of the heat adjustment
control, the distance of the nozzle
opening from the work surface and
length of time that heat is applied
to the work surface.
Before performing an application,
we recommend that you experiment with a piece of scrap material. Use care in approaching the
work until you find the proper combination of heat adjustment, distance from the work surface and
heat application time.Use a gentle
back and forth motion when applying heat unless it is found that a
concentrated heat is desired.
To Operate Heat Gun
1) Plug heat gun into properly rated
outlet.
2) Move rocker switch to “Hot”
position. Turn heat control to
desired setting. Heat gun will
come up to full operating temperature.
3) Adjustable stand is provided to
allow nozzle to be rotated from
almost horizontal to vertical position.
4) To turn heat gun off after use,
move switch to “COLD” position.
Run on cold for approximately
three minutes. This will allow the
heat gun to cool down and the
nozzle to become cool to the
touch.
5) Move switch to “OFF” position.
operating inStructionS
When heat gun is used in an
enclosed container, such as a shrink
tunnel or special enclosure, ambient
air must be allowed to pass into the
heat gun and there must be an outlet
of equal size for the heated air to
pass out of the enclosure also. Total
enclosure will cause damage or possible failure to the heat gun due to
the extreme heat generated.
typical applicationS
How to Strip Paint
In addition to many other applications, stripping paint has become a
popular use for your Varitemp
®
Heat Gun. Because of its higher
power and airflow ratings many
professional restoration and renovation contractors recognize it as
the tool of choice for tough paint
stripping jobs.
Paint Stripping Safety
Instructions
1) WARNING: With a heat gun, as
with all other heat tools, keep a
fire extinguisher handy and
observe all sensible fire precautions.
We do not recommend using this
heat gun on hollow surfaces
such as outdoor siding, walls,
soffits, panels and partitions, etc.
These areas often contain flammable materials such as dust,
wood chips, insulation, rodent
nests and other debris which
could accidentally ignite.
Your heat gun is best used for
stripping paint from solid woodwork with ins and outs, such as
solid interior trim, mouldings,
turnings, doors, balusters and
porch trim, etc.
When stripping paint, always
keep the heat gun moving in a
continuous back and forth
motion. Stopping or pausing too
long in one spot could ig nite the
surface you are working on or the
area behind it.
2) Do not breathe or swallow lead
based paint in any form. Many
old homes and other buildings
contain lead based paint. Dust,
scrapings, residues and vapors
of lead based paint are extremely
poisonous. Prevent possible lead
poisoning when stripping this
type of paint by using adequate
ventilation (such as a window fan
in the exhaust mode), and keeping a clean work area. When dust
or vapors are present, use a respirator designed to filter lead.
Move work outside when possible.
Page 4
4
www.masterappliance.com
Typical Applications (cont’d)
Failure to follow adequate safety
precautions when working with
lead based paint could result in
lead poisoning. See our Paint
Stripping instructions for more
information.
3) Keep away from chemical paint
strippers which can ignite or
release harmful vapors.
4) Use adequate ventilation (such
as a window fan in the exhaust
mode) and keep your work area
clean.
5) Wear gloves and safety glasses
at all times.
6) Keep a fully charged fire extinguisher close at hand.
7) Stay alert, watch what you are
doing, and use common sense.
IMPORTANT SAFETY
INSTRUCTIONS
READ THESE INSTRUCTIONS
WARNING: Hidden areas such as
behind walls, ceilings, floors, soffit
boards, and other panels may contain flammable liquids that could be
ignited by the hot air gun when
working in these locations. The ignition of these materials may not be
readily apparent and could result in
property damage and injury to persons. Do not use if in doubt about
this hazard. When working in these
locations, keep the hot air gun moving in a back-and-forth motion.
Lingering or pausing in one spot
could ignite the panel or the material behind it.
Paint Stripping
WARNING: Extreme care should be
taken when stripping paint. The
peelings, residue and vapors of
paint may contain lead, which is
poisonous. Any pre-1977 paint may
contain lead and paint applied to
homes prior to 1950 is likely to contain lead. Once deposited on surfaces, hand to mouth contact can
result in the ingestion of lead.
Exposure to even low levels of lead
can cause irreversible brain and
nervous system damage; young
and unborn children are particularly
vulnerable.
Before beginning any paint removal
process you should determine
whether the paint you are removing
contains lead. This can be done by
your local health department or by
a professional who used a paint
analyzer to check the lead contact
of the paint to be removed. LEAD-
BASED PAINT SHOULD ONLY BE
REMOVED BY A PROFESSIONAL AND SHOULD NOT BE
REMOVED USING A HOT AIR
GUN
Persons removing paint should follow these guidelines:
1) Move the work piece outdoors. If
this is not possible, keep the
work area well ventilated. Open
the windows and put an exhaust
fan in one of them. Be sure the
fan is moving the air from inside
to outside.
2) Remove or cover any carpets,
rugs, furniture, clothing, cooking
utensils and air ducts.
3) Place drop cloths in the work
area to catch any paint chips or
peelings. Wear protective clothing such as extra work shirts,
overalls and hats.
4) Work in one room at a time.
Furnishings should be removed
or placed in the center of the
room and covered. Work areas
should be sealed off from the
rest of the dwelling by sealing
doorways with drop cloths.
5) Children, pregnant or potentially
pregnant women and nursing
mothers should not be present in
the work area until the work is
done and all cleanup is complete.
6) Wear a dust respirator or a dual
filter (dust and fume) respirator
mask which has been approved
by the Occupational Safety and
Health Administration (OSHA),
the National Institute of Safety
and Health (NIOSH), or the
United States Bureau of Mines.
These masks and replaceable
filters are readily available at
major hardware stores. Be sure
the mask fits. Beards and facial
hair may keep masks from sealing properly. Change filters
often. DISPOSABLE PAPER
MASKS ARE NOT ADEQUATE.
7) Use caution when operating the
hot air gun. Keep the hot air gun
moving as excessive heat will
generate fumes which can be
inhaled by the operator.
8) Keep food and drink out of the
work area. Wash hands, arms
and face and rinse mouth before
eating or drinking. Do not smoke
or chew gum or tobacco in the
work area.
9) Clean up all removed paint and
dust by wet mopping the floors.
Use a wet cloth to clean all walls,
sills and any other surface where
paint or dust is clinging. DO NOT
SWEEP, DRY DUST OR
VACUUM. Use a high phosphate
detergent or trisodium phosphate (TSP) to wash and mop
areas.
10) At the end of each work session put the paint chips and
debris in a double plastic bag,
close it with tape or twist ties,
and dispose of properly.
11) Remove protective clothing
and work shoes in the work
area to avoid carrying dust into
the rest of the dwelling. Wash
work clothes separately. Wipe
shoes off with a wet rag that is
then washed with the work
clothes. Wash hair and body
thoroughly with soap and
water.
SAVE THESE INSTRUCTIONS
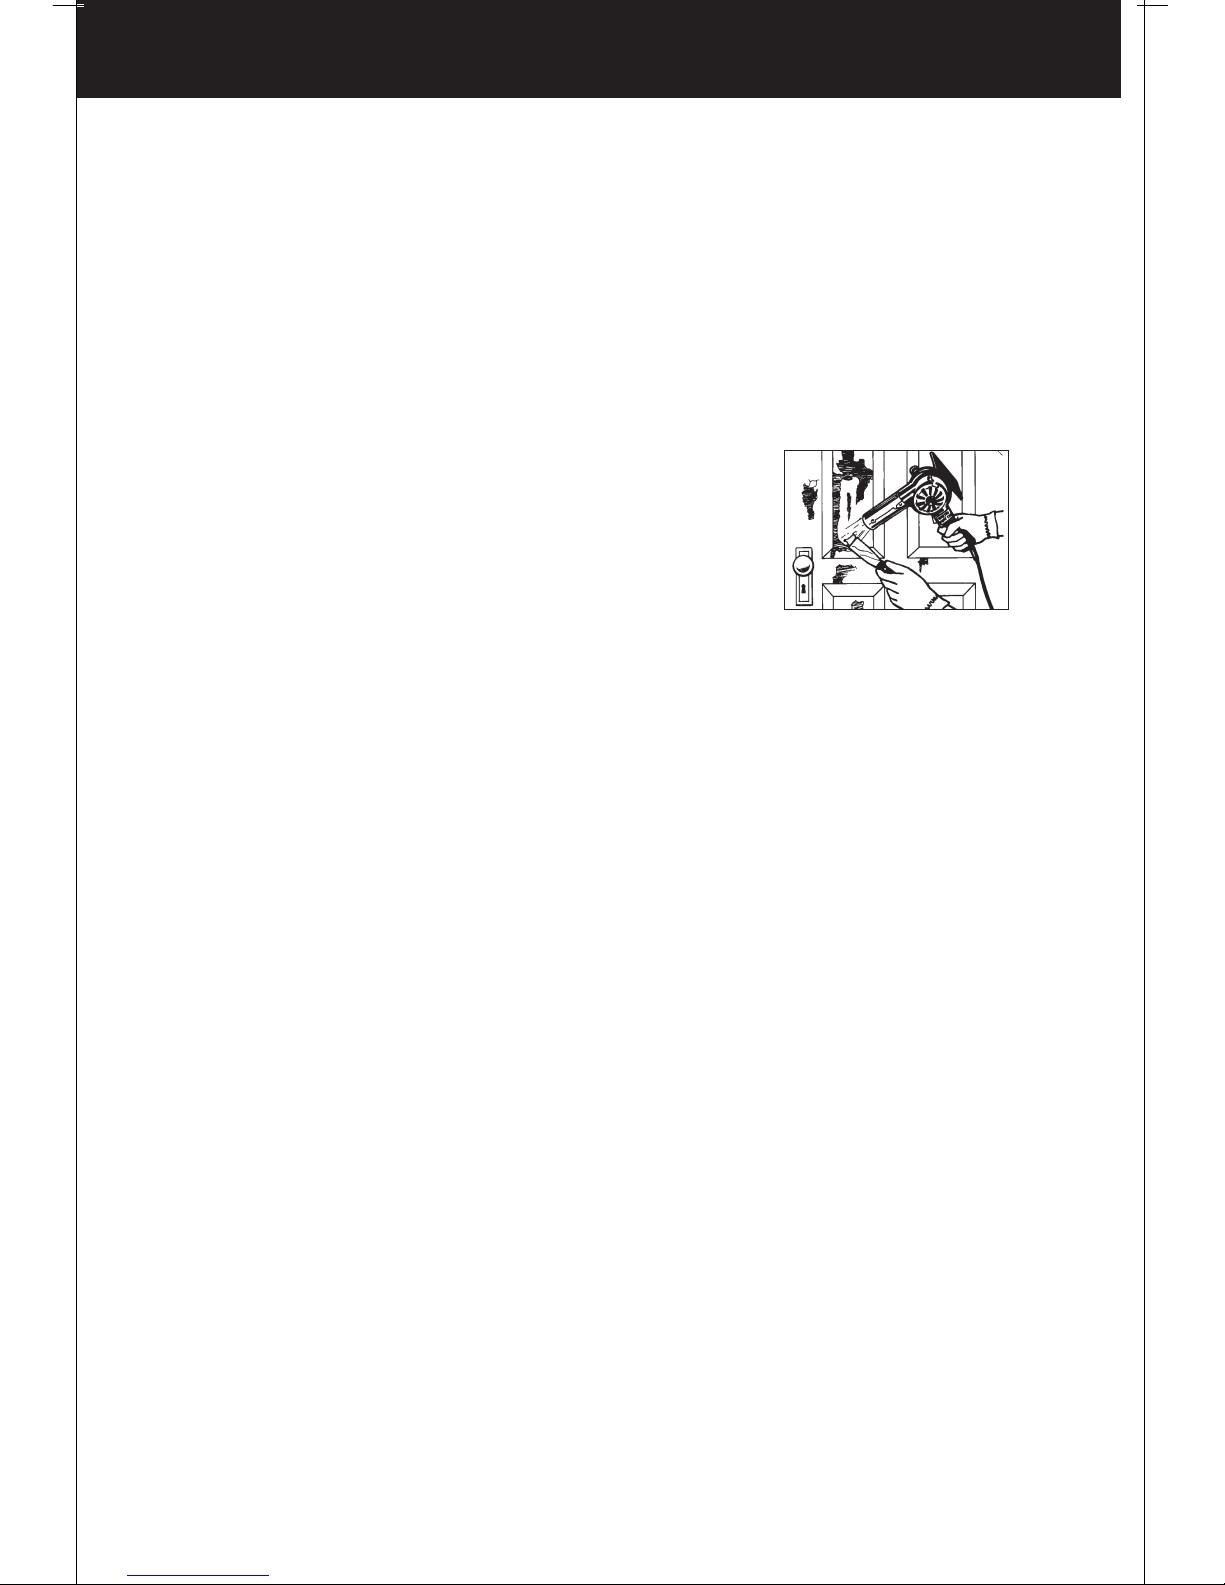
Stripping Paint
1) To strip paint, turn unit on and
hold it about 1 inch from the surface being stripped. Proper distance and speed of stripping
should be determined by experience. It is an advantage to hold
the gun further from the surface
and to move forward slowly.
Slower speed is compensated
by the wider softened areas.
Heat will also penetrate deeper.
2) Outlet temperature can be regu-
lated by the heat control. At
maximum, temperature is about
500°F/260°C at a distance of 1
inch from the nozzle. Experiment
to see which setting gives the
best results with the paint you
are stripping.
3) As paint begins to blister and
bubble, move gun slowly in a
steady progression across the
surface. Follow closely with a
scraping knife (a 2-inch wall
scraper works best) to scrape
the loosened paint. Preheat
scraper as you are heating the
paint surface. This increases the
speed of paint stripping.
a. Removal of paint by using
heat is based on the fact that
all organic paints soften at
elevated temperatures. When
soft, the paint can be easily
lifted off without damage to
the surface.
b. When stripping paint from
grooves in moldings, you can
devise your own scraping
tools. Old screwdrivers with
ground-down blades and
linoleum knives are often
used.
Page 5

5
www.masterappliance.com
Stretching, Shaping and
Installing Vinyl
Direct hot air stream at vinyl section and wave heat gun in a back
and forth motion. Stretch and
shape until wrinkles are removed.
DO NOT aim at glass.
Defrosting Frozen Coils or Pipes
Direct hot air stream at frozen part
and wave back and forth until part
is defrosted or thawed.
Loosening Nuts and Bolts
Direct hot air stream at nut or bolt
to be loosened for a short period of
time. Heating the nut or bolt will
cause the metal to expand.
Remove the air stream from work
piece. Loosen nut or bolt with
proper wrench.
Typical Applications (cont’d)
4) When the task is completed,
move rocker switch to “Cool”
position. Allow blower to operate
for a few minutes on cool.
Shrinking Tubing
Use stand to free both hands. Slide
tubing over area to be insulated.
Place in air stream and move with
a side to side motion until tubing
has shrunk. Remove from air
stream.
Shrinking Packaging
After shrink wrap has been sealed
around product, poke a small hole
in it to allow trapped air to escape.
Then wave heated air stream back
and forth across package until
shrink wrap has evenly shrunk.
Removing Floor Tile
Direct heated air stream at tile to
be removed in a back and forth
motion. This will soften the adhesive backing. Place putty knife
under tile and lift to remove.
Removing Old Putty
When removing putty from a broken window, carefully remove the
broken glass first. When removing
putty from an undamaged window,
direct the hot air stream away from
the glass to prevent cracking due
to thermal shock. It is convenient to
shield the glass from the hot air
with a large putty knife. Wave the
hot air stream at putty until softened. Remove with putty knife.
Speed Drying Parts
Parts and other materials can be
speed dried by waving the heated
air stream over the work until dried.
If you have any questions regarding
your specific appli cation or use, feel
free to call our Customer Service
Depart ment at 262-633-7791.
NOTE: Users should independently evaluate the suitability of the product for their application.
Bending and Forming Plastics
Experiment with a piece of scrap
material first to develop a proper
technique. Place plastic piece into
a proper holding fixture. Wave hot
air along the whole length of the
“Bend” line until plastic softens
along that area. Bend plastic to
desired position.
Page 6

6
www.masterappliance.com
Repair And Maintenance Instructions
All repairs and maintenance recommended in this instruction manual must be performed by a
qualified repair technician who is
experienced with the repair of electric tools, a qualified service organization, or Master Appliance
Corp.’s Repair Department.
Please contact Master’s Customer
Service Department for genuine
Master Appliance replacement
parts or for repair service.
Repair Service Dept
877-250-1934
sales@masterappliance.com
www.masterappliance.com
WARNING: Always unplug your
tool before performing any maintenance or repairs. Use only identical
Master Appliance brand replacement parts.
Motor Brushes
1) Unplug tool before removing
brushes.
2) Inspect brushes regularly (at
least every 100 hours of running
time). If brushes are less than
1/8" long, replace them immediately.
3) Remove brushes one at a time.
To remove, unscrew the brush
cap located on the side of the
housing and remove the brushspring.
4) Always replace brushes in sets
of 2 to ensure equal tension. If
returning partially used brushes,
match the curvature of the
brushes to the commutator.
5) To replace, insert new brushspring into hole and screw on
brush cap.
6) After second set of brushes are
worn down, replacement of the
armature may be necessary.
Return the tool to Master
Appliance Corp. Repair
Department or a qualified service organization for service.
7) Always use original Master
Appliance Corp. replacement
parts.
Lubrication
The bearings are lubricated at the
factory and require no further lubrication.
Cleaning
Unplug heat gun before cleaning.
To clean outside of tool, use only a
mild soap and damp cloth. Do not
use other cleaning agents, turpentine, gasoline, lacquer or paint thinner, or other solvents that may
contain chemicals which are harmful to plastics and other insulating
materials. Never immerse tool in a
liquid or allow a liquid to enter
inside the tool. Make sure all vents
and openings are free and clear of
debris.
one year full Warranty
apply if the heat tool has been misused, abused, tampered with or
altered.
At the end of the warranty period,
Master Appliance shall be under
no further obligation, expressed or
implied. Master Appliance
assumes no responsibility for, and
this warranty shall not cover, any
incidental or consequential damages from any defect in products
or their use.
This warranty gives you specific
rights. You may also have other
rights which may vary from state to
state. Warranty information is
included within the Instruction
Master Heat Tools are carefully
tested and inspected before being
shipped from the factory.
We warrant our products to be free
from defects in materials and workmanship, under normal use and
service, for one year from date of
purchase. In the event of a defect
in materials or workmanship we will
either repair or replace, at our
option, without charge any part
which in our judgement shows evidence of such defect.
Warranty does not apply to wearable items such as attachments or
heating elements, which require
periodic replacement, nor does it
Manual for each product or may be
obtained by contacting Master’s
Customer Service Department.
Master Appliance Corp.
2420 18th Street
Racine, Wisconsin 53403
U.S.A.
Phone 262-633-7791
800-558-9413 (USA)
Fax 262-633-9745
sales@masterappliance.com
www.masterappliance.com
Page 7

7
www.masterappliance.com
VARITEMP® Heat Gun Replacement Parts
exploded VieW
17
6
3
14
9
8
16
2
1
4
6
5
19
7
10
19
15
11
8
12
13
20
18
Item No. Part Number Description
1 ARM-543 * Armature Kit, 230V
1 ARM-542 Armature Kit, 120V
2 BLW-001 Blower Wheel
3 BRH-025K * Brush Holder Kit, 230V (2), incl. Brushes
3 BRH-040K Brush Holder Kit, 120V (2), incl. Brushes
4 BRY-141 Upper Bearing Bracket Kit
5 BSY-005 Stand Kit (VT-750C, VT-752C)
6 FLD-450 * Field Kit, 230V, incl. Brushholders
6 FLD-484 Field Kit, 120V, incl. Brushholders
7 HAS-014K * Element Kit, 230V, incl. Mica
7 HAS-043K Element Kit, 120V incl. Mica
8 HDE-013 Handle Kit
9 INN-032 Mica, Corrugated
10 NAS-006 Nozzle Kit
11 SHL-004 Shield Kit
12 SRW-141 Screw, Clamp
13 SRW-321 Screw, Shoulder
14 SRW-349K Screw, Nozzle (Kit of 3)
15 SWH-019 Switch Kit, Snap-In Rocker
15 35217 Switch Kit, Momentary Contact
16 30582 Heat Control, Dial and Knob Kit, 120V
16 30583 * Heat Control, Dial and Knob Kit, 230V
17 35257 Brush/Spring and Cap Kit (2)
18 TMB-003 * Terminal Block
19 51211 Cordset Kit, 120V, 15 Amp, incl. Guard, Grd. Screw
19 51265 Cordset Kit, 230V, USA, incl. Guard, Grd. Screw
19 35219 * Cordset, 230V, European, incl. Guard, Grd. Screw
19 35006 * Cordset, 230V, British, incl. Guard, Grd. Screw
20 WHR-003KA Armature End Play Spacer Kit (6)
* 230 Volt Models Only
Note: Kits include hardware (see exploded view)
Varitemp® Heat Gun replacement
parts and accessories are engineered and manufactured to precise Master Appliance
specifications. Replacement parts
and accessories from other manu-
facturers are not produced to these
precise specifications and, therefore, may cause difficulties with—or
actual damage to—a Varitemp
®
Heat Gun. Master Appliance cannot
assume any responsibility or liability
for difficulties resulting from the use of
any other brand or replacement parts
or accessories with a Varitemp
®
heat
gun.
Page 8

8
www.masterappliance.com
Description et introduction
Température (max.) Vélocité
Models °F °C Volts Amps Watts m/min m3/min
(ft/min) (ft3/min)
VT-750C 1000 540 120 14.5 1740 670,6 (2200) 0,48 (17)
VT-752C 750 400 230 7 1610 853,4 (2800) 0,59 (21)
Le Varitemp® Heat Gun est un pistolet à air chaud polyvalent de capacité élevée et de qua lité industrielle.
Doté de la puissance et du débit
supérieurs propres aux appareils
MASTER, il permet d’accomplir plus
rapidement les tâches industrielles
requérant des températures élevées.
Sa puissance nominale peut attein
dre 1740 watts (120 volts) et 1610
watts (230 volts).
Quant au débit d’air, il atteint en
moyenne 914 m/minute (3 000 pi/
min) pour ce qui est de la vitesse, et
0,65m
3
/minute (23 pi3/min) pour ce
qui est du volume. Combinés, tous
ces facteurs assurent une meilleure
performance à l’utilisateur final. Vous
pourrez utiliser votre Varitemp
®
Heat
Gun pour tous les travaux « nécessi
tant une source de chaleur rapide,
portative et sans flamme ».
Les pistolets à air chaud constitu-
ent une source de chaleur sans
flamme extrêm ement élevée
(jusqu’à 540°C/1 000°F). Comme
pour tous les appareils à haute
température et indépendamment de
la nature de votre application par
ticulière, une prudence et un soin
extrêmes s’im posent lors de l’utili
sation de cet appareil. Nous vous
recommandons donc d’accorder
toute votre attention aux consignes
de sécurité présentées dans ce
manuel pour votre protection.
caractériStiqueS
Dimensions ...........................longueur 20 cm x largeur 13 cm x hauteur 24 cm
(8” x 5-1/4” x 9-1/2”)
Diamètre de la buse .................................................3 cm (1-3/16”)
Longueur du cylindre de protection de la buse .........................10,6 cm (4-3/16”)
Longueur du cordon de raccordement ................................... 1,82 m (6 pi)
Poids net .......................................................... 1,6 kg (3.5 lb)
Modèles 120V ..............................................................60 Hz
Modèles 230V. . . . . . . . . . . . . . . . . . . . . . . . . . . . . . . . . . . . . . . . . . . . . . . . . . . . . . . . . . . 50/60 Hz
ATTENTION: CET APPAREIL
CONSTITUE UNE SOURCE DE
CHALEUR SANS FLAMME À
HAUTE TEMPÉRATURE. COMME
POUR TOUS CES APPAREILS
ÉLECTRIQUES, RESPECTEZ
TOUJOURS LES CONSIGNES DE
SÉCURITÉ POUR RÉDUIRE LES
RISQUES D’INCENDIE,
D’ÉLECTROCUTION OU DE
LÉSION CORPORELLE.
1) Lisez et veillez à bien comprendre les instructions présentées
dans ce manuel avant d’utiliser
votre pistolet à air. Conservez ce
manuel comme référence.
2) ATTENTION: Lors de
l’utilisation d’un pistolet à air,
comme pour tous les autres outils chauffants, conservez un
extincteur à portée de la main et
prenez toutes les précautions
anti-incendie appropriées.
L’usage de ce pistolet à air est
déconseillé sur les surfaces
creuses (planches de revêtement de mur extérieur, intrados,
lambris, murs et cloisons, etc.).
Ces surfaces renferment souvent des matériaux inflammables tels que poussière,
copeaux de bois, matière isolante, nids de rongeurs et autres
débris suscep tibles de prendre
feu.
Le pistolet Varitemp
®
Heat Gun
convient particulièrement bien
au décapage de bois massif à
moulures, tels les plinthes et
garnitures d’intérieur, les portes,
balustrades et garnitures en
bois massif de porches et vérandas, etc. Lors du décapage de
surfaces peintes, veillez à ne
jamais interrompre le mouvement de va-et-vient du pistolet.
Un arrêt ou une pause prolongée
sur un point de la surface de tra
vail peut enflammer la surface ou
le matériau situé derrière cette
surface. Pour plus de détails, voir
les instructions présentées sous le
titre « Décapage ».
3) Veillez à ne jamais inhaler ou
avaler de peinture à base de
plomb, sous quelque forme que
ce soit. On trouve ce type de
peinture dans de nombreux bâtiments anciens. La poussière, les
raclures, résidus et vapeurs de
peinture à base de plomb sont
extrêmement nocifs. Pour éviter
toute intoxication lors du décapage de surfaces revêtues de
peinture à base de plomb,
veillez à assurer une ventilation
adéquate (à l’aide, par exemple,
d’un aérateur aspirant) et à
maintenir propre votre zone de
travail. En présence de poussière ou de vapeur, utilisez un
masque à filtre à plomb. Dans la
mesure du possible, travaillez à
l’extérieur.
L’absence de précautions
adéquates lors du traitement de
peintures à base de plomb
entraîne un risque de saturnisme. Pour plus de détails, voir
les instructions présentées sous
le titre « Décapage ».
4) ATTENTION: Afin de réduire les
risques d’in cendie ou d’électrocution, n’exposez jamais votre
pistolet à air à la pluie ou à l’humidité. Rangez-le à l’intérieur et
ne le branchez que sur des
prises mises à la terre.
5) N’utilisez aucun adaptateur de
prise et n’ôtez en aucun cas la
broche de terre de la fiche. Votre
pistolet à air est muni d’une fiche
à 3 broches et d’un système de
mise à la terre à 3 fils. Ne le
branchez que sur des prises
adéquatement mises à la terre.
6) Ne raccordez ce pistolet à air
qu’à des circuits de tension
nominale adéquate afin d’éviter
toute surchauffe des systèmes
électriques.
7) Les pistolets Varitemp
®
Heat
émettent, par la buse, une chaleur pouvant atteindre 540°C (1
000°F). Ne dirigez jamais ce flux
conSigneS de Sécurité
Page 9

9
www.masterappliance.com
Consignes de sécurité (suite)
d’air chaud vers vos vêtements,
vos mains ou toute autre partie
de votre corps. N’utilisez jamais
cet appareil comme sèche-cheveux.
8) Laissez refroidir l’orifice de la
buse et son cylindre de protection avant de les toucher. En
Mode « HOT » [chaud], cette
buse dégage une température
extrêmement élevée. Tenez toujours l’appareil par sa poignée
ou utilisez le support permanent.
9) Faites fonctionner votre pistolet
en mode « COLD » [froid} avant
de l’éteindre. Il faut environ 3
minutes pour refroidir la buse et
son cylindre protecteur.
10) Évitez tout contact direct entre
la buse et votre surface de travail. Maintenez la buse à une
distance d’au moins 25 mm (1
po) de la surface de travail.
11) Maintenez votre zone de travail
propre. Désordre et encombrement favorisent les accidents.
12) Tenir hors de portée des
enfants et des personnes
présentant des capacités physiques, sensorielles ou mentales amoindries ou un manque
d’expérience ou de connaissances. Les personnes
étrangères au travail en cours
doivent se tenir à l’écart de la
zone de travail. Ne les laissez
toucher ni l’appareil ni son cordon de raccordement.
13) Utilisez cet appareil dans une
zone bien aérée. Ne l’utilisez
pas à proximité de liquides
inflammables ou dans un milieu
propice aux explosions (en
présence de gaz, fumées ou
poussière).
14) Éliminez tous matériaux hautement inflammables et autres
débris de votre zone de travail.
15) Portez des lunettes de protection pendant toute la durée du
travail.
16) Si une rallonge doit être utilisée, veillez à utiliser un cordon
à 3 fils avec mise à la terre,
d’une capacité minimale de
calibre 14. Les cordons pour
usage extérieur reconnus par
les Underwriters Laboratories
(UL) aux États-Unis ou par l’Association cana dienne de normalisation (ACNOR) au
Canada sont recommandés
(les cordons pour usage
extérieur conviennent également aux applications
intérieures.)
17) Ne soumettez le cordon à
aucun traitement abusif. Ne
débranchez jamais l’appareil
en tirant sur le cordon et ne le
portez jamais en le tenant par
le cordon.
18) N’enlevez pas le support réglable de l’appareil. Lorsque vous
ne le tenez pas à la main,
posez le pistolet sur une surface plate. Placez le cordon de
manière à éviter le renversement de l’appareil.
19) Ayez toujours un extincteur
plein à portée de la main.
20) Surveillez l’appareil en permanence lorsqu’il est allumé ou en
cours de refroidissement.
21) Restez alerte. N’utilisez pas cet
outil si vous êtes fatigué. Ayez
recours à votre bon sens et
accordez une attention soutenue à votre travail.
22) Rangez votre pistolet de
manière adéquate. Laissez-le
refroidir avant de le ranger.
Rangez-le dans un endroit sec
à une certaine hauteur ou sous
clé, hors de portée des enfants.
23) AVERTISSEMENT : Ce produit,
lorsqu’il est utilisé pour braser
et pour d’autres utilisations
semblables, peut vous exposer
à du PLOMB, reconnu dans
l’État de la Californie pour
causer le cancer, des malformations congénitales et des
dommages à l’appareil reproducteur. Pour obtenir plus de
renseignements, aller à
www.P65Warnings.ca.gov
Votre Varitemp® Heat Gun est un pistolet à air chaud polyvalent de capacité élevée et de qua lité industrielle. Sa
puissance et son débit élevés vous
permettront d’accomplir plus rapidement vos travaux à chaud.
Cet appareil émet un flux rapide
d’air chaud pouvant servir à activer
les adhésifs, plier et façonner les
matières plastiques, sécher les
résines époxydes, ébavurer les
plastiques, dégivrer les bobines
gelées, sécher les négatifs et
autres pièces, chauffer les solides
et les liquides, desserrer les écrous
et les boulons, enlever les dalles
de carrelage et le mastic de soutien de vitres, réparer les vinyles,
rétrécir les tubes isolants et les
films d’emballage, ramollir les
matières dures et décaper les surfaces peintes. La solution idéale,
chaque fois que vous avez besoin
d’une source de chaleur rapide et
portative.
La bonne quantité de chaleur à
appliquer pour chaque application
dépend de l'ajustement de la commande de réglage de la chaleur,
de la distance entre l'ouverture de
la buse et la surface de travail et
de la durée pendant laquelle la
chaleur est appliquée sur la surface de travail.
Avant de travailler, nous recommandons que vous fassiez un test avec
des rebus de métal. Soyez prudent
dans l'approche du travail jusqu'à ce
que vous ayez trouvé la bonne combinaison de réglage de chaleur, de
distance avec la surface de travail et
de durée d'application de chaleur.
Appliquez la chaleur en appliquant
un doux mouvement de va et vient
jusqu'à ce que la chaleur ait atteint la
concentration désirée.
Fonctionnement du pistolet
1) Branchez le pistolet thermique
dans une prise ayant la bonne
tension nominale.
2) Déplacez l'interrupteur à bascule en position « Hot » (chaud).
Tournez la commande de chaleur au réglage désiré. Le pistolet thermique atteindra la bonne
température de fonctionnement.
3) Réglez le volet de prise d’air en
fonction de la position souhaitée.
mode d’emploi
Lors du travail dans un conteneur
fermé, tel qu’un tunnel de rétrécissement, le pistolet doit être constamment alimenté en air neuf, et un
orifice doit assurer l’évacuation de
l’air chaud. Un matériau hermétiquement clos peut, du fait de la chaleur
extrême, endommager le pistolet ou
provoquer une panne.
Ouvrez-le pour un flux d’air
légèrement refroidi et fermez-le
complètement pour at teindre la
température de fonctionnement
la plus élevée.
4) Le support réglable de
l’appareil permet une rotation de
la buse depuis une position
presque horizontale jusqu’à la
verticale.
5) Pour éteindre le pistolet, placez
l’interrupteur en position « COLD
» [froid]. Laissez-le fonctionner
ainsi pendant environ trois mi nutes, de façon à faire refroidir le
moteur et la buse.
6) Placez l’interrupteur en position
« OFF » [arrêt].
Page 10

10
www.masterappliance.com
Applications types
Décapage de surfaces peintes
Outre ses nombreuses autres
applications, le Varitemp
®
Heat
Gun est devenu un outil popu- laire
de décapage de surfaces peintes.
Sa puissance et son débit nominaux supérieurs en font l’outil de
prédilection de nombreux professionnels de la restauration et rénovation pour les travaux ardus de
décapage.
Consignes de sécurité
1) ATTENTION: Lors de l’utilisation
d’un pistolet à air, comme pour
tous les outils chauffants, conservez un extincteur à portée de
la main et prenez toutes les précautions anti-incendie appropriées.
L’usage de ce pistole à air est
déconseillé sur les surfaces
creuses (planches de revêtement de mur extérieur, intrados,
lambris, murs et cloisons, etc.).
Ces surfaces renferment souvent des matériaux inflamma
bles
tels que poussière, copeaux
de
bois, matière isolante, nids de
rongeurs et autres débris
suscep tibles de prendre feu.
Votre pistolet à air convient le
mieux au décapage de bois
massif à moulures, tels les plinthes et garnitures d’intérieur, les
portes, balustrades et garnitures
en bois massif de porches et
vérandas, etc.
Lors du décapage de surfaces
peintes, veillez à ne jamais interrompre le mouvement de va-etvient du pistolet. Un arrêt ou une
pause prolongée sur un point de
la surface de travail peut enflammer la surface ou le matériau
situé derrière cette surface.
2) Veillez à ne jamais inhaler ou
avaler de peinture à base de
plomb, sous quelque forme que
ce soit. On trouve ce type de
peinture dans de nombreux bâtiments anciens. La poussière, les
raclures, résidus et vapeurs de
peinture à base de plomb sont
extrêmement nocifs. Pour éviter
toute intoxication lors du décapage de surfaces revêtues de
peinture à base de plomb,
veillez à assurer une ventilation
adéquate (à l’aide, par exemple
d’un aérateur aspirant) et à
maintenir propre votre zone de
travail. En présence de poussière ou de vapeur, utilisez un
masque à filtre á plomb. Dans la
mesure du possible, travaillez à
l’extérieur.
Vous vous exposerez, à défaut
de suivre les précautions
adéquates lors du traitement de
peinture à base de plomb, à un
risque de saturnisme. Pour plus
de détails, voir les instructions
présentées sous le titre «
Décapage ».
3) N’utilisez aucun décapant
chimique. Ces produits sont
inflammables et peuvent
dégager des vapeurs nocives.
4) Veillez à assurer une ventilation
adéquate de votre zone de travail (à l’aide, par exemple, d’un
aérateur aspirant) et maintenez
cette zone propre.
5) Portez des gants et des lunettes de
protection pendant toute la durée
du travail.
6) Gardez un extincteur plein à
portée de la main.
7) Restez alerte, accordez une
attention soutenue à votre travail
et ayez recours à votre bon
sens.
INSTRUCTIONS DE SECURITE
LIRE CES INSTRUCTIONS
ATTENTION: Certaines surfaces
cachées se trouvant derrière murs,
plafonds, sols, plaques intrados ou
autres panneaux peuvent contenir
des matériaux inflammables que le
pistolet à air chaud risque de calciner lors du travail dans ces
endroits. La calcination de ces
matériaux pourrait passer
inaperçue et provoquer des dommages ou blesser des personnes.
Ne pas utiliser en cas de doute sur
ces dangers. Le travail dans de
telles conditions doit se faire en
bougeant le pistolet à air chaud
avec un mouvement de va et-vient.
S’attarder ou s’arrêter sur un
point
pourrait mettre le feu au panneau ou
au matériel qui est derrière. Le pistolet à air chaud s’utilise, dans ce cas,
sur basse température (LOW).
Décaper la peinture
ATTENTION: Le décapage se fait
avec un soin extrême. Les pelures,
résidus et vapeurs de peinture peuvent contenir du plomb, qui est un
poison. Toute peinture datant d’avant
1977 peut contenir du plomb et la
peinture appliquée avant 1950 dans
une maison d’habitation contient certainement du plomb. Une fois que le
plomb s’est déposé sur les surfaces,
il est possible d’en ingérer en portant
la main à la bouche. Le simple fait
d’être exposé à une quantité même
minime de plomb peut entraîner d’irréparables lésions cérébrales et
endommagements du système
nerveux auxquels les enfants en bas
âge et les bébés à naître sont particulièrement vulnérables.
Avant de commencer toute opération
de décapage de peinture il faut
déterminer si la peinture que vous
allez enlever contient du plomb.
Vous pouvez le faire faire à l’office
régional de santé ou par un expert
qui utilise un analyseur de peinture
pour vérifier le contenu en plomb de
la peinture à enlever. LA PEINTURE
À BASE DE PLOMB DOIT ÊTRE EN
LEVÉE PAR UN PROFESSIONNEL
ET NE DEVRAIT PAS ÊTRE ENLEV
ÉE AU PISTOLET À AIR CHAUD.
Toute personne décapant de la
peinture devrait suivre les recommandations suivantes.
1) Amenez la pièce à travailler
dehors. Si ce n’est pas possible, il
faut une ventilation constante du
lieu de travail. Ouvrez les fenêtres
et placez un ventilateur extracteur
sur une d’entre-elles. Assurezvous que le ventilateur déplace
l’air de l’intérieur vers l’extérieur.
2) Enlevez ou couvrez les
moquettes, tapis, meubles, vêtements, ustensiles de cuisine et
conduites d’air.
3) Étendez des bâches dans l’aire de
travail afin de collecter tous éclats
ou pelures de peintures. Portez des
vêtements de protection, tels chemises de travail, combinaisons,
casquettes.
4) Ne travaillez que dans une pièce
à la fois. Il faut enlever les meubles ou les placer au centre de la
pièce et les recouvrir. Les lieux de
travail devraient êtres coupés du
reste de l’habitation par des
bâches pendues sur les portes.
5) Ni enfant, ni femme enceinte,
potentiellement enceinte ou allaitant au sein ne doivent être
présents sur les lieux de travail
tant que le travail n’est pas fini et
tout le nettoyage terminé.
6) Portez un masque respiratoire
protecteur ou un masque respiratoire à filtre à double protection
(poussières et vapeurs) homologué par l’Administration de la
Santé et la Sécurité au Travail
(OSHA), l’Institut National de la
Sécurité et de la Santé (NIOSH) ou
le United States Bureau of Mines.
Ces masques et filtres changeables s’obtien nent facilement
dans les grandes quincailleries.
Assurez-vous que le masque est
à votre taille. La barbe et les poils
du visage peuvent empêcher la
bonne adhésion du masque.
Changez souvent de filtre. LES M
ASQUES JETABLES EN PAPIER N
E SONT PAS APPROPRIÉS.
7) Utilisez le pistolet à air chaud
avec précaution. Le pistolet à air
chaud doit toujours être en mouvement car la chaleur excessive
cause des vapeurs que l’opérateur peut respirer.
8) Aucune nourriture ou boisson ne
doivent se trouver sur les lieux de
travail. Lavez vous les mains, les
bras et le visage et rincez vous la
bouche avant de manger ou de
boire. Ne pas fumer, mâcher de
chewing-gum ou priser de tabac
sur les lieux de travail.
9) Nettoyez toute la peinture
décapée ainsi que la poussière
Page 11

11
www.masterappliance.com
Applications types (suite)
en essuyant avec une serpillière
humide. Utiliser un torchon
humide pour nettoyer les murs,
rebords et toute autre surface où
la peinture ou la poussière se sont
déposées. NE PAS BALAYER,
ÉPOUSSETER À SEC OU PASSE
R L’ASPIRATEUR. Utiliser un
détergent riche en phosphate ou
en trisodium phosphate
(TSP) pour laver et essuyer les
surfaces.
10) À la fin de chaque séance de travail,
mettre les éclats et les débris dans
un sac en plastique double que
vous fermerez avec un ruban adhésif ou un fil de torsion et jetterez de
façon adéquate.
11) Retirer les vêtements de protection et chaussures de travail sur
les lieux de travail et évitez de
porter de la poussière dans le
reste de l’habitation. Lavez les
habits de travail séparément.
Essuyez les chaussures avec un
chiffon humide qui sera lavé avec
les habits de travail. Lavez vous
les cheveux et le corps complétement avec de l’eau et du
savon.
CONSERVER CES INSTRUCTIONS
Décapage
1) Pour décaper une surface peinte,
allumez l’appareil et tenez-le à environ
25 mm (1 po) de la surface à
décaper. L’expérience vous aidera à
déterminer la distance et la vitesse de
décapage adéquates. Il est
préférable de maintenir le pistolet à
une certaine distance de la surface et
de l’en approcher lentement. Le ralentissement de la vitesse sera compensé par la largeur accrue de la
surface ramollie. La chaleur pénétrera
également plus en profondeur.
2) La température de sortie peut être
réglée à l’aide du volet situé sur le
côté de l’appareil. Lorsque ce volet
est ouvert, la température est d’environ 260°C/500°F à 25 mm (1 po)
de l’orifice de la buse. Lorsqu’il est
fermé, cette température est d’environ 400°C/750°F. Essayez différents réglages afin de déterminer
le plus efficace suivant le type de
peinture rencontré.
3) Lorsque la peinture commence à
se boursoufler et à former des
bulles, déplacez lentement et uniformément le pistolet par-dessus
la surface, et commencez
immédiatement à décaper avec
un grattoir (un grattoir de 50 mm
(2”)] assure les meilleurs résultats) pour éliminer la peinture
décollée. Préchauffez le grattoir
tout en chauffant la surface peinte
pour accélérer le décapage.
a) Le décapage à l’air chaud est
rendu possible grâce au
ramolis sement des peintures
organiques sous l’effet de
températures élevées. Une fois
ramollie, la peinture peut être
aisément soulevée, sans
abîmer la surface qu’elle recouvrait..
b) Pour décaper les rai nures de
moulures, vous pouvez créer
vos propres grattoirs. Les
vieux tournevis à tête émoulue
et les couteaux à linoléum sont
souvent utiles.
4) Le décapage achevé, placez l’interrupteur à bascule en position «
COOL » et laissez l’appareil
fonctionner ainsi pendant
quelques minutes.
Rétraction de tubes isolants
Posez l’appareil sur son support afin
de garder les deux mains libres.
Glissez le tube sur la zone à isoler.
Placez-le au-dessus du flux d’air
chaud et déplacez-le d’un mouvement latéral constant jusqu’à ce qu’il
se rétracte. Retirez-le du flux d’air
chaud.
Emballage sous film rétractable
Après avoir scellé le film rétractable
autour du produit à emballer, percez-y un petit orifice pour permettre
à l’air emprisonné de s’échapper.
Dirigez ensuite le flux d’air chaud
vers l’emballage en effectuant d’un
mouvement de va-et-vient jusqu’à
rétraction uniforme du film.
Décollage de dalles de
carrelage
Dirigez le flux d’air chaud vers la
dalle à décoller en effec tuant un
mouvement de va-et-vient de façon
à en ramollir le dos adhésif. Insérez
un couteau à mastic sous la dalle et
soulevez-la.
Pliage et façonnage des matières
plastiques
Déterminez tout d’abord la technique à suivre sur un morceau à
jeter. Fixez la pièce à traiter à l’aide
d’un support adéquat. Passez d’un
mouvement de va-et-vient le pistolet le long de toute la ligne à plier,
jusqu’à ce que le plastique se
ramollisse. Pliez selon la position
voulue.
Enlèvement de mastic
Pour enlever le mastic soutenant une
vitre brisée, commencez par retirer
soigneusement la vitre. Pour enlever
le mastic de soutien d’une vitre
intacte, veillez à ne pas diriger le flux
d’air chaud vers le verre afin d’éviter
qu’il ne se fêle sous l’effet du choc
thermique. Le verre peut être facilement protégé à l’aide d’un large couteau à mastic. Agitez le pistolet en
direction du mastic jusqu’à ce que
celui-ci se ramollisse. Enlevez
ensuite le mastic à l’aide d’un couteau à mastic.
Séchage rapide de pièces
Toutes sortes de pièces et matériaux peuvent être séchés rapidement à l’aide du pistolet, d’un
mouvement de va-et-vient constant.
Extension, façonnage et installation des vinyles
Dirigez le flux d’air chaud vers la
pièce de vinyle à traiter et agitez le
pistolet d’un mouvement de va-etvient. Étendez et façonnez le vinyle
jusqu’à élimination des ridules. NE
DIRIGEZ PAS le pistolet vers le
verre.
Page 12

12
www.masterappliance.com
Applications types (suite)
Dégivrage de bobines ou tuyaux
gelés
Dirigez le flux d’air chaud vers la
partie gelée en effectuant un mouvement de va-et-vient.
Desserrage de boulons et écrous
Dirigez brièvement le flux d’air
chaud vers le boulon ou l’écrou à
desserrer. La chaleur provoquera
l’expansion du métal. Éloignez l’ap-
Si vous vous posez la moindre question au sujet de votre application particulière, n’hésitez pas à appeler notre
Service clients au 262-633-7791.
pareil de la pièce et desserrez
l’écrou ou le boulon à l’aide d’une
clé appropriée.
Toutes les réparations et opérations
d’entretien recommandées dans ce
manuel doivent être accomplies
par un technicien qualifié et expérimenté, un organisme d’entretien
qualifié ou par le Service d’entretien de la Master Appliance Corp.
Veuillez communiquer avec le
département de service à la clientèle de Master pour obtenir des
pièces de remplacement de marque
Master Appliance ou encore obtenir un service de réparation.
Repair Service Dept
877-250-1934
sales@masterappliance.com
www.masterappliance.com
ATTENTION: Débranchez toujours
votre appareil avant de procéder à
une intervention d’entretien ou de
réparation. N’utilisez que des
pièces de rechange de marque
Master Appliance identiques à
celles enlevées.
Balais du moteur
1) Débranchez l’appareil avant
d’en ôter les balais.
2) Vérifiez les balais régulièrement
(au moins toutes les 100 heures
d’uti lisation). Si la longueur de
leurs poils est inférieure à
3 mm (1/8”), remplacez-les
immédiatement.
3) Retirer les brosses, une à la fois.
Pour ce faire, dévisser le capuchon de brosse se trouvant sur
le côté du compartiment et
enlever la brosse à ressort.
4) Toujours remplacer les brosses
par 2 afin d'assurer une tension
égale. Si des brosses avec une
usure partielle sont remises en
place, assurer que leur courbure
correspond au commutateur.
5) Pour remplacer, insérer la nouvelle brosse à ressort dans le trou
et revisser le capuchon de brosse
6) Lorsque le deuxième ensemble
de brosses sera usé, il est probable que l'armature ait à être remplacée elle aussi. Renvoyer l'outil
au département de réparation de
Master Appliance Corp. ou à une
organisation de service qualifiée
afin d'assurer l'entretien.
7) Utilisez toujours des pièces de
rechange Master Appliance
originales.
Lubrification
Les paliers sont huilés en usine et
ne requièrent aucune autre lubrification.
Nettoyage
Débranchez le pistolet à air avant de
le nettoyer. Ne nettoyez l’extérieur de
l’appareil qu’à l’aide de savon doux
et d’un chiffon humide. N’utilisez
aucun autre agent d’entretien, pas
plus que de la térébenthine, de l’essence, du diluant de vernis ou de
peinture ou autres dissolvants pouvant contenir des substances chimiques susceptibles d’endommager
les pièces en plastique et autres
matières isolantes. Ne plongez
jamais l’appareil dans un liquide et
ne laissez jamais de fluide pénétrer
à l’intérieur. Veillez également à ce
qu’aucun débris n’obstrue les orifices de ventilation et autres orifices.
réparation et entretien
manière périodique. De même, elle
ne s’applique pas non plus en cas
d’utilisation incorrecte ou abusive de
l’outil à air chaud, ou si celui-ci a été
ouvert et modifi é.
A la fi n de la période de garantie,
Master Appliance ne saurait être
tenu par aucune obligation,
expresse ou tacite. Master
Appliance décline toute responsabilité en cas de dommage consécutif
ou indirect découlant de tout défaut
ou de la simple utilisation du produit
- dommage non couvert par la
présente garantie.
La présente garantie vous octroie
des droits spécifi ques. Il se peut
que des droits supplémentaires
vous soient accordés en fonction de
la législation en vigueur d’un état à
l’autre.
Les outils Master Heat ont fait l’objet
de tests et d’une vérifi cation réalisés avec précaution avant de quitter l’usine. Nous garantissons que
nos produits sont libres de tout
défaut de matériel ou de fabrication,
dans le cadre d’une utilisation et
d’un entretien normaux, pendant un
an à compter de la date d’achat. En
cas de défaut de matériel ou de fabrication, nous procèderons à la
réparation ou à l’échange, gratuitement à notre discrétion, de toute
pièce qui nous semble présenter
ledit défaut.
La présente garantie ne s’applique
pas aux articles portables, notamment les accessoires, les brosses,
les éléments chauffants, les pointes
de chauffe, les pointes à chauffer,
les brûleurs ou dispositifs d’éjection,
qu’il est nécessaire de remplacer de
Les informations relatives à la garantie sont comprises dans le Manuel
d’utilisation afférant à chaque produit ou peuvent être obtenues en
contactant le service clientèle de
Master.
Master Appliance Corp.
2420 18th Street
Racine, Wisconsin 53403
U.S.A.
Téléphone 262-633-7791
800-558-9413 (USA)
Télécopieur 262-633-9745
sales@masterappliance.com
www.masterappliance.com
garantie intégrale d'un an
NOTA: Les utilisateurs doivent évaluer l’applicabilité de l’outil à leurs propres besoins.
Page 13

13
www.masterappliance.com
Pièces de rechange pour VARITEMP® Heat Gun
Vue en éclaté
17
6
3
14
9
8
16
2
1
4
6
5
19
7
10
19
15
11
8
12
13
20
18
Article n° Pièce n° Description
1 ARM-543 * Armature et anneaux de retenue, 230V
1 ARM-542 Armature et anneaux de retenue, 120V
2 BLW-001 Rotor de la soufflante
3 BRH-025K * Trousse de support à brosse, 230V (2), avec brosses
3 BRH-040K Trousse de support à brosse, 120V (2), avec brosses
4 BRY-141 Trousse de support à roulement supérieure
5 BSY-005 Trousse de support (VT-750C, VT-752C)
6 FLD-450 * Trousse de terrain, 230 V, avec supports de brosse
6 FLD-451 Trousse de terrain, 120 V, avec supports de brosse
7 HAS-014K * Trousse d’élément, 230V, avec mica
7 HAS-043K Trousse d’élément, 120V, avec mica
8 HDE-013 Trousse de poignée
9 INN-032 Mica, ondulé
10 NAS-006 Trousse de buse
11 SHL-004 Trousse de bouclier
12 SRW-141 Boulon à serrer
13 SRW-321 Boulon à embase
14 SRW-349K Vis de buse (jeu de 3)
15 SWH-019 Trousse d'interrupteur, basculant à ressort
15 35217 Trousse d'interrupteur, contact momentané
16 30582 Contrôle de la chaleur, trousse de cadran et bouton, 120 V
16 30583 * Contrôle de la chaleur, trousse de cadran et bouton, 230 V
17 35257 Trousse de brosse à ressort et capuchon (2)
18 TMB-003 * Terminal Block
19 51211 Trousse de cordon, 120 V 15A, É.-U., avec dispositif de protection
19 51265 Trousse de cordon, 230 V, É.-U., avec dispositif de protection
19 35219 * Trousse de cordon, 230 V, Europe, avec dispositif de protection
19 35006 * Trousse de cordon, 230 V, Grande-Bretagne, avec dispositif de protection
20 WHR-003KA Trousse de cale d'espacement de jeu axial de l'armature (6)
* Modèles de 230 volts uniquement
Remarque : les trousses comprennent la quincaillerie (voir la vue éclatée)
Les pièces de rechange et accessoires du pistolet à air Varitemp
®
Heat Gun sont conçus et fabriqués
conformément aux spécifications
précises de Master Appliance. Les
pièces de rechange et accessoires
d’autres fabricants ne sont pas
produits selon ces spécifications
précises et peuvent dès lors être
source de pro blèmes — voire de
dégâts. Master Appliance n’assumera aucune responsabilité ou
obligation en cas de difficultés
liées à l’utilisation de pièces de
rechange ou d’accessoires d’autres marques sur un pistolet
Varitemp
®
Heat Gun.
Page 14

14
www.masterappliance.com
Descripción e introducción
Temperatura (max.) Velocidad
Modelos °F °C Voltios Amperios Vatios m/min m3/min
(ft/min) (ft3/min)
VT-750C 1000 540 120 14.5 1740 670,6 (2200) 0,48 (17)
VT-752C 750 400 230 7 1610 853,4 (2800) 0,59 (21)
La Varitemp® Heat Gun es una pistola de aire caliente con calidad
industrial, para usos múltiples y servicio pesado. Dotados de mayor
potencia y un flujo de aire extra
fuerte, nuestros modelos MASTER
realizan con mayor rapidez los trabajos industriales que requieren
altas temperaturas.
Su Master Varitemp® Heat Gun está
equipada con un disco-cuadrante
progresivo electrónico de temperatura que regula la corriente que circula por el elemento calefactor. Esto
permite regular las temperaturas de
salida desde la temperatura ambiente hasta 540°C (1000°F).
Las pistolas de aire caliente son
una fuente de calor, a muy elevada
temperatura y sin llamas (hasta
540°C/ 1000°F). Como con cualquier otro producto que genera
temperaturas muy elevadas, sin
tener en cuenta el tipo de aplicación, siempre tome las debidas
precauciones de seguridad al utilizar esta herramienta. Para su protección, recomen damos estar
atento a las instrucciones de
seguridad presentadas en este
manual.
eSpecificacioneS
Tamaño ................................. longitud 20 cm x anchura 13 cm x altura 24 cm
(8” x 5-1/4” x 9-1/2”)
Diámetro de la boquilla ...............................................3 cm (1-3/16”)
Longitud del protector de la boquilla .................................10,6 cm (4-3/16”)
Longitud del cable eléctrico. ......................................... 1,82 m (6 pies)
Peso neto ..........................................................1,6 kg (3.5 lb)
Modelos de 120V ...........................................................60 Hz
Modelos de 230V ....................................................... 50/60 Hz
AVISO: ESTE PRODUCTO ES UNA
FUENTE DE CALOR, A MUY
ELEVADA TEMPERATURA Y SIN
LLAMAS. COMO CON
CUALQUIER HERRAMIENTA
ELÉCTRICA, SIEMPRE OBSERVE
LAS PRECAUCIONES DE
SEGURIDAD PARA REDUCIR LOS
RIESGOS DE INCENDIO, DE
CHOQUE ELÉCTRICO O DE
LESIÓN CORPORAL.
1) Antes de usar esta herra mienta,
lea y comprenda este manual
de instrucciones. Guarde este
ma nual para futura referencia.
2) AVISO: Con una pistola de aire
caliente, igual que con cualquier
otra herramienta térmica, tenga
a mano un extinguidor de incendios y observe todas las precauciones sensatas contra
incendios.
No recomendamos usar esta
pistola de aire caliente en superficies huecas tales como tablas
de pared exterior, paredes interiores, sofitos, paneles, tabiques,
etc. Estas superficies frecuentemente contienen materiales
inflamables como polvo, astillas
de madera, material aislante,
nidos de roedores y otros
desechos que accidentalmente
podrían incendiarse.
El mejor uso para su pistola de
aire caliente es el de remover la
pintura de obras de madera sól-
importanteS inStruccioneS de Seguridad
ida con sus entrantes y salientes
tales como zócalos y adornos
interiores, molduras, piezas torneadas, puertas, balaustres,
adornos de portales, etc.
Al remover pintura, siempre
mantenga la pistola con un movimiento continuo hacia adelante
y hacia atrás. El detenerse o
prolongar una pausa en un
punto determinado podría inflamar la superficie sobre la cual
se trabaja o el área detrás de la
misma. Para información adicional, vea las Instrucciones para
remover pintura.
3) No respire los vapores o trague
en forma alguna las pinturas con
base de plomo. Muchas casas
antiguas y otros edificios contienen pinturas con base de
plomo. El polvo, las raspaduras,
los resi duos y vapores de pintura con base de plomo son
extremadamente venenosos. Al
remover este tipo de pintura,
evite las posibilidades de
envenenamiento con plomo
[sa turnismo] empleando una
ventilación adecuada (como un
ventilador de ventana en su
modo de extractor) y conservando un área de trabajo limpia.
Ante la presencia de polvo o
vapores de plomo, use un dispositivo respirador di señado
para filtrar plomo. Siempre que
sea posible, mueva el trabajo al
exterior.
La negligencia en tomar las precauciones de seguridad adecuadas al trabajar con pinturas a
base de plomo, podría conducir
al envenenamiento con plomo
[saturnismo]. Para información
adicional, vea nuestras
“Instrucciones para remover pintura.”
4) AVISO: Para reducir el riesgo de
incendio o de choque eléctrico,
no exponga su pistola de aire
caliente a la lluvia o humedad.
Guárdela bajo techo. Conecte la
herramienta sólo a tomas conectadas a tierra.
5) No use adaptadores de enchufe
ni remueva la espiga de tierra
del enchufe. Esta herramienta
está equipada con un enchufe
para 3 espigas y un sistema trifilar conectado a tierra. Sólo
conecte la herramienta a salidas
debidamente conectadas a
tierra.
6) Para evitar el recalenta miento
del sistema eléctrico, sólo use la
pistola de aire caliente en circuitos eléctricos con la capacidad
de carga adecuada.
7) La pistola Varitemp
®
Heat puede
emitir por su boquilla un calor sin
llamas con temperaturas hasta
540°C (1 000°F). No dirija esta
corriente de aire caliente hacia su
ropa, las manos u otras partes del
Page 15

15
www.masterappliance.com
Importantes instrucciones de seguridad (continuación)
cuerpo. No use la herra mienta
como secador de pelo.
8) No toque la abertura de la
boquilla o el protector de la
boquilla hasta que esté frío.
Estando en el modo “HOT” [caliente], la boquilla genera un calor
extremadamente intenso. Siempre
sujete la herramienta por su
agarra dera o use el pedestal que
está permanentemente sujeto a la
misma.
9) Antes de apagar la pistola,
hágala funcionar en “COLD”
[frío]. La boquilla y el protector
de la boquilla requieren unos 3
minutos para enfriarse lo suficiente para permitir tocarlos.
10) No toque la superficie de tra-
bajo con la boquilla. Man tenga la
cara de la boquilla a una distancia de por lo menos 25 mm (1
pulg) de la superficie de trabajo.
11) Mantenga su área de trabajo
limpia. Las áreas de trabajo
descuidadas o desordenadas
pueden provocar los accidentes y lesiones.
12) Mantenga el producto alejado
de los niños y de las personas
con capacidades físicas, sensoriales o mentales reducidas o
falta de experiencia o conocimiento. Las personas ajenas
al trabajo en curso deben que-
dar a una distancia prudencial
del área de trabajo. No las permita tocar la herramienta o su
cable de extensión.
13) Use esta herramienta en un área
bien ventilada. No la use cerca
de líquidos in- flamables o en un
ambiente explosivo (en presencia de vapores, gases o polvo).
14) Remueva del área de trabajo
todos los materiales altamente
inflamables y otros desechos.
15) Siempre use gafas de seguridad cuando trabaje con esta
herramienta.
16) Al usar una extensión, sólo use
un cable eléctrico trifilar conectado a tierra con una capacidad
mínima de calibre 14.
Recomen damos que estos
cables sean aprobados por los
Under writers Laboratories (UL)
en los EE.UU. o por la
Canadian Standards
Association (CSA) en el
Canadá y que sean adecuados
para uso exterior. Los cables
eléctricos marcados para uso
exterior también son adecuados para uso interior.
17) No abuse del cable eléctrico.
Nunca desconecte la herramienta tirándola del cable, ni la
transporte colgándola del
cable.
18) No remueva el pedestal ajustable.
Cuando la herramienta no se esté
sujetando con la mano, colóquela
sobre una super ficie nivelada.
Coloque el cable eléctrico de
manera que no provoque el
vuelco de la herramienta.
19) Mantenga a su alcance un
extinguidor de incendios totalmente cargado.
20) No deje desatendida la herramienta mientras esté en marcha o enfriándose.
21) Permanezca alerta. Si está cansado, no trabaje con la herramienta. Use el sentido común y
preste atención a lo que esté
haciendo.
22) Guarde la herramienta en la
forma adecuada. Deje enfriar la
herramienta antes de guardarla.
Guarde la herramienta en un
lugar seco, alto y bajo llave.
Mantenga la herra mienta fuera
del alcance de los niños.
23) ADVERTENCIA: Este producto, al
utilizarlo para soldadura y aplicaciones similares, puede causar exposición al PLOMO, que
el Estado de California reconoce como causa de cáncer,
defectos congénitos y otros
daños reproductivos.
Para más información visite
www.P65Warnings.ca.gov
Su Varitemp
®
Heat Gun es una pistola de aire caliente con calidad
industrial, para usos múltiples y
servicio pesado. Su alta potencia y
flujo de aire extra fuerte le permitirán realizar más trabajos de
calentamiento con mayor rapidez.
Este producto proporciona un flujo
rápido de aire caliente para usos
tales como la activación de adhesivos, dobladura y conformación
de materiales plásticos, secado de
resinas epoxias, remoción de rebabas de plásticos, descongelación
de serpentines y tuberías congeladas, secado de piezas y negativos,
calentamiento de sólidos y líquidos, aflojamiento de tuercas y tornillos, remoción de losas de piso y
su adhesivo, reparación de vinilo,
contracción de tuberías y envolturas, ablandamiento de materiales y
remoción de pintura. “La solución
ideal dondequiera que necesite
calor rápido y portátil.”
La cantidad justa de calor para
cada aplicación depende del
ajuste del controlador de calor, la
distancia de la boquilla desde la
superficie de trabajo y el tiempo en
que se aplica calor a la superficie
de trabajo.
Antes de realizar una aplicación,
recomendamos que pruebe con un
trozo de material. Tenga cuidado al
iniciar el trabajo y hasta descubrir
la combinación adecuada de calor,
distancia de la superficie de trabajo y tiempo de aplicación de
calor. Realice un suave movimiento
hacia adelante y atrás durante la
aplicación salvo que determine la
necesidad de concentrar el calor.
Para operar la pistola de aire caliente:
1) Enchufe la pistola de calor en un
tomacorriente adecuado.
2) Coloque el interruptor en la
posición “Hot” (Caliente). Gire el
controlador de calor hasta alcanzar la configuración deseada.
La pistola de calor comenzará a
funcionar a su máxima temperatura de trabajo.
3) Ajuste el regulador de entrada
de aire a la posición deseada.
Abra el regulador para un flujo
de aire ligeramente más frío.
Ciérrelo completamente para
alcanzar la temperatura de funcionamiento más alta.
4) El pedestal ajustable permite la
rotación de la boquilla desde la
posición casi horizontal hasta la
posición vertical.
5) Para apagar la pistola, coloque
el conmutador en la posición de
“COLD” [frío]. Hágala funcionar
en frío durante aproximadamente tres mi nutos. Esto permitirá que la pistola y la boquilla
se enfríen lo suficiente para permitir tocarlas.
6) Coloque el conmutador en la
posición de “OFF” [apagado].
inStruccioneS de operación
Cuando se usa la pistola de aire caliente en un contenedor cerrado,
como sería un túnel de contracción
o algún tipo de envase especial, se
debe permitir la entrada de aire
fresco en la pistola; igualmente hay
que tener un orificio de tamaño igual
para facilitar la evacuación del aire
caliente. Un enclaustramiento total
provocará daños o posible falla en la
pistola debido al extremo calor generado.
Page 16

16
www.masterappliance.com
Aplicaciones típicas
Remoción de pintura
Además de muchos otros usos, la
Varitemp
®
Heat Gun se ha convertido en una herra mienta popular
para remover pintura. Debido a su
mayor potencia y flujo de aire extra
fuerte, muchos contratistas profesionales de restauración y renovación, la reconocen como la
herramienta de selección para las
tareas duras de remover pintura.
Instrucciones de seguridad para
remover pinturas
1) AVISO: Con una pistola de aire
caliente, como con todas las
herramientas térmicas, siempre
mantenga accesible un extinguidor de incendios y observe
todas las precauciones sensatas
contra incendios.
No recomendamos el uso de
esta pistola de aire caliente
sobre superficies
huecas tales como tablas de
pared exterior, paredes interiores, sofitos, paneles, tabiques,
etc. Estas superficies frecuentemente contienen materiales
inflamables como polvo, astillas
de madera, aislamiento, nidos
de roedores y otros desechos
que accidentalmente podrían
incendiarse.
El mejor uso para su pistola de
aire caliente es el de remover la
pintura de obras de madera sól-
ida con sus entrantes y salientes
tales como zócalos y adornos
interiores, molduras, piezas torneadas, puertas, balaustres,
adornos de portales, etc.
Al remover pintura, siempre
mantenga la pistola con un movimiento continuo hacia adelante
y hacia atrás. El detenerse o
prolongar una pausa en un
punto determinado podría inflamar la superficie sobre la cual
se trabaja o el área detrás de la
misma.
2) No respire los vapores o ingiera
en forma alguna las pinturas con
base de plomo. Muchas casas
antiguas y otros edificios contienen pinturas con base de
plomo. El polvo, las raspaduras,
los residuos y vapores de pintura con base de plomo son
extrema damente venenosos. Al
remover este tipo de pintura,
evite las posibilidades de
envenenamiento con plomo [saturnismo] empleando una ventilación adecuada (como un
ventilador de ventana en su
modo de extractor) y conservando un área de trabajo limpia.
Ante la presencia de polvo o
vapores de plomo, use un dis-
positivo respirador diseñado
para filtrar plomo. Siempre que
sea posible, mueva el trabajo al
exterior.
La negligencia en tomar las pre-
cauciones de seguridad adecuadas al trabajar con pinturas a
base de plomo, podría conducir
al envenenamiento con plomo
[saturnismo]. Para información
adicional, vea nuestras
“Instrucciones para remover la
pintura.”
3) No utilice ninguno de los productos químicos para remover
pinturas. Estos productos son
susceptibles de inflamarse y
despedir vapores dañinos.
4) Use una ventilación adecuada
(como un ventilador de ventana
en su modo de extractor) y conserve limpia su área de trabajo.
5) Use guantes y gafas de seguridad cuando trabaje con esta
herramienta.
6) Siempre mantenga acces ible un
extinguidor de incendios totalmente cargado.
7) Manténgase alerta, observe lo
que hace y haga uso del sentido
común.
INSTRUCCIONES DE
SEGURIDAD IMPORTANTES
LEER ESTAS INSTRUCCIONES
ADVERTENCIA: Las áreas que
quedan escondidas, como detrás
de paredes, techos, suelos, placas
de techo y otros tipos de paneles
pueden contener materiales inflamables que se pueden incendiar por
la acción de la pistola de aire caliente. La ignición de estos materiales
puede no ser evi
dente desde un
principio y provocar daños en
propiedades o personas. No utilizar la
pistola si existen dudas sobre este
riesgo. Al trabajar en lugares con
estas caracteristicas, mover la pistola
hacia adelante y hacia atrás.
Prolongar su uso o detenerse en un
lugar puede incendiar el panel o el
material situado tras él. La pistola de
aire debe utilizarse con temperatura
BAJA, que es aproximadamente el #
8 en el dial de temperatura.
Para quitar pintura
ADVERTENCIA: Se debe tener mucho
cuidado al quitar pintura.
Las capas de pintura, los residuos y
los vapores pueden contener plomo,
que es venenoso. Cualquier pintura
anterior a 1977 puede contener plomo
y la pintura que se aplicaba a los hogares antes de 1950 suele contener
plomo. Una vez depositado sobre
superficies, el contacto de la mano
con la boca puede resultar en la
ingestión del plomo. La expo sición a
niveles incluso muy bajos de plomo
puede causar daños irreversibles en
el cerebro y el sistema nervioso. Los
niños pequeños y los fetos son particularmente vulnerables.
Antes de iniciar cualquier proceso
para retirar pintura se debe determinar
si dicha pintura contiene plomo. Esto
puede ser llevado a cabo por el
departamento de sanidad local o
por un profesional que utilice un
analizador de pintura para comprobar el contacto que ha tenido con el
plomo la pintura que se ha de retirar.
LAS PINTURAS CON BASE DE
PLOMO SOLO DEBEN SER
RETIRADAS POR UN
PROFESIONAL Y NO DEBEN
QUITARSE UTILIZANO UNA
PISTOLA DE AIRE CALIENTE.
Las personas que retiren pintura
deben seguir estas indicaciones:
1) Trasladar al aire libre la pieza con
la que se ha de trabajar. Si esto no
es posible, mantener bien ventilada el área de trabajo. Abrir las
ventanas y colocar un ventilador
en una de ellas. Asegurarse de
que el ventilador se lleva el aire
desde el interior hacia el exterior.
2) Retirar o cubrir las alfombras,
alfombrillas, muebles, ropa, utensilios de cocina y conductos de
ventilación.
3) Cubrir el suelo del área de trabajo
con telas, para recoger las virutas
o capas de pintura. LLevar ropas
de protección como camisas,
monos y gorros para trabajos
especiales.
4) Trabajar en una sola habitación.
Los muebles deben ser retirados
o colocados en el centro de la
habitación y cubiertos. Las áreas
de trabajo deben aislarse para
separarlas del resto de la vivienda,
sellando la puerta con telas colocadas en el suelo.
5) Los niños, las mujeres embarazadas o con posibilidades de
estarlo y las madres lactantes no
deben estar presentes en el área
de trabajo hasta que éste se haya
acabado y todo esté limpio.
6) LLevar una mascarilla de respiración de polvo o una mascarilla
de respiración con filtro dual (polvo
y humo) que esté aprobada por la
Occupational Safety and Health
Administration (OSHA) Administración de Salud y
Seguridad Ocupacionales -, el
National Institute of Safety and
Health (NIOSH) - Instituto Nacional
de Salud y Seguridad -, o el
United States Bureau of Mines Negociado de Minas de los
Estados Unidos -. Estas mascarillas y los filtros de recambio se
pueden obtener en tiendas mayoristas. Asegurarse de que la
mascarilla ajusta bien. La barba y
el pelo de la cara pueden impedir
que las mascarillas queden debidamente ajustadas. Cambiar los
filtros a menudo. LAS
MASCARILLAS DE PAPEL
DESECHABLES NO SON
ADECUADAS.
Page 17

17
www.masterappliance.com
Aplicaciones típicas (continuación)
7) Tener cuidado al manejar la pistola
de aire caliente. Mantenerla en
movimiento ya que un calor excesivo generará humos que pueden
ser inhalados por el operario.
8) Mantener la comida y la bebida
fuera del área de trabajo. Laverse
las manos, los brazos y la cara y
aclararse la boca antes de comer
o beber. No fumar o mascar chiclé o tabaco en el área de trabajo.
9) Retirar toda la pintura que se ha
quitado y el polvo fregando el suelo.
Utilizar un paño humedo para limpiar todas las paredes, umbrales y
cualquier otra superficie donde
haya pintura o polvo. NO BARRER,
NI LIMPIAR EN SECO NI ASPIRAR
EL POLVO. Utilizar un detergente
con alto contenido en fosfatos o
fosfato trisódico (TSP) para lavar y
fregar las superficies afectadas.
10) Al finalizar cada sesión de tra-
bajo, colocar las virutas de pintura y otros residuos en una
bolsa de plástico doble, cerrarla
con cinta adhesiva o cintas retorcidas y tirarla en un contenedor
adecuado.
11) Quitarse la ropa de protección y
los zapatos en el área de trabajo
para no llevar el polvo al resto de
la vivienda. Lavar la ropa de trabajo por separado. Limpiar los
zapatos con un paño húmedo y
lavarlo junto con la ropa de trabajo. Lavar bien el cabello y el
cuerpo con agua y jabón.
GUARDA ESTAS
INSTRUCCIONES
Forma de remover la pintura
1) Para remover pintura vieja, active
la unidad y sosténgala aproximadamente a 25 mm (1 pulg) de la
superficie a limpiarse. La experiencia le ayudará a determinar la
distancia y velocidad adecua das. Es
ventajoso sostener la pistola a una
cierta distancia de la super ficie y
acercársela lentamente. La velocidad más lenta será compensada
por la amplitud de las áreas ablanda das. Igualmente, el calor tendrá
mayor penetración.
2) La temperatura de salida puede
ajustarse mediante el regulador situado al costado de la unidad. Con el
regulador abierto, la temperatura
está cerca de 260°C/500°F a una
distancia de 25 mm (1 pulg) de la
boquilla. Con el regulador cerrado, la
temperatura está cerca de 400°C/
750°F. Experi mente para ver qué
regulación le aporta los mejores
resultados con el tipo de pintura que
esté tratando de remover.
3) A medida que la pintura comienza a
ampollarse y formar burbujas,
mueva lentamente la pistola avan-
zando sobre la superficie con uniformidad y comience inmediatamente
a remover pintura con una cuchilla
de raspar (una espátula de 50 mm
(2 pulg) asegura los mejores resultados) para remover la pintura aflojada. Precaliente la espátula a
medida que calienta la superficie
pintada para ace lerar la remoción
de la pintura.
a. La remoción de pintura mediante
el uso de calor se basa en el
hecho de que todas las pinturas
orgánicas se ablandan a temperaturas elevadas. Una vez
ablandada, la pintura se puede
remover fácilmente sin dañar la
superficie.
b. Al remover pintura de las ranuras
de molduras, usted puede improvisar su propia herramienta
raspadora. Son de uso frecuente
los viejos destornilladores con
láminas esmeriladas a la medida
necesaria y las cuchillas para
cortar linóleo.
4) Una vez terminada la tarea, coloque el conmutador basculante en
la posición de “COOL” [frío]. Deje
que el soplador trabaje varios
minutos en la posición de “COOL.”
Contracción térmica de tubos
Ponga la pistola en su pedestal para
dejar las manos libres. Deslice el
tubo sobre el área a aislarse. Sitúe
el tubo en la corriente de aire caliente y muévelo de un lado al otro
hasta que se haya encogido.
Retírelo de la corriente de aire.
Contracción térmica de envolturas
plásticas
Después que la envoltura termoencogible se ha sellado alrededor
de un producto, haga un pequeño
orificio en la misma para permitir el
escape del aire. Después dirija la
corriente de aire caliente hacia el
paquete efectuando un movimiento
hacia adelante y hacia atrás por
todo el paquete hasta que la
envoltura se haya encogido de
manera uniforme.
Remoción de losas para piso
Con un movimiento hacia adelante y
hacia atrás, dirija la corriente de aire
caliente hacia la losa que se vaya a
levantar. De esta forma se ablandará
el respaldo adhesivo. Coloque una
espátula debajo de la losa para levantarla y removerla.
Dobladura y conformación de
materiales plásticos
Experimente primero con un pedazo
desechable para desa–rrollar una
técnica adecuada. Coloque el
pedazo de plástico dentro de un
dispositivo de sujeción apropiado.
Mueva el aire caliente a todo lo largo
de la línea a doblarse hasta que el
plástico se ablande a lo largo de ese
área. Doble el plástico a la posición
deseada.
Remoción de masilla vieja
Para quitar la masilla de una ventana rota, con mucho cuidado, primeramente retire los cristales rotos.
Para quitar la masilla de una ventana intacta, no dirija la corriente de
aire caliente contra el cristal para
evitar su cuarteadura debido al choque térmico. Es conveniente proteger el cristal del aire caliente usando
una espátula grande. Con un movimiento hacia adelante y hacia atrás,
dirija la corriente de aire caliente
hacia la masilla hasta que se
ablande. Quite la masilla con la
espátula.
Secado rápido de piezas
Piezas y otros materiales pueden
secarse rápidamente moviendo la
corriente de aire caliente sobre el
trabajo hasta dejarlo seco.
Page 18

18
www.masterappliance.com
Aplicaciones típicas (continuación)
Estirado, conformación e instalación de vinilo
Dirija la corriente de aire caliente
hacia una sección de vinilo y mueva
la pistola de aire caliente con un
movimiento hacia adelante y hacia
atrás. Estire y dé forma al vinilo
hasta eliminar todas las arrugas.
NO DIRIJA la corriente de aire
caliente contra el cristal.
Descongelación de
serpentines y tuberías
Dirija la corriente de aire caliente a
la pieza congelada usando un movimiento hacia adelante y hacia atrás
hasta que la pieza se descongele.
Aflojamiento de tuercas y tornillos
Por breve período de tiempo, dirija
la corriente de aire caliente hacia la
tuerca o tornillo a aflojar. El calentar
la tuerca o tornillo provocará la
expansión del metal. Retire la corriente de aire caliente de la pieza de
trabajo. Afloje la tuerca o tornillo
usando la llave apropiada.
Toda reparación o servicio de mantenimiento recomendado en este
manual de instrucciones, debe ser
reali zado por un técnico experimentado en la reparación de herramientas eléctricas o por una
organización de servicio calificada,
o por el Depar tamento de Servicio
de Master Appliance Corp.
Comuníquese con el Departamento
de Atención al Cliente de Master
para obtener repuestos Master
Appliance genuinos o para el servicio de reparaciones.
Repair Service Dept
877-250-1934
sales@masterappliance.com
www.masterappliance.com
AVISO: Antes de realizar cualquier
mantenimiento o reparación,
desconecte su herramienta. Sólo
use las piezas de repuesto idénticas de marca Master Appliance.
Escobillas de motor
1) Antes de quitar las escobillas,
desconecte la herramienta.
2) Inspeccione regularmente las
escobillas (por lo menos cada
100 horas de tiempo en marcha). Si las escobi llas tienen
menos de 3 mm (1/8”) de largo,
reemplácelas inmediatamente.
3)
Quite las escobillas de a una por
vez. Para hacerlo, desatornille la
tapa de las escobillas ubicada
en el costado de la caja y quite
el conjunto escobilla-resorte.
4)
Siempre reemplace las escobillas
en juegos de 2 para garantizar que
la tensión sea igual. Si se vuelven
a colocar escobillas parcialmente
usadas, ajuste la curvatura de
las escobillas al colector.
5) Para reemplazarlas, introduzca
el nuevo conjunto de escobilla-resorte en el orificio y atornille
la tapa de la escobilla.
6)
Después de que se haya gastado
el segundo juego de escobillas,
es posible que sea necesario
cambiar el armazón. Envíe la
herramienta al Departamento de
Reparaciones de Master Appliance
Corp. o a una empresa de manten
-
imiento calificado para su reparación.
7) Siempre use las piezas de
repuesto originales de Master
Appliance Corp.
Lubricación
Los rodamientos están lubricados
en fábrica y no requieren lubricación
adicional.
Limpieza
Antes de efectuar la limpieza,
desconecte la pistola de aire caliente. Para limpiar el exterior de la
herramienta, use un jabón suave y
una tela húmeda. No use agentes
limpiadores, trementina [aguarrás],
gasolina, diluyente de laca o de pintura u otros disolventes conteniendo
substancias químicas que pueden
ser dañinas a los materiales plásticos y otros materiales aislantes.
Nunca sumerja la herramienta en
líquido o deje que un líquido penetre
en el interior de la herramienta.
Cerciórese de que todas las aberturas y áreas de ventilación estén
libres de desechos.
inStruccioneS de reparación y mantenimiento
Las Herramientas Master Heat se
prueban e inspeccionan con cuidado
antes de enviarse desde la fábrica.
Garantizamos que nuestros productos carecen de defectos de material
y de manufactura, en condiciones
de utilización normal y un servicio
por, un año desde la fecha de compra. En el caso de que hubiese un
defecto en los materiales o mano de
obra repararemos o reemplazaremos, sin cargo por opción nuestra,
cualquier parte que en nuestro juicio
muestre evidencia de tal defecto.
La garantía no se aplica a elementos
desgastables tales como accesorios, cepillos, elementos de calentamiento, puntas de soldadura, puntas
de calor, quemadores o eyectores,
que requieren reemplazo periódico,
ni se aplican si la herramienta de
calefacción ha sido mal utilizada,
abusada, intervenida o alterada.
Al fi nalizar el período de garantía,
Master Appliance no estará bajo
ninguna obligación, expresa o
implícita. Master Appliance no
asume responsabilidad por, y esta
garantía no lo cubrirá, cualquier
daños incidentales o consecuenciales de cualquier defecto de los productos o de su utilización.
Esta garantía le brinda derechos
específi cos. También puede poseer
otros derechos que pueden variar
de estado a estado. La información
de garantía está incluida dentro del
Manual de Instrucciones para cada
producto o puede obtenerse contactando al Departamento de
Atención al Cliente.
Master Appliance Corp.
2420 18th Street
Racine, Wisconsin 53403
EE.UU.
Teléfono: 262-633-7791
800-558-9413 (
EE.UU.)
Fax: 262-633-9745
sales@masterappliance.com
www.masterappliance.com
garantía total por un año
Si usted tiene alguna pregunta relacionada
con el uso específico de su pistola de aire
caliente, no deje de llamar al Departamento
de Servicios a Clientes al 262-633-7791.
NOTA: Los usuarios deben evaluar independientemente la idoneidad del producto para sus necesidades.
Page 19

19
www.masterappliance.com
Piezas de repuesto para VARITEMP® Heat Gun
ViSta eSquemática
Item No. Part Number Description
1 ARM-543 * Juego de armadura, 230V
1 ARM-542 Juego de armadura, 120V
2 BLW-001 Rotor del soplador
3 BRH-025K * Juego del portaescobillas, 230V (2), con escobillas
3 BRH-040K Juego del portaescobillas, 120V (2), con escobillas
4 BRY-141 Juego del soporte del rodamiento superior
5 BSY-005 Juego del pedestal (VT-750C, VT-752C)
6 FLD-450 * Juego de campo, 230V, con portaescobillas
6 FLD-484 Juego de campo, 120V, con portaescobillas
7 HAS-014K * Juego de elementos, 230V, con mica
7 HAS-043K Juego de elementos, 120V, con mica
8 HDE-013 Juego de la agarradera
9 INN-032 Mica, corrugado
10 NAS-006 Juego de la boquilla
11 SHL-004 Juego del protector de la boquilla
12 SRW-141 Tornillo de fijación
13 SRW-321 Tornillo de tope
14 SRW-349K Tornillo para boquilla (juego de 3)
15 SWH-019 Juego del interruptor, basculante de resorte
15 35217 Juego del interruptor, contacto momentáneo
16 30582 Kit de remache, perilla y controlador de calor, 120V
16 30583 * Kit de remache, perilla y controlador de calor, 230V
17 35257 Juego de resorte-escobilla y tapa (2)
18 TMB-003 * Bloque de terminales
19 51211 Juego de cables, 120V 15A, EE. UU., con protección
19 51265 Juego de cables, 230V, EE. UU., con protección
19 35219 * Juego de cables, 230V, Europa, con protección
19 35006 * Juego de cables, 230V, Gran Bretaña, con protección
20 WHR-003KA Juego del espaciador de extremo libre del armazón (6)
* Únicamente modelos de 230 voltios
Nota: Los juegos incluyen los accesorios (ver vista esquemática)
Las piezas de repuesto y los accesorios para la pistola Varitemp
®
Heat Gun están
diseñados y fabricados según las
especificaciones precisas de
Master Appliance. Las piezas de
repuesto y accesorios procedentes
de otros fabricantes no cumplen
con estas especificaciones precisas y, por lo tanto, pueden provocar dificultades o averías a su
pistola Varitemp
®
Heat Gun. Master
Appliance no puede asumir ninguna obligación o respon sabilidad
civil por dificultades derivadas del
uso de piezas de repuesto o accesorios procedentes de otras marcas
en
una pistola Varitemp
®
Heat Gun.
17
6
3
14
9
8
16
2
1
4
6
5
19
7
10
19
15
11
8
12
13
20
18
Page 20

20
www.masterappliance.com
Master Appliance Corp.
2420 18th St.
Racine, WI 53403-2381
USA
Tel: 1-800-558-9413 (toll free in the U.S.A. and Canada)
(Appel gratuit aux États-Unis et au Canada)
(Llamada gratuita en los EE. UU y Canadá)
Tel: 001-262-633-7791 (all other Countries)
(tous autres pays)
(todos los demás países)
Fax: 262-633-9745
Email : sales@masterappliance.com
Correo electrónico: sales@masterappliance.com
P/N 58222 Rev G
 Loading...