

Page 1

MASSIVE
Sub-woofers
Re-cone kit manual
2005 Massive Audio Inc.
Printed in the U.S.A.
Massive Audio Inc.
P.O. Box 252004
Los Angeles, CA 90025 U.S.A.
www.massiveaudio.com
V.1.02
Page 2
Re-cone Kit manual
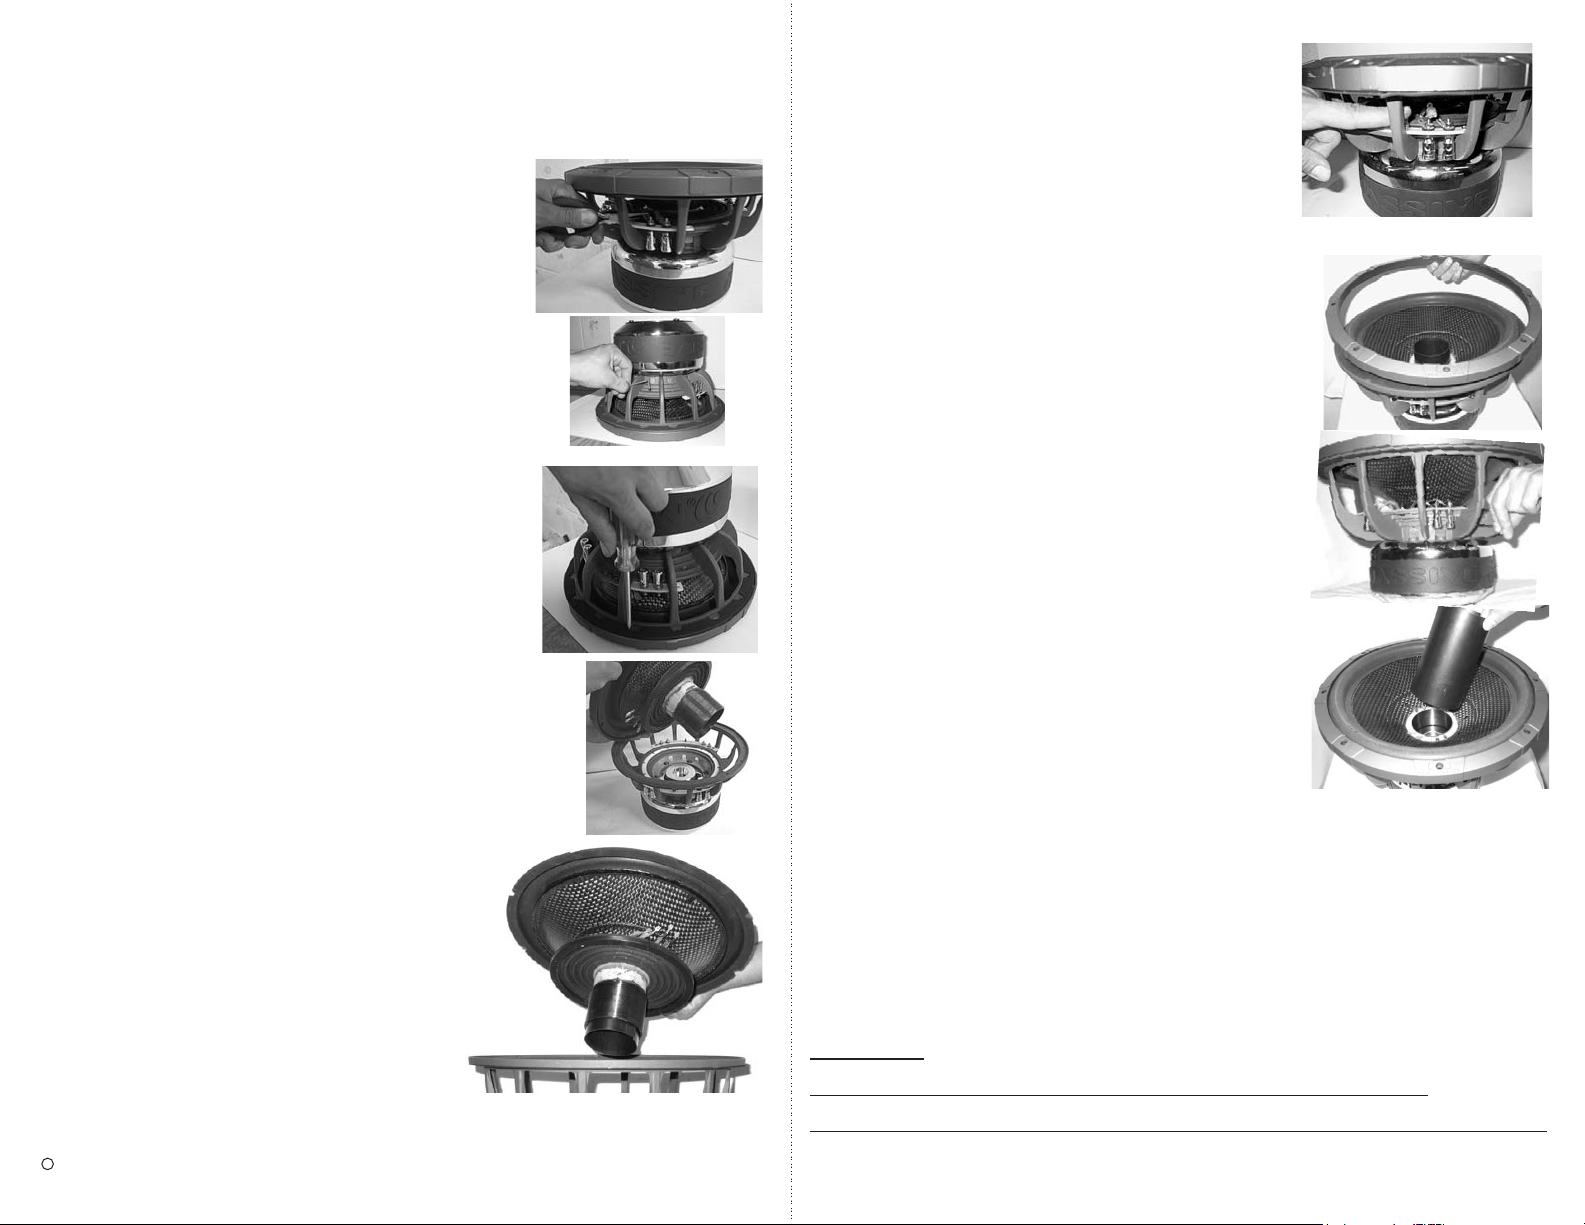
1. Disconnect all of the terminal leads.
6. Line-up speaker wire leads to the speaker
terminals and make sure the spider, surround
and gasket lay flat on the frame.
Align and hand tighten screws
securing the spider check for alignment and
then hand tighten the screws that secures the surround to the basket.
6
2. Turn the speaker over (magnet should be
on the top) . Remove the 8 mm hex head
screws that secure the spider to the frame.
(Total of 12 screws)
3. Remove the Philips head screws that
secures the surround and gasket to the
frame. (Total of 12 screws)
4. Turn the speaker over (magnet should be on
the bottom) Lift off the entire speaker assembly.
*Re-use screws from original product.
.
1
3
2
4
7. Reconnect all the speaker leads to the
speaker terminals.
8.Hand tighten all the screws that secure
the spider, surround and gasket in a cris cross
pattern (Screw-in the spider first)
8
9. Remove the plastic shim and make sure the
woofer is aligned correctly and the voice coil
is not rubbing against the edge
by pushing the cone in.
10. Tighten all screws using appropriate torque.
11. Play speaker at low volume and low frequency in free air
to make sure all the parts are lined-up correctly and the
speaker is functioning properly.
9
5.Insert the re-cone kit back into the frame
and motor.
INSERT PLASTIC SHIM IN VOICE COIL
BEFORE PLACING THE RE-CONE
ASSEMBLY INSIDE THE BASKET.
C
5
12. Glue the dust cap to the cone using a high-stenght shock-
resistant epoxy glue.
Warning:
Massive Audio is the only certified re-coning station.
Warranty only applies to speakers re-coned by Massive Audio.
 Loading...