

Page 1
U-1264 SIDE UTILITY TRAY ASSEMBLY
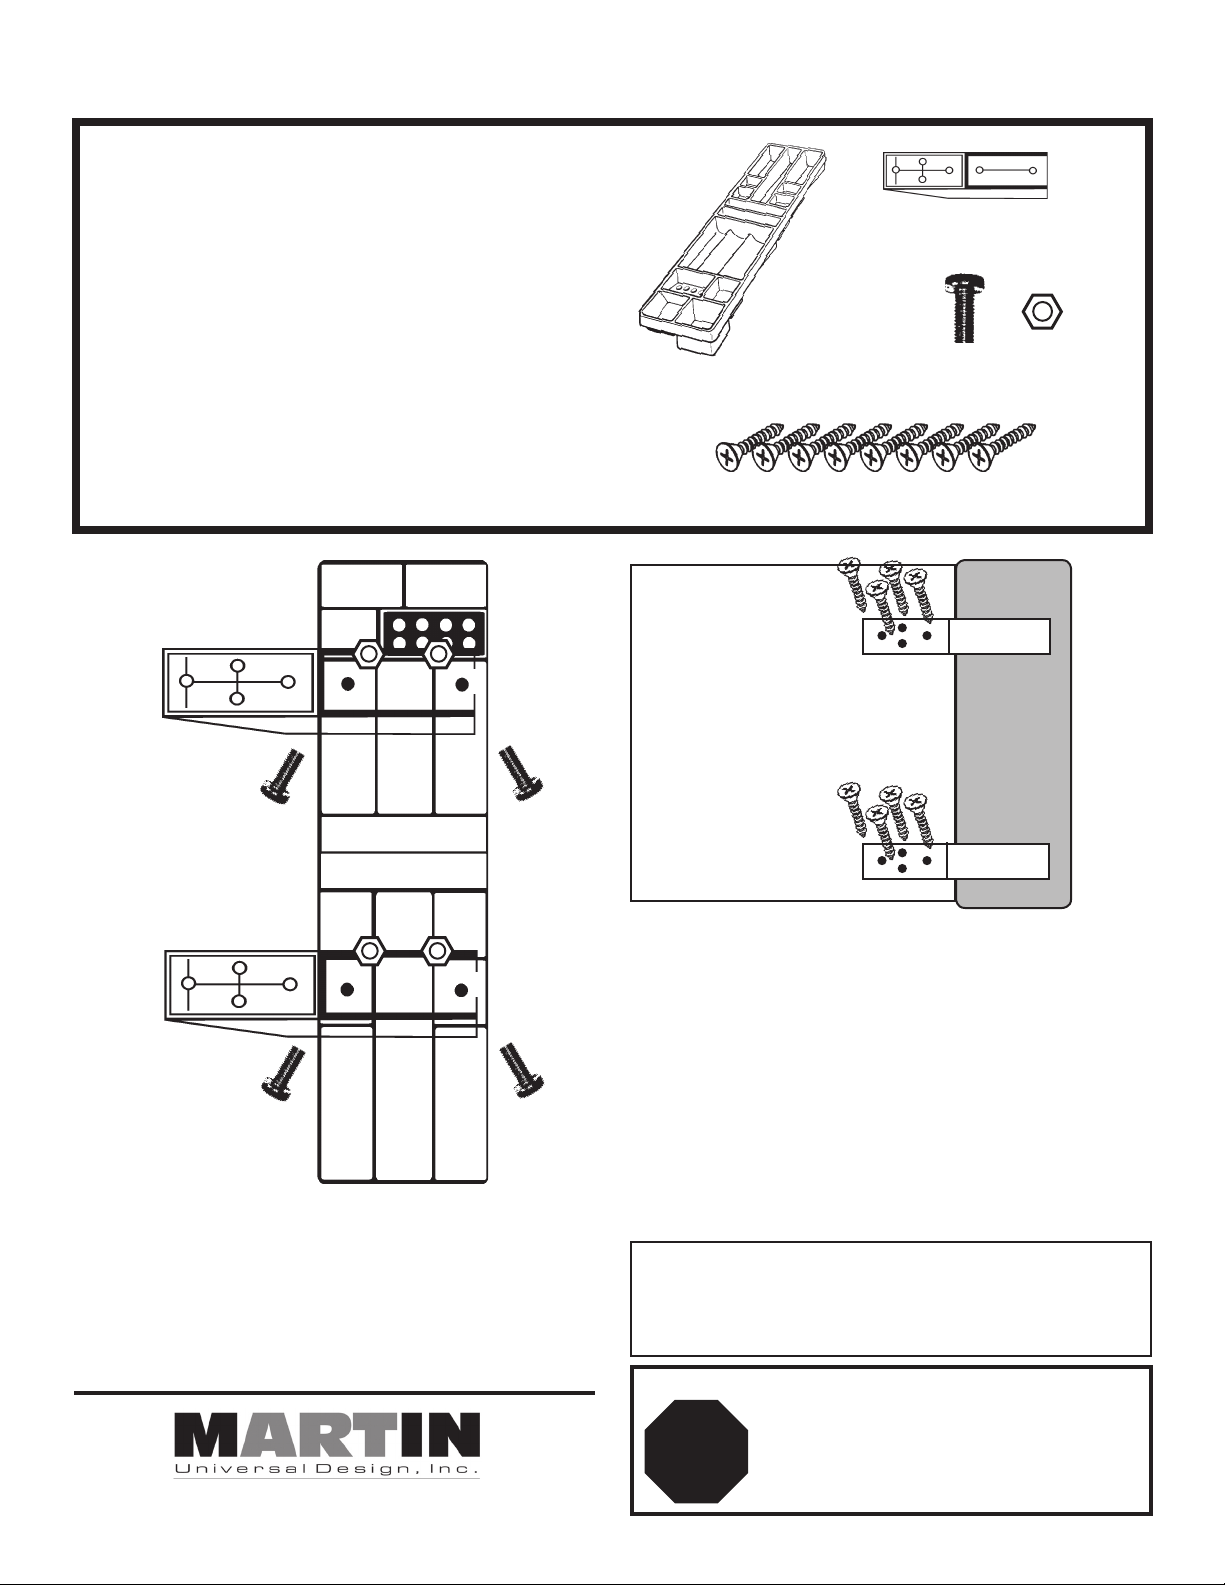
ITEM # PARTS LIST QTY
U-1264 Side Utility Tray 1
Bracket 2
Screws 4
Nuts for Screws 4
Phillip WoodScrews 8
[2] - Side Utilty Tray
Brackets
Tools Needed for assembly:
Hammer & Phillips Screwdriver
or power screwdriver needed for assembly.
Fig. 1
[1] - Side Utilty Tray
[8] - Phillip Screws
Rear view of Drawing
Top and Side Tray
4] - Screws & Nuts
Fig. 2
1. Take the utility tray and attach each bracket to the
bottom side of the tray using [2] each screws and
nuts. Insert the screw from the bottom of the bracket
up through the utility tray and secure with the nut from
the inside of the side utility tray. Repeat for all [4] screws
and nuts. As shown in FIG 1.
Martin Universal Design, Inc. • 4444 Lawton Avenue, Detroit, MI 48208 USA
Tel: (313)895-0700 / Fax:(313)895-0709 • E-mail: Custservmud@aol.com
2. Now you will attach the assembled Side Tray to the
rear side of the Drawing Board. Place the Side Tray
brackets onto the Rear side of the Drawing Board and
mark with a pencil in each of the [4] holes in each
bracket. Take Tray away and now tap the drawing board
on each marked spot with a pointed object and hammer
to break the surface of the Drawing Board, to allow
easier screwing of the screws. Once all holes are tapped.
Have someone hold the tray in position and screw in [4]
wood screws into each bracket to secure tray to drawing
board. As shown in FIG 2.
Once secure, you are finished and ready to use.
This Martin Universal Design, Inc. product has a one year guarantee
to be free from manufacturers defects during that period of use by the
original purchaser. Items or parts subjected to extreme temperature or
abuse or use of this product other than manufacturers intended purpose
is not covered under this guarantee.
Any Questions with Assembly? We Can Help
STOP
ONE YEAR GUARANTEE
PLEASE DO NOT RETURN THIS SIDE TRAY to
the Store where you purchased it. If you are un-
able to assemble or parts are missing,
PLEASE Call Customer Service at
Martin Universal Design, Inc.
313-895-0700 or Email: custservmud@aol.com
 Loading...