

Page 1
Two In One Floor
Standing/Table
Top Easel
®
Assembly
Instructions
Martin/F. Weber Co.
4444 Lawton Avenue, Detroit, MI 48208 USA
Email: Custservmud@aol.com
Made in China
U.S. Patent No.
5,308,035
Page 2
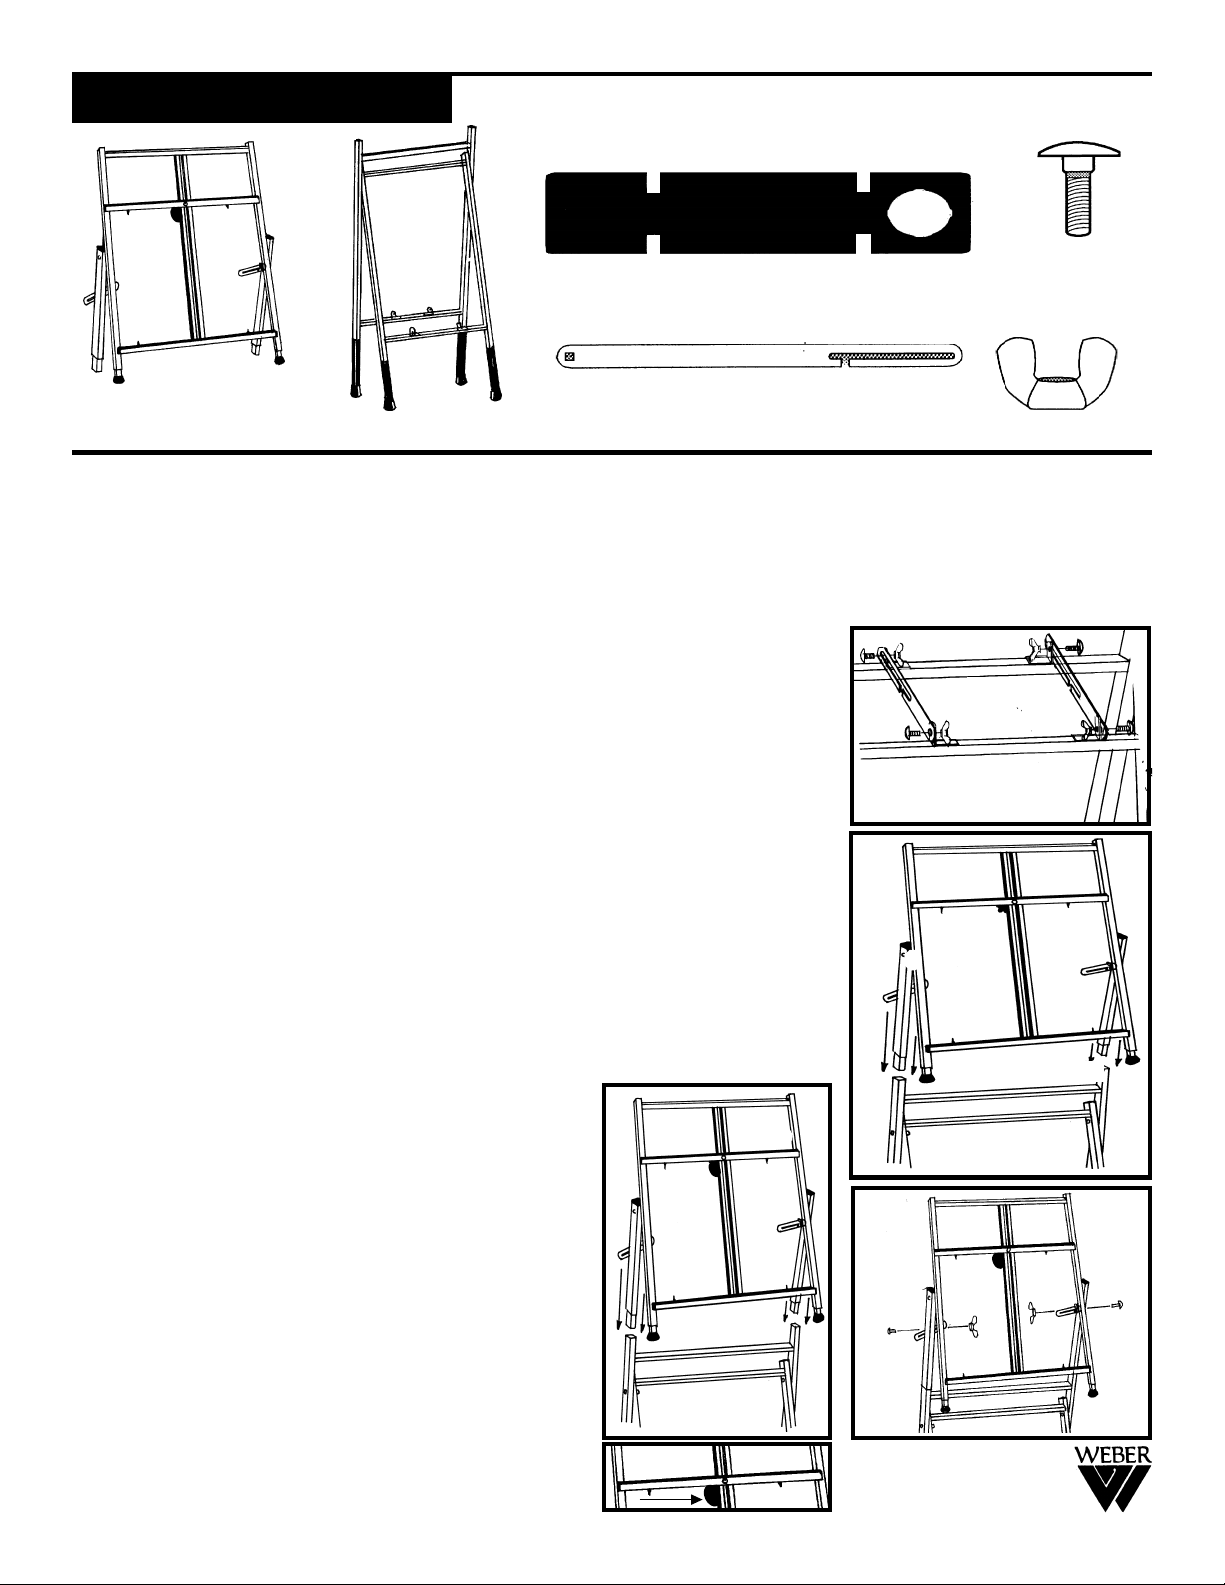
CONTENTS OF CARTON:
If you are having Assembly Problems, Call our Hotline at (313)895-0700
or Email: custservmud@aol.com
[E] 4 ea. Bolts
[C] 1 ea. Art Material Shelf
[A] 1 ea. Upper Assembly
[B] 1 ea. Lower Stand
Assembly
[D] 2 ea. Lower Stand
Brackets
[F] 4 ea. Wing Nuts
REMOVE CONTENTS OF EASEL FROM CARTON
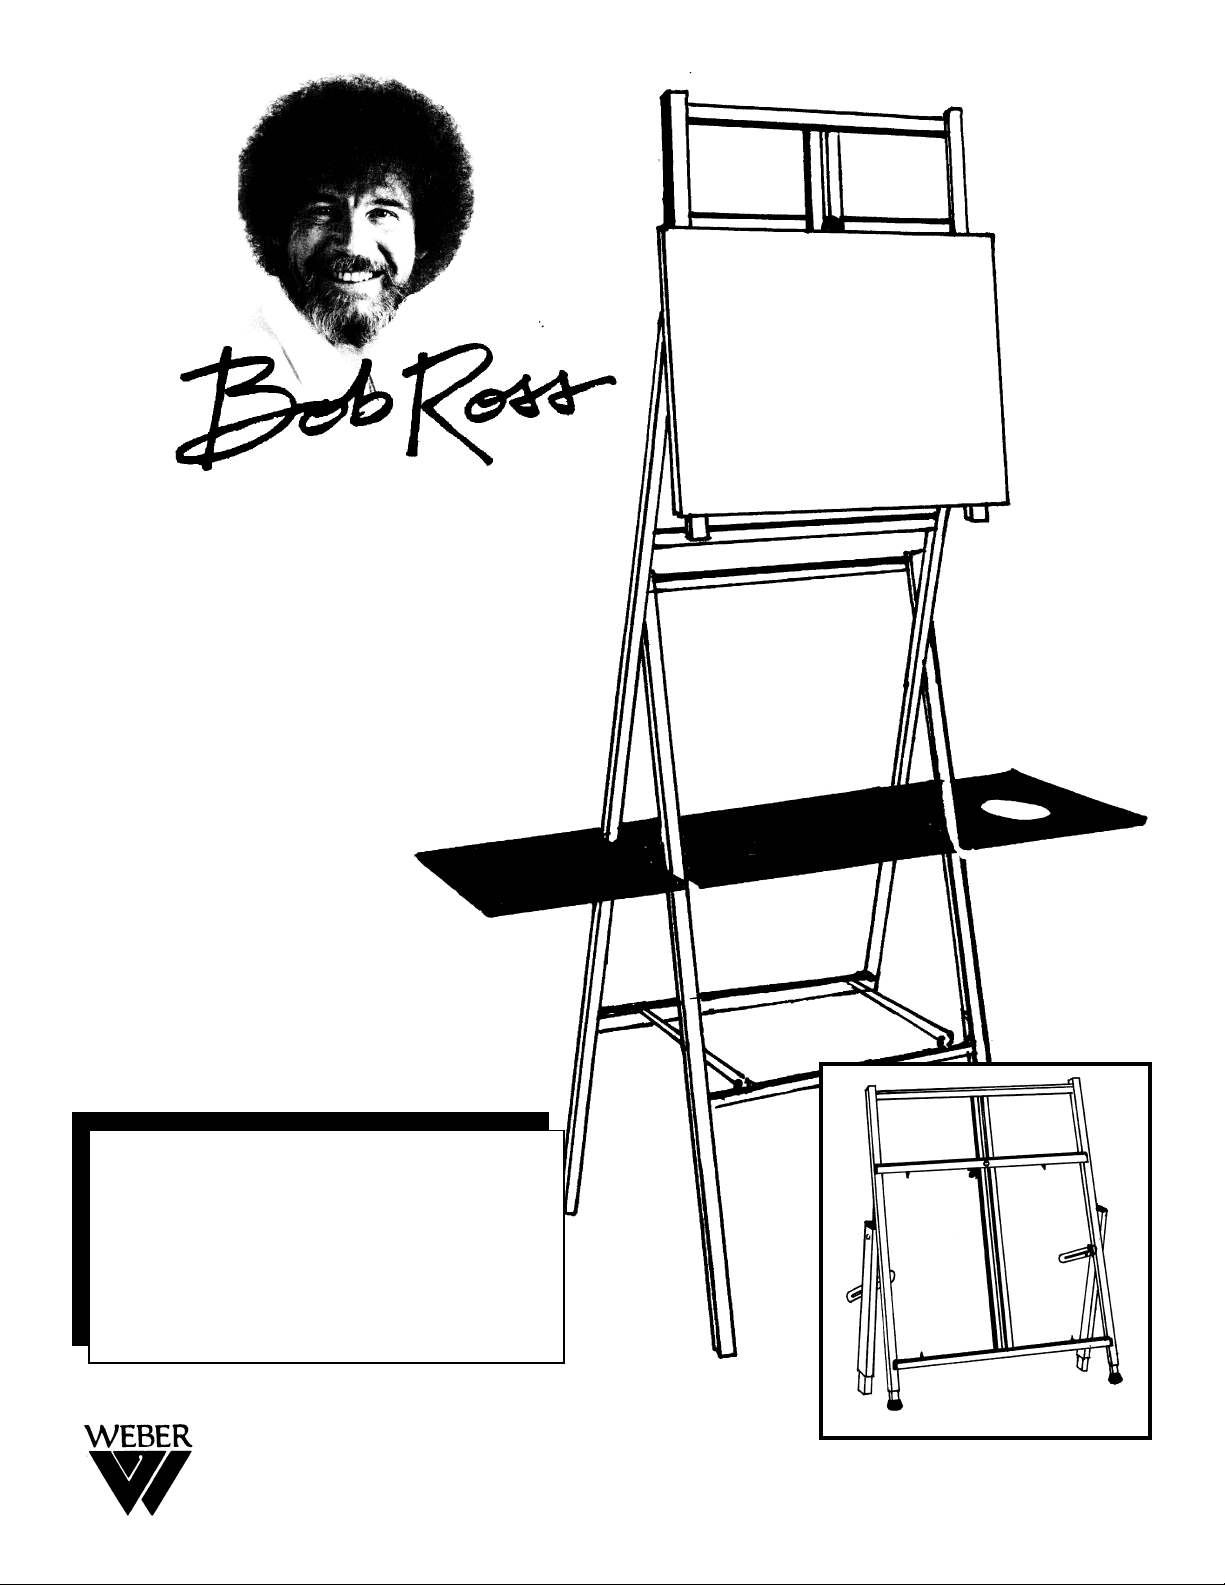
1. Enclosed are all the components necessary to assemble your new Bob Ross Two-In-One Standing/Table Top Easel.
Prior to assembly, please make sure all your parts are enclosed by checking them against the parts list above.
2. Position the lower Assembly [B] on floor and carefully spread legs so that lower Assembly stands on floor.
3. Locate the [2] Lower Stand brackets [D] and attach the side with the 1/4” square cut-out to the Lower Stand Assembly
[B] using [2] Bolts [E] and [2] Wing Nuts [F]. Hand tighten. Now attach the channel
cut-out (in the lower stand barckets) to the Lower Stand Assembly [B] using the
other [2] Bolts [E] and [2] Wing nuts [F]. See Fig. 1 at right.
4. Attach Art Material Shelf [C] by inserting it between the legs of the Lower
Stand Assembly [B] legs and inserting the legs between rectangle cutouts on
the Art Material Shelf [C]. Please Note: The Art Material Shelf is reversible
which enables you to have the cutout for the Bob Ross® Brush Cleaning Bucket
and Screen to be at the right or left hand side of your easel. See Fig. 2 at right
Note: The Bob Ross® Brush Cleaning Bucket and Screen, item #R6545, can be
purchased separately.
5. Attach the Upper Assembly [A] on to the Lower Stand Assembly [B] by inserting
the [2] rear legs of the Upper Assembly [A] into the Lower Stand Assembly [B].
See Fig. 3 at right.
6. Taking Upper Assembly [A] remove bolt and wing nut on tilt bracket. Re-insert bolt
through tilt brackets that are attached to the Upper Assembly [A] and tighten with
wing nut. See Fig 4. at right. NOTE: When you want to change the tilt of your
canvas, you will need to loosen these wing nuts and
change the tilt of theUpper Assembly [A] to the desired
position andthen tighten the wing nuts once again to
secure it.
7. Your unit is now completely assembled in the upright
position. The easel should look like the image on the
front side of this assembly instruction. TO CONVERT
TO A TABLE TOP EASEL, simply pull up on the Upper
Assembly section of the easel while holding down on
the base of the easel. NOTE: You may need to work
the easel from side to side in order to remove the table
top portion.
8. To adjust the height of the Upper Canvas support,
loosen the large black plastic knob on the back of the
easel and move the canvas support to the desired
height and then re-tighten the knob. See FIG. 5
9. HAPPY PAINTING!
Fig. 5
Fig. 3
Fig. 1
Fig. 2
Fig. 4
 Loading...