

Page 1
How to Install Your
PRO-DRAFT Parallel Straightedge
Detailed
Illustration
of plastic
clamp
Assembly
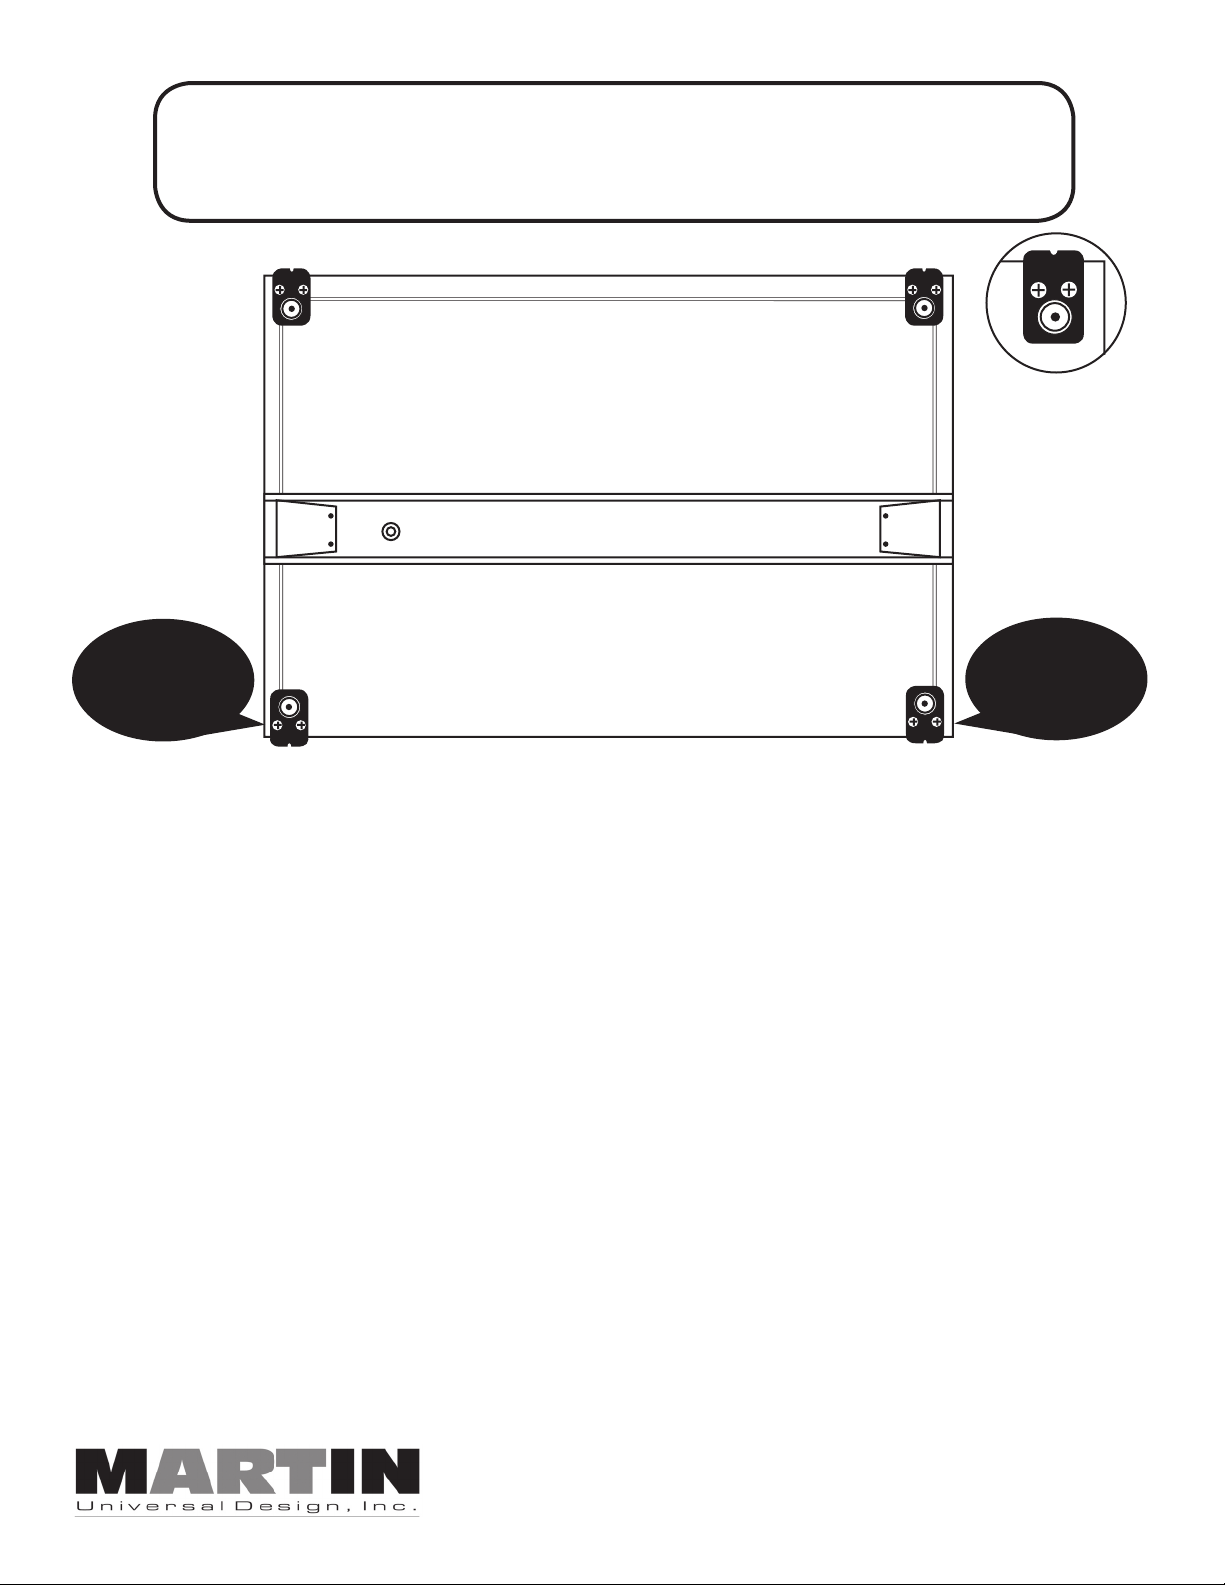
TIE WIRE
AROUND THIS
CORNER
LAST!
INSTRUCTIONS FOR YOUR MARTIN UNIVERSAL DESIGN PARALLEL STRAIGHTEDGE
1. Carefully unpack your Parallel Straightedge from its carton. Open hardware package and put aside the
2 metal “L” shaped pieces along with the 4 small silver screws. These will NOT be USED.
2. Adjust your drawing table, so that it is in a flat position, before attaching straightedge.
3. Attach the [4] Black plastic clamps by screwing them into each corner of the board using [2] each black
wood screws provided as shown in the illustration above.
MAKE SURE each clamp is equally spaced from each side of the board.
4. Place your straightedge upon the drawing board and take the loose end of the wire from the right side
of the straightedge and tie it around the metal post of the knob on the right hand lower corner of the
drawing board. Proceed by tightening down the knob.
5. Pull the wire loose (by spring) from the top edge of the straightedge to give you slack, now you can
place the wire around the top right hand corner clamp and knob (DO NOT TIGHTEN DOWN KNOB).
Proceed to place the wire around the upper left hand corner clamp
(DO NOT TIGHTEN DOWN KNOB).
6. Make sure straightedge is parallel with drawing board and pull taught other end of wire (left side).
7. Tie left hand end of wire to bottom left hand corner of post on knob. Tighten down knob to keep
wire in place.
8. Your assembled straightedge should look like the above illustration. The straightedge should be parallel
with the drawing board.
TIE WIRE
AROUND THIS
CORNER
FIRST!
4444 Lawton Avenue, Detroit, MI 48208 USA
Tel:(313)895-0700 / Fax: (313)895-0709 • E-mail: Custservmud@aol.com
 Loading...