

Page 1

Torino
Item No. 92-AE122
Aluminum Easel Assembly Instructions (page 1)
Carton Contains:
[A] Easel, [B] Adjustment Knobs, [C] Lower Canvas Support (large)
and [D] Upper Canvas Support (small)
Part A
[1] Easel
Step 1.
Empty contents of carton. Remove all plastic
packaging.
Step 2.
Make sure all parts are included.
Call 1-313-895-0700 if any parts are missing.
See Parts List above.
Step 3.
Take Easel [A] and pull out (spread) the side
legs. Loosen knob on rear tilting leg and tilt rear
leg so that tilting brackets reach knob on lower
portion of rear leg. See FIG 1.
Step 4.
Position tilting brackets over bolt going through
lower part of leg. See FIG 2. Tighten knob at
desired angle.
[2] Adjustment Knobs
with T-Bolts attached
Part B
Part C
[1] Lower Canvas Tray
with Palette Holders
FIG 1
[A]
Part D
[1] Upper Canvas Support
Go to page 2 for additional instructions.
If you have any questions or difficulties
assembling this easel.
Please call our Customer Service Hotline
at: (313)895-0700
Martin/F. Weber Co., Detroit, MI USA
www.weberart.com
Email: Custservmud@aol.com
Made in China
Tilting Brackets
Knob Rear Leg
FIG 2
Revised 09/06
Page 2
Torino
Item No. 92-AE122
Aluminum Easel Assembly Instructions (page 2)
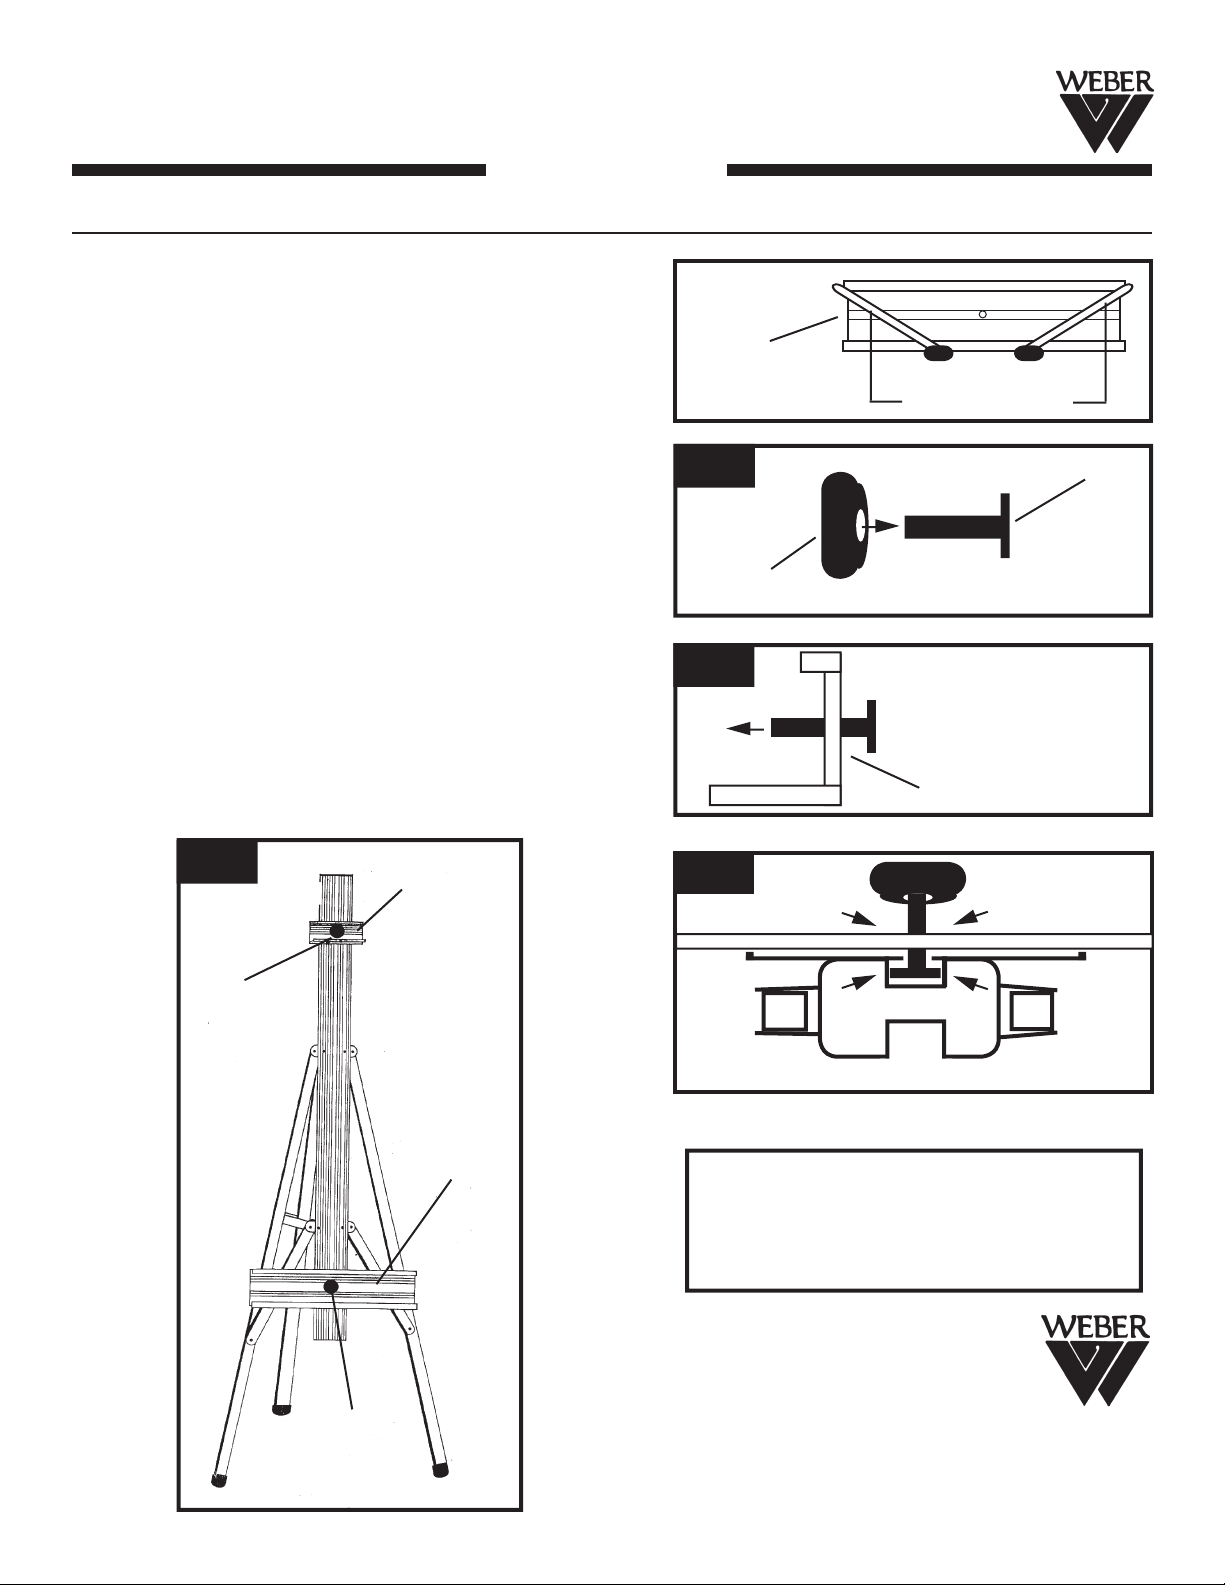
Step 5.
Before attaching the lower canvas support [C] to the
easel begin by taking [1] Knob [B] and remove T-bolt
by un-screwing from Knob. See FIG 3.
Step 6.
Insert T-Bolt through hole from the back of canvas tray.
See FIG 4. Continue by sliding flat end of T-Bolt up into
groove of center column. Complete by attaching knob
[B] to T-bolt on front of lower canvas tray. See FIG 5.
REPEAT with Upper Canvas Support, only this time
sliding T-bolt through top end of easel, similar to FIG 5.
NOTE: When needing to adjust the position of the upper canvas support or lower canvas tray, loosen the
knobs and move them to the desired position.
Re-tighten to secure.
Step 7.
Lower
Canvas
Support [C]
FIG 3
Knob
FIG 4
Palette Holders
T-Bolt
Side View of Lower Canvas Tray
Double check all nuts and knobs making sure all
are tightened. Your easel is now ready to use.
See FIG 6.
FIG 6
[B]
upper can-
vas support
lower can-
vas tray
Insert T-Bolt through
back of Canvas Tray
FIG 5
End view of center column of easel & lower canvas tray
If you have any questions or difficulties
assembling this easel.
Please call our Customer Service Hotline
at: (313)895-0700
Revised 09/06
[B]
Martin/F. Weber Co., Detroit, MI USA
www.weberart.com
Email: Custservmud@aol.com
Made in China
 Loading...